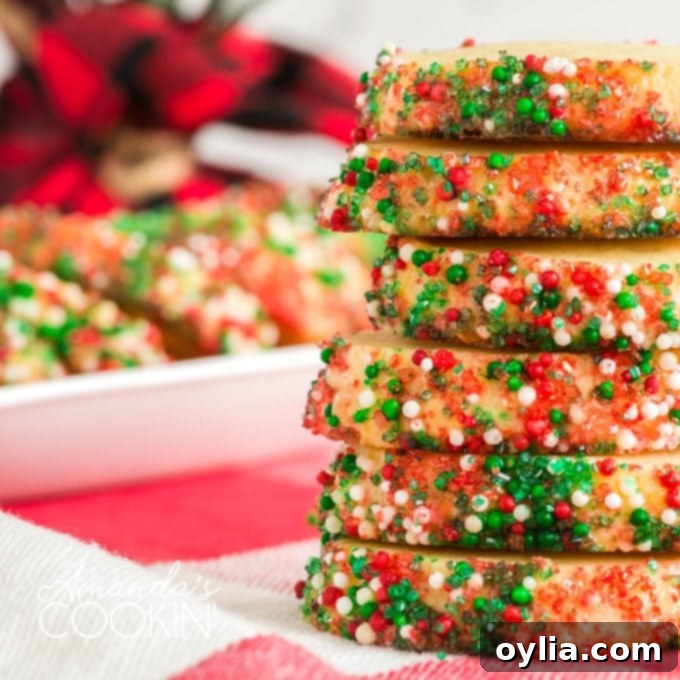
Classic Shortbread Cookies: A Simple, Buttery, and Delicious Recipe for Any Occasion
Shortbread cookies are the epitome of simple elegance in the world of baking. With just a handful of staple ingredients—butter, sugar, powdered sugar, salt, a few egg yolks, and all-purpose flour—you can create a truly remarkable treat. These cookies are wonderfully versatile, fitting perfectly into any occasion. While they are especially enchanting when beautifully decorated with sugar for the holidays, making them a festive addition to any dessert tray alongside classics like Grandma’s Sugar Cookies, their rich, buttery flavor makes them a welcome indulgence year-round.
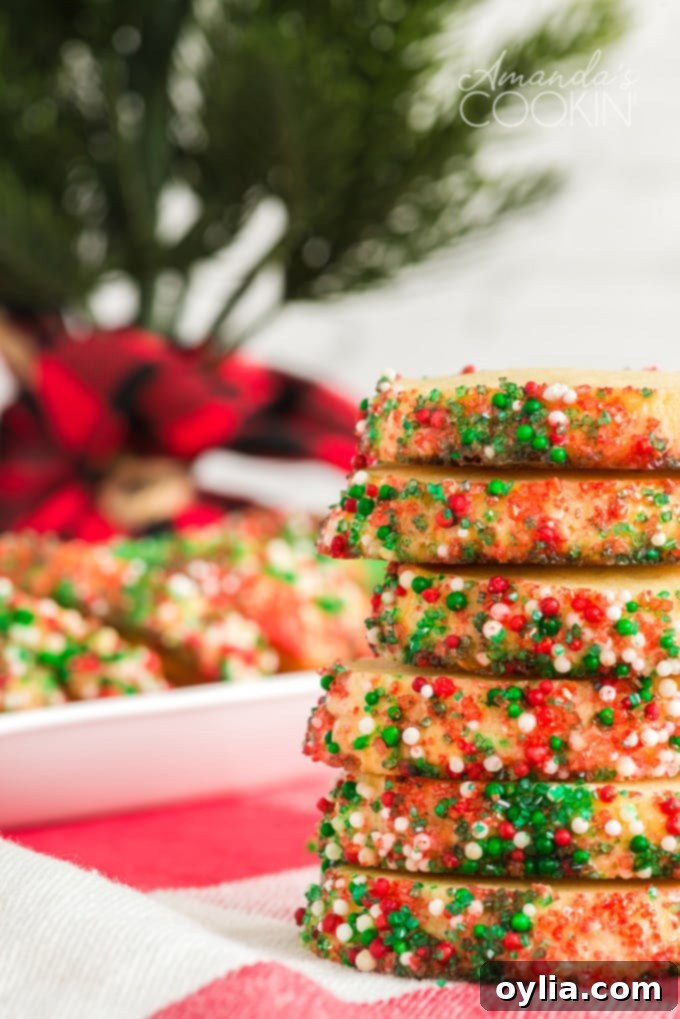
The Enduring Appeal of Shortbread: A Buttery Classic
What makes shortbread so universally loved? It’s arguably its pure, unadulterated buttery flavor and its distinct crumbly, melt-in-your-mouth texture. Originating in Scotland, traditional shortbread relies on a high ratio of butter to flour, with little to no leavening. This is what gives it its characteristic dense yet tender “short” texture – a term that historically referred to a pastry rich in fat. Unlike many other cookies, shortbread doesn’t aim for chewiness or a cake-like softness; its magic lies in its delightful snap and immediate dissolution on the tongue.
Whether enjoyed with a cup of tea, as a festive holiday treat, or simply as a comforting snack, shortbread cookies consistently deliver a satisfying experience. Their humble appearance often belies the depth of flavor they offer, making them a true testament to the power of quality ingredients and a straightforward baking process.
The Inspiration: Dorie Greenspan’s Exquisite Shortbread Recipe
This particular shortbread recipe comes from the esteemed Dorie Greenspan, a culinary legend, and her beloved cookbook, Baking From My Home to Yours. Dorie, known for her precise and approachable recipes, refers to these delightful biscuits as “sables.” The name “sables” is French for “sand,” a perfect descriptor for the wonderfully sandy, tender texture that defines these cookies. We simply call them buttery, incredibly delicious, and utterly addictive!
Greenspan’s expertise ensures that this recipe is not only easy to follow but also guarantees a consistently perfect result every time. It’s a classic for a reason, and once you try these, you’ll understand why they’ve earned a permanent spot in so many home bakers’ repertoires.
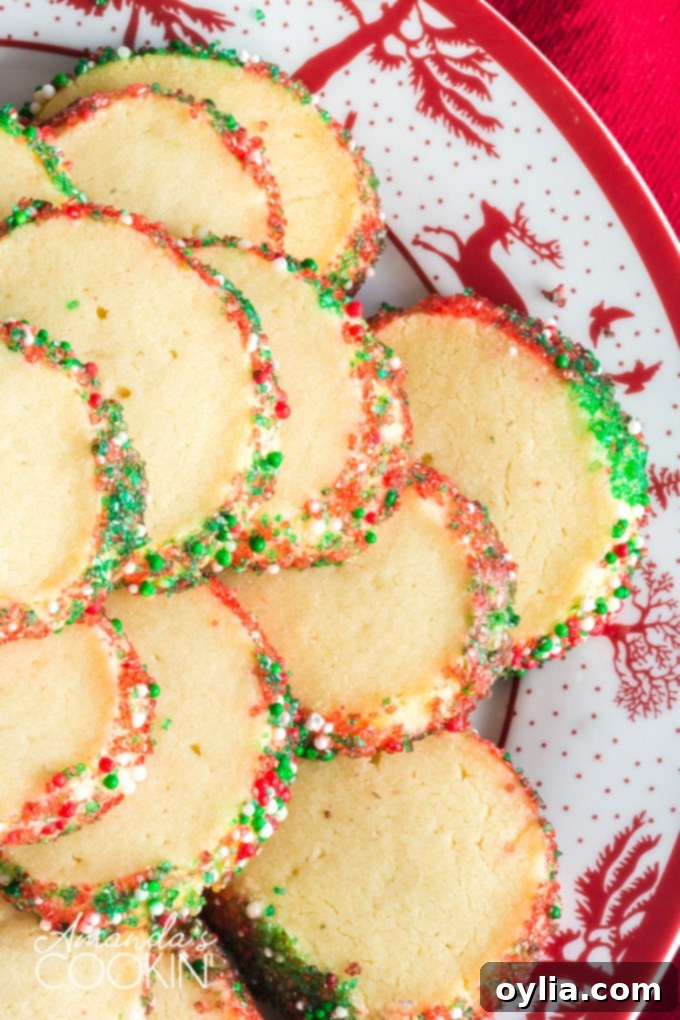
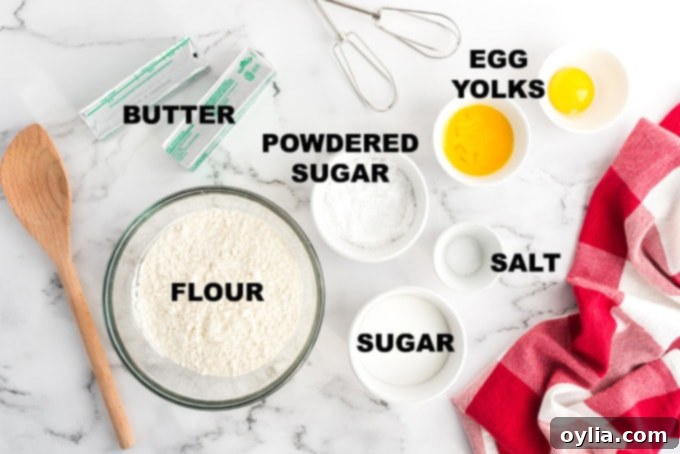
Essential Ingredients for Perfect Shortbread
The beauty of shortbread lies in its simplicity. Each ingredient plays a crucial role in achieving that coveted buttery, crumbly texture. Here’s a closer look at what you’ll need:
- Unsalted Butter: This is the star of the show. Using unsalted butter allows you to control the exact amount of salt in your recipe. Ensure it’s softened to room temperature for optimal creaming with the sugars, which is vital for a smooth, homogenous dough.
- Granulated Sugar: Provides sweetness and helps create a crisp texture.
- Powdered Sugar (Confectioners’ Sugar): Contributes to the tender, melt-in-your-mouth quality of the shortbread. Sifting it prevents lumps in the dough.
- Salt: A pinch of salt is crucial for balancing the sweetness and enhancing the rich butter flavor.
- Egg Yolks: Unlike many cookie recipes that use whole eggs, shortbread often calls for only egg yolks. This is key to achieving a richer, more tender, and less crumbly (in a dry way) cookie. The fat in the yolks adds to the “short” texture, while omitting the whites prevents a tougher, crispier result.
- All-Purpose Flour: The primary dry ingredient, providing the structure for the cookies. Avoid overworking the flour to prevent excessive gluten development, which can lead to tough cookies.
- Decorations (Optional): Nonpareils or colored sugar add a festive touch, especially for holidays. You can also experiment with coarse sugar for a delightful textural crunch.
Helpful Baking Tools for Shortbread Success
Having the right tools can make the baking process smoother and ensure professional-looking results:
- Stand mixer: Essential for creaming butter and sugar until light and fluffy, ensuring a consistent dough.
- Measuring cups and spoons: Accuracy is key in baking, especially with a simple recipe like shortbread where ingredient ratios are paramount.
- Rubber spatula: Perfect for scraping down the sides of the bowl and gently folding in flour to avoid overmixing.
- Insulated baking sheets: These help prevent the bottoms of your cookies from browning too quickly, ensuring even baking.
- Silicone baking mat or parchment paper: Creates a non-stick surface, making it easy to remove cookies and preventing sticking.
- Wire cooling racks: Crucial for allowing air to circulate around the cookies, cooling them evenly and preventing sogginess.
- Pastry brush: (Added) Useful for evenly applying the egg yolk wash before decorating.
12 DAYS OF CHRISTMAS COOKIES
12 Christmas cookies you will love, PLUS bonus baking tips and TWO extra recipes you will not find on this blog! See ALL my cookbooks here!
Get the Christmas cookies cookbook! ONLY $9.97!!
Expert Baking Tips for Flawless Shortbread
Achieving the perfect shortbread texture is straightforward, but a few key tips can elevate your baking from good to truly exceptional:
- Don’t Overmix the Flour: This is perhaps the most crucial tip for shortbread. Once you add the flour, mix just until it disappears into the dough and the dough looks uniformly moist. Overmixing develops gluten, which can lead to a tough, chewy cookie, rather than the desired tender, crumbly “short” texture.
- Incorporate Leftover Flour Gently: If you find a little flour still lingering at the bottom of the bowl after mixing, don’t keep running the mixer. Instead, use a rubber spatula to gently fold and press the remaining flour into the dough by hand. This minimizes gluten development.
- Embrace the “Clumpy” Dough: Shortbread dough will not behave like a typical cookie dough that cleans the sides of the bowl or forms a smooth ball. It’s meant to be soft, moist, and a bit clumpy. When pinched, it should feel a little like Play-Doh – pliable but not sticky or overly smooth.
- Chill, Chill, Chill: Refrigerating the dough is absolutely essential for shortbread. A minimum of 3 hours (and preferably longer, even overnight) allows the butter to firm up, preventing the cookies from spreading excessively in the oven. It also gives the flavors a chance to meld, resulting in a more delicious cookie. This chilling period is why we don’t preheat the oven right away.
- Even Slicing for Consistent Baking: When slicing the chilled dough logs, aim for uniform thickness (about 1/3-inch). This ensures all cookies bake evenly and finish at the same time.
- Rotate for Even Browning: Baking one sheet at a time and rotating it halfway through the baking time helps ensure even heat distribution and consistent browning across all cookies.
- Patience During Cooling: Shortbread cookies are delicate when hot. Let them rest on the baking sheet for a minute or two after coming out of the oven before carefully transferring them to a wire rack to cool completely. This helps them firm up and prevents breakage.
Step-by-Step Guide: Crafting Your Shortbread Masterpiece
Creating these delightful shortbread cookies is a rewarding process, and following these steps will ensure a perfect batch every time. Remember, the key to great shortbread is quality ingredients and careful, gentle handling of the dough.
- Prepare Your Baking Area: We won’t be preheating the oven immediately, as the dough requires significant chilling time. However, it’s a good idea to line two baking sheets with silicone baking mats or parchment paper now, so they’re ready when you are.
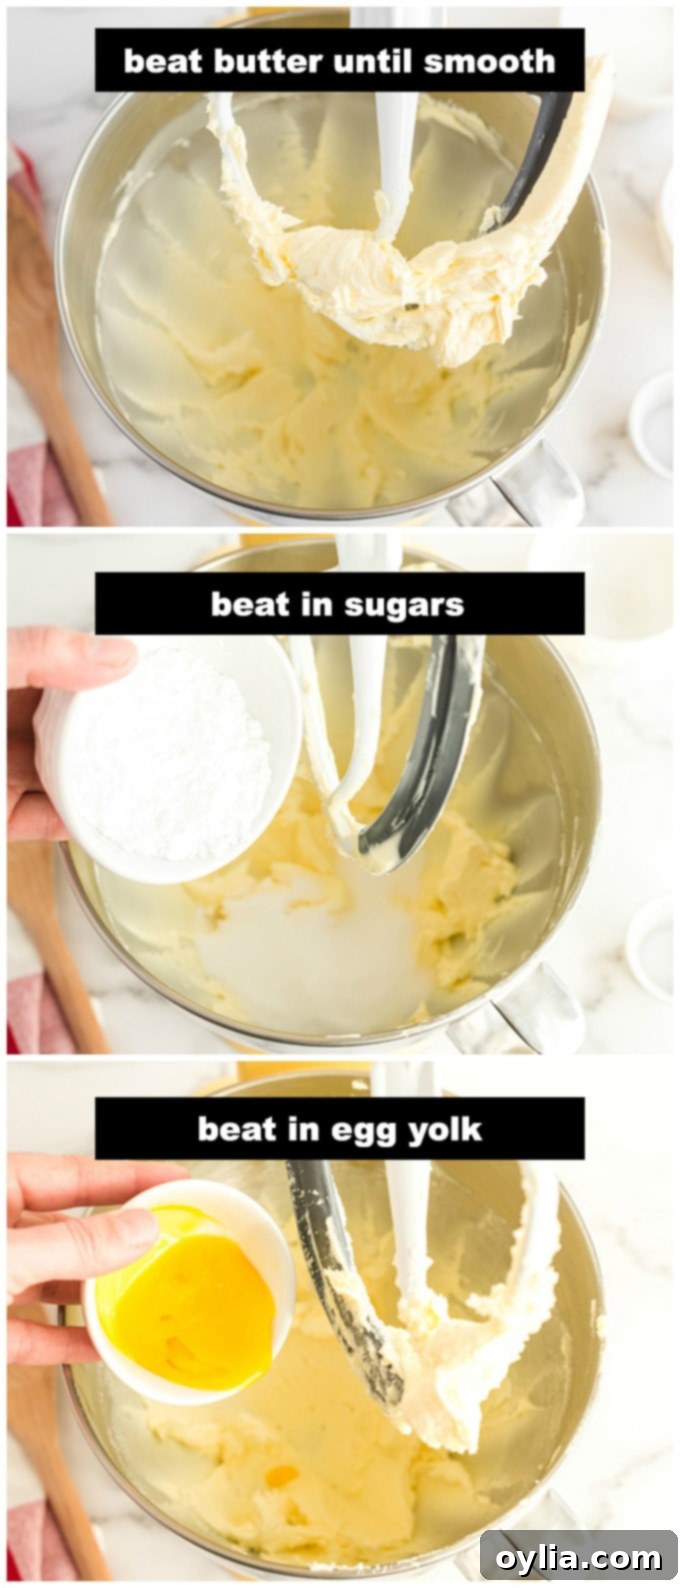
- Cream the Butter: In the bowl of your stand mixer (or a large bowl with a hand mixer), beat the softened unsalted butter at medium speed. Continue beating until it’s wonderfully smooth and very creamy. This process incorporates air, contributing to the cookie’s tender texture.
- Add Sugars and Salt: Now, add both the granulated sugar and the sifted confectioners’ sugar, along with the salt, to the creamed butter. Beat the mixture until it’s thoroughly blended, which usually takes about 1 minute. The consistency should be smooth and velvety, not overly fluffy or airy like a cake batter.
- Incorporate Egg Yolks: Reduce your mixer speed to low. Add two of the egg yolks to the mixture and beat until everything is homogeneous and fully combined. The egg yolks add richness and tenderness, essential for classic shortbread.
- Add the Flour Gently: Turn off the mixer. Pour in all the all-purpose flour. To prevent a cloud of flour, drape a clean kitchen towel over your stand mixer. Pulse the mixer at low speed about 5 times, for just a second or two each pulse. Peek under the towel; if there’s still a lot of flour on the surface, give it a couple more gentle pulses. If not, remove the towel.
- Finish Mixing: Continuing at low speed, mix for about 30 seconds more. Stop just as the flour fully disappears into the dough and the mixture looks uniformly moist. Remember, you’re aiming for a soft, moist, and slightly clumpy dough – it won’t be perfectly smooth, and it shouldn’t clean the sides of the bowl. If a little flour remains at the bottom, use a rubber spatula to fold it in by hand. Pinch the dough; it should feel a little like Play-Doh.
- Shape and Chill the Dough: Scrape the dough out onto a clean, smooth work surface. Gather it into a ball, then divide it in half. Take each half and shape it into a smooth log, approximately 9 inches long. Using a piece of plastic wrap to help form the log can make this process easier and less messy. Wrap each log tightly in plastic wrap and refrigerate them for at least 3 hours. For the best results and easiest slicing, longer chilling (even overnight) is preferable. This firming-up period is critical for preventing the cookies from spreading too much during baking.

- Prepare for Baking: When you’re ready to bake, center a rack in your oven and preheat the oven to 350 degrees F (175 degrees C).
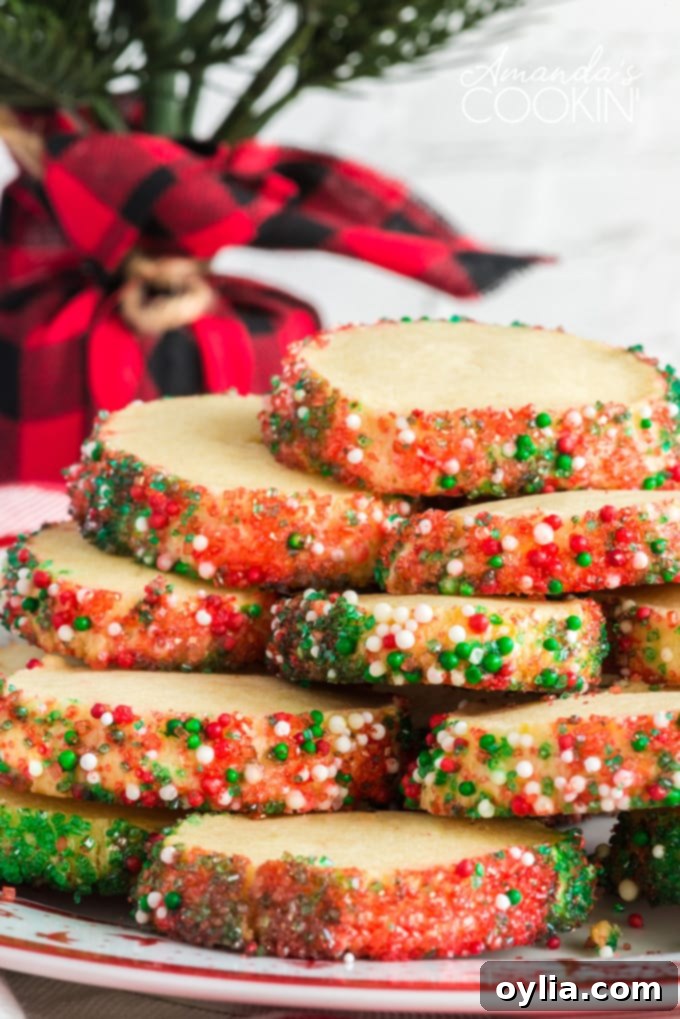
- Egg Wash and Decorate: Remove one log of dough from the refrigerator and unwrap it. In a small bowl, whisk the remaining egg yolk until it is smooth. This egg yolk will act as your “glue.” Using a pastry brush, lightly brush all sides of the dough log with the whisked egg yolk. Then, generously sprinkle your chosen decorating sugar (or nonpareils) over the entire surface of the log, pressing gently to adhere.

- Slice the Cookies: If the ends of your dough roll are a bit ragged, trim them off for a neater appearance. Then, using a sharp knife, slice the log into uniform 1/3-inch-thick cookies. Place these rounds onto your prepared baking sheets, ensuring you leave about an inch of space between each cookie to allow for slight spreading.
- Bake and Cool: Bake one sheet of cookies at a time for 17 to 20 minutes, rotating the baking sheet halfway through to ensure even baking. Properly baked shortbread will have lightly golden edges, a light brown bottom, and a pale top. They might feel slightly tender when gently touched in the center, which is perfectly fine. Remove the baking sheet from the oven and let the cookies rest on the sheet for a minute or two. This brief cooling period helps them firm up. Then, carefully transfer them to a wire rack using a wide metal spatula to cool completely to room temperature.
- Repeat: Repeat steps 8-11 with the second log of dough. Make sure your baking sheets are cool before placing the next batch of cookies on them. Baking on a hot sheet can cause the butter to melt too quickly and the cookies to spread.

We absolutely adore a simple recipe that yields spectacular results, and these shortbread cookies wholeheartedly fit that description. While they are undoubtedly a fantastic choice for Christmas cookie exchanges and holiday platters, please don’t let this recipe be relegated to just one season. Their pure, buttery goodness is truly enjoyable all year round!
Shortbread Variations to Explore
While classic shortbread is perfect on its own, it also serves as an excellent canvas for various flavor additions. Feel free to get creative:
- Vanilla Bean: Scrape the seeds from half a vanilla bean into the butter and sugar mixture for an exquisite floral aroma.
- Citrus Zest: Add 1-2 teaspoons of finely grated lemon or orange zest for a bright, zesty flavor.
- Almond Extract: A quarter teaspoon of almond extract can complement the buttery flavor beautifully.
- Chocolate Chips: Fold in mini chocolate chips or finely chopped chocolate during the last stage of mixing.
- Spices: A pinch of cinnamon, cardamom, or even a touch of nutmeg can add warmth.
- Lavender: Incorporate a small amount of food-grade dried lavender for a sophisticated, aromatic twist.
Storing Your Delicious Shortbread Cookies
Proper storage ensures your shortbread cookies remain fresh and delicious for as long as possible:
- At Room Temperature: Once completely cooled, store shortbread cookies in an airtight container at room temperature for up to 1 week. Separate layers with parchment paper to prevent sticking and maintain their crispness.
- Freezing Baked Cookies: For longer storage, baked shortbread cookies can be frozen for up to 3 months. Arrange them in a single layer on a baking sheet to freeze solid, then transfer to a freezer-safe airtight container or bag. Thaw at room temperature before serving.
- Freezing Dough: The unbaked dough logs can be wrapped exceptionally well in plastic wrap and then foil, and frozen for up to 1 month. Thaw in the refrigerator overnight before slicing and baking as directed.
Frequently Asked Questions About Shortbread Cookies
Got questions about making the perfect shortbread? Here are answers to some common queries:
What’s the difference between shortbread and sugar cookies?
The primary differences lie in their ingredients and leavening. Shortbread is traditionally made with a high butter-to-flour ratio, egg yolks (or no eggs at all), and no leavening agents (like baking powder or soda). This gives it its distinct crumbly, tender, “short” texture. Sugar cookies, on the other hand, typically use whole eggs and a leavening agent, resulting in a slightly chewier, crispier, and often softer cookie that holds its shape well for decorating.
Can I use cold butter for shortbread?
While some recipes for certain types of pastries might call for cold butter, for this particular shortbread recipe, softened butter is crucial. Creaming softened butter with sugar creates tiny air pockets that contribute to the cookie’s tender texture. Cold butter will not cream properly and will result in a denser, less delicate cookie.
Why is my shortbread dough too crumbly or too sticky?
If your dough is too crumbly, it might be due to too much flour or not enough mixing/moisture. Add a tiny bit of the remaining egg white (from the egg yolks you used) or a teaspoon of water, a little at a time, until it comes together. If it’s too sticky, you might have added too little flour or too much butter, or your butter was too warm. Try chilling it for longer; if it’s still too sticky, you might need to dust in a tiny bit more flour while gently working it.
Why do my shortbread cookies spread too much?
Excessive spreading is often due to the dough not being chilled sufficiently. Cold dough helps the butter stay solid longer in the oven, maintaining the cookie’s shape. An oven that’s too hot or overmixing the dough (which can warm the butter and develop too much gluten) can also contribute to spreading.
Can I make shortbread without a stand mixer?
Yes, absolutely! You can cream the butter and sugars together using a hand mixer or even by hand with a sturdy whisk and a lot of elbow grease. Once the flour is added, use a rubber spatula or your hands to gently mix until just combined. It will take a bit more effort but is definitely achievable.
What does “sables” mean in relation to shortbread?
“Sables” is a French term that translates to “sands.” It’s often used to describe delicate, crumbly butter cookies that have a sandy texture, very similar to classic shortbread. Dorie Greenspan’s use of the term perfectly captures the delightful, tender crumb of these cookies.
Shortbread Cookies
IMPORTANT – There are often Frequently Asked Questions within the blog post that you may find helpful. Simply scroll back up to read them!
Print It
Rate It
Save ItSaved!
Ingredients
- 1 cup unsalted butter softened
- ½ cup granulated sugar
- ¼ cup confectioners’ sugar sifted
- ½ teaspoon salt
- 3 large egg yolks divided
- 2 cups all-purpose flour
- course sugar or nonpareils optional
Things You’ll Need
-
Stand mixer
-
Measuring cups and spoons
-
Rubber spatula
-
Insulated baking sheets
-
Silicone baking mat
-
Wire cooling racks
-
Pastry brush
Before You Begin
- Mix just until the flour disappears into the dough and the dough looks uniformly moist.
- If most of the flour is incorporated but you’ve still got some in the bottom of the bowl, use a rubber spatula to work the rest of the flour into the dough.
- The dough will not clean the sides of the bowl, nor will it come together in a ball — and it shouldn’t. You want to work the dough as little as possible.
- Pinch it, and it will feel a little like Play-Doh.
Instructions
-
Beat the butter at medium speed until smooth and very creamy. Add the sugars and salt and beat until well blended, about 1 minute. The mixture should be smooth and velvety, not fluffy and airy. Reduce the mixer speed to low and beat in 2 of the egg yolks, again beating until the mixture is homogeneous.
-
Turn off the mixer. Pour in the flour, drape a kitchen towel over the stand mixer to protect yourself and the counter from flying flour and pulse the mixer at low speed about 5 times, a second or two each time. Take a peek — if there is still a lot of flour on the surface of the dough, pulse a couple more times; if not, remove the towel. Continuing at low speed, mix for about 30 seconds more, just until the flour disappears into the dough and the dough looks uniformly moist. (If most of the flour is incorporated but you’ve still got some in the bottom of the bowl, use a rubber spatula to work the rest of the flour into the dough.) The dough will not clean the sides of the bowl, nor will it come together in a ball — and it shouldn’t. You want to work the dough as little as possible. What you’re aiming for is a soft, moist, clumpy (rather than smooth) dough. Pinch it, and it will feel a little like Play-Doh.
-
Scrape the dough out onto a smooth work surface, gather it into a ball and divide it in half. Shape each piece into a smooth log about 9 inches long: it’s easiest to work on a piece of plastic wrap and use the plastic to help form the log. Wrap the logs well and refrigerate them for at least 3 hours, preferably longer.
-
GETTING READY TO BAKE: Center a rack in the oven and preheat the oven to 350 degrees F. Line two baking sheets with parchment or silicone mats.
-
Remove a log of dough from the refrigerator, unwrap it and place it on a piece of parchment or wax paper. Whisk the remaining egg yolk until it is smooth, and brush some of the yolk all over the sides of the dough — this is the glue — then sprinkle the entire surface of the log with decorating sugar.
-
Trim the ends of the roll if they’re ragged, and slice the log into 1/3-inch-thick cookies. Place the rounds on the baking sheets, leaving an inch of space between them.
-
Bake one sheet at a time for 17 to 20 minutes, rotating the baking sheet at the midway point. When properly baked, the cookies will be light brown on the bottom, lightly golden around the edges and pale on top; they may feel tender when you touch the top gently, and that’s fine. Remove from the oven and let the cookies rest a minute or two before carefully lifting them onto a rack with a wide metal spatula to cool to room temperature.
-
Repeat with the remaining log of dough, making sure the baking sheets are cool before you bake the second batch.
Nutrition
The recipes on this blog are tested with a conventional gas oven and gas stovetop. It’s important to note that some ovens, especially as they age, can cook and bake inconsistently. Using an inexpensive oven thermometer can assure you that your oven is truly heating to the proper temperature. If you use a toaster oven or countertop oven, please keep in mind that they may not distribute heat the same as a conventional full sized oven and you may need to adjust your cooking/baking times. In the case of recipes made with a pressure cooker, air fryer, slow cooker, or other appliance, a link to the appliances we use is listed within each respective recipe. For baking recipes where measurements are given by weight, please note that results may not be the same if cups are used instead, and we can’t guarantee success with that method.
More Irresistible Cookie Recipes
If you’re a fan of these classic shortbread cookies, you’ll love exploring some of our other delightful cookie recipes:
- Butter Cookies
- Chocolate Crinkle Cookies
- Thumbprint Cookies
- Neapolitan Cookies
- Cherry Pie Cookies
- Danish Butter Cookies
- Fluffernutter Cookies
This post originally appeared here on Dec 8, 2009, and has been updated and expanded for clarity and comprehensiveness.
