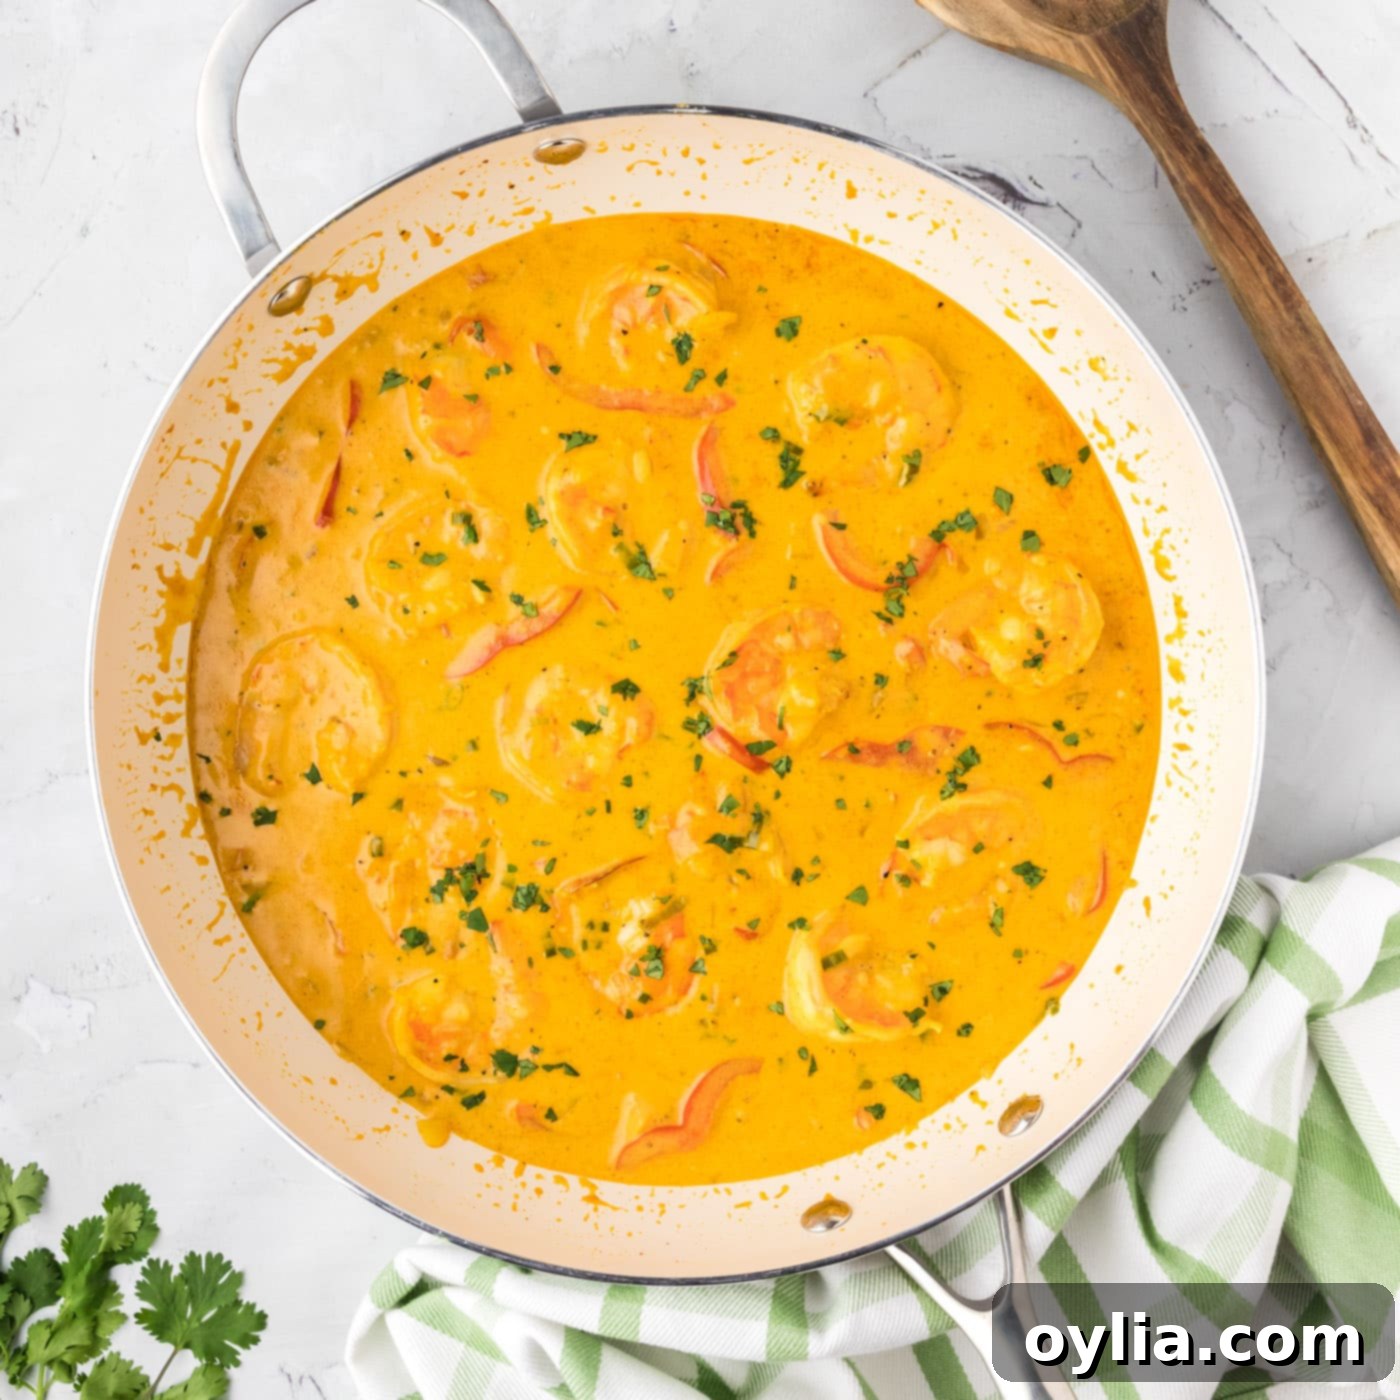
Quick & Easy Creamy Shrimp Curry: A Flavorful 30-Minute Stovetop Delight
Prepare to tantalize your taste buds with this incredible **creamy shrimp curry recipe** that brings together succulent shrimp, crisp bell peppers, and sweet onions, all bathed in a rich, aromatic gravy that absolutely explodes with flavor! This dish isn’t just bursting with taste; it’s also remarkably easy to make, coming together in under 30 minutes right on your stovetop. Perfect for a bustling weeknight or when you’re craving something exotic yet comforting, this **stovetop shrimp curry** delivers a gourmet experience with minimal effort. Its delightful blend of spices and fresh ingredients ensures every spoonful is a journey of culinary bliss, proving that truly satisfying meals don’t have to be complicated or time-consuming.

Why This Easy & Quick Shrimp Curry Recipe Will Become Your Favorite
This **shrimp curry recipe** truly stands out for its exceptional simplicity, lightning-fast preparation, and profoundly satisfying flavor profile. In today’s busy world, where culinary masterpieces often demand extensive time and effort, this dish offers a welcome reprieve. It’s a remarkable one-skillet creation, which not only simplifies the cooking process but also minimizes cleanup, making it a dream for any home cook. The magic lies in how quickly and efficiently all the ingredients meld together, developing a rich, cohesive taste.
So, what makes this specific **easy shrimp curry** an absolute must-try for your kitchen?
- Unbeatable Speed and Convenience: Imagine a flavorful, homemade curry ready on your table in under thirty minutes from start to finish. This recipe makes that a reality. It’s the ultimate solution for those hectic weeknights when you’re pressed for time but still crave a wholesome, comforting, and deeply satisfying meal that’s better than any takeout.
- A Symphony of Flavors: We unlock a deep, aromatic gravy that truly ‘explodes’ with flavor, all thanks to a carefully selected array of pantry spices. While the world boasts a rich tapestry of curry variations – from the hearty Chicken Tikka Masala to the vibrant red, yellow, and green curries – our recipe offers a beautifully balanced and approachable blend. It’s designed to be universally appealing, bringing that complex curry house taste directly to your home kitchen without the complex techniques.
- Simple, Accessible Ingredients: You won’t need to embark on a scavenger hunt for obscure spices or exotic produce. This recipe thoughtfully utilizes readily available ingredients that are likely already staples in your pantry or can be easily found at any local grocery store. This ensures a stress-free cooking experience from shopping list to dinner plate.
- The Brilliance of One-Skillet Cooking: The entire culinary process unfolds in a single pan. This genius approach not only cuts down significantly on dirty dishes (a major win!) but also ensures that every single drop of delicious juice and aromatic spice is contained and contributes to a richer, more intensely flavored sauce.
- Effortless Customization: Whether your palate yearns for a milder touch or a fiery kick, this curry is wonderfully adaptable. It serves as an excellent foundational recipe, empowering you to adjust seasonings, add more heat, or even incorporate additional vegetables to suit your personal preferences. This flexibility allows you to craft a truly bespoke dining experience tailored precisely to your taste.
Step aside, takeout menus! This **quick shrimp curry** brings the authentic, restaurant-quality taste directly to your home kitchen without any of the fuss, the wait, or the expense. It’s a comforting, aromatic, and deeply satisfying dish that emphatically proves that healthy, delicious, and easy can, indeed, go hand-in-hand.
Essential Ingredients for Your Delicious Stovetop Shrimp Curry
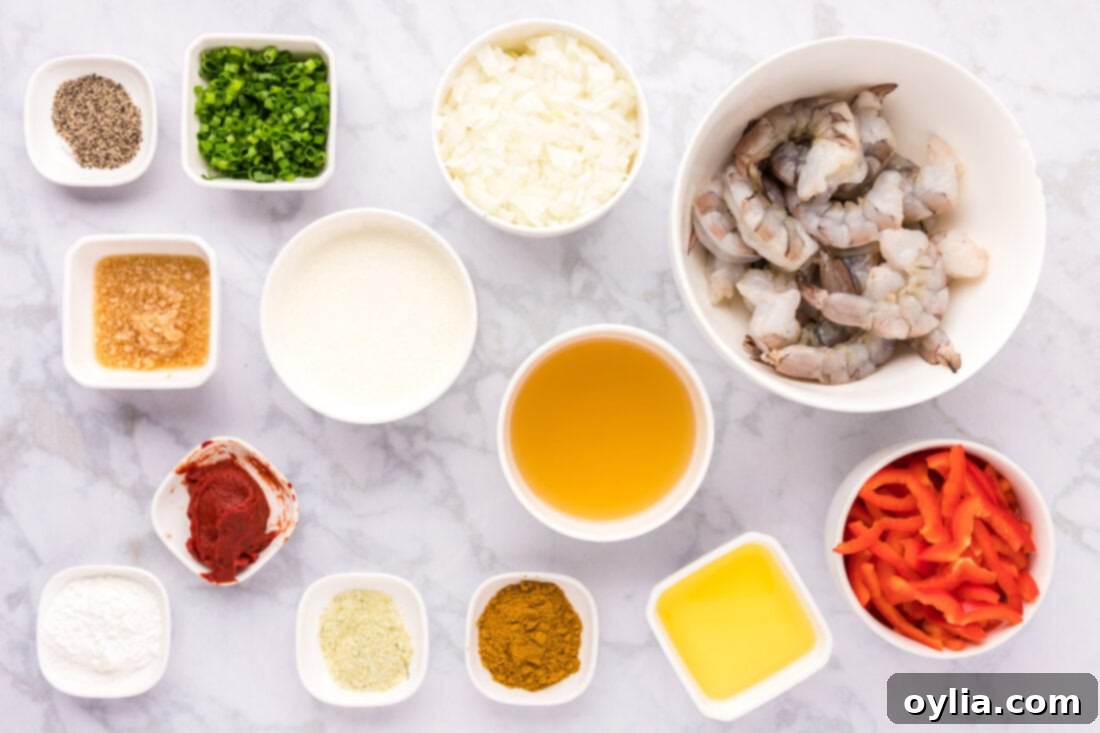
Creating this delicious **easy shrimp curry** begins with gathering fresh, high-quality ingredients. While the comprehensive list with precise measurements is conveniently located in the printable recipe card at the end of this post, let’s take a moment to explore the key components and offer some helpful insights and versatile substitution suggestions to ensure your dish is perfect every time.
Ingredient Spotlight & Smart Substitutions for the Best Shrimp Curry
Understanding the role of each ingredient is fundamental to mastering any great recipe. Here’s a deeper look at what goes into our **creamy shrimp curry**, along with some versatile options to match your pantry and dietary preferences:
- SHRIMP: We highly recommend using “grilling shrimp” due to their impressive size and ability to retain a wonderfully tender, juicy texture when cooked. These are often available at your local butcher’s counter in the meat department. For added convenience, extra-large bagged shrimp that are already peeled and deveined are an excellent alternative. If you opt for frozen shrimp, ensure they are thoroughly thawed before you begin cooking to prevent them from releasing excess water into your sauce and to guarantee even cooking. It’s best to avoid pre-cooked frozen shrimp for this recipe, as they can easily become rubbery and overcooked when reheated within the curry sauce.
- AROMATICS & FRESH VEGETABLES:
- Onions & Bell Peppers: These form the aromatic cornerstone of our curry, imparting natural sweetness, vibrant color, and a pleasing texture. While red bell peppers add a beautiful hue, any color bell pepper will perform admirably. Ensure they are finely chopped or julienned to facilitate quick and even cooking.
- Minced Garlic: Freshly minced garlic undoubtedly provides the most robust and authentic flavor. However, for those moments when time is of the essence, pre-minced garlic from a jar serves as a perfectly acceptable and convenient shortcut.
- Green Onions: Incorporated towards the end of the cooking process, green onions contribute a fresh, mild oniony zing and a visually appealing burst of color, enhancing both the taste and presentation of your curry.
- ESSENTIAL SPICES & SEASONING:
- Curry Powder: This is arguably the most crucial ingredient, the very heart of our curry’s flavor! Utilizing a high-quality, pre-blended curry powder significantly reduces preparation time while still delivering a complex and deeply aromatic profile. You have the flexibility to choose a mild, medium, or hot curry powder, allowing you to tailor the spice level precisely to your personal preference. Keep in mind that different brands offer varying flavor nuances, so selecting a blend you enjoy is key.
- Garlic Salt & Black Pepper: These foundational seasonings are indispensable for enhancing the overall savory depth and balance of the dish. Remember to taste and adjust the quantities to achieve your perfect balance.
- Tomato Paste: Even a small amount of tomato paste plays a vital role. It adds a crucial layer of umami (savory depth) and contributes a beautiful reddish-orange hue to the sauce, while also helping to balance the intricate array of spices.
- LIQUIDS & THICKENERS FOR THE SAUCE:
- Chicken Stock: This provides a rich, savory liquid base that forms the foundation of our creamy sauce. For those seeking a lighter flavor or a pescatarian-friendly option, vegetable stock can be used as a suitable substitute.
- Heavy Cream: The secret to our **creamy shrimp curry’s** luxurious, velvety texture and decadent richness. For a delightful and dairy-free variation, you can easily substitute the heavy cream with an equal amount of full-fat canned coconut milk. This transforms the dish into an authentic **coconut shrimp curry**, adding a subtle sweetness and alluring tropical notes that many adore.
- Cornstarch Slurry: A simple yet highly effective mixture of cornstarch dissolved in cold water, this slurry is absolutely essential for achieving that perfect, clingy consistency for your curry gravy. It ensures that your flavorful sauce coats every piece of shrimp beautifully and holds up wonderfully when served alongside rice or naan.
- Olive Oil: Used as the primary cooking fat, olive oil provides an excellent base for sautéing the vegetables and blooming the spices. Any neutral-flavored oil, such as canola or vegetable oil, can be used interchangeably.
Armed with this detailed ingredient knowledge and these flexible substitution options, you are perfectly equipped to create a truly outstanding and personalized **shrimp curry recipe** that will impress everyone at your table!
Crafting Your Creamy Shrimp Curry: An Easy Step-by-Step Guide
Embark on a delightful culinary journey to create this mouthwatering **stovetop shrimp curry** with our detailed, step-by-step instructions. These accompanying photos are here to visually guide you through each crucial stage of the cooking process, ensuring your success. For the full printable recipe card, which includes exact measurements and a concise instruction list, remember you can Jump to Recipe at the very bottom of this post.
- Prepare Your Skillet: Begin by adding 3 Tablespoons of olive oil to a large skillet. Place it over medium-high heat. Wait until the oil is visibly shimmering, which indicates it’s hot enough to properly sauté your vegetables and start developing those foundational flavors. This initial heat is key to a good sear and fragrance.
- Sauté the Aromatics: Introduce the chopped vegetables by adding ½ cup chopped onion and ½ cup julienned red bell pepper to the hot skillet. Sauté them for 2-3 minutes, stirring frequently. You want them to soften slightly and become wonderfully fragrant, but avoid fully browning them at this stage.
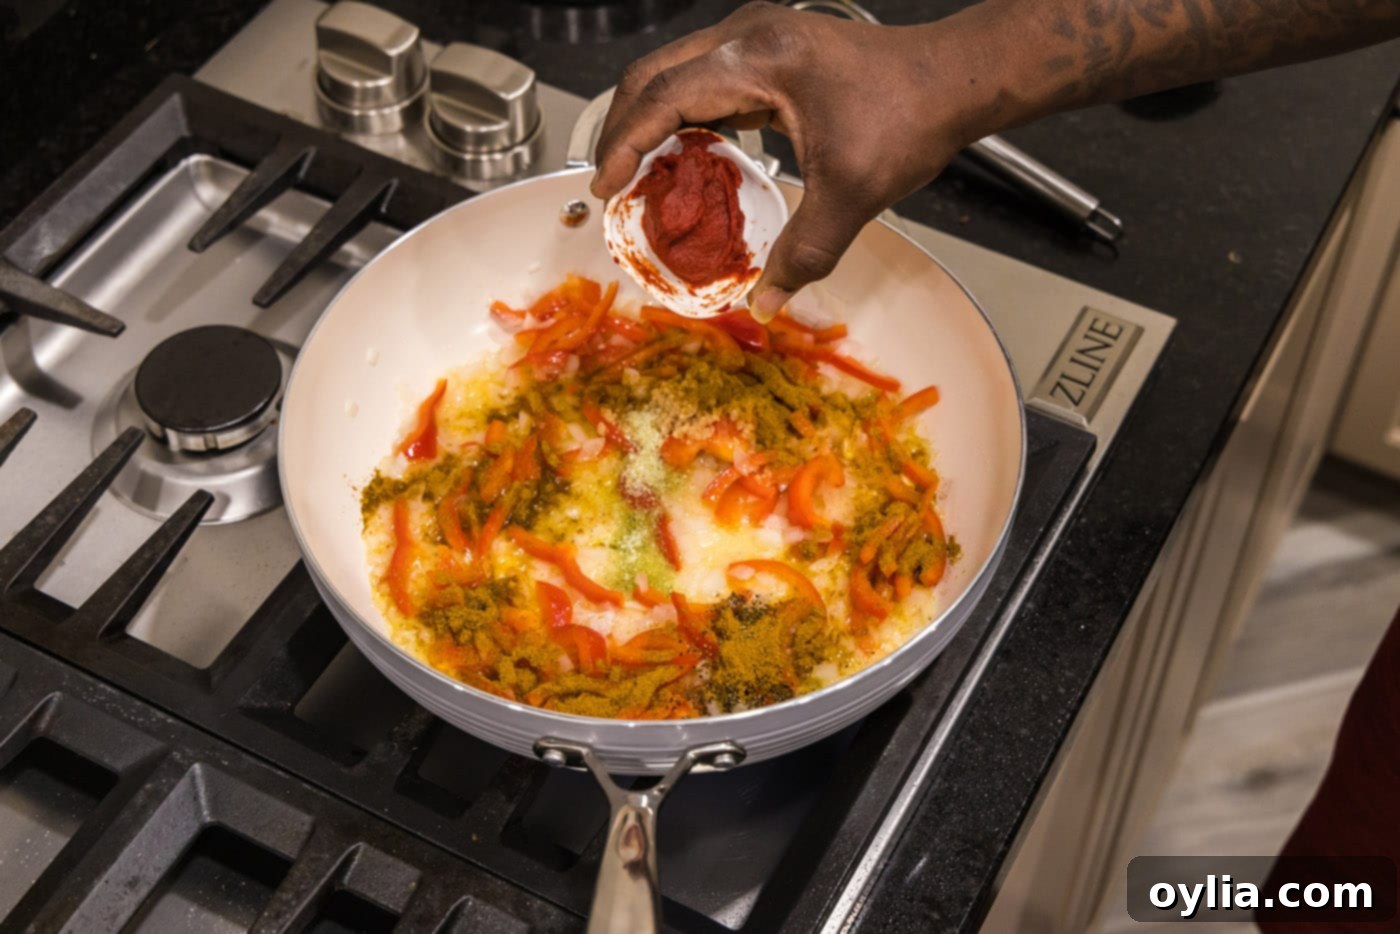
- Bloom the Spices: This step is where the curry’s signature flavor truly begins to develop. Add 2 Tablespoons minced garlic, 1 teaspoon black pepper, 1 teaspoon garlic salt, 1 ½ Tablespoons curry powder, and 1 ½ Tablespoons tomato paste to the skillet. Stir vigorously to thoroughly combine all these ingredients with the softened vegetables. Continue to cook this aromatic mixture for 1-2 minutes, allowing the spices and tomato paste to “bloom” in the hot oil. This process intensifies their flavors and releases their beautiful aromas, forming a rich base for your curry.

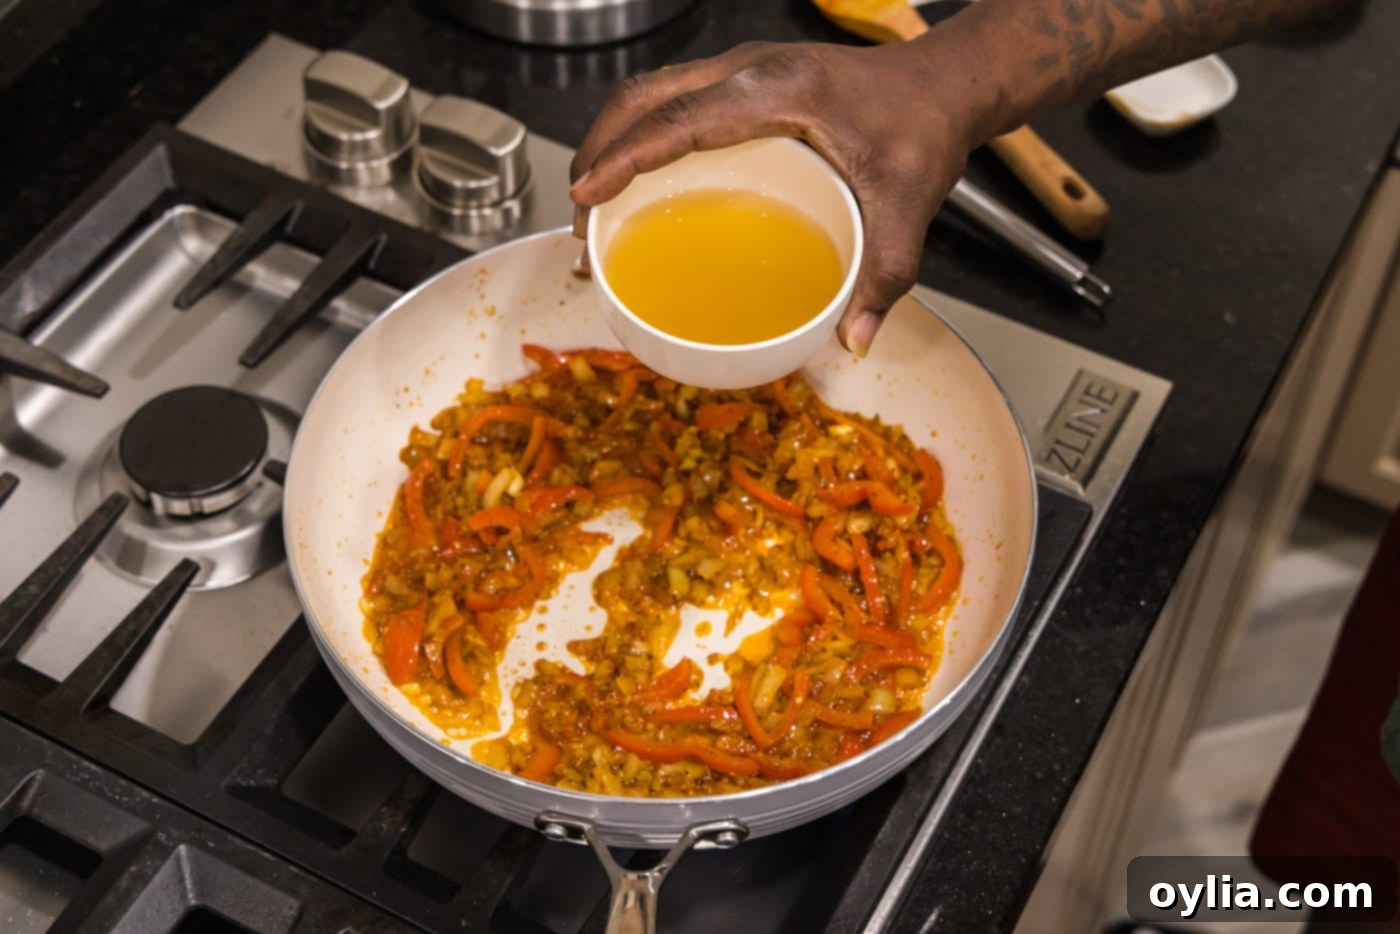
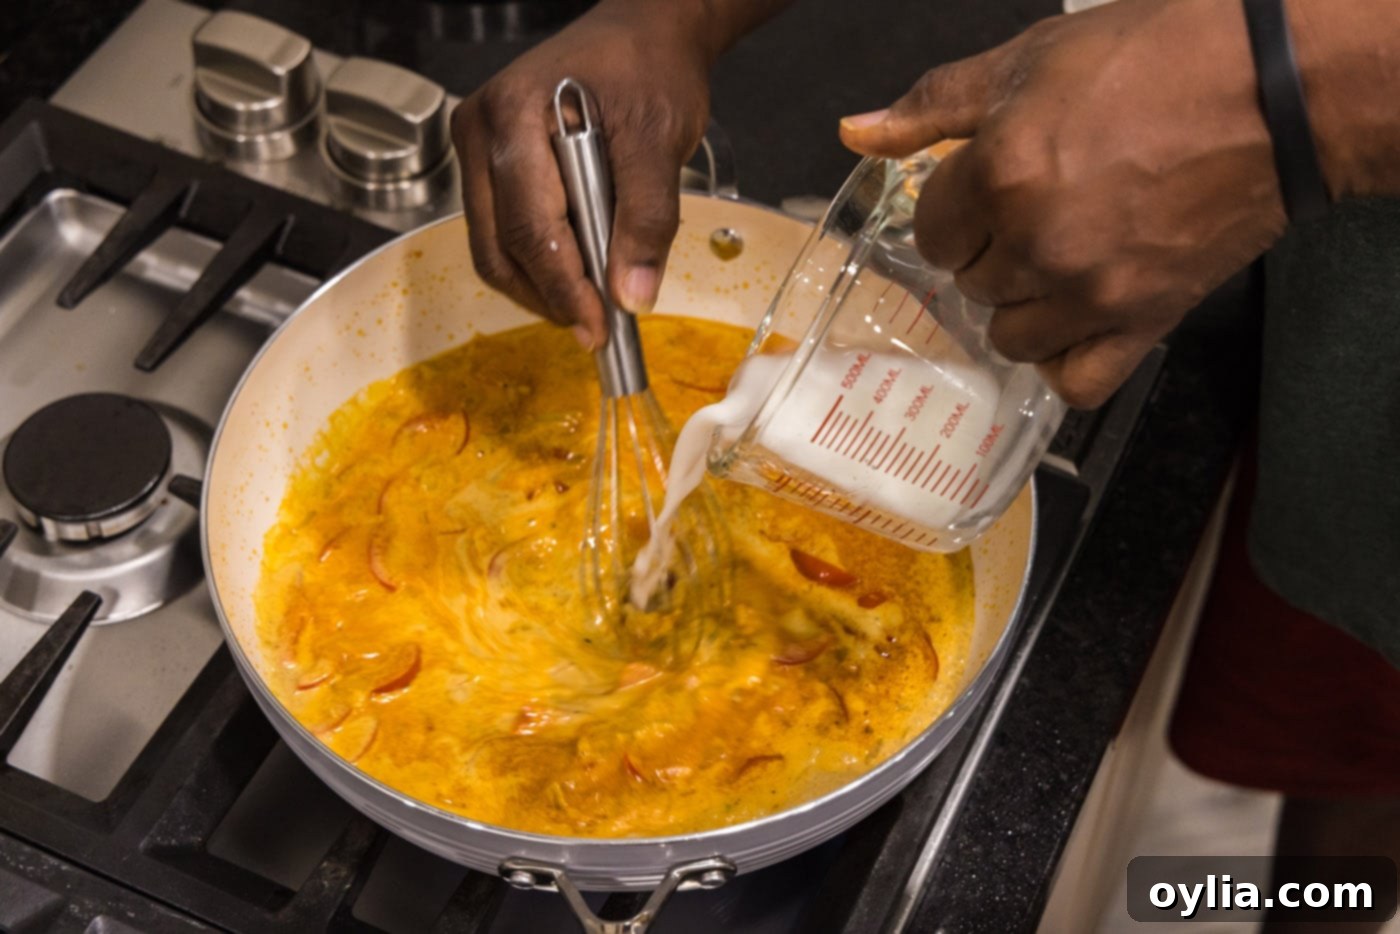
- Create the Creamy Gravy: Now, pour in ¼ cup chicken stock and ½ cup heavy whipping cream. Stir diligently to ensure all the spices and tomato paste are fully incorporated into the liquids, creating a wonderfully smooth and rich sauce. Bring this delectable mixture to a gentle simmer, allowing the flavors to meld.


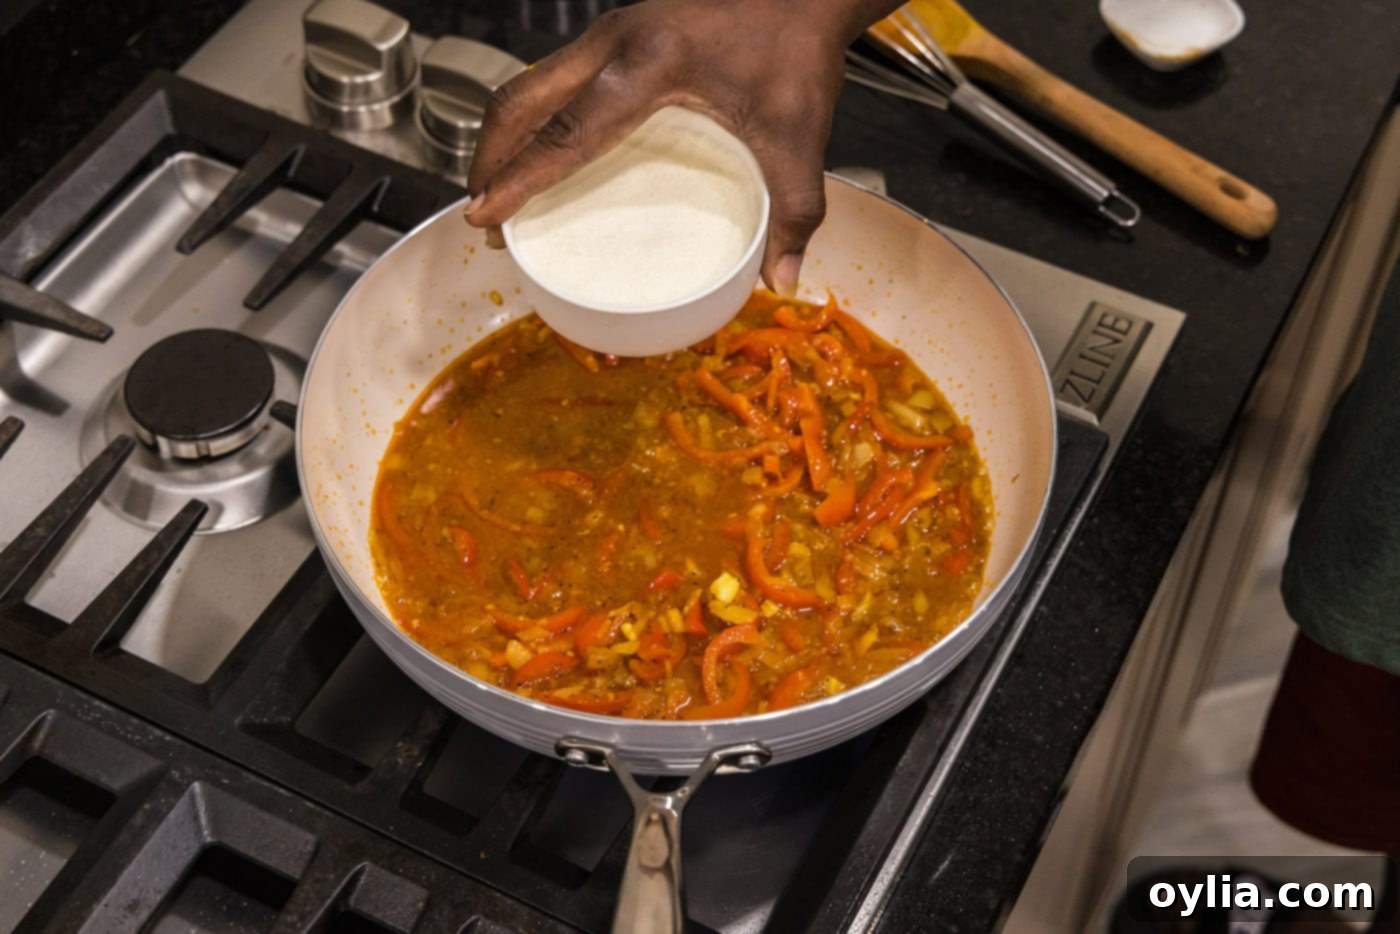
- Thicken the Sauce: In a small, separate bowl, whisk together 1 Tablespoon of cornstarch and 2 Tablespoons of water until a smooth slurry forms. Gradually whisk this cornstarch slurry into the gently simmering curry in the skillet. Continue to stir gently as the sauce begins to thicken to your desired consistency. This step is crucial for achieving that luxurious, restaurant-quality body for your gravy.

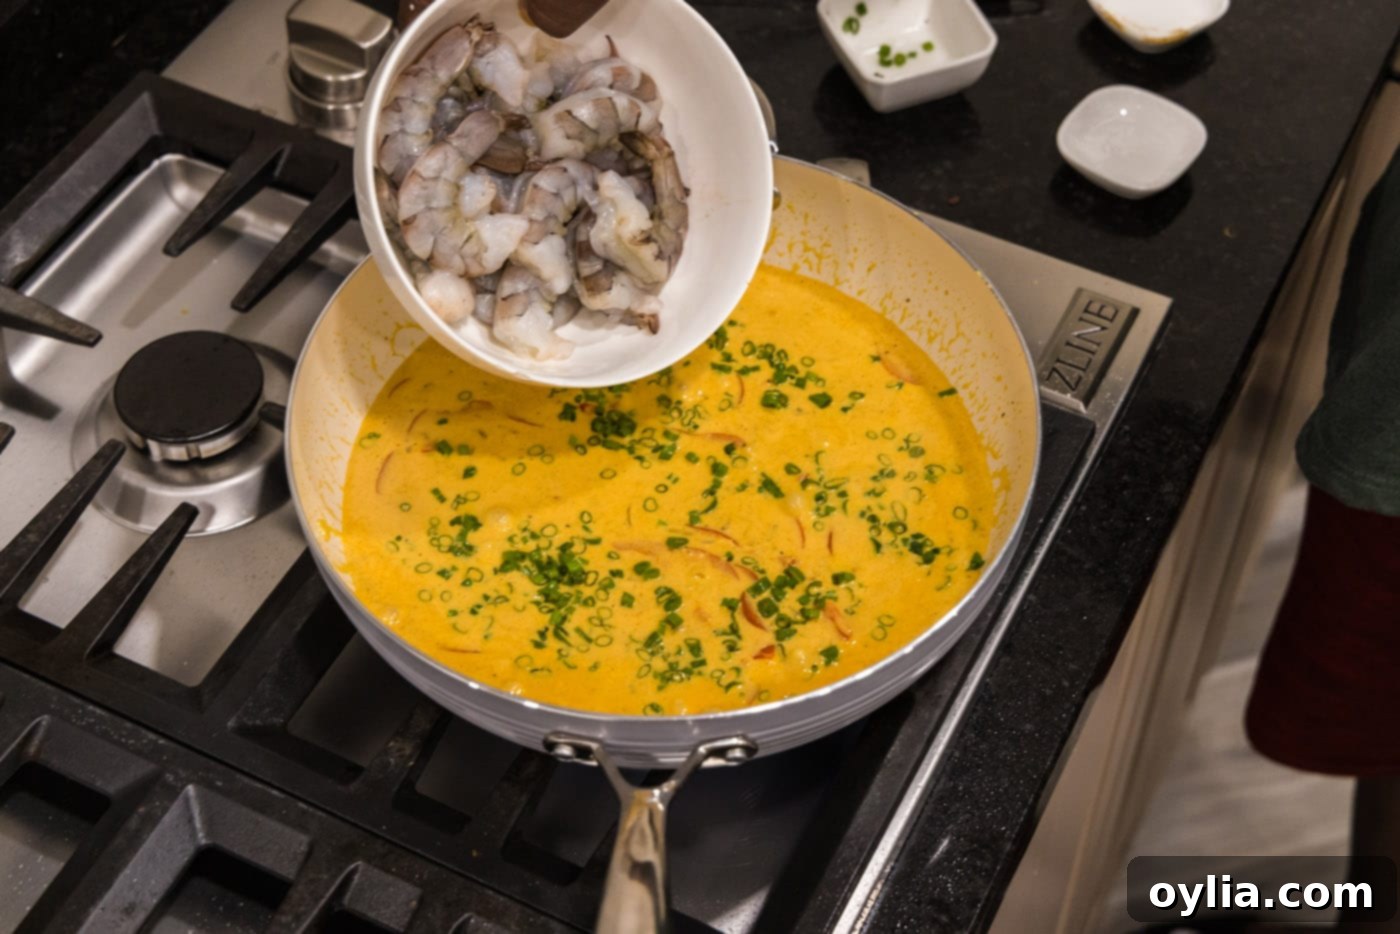
- Introduce the Shrimp & Green Onions: Stir in 3 Tablespoons chopped green onion and the 1 pound of raw grilling shrimp (which should be peeled and deveined) into the skillet. Gently mix all the ingredients, ensuring that all the shrimp are fully submerged and coated in the rich, creamy sauce. This step allows the shrimp to cook evenly and absorb all the incredible flavors of the curry.

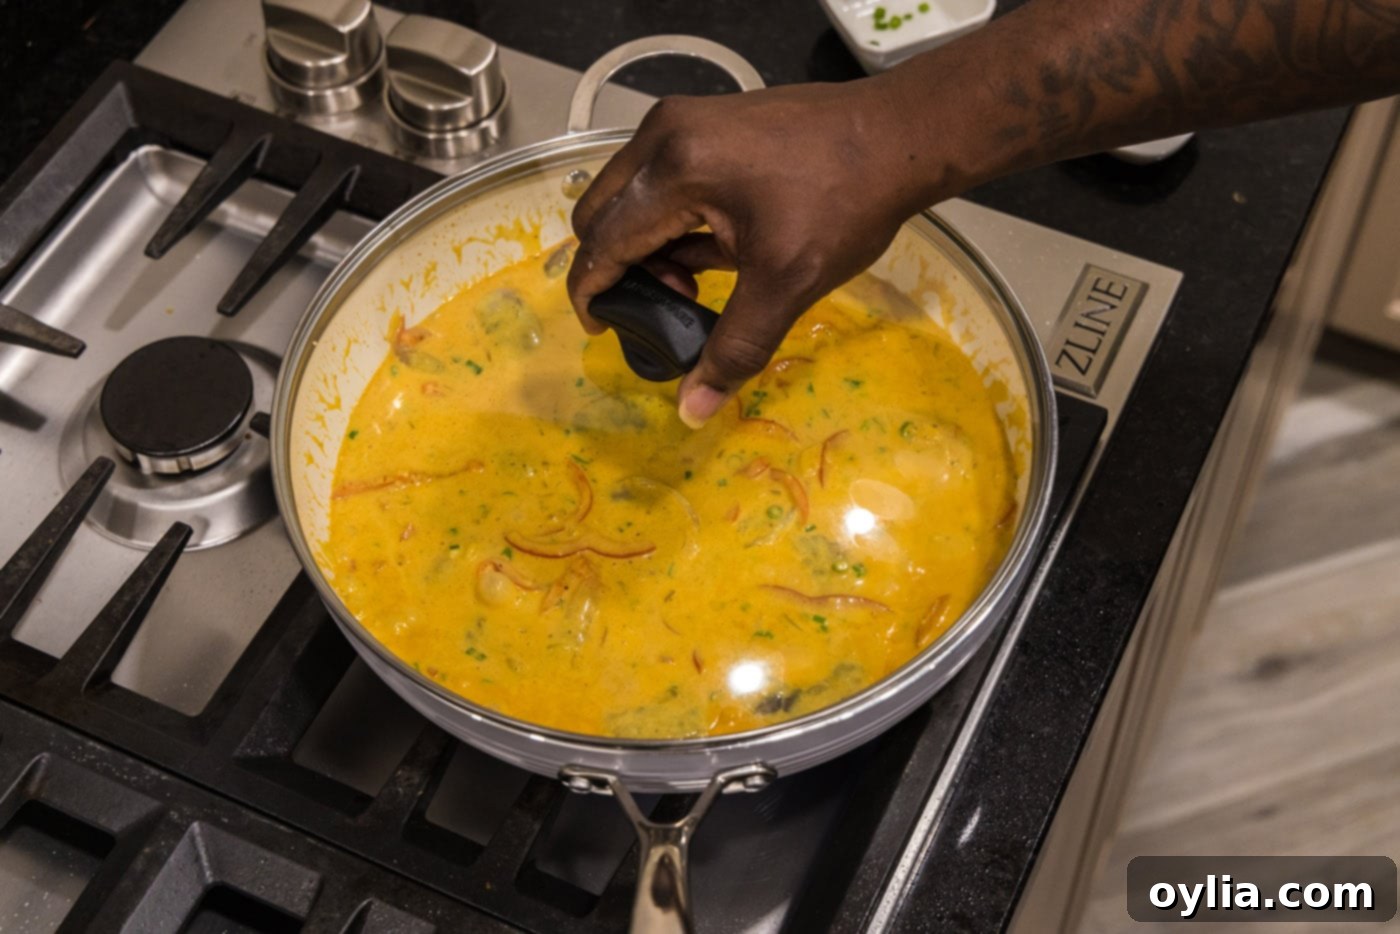
- Gentle Cooking for Tender Shrimp: Reduce the heat to medium-low, then cover the skillet. Allow the **shrimp curry** to cook undisturbed for 5-6 minutes. This gentle, covered cooking method steams the shrimp perfectly, ensuring they become wonderfully tender and juicy without any risk of overcooking.

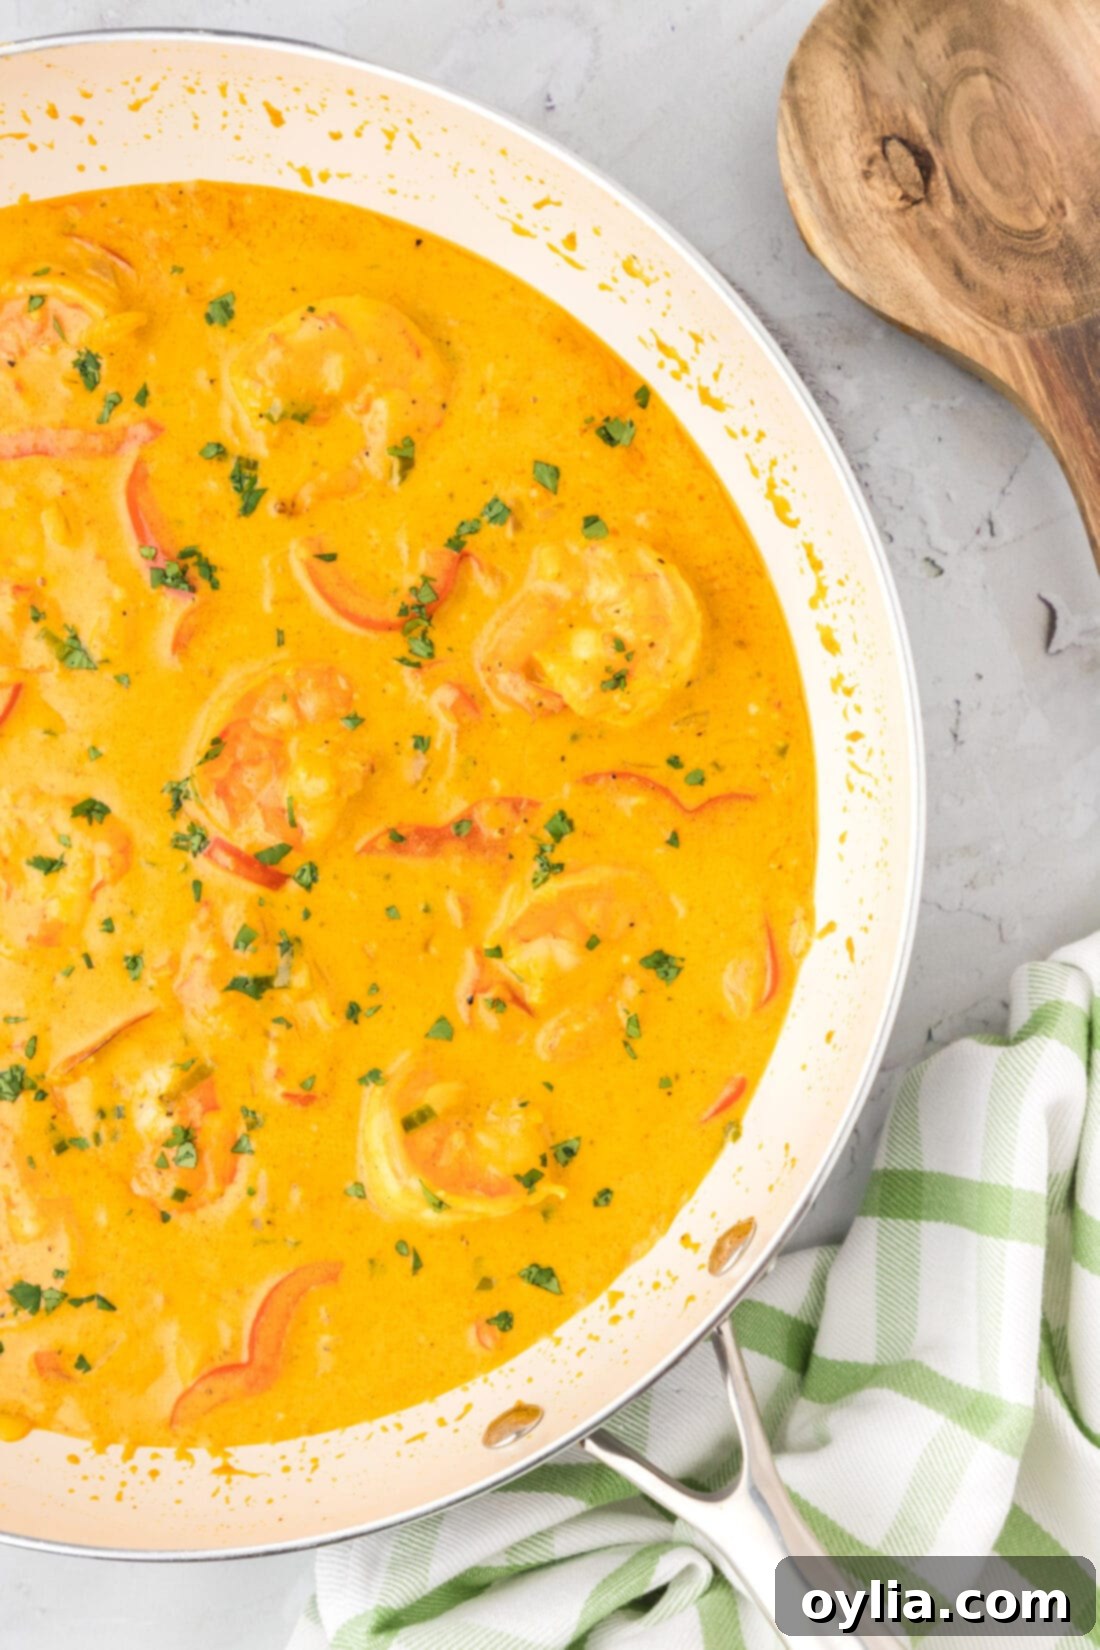
- Finishing Touches & Serving: Remove the cover, give the curry a final gentle stir, and let it cook for another 2-3 minutes. Observe the shrimp carefully: they will turn opaque and transform into a beautiful light pink color when they are perfectly cooked through. Be extra vigilant during this stage – shrimp cook incredibly fast, and even a minute too long can render them tough and rubbery. Immediately remove the skillet from the heat as soon as the shrimp reach this ideal point to preserve their delicate texture and succulence.
And just like that, your delectable **30-minute creamy shrimp curry** is ready to be served! The enticing aroma alone is sure to gather your family and friends around the table with eager anticipation. Enjoy this quick, flavorful, and incredibly satisfying meal!
Frequently Asked Questions & Expert Tips for Perfect Shrimp Curry
To effortlessly transform this recipe into a rich and fragrant **Coconut Shrimp Curry**, simply replace the heavy cream with an equal amount of full-fat canned coconut milk. The coconut milk will infuse the sauce with a subtle sweetness, a delightful tropical essence, and a wonderful creamy texture, creating a distinct and equally delicious flavor profile. For the best consistency and richness, always opt for full-fat coconut milk rather than light versions.
Absolutely, using frozen shrimp is perfectly acceptable and often a convenient choice! However, it is absolutely crucial that you thaw them completely before you begin the cooking process. Cooking frozen shrimp directly can lead to them releasing excessive water, which will dilute your flavorful curry sauce and negatively impact its consistency. The quickest and safest way to thaw shrimp is to place them in a bowl of cold water for approximately 15-20 minutes, changing the water once or twice. A word of caution: we strongly advise against using pre-cooked frozen shrimp for this recipe, as they tend to become tough and rubbery when cooked a second time within the hot curry sauce.
Store any leftover **creamy shrimp curry** in an airtight container in the refrigerator for up to 3 days. When it comes to reheating, do so gently on the stovetop over medium heat until it’s warmed through. A valuable expert tip to prevent overcooking the delicate shrimp during reheating is to carefully remove the shrimp from the gravy first. Then, warm the gravy separately until it’s hot, and only then add the shrimp back into the sauce for just a minute or two, allowing them to gently warm without becoming rubbery. This method helps maintain the shrimp’s tender, succulent texture.
The wonderful aspect of homemade curry is its inherent adaptability! If you desire a spicier kick, you can easily add a pinch of cayenne pepper, some red chili flakes, or a finely diced fresh green chili (or even a small amount of ginger) along with the garlic and curry powder. For those who prefer a milder flavor, simply reduce the amount of curry powder or opt for a mild blend. Always taste the sauce as you go and adjust seasonings to perfectly suit your palate.
There’s a diverse world of curry powders, each boasting a unique blend of spices. For this particular **easy shrimp curry**, a standard ‘mild’ or ‘medium’ Indian-style curry powder blend is ideal, as it provides a well-rounded and balanced flavor profile that complements the shrimp beautifully. If you have a preferred brand, certainly use that! Feel free to experiment with different blends, such as Madras curry powder for a spicier result, or milder Japanese or Caribbean types, to discover new flavor dimensions. Just ensure you’re using a good quality blend for the most delicious outcome.
Absolutely! This recipe is incredibly versatile and welcomes the addition of extra vegetables. Excellent choices include fresh spinach (stir in at the very end until just wilted), frozen peas (add them with the shrimp), finely diced potatoes (it’s best to par-boil them first or add them early with the onions to ensure they cook through), or even small cauliflower florets. Adding more vegetables not only boosts the nutritional content but also makes the meal heartier and more satisfying. Just ensure any harder vegetables are cut into smaller pieces to facilitate quick cooking.
Shrimp cook at an astonishing speed, often in just a few short minutes. The dire consequence of overcooking shrimp is a tough, rubbery texture that detracts significantly from their delightful succulence. Always monitor them closely during the final cooking stage; they are perfectly done when they turn opaque throughout and curl into a distinct C-shape. The moment they reach this stage, promptly remove the skillet from the heat to preserve their delicate texture and ensure the perfect finish for your **creamy shrimp curry**.
Delicious Serving Suggestions for Your Flavorful Shrimp Curry
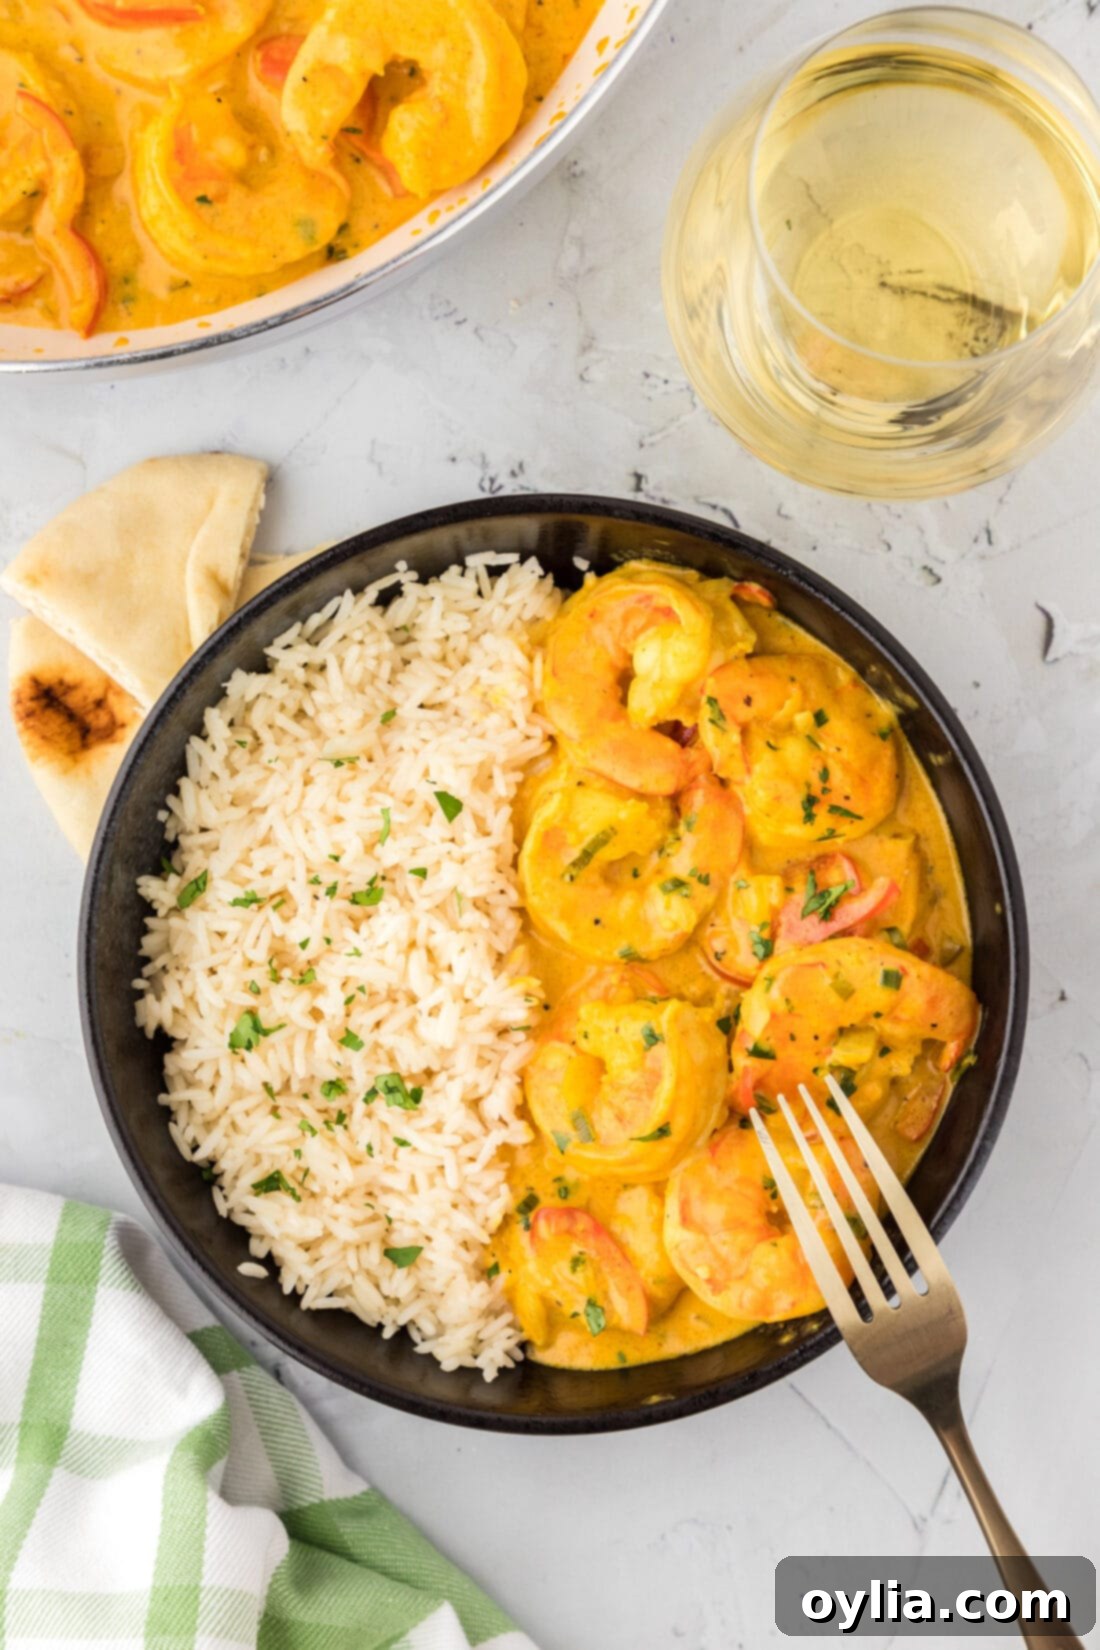
This delightful **creamy shrimp curry** is incredibly versatile and pairs beautifully with a wide array of side dishes, transforming a simple meal into a memorable feast. Here are some ideas to elevate your dining experience:
- The Classic Rice Pairing: Serve your **easy shrimp curry** generously over a bed of perfectly cooked, fluffy basmati rice, aromatic jasmine rice, or even nutritious brown rice for a wholesome meal. The rice acts as a magnificent sponge, soaking up all the rich, flavorful gravy, ensuring every single bite is utterly satisfying and bursting with taste.
- Warm, Pillowy Flatbreads: No curry experience is complete without some warm bread for dipping! Pillowy naan bread, traditional roti, or flaky paratha are ideal choices for mopping up every last drop of the exquisite sauce. Consider garlic naan or butter naan to add an extra layer of savory deliciousness to your meal.
- Wholesome Grains: For a lighter or gluten-free alternative, consider serving your **shrimp curry** with perfectly cooked quinoa or fluffy couscous. Their distinct textures provide a pleasing contrast to the creamy sauce, offering a refreshing twist on the classic pairing.
- Fresh & Crisp Greens: A simple side salad, tossed with a light vinaigrette, can provide a wonderful counterpoint to the richness of the curry. The fresh, crisp greens add a refreshing element that brightens your plate and cleanses the palate.
- Complementary Roasted Vegetables: Enhance your meal with some perfectly roasted vegetables such as tender broccoli florets, slender asparagus spears, or vibrant green beans. Their slight char and crisp-tender texture add another delightful dimension of flavor and textural interest to your plate.
- Refreshing Garnishes: Elevate the presentation and flavor of your curry with simple yet impactful garnishes. A generous sprinkle of fresh, chopped cilantro, a zesty squeeze of fresh lime juice, or a cooling dollop of plain Greek yogurt or sour cream can brighten the flavors, add a beautiful visual appeal, and provide a delightful cooling contrast to the curry’s warmth.
No matter how you choose to serve it, this **30-minute shrimp curry** is guaranteed to be a crowd-pleaser, delivering warmth, flavor, and satisfaction with every spoonful!
Explore More Seafood & Creamy Curry Delights
If you thoroughly enjoyed crafting and savoring this **quick and easy creamy shrimp curry**, we warmly encourage you to delve into some of our other fantastic seafood and curry-inspired recipes. Expand your culinary repertoire and discover new favorites with these delicious ideas:
- Crispy Golden Fried Shrimp
- Exotic & Tropical Coconut Shrimp
- Irresistible Garlic Butter Shrimp Scampi
- Sweet and Savory Honey Walnut Shrimp
- Authentic & Beloved Chicken Tikka Masala (for another creamy, spice-filled favorite!)
I absolutely love to bake and cook, and my greatest joy is sharing my kitchen experiences and delicious creations with all of you! Remembering to come back each day for new inspiration can sometimes be a challenge, which is precisely why I offer a convenient newsletter. Every time a new, exciting recipe posts, it lands directly in your inbox. Simply subscribe here and start receiving your free daily recipes to keep your culinary adventures fresh!

Shrimp Curry
IMPORTANT – There are often Frequently Asked Questions within the blog post that you may find helpful. Simply scroll back up to read them!
Print It
Pin It
Rate It
Save ItSaved!
Ingredients
- 3 Tablespoons olive oil
- ½ cup chopped onion
- ½ cup red bell pepper julienned
- 2 Tablespoons minced garlic
- 1 teaspoon garlic salt
- 1 teaspoon black pepper
- 1 ½ Tablespoons curry powder
- 1 ½ Tablespoons tomato paste
- ¼ cup chicken stock
- ½ cup heavy whipping cream
- 1 Tablespoon cornstarch
- 2 Tablespoons water
- 3 Tablespoons green onions chopped
- 1 pound raw grilling shrimp deveined and shells removed
Things You’ll Need
-
Large skillet
-
Vinyl gloves
Before You Begin
- To make **Coconut Shrimp Curry**, simply replace the heavy cream with canned coconut milk for a delightful tropical twist.
- Store leftovers in an air-tight container in the refrigerator for up to 3 days. When reheating, warm gently on the stovetop over medium heat. To prevent overcooking the shrimp, remove them from the gravy, warm the gravy, then return the shrimp briefly.
- For a spicier kick, add a pinch of cayenne pepper or a finely diced green chili along with the curry powder.
- Always thaw frozen shrimp completely before cooking to ensure optimal texture and prevent excess moisture in the sauce.
Instructions
-
Add olive oil to a large skillet over medium-high heat until shimmering.
-
Add onion and red bell pepper and saute for 2-3 minutes until slightly softened and fragrant.
-
Add minced garlic, black pepper, garlic salt, curry powder, and tomato paste. Stir to combine and cook for 1-2 minutes, allowing the spices to bloom.
-
Add chicken stock and heavy cream, stir to combine into a smooth, rich gravy. Bring to a gentle simmer.
-
Make a slurry from cornstarch and water and whisk the slurry into the simmering skillet to thicken the sauce.
-
Add chopped green onion and the raw shrimp to the skillet. Stir to combine ensuring all the shrimp are submerged in the sauce.
-
Reduce heat to medium-low and cover, allow to cook for 5-6 minutes until shrimp are almost opaque.
-
Remove cover, stir and allow to cook for 2-3 minutes more until the shrimp turn light pink and opaque.
Shrimp do not take long to cook so be sure to remove dish from the heat as soon as you are done to avoid them becoming rubbery and overcooked.
Nutrition
The recipes on this blog are tested with a conventional gas oven and gas stovetop. It’s important to note that some ovens, especially as they age, can cook and bake inconsistently. Using an inexpensive oven thermometer can assure you that your oven is truly heating to the proper temperature. If you use a toaster oven or countertop oven, please keep in mind that they may not distribute heat the same as a conventional full sized oven and you may need to adjust your cooking/baking times. In the case of recipes made with a pressure cooker, air fryer, slow cooker, or other appliance, a link to the appliances we use is listed within each respective recipe. For baking recipes where measurements are given by weight, please note that results may not be the same if cups are used instead, and we can’t guarantee success with that method.
