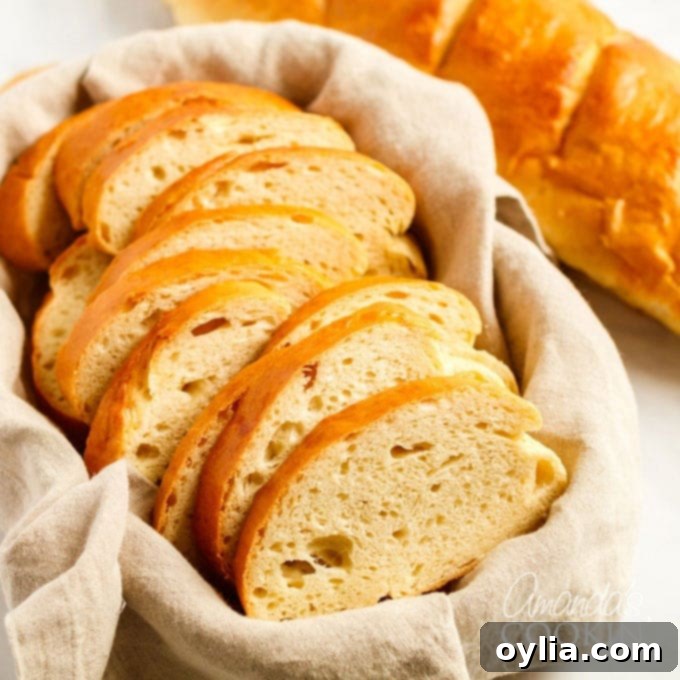
Homemade Italian Bread: An Easy Recipe for Crusty, Flavorful Loaves
There’s nothing quite like the aroma of freshly baked bread filling your home. While store-bought options offer convenience, the simple act of baking your own Italian bread is an incredibly rewarding experience. This recipe delivers a product that’s far superior in taste and texture, promising to elevate your meals and satisfy your cravings. From its golden, crusty exterior to its soft, airy interior, warm, toasty bread straight from the oven is the ultimate comfort food.
This versatile homemade Italian loaf is a fantastic companion to a wide array of dishes, extending far beyond traditional Italian fare. It shines brightly alongside a comforting bowl of spaghetti and meatballs in marinara sauce or a hearty plate of our tender crockpot roast beef. You’ll find yourself reaching for a slice to complement everything from savory stews to simple salads. For those who appreciate the ease of our 1963 homemade white bread for sandwiches or our everything peasant bread for snacking, you’re sure to adore this Italian bread for its incredible flavor and satisfying texture that enhances any meal.
Understanding Italian Bread: Key Differences from French Bread
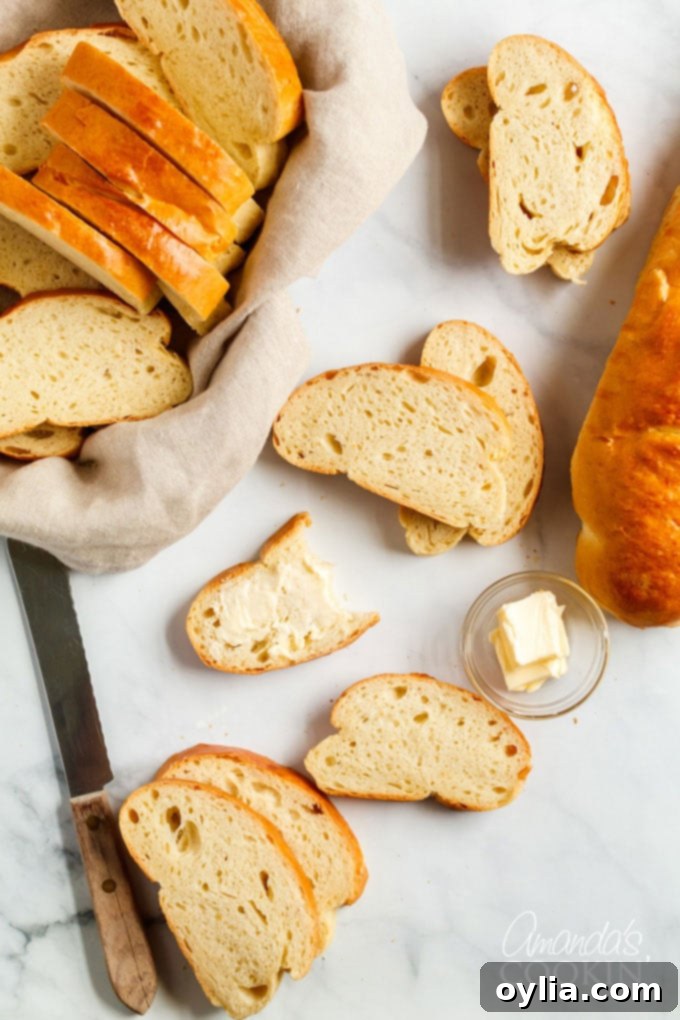
While often grouped under the umbrella of “crusty bread,” there’s a distinct difference between French bread and Italian bread. Most people might not know or simply overlook these nuances, but understanding them can deepen your appreciation for each style. These differences largely stem from traditional ingredients, shaping, and baking methods, resulting in unique textures and flavor profiles.
French bread, particularly the iconic baguette, typically adheres to a strict “lean dough” formula, using only flour, yeast, salt, and water. French law historically prohibits the addition of oils or fats, which contributes to its signature super crisp crust and open, airy interior. A French loaf is usually long, thin, and known for its shattering crust that flakes as you break it.
Italian bread, on the other hand, embraces a slightly different philosophy. While it shares many basic ingredients with its French counterpart, traditional Italian recipes often incorporate a small amount of fat, such as olive oil or vegetable oil. This addition is key; it contributes to a softer, chewier crumb and a less brittle, yet still delightfully crusty, exterior that is perfect for soaking up sauces. Italian loaves tend to be shorter and wider than French baguettes, with a more substantial, rustic feel. Common shapes vary from round ciabatta to oblong or torpedo-shaped loaves, often featuring a slightly denser, more structured interior than French bread. The inclusion of oil also imparts a subtle richness and distinct flavor that makes Italian bread a favorite for many.
Expert Tips for Perfect Homemade Italian Bread & FAQs
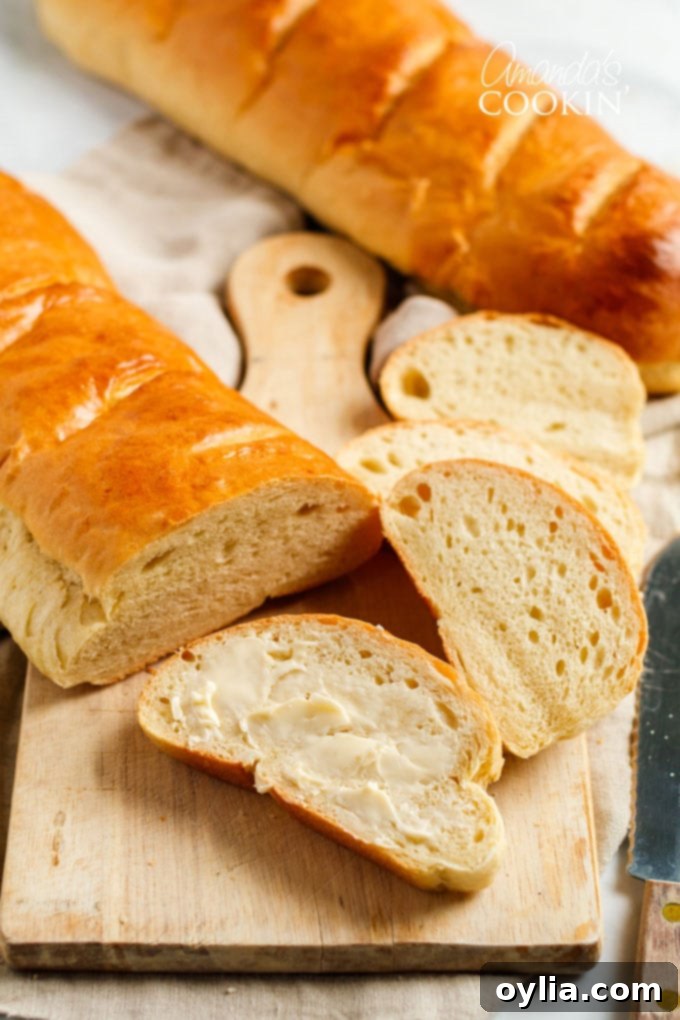
Baking bread is a delightful blend of science and art, and with a few expert tips and answers to common questions, you can achieve a perfect loaf of Italian bread every time. This section provides essential guidance on ingredients, temperatures, and troubleshooting to help you master this delicious recipe. You will find the full list of ingredients with precise measurements in the printable recipe card at the end of this post.
- Choosing Your Yeast: You can easily use packets of active dry yeast, which are readily available at any grocery store. For frequent bakers, investing in larger packages of SAF instant yeast can be more economical and convenient. Remember, active dry yeast needs to be “proofed” – dissolved in warm water with a touch of sugar – to activate it and ensure your bread rises properly. Instant yeast, while often not requiring proofing, is also fine for this recipe, just be sure to follow the instructions for active dry yeast as written if using it. This crucial step verifies your yeast is alive and active!
- The Importance of Water Temperature: When a bread recipe calls for warm water to activate yeast, the ideal temperature range is 105-115 degrees F (40-46 degrees C). This specific range is where yeast thrives best. If the water is too hot, it will kill the yeast, preventing your dough from rising. If it’s too cold, it will significantly delay or inhibit the yeast’s activation process. Using a reliable kitchen thermometer is highly recommended for accuracy.
- Hot Water for Initial Mixing: This recipe also specifies hot water for mixing with other ingredients before the yeast mixture is added. For this step, hot tap water, typically around 115-120 F (46-49 C), is perfect – there’s no need for boiling water. This temperature helps to dissolve the sugar and salt effectively and creates a more conducive environment for the dough before the activated yeast is introduced.
- Selecting Your Oil: The recipe calls for versatile vegetable oil. However, if you’re looking to add a slightly richer flavor and a hint of authentic Mediterranean essence, olive oil can be used as a delicious substitute. Both oils contribute to the bread’s tender crumb and desirable texture.
- Flour Type for Best Results: We recommend using high-quality all-purpose flour (white, not wheat) for this Italian bread. All-purpose flour strikes an excellent balance, providing sufficient gluten development for a chewy yet soft interior. While experienced bakers might experiment with bread flour for an even more pronounced chewiness, all-purpose flour consistently yields fantastic results for this recipe.
- Achieving the Right Dough Consistency: After adding all the flour, your dough will likely still feel quite sticky. This is normal! Resist the urge to add too much extra flour at this stage, as over-flouring can lead to a dry, dense loaf. The goal is a dough that is sticky but workable. During the shaping phase, you’ll lightly flour your surface and hands, adding just enough extra flour to make the dough manageable without drying it out. A slightly tacky dough often results in a more tender and moist finished bread.
Yes, freezing bread dough is an excellent way to prepare ahead and enjoy fresh homemade bread whenever the craving strikes! You can freeze the dough for up to 3 months. After its initial rise and once you’ve formed it into loaves, wrap the dough tightly in plastic wrap, ensuring no air can reach it. Then, place the wrapped loaves into freezer bags. When you’re ready to bake, remove the dough from the freezer and thaw it at room temperature. This typically takes about 4 hours. Once thawed, let it rise for its second proofing as directed in the recipe (about 30 minutes), then proceed with brushing the egg white and baking. This method allows you to enjoy the convenience of homemade bread without the daily commitment of starting from scratch.
Helpful Kitchen Tools for Baking Homemade Bread
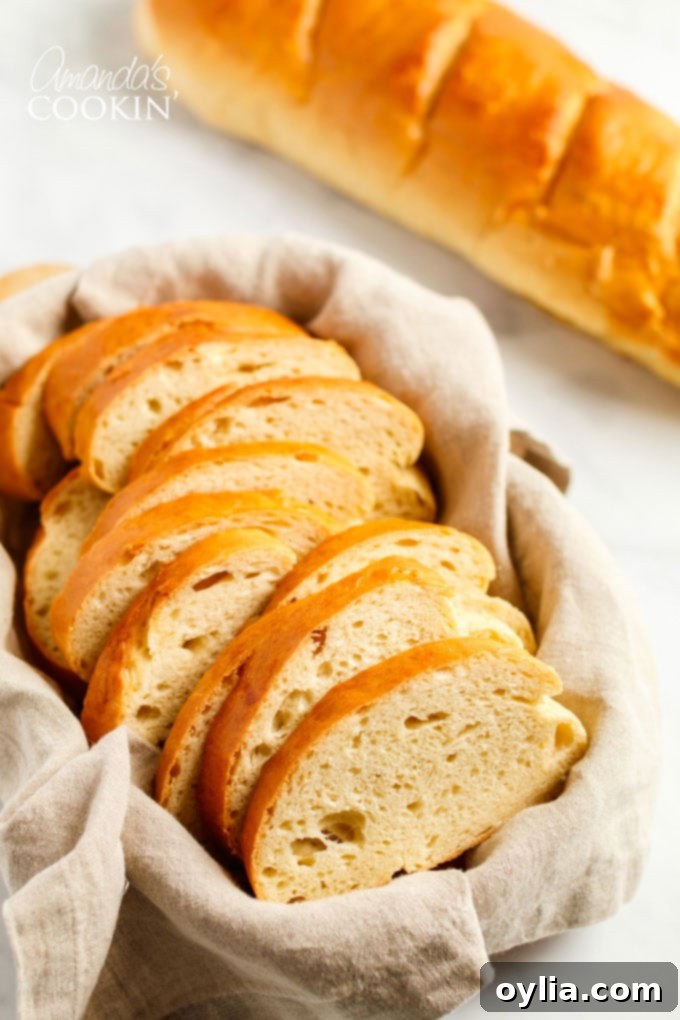
Having the right kitchen tools can significantly enhance your bread-making experience, making it more enjoyable and efficient. Here’s a curated list of essentials that will assist you in creating perfect loaves of Italian bread:
- Mixing bowls: A set of sturdy mixing bowls, including one large enough to comfortably accommodate the rising dough, is absolutely essential.
- Stand mixer or hand mixer: While this recipe doesn’t call for intensive kneading, a stand mixer with a paddle attachment can make the initial mixing process quicker and cleaner. A hand mixer can also be used for combining ingredients effectively.
- Baking sheets: You’ll need at least one, preferably two, large baking sheets to bake your loaves. Ensure they are properly greased to prevent sticking.
- Wire cooling rack: Crucial for allowing your freshly baked bread to cool evenly, which prevents a soggy bottom and promotes that desirable crisp crust.
- Pastry brush: Ideal for applying the egg wash to the tops of your loaves, giving them that beautiful golden sheen and extra crispness.
- Rolling pin: Useful for gently rolling out the dough into the desired length before shaping your loaves.
- Bread knife: A long, serrated bread knife is key for cleanly slicing your finished loaves without crushing their delicate interior.
- Kitchen thermometer: Highly recommended for accurately measuring water temperature, which is vital for proper yeast activation.
Seeking a more hands-off approach? Bread Machine instructions for the dough cycle are included at the end of this post!
Step-by-Step Guide: How to Make Homemade Italian Bread
Baking this rustic and flavorful Italian bread is a straightforward process, making it accessible even for novice bakers. By following these detailed instructions, you’ll create two beautiful, artisan-quality loaves that will impress your family and friends. Remember, patience and attention to detail at each stage are your best tools for achieving truly great bread.
Print this recipe here for easy kitchen reference while you bake!
- Activate the Yeast (Proofing): In a small bowl, combine the active dry yeast, 1/2 cup of warm water (ensure the temperature is between 105-115°F / 40-46°C – it should feel comfortably warm, not hot, to the touch), and 1/2 teaspoon of granulated sugar. Stir gently to combine, then set the bowl aside for 5-10 minutes. This process, known as proofing, reactivates the yeast and confirms its viability. You’ll know it’s working when a foamy layer appears on the surface. If no foam appears, your yeast may be old or the water temperature was off, and you’ll need to restart this step with fresh yeast.
A NOTE ABOUT YEAST: Understanding your yeast is crucial for successful bread baking. Active dry yeast typically requires proofing in warm water with sugar to reactivate it. This step “proves” that the yeast is still alive and will properly leaven your bread. Instant dry yeast, on the other hand, is processed differently and can often be mixed directly with dry ingredients without prior proofing. For this recipe, we specify active dry yeast and the essential proofing step to ensure proper rising.
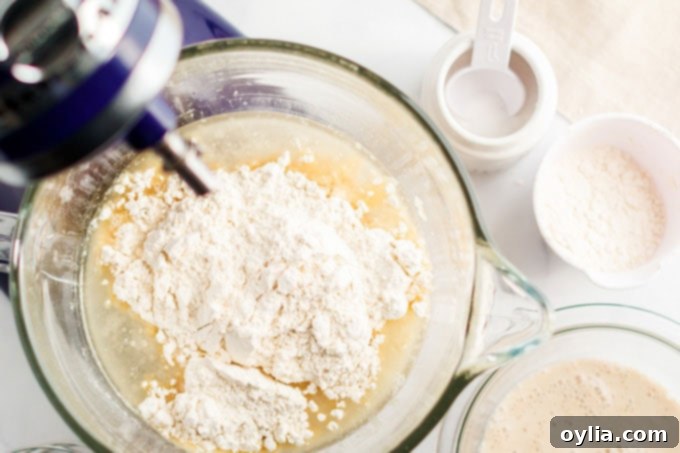
- Prepare the Main Wet Mixture: In a large mixing bowl or the bowl of your stand mixer, combine 2 cups of hot water (this should be hot to the touch, approximately 115-120°F / 46-49°C, but not boiling), 3 tablespoons of granulated sugar, the salt, and the vegetable oil. Mix these ingredients thoroughly until the sugar and salt are mostly dissolved. Then, add the initial 3 cups of all-purpose flour to this mixture. Stir vigorously with a spoon or mix with your stand mixer (using a paddle attachment initially) until well blended and smooth.
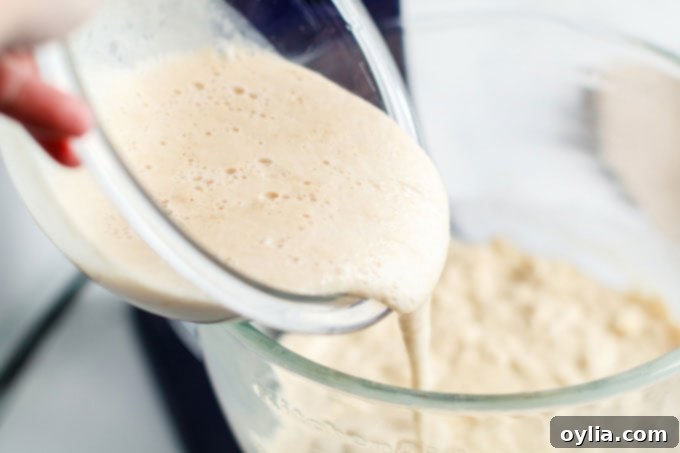
- Combine Yeast with Main Mixture: Gently pour the now-foamy, proofed yeast mixture into the large bowl with your other ingredients. Stir until the yeast mixture is fully incorporated into the dough.
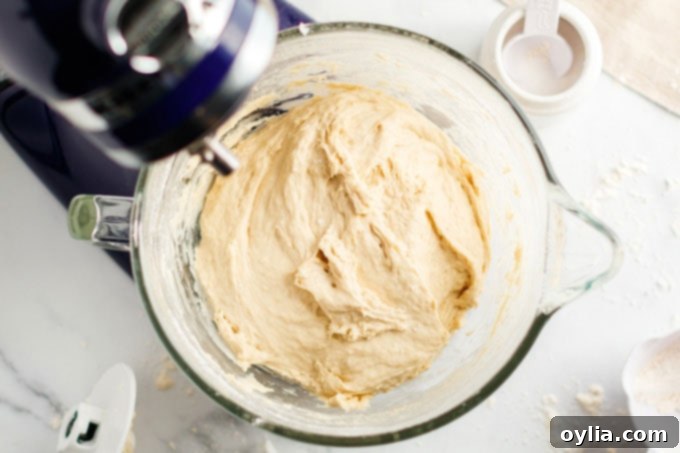
- Add Remaining Flour and First Rise: Gradually add another 2 to 3 cups of all-purpose flour to the mixture. Mix until the flour is fully incorporated and a soft, sticky dough forms. At this stage, the dough will still be quite sticky – do not be alarmed or tempted to add too much flour too quickly, as over-flouring can result in a dry, dense loaf. Once mixed, leave the dough in the bowl, cover it with a clean kitchen towel (or remove the mixer bowl if using a stand mixer to prevent the dough hook from getting covered in the rising dough), and let it rise in a warm, draft-free place for 1 hour. During this crucial first rise, the dough should roughly double in size, becoming light and airy.
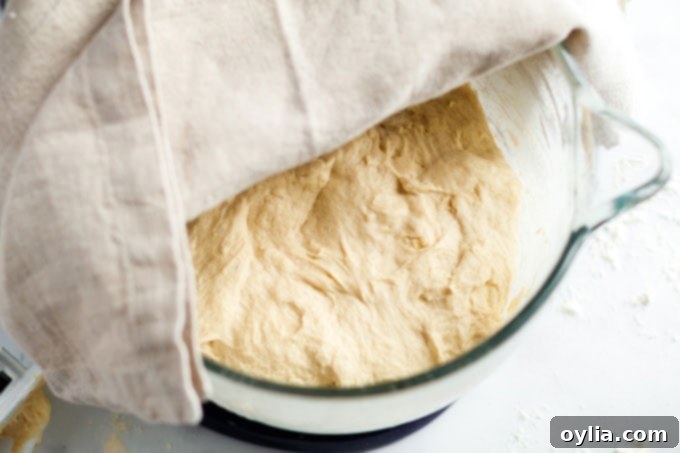
- After the First Rise: After approximately one hour, your dough should have visibly risen and become puffy.
- Prepare for Shaping (No Kneading Required): Turn the risen dough out onto a lightly floured surface. If the dough is still excessively sticky and difficult to handle, gradually sprinkle in small amounts of additional flour (a quarter cup at a time) until it becomes workable and less tacky, but still soft and pliable. Avoid adding too much flour, which can result in dry bread. Divide the dough into 2 equal pieces for larger, traditional loaves, or 3 pieces if you prefer smaller, more individual-sized loaves.
NOTE: An important characteristic of this recipe is that the dough does not require intensive kneading. Its texture and rise are primarily achieved through the initial mixing and extended proofing periods, making it a very approachable recipe for bakers of all skill levels.
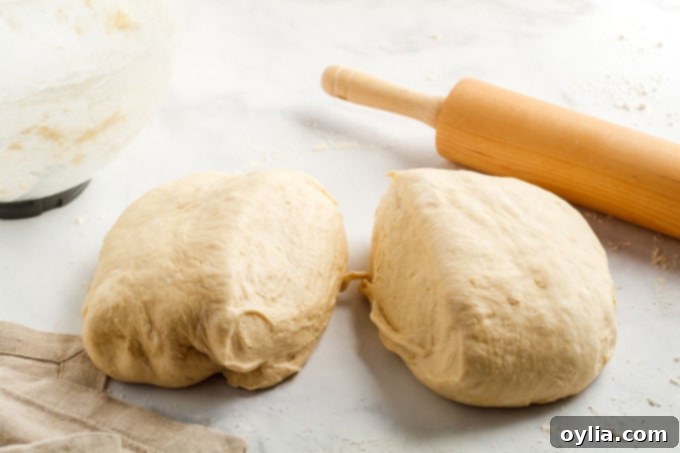
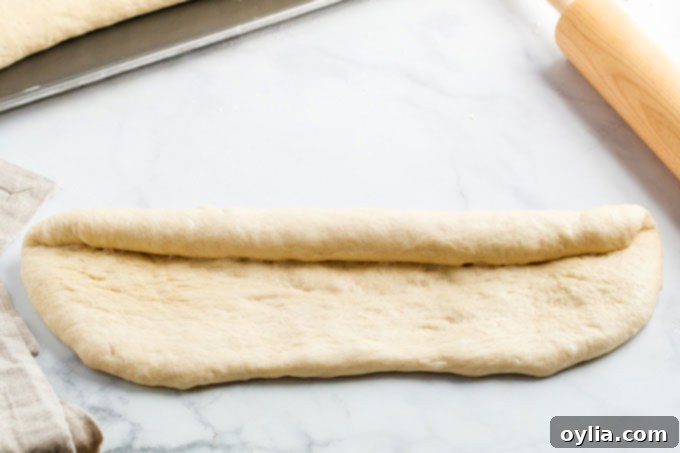
- Shape the Loaves: Take one piece of divided dough and, on your lightly floured surface, gently roll it out into an oblong or rectangular shape, aiming for your desired length. Then, starting from one of the long edges, tightly roll the dough up lengthwise, much like you would roll a jelly roll. This technique creates tension in the dough, which helps it maintain its shape during baking and contributes to a beautiful, classic loaf structure.
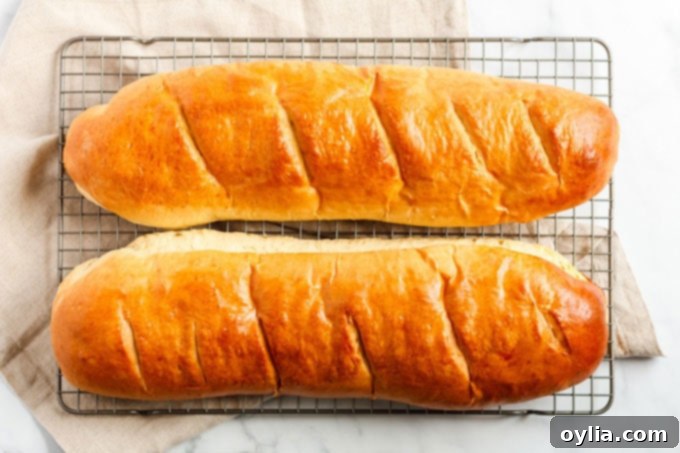
- Place on Baking Sheet and Slash: Carefully transfer your shaped loaves to a greased cookie sheet, placing them sealed side down to prevent them from unraveling. Gently tuck the ends underneath each loaf to create a neat, finished appearance. Using a very sharp knife or a bread lame (a specialized razor blade for dough), make several diagonal slashes across the top of each loaf, spaced about every couple of inches. These slashes are both decorative and functional: they allow steam to escape during baking, helping the bread expand properly and preventing uncontrolled tearing of the crust.
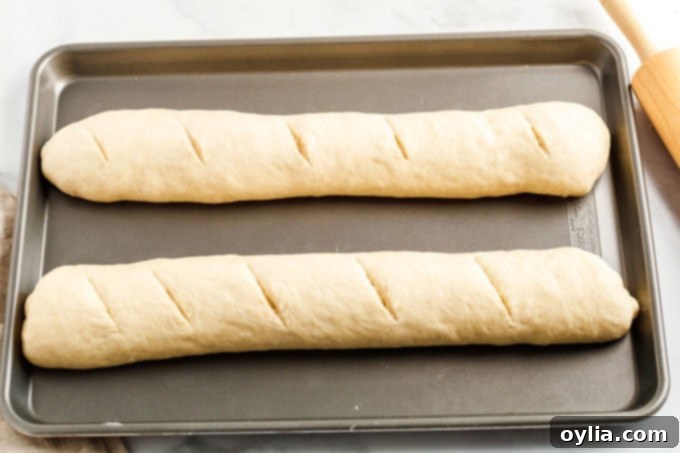
- Second Rise (Final Proofing): Cover the shaped loaves once more with a clean kitchen towel and let them rise for an additional 30 minutes in a warm, draft-free spot. This second rise, or final proofing, is essential for allowing the gluten to relax further and for the yeast to produce more carbon dioxide, resulting in a lighter, airier texture in your finished bread.
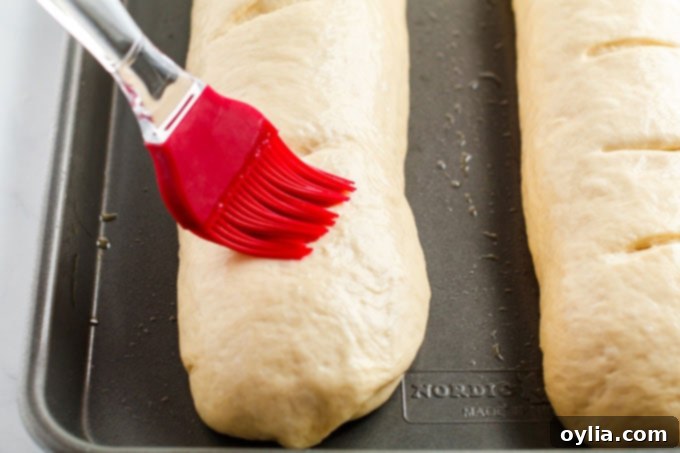
- Preheat Oven & Apply Egg Wash: While your loaves are undergoing their second rise, preheat your oven to 400 degrees Fahrenheit (200°C). In a small bowl, whisk one large egg white until it’s slightly frothy. Just before placing the loaves in the oven, gently brush this egg wash generously over the tops and sides of your risen loaves. The egg wash is a simple but effective step that contributes to a beautiful golden-brown color and a lovely crisp crust.
- Bake to Perfection: Carefully transfer the baking sheet with the prepared loaves into the preheated oven. Bake for 25-30 minutes, or until the loaves are deeply golden brown and sound hollow when tapped on the bottom. Keep in mind that exact baking times can vary slightly depending on your specific oven, so monitor your bread for the desired color and doneness.
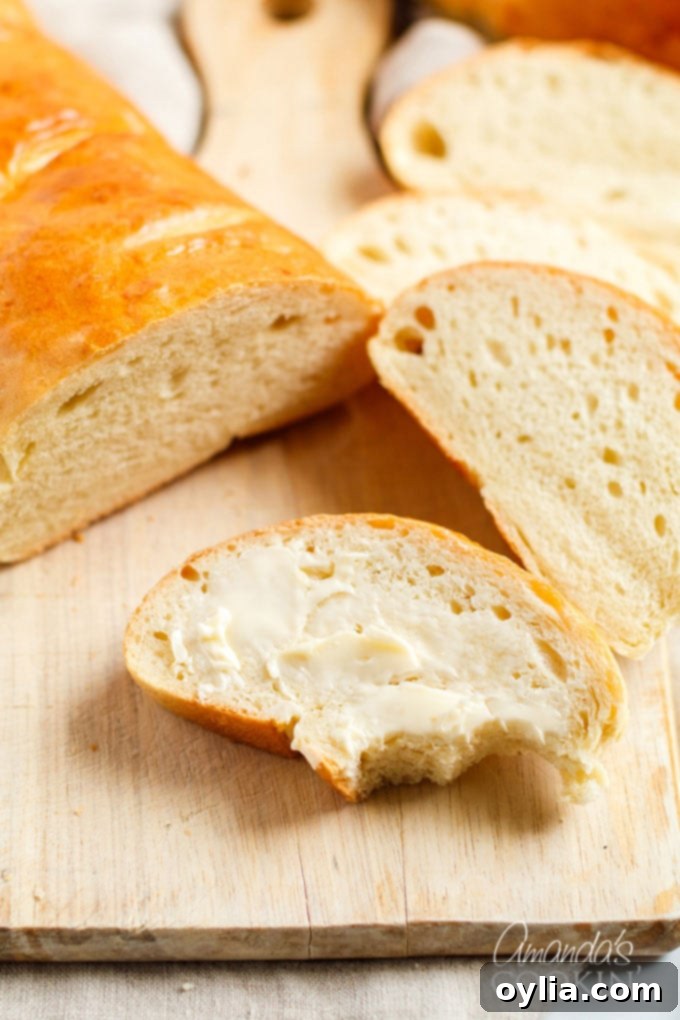
- Cool and Serve: Once baked to perfection, immediately transfer the hot loaves to a wire cooling rack. Allow them to cool for at least 15-20 minutes before slicing. This cooling time is crucial for the internal structure of the bread to set properly, ensuring a perfect texture. Then, slice and enjoy your magnificent homemade Italian bread, perhaps with some butter or a dip in olive oil!
Making Italian Bread Dough in a Bread Machine
For those who prefer the convenience and automation of a bread machine, you can still enjoy homemade Italian bread with minimal hands-on effort. This method utilizes your bread machine specifically for the dough preparation cycle, after which you will remove, shape, and bake the loaves in your conventional oven. It’s an excellent way to streamline the bread-making process, especially if you’re looking to save time or are new to baking with yeast.
- Adjust Ingredients for Bread Machine: Refer to the printable recipe card below. For the bread machine, you will need to cut all the ingredients in half, except for the yeast itself. Crucially, you will eliminate the initial small amount of water and sugar used for proofing the active dry yeast, as the bread machine’s dough cycle is designed to handle this differently, often optimized for instant yeast.
- Load Wet Ingredients First: Ensure the kneading paddle is correctly inserted into the bottom of your bread machine bucket. Add 1 cup of warm water (around 105-115°F / 40-46°C) and 1/4 cup of vegetable or olive oil to the bucket.
- Add Dry Ingredients (Layered Approach): Next, add 4 1/2 teaspoons of granulated sugar and 1 1/2 teaspoons of salt directly into the bucket. Carefully add 3 cups of all-purpose flour over the wet ingredients, creating a distinct layer that completely covers the water and oil.
- Add Yeast on Top: On top of the flour layer, place 2 1/4 teaspoons (equivalent to one standard packet) of active dry or instant yeast. It is important that the yeast remains separate from the liquid ingredients initially, preventing premature activation.
- Select Dough Cycle: Place the bucket securely into the bread machine and select the “Dough” cycle. Start the machine. This cycle will automatically mix, knead (if required by your machine’s specific dough program), and complete the first rise.
- Shape and Second Rise: Once the bread machine beeps, signaling the end of the dough cycle, carefully remove the dough. If it feels excessively sticky, lightly flour your hands and work surface, adding small amounts of flour as needed until the dough is workable. Proceed to roll and shape the dough into loaves following steps 7 and 8 from the conventional oven instructions above. Place the shaped loaves on a greased baking sheet, add the characteristic diagonal slashes to the top, and cover them with a clean towel to let rise for the second proofing (approximately 30 minutes).
- Final Bake: While the loaves are undergoing their second rise, preheat your conventional oven to 400°F (200°C). Brush the risen loaves with an egg white wash (as detailed in step 10 of the main recipe). Bake for 25-30 minutes, or until they achieve a beautiful golden-brown color and a crusty finish.
Delicious Pairings: How to Enjoy Your Homemade Italian Bread
Our homemade Italian bread is incredibly versatile and can enhance a multitude of meals, proving its worth far beyond just Italian cuisine! Its robust flavor, satisfying texture, and ability to soak up rich liquids make it an ideal accompaniment for almost any dish. Here are some of our favorite and most creative ways to enjoy this delicious bread:
- With Hearty Roasts and Stews: There’s truly nothing better than using a thick hunk of this bread to sop up the savory juices and rich gravies from a succulent pork sirloin roast, a classic beef pot roast, or a slow-cooked chicken stew. Its slightly chewy texture stands up perfectly to flavorful sauces.
- Alongside Comforting Soups: A big bowl of warm, comforting soup simply begs for a piece of crusty bread. Whether it’s our aromatic Italian Sausage Tomato Orzo Soup, a creamy Cheddar Cheese Potato Soup, or a rustic lentil soup, a slice of warm, buttered Italian bread is the perfect accompaniment. And for all you Olive Garden fans out there, it’s absolutely amazing with a copycat Zuppa Toscana!
- Essential for Pasta and Sauces: Of course, this bread is a natural and indispensable fit for all your favorite Italian pasta dishes. Serve it generously alongside your beloved lasagna, such as our convenient new Crockpot Lasagna, or a classic plate of spaghetti and meatballs. It’s also absolutely essential for dipping into the rich, aromatic sauce of a flavorful Chicken Cacciatore.
- Appetizers and Creative Snacks: Don’t let any leftover bread go to waste! Transform it into delectable garlic bread, vibrant bruschetta with fresh tomatoes and basil, or crispy homemade croutons for your salads. It’s also wonderful simply toasted with butter or dipped in good quality extra virgin olive oil with a pinch of salt and freshly ground pepper.
- Elevated Sandwiches: While perfect as an artisan loaf, a fresh slice can also make a fantastic base for elevated open-faced sandwiches or pressed paninis, especially when filled with gourmet Italian deli meats, cheeses, and fresh vegetables.
Need even more delicious meal inspiration? Explore all our dinner recipes here to find the perfect pairing for your magnificent homemade Italian bread!
What Our Readers Are Saying: Real Testimonials for This Italian Bread Recipe
Are you considering trying your hand at bread baking for the first time? Or perhaps you’re an experienced baker searching for a new staple recipe to add to your repertoire? Don’t just take our word for how wonderful this homemade Italian bread is! Here’s a small but powerful sampling of the overwhelmingly positive feedback from our community of passionate bakers who have tried and fallen in love with this recipe. Their experiences speak volumes about the recipe’s reliability, ease of execution, and consistently delicious outcome. You can find many more glowing reviews and helpful comments further down in the comments section!
“I have made this twice and it is very tasty, good crust and soft inner not dense , very good flavor, I have been baking bread for 40 years, this is in the top five, Thanks.” ~ Thomas
“By far one of the best and easiest bread recipes I have come across!! Dough comes out perfect and is so easy to roll!! So glad I came across this recipe it’s a game changer.” ~ Tracy
“This bread was so, so delicious! I am proud of myself for going through with it. I was scared to do it and usually need video ( visual learner ) but went ahead and one of the two loaves is already gone! I wish I could attach a pic! I will make this over and over!” ~ Desiree
“I never post reviews… but after making this, I had to!!! I only had bread flour, so used that… but that was the only deviation. I followed the recipe exactly. The bread came out PERFECT! Crispy outside and moist inside. This is some of the best bread I’ve ever made. It will definitely be made again. Thank you!!” ~ Terri
“’This is a million times better than store bought bread’
‘You have to make this every time we have pasta now’
‘Nom nom nom…’Feedback from my family after serving them this bread for dinner. Excellent recipe!” ~Dave
“OMG! I made this bread today and have to say this is the BEST bread I have ever made, and I’ve tried a lot of recipes! It was very light and fluffy yet just crispy enough on the crust. The only changes I made were I used bread flour and only used 2.5 tablespoons of the sugar instead of three. Thank you for sharing this! I am throwing away all my other bread recipes!” ~ Nadine

Homemade Italian Bread
IMPORTANT – There are often Frequently Asked Questions within the blog post that you may find helpful. Simply scroll back up to read them!
Print It
Pin It
Rate It
Save ItSaved!
Ingredients
- 1 ½ tablespoons active dry yeast 2 packets
- ½ cup warm water 110F
- ½ teaspoon granulated sugar
- 2 cups hot water hot to the touch, not boiling (115-120F)
- 3 tablespoons granulated sugar
- 1 tablespoon salt
- ½ cup vegetable oil
- 5-6 cups all-purpose flour add more if needed to get to a pliable dough
- 1 large egg white for brushing on loaves
Before You Begin
- If your dough is still super sticky, you can add small amounts of flour until the dough just comes together.
- You can use the packets of active dry yeast available at any grocery store. I bake a lot of bread, so I prefer to by SAF instant yeast in larger packages. If you use active dry, just follow the instructions in the recipe and let it sit for a few minutes to proof (it will get a little foamy).
- When a bread recipe calls for warm water, the temperature should be around 110 degrees F. If the water is too hot it will kill the yeast, and too cold will delay the rise process.
- Use regular white granulated sugar for this recipe.
- In a separate step, you’ll also use hot water in this recipe. Since you are mixing it with other ingredients before adding the yeast mixture it will be fine. You want hot tap water, not boiling water.
- Regular everyday table salt is used, not Kosher or sea salt.
A note about yeast:
You can use active dry yeast or instant yeast. If you use active dry yeast it needs to be proofed in order for it to be reactivated. Instant dry yeast doesn’t need proofing. Active dry yeast must be reactivated by proofing in warm water, or the bread won’t rise properly. This process is to “prove” that the yeast is still alive.
- This recipe calls for vegetable oil, but olive oil can also be used.
- We are using all-purpose flour, white not wheat, to make this bread.
Instructions
-
Dissolve yeast, 1/2 cup warm water (110F), and 1/2 teaspoon granulated sugar in a small bowl.
-
In a large bowl or stand mixer, combine 2 cups hot water (115-120F), 3 tablespoons granulated sugar, the salt, and the oil. Add 3 cups of flour to the mixture in this large bowl/mixer and mix well. Stir in yeast mixture.
-
Add 2 – 3 cups more flour and mix until well blended. (At this point your dough will still be quite sticky). Leave in bowl, cover with a towel and let rise for 1 hour. (If using a mixer, remove the bowl from the mixer and cover. Otherwise your paddle attachment or dough hook will get covered in dough when it rises). NO KNEADING IS REQUIRED.
-
After the rise, if the dough is too sticky to handle, add more flour until its workable. For some people this can be up to a cup or more! Just don’t dry out the dough. Add by quarter cupfuls until its workable.
-
Divide dough into 2 (or 3 if you want smaller loaves) pieces. Roll out each piece on a floured surface into the length desired then roll up lengthwise like a jelly roll. If it’s still too sticky, add more flour until it’s workable but not dry.
-
Put on a greased cookie sheet, sealed side down, and tuck the ends under. Slash the top diagonally across the top every couple of inches with a sharp knife.
-
Cover and let loaves rise 30 more minutes.
-
While loaves are rising, preheat oven to 400 degrees Fahrenheit.
-
Whisk the egg white and brush over the top of loaves.
-
Bake for 25 – 30 minutes.
Nutrition
The recipes on this blog are tested with a conventional gas oven and gas stovetop. It’s important to note that some ovens, especially as they age, can cook and bake inconsistently. Using an inexpensive oven thermometer can assure you that your oven is truly heating to the proper temperature. If you use a toaster oven or countertop oven, please keep in mind that they may not distribute heat the same as a conventional full sized oven and you may need to adjust your cooking/baking times. In the case of recipes made with a pressure cooker, air fryer, slow cooker, or other appliance, a link to the appliances we use is listed within each respective recipe. For baking recipes where measurements are given by weight, please note that results may not be the same if cups are used instead, and we can’t guarantee success with that method.
This recipe for delicious homemade Italian bread was originally published here on January 28, 2009. It has since been updated and refined to provide you with the most comprehensive and enjoyable baking experience possible!
