Master the Secret: Your Guide to Perfect Homemade Olive Garden Breadsticks
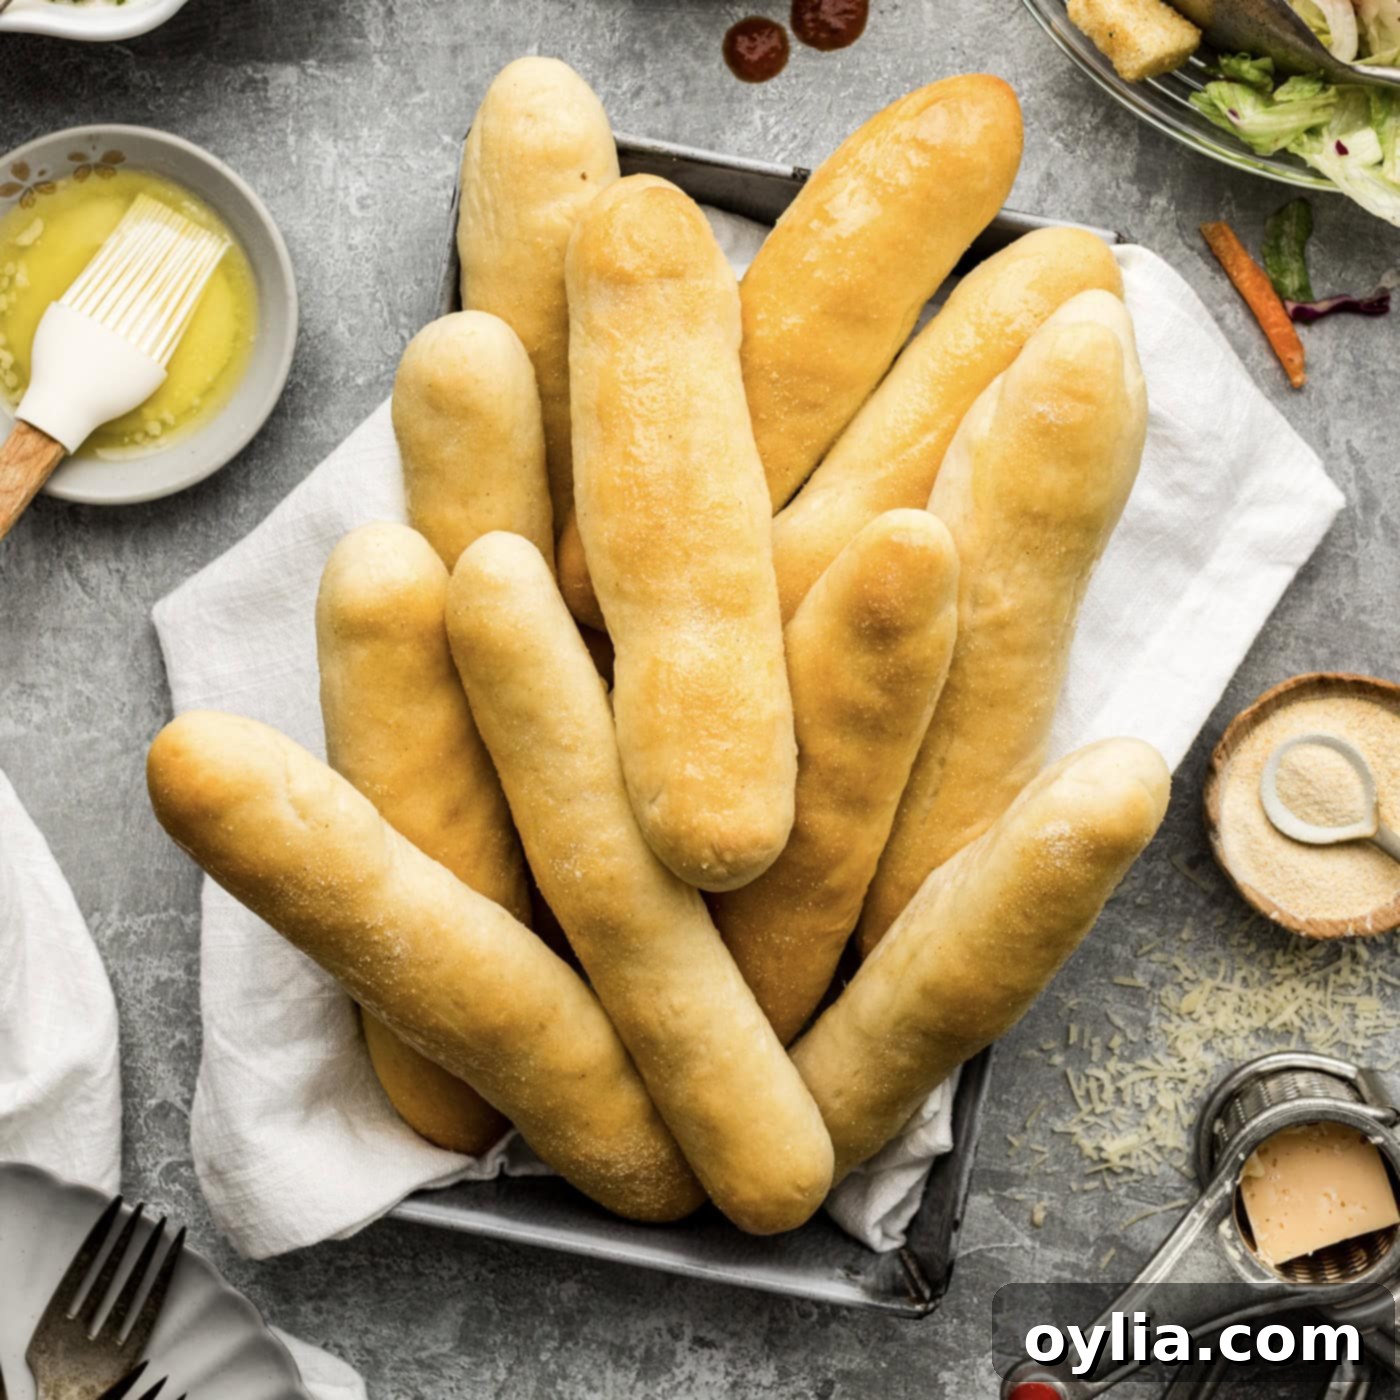
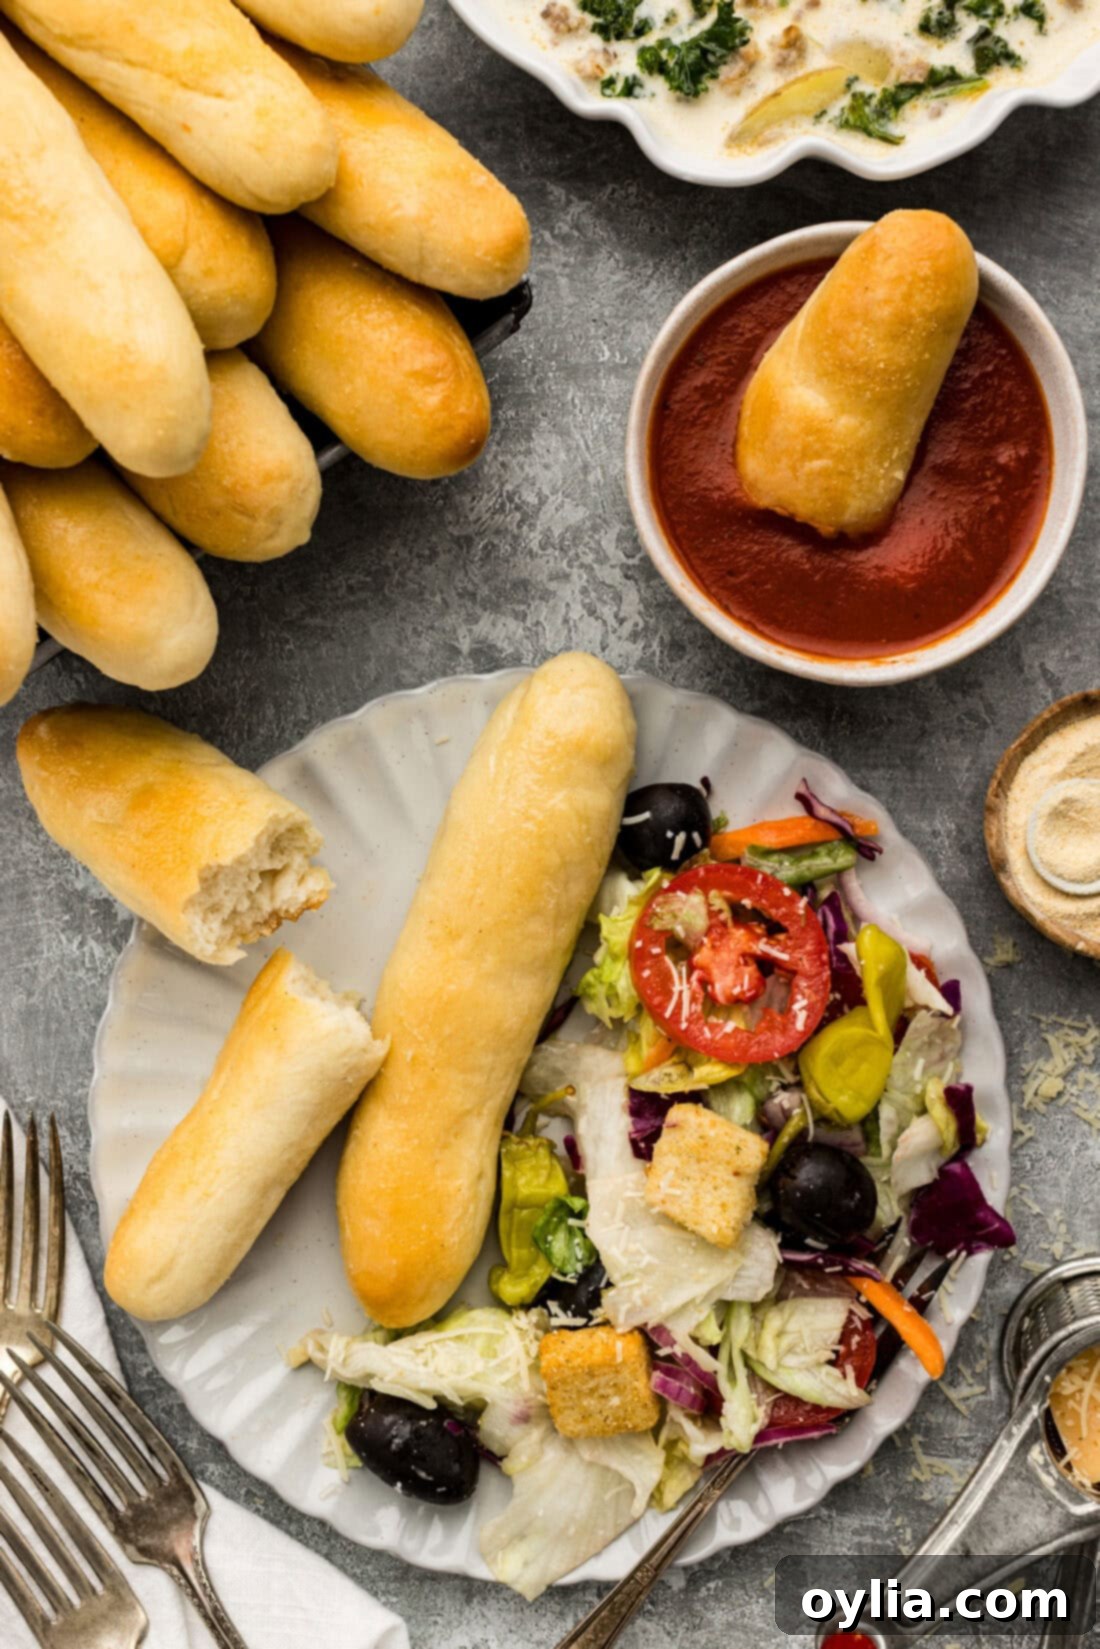
Imagine warm, irresistibly soft breadsticks, generously brushed with melted garlic butter and sprinkled with just the right amount of garlic salt, arriving fresh from your oven. That’s precisely what this homemade Olive Garden breadsticks recipe delivers every single time! Forget the drive to the restaurant; with this comprehensive guide, you can recreate that iconic, pillowy perfection right in your own kitchen, satisfying those cravings whenever they strike.
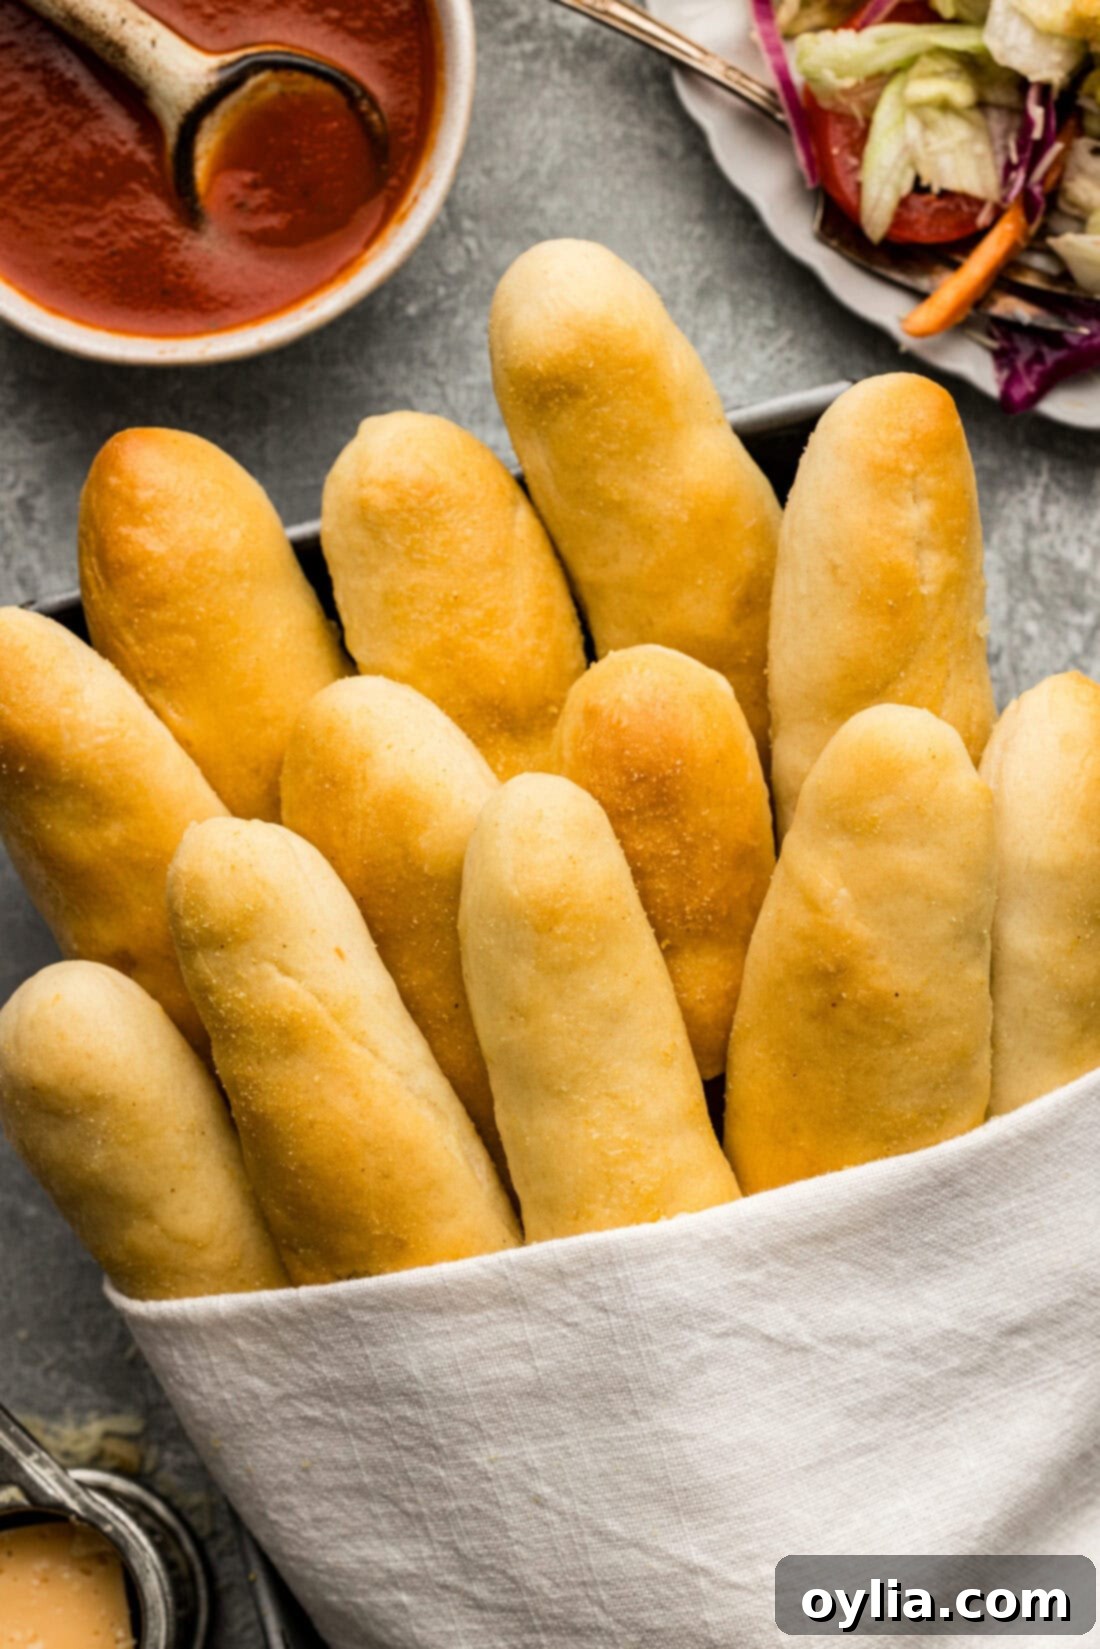
Olive Garden’s unlimited breadsticks are legendary, a beloved start to any Italian-American meal that often outshines the main course. The combination of their soft, chewy texture and savory garlic-butter topping is simply irresistible, leaving diners constantly reaching for more. This recipe isn’t just about replicating a dish; it’s about bringing that comforting, restaurant-quality experience to your dinner table, allowing you to enjoy endless, warm, fluffy breadsticks without ever leaving home.
From family dinners to special occasions, these copycat Olive Garden breadsticks are guaranteed to be a crowd-pleaser. They are surprisingly simple to make, even for novice bakers, and the payoff in terms of flavor and satisfaction is immense. Get ready to impress your loved ones with these delightful homemade treats!
The Secret Behind Perfect Olive Garden Breadsticks
Many home cooks believe the magic of Olive Garden breadsticks lies solely in a complex dough, but the real secret, which might surprise you, is actually in what happens after they emerge golden and steamy from the oven. While a good, soft dough is undeniably foundational – and I highly recommend using a reliable, tender dough like my proven pull-apart dinner roll dough as a starting point – the true “wow” factor comes from the generous drenching in melted butter and a liberal dusting of garlic salt applied while they’re still piping hot. This immediate application ensures the butter deeply soaks into the warm bread, creating that signature rich flavor and incredibly soft, moist crumb, while the garlic salt adheres perfectly, delivering that iconic savory finish that we all love.
I’ve been meticulously perfecting this copycat Olive Garden breadsticks recipe since 2014, and it has consistently delivered outstanding results, never failing to produce warm, fluffy, garlic-kissed breadsticks every single time. It’s more than just a recipe; it’s a tested method that guarantees success. To elevate your homemade Olive Garden experience, consider serving these delightful sticks alongside a hearty bowl of my copycat Zuppa Toscana, a comforting Pasta Fagioli, or even my Chicken Gnocchi Soup. You’ll be transported straight to your favorite Italian-American restaurant, but with the added satisfaction and pride of having created it yourself.
Essential Ingredients for Your Homemade Breadsticks
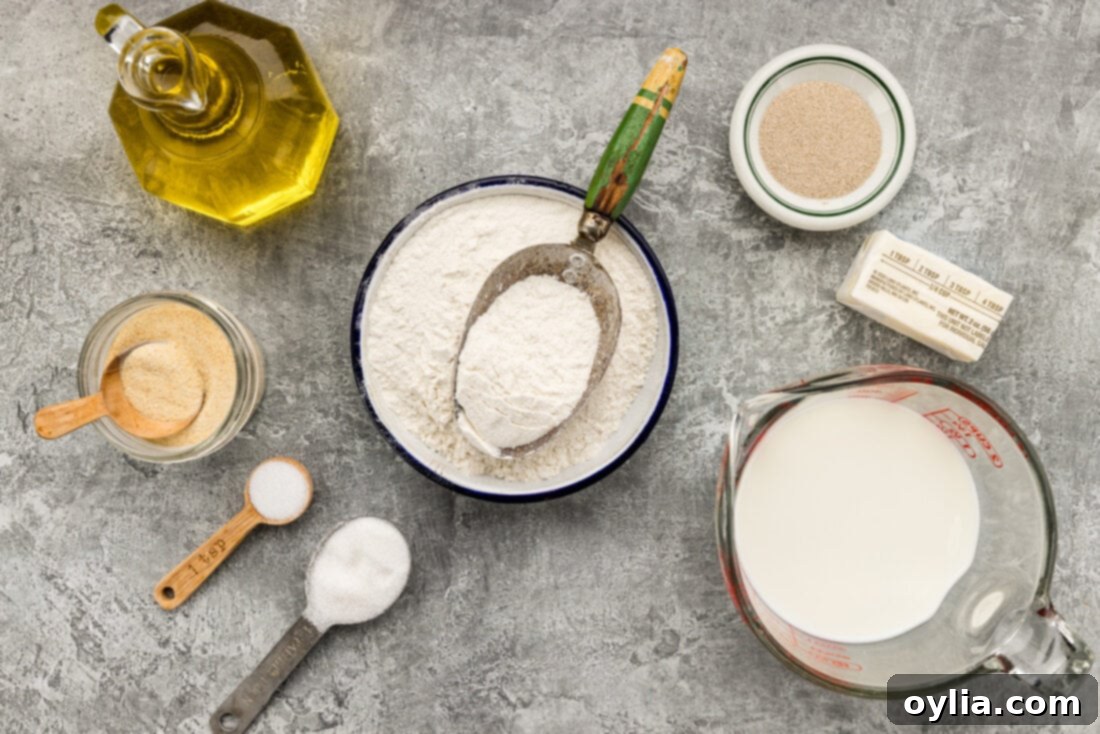
Creating these delightful, fluffy breadsticks requires a handful of common pantry staples that are likely already in your kitchen. The full, detailed list with precise measurements and comprehensive instructions can be found in the printable recipe card at the very end of this post. However, let’s briefly touch upon the key components that bring this recipe to life and ensure you achieve that authentic Olive Garden taste and texture we’re aiming for.
Ingredient Spotlight & Expert Tips for Success
Understanding each ingredient’s role and how to handle it properly is crucial for successful baking, especially when working with yeast doughs. Here’s a closer look at a few key components and some helpful tips for substitutions or troubleshooting:
- YEAST: Active dry yeast is the magical leavening agent that gives these breadsticks their incredible rise, creating that signature airy and pillowy texture. Always double-check the expiration date on your yeast package before you begin; expired yeast is, more often than not, the primary culprit behind dough that fails to rise. If you’re ever unsure about your yeast’s viability, you can perform a quick test: sprinkle a small amount into warm water (around 105-115°F) with a pinch of sugar. If it foams and becomes bubbly within 5-10 minutes, it’s active and ready to use!
- MILK: The temperature of your milk is paramount for activating the yeast correctly. It needs to be warm, but never hot. The ideal temperature range is between 105°F and 115°F (40°C and 46°C), which you can accurately measure with a digital cooking thermometer. Milk that is too hot will kill the delicate yeast, preventing it from activating and causing your dough not to proof. Conversely, if the milk is too cold, the yeast won’t activate effectively, leading to a sluggish or non-existent rise. Whole milk tends to give the richest flavor and most tender crumb, but 2% milk can also be successfully used.
- FLOUR: All-purpose flour is perfectly suited for this recipe, striking the right balance to provide a tender yet structured breadstick. While some recipes might call for bread flour for a chewier texture, we are aiming for that classic soft Olive Garden style, which all-purpose flour delivers beautifully. Proper measurement is key: always spoon the flour into your measuring cup and level it off with a straight edge, rather than scooping directly, which can compact the flour and lead to over-measurement and a dense dough.
- OLIVE OIL: Extra virgin olive oil contributes significantly to the dough’s richness and a subtle depth of flavor, enhancing its overall tenderness and moisture. If extra virgin olive oil isn’t available, a light olive oil or another neutral-flavored oil like vegetable or canola oil can be used as a substitute, though this might result in a slight variation in the final flavor profile.
- SUGAR & SALT: Granulated sugar serves a dual purpose in this recipe: it acts as food for the yeast, helping it activate and produce that wonderful, airy rise, and it also contributes to the breadsticks’ subtle sweetness and golden-brown crust. Salt, on the other hand, is essential for balancing the flavors and controlling the yeast’s activity, preventing it from over-proofing too quickly. Both are non-negotiable for the best results.
- MELTED BUTTER & GARLIC SALT (The Signature Topping!): This is truly where the magic of the Olive Garden breadstick experience is captured! Use a good quality butter for the richest flavor. For the garlic salt, feel free to adjust the amount to your personal preference – some like a light dusting, others prefer a more intense garlic punch. You can also easily create your own garlic salt by mixing garlic powder with fine sea salt, allowing you complete control over the ratio. For an added touch of color and a hint of freshness, some bakers enjoy mixing a pinch of dried parsley flakes into the garlic salt.
Step-by-Step Guide: Crafting Your Own Irresistible Olive Garden Breadsticks
These detailed step-by-step photos and instructions are here to guide you through the entire bread-making process, ensuring your homemade breadsticks turn out perfectly soft, fluffy, and flavorful. For the full printable recipe card with precise ingredient measurements and comprehensive instructions, simply Jump to Recipe at the bottom of this post.
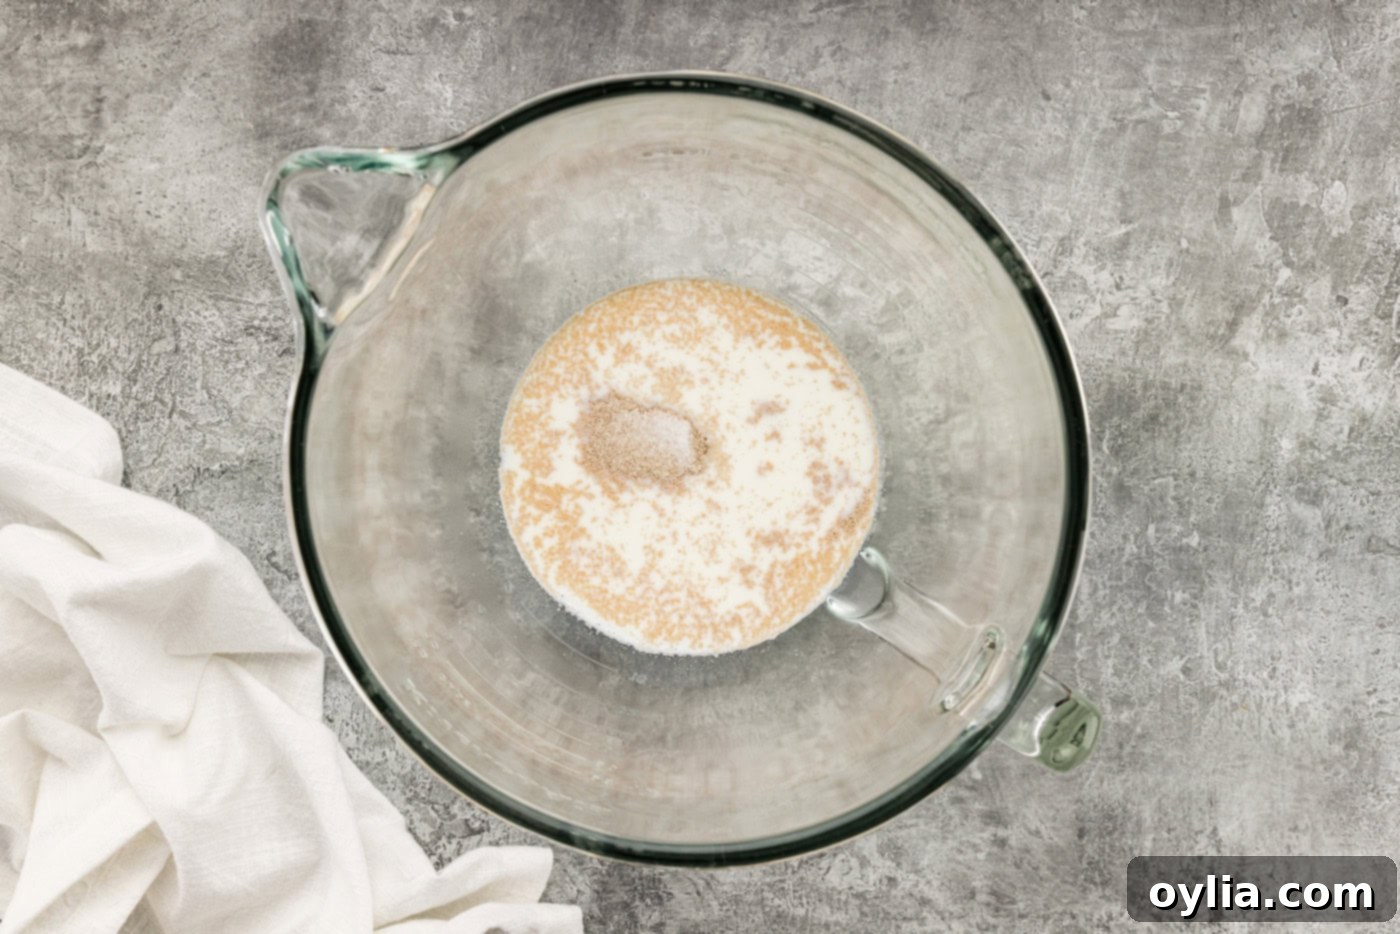
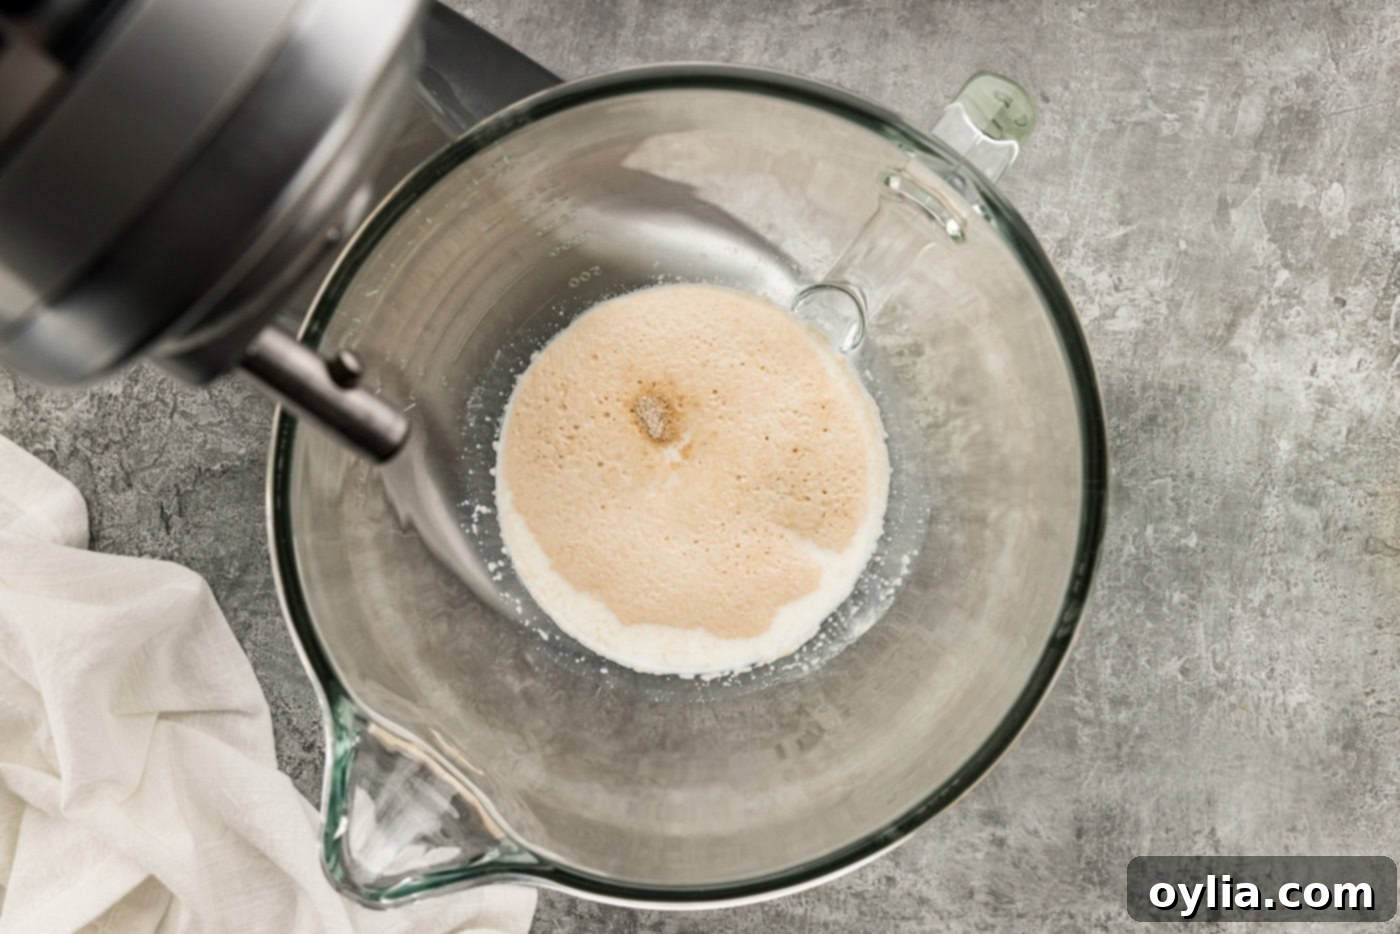
- Activate the Yeast: In the bowl of your electric mixer (or a large mixing bowl if kneading by hand), sprinkle the quick-acting active dry yeast evenly over the warm milk. Next, gently sprinkle the granulated sugar over the yeast mixture. Allow this concoction to sit undisturbed for 3-4 minutes. You’ll know the yeast is active and thriving when it becomes noticeably foamy and slightly bubbly on the surface, indicating it’s ready to work its magic and give your breadsticks their lift.


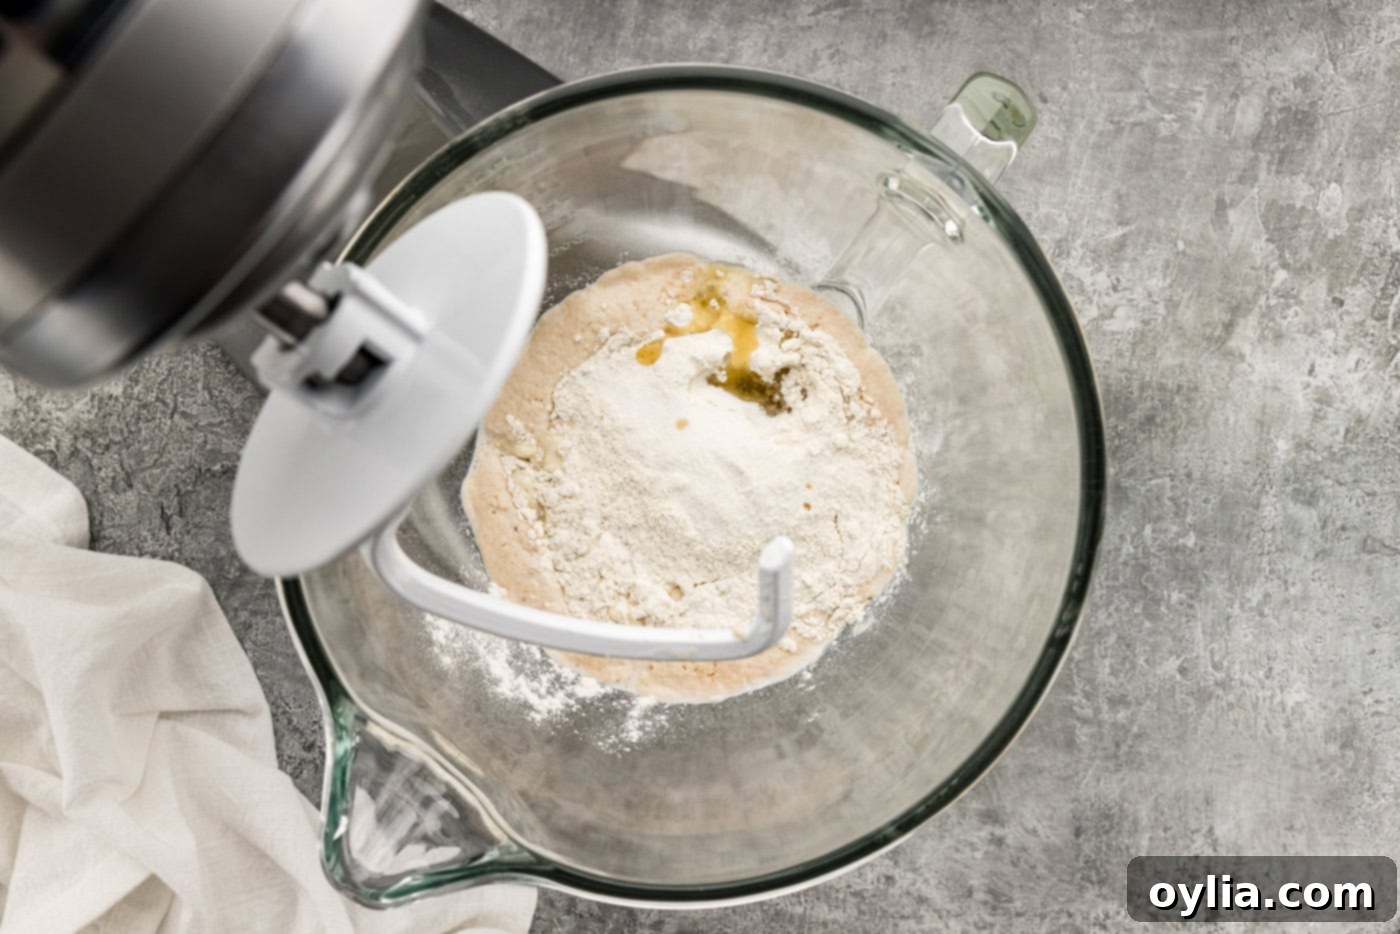
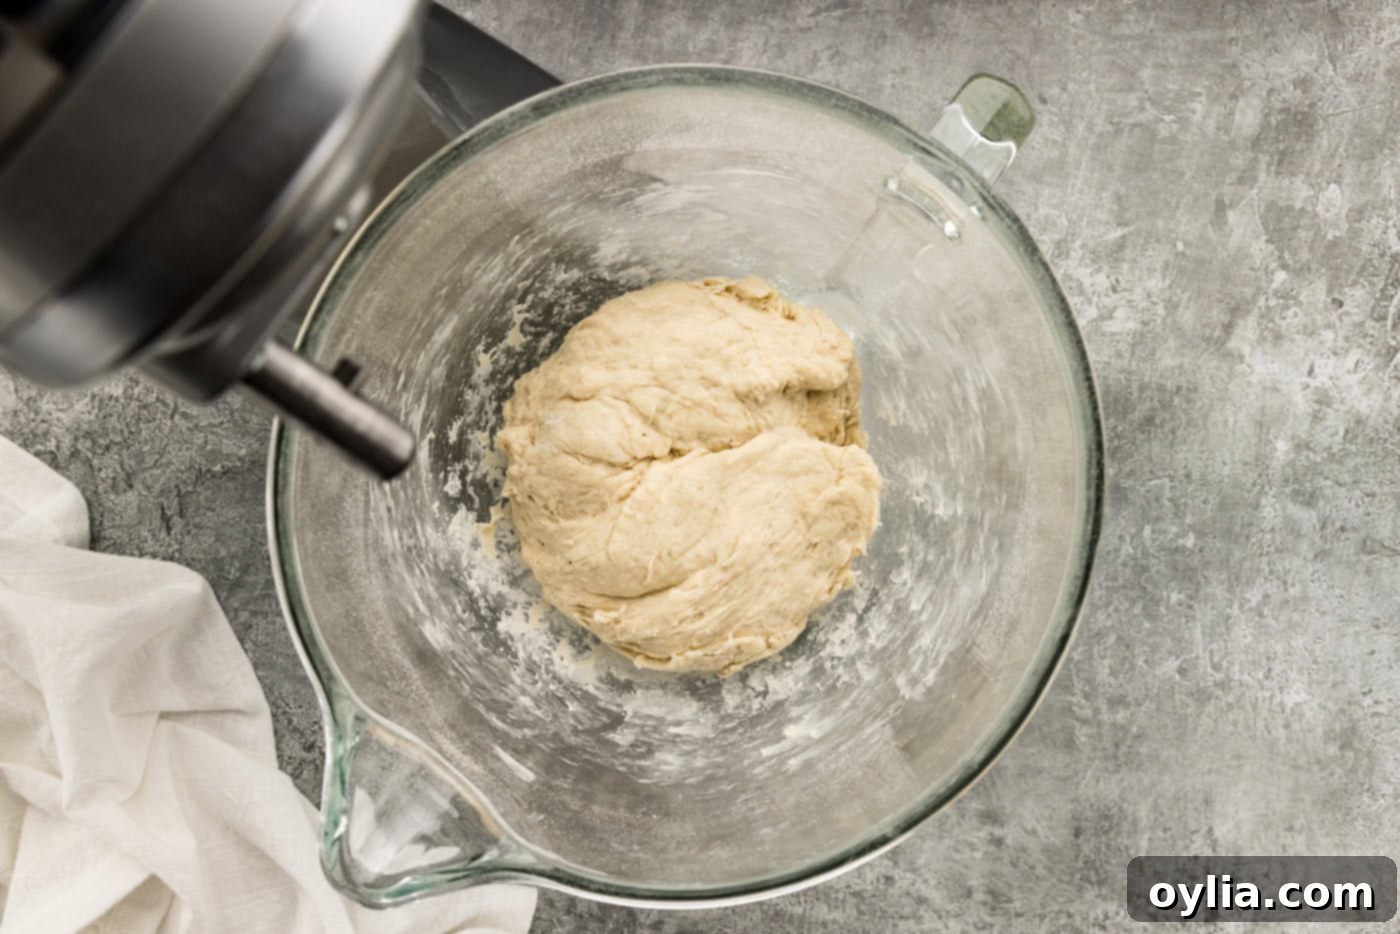
- Prepare the Dough (Initial Mix): With your electric mixer on a low speed (or using a sturdy spoon if mixing by hand), add 1 cup (approximately 130g) of the all-purpose flour, along with the extra virgin olive oil and salt, to the activated yeast mixture. Mix thoroughly until these initial ingredients are well combined and the mixture begins to form a smooth, somewhat thick batter.

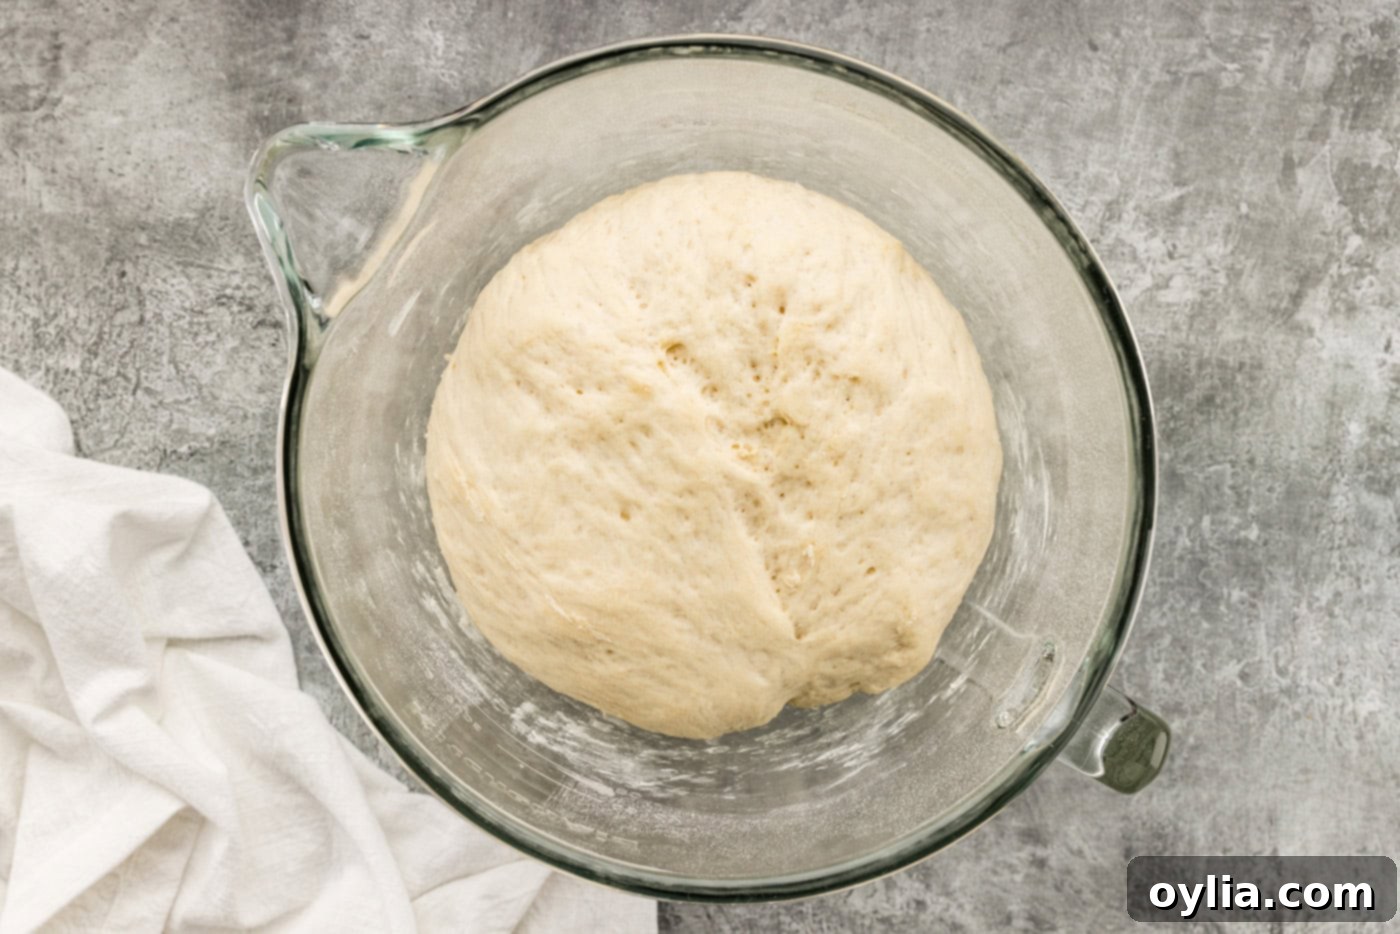
- Develop the Dough & First Rise: Increase the mixer speed to medium and continue beating the mixture until it becomes completely smooth and slightly elastic. Gradually add the remaining flour, approximately 2 to 2 1/2 cups (260g – 325g), mixing only until it is just incorporated and a soft dough forms. Be careful not to overmix, as this can result in tough breadsticks. Once the dough comes together, cover the bowl with plastic wrap or a clean kitchen towel and let it rise in a warm, draft-free place until its size has roughly doubled. This crucial first rise usually takes about 45 minutes, depending on the warmth of your environment. A warm spot near a sunny window or in a slightly warm (but turned off) oven works perfectly.


- Prepare for Baking: While your dough is undergoing its first rise, take a moment to preheat your oven to 400°F (200°C). Then, line two insulated baking sheets with parchment paper. Insulated sheets are highly recommended as they help prevent the bottoms of the breadsticks from browning too quickly, ensuring a perfectly even bake and a consistently soft texture. If you don’t have insulated sheets, stacking two regular baking sheets will offer a similar protective effect against over-browning.
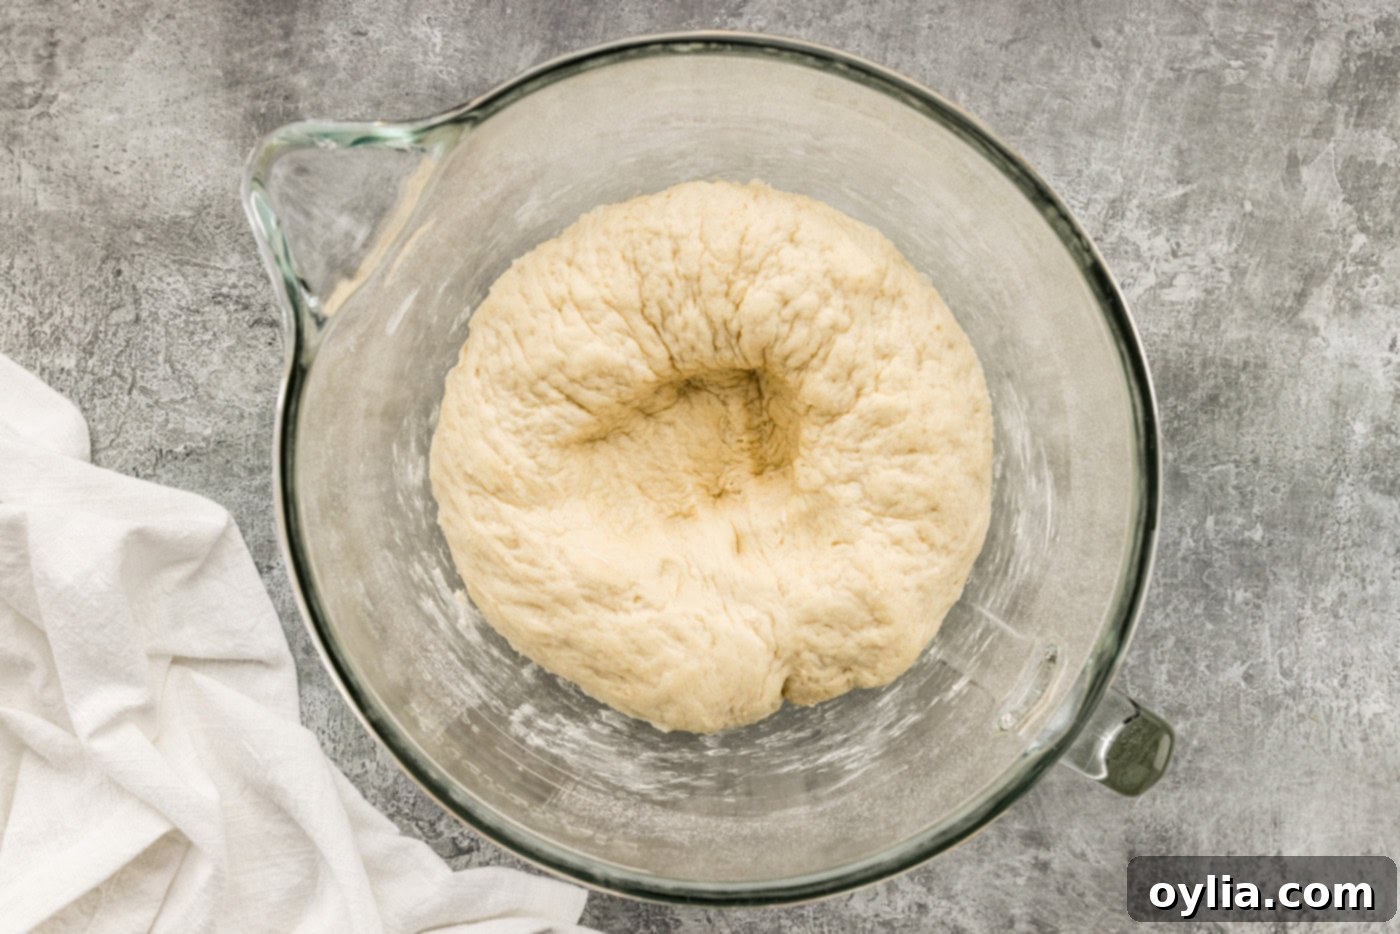
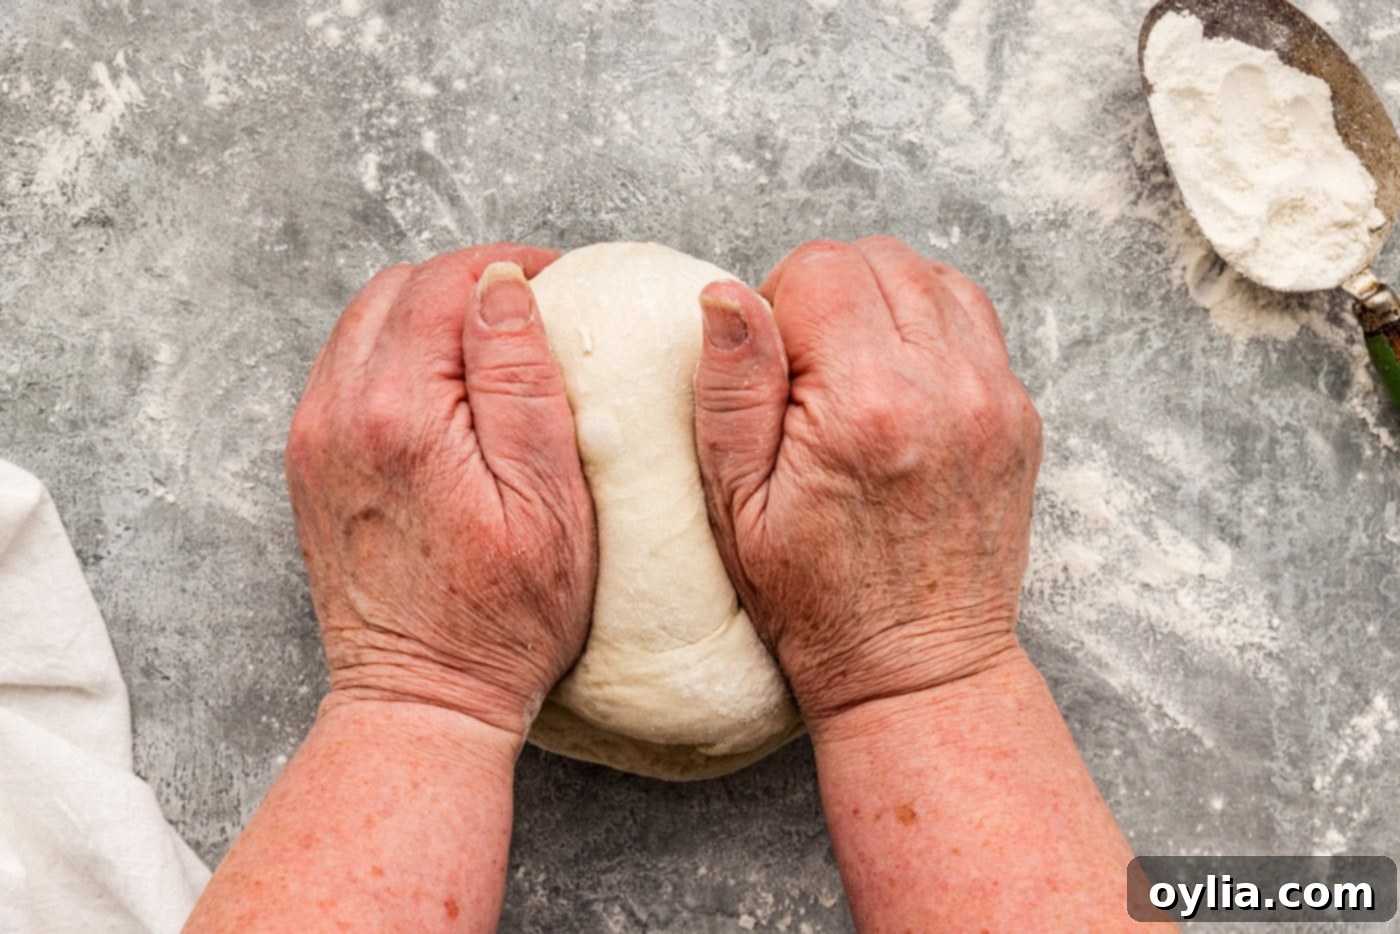
- Punch Down and Knead: Lightly sprinkle your clean work surface with extra flour. Once the dough has successfully doubled in size, gently punch it down to release the accumulated air. Transfer the dough to your floured surface and knead it by hand for 3-5 minutes. This vital step helps to further develop the gluten, resulting in a smooth, elastic, and easily workable dough. The dough should feel soft, supple, and spring back slightly when poked.


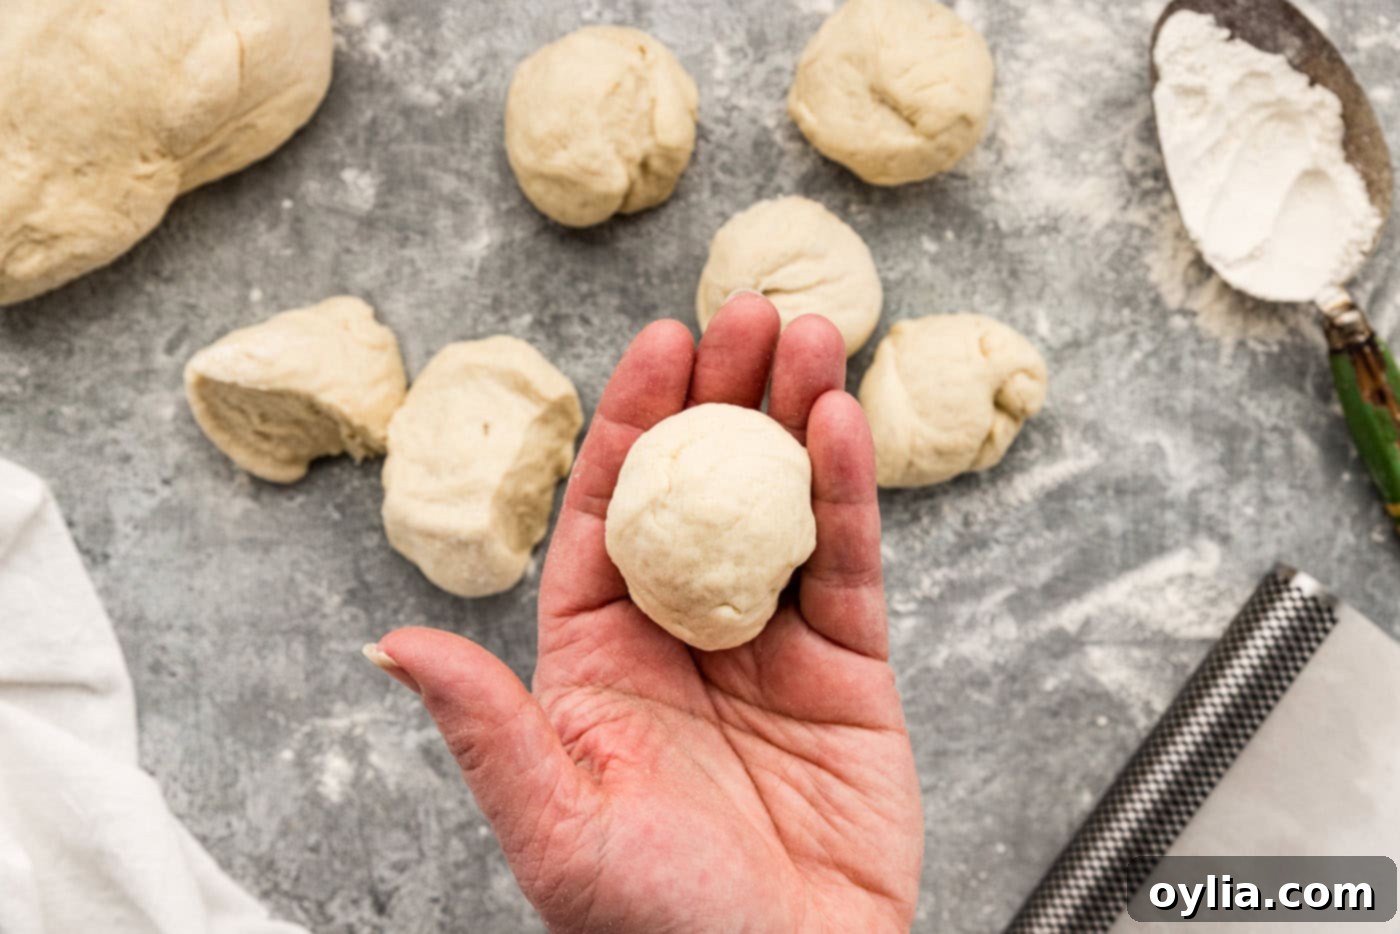
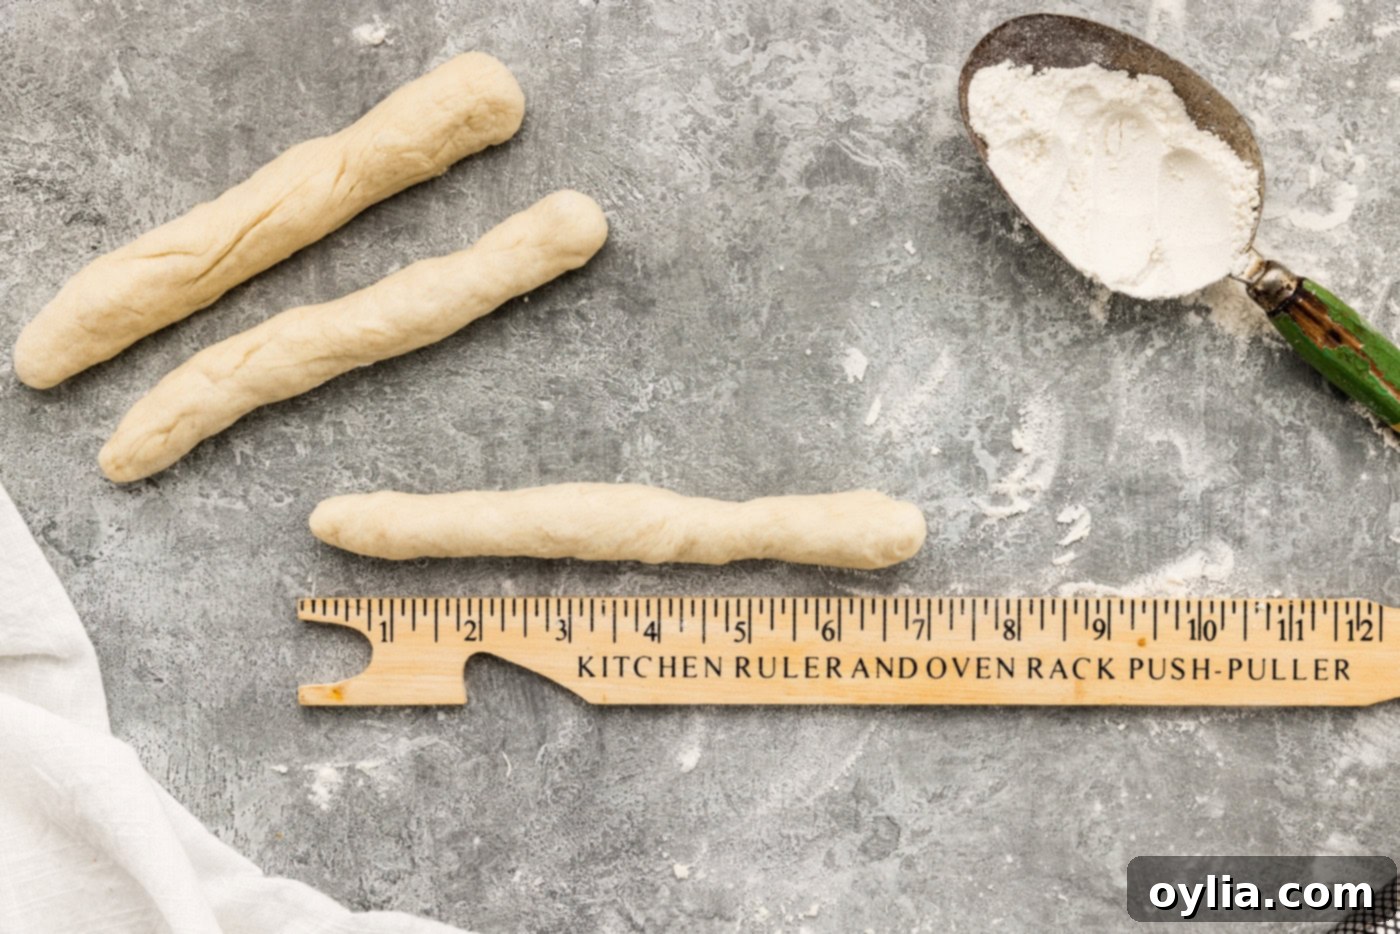
- Shape the Breadsticks & Second Rise: Divide the kneaded dough into 16 equal pieces. For optimal consistency in size, each piece should weigh approximately 2 ounces. Roll each individual piece into a smooth ball, then gently roll it between the palms of your hands or on your work surface to form a uniform 7-inch-long stick. Arrange the shaped breadsticks on your prepared baking sheets, ensuring they are spaced about 2 inches apart to allow for proper rising and airflow during baking. Cover them lightly with plastic wrap or a kitchen towel and let them rise for another 15 minutes. This brief second rise is key to achieving extra fluffiness.


- Bake to Golden Perfection: Carefully transfer the baking sheets to your preheated oven. Bake the breadsticks for approximately 12-13 minutes, or until their crust achieves a beautiful, light golden brown color. It’s important to keep a close eye on them, as oven temperatures can vary. The breadsticks should be cooked through, but still very soft and tender to the touch, not hard or crispy.
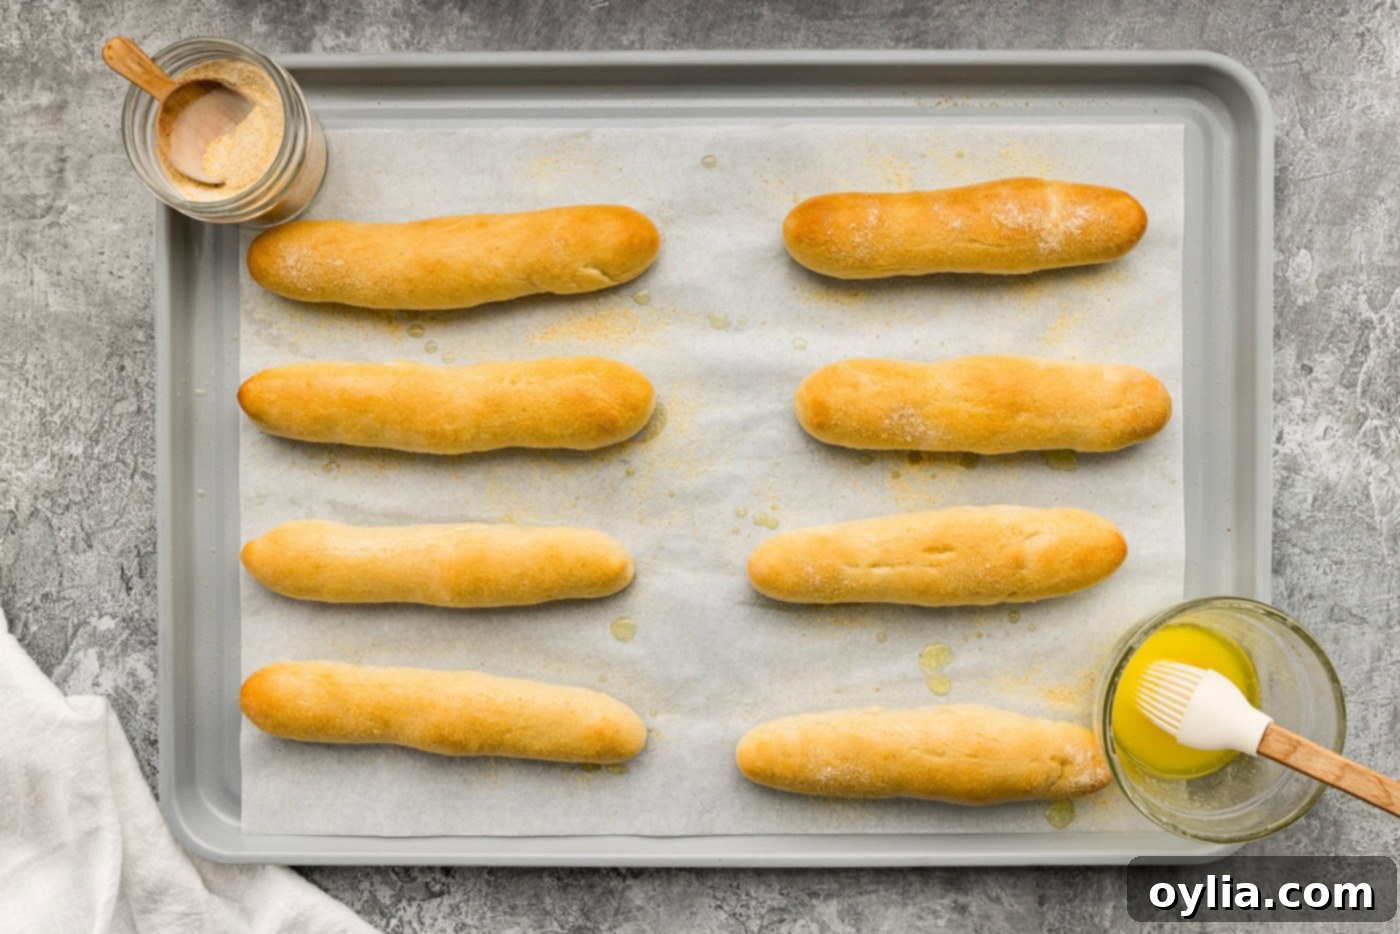
- The Signature Finish: This is the secret step that transforms ordinary bread into iconic Olive Garden breadsticks! Immediately upon removing the hot breadsticks from the oven, generously brush each one with the melted butter. While the butter is still glistening and before it fully absorbs, liberally sprinkle garlic salt over each breadstick. The residual heat from the breadsticks will help the butter soak in deeply, infusing them with rich flavor, and ensures the garlic salt adheres perfectly, creating that undeniable Olive Garden taste and aroma. Serve these culinary masterpieces warm and prepare for applause!

Frequently Asked Questions & Expert Tips for Breadstick Perfection
These homemade Olive Garden breadsticks are undoubtedly at their peak when served warm and fresh from the oven, with that enticing steamy interior and glossy garlic-butter coating. However, if you find yourself with any delicious leftovers (a rare occurrence!), you can store them to enjoy later. First, allow them to cool completely to room temperature. Then, place them in an airtight container or a large resealable plastic bag. They will keep well at room temperature for about 2-3 days without losing too much of their softness. To reheat and bring back that fresh-baked warmth, you can use an air fryer (at 300°F for 2-3 minutes), a toaster oven, or a conventional oven (at 350°F for 5-7 minutes) until they are warmed through and soft again. Avoid using a microwave, as it tends to make bread products chewy and less appealing.
Absolutely! Freezing these breadsticks is a fantastic way to prepare them in advance and enjoy them whenever a craving strikes. For the best results when freezing, I highly recommend parbaking them first. This means baking them just until they form a slight crust and hold their shape, but before they turn golden brown. They should still be pale in color and feel soft. Allow the parbaked breadsticks to cool completely. Then, arrange them in a single layer on a baking sheet and flash freeze them until they are solid. Once frozen solid, transfer them to a large freezer-safe ziptop bag or an airtight container, ensuring as much air is removed as possible. They can be stored in the freezer for up to 3 months. When you’re ready to bake, simply place the frozen breadsticks directly onto a parchment-lined cookie sheet and bake according to the original instructions (400°F for 12-13 minutes). Keep a close eye on them, as baking times for frozen breadsticks might be slightly less or the same depending on your specific oven and how much they were parbaked.
The secret to their signature softness and incredible fluffiness lies in a combination of carefully managed factors throughout the baking process. Firstly, a well-hydrated dough, specifically using milk, contributes significantly to a tender and moist crumb. Secondly, proper yeast activation followed by two distinct proofing (rising) periods allows the dough to develop abundant air pockets, which are crucial for that airy, light texture. Lastly, the short baking time at a relatively high temperature ensures they cook quickly without drying out, preserving their moist interior. And of course, the immediate application of melted butter and garlic salt after baking keeps the crust supple and flavorful.
Yes, you absolutely can prepare the dough ahead of time to make your baking day smoother! After the first rise (following Step 3 in the instructions), gently punch down the dough to release the air. Then, cover the bowl tightly with plastic wrap and refrigerate it for up to 24 hours. When you’re ready to bake, remove the dough from the refrigerator and let it sit at room temperature for about 30-60 minutes. This allows the dough to come closer to room temperature and become more pliable. Then, you can proceed with shaping the breadsticks (Step 5) and follow the rest of the recipe as written. Just be aware that the second rise might take slightly longer than 15 minutes because the dough is still a bit chilled.
If your dough didn’t rise as expected, there are a few common reasons to consider. The most frequent culprit is expired or inactive yeast. Always check the expiration date on your yeast package, and ensure it becomes foamy and bubbly during the initial proofing step with warm milk and sugar. Another critical factor is the temperature of your milk – if it’s too hot, it can kill the yeast, and if it’s too cold, it won’t activate effectively. Aim for that sweet spot of 105-115°F (40-46°C). Lastly, a cold or drafty environment can significantly hinder dough rising. Always ensure your dough is proofing in a warm, consistent, and draft-free location in your kitchen.
Delicious Ways to Enjoy Your Homemade Breadsticks
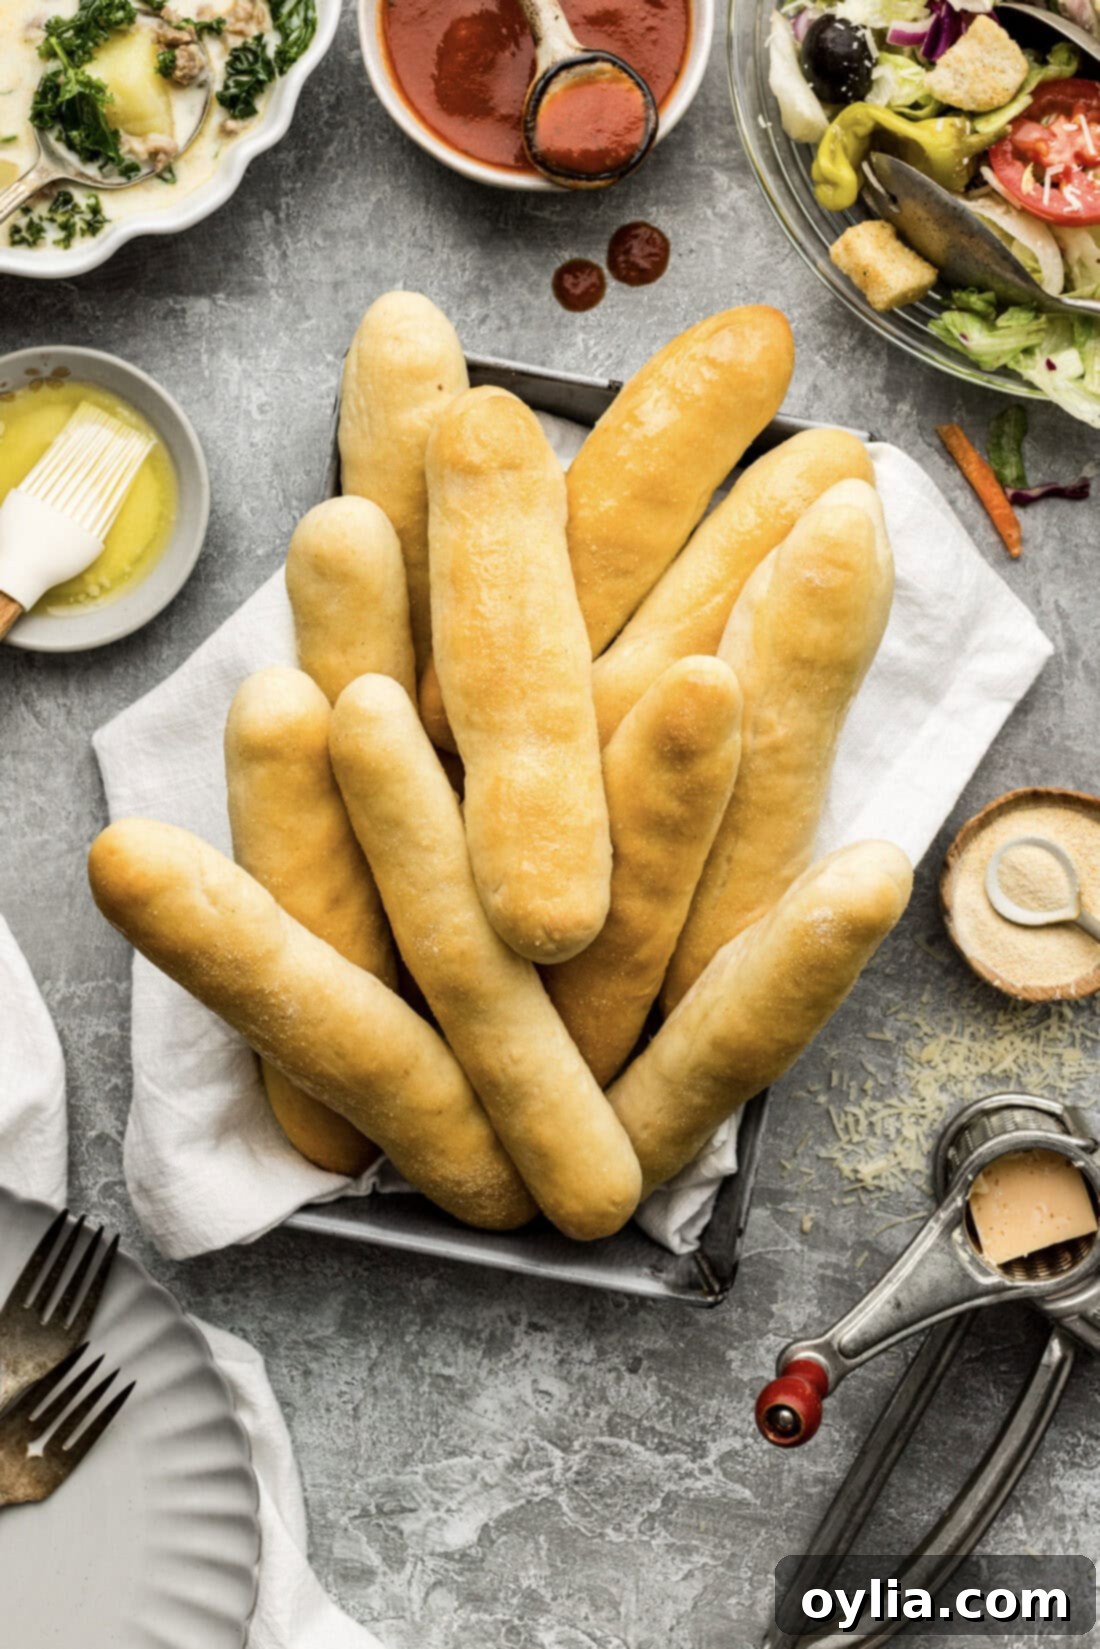
Once you’ve mastered these irresistible homemade Olive Garden breadsticks, the serving possibilities are truly endless! They are incredibly versatile and complement a wide range of dishes, making them a fantastic addition to almost any meal. Naturally, they are the perfect accompaniment to Italian-American classics. Serve them alongside a crisp, fresh garden salad and a comforting bowl of hearty soup – perhaps my creamy Zuppa Toscana, the warming Chicken Gnocchi Soup, or a rustic Pasta Fagioli. Beyond soup, these fluffy breadsticks are a must-have with any pasta dish, from a simple, elegant marinara to a rich, velvety Alfredo, a savory meat sauce, or a flavorful Vodka Sauce. They also make an excellent side for homemade pizza, baked lasagna, chicken parmesan, or even a classic spaghetti and meatballs. For an even more indulgent experience, try dipping them in a warm bowl of marinara, creamy Alfredo, or a savory cheese dip. You can even enjoy them simply on their own as a delightful and satisfying snack, fresh from the oven!
More Copycat Olive Garden Recipes to Savor
If you love bringing the authentic taste of Olive Garden right into your home, be sure to explore more of my tried-and-true copycat recipes. Expand your family’s favorite menu and delight your friends and guests with these incredibly popular fan favorites:
- Copycat Olive Garden Peach Iced Tea
- The Best Zuppa Toscana (Olive Garden Copycat)
- Creamy Chicken Gnocchi Soup
- How to Make Authentic Bruschetta
I am passionate about baking and cooking, and it brings me immense joy and satisfaction to share my kitchen experiences and successful recipes with all of you! Remembering to come back each day to check for new delicious ideas can be tough, which is why I offer a convenient newsletter delivered straight to your inbox every time a new recipe is posted. Simply subscribe here and start receiving your free daily recipes, invaluable tips, and fresh culinary inspiration directly to your inbox!
Olive Garden Breadsticks
IMPORTANT – There are often Frequently Asked Questions within the blog post that you may find helpful. Simply scroll back up to read them!
Print It
Pin It
Rate It
Save It
Saved!
Course:
Appetizer, Breads
Cuisine:
American, Italian
16
breadsticks
1 hour
15 minutes
152
Amanda Davis
Ingredients
- 1 package quick-acting active dry yeast 4 tsp, or .2 ounces
- 1 ⅓ cup milk warmed to 105 to 115F degrees
- 1 Tablespoon granulated sugar
- 3 to 3 ½ cups all-purpose flour 390g – 455g. plus extra for dusting work surface
- 3 Tablespoons extra virgin olive oil
- 1 teaspoon salt
- 2-3 Tablespoons melted butter
- Garlic salt
Things You’ll Need
-
Stand mixer
-
Insulated baking sheets
Before You Begin
- If you don’t have insulated baking sheets you can double the baking sheets (stacking one on top of the other). This helps the bottom not brown so quick.
- Double check that your yeast is not expired. More often than not, the cause of your dough not proofing is due to expired yeast.
- It’s important to test the temperature of your milk. It should register between 105 – 115F on a digital cooking thermometer. If your milk is too hot it can kill the yeast and prevent it from activating, which again, can cause your dough not to proof.
Instructions
-
Sprinkle yeast over warm milk then sprinkle sugar over yeast in electric mixer bowl. Let proof for 3-4 minutes.1 package quick-acting active dry yeast, 1 1/3 cup milk, 1 Tablespoon granulated sugar
-
With mixer on low speed, mix in 1 cup (130g) of the flour, olive oil, and salt.3 Tablespoons extra virgin olive oil, 1 teaspoon salt
-
Increase speed to medium and beat until smooth. Beat in remaining flour and mix just until incorporated. Cover and let rise in warm place until double, about 45 minutes.
-
Preheat oven 400 degrees F. Line two insulated baking sheets with parchment paper.
-
Sprinkle work surface with extra flour. Punch down dough and transfer it to the work surface, kneading it by hand for 3-5 minutes, or until dough is soft and workable.
-
Divide dough into 16 equal pieces (about 2-ounces each). Roll each piece into a ball then roll between the palms of your hands into 7-inch long sticks. Place sticks on the baking sheet, placing them 2-inches apart. Cover and let rise for 15 minutes.
-
Bake until crust is light golden brown, about 12-13 minutes.
-
Remove from oven and immediately brush with melted butter and sprinkle with garlic salt.2-3 Tablespoons melted butter, Garlic salt
Expert Tips & FAQs
- These breadsticks are best served warm and steamy from the oven, but you can store fully cooled leftovers in an air-tight container kept at room temperature for 2-3 days. Reheat them in the air fryer or oven until warmed through.
Nutrition
Tried this Recipe? Pin it for Later!Follow on Pinterest @AmandasCookin or tag #AmandasCookin!
The recipes on this blog are tested with a conventional gas oven and gas stovetop. It’s important to note that some ovens, especially as they age, can cook and bake inconsistently. Using an inexpensive oven thermometer can assure you that your oven is truly heating to the proper temperature. If you use a toaster oven or countertop oven, please keep in mind that they may not distribute heat the same as a conventional full sized oven and you may need to adjust your cooking/baking times. In the case of recipes made with a pressure cooker, air fryer, slow cooker, or other appliance, a link to the appliances we use is listed within each respective recipe. For baking recipes where measurements are given by weight, please note that results may not be the same if cups are used instead, and we can’t guarantee success with that method.
This post originally appeared on this blog on Oct 8, 2014, and has since been updated with new photos, expert tips, and expanded content for an even better baking experience.
