Indulge in Homemade Brown Sugar Vanilla Bean Ice Cream: A Rich, Creamy & Easy Recipe
There’s an undeniable charm to homemade treats, and homemade ice cream stands out as one of the most satisfying. While it might require a little more time than a trip to the store, the reward of a perfectly creamy, intensely flavorful scoop of ice cream made right in your own kitchen is truly unparalleled. Beyond the sheer deliciousness, there’s a unique sense of accomplishment in crafting something so delightful from scratch. And what could be better than homemade ice cream? Developing your very own signature recipe, tailored to your exact tastes!
The Magic of Brown Sugar Vanilla Bean Ice Cream
The foundation of many homemade ice cream recipes is surprisingly simple, typically involving milk, cream, egg yolks, sugar, and a chosen flavoring. While countless variations exist, the core principles remain constant. You’ll find recipes that use whole eggs, others just yolks, some specify half-and-half or skim milk, and a range of sugars from white to brown to caster sugar. After delving into numerous sources and experimenting, I decided to blend the best of these basics to create something truly special: a rich and deeply satisfying brown sugar vanilla bean ice cream.
For months, I had been holding onto some exquisite Madagascar vanilla beans in my pantry, patiently awaiting the perfect recipe. My dream was always to create an authentic vanilla bean ice cream, and the idea of infusing it with the rich, caramelized notes of brown sugar seemed utterly irresistible. Combining these two elements promised a depth of flavor far beyond a standard vanilla, and the results did not disappoint!
A Symphony of Flavors: The Delicious Results
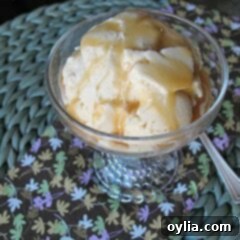
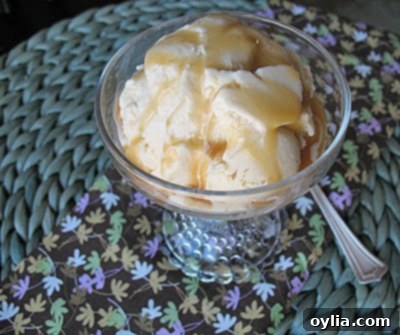
The outcome was nothing short of delicious! This ice cream boasts a flavor profile that is wonderfully richer and more complex than your average vanilla ice cream, largely thanks to the distinctive taste of brown sugar. The subtle molasses notes from the brown sugar perfectly complement the floral and sweet essence of the vanilla bean, creating a harmonious blend that lingers beautifully on the palate. A light drizzle of warm caramel sauce proved to be the absolute perfect topping, adding another layer of sweetness and a touch of decadence to this already fabulous treat.
Amanda’s Expert Tips for Perfect Homemade Ice Cream
Based on my own experiences in the kitchen, here are some invaluable notes and tips to help you achieve the best possible homemade ice cream:
1) Don’t Miss a Single Seed: Scrape Your Pan Thoroughly.
When transferring the milk mixture from the saucepan, always use a rubber spatula. In my enthusiasm, and due to the dark color of my pan, I once rinsed away a significant amount of precious vanilla bean seeds without even realizing they were there! A rubber spatula will ensure you scrape every last flavorful speck into your custard, maximizing that wonderful vanilla bean taste. Consider using a lighter-colored saucepan if you have one, or be extra diligent with your scraping.
2) Combatting Rock-Hard Ice Cream: The Alcohol Secret.
To prevent your homemade ice cream from freezing into an unyielding block, a small amount of alcohol can be a game-changer. Adding just a tablespoon of brandy or vodka lowers the freezing point, resulting in a softer, more scoopable texture directly from the freezer. Don’t worry, you won’t taste the alcohol at all! I regrettably forgot this step in one batch, leading to a lengthy wait on the counter or a quick zap in the microwave (15-20 seconds) before I could enjoy a scoop. For those who prefer to avoid alcohol, a teaspoon of corn syrup or invert sugar can also help achieve a similar softer texture by interfering with ice crystal formation.
3) Tailoring Sweetness: Adjusting Sugar Levels.
This particular recipe yields a wonderfully sweet ice cream, characteristic of a decadent dessert. However, if you prefer a less intensely sweet treat, you can absolutely adjust the sugar content. I’d suggest reducing the total sugar by about one-third, perhaps aiming for approximately 2/3 of the original amount instead of 3/4. This will still provide fantastic flavor and maintain the desired texture without being overwhelmingly sweet. Remember that sugar also contributes to the creaminess and lowers the freezing point, so don’t cut it too drastically.
4) Double the Vanilla, Double the Delight.
My recipe includes a teaspoon of vanilla extract in addition to the vanilla bean. While the vanilla bean provides a deep, complex, and visible vanilla flavor, I am a true vanilla enthusiast. The extract acts as a wonderful booster, amplifying the overall vanilla presence and creating an even more pronounced and fragrant flavor profile. Feel free to follow suit if you adore vanilla as much as I do, or omit the extract if you prefer the subtle elegance of just the bean.
Beyond this delightful creation, I’ve had the pleasure of crafting many other dreamy frozen treats. Some of my personal favorites include the spicy notes of Mexican Chocolate Ice Cream, the warm comfort of Cinnamon Ice Cream, and the classic indulgence of Oreo Ice Cream. Each offers a unique experience, but the brown sugar vanilla bean recipe holds a special place for its unparalleled richness.
Brown Sugar Vanilla Bean Ice Cream
by Amanda Formaro

Brown Sugar Vanilla Bean Ice Cream
IMPORTANT – There are often Frequently Asked Questions within the blog post that you may find helpful. Simply scroll back up to read them!
Print It
Pin It
Rate It
Save ItSaved!
Ingredients
- 2 cups whole milk
- 2 cups heavy whipping cream
- 6 egg yolks
- ¼ cup sugar
- ½ cup brown sugar
- 1 vanilla bean
- 1 teaspoon vanilla extract
Instructions
-
Split the vanilla bean down the middle with a sharp knife and scrape out the seeds. Set aside pods and seeds.
-
Combine the milk and the cream in a large heavy bottomed saucepan and bring just to a boil. Turn off the heat, add the vanilla bean pods and the seeds, then cover and let steep for 30 minutes. This steeping process is crucial for extracting maximum flavor from the vanilla bean into your milk mixture.
-
In a separate medium bowl, whisk together the sugar, brown sugar, and egg yolks until they are thoroughly combined and the mixture becomes light and fluffy. This aeration helps create a smoother custard.
-
Remove the cover from the saucepan and return the milk mixture to the stove, bringing it just to a boil again. Turn off the heat. Now, carefully and slowly drizzle about 1/4 of the hot milk mixture into your egg yolk mixture, whisking continuously. This vital step is known as “tempering” the eggs, gradually increasing their temperature without scrambling them. Continue to slowly add the remaining milk mixture, whisking constantly, until all of it has been combined with the egg yolk mixture.
-
Pour the combined egg and milk mixture back into the clean saucepan. Heat the mixture over medium heat, stirring continuously with a wooden spoon. It’s important to scrape the bottom and corners of the pan as you stir to prevent sticking and ensure even cooking. Continue cooking until the mixture thickens into a rich custard and coats the back of your spoon. A reliable test is to run your finger in a line across the back of the spoon; if the line remains distinct and doesn’t immediately fill in, your custard has thickened enough. This process can take anywhere from 2 to 10 minutes, depending on the heat of your stove and the thickness of your pan.
-
Once the custard is ready, immediately pour it through a fine-mesh sieve into a clean metal or glass bowl. This step removes any tiny bits of cooked egg or vanilla bean pod remnants, ensuring a perfectly smooth ice cream base. Carefully remove the vanilla bean pods from the strainer and set them aside (don’t discard them, they can be used to make vanilla sugar!). Use a rubber spatula to make sure you scrape out all the vanilla bean seeds and custard from the saucepan and the sieve. Stir in the vanilla extract for an extra boost of flavor.
-
To rapidly cool the custard, place the bowl into a larger bowl filled with ice water, stirring the custard occasionally. Once the custard has cooled significantly, cover its surface directly with plastic wrap to prevent a skin from forming. Chill the custard thoroughly in the refrigerator for at least a couple of hours, or ideally overnight, until it is completely cold. Once chilled, churn the custard in your ice cream maker following the manufacturer’s specific instructions. After churning, transfer the soft ice cream to an airtight, covered container and freeze until it is firm and set, typically a minimum of 4-6 hours.
-
*For the reserved vanilla bean pods: Allow them to dry completely. Once dry, you can bury them in a bowl or jar of white granulated sugar and cover tightly. Over time, the pods will infuse the sugar with a beautiful vanilla aroma, creating a homemade vanilla sugar that’s perfect for baking or sweetening coffee!
The recipes on this blog are tested with a conventional gas oven and gas stovetop. It’s important to note that some ovens, especially as they age, can cook and bake inconsistently. Using an inexpensive oven thermometer can assure you that your oven is truly heating to the proper temperature. If you use a toaster oven or countertop oven, please keep in mind that they may not distribute heat the same as a conventional full sized oven and you may need to adjust your cooking/baking times. In the case of recipes made with a pressure cooker, air fryer, slow cooker, or other appliance, a link to the appliances we use is listed within each respective recipe. For baking recipes where measurements are given by weight, please note that results may not be the same if cups are used instead, and we can’t guarantee success with that method.
Frequently Asked Questions (FAQ)
- Q: Can I use only vanilla extract instead of a vanilla bean?
- A: While you can substitute with vanilla extract (about 1-2 teaspoons for one bean), the flavor profile will be different. Vanilla beans provide a deeper, more complex, and authentic vanilla taste with visible specks. The extract is great for an additional boost or a simpler vanilla flavor, but the bean is key to this recipe’s richness.
- Q: Do I need an ice cream maker for this recipe?
- A: Yes, this recipe is designed for an ice cream maker. The churning process introduces air and breaks up ice crystals, resulting in the creamy texture we all love. While no-churn ice cream recipes exist, they typically rely on sweetened condensed milk and whipped cream and produce a different consistency.
- Q: How long does homemade ice cream last in the freezer?
- A: For optimal taste and texture, homemade ice cream is best enjoyed within 1-2 weeks. Beyond that, it might start to develop ice crystals and lose some of its creamy consistency. Always store it in an airtight container to prevent freezer burn and absorb odors.
- Q: Can I make this ice cream ahead of time for a party?
- A: Absolutely! In fact, making the custard base a day in advance and chilling it overnight is highly recommended as it allows the flavors to meld and ensures it’s perfectly cold for churning. Churn the ice cream the day before or the morning of your event, then freeze until serving.
NEW! Be sure to subscribe to my newsletter, Foodie in the Craftroom, to receive updates and tips from both Amanda’s Cookin’ and Crafts by Amanda! Visit https://amandascookin.com/p/subscribe-to-newsletter.html
