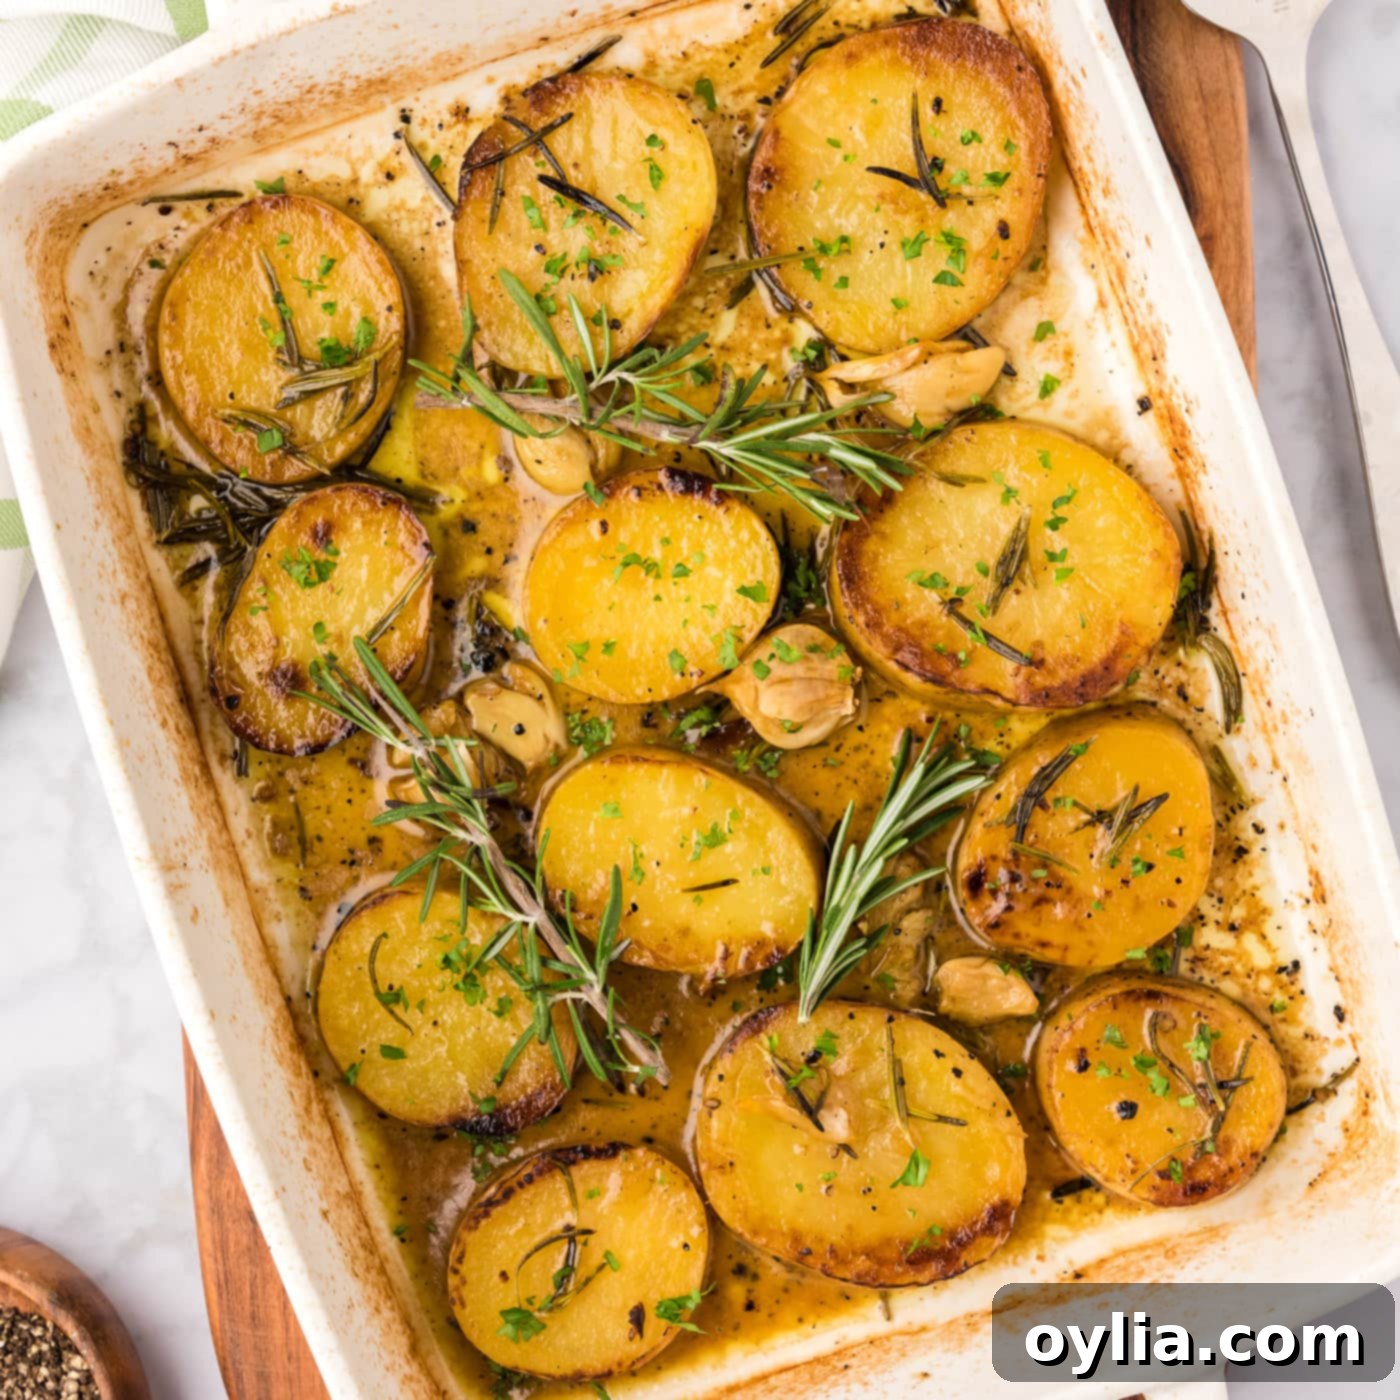
The Ultimate Melting Potatoes Recipe: Crispy Golden Crust, Creamy Tender Inside
Prepare to be enchanted by the magic of Melting Potatoes, a side dish that truly lives up to its name. In this exceptional recipe, perfectly sliced potatoes are lovingly enveloped in a rich medley of aromatic herbs, savory butter, pungent garlic, and comforting chicken broth. The result? Each glorious bite offers an incredibly creamy and tender texture that seems to melt in your mouth, beautifully contrasted by a crisp, golden-brown crust. This isn’t just a potato dish; it’s an experience, transforming humble spuds into a culinary masterpiece that will impress at any meal.
Why This Melting Potatoes Recipe Works Wonders
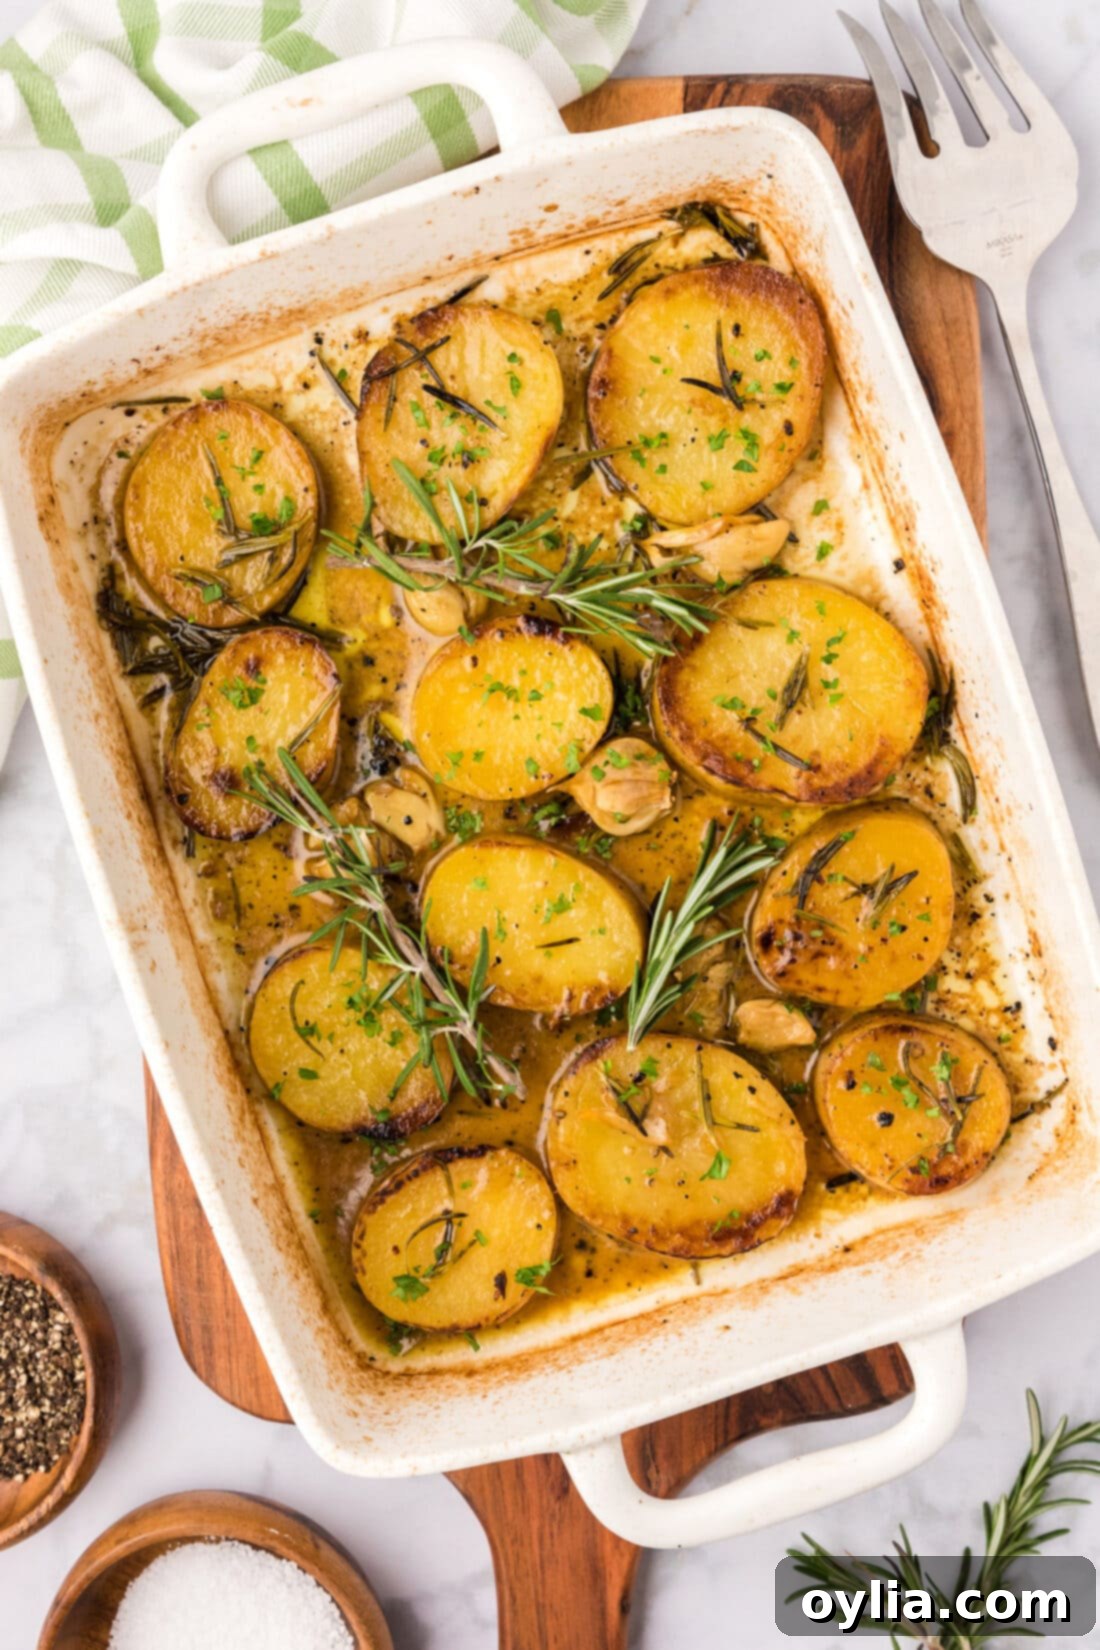
The secret behind these exquisite melting potatoes lies in their ingenious two-stage cooking process. Unlike ordinary roasted potatoes, these thick potato rounds first undergo a quick, high-heat searing in a skillet. This crucial step is what initiates that irresistible crispy, golden exterior – a foundational layer of texture that sets them apart. After achieving this initial browning, the potatoes are transferred to a baking dish, where the real magic unfolds. They’re then roasted slowly in a fragrant bath of savory chicken broth, whole garlic cloves, fresh rosemary sprigs, and generous pats of butter.
During this roasting phase, the potatoes don’t just cook; they braise. They meticulously soak up the flavorful chicken broth and the rich essences of the surrounding ingredients. This slow absorption process is what infuses every fiber of the potato with deep, savory notes, transforming their internal structure into something extraordinarily creamy, delightfully caramelized, and ultimately ultra-tender. The contrast between the deeply flavorful, impossibly soft interior and the satisfyingly crisp crust is what defines a true melting potato, making them far superior to standard roasted varieties and earning them their evocative name. It’s a harmonious blend of textures and tastes that elevates a simple vegetable to an unforgettable culinary highlight.
Gather Your Ingredients for Melting Potatoes
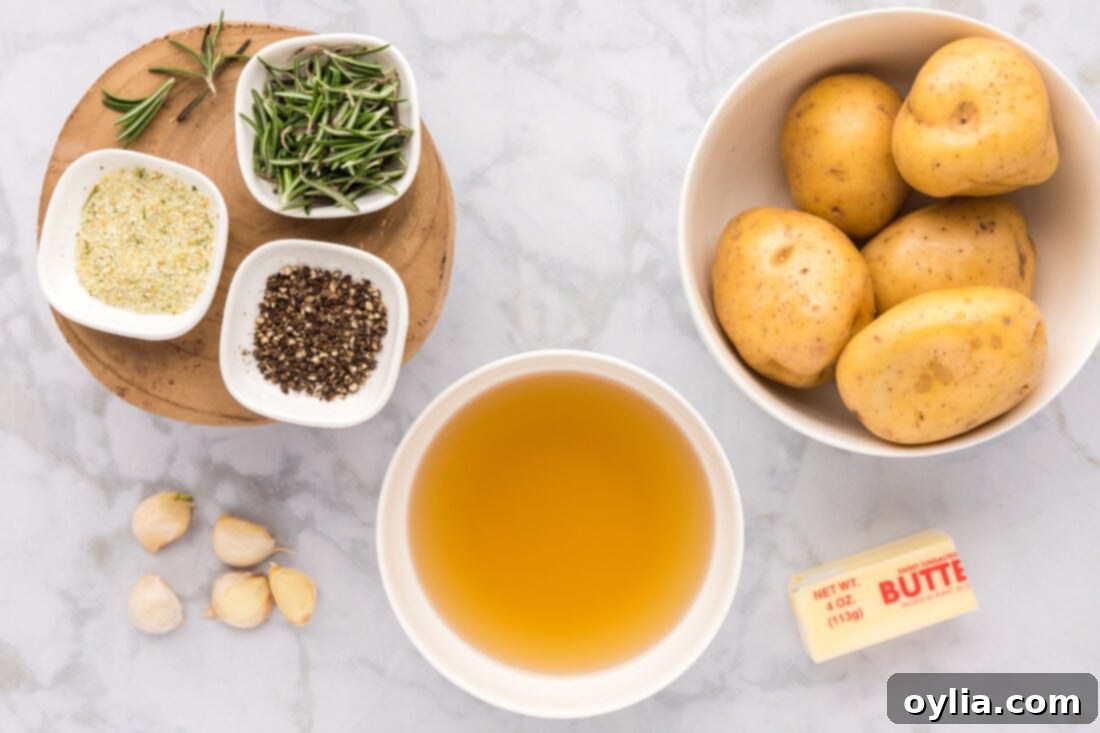
Creating these sensational melting potatoes requires just a handful of simple, fresh ingredients that come together to produce an incredibly rich and satisfying flavor. Quality ingredients are key to achieving the desired taste and texture that makes this dish so memorable. You’ll find a complete list of all measurements, ingredients, and detailed instructions in the printable version of the recipe card located at the end of this post.
Ingredient Insights & Substitution Guide
Choosing Your Potatoes for the Perfect Melt
POTATOES – While our recipe calls for Yukon Gold potatoes, which are celebrated for their creamy texture and ability to hold their shape after cooking, you have flexibility. Red potatoes can also be an excellent choice, offering a slightly waxier texture that remains firm while still absorbing flavor beautifully. Russet potatoes, on the other hand, are starchier and tend to yield a fluffier interior, absorbing flavors intensely. If using Russets, be mindful that they might break down a little more, but will still be wonderfully tender. The key is to slice them consistently for even cooking, regardless of the variety.
Enhancing Flavor: Herbs, Broth & Garlic
HERBS – Fresh rosemary provides a wonderfully aromatic and earthy note to these melting potatoes. However, feel free to personalize your dish. Fresh thyme offers a delicate, lemony nuance, while fresh sage can lend a more robust, savory depth. If fresh herbs aren’t available, you can use dried, but remember to use about one-third of the amount specified for fresh, as dried herbs are more concentrated. A mix of your favorite compatible fresh herbs can also create a unique flavor profile.
BROTH – Chicken broth is essential for infusing the potatoes with a rich, savory base. For a vegetarian or vegan version, a good quality vegetable broth works perfectly. Beef broth can also be used for a deeper, more robust flavor that pairs exceptionally well with red meats.
GARLIC – We use whole, slightly crushed garlic cloves for a mellow, slow-infused garlic flavor without the risk of burning that minced garlic might pose during the long roasting time. Crushing them gently releases their essential oils, allowing them to perfume the broth and potatoes beautifully.
Butter and Seasoning: The Finishing Touches
BUTTER – Unsalted butter is preferred as it gives you complete control over the saltiness of your dish. If using salted butter, reduce the amount of added garlic salt. The butter contributes to both the crispy crust during searing and the overall richness of the braising liquid, adding a luxurious mouthfeel to the finished potatoes.
SEASONING – Garlic salt and cracked black pepper are the primary seasonings, providing a simple yet potent flavor combination. Always season to taste, ensuring each side of the potato receives a good coating during the searing process. Don’t be shy with the pepper; its fresh bite complements the creamy potatoes beautifully.
How to Make Perfect Melting Potatoes
Embark on a culinary journey to create these heavenly melting potatoes. Follow these clear, step-by-step photos and instructions to visualize each stage of the process, ensuring a perfect result every time. For the precise measurements and a convenient printable version of this recipe, simply Jump to Recipe at the bottom of the page.
- Preheat your oven to 425 F (220 C) to ensure it’s ready for roasting. Thoroughly rinse your potatoes under cold water and pat them completely dry with a clean kitchen towel. It’s recommended not to peel them, as the skin adds texture, flavor, and valuable nutrients, but the choice is ultimately yours.
- Carefully trim off the ends of each potato. These ends can be saved for another recipe, added to a stock, or simply discarded.
- Slice the potatoes into thick, uniform rounds, approximately 3/4-inch (2 cm) thick. Consistency in thickness is crucial for ensuring all potatoes cook evenly and achieve that perfect melt-in-your-mouth texture.
- In a large, heavy-bottomed skillet (cast iron works wonderfully here), melt 1 1/2 tablespoons of the unsalted butter over medium-high heat. Use a basting brush to evenly spread the melted butter across the entire bottom surface of the skillet, ensuring no spot is missed for that golden crust.
- Carefully arrange the sliced potato rounds in a single layer in the hot skillet. Work in batches if necessary to avoid overcrowding, as this is vital for achieving a proper sear and crisp crust.
- Generously season the exposed side of the potatoes with garlic salt and freshly cracked black pepper. Don’t be shy; the potatoes will absorb these flavors beautifully.
- Cook the potatoes undisturbed for 5-7 minutes. This initial sear is critical for developing that beautiful, crisp golden-brown crust on one side.
- Using tongs, carefully turn each potato slice over to expose the unbrowned side. Season this newly exposed side to taste with garlic salt and cracked black pepper. You may not need to use all of your remaining seasonings, depending on your preference.
- While the second side is searing, pour the chicken broth into a 13×9 baking dish. Once the potatoes have a nice brown crust on both sides, carefully transfer them from the skillet into the chicken broth in the baking dish, arranging them in a single layer.
- Take your whole garlic cloves and slightly crush them. A simple method is to place the flat side of a chef’s knife onto the clove and give it a firm whack with the heel of your hand. This releases their aromatic oils. Distribute the crushed garlic cloves throughout the broth, nestling them between the potato slices.
- Slice the remaining butter into small pats, ensuring you have one pat for each potato slice. Place a pat of butter on top of each potato round in the baking dish.
- Divide the fresh rosemary into small bundles and place a small bunch on top of each butter pat, allowing the herb’s fragrance to infuse the potatoes as they bake.
- Place the baking dish into the preheated oven and bake for 10-15 minutes. After this time, carefully remove the dish, turn the potatoes over using tongs, and return them to the oven to bake for an additional 10-15 minutes, or until they are fork-tender and have absorbed most of the broth.
Expert Tips for Mastering Melting Potatoes
Achieving the perfect melting potatoes involves a few key techniques. First, **uniform slicing** is paramount. Aim for consistent 3/4-inch thick rounds to ensure every piece cooks evenly. Uneven slices will result in some potatoes being overcooked and mushy, while others remain undercooked. Secondly, **do not overcrowd the skillet** during the initial searing stage. Potatoes need space to brown properly and develop that coveted crispy crust. If your skillet is too small, work in batches to allow enough surface area for caramelization. Overcrowding will steam the potatoes instead of searing them, preventing a crisp exterior.
Another crucial tip is to ensure the **broth level is just right** in the baking dish. You want enough liquid to braise the potatoes and infuse them with flavor, but not so much that they are submerged and become soggy. The potatoes should be partially immersed, allowing them to absorb the liquid while the exposed tops can still get a bit of oven crisp. Finally, **flipping the potatoes halfway through the baking process** is vital. This ensures even absorption of the flavorful broth and helps both sides of the potato rounds become tender and infused with all the wonderful ingredients like garlic and rosemary. It also promotes uniform browning on the tops for that all-important contrast in texture. Always check for doneness by piercing with a fork; it should slide in easily, indicating a perfectly “melted” interior.
Frequently Asked Questions
To best preserve the quality and flavor of your melting potatoes, store any leftovers in an airtight container in the refrigerator for up to 4-5 days. When you’re ready to enjoy them again, simply spread them out on a baking sheet and reheat them in a 350°F (175°C) oven until they are warmed through and the edges begin to crisp up again. This method helps restore some of their original texture, unlike microwave reheating which can make them soft.
While you certainly can remove the skin from the potatoes for this recipe, we generally prefer to leave it on. The potato skin adds a rustic charm, contributes to the crispy texture, and is a good source of fiber and nutrients. Leaving the skin on also saves you prep time! Ultimately, the decision comes down to your personal preference for texture and appearance.
Melting potatoes are best enjoyed fresh from the oven, when their crust is at its crispiest and the interior is most tender. However, you can prepare them partially ahead of time. You can slice the potatoes and keep them submerged in cold water in the refrigerator for up to a day to prevent oxidation. You can also complete the searing step (steps 1-9) and then pause. Allow the seared potatoes to cool, then refrigerate them. When ready to bake, arrange them in the baking dish with broth, butter, and herbs, and proceed with the baking instructions, adding an extra 5-10 minutes to the baking time if starting from cold.
While technically possible, freezing melting potatoes is not recommended. The unique texture of these potatoes, particularly their creamy interior and crispy exterior, suffers significantly during the freezing and thawing process. They tend to become mushy and lose their distinct “melt-in-your-mouth” quality. For best results, it’s always better to make them fresh.
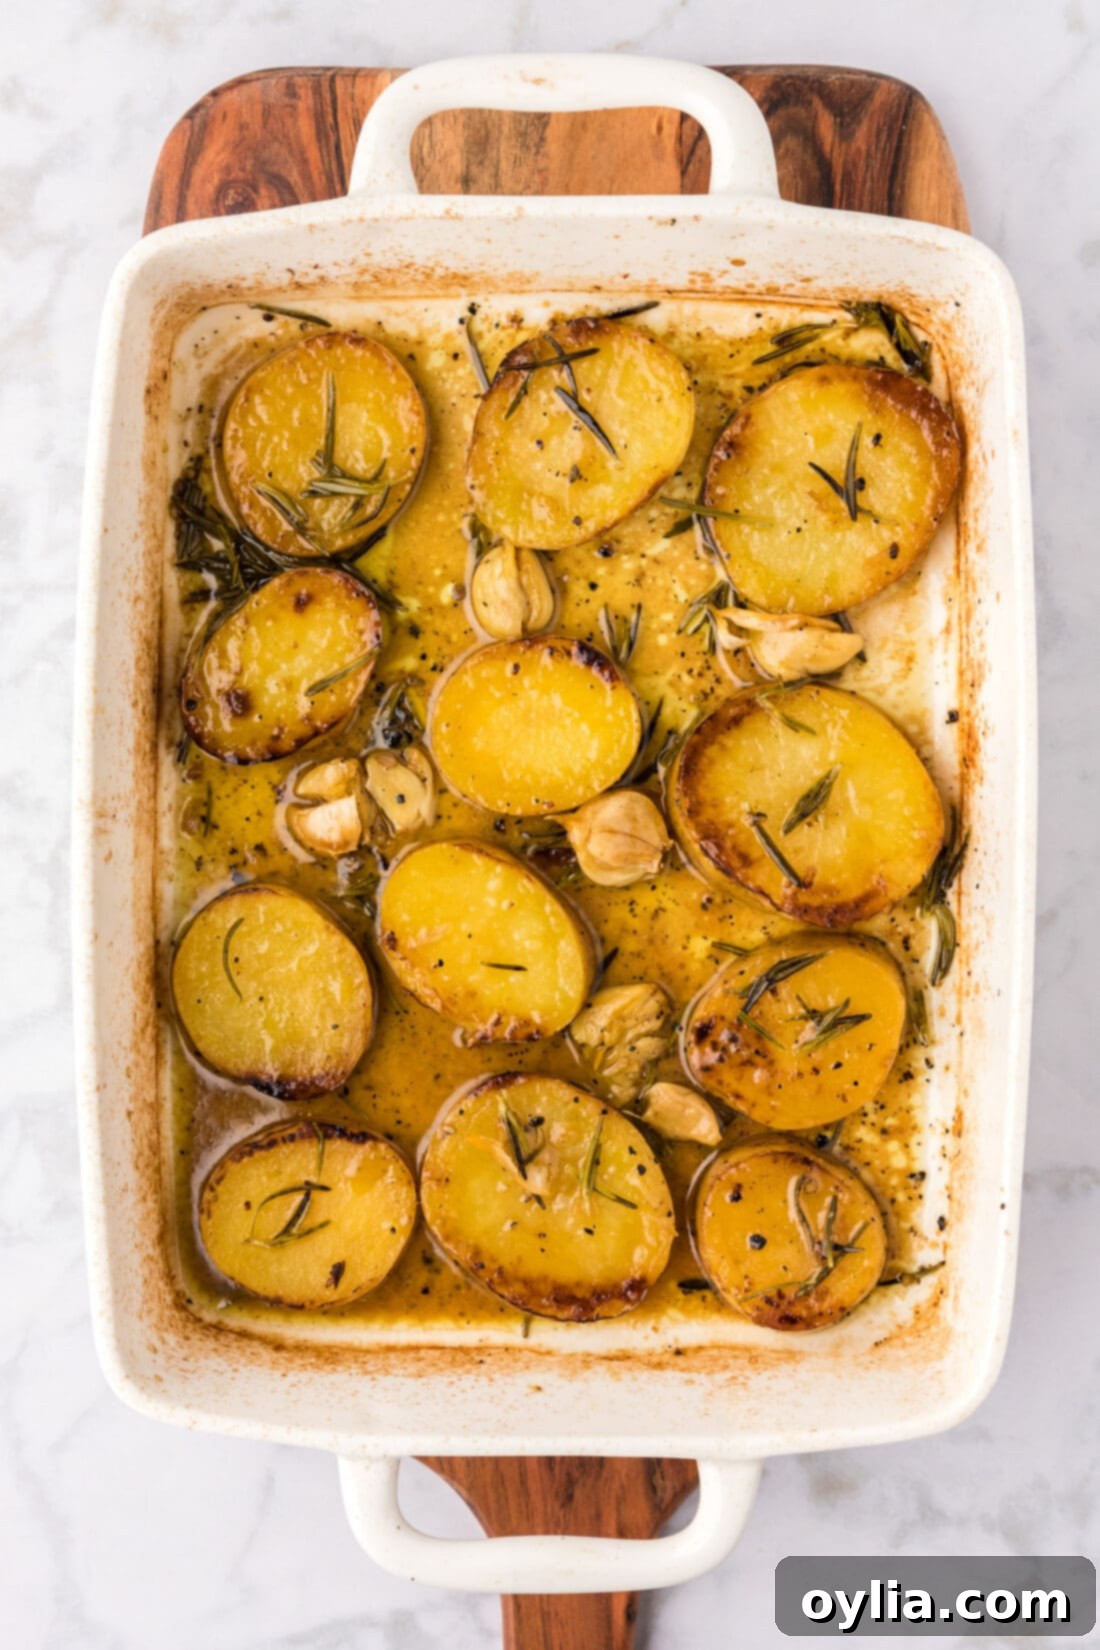
Serving Suggestions for Melting Potatoes
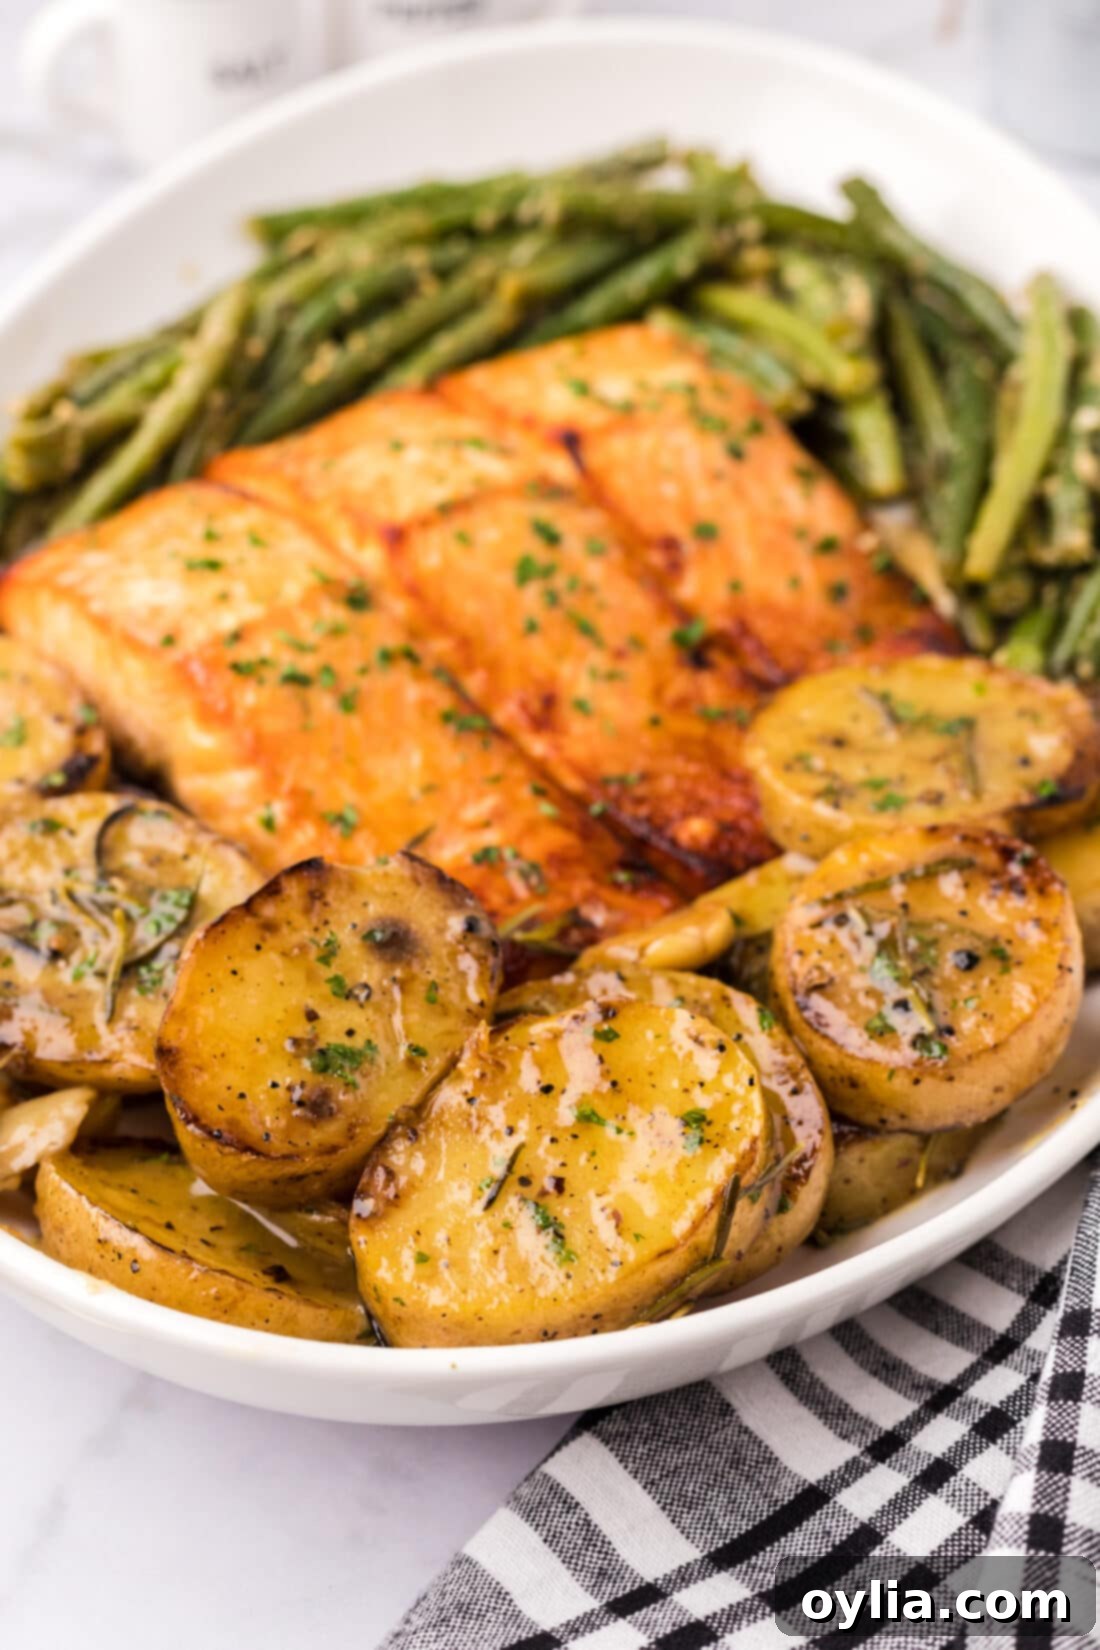
Melting potatoes are a remarkably versatile side dish, perfectly suited to complement a wide array of meals, from simple weeknight dinners to elegant holiday feasts and special gatherings. Their rich, savory flavor and delightful texture make them an ideal pairing for almost any main course. Imagine them alongside succulent roasted salmon, adding a comforting depth to seafood. They are equally magnificent with robust meats like a perfectly cooked reverse sear ribeye or a tender pork tenderloin. For poultry dishes, they pair wonderfully with the delicate flavors of chicken francese, roasted chicken, or even a classic turkey dinner.
Beyond these, their versatility knows no bounds. Serve them with a hearty beef stew, grilled lamb chops, or a rich pot roast. For vegetarian options, they make a substantial and flavorful accompaniment to a robust lentil loaf or a medley of roasted seasonal vegetables. Don’t limit them to just main courses; these potatoes can even be presented as an elegant appetizer, perhaps with a side of creamy herb dip. With their captivating combination of a crispy exterior and a melt-in-your-mouth interior, melting potatoes are guaranteed to be a crowd-pleaser that elevates any meal.
More Irresistible Potato Recipes to Try
If you’ve fallen in love with the comforting versatility of potatoes, you’ll be thrilled to explore more of our cherished recipes. From cheesy and decadent to crispy and savory, there’s a potato dish for every occasion. Discover your next favorite:
- Creamy Au Gratin Potatoes
- Garlicky Parmesan Potatoes
- Ultimate Cheesy Bacon Chive Twice Baked Potatoes
- Simple Garlic Roasted Potatoes
- Decadent Bacon Three Cheese Potatoes
I absolutely adore creating and sharing delicious recipes, and I’m passionate about bringing my kitchen experiences directly to you! It can be tricky to remember to check back every day, which is why I offer a convenient newsletter delivered right to your inbox every time a new recipe is posted. Simply subscribe to start receiving your free daily recipes and never miss out on culinary inspiration!
Melting Potatoes
IMPORTANT – There are often Frequently Asked Questions and Expert Tips within the blog post that you may find helpful. Simply scroll back up to read them for more detailed insights!
Print It
Pin It
Rate It
Save ItSaved!
Ingredients
- 3 pounds Yukon gold potatoes
- 1 ½ cups chicken broth
- 2 Tablespoons fresh rosemary separated into small leaf bundles
- cracked black pepper to taste
- garlic salt to taste
- 5 cloves garlic whole
- 4 Tablespoons unsalted butter separated
Things You’ll Need
-
Large heavy bottomed skillet
-
13×9 baking dish
Before You Begin & Recipe Notes
- For this melting potatoes recipe, Yukon Gold potatoes are ideal for their creamy texture, but red potatoes or even Russet potatoes can be used successfully. Keep in mind Russets will yield a fluffier interior.
- Feel free to customize the fresh herbs! While rosemary offers a classic flavor, fresh thyme or a mix of your favorite robust herbs can also be used to complement your meal.
- We recommend keeping the potato skin on for added texture and nutrients, but peeling them is entirely a matter of personal preference.
- Store any leftover melting potatoes in an airtight container in the refrigerator for up to 4-5 days. For best results when reheating, spread them on a baking sheet and warm them through in a 350°F (175°C) oven until slightly crispy again.
- Ensure your potatoes are sliced uniformly (about 3/4-inch thick) for even cooking and to achieve that desirable “melt” in every bite.
- When searing the potatoes, avoid overcrowding the skillet. Working in batches ensures a proper golden crust forms, rather than steaming the potatoes.
Instructions
-
Preheat oven to 425 F (220 C). Rinse potatoes thoroughly and pat them completely dry. Do not peel, unless preferred.
-
Cut the ends off of the potatoes. These ends can be used in another dish or discarded.
-
Slice potatoes into thick, uniform pieces, about 3/4-inch (2 cm) thick.
-
Melt 1 1/2 tablespoons of the butter in a large, heavy-bottomed skillet over medium-high heat. Use a basting brush to spread the melted butter all over the bottom of the skillet.
-
Place sliced potatoes into the skillet in a single layer, getting as many in as you can without overcrowding. Work in batches if necessary.
-
Season the exposed side of the potatoes generously with garlic salt and cracked black pepper to taste.
-
Cook for 5-7 minutes, undisturbed, until the potatoes have developed a nice brown, crispy crust.
-
Turn the potatoes over to the unbrowned side and season this side to taste with garlic salt and cracked black pepper. (You may not use all of the seasonings.)
-
Pour chicken broth into a 13×9 baking dish. Carefully transfer the browned potatoes into the chicken broth, arranging them in a single layer.
-
Slightly crush the garlic cloves (e.g., by placing the flat side of a chef’s knife onto the clove and giving it a good whack). Place the crushed garlic cloves into the broth between the potatoes.
-
Slice the remaining butter into enough squares so that you have one pat for each potato slice. Place these butter pats on top of each potato.
-
Place a small bunch of fresh rosemary leaves on top of each butter pat.
-
Bake in the preheated oven for 10-15 minutes. Carefully remove the dish, turn the potatoes over, then bake for an additional 10-15 minutes, or until fork-tender and most of the liquid has been absorbed.
Nutrition
The recipes on this blog are tested with a conventional gas oven and gas stovetop. It’s important to note that some ovens, especially as they age, can cook and bake inconsistently. Using an inexpensive oven thermometer can assure you that your oven is truly heating to the proper temperature. If you use a toaster oven or countertop oven, please keep in mind that they may not distribute heat the same as a conventional full sized oven and you may need to adjust your cooking/baking times. In the case of recipes made with a pressure cooker, air fryer, slow cooker, or other appliance, a link to the appliances we use is listed within each respective recipe. For baking recipes where measurements are given by weight, please note that results may not be the same if cups are used instead, and we can’t guarantee success with that method.
