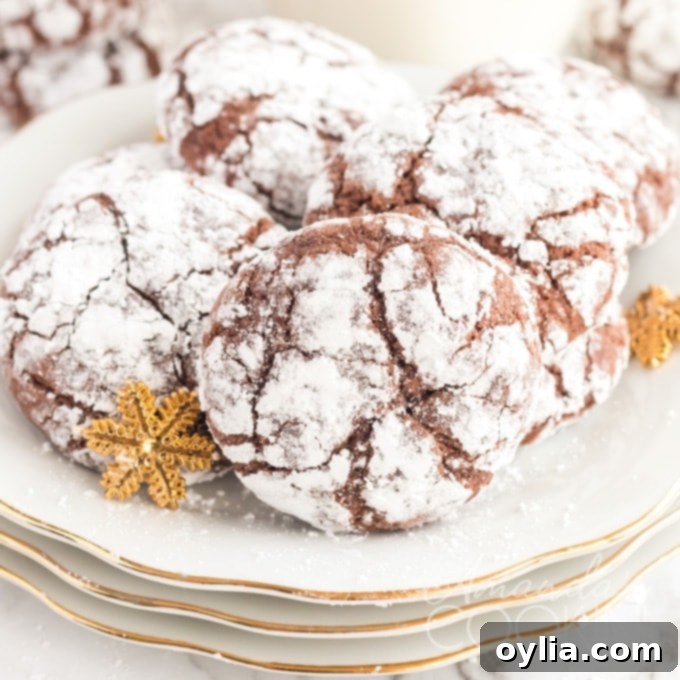
Easy & Irresistible Chewy Chocolate Crinkle Cookies: A Holiday Favorite
Imagine the rich, fudgy taste of your favorite brownie, but in a delightful, bite-sized cookie form, generously dusted with powdered sugar that makes it look like it just emerged from a winter wonderland. That’s exactly what you get with these incredible Chocolate Crinkle Cookies! They are exceptionally easy to prepare, making them a fantastic choice for bakers of all skill levels. While the active preparation time is minimal, you’ll need to account for an hour or two of crucial chill time for the dough, so a little planning ensures perfect results for these wonderfully chewy, intensely chocolatey treats. These cookies are a beloved classic, especially during the festive season, and they pair beautifully on a holiday platter alongside other delights like our vibrant Orange Crinkle Cookies.
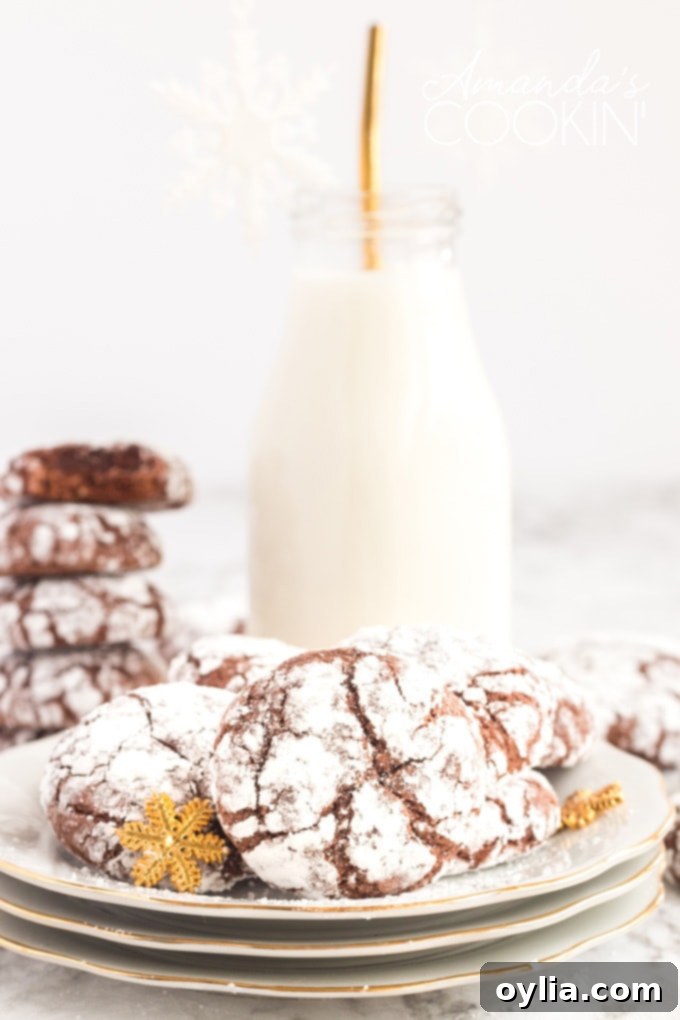
Why Everyone Loves Chocolate Crinkle Cookies
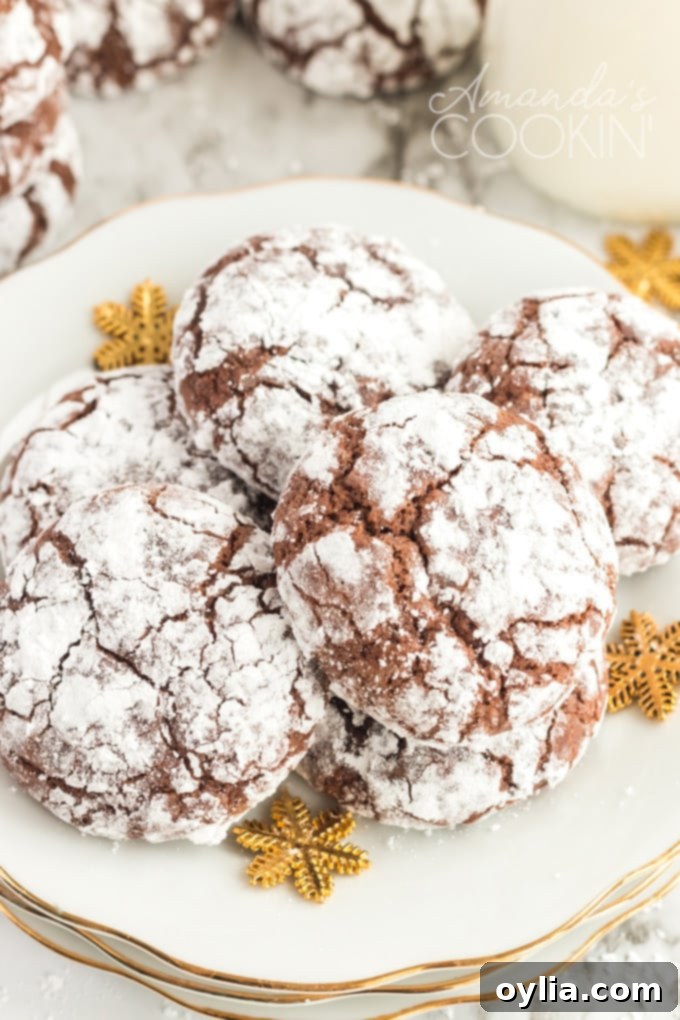
Chocolate Crinkle Cookies hold a special place in the hearts of many, and it’s not hard to see why. Their unique appeal lies in a perfect trifecta of texture, flavor, and visual charm. The moment you bite into one, you’re greeted with a delightfully chewy interior that truly mimics the gooey richness of a fresh-baked brownie. The deep, intense chocolate flavor is satisfying without being overly sweet, balanced by the gentle sweetness of the powdered sugar coating. This iconic “snow” topping isn’t just for looks; it melts slightly during baking, creating those beautiful, characteristic cracks that give the cookies their name and irresistible rustic appearance.
While often associated with Christmas and holiday cookie platters due to their festive “snowy” look, these cookies are a fantastic indulgence any time of the year. They are simple enough for a casual baking day, yet elegant enough to be served at gatherings or given as thoughtful homemade gifts. Their straightforward ingredient list and relatively easy process make them approachable for even novice bakers, ensuring a delicious outcome with minimal fuss. Plus, who can resist a cookie that looks like it’s been kissed by Jack Frost himself?
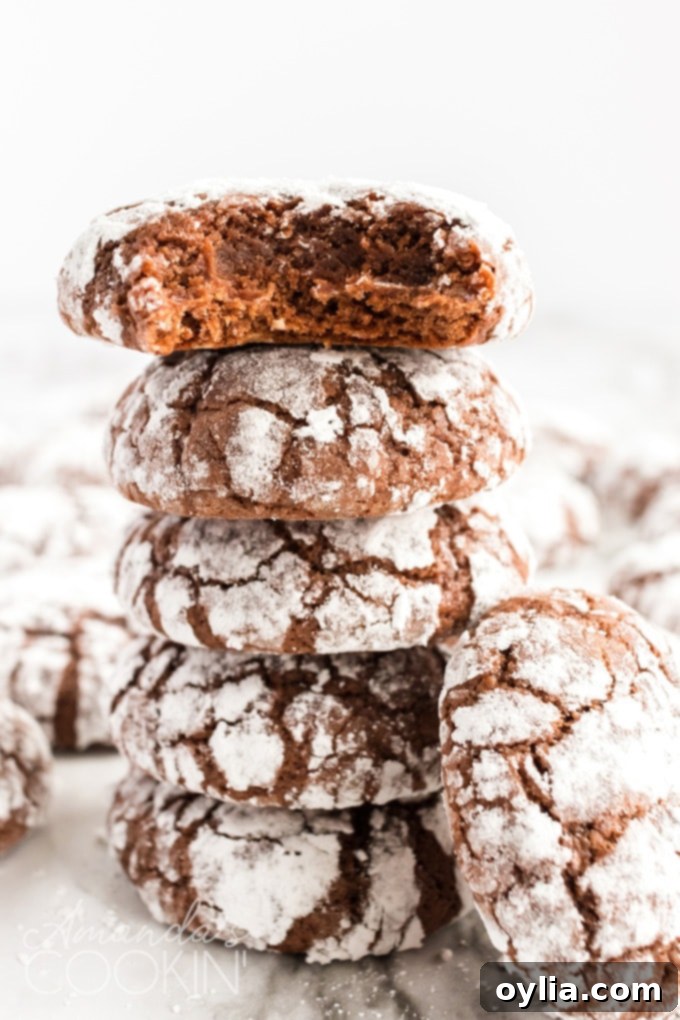
The Magic Behind the Crinkles: How They Get Their Signature Look
The distinctive crinkled surface of these cookies is not just a charming aesthetic; it’s a testament to a simple yet brilliant baking technique. The secret lies in generously coating the chocolate dough balls in a thick layer of powdered sugar just before baking. As the cookies bake, the chocolate dough underneath expands and spreads. The powdered sugar coating, being less elastic, can’t stretch as much, causing it to crack and reveal the rich, dark chocolate beneath. This contrast creates the beautiful “crinkle” effect, making each cookie a unique piece of art. The thick coating also ensures a delightful textural element, adding a delicate sweetness that perfectly complements the deep cocoa flavor.
Key Ingredients You’ll Need for Perfect Crinkle Cookies
This is a truly simple cookie recipe that delivers maximum flavor with minimal fuss. If your heart sings for a rich, chewy brownie, then prepare to fall in love with these cookies. The ingredients are common pantry staples, ensuring you can whip up a batch whenever a craving strikes!
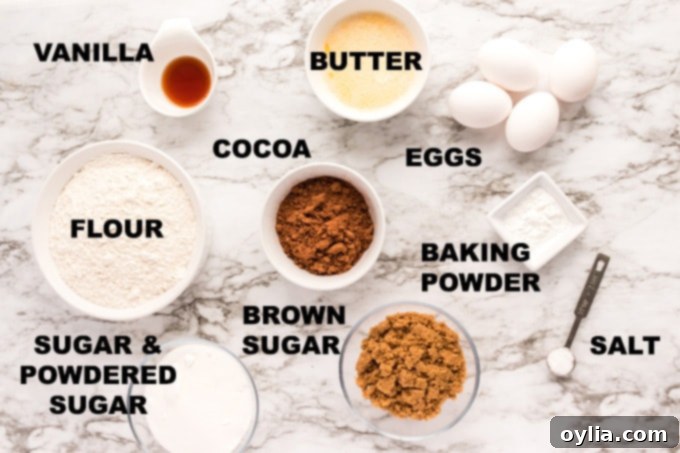
- Dry ingredients: all-purpose flour, unsweetened cocoa, baking powder, salt
- Wet ingredients: granulated sugar, light brown sugar, eggs, vanilla, unsalted butter
- Topping: powdered sugar
A Closer Look at the Ingredients: What Each Does
- All-Purpose Flour: Provides the fundamental structure for our cookies. Using the correct amount is crucial for the right chewiness.
- Unsweetened Cocoa Powder: This is where the deep, rich chocolate flavor comes from. Opt for a good quality cocoa for the best taste.
- Baking Powder: Our leavening agent, which helps the cookies rise slightly and develop their soft texture, contributing to the crinkle effect.
- Salt: A crucial flavor enhancer that balances the sweetness and brings out the robust chocolate notes.
- Granulated Sugar & Light Brown Sugar: This combination is key to the cookie’s texture. Granulated sugar provides crispness, while brown sugar adds moisture, chewiness, and a subtle caramel note that complements the chocolate beautifully.
- Eggs: Act as a binder, providing structure and richness to the cookie dough, contributing to that irresistible chew.
- Vanilla Extract: A universal flavor enhancer that rounds out the chocolate and sugar flavors, adding warmth and depth.
- Unsalted Butter (melted and cooled): Adds richness and moisture. Melting it first helps create a fudgy, brownie-like texture, but ensure it’s cooled to prevent cooking the eggs.
- Powdered Sugar: The essential ingredient for the signature “crinkle” look and a delicate, sweet outer layer. Don’t skimp on this!
Looking for more delicious holiday recipes? Get your hands on our “12 Days of Christmas Cookies” cookbook! It features 12 amazing Christmas cookie recipes you will love, plus bonus baking tips and TWO extra recipes you won’t find on this blog. See ALL my cookbooks here! Get the Christmas cookies cookbook for ONLY $9.97!!
Essential Kitchen Tools for a Smooth Baking Experience
Having the right tools on hand can make all the difference in your baking process, ensuring efficiency and excellent results. For these chocolate crinkle cookies, a few basic kitchen items are all you need:
- Measuring cups and spoons: Accuracy in baking is paramount, especially with flour and leavening agents.
- Mixing bowls: You’ll need at least two – one for dry ingredients and one for wet.
- Baking sheets: Insulated baking sheets are recommended to ensure even cooking and prevent burnt bottoms.
- Cooling rack: Essential for allowing air to circulate around the cookies, preventing them from getting soggy and ensuring they set properly.
- A hand mixer or stand mixer will also be incredibly helpful for creaming the wet ingredients efficiently.
Expert Baking Tips for Crinkle Cookie Success
Achieving those perfectly chewy, beautifully crinkled cookies is easy with a few key considerations in mind. These tips will help ensure your batch turns out wonderfully every time:
- Proper Spacing is Key: Be sure to place cookie dough balls at least 2 inches apart on your baking sheets. These cookies will spread significantly as they bake, and proper spacing prevents them from merging into one giant cookie mass.
- Don’t Skip the Chill Time: The recommended 1-2 hours of chilling time in the refrigerator is non-negotiable for this recipe. Chilling the dough firms it up, making it much easier to handle and roll into balls. More importantly, it prevents the cookies from spreading too much in the oven, helping them maintain a good shape and allowing the powdered sugar to create distinct crinkles.
- Thoroughly Coat in Powdered Sugar: When rolling the dough balls, ensure they are completely and generously coated in powdered sugar. A thick layer is essential for that iconic “snowy” crinkle effect. Don’t be shy with the sugar!
- Do Not Overbake: Chocolate Crinkle Cookies are meant to be chewy and fudgy, not dry and crumbly. They are typically done when the edges are set, but the centers still look a bit glossy and soft. Overbaking will result in a hard, cake-like texture, so keep a close eye on them during the last few minutes of baking.
- Allow to Cool on the Pan: While it’s tempting to move them immediately, let the cookies rest on the hot baking sheet for 4-5 minutes after removing them from the oven. This allows them to set up slightly, making them less fragile and easier to transfer to a cooling rack without breaking apart.
- Use Parchment Paper: Lining your baking sheets with parchment paper prevents sticking and makes for easy cleanup.
How to Make Chocolate Crinkle Snow Cookies: A Detailed Step-by-Step Guide
Ready to create these deliciously chewy chocolate snow cookies that taste just like your favorite brownies? The process is straightforward, and following these steps carefully will lead to a perfect batch that’s as beautiful as it is tasty. Remember that crucial chill time!
- Prepare Dry Ingredients: In a medium-sized bowl, begin by thoroughly whisking together your all-purpose flour, unsweetened cocoa powder, baking powder, and salt. Whisking ensures these ingredients are well combined and evenly distributed throughout the dough. Set this bowl aside for later.
- Cream Wet Ingredients: In the bowl of your stand mixer (or using a hand mixer), combine both the granulated sugar and the light brown sugar. Add the eggs and vanilla extract. Beat these ingredients together on high speed until the mixture becomes light, fluffy, and airy – this can take a few minutes and is vital for the cookie’s final texture.
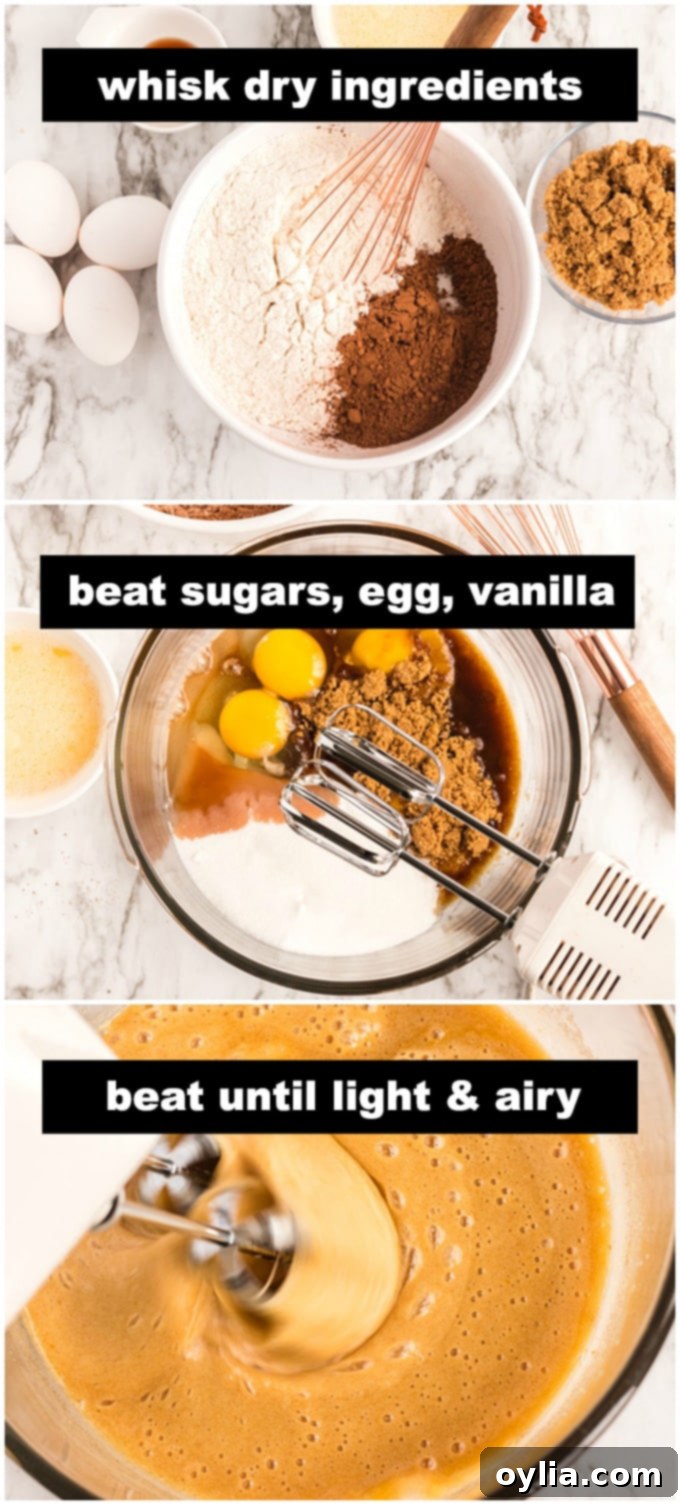
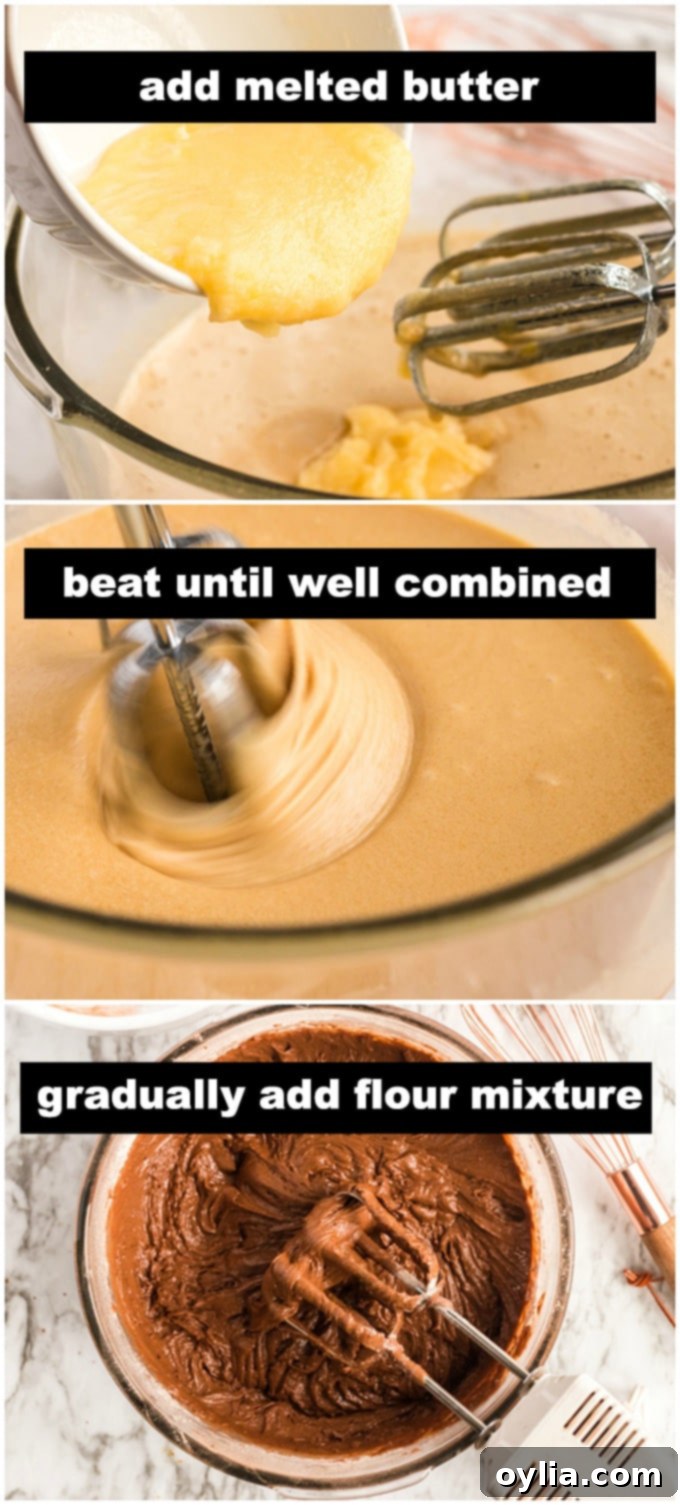
- Incorporate Butter: Carefully add the melted and cooled unsalted butter to the wet ingredient mixture. Beat again until everything is perfectly combined and smooth.
- Combine Wet and Dry: Gradually, add the whisked flour mixture to your wet ingredients, mixing well after each addition until a homogeneous dough forms. The resulting batter will have a rich, dark color and a consistency quite similar to brownie batter – thick and fudgy.

- Chill the Dough: This is a critical step! Cover the bowl of batter tightly with plastic wrap and refrigerate for a minimum of two hours. This chilling period allows the dough to firm up, making it much easier to handle and roll, and prevents the cookies from spreading too much during baking.
- Prepare for Baking: Once the dough is chilled, preheat your oven to 350°F (175°C). Line insulated baking sheets with parchment paper; this helps prevent sticking and ensures even baking.
- Roll and Coat: Take small portions of the firm dough, about one inch in diameter, and roll them into smooth balls. Now, roll each dough ball generously in powdered sugar, ensuring a thick, even coating. This heavy coating is what creates the beautiful crinkle effect.
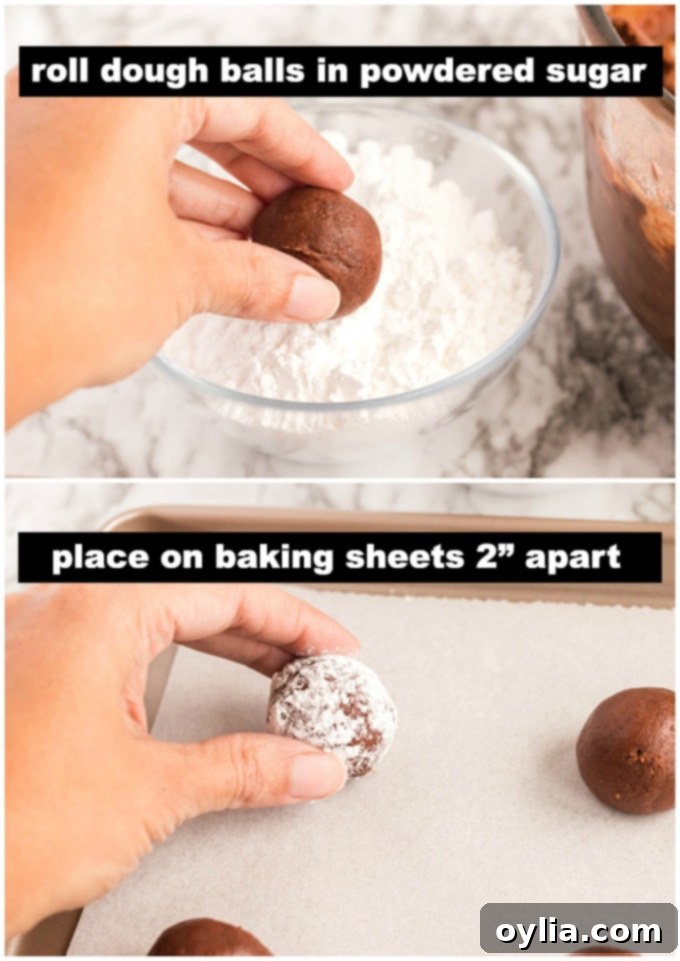
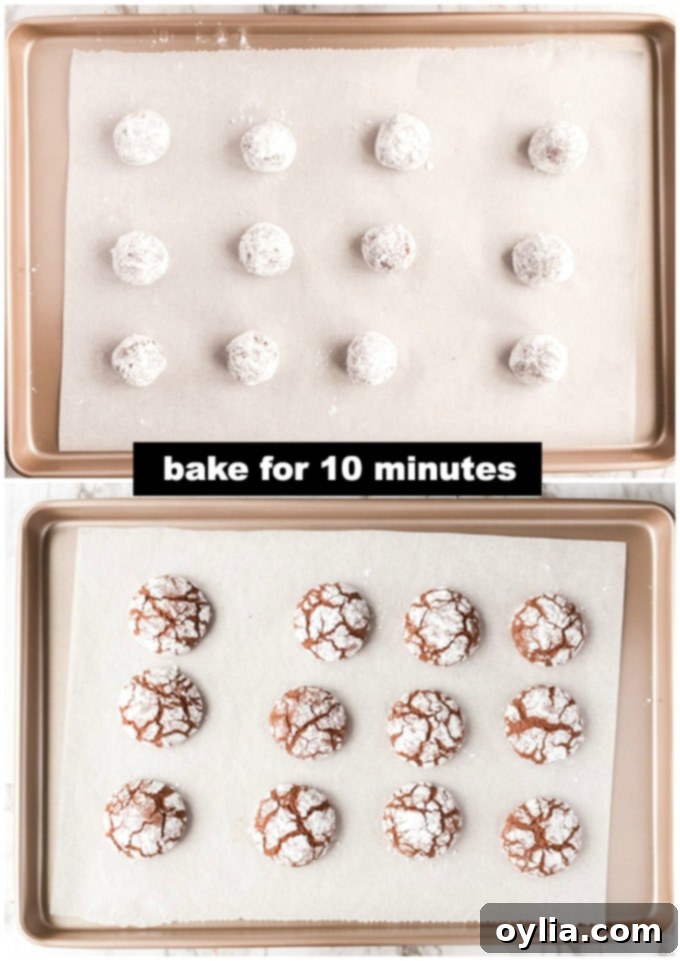
- Bake to Perfection: Place the coated dough balls on the prepared baking sheet, spaced about 2 inches apart. Bake for approximately 10 minutes. It’s crucial not to overbake these cookies; they should still appear a bit glossy and slightly soft in the center when you remove them from the oven. Their edges will be set, but the middle will be wonderfully chewy.
- Cool and Enjoy: Remove the baking sheet from the oven and let the cookies cool on the pan for 4-5 minutes. This brief resting period allows them to firm up without becoming hard. Then, carefully transfer the cookies to a wire cooling rack to cool completely. Once cooled, they will have that signature chewy texture that makes them so irresistible!
Storing Your Chocolate Crinkle Cookies for Freshness
Once your Chocolate Crinkle Cookies have cooled completely, proper storage will keep them fresh and chewy for days. Store them in an airtight container at room temperature. They will remain delicious for up to 5-7 days. If you’re planning to make them ahead for a special occasion or holiday gifting, these cookies also freeze beautifully. Simply place them in an airtight freezer-safe container or bag, separating layers with parchment paper, and they’ll keep for up to 2-3 months. Thaw at room temperature when ready to enjoy.
Serving Suggestions and Perfect Pairings
Chocolate Crinkle Cookies are fantastic on their own, but they truly shine when paired with the right accompaniments. A tall, cold glass of milk is a classic match, perfect for dunking. For a more adult treat, a warm mug of coffee or a rich hot chocolate can elevate the experience, making them an ideal dessert for cozy evenings. They also make a stunning addition to any dessert table, especially during the holidays, and are excellent for filling Christmas cookie tins as thoughtful homemade gifts.
Delicious Variations to Try
While the classic Chocolate Crinkle Cookie is perfect as is, you can easily customize them to add your own twist:
- Mint Chocolate Crinkles: Add 1/2 to 1 teaspoon of mint extract along with the vanilla for a festive, refreshing flavor. You can even add a few drops of green food coloring to the dough for a playful look.
- Espresso Crinkles: For an enhanced chocolate flavor, dissolve 1-2 teaspoons of instant espresso powder in the melted butter before adding it to the mixture. The coffee notes will deepen the cocoa without making the cookies taste like coffee.
- Chili Chocolate Crinkles: For a subtle kick, add a pinch of cayenne pepper or chili powder to the dry ingredients. It creates a warm, intriguing undertone that chocolate lovers will adore.
- Nutty Crinkles: Fold in 1/2 cup of finely chopped pecans or walnuts into the dough for added texture and a nutty flavor profile.
More Irresistible Cookie Recipes to Explore
If you’ve enjoyed baking and tasting these Chocolate Crinkle Cookies, you’ll love exploring other delightful cookie recipes from our collection. Expand your baking repertoire with these fan favorites:
- Grandma’s All-Occasion Sugar Cookies
- Hershey Drop Stuffed Peanut Butter Cookies
- Pecan Pie Bars
- Cherry White Chocolate Chip Cookies
- Italian Anisette Cookies
- Chocolate Thumbprint Cookies
- Lofthouse Cookies

Chocolate Crinkle Cookies
IMPORTANT – There are often Frequently Asked Questions within the blog post that you may find helpful. Simply scroll back up to read them!
Print It
Rate It
Save ItSaved!
Course: Desserts
Cuisine: American
Ingredients
- 2 ½ cups unbleached all purpose flour
- ½ cup plus one tablespoon unsweetened cocoa
- 2 teaspoons baking powder
- ½ teaspoon salt
- 1 cup granulated sugar
- 1 cup packed light brown sugar
- 4 large eggs
- 2 teaspoons vanilla
- ½ cup unsalted butter, melted and cooled
- 1 ½ cups powdered sugar
Things You’ll Need
-
Hand mixer
-
Measuring cups and spoons
-
Mixing bowls
-
Insulated baking sheets
-
Wire cooling racks
Before You Begin
- Be sure to place cookies 2-inches apart on baking sheets as they double in size while baking.
- Let the cookies rest and cool so they will set up. Otherwise they may fall apart when you pick them up warm.
Instructions
-
In a medium bowl whisk together flour, cocoa, baking powder and salt. Set aside.
-
In a mixer beat both sugars, eggs and vanilla on high speed until light and airy. Add melted butter and beat until well combined. Gradually add flour mixture and mix well. The batter will be a similar consistency to brownie batter.
-
Cover batter with plastic wrap and refrigerate for two hours to firm up.
-
Preheat oven to 350 F. Line insulated baking sheets with parchment paper.
-
From the dough, make one-inch balls and roll in powdered sugar. Place on baking sheet 2 inches apart. Bake for 10 minutes. Do not over bake. They will appear a bit glossy on top, so don’t be tempted to bake much longer.
-
Remove from oven and cool on pan 4-5 minutes then carefully transfer cookies to cooling rack to cool completely. Cookies will be chewy.
Nutrition

Why Everyone Loves Chocolate Crinkle Cookies
Chocolate Crinkle Cookies hold a special place in the hearts of many, and it’s not hard to see why. Their unique appeal lies in a perfect trifecta of texture, flavor, and visual charm. The moment you bite into one, you’re greeted with a delightfully chewy interior that truly mimics the gooey richness of a fresh-baked brownie. The deep, intense chocolate flavor is satisfying without being overly sweet, balanced by the gentle sweetness of the powdered sugar coating. This iconic “snow” topping isn’t just for looks; it melts slightly during baking, creating those beautiful, characteristic cracks that give the cookies their name and irresistible rustic appearance.
While often associated with Christmas and holiday cookie platters due to their festive “snowy” look, these cookies are a fantastic indulgence any time of the year. They are simple enough for a casual baking day, yet elegant enough to be served at gatherings or given as thoughtful homemade gifts. Their straightforward ingredient list and relatively easy process make them approachable for even novice bakers, ensuring a delicious outcome with minimal fuss. Plus, who can resist a cookie that looks like it’s been kissed by Jack Frost himself?

The Magic Behind the Crinkles: How They Get Their Signature Look
The distinctive crinkled surface of these cookies is not just a charming aesthetic; it’s a testament to a simple yet brilliant baking technique. The secret lies in generously coating the chocolate dough balls in a thick layer of powdered sugar just before baking. As the cookies bake, the chocolate dough underneath expands and spreads. The powdered sugar coating, being less elastic, can’t stretch as much, causing it to crack and reveal the rich, dark chocolate beneath. This contrast creates the beautiful “crinkle” effect, making each cookie a unique piece of art. The thick coating also ensures a delightful textural element, adding a delicate sweetness that perfectly complements the deep cocoa flavor.
Key Ingredients You’ll Need for Perfect Crinkle Cookies
This is a truly simple cookie recipe that delivers maximum flavor with minimal fuss. If your heart sings for a rich, chewy brownie, then prepare to fall in love with these cookies. The ingredients are common pantry staples, ensuring you can whip up a batch whenever a craving strikes!

- Dry ingredients: all-purpose flour, unsweetened cocoa, baking powder, salt
- Wet ingredients: granulated sugar, light brown sugar, eggs, vanilla, unsalted butter
- Topping: powdered sugar
A Closer Look at the Ingredients: What Each Does
- All-Purpose Flour: Provides the fundamental structure for our cookies. Using the correct amount is crucial for the right chewiness.
- Unsweetened Cocoa Powder: This is where the deep, rich chocolate flavor comes from. Opt for a good quality cocoa for the best taste.
- Baking Powder: Our leavening agent, which helps the cookies rise slightly and develop their soft texture, contributing to the crinkle effect.
- Salt: A crucial flavor enhancer that balances the sweetness and brings out the robust chocolate notes.
- Granulated Sugar & Light Brown Sugar: This combination is key to the cookie’s texture. Granulated sugar provides crispness, while brown sugar adds moisture, chewiness, and a subtle caramel note that complements the chocolate beautifully.
- Eggs: Act as a binder, providing structure and richness to the cookie dough, contributing to that irresistible chew.
- Vanilla Extract: A universal flavor enhancer that rounds out the chocolate and sugar flavors, adding warmth and depth.
- Unsalted Butter (melted and cooled): Adds richness and moisture. Melting it first helps create a fudgy, brownie-like texture, but ensure it’s cooled to prevent cooking the eggs.
- Powdered Sugar: The essential ingredient for the signature “crinkle” look and a delicate, sweet outer layer. Don’t skimp on this!
Looking for more delicious holiday recipes? Get your hands on our “12 Days of Christmas Cookies” cookbook! It features 12 amazing Christmas cookie recipes you will love, plus bonus baking tips and TWO extra recipes you won’t find on this blog. See ALL my cookbooks here! Get the Christmas cookies cookbook for ONLY $9.97!!
Essential Kitchen Tools for a Smooth Baking Experience
Having the right tools on hand can make all the difference in your baking process, ensuring efficiency and excellent results. For these chocolate crinkle cookies, a few basic kitchen items are all you need:
- Measuring cups and spoons: Accuracy in baking is paramount, especially with flour and leavening agents.
- Mixing bowls: You’ll need at least two – one for dry ingredients and one for wet.
- Baking sheets: Insulated baking sheets are recommended to ensure even cooking and prevent burnt bottoms.
- Cooling rack: Essential for allowing air to circulate around the cookies, preventing them from getting soggy and ensuring they set properly.
- A hand mixer or stand mixer will also be incredibly helpful for creaming the wet ingredients efficiently.
Expert Baking Tips for Crinkle Cookie Success
Achieving those perfectly chewy, beautifully crinkled cookies is easy with a few key considerations in mind. These tips will help ensure your batch turns out wonderfully every time:
- Proper Spacing is Key: Be sure to place cookie dough balls at least 2 inches apart on your baking sheets. These cookies will spread significantly as they bake, and proper spacing prevents them from merging into one giant cookie mass.
- Don’t Skip the Chill Time: The recommended 1-2 hours of chilling time in the refrigerator is non-negotiable for this recipe. Chilling the dough firms it up, making it much easier to handle and roll into balls. More importantly, it prevents the cookies from spreading too much in the oven, helping them maintain a good shape and allowing the powdered sugar to create distinct crinkles.
- Thoroughly Coat in Powdered Sugar: When rolling the dough balls, ensure they are completely and generously coated in powdered sugar. A thick layer is essential for that iconic “snowy” crinkle effect. Don’t be shy with the sugar!
- Do Not Overbake: Chocolate Crinkle Cookies are meant to be chewy and fudgy, not dry and crumbly. They are typically done when the edges are set, but the centers still look a bit glossy and soft. Overbaking will result in a hard, cake-like texture, so keep a close eye on them during the last few minutes of baking.
- Allow to Cool on the Pan: While it’s tempting to move them immediately, let the cookies rest on the hot baking sheet for 4-5 minutes after removing them from the oven. This allows them to set up slightly, making them less fragile and easier to transfer to a cooling rack without breaking apart.
- Use Parchment Paper: Lining your baking sheets with parchment paper prevents sticking and makes for easy cleanup.
How to Make Chocolate Crinkle Snow Cookies: A Detailed Step-by-Step Guide
Ready to create these deliciously chewy chocolate snow cookies that taste just like your favorite brownies? The process is straightforward, and following these steps carefully will lead to a perfect batch that’s as beautiful as it is tasty. Remember that crucial chill time!
- Prepare Dry Ingredients: In a medium-sized bowl, begin by thoroughly whisking together your all-purpose flour, unsweetened cocoa powder, baking powder, and salt. Whisking ensures these ingredients are well combined and evenly distributed throughout the dough. Set this bowl aside for later.
- Cream Wet Ingredients: In the bowl of your stand mixer (or using a hand mixer), combine both the granulated sugar and the light brown sugar. Add the eggs and vanilla extract. Beat these ingredients together on high speed until the mixture becomes light, fluffy, and airy – this can take a few minutes and is vital for the cookie’s final texture.

- Incorporate Butter: Carefully add the melted and cooled unsalted butter to the wet ingredient mixture. Beat again until everything is perfectly combined and smooth.
- Combine Wet and Dry: Gradually, add the whisked flour mixture to your wet ingredients, mixing well after each addition until a homogeneous dough forms. The resulting batter will have a rich, dark color and a consistency quite similar to brownie batter – thick and fudgy.
- Chill the Dough: This is a critical step! Cover the bowl of batter tightly with plastic wrap and refrigerate for a minimum of two hours. This chilling period allows the dough to firm up, making it much easier to handle and roll, and prevents the cookies from spreading too much during baking.
- Prepare for Baking: Once the dough is chilled, preheat your oven to 350°F (175°C). Line insulated baking sheets with parchment paper; this helps prevent sticking and ensures even baking.
- Roll and Coat: Take small portions of the firm dough, about one inch in diameter, and roll them into smooth balls. Now, roll each dough ball generously in powdered sugar, ensuring a thick, even coating. This heavy coating is what creates the beautiful crinkle effect.

- Bake to Perfection: Place the coated dough balls on the prepared baking sheet, spaced about 2 inches apart. Bake for approximately 10 minutes. It’s crucial not to overbake these cookies; they should still appear a bit glossy and slightly soft in the center when you remove them from the oven. Their edges will be set, but the middle will be wonderfully chewy.
- Cool and Enjoy: Remove the baking sheet from the oven and let the cookies cool on the pan for 4-5 minutes. This brief resting period allows them to firm up without becoming hard. Then, carefully transfer the cookies to a wire cooling rack to cool completely. Once cooled, they will have that signature chewy texture that makes them so irresistible!

Storing Your Chocolate Crinkle Cookies for Freshness
Once your Chocolate Crinkle Cookies have cooled completely, proper storage will keep them fresh and chewy for days. Store them in an airtight container at room temperature. They will remain delicious for up to 5-7 days. If you’re planning to make them ahead for a special occasion or holiday gifting, these cookies also freeze beautifully. Simply place them in an airtight freezer-safe container or bag, separating layers with parchment paper, and they’ll keep for up to 2-3 months. Thaw at room temperature when ready to enjoy.
Serving Suggestions and Perfect Pairings
Chocolate Crinkle Cookies are fantastic on their own, but they truly shine when paired with the right accompaniments. A tall, cold glass of milk is a classic match, perfect for dunking. For a more adult treat, a warm mug of coffee or a rich hot chocolate can elevate the experience, making them an ideal dessert for cozy evenings. They also make a stunning addition to any dessert table, especially during the holidays, and are excellent for filling Christmas cookie tins as thoughtful homemade gifts.
Delicious Variations to Try
While the classic Chocolate Crinkle Cookie is perfect as is, you can easily customize them to add your own twist:
- Mint Chocolate Crinkles: Add 1/2 to 1 teaspoon of mint extract along with the vanilla for a festive, refreshing flavor. You can even add a few drops of green food coloring to the dough for a playful look.
- Espresso Crinkles: For an enhanced chocolate flavor, dissolve 1-2 teaspoons of instant espresso powder in the melted butter before adding it to the mixture. The coffee notes will deepen the cocoa without making the cookies taste like coffee.
- Chili Chocolate Crinkles: For a subtle kick, add a pinch of cayenne pepper or chili powder to the dry ingredients. It creates a warm, intriguing undertone that chocolate lovers will adore.
- Nutty Crinkles: Fold in 1/2 cup of finely chopped pecans or walnuts into the dough for added texture and a nutty flavor profile.

More Irresistible Cookie Recipes to Explore
If you’ve enjoyed baking and tasting these Chocolate Crinkle Cookies, you’ll love exploring other delightful cookie recipes from our collection. Expand your baking repertoire with these fan favorites:
- Grandma’s All-Occasion Sugar Cookies
- Hershey Drop Stuffed Peanut Butter Cookies
- Pecan Pie Bars
- Cherry White Chocolate Chip Cookies
- Italian Anisette Cookies
- Chocolate Thumbprint Cookies
- Lofthouse Cookies

Chocolate Crinkle Cookies
IMPORTANT – There are often Frequently Asked Questions within the blog post that you may find helpful. Simply scroll back up to read them!
Print It
Rate It
