Easy Apple Hand Pies: Your Go-To Fall Dessert with Flaky Crust & Caramel Drizzle
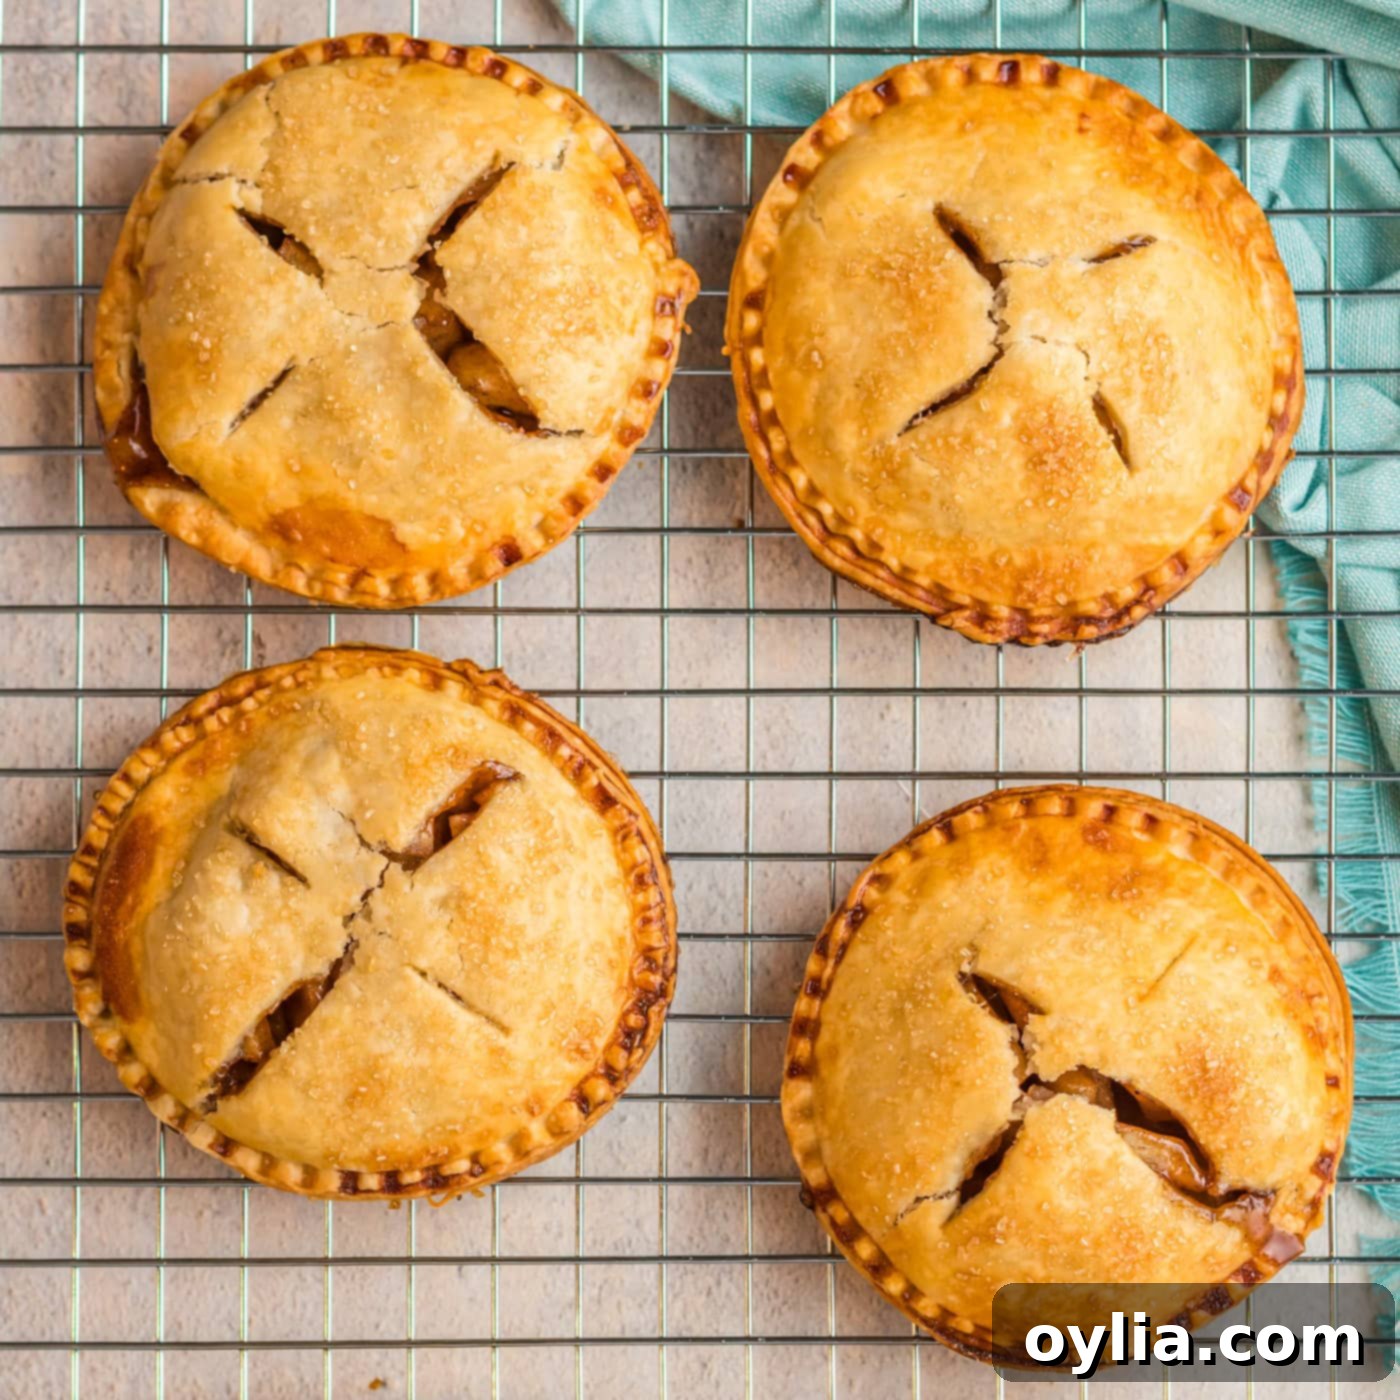
Step into a world of cozy autumn flavors with these utterly irresistible **apple hand pies**. Imagine tender, perfectly spiced apples nestled inside a golden, flaky crust, all finished with a decadent drizzle of warm caramel sauce. These individual treats are not just delicious; they’re a portable celebration of fall, perfect for sharing or savoring all by yourself. Forget complicated baking; this recipe is designed for simplicity without sacrificing that cherished homemade taste.
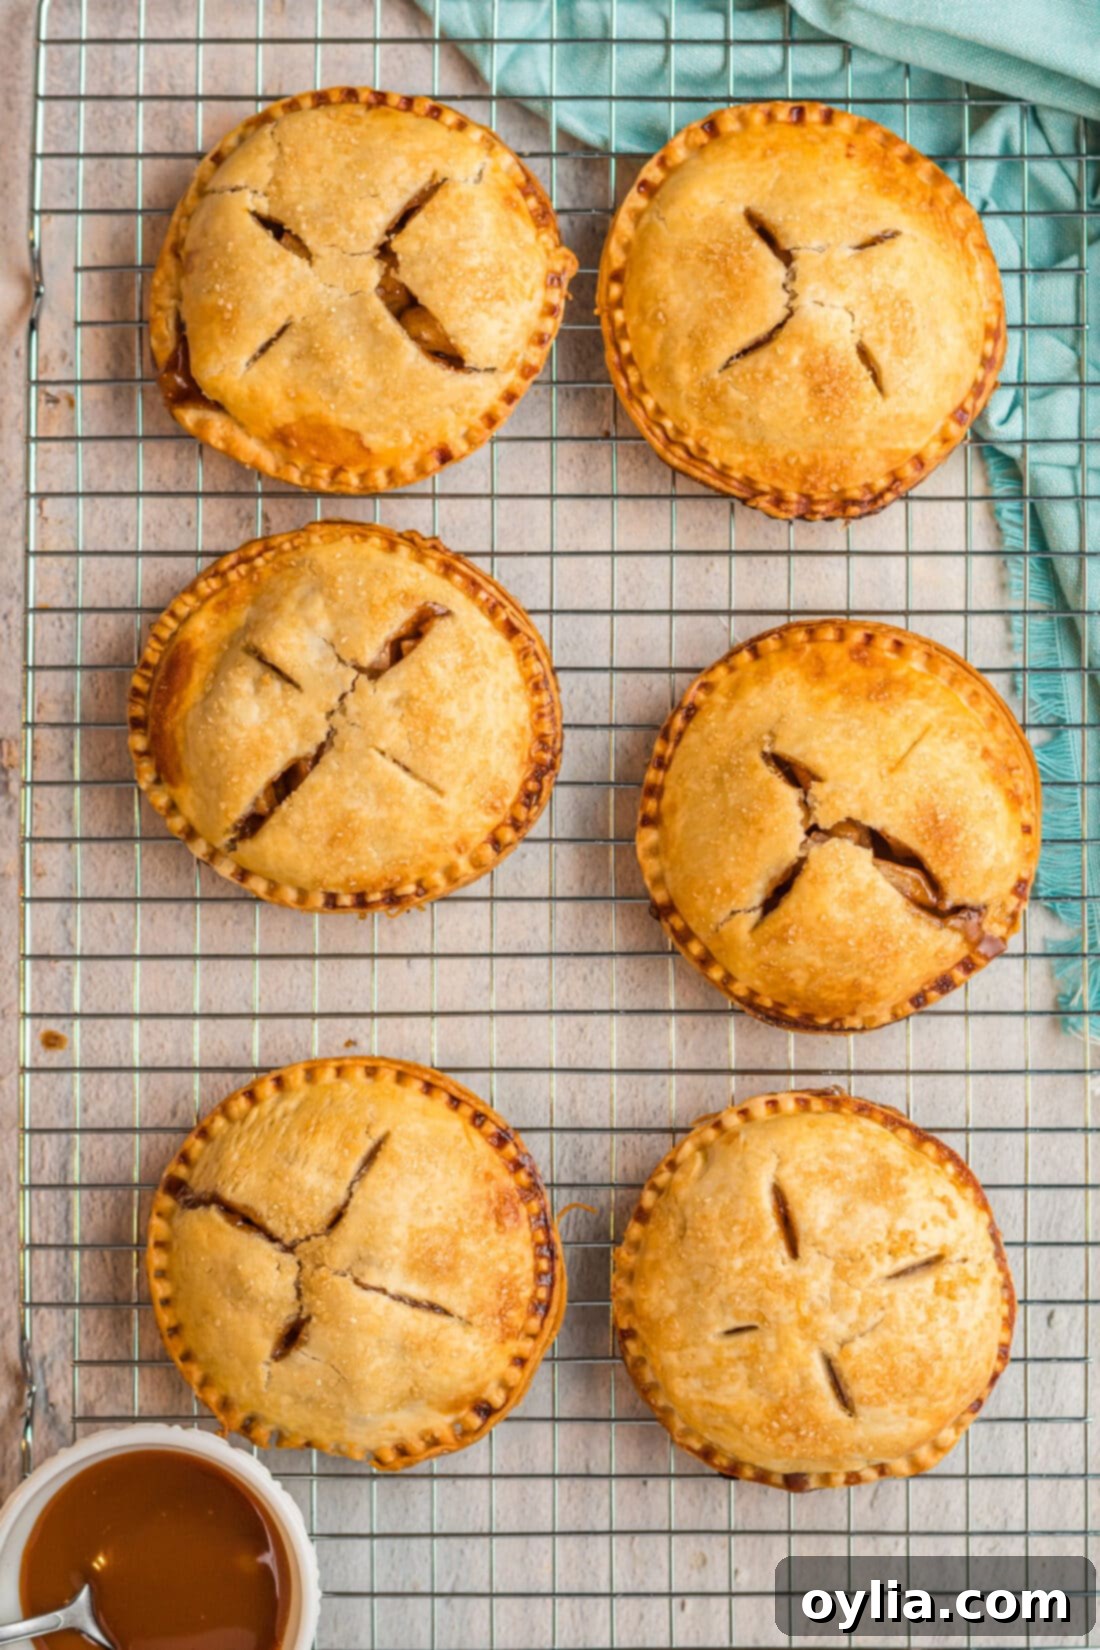
Why This Apple Hand Pie Recipe is a Must-Try!
This **apple hand pie recipe** is designed for deliciousness and convenience, making it a perfect choice for both novice and experienced bakers. Here’s why it stands out:
- Rich, Complex Flavor: We’ve elevated the classic apple pie filling with a hint of bourbon, which deepens the notes of brown sugar, nutmeg, cinnamon, and allspice. The bourbon adds a subtle warmth and complexity that truly sets these hand pies apart, though it can easily be swapped for lemon juice for an equally delightful alcohol-free version.
- Effortless Preparation: By utilizing store-bought refrigerator pie crusts, we cut down on prep time significantly, allowing you to enjoy these treats without the fuss of making dough from scratch. This makes it a fantastic project for busy weekends or even a fun activity for kids to help with.
- Perfectly Portable: Unlike a traditional pie, these individual portions are ideal for on-the-go snacking, lunchboxes, potlucks, or holiday gatherings like Friendsgiving and Thanksgiving. No plates or forks required!
- Irresistible Fall Vibe: There’s truly nothing that captures the essence of autumn quite like the aroma and taste of warm, spiced apples baked into a flaky pastry. Making a batch of these apple hand pies alongside pumpkin hand pies is our absolute favorite way to embrace the fall season.
RELATED: If you love fruit-filled pastries, you might also like this recipe – Lemon Blueberry Hand Pies
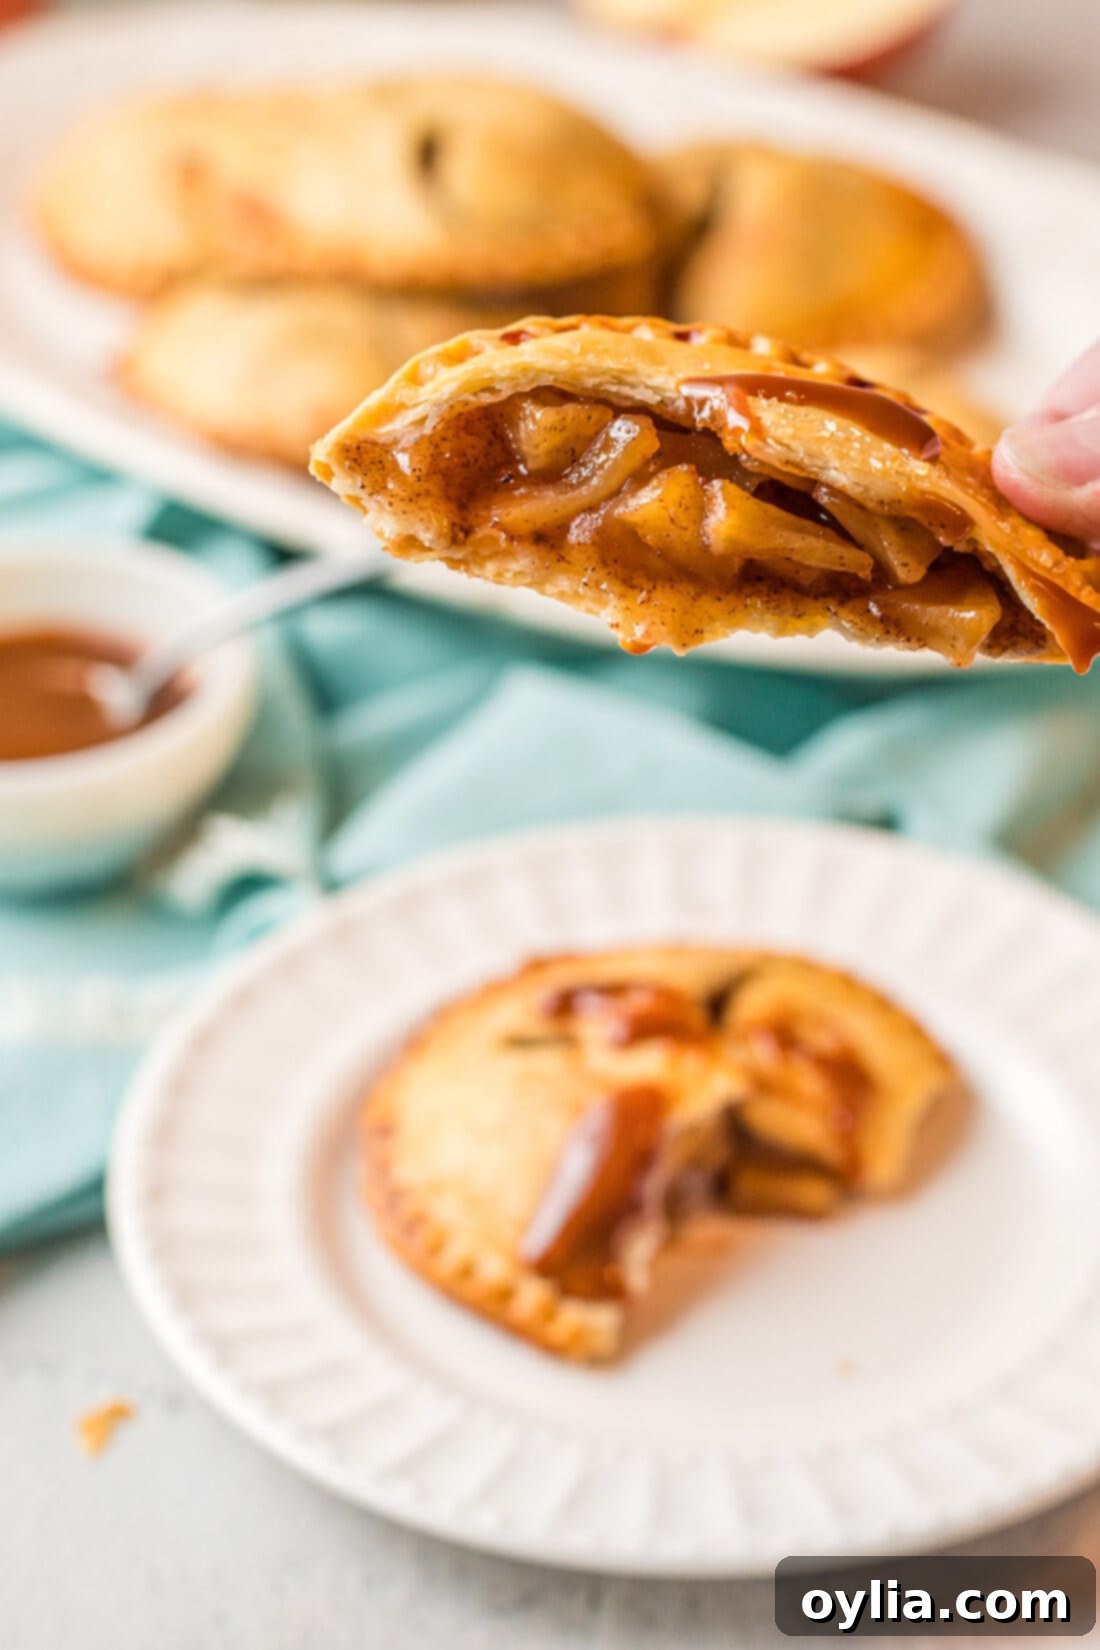
Gather Your Ingredients for Homemade Apple Hand Pies
Before you begin creating these delightful **homemade apple hand pies**, make sure you have all your ingredients ready. This list covers everything you’ll need for the perfectly spiced apple filling and the flaky pie crust. For precise measurements, please refer to the printable recipe card at the end of this post.
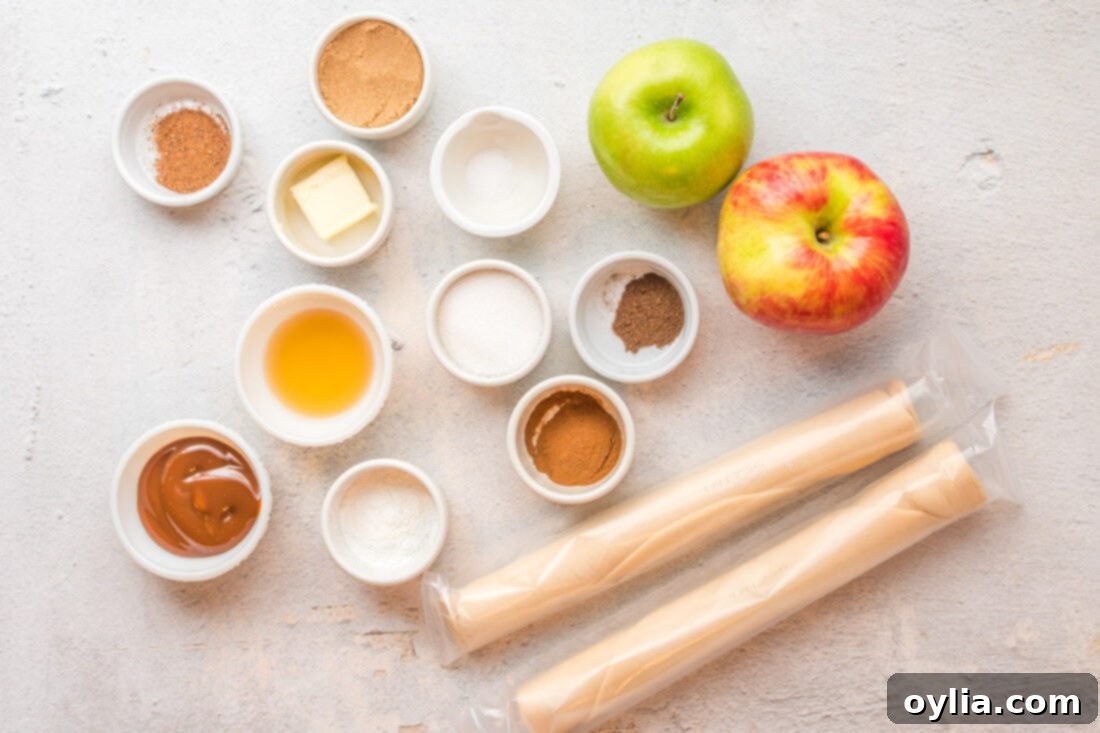
Ingredient Info and Substitution Suggestions for Your Perfect Apple Hand Pies
Crafting the perfect **apple hand pie** starts with understanding your ingredients. Here’s a deeper look into what you’ll need and how you can adapt the recipe to your preferences:
- APPLES: The star of the show! For the best texture and flavor in your baked goods, you’ll want to select crisp, firm apples that hold their shape well during cooking. Excellent choices include Granny Smith (for a tart contrast), Honeycrisp (sweet and crisp), Gala (mildly sweet), Pink Lady, or Golden Delicious. A mix of sweet and tart varieties often yields the most balanced and interesting flavor profile. There’s nothing quite like the taste of freshly picked apples, especially if you get them from a local apple orchard!
- FILLING SAUCE: This is where the magic happens!
- Sugars: We use both granulated sugar and light brown sugar to achieve a balanced sweetness with a hint of molasses depth. If you prefer a richer, more intense caramel flavor, feel free to substitute dark brown sugar for light brown sugar.
- Spices: Cinnamon, nutmeg, and allspice are the quintessential fall spices that create that warm, comforting aroma and taste. Freshly grated nutmeg offers a more potent flavor, but pre-ground nutmeg (from a bottle) works perfectly well. For ultimate convenience, you can substitute all individual spices for a pre-mixed apple pie spice blend if you have it on hand.
- Bourbon: A small amount of bourbon adds a wonderful depth and sophisticated warmth to the apple filling, complementing the spices beautifully. While highly recommended for an extra layer of flavor, if you prefer to omit alcohol, a splash of fresh lemon juice is a fantastic substitute. Lemon juice brightens the apple flavor and provides a slight tang, balancing the sweetness.
- Thickener: Cornstarch mixed with water creates a slurry that ensures your apple filling is perfectly thickened and not watery, preventing soggy bottoms in your hand pies.
- DOUGH: To keep these **apple hand pies** delightfully sweet and wonderfully simple, we’ve chosen to use a pre-made, refrigerated pie crust, readily available at most grocery stores. This significantly speeds up the preparation process, making these pies come together in a snap and easily manageable for bakers of all ages. However, if you have a cherished homemade pie dough recipe and the time, feel free to substitute it for a truly from-scratch experience. For those using store-bought dough, remember to let it come to room temperature for about 10-15 minutes before unrolling to prevent cracking.
- EGG WASH & TOPPING: An egg yolk mixed with a little water creates a beautiful golden sheen and helps the sugar sprinkle adhere, adding a lovely crunchy texture and professional finish. Granulated sugar on top adds an extra touch of sweetness and sparkle.
- CARAMEL SAUCE: While optional, a drizzle of store-bought or homemade caramel sauce after baking transforms these hand pies into an even more decadent dessert.
How to Make Delicious Apple Hand Pies: Step-by-Step Guide
These step-by-step photos and detailed instructions are here to help you visualize how to make this recipe for **apple hand pies**. You can Jump to Recipe to get the printable version of this recipe, complete with exact measurements and instructions, at the bottom of this post.
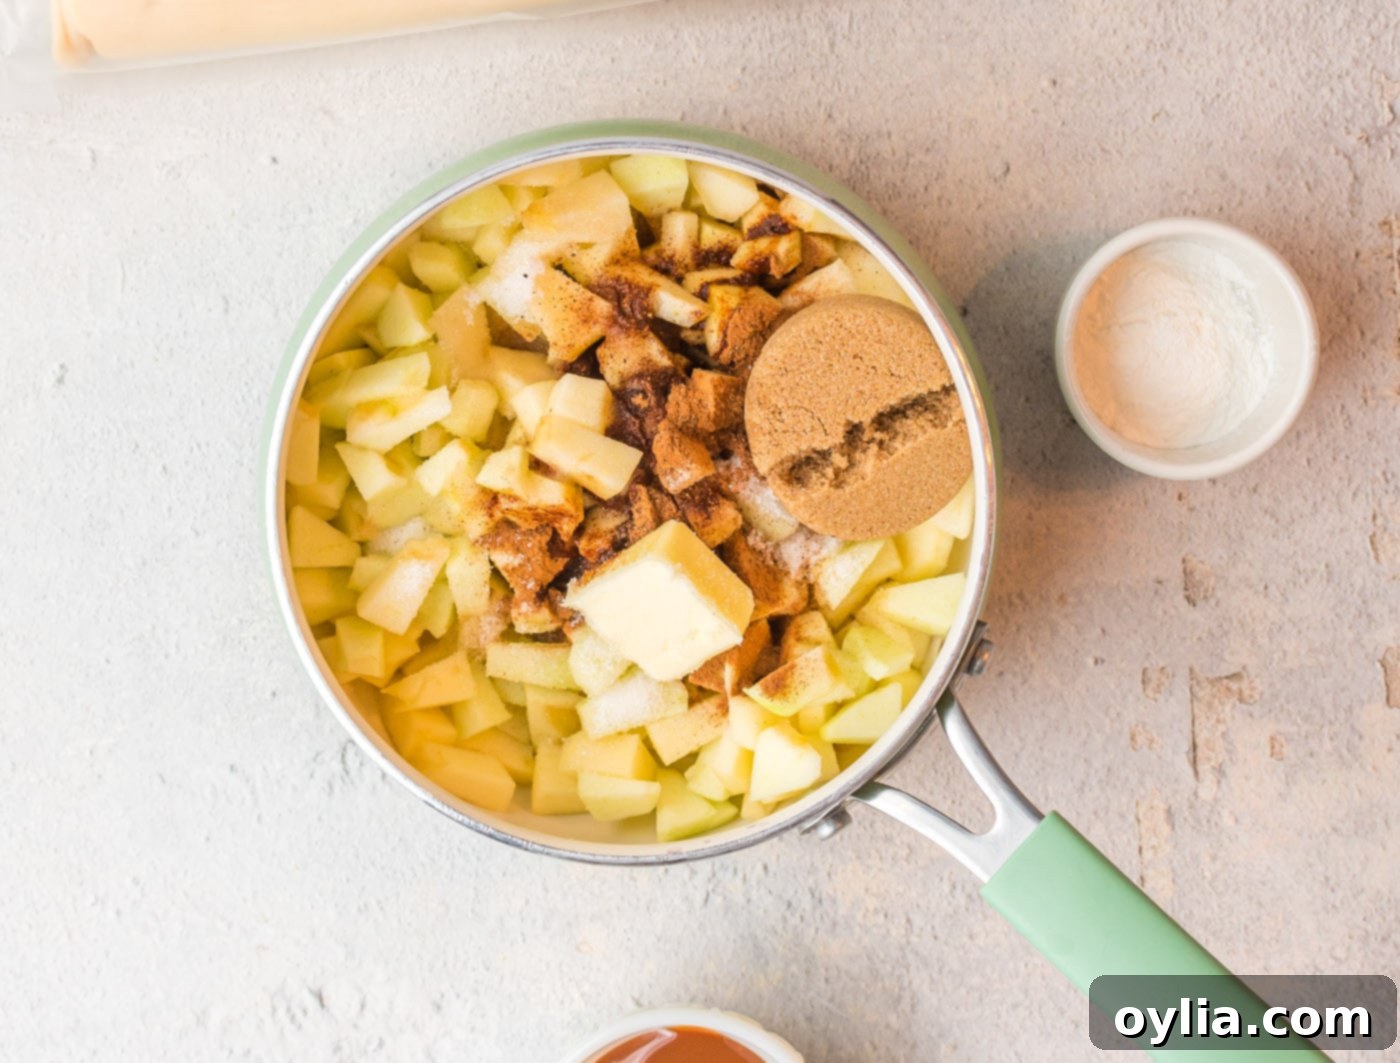
- Prepare the Apple Filling: In a medium saucepan, combine your diced apples, butter, granulated sugar, brown sugar, cinnamon, nutmeg, allspice, salt, and bourbon (or lemon juice). Stir everything together thoroughly to ensure the apples are evenly coated with the spices and sugars.

- Thicken the Sauce: In a small separate bowl, combine the water and cornstarch, stirring until completely smooth. This slurry will act as your thickening agent. Pour this mixture into the saucepan with the apples and stir well once more to combine everything.
- Cook the Apples: Place the saucepan over medium heat and cook, stirring occasionally, until the apples become tender (but still hold some shape) and the sauce has noticeably thickened to a glossy consistency. This usually takes about 5-7 minutes. Once thickened, remove the pan from the stove and set the filling aside to cool slightly while you prepare the crust.
- Prepare for Baking: Preheat your oven to 425°F (220°C). Line a cookie sheet with parchment paper to prevent sticking and make for easy cleanup.
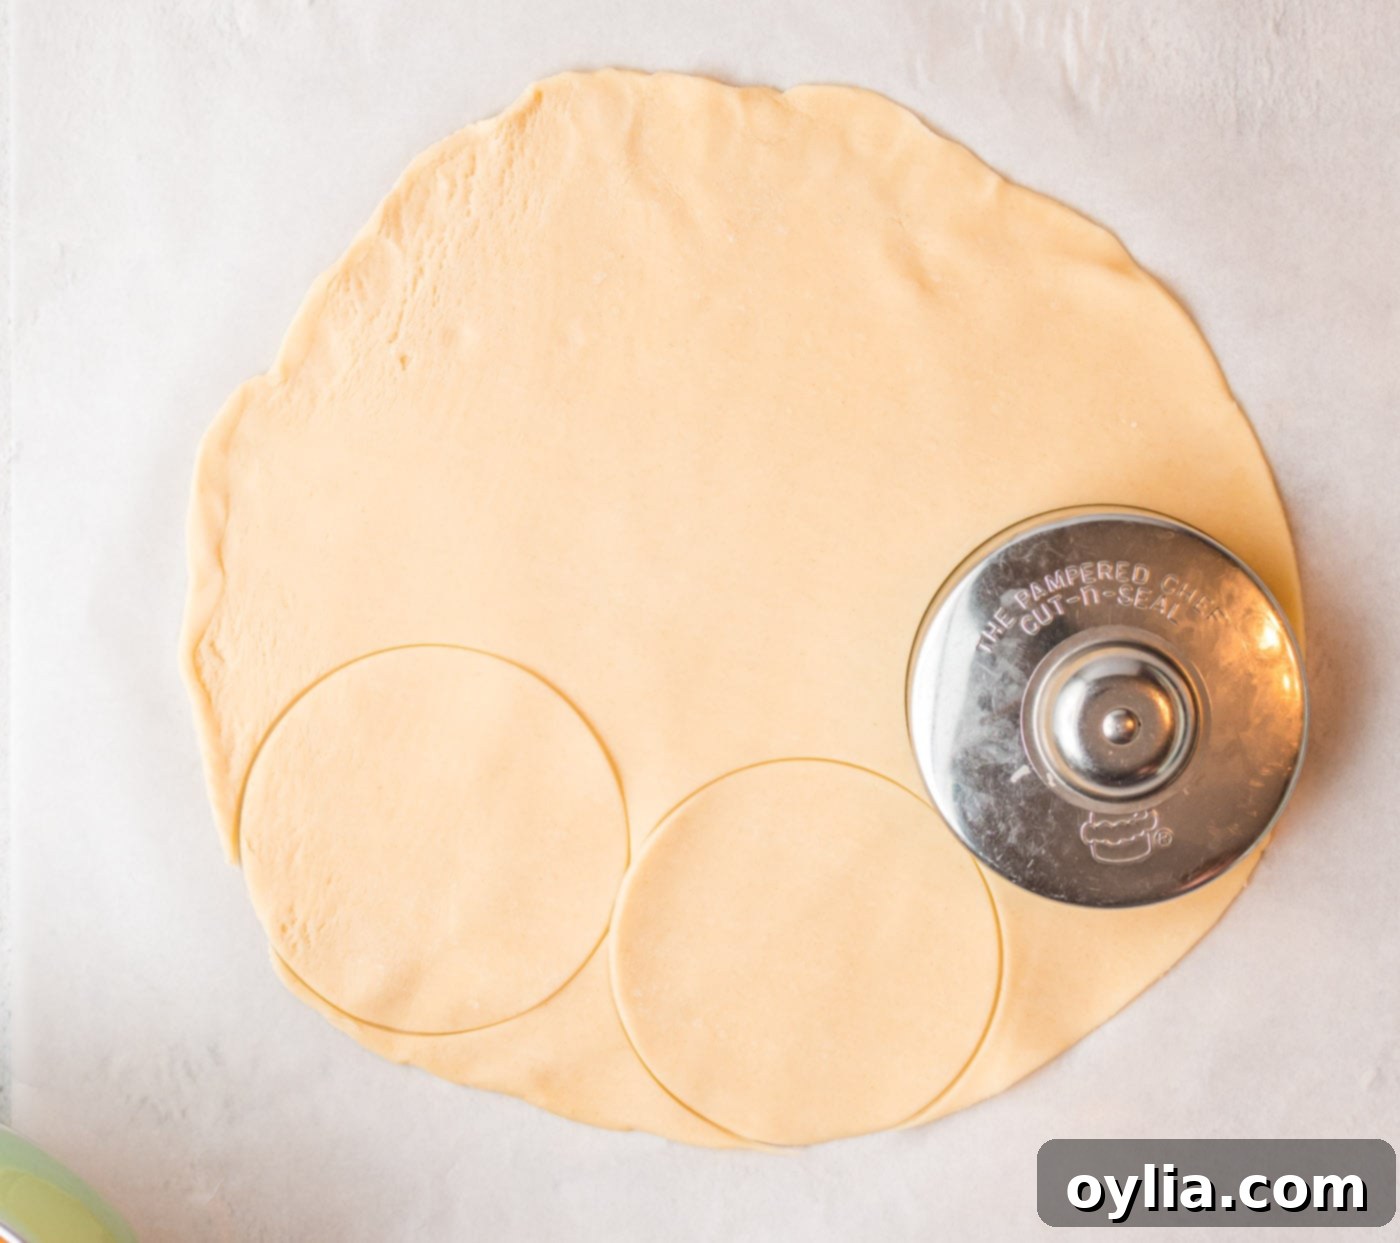
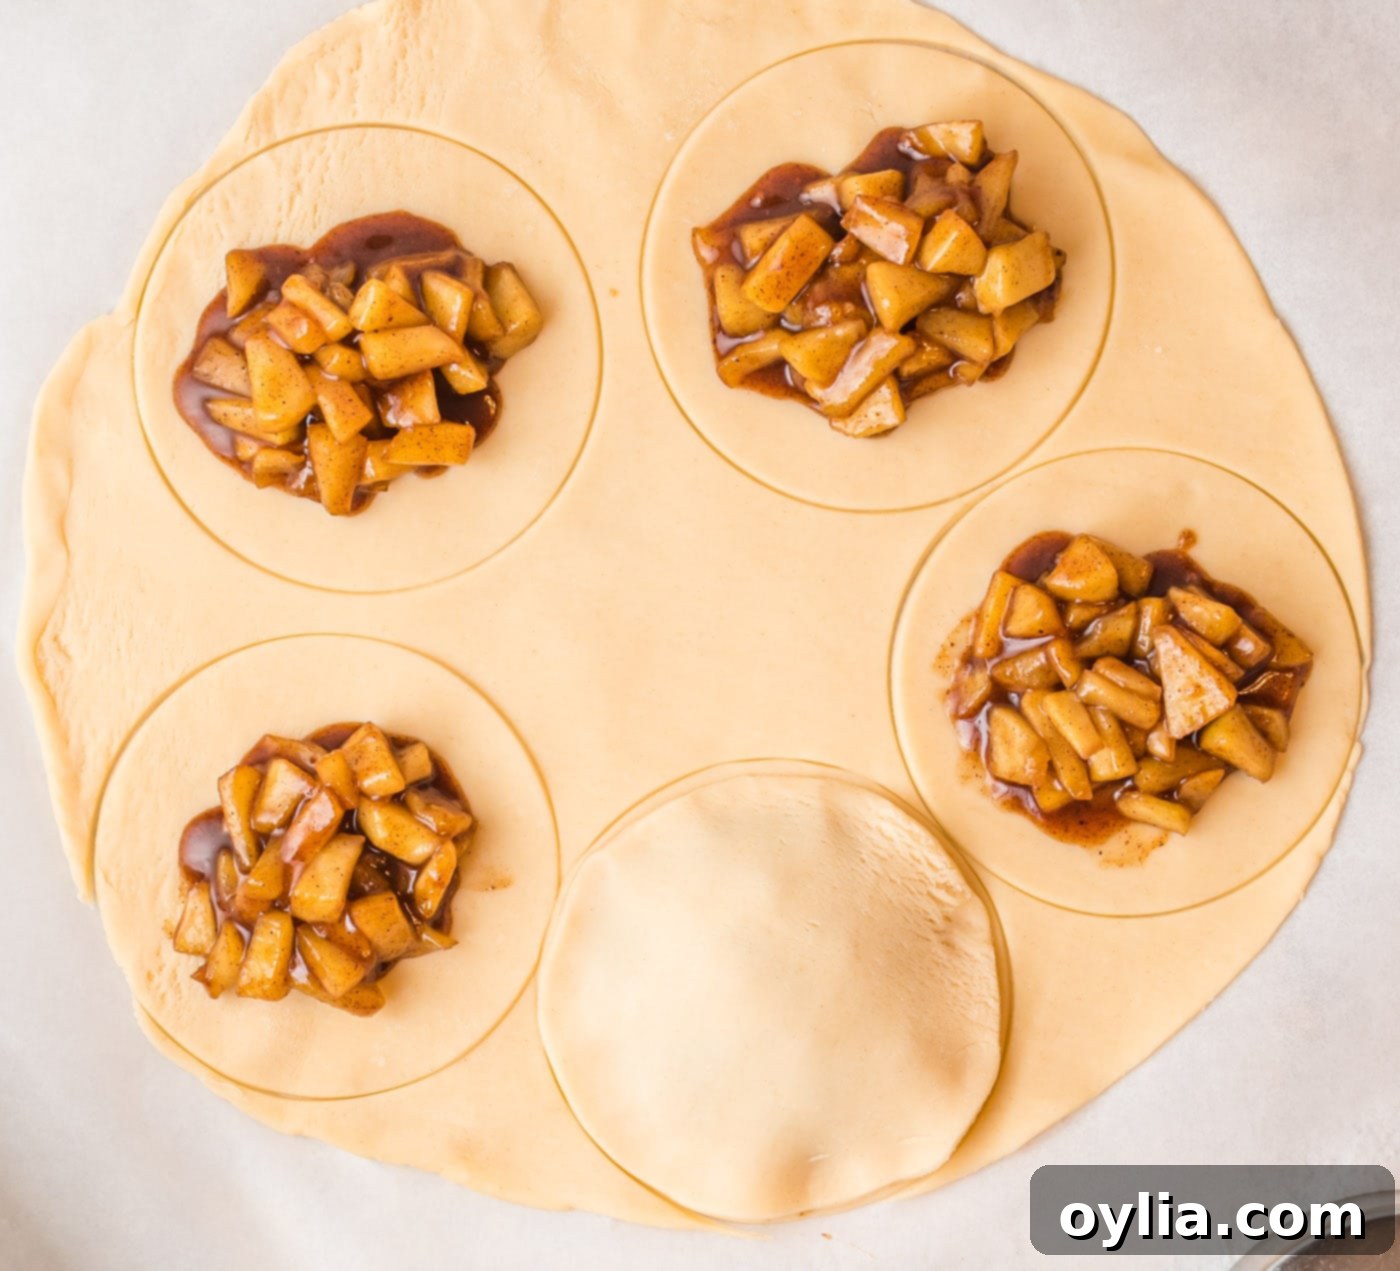
- Cut the Pie Crust: Unroll the refrigerated pie crusts. Using a large round cookie cutter (about 4-5 inches in diameter), cut out circles from the dough. If you don’t have a cookie cutter, you can invert a small bowl or cup and trace around it with a knife. You should get about 5-6 circles from each sheet of dough. You may need to gently re-roll the scraps to cut out additional circles.

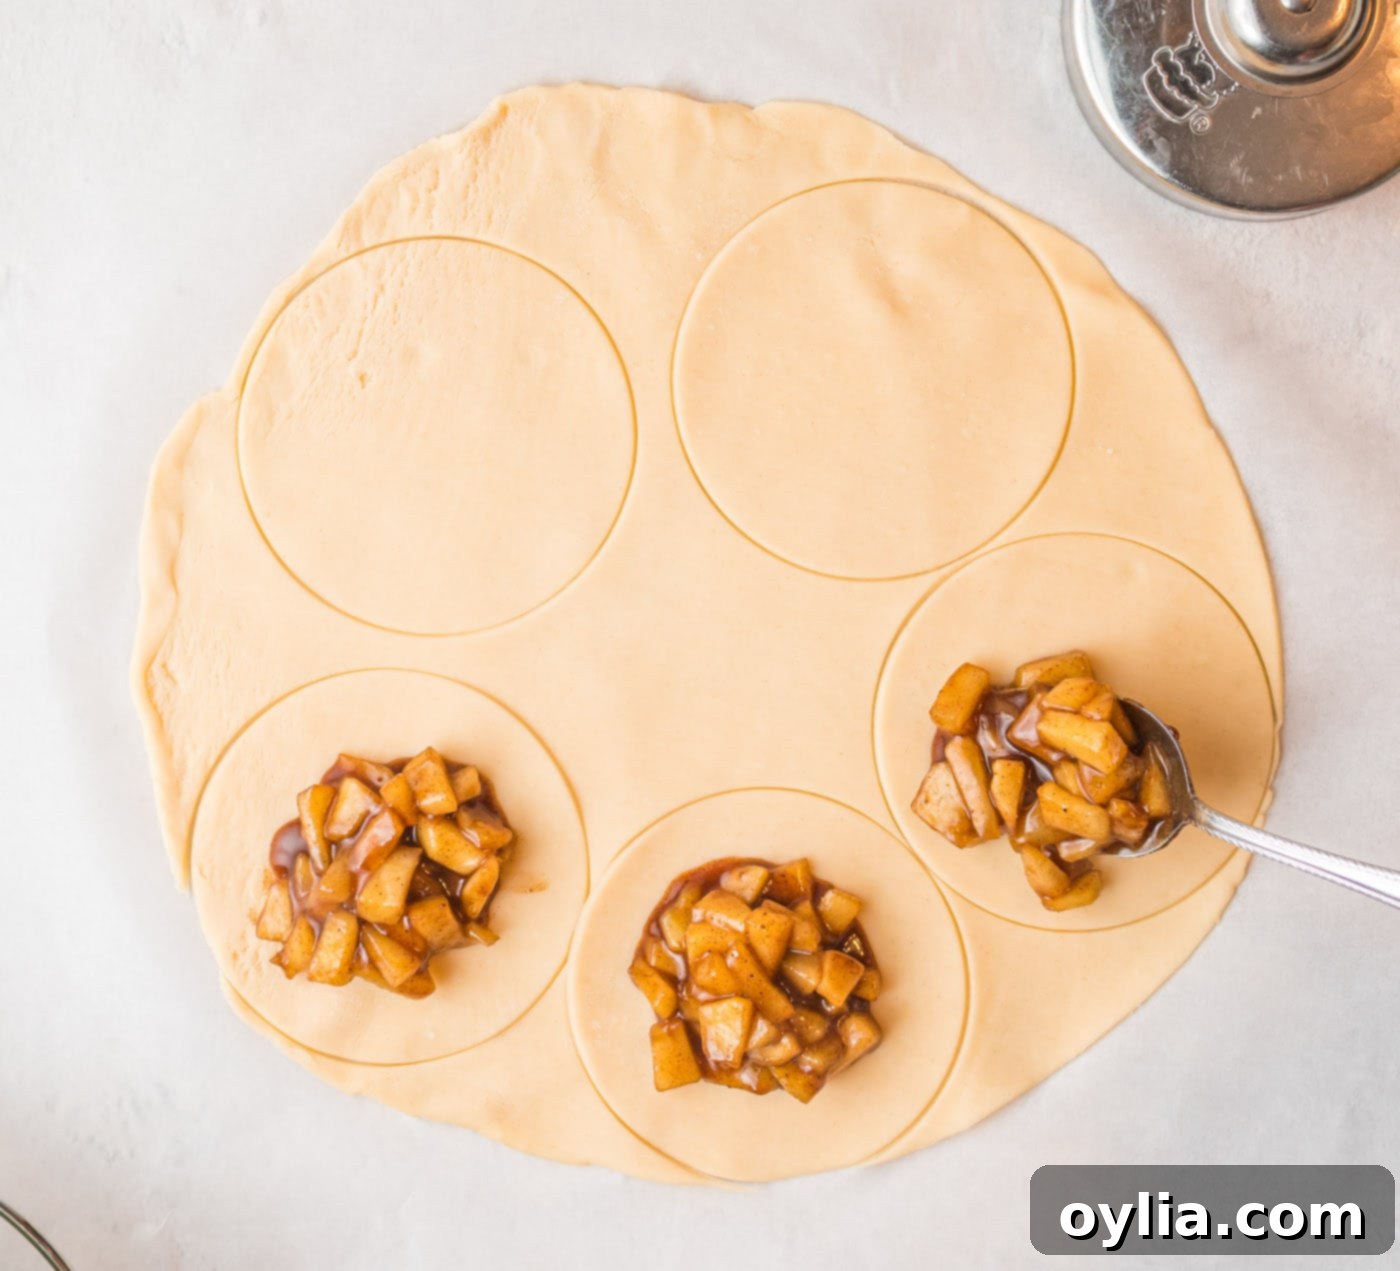
- Fill and Seal the Pies: Place one pie crust circle on your prepared baking sheet. Spoon a heaping tablespoon of the cooled apple filling into the center of the circle. Be careful not to overfill. Dip your finger in water and run it around the edge of the circle; this creates a seal. Place another pie crust circle on top, aligning the edges. Gently press the edges together to seal the filling inside.
EXPERT TIP: The amount of apple pie mixture is crucial. A heaping tablespoon is usually sufficient, depending on the size of your pie crust circles. It’s important to leave enough space around the edges (at least 1/2 inch) to properly seal the dough. Overfilling or insufficient sealing can lead to the delicious filling leaking out during baking, which nobody wants!


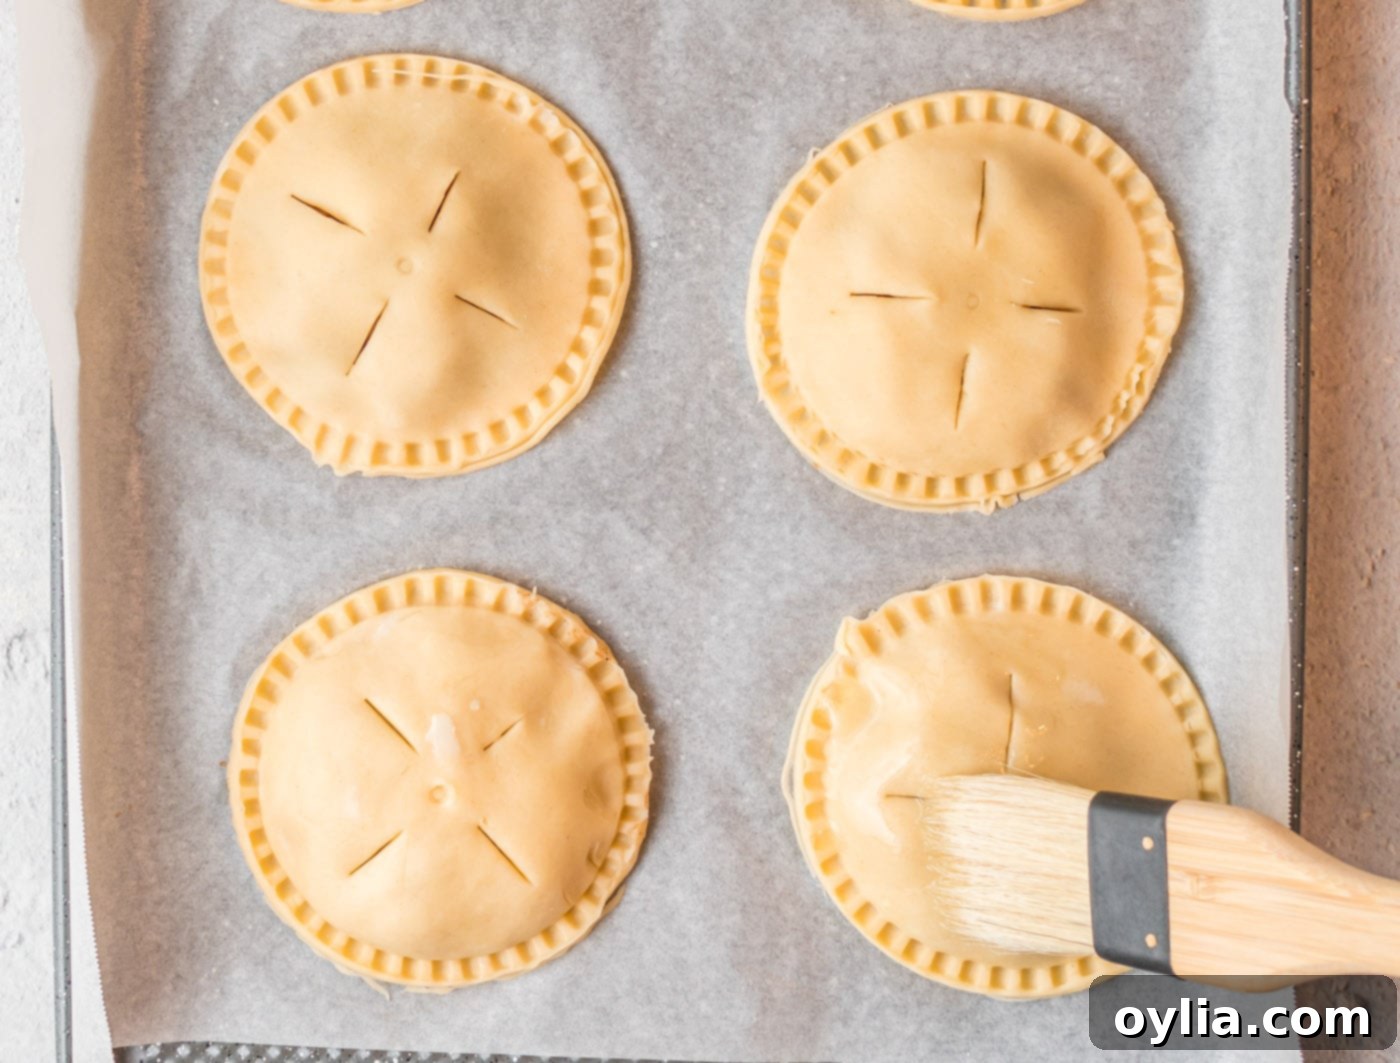
- Crimp and Vent: Use the tines of a fork to firmly crimp the edges of each hand pie together. This not only creates a beautiful decorative finish but also ensures a secure seal. Before baking, use a sharp knife to cut a few small slits onto the tops of the pies. These vents allow steam to escape, preventing the pies from bursting and ensuring a perfectly crisp crust.

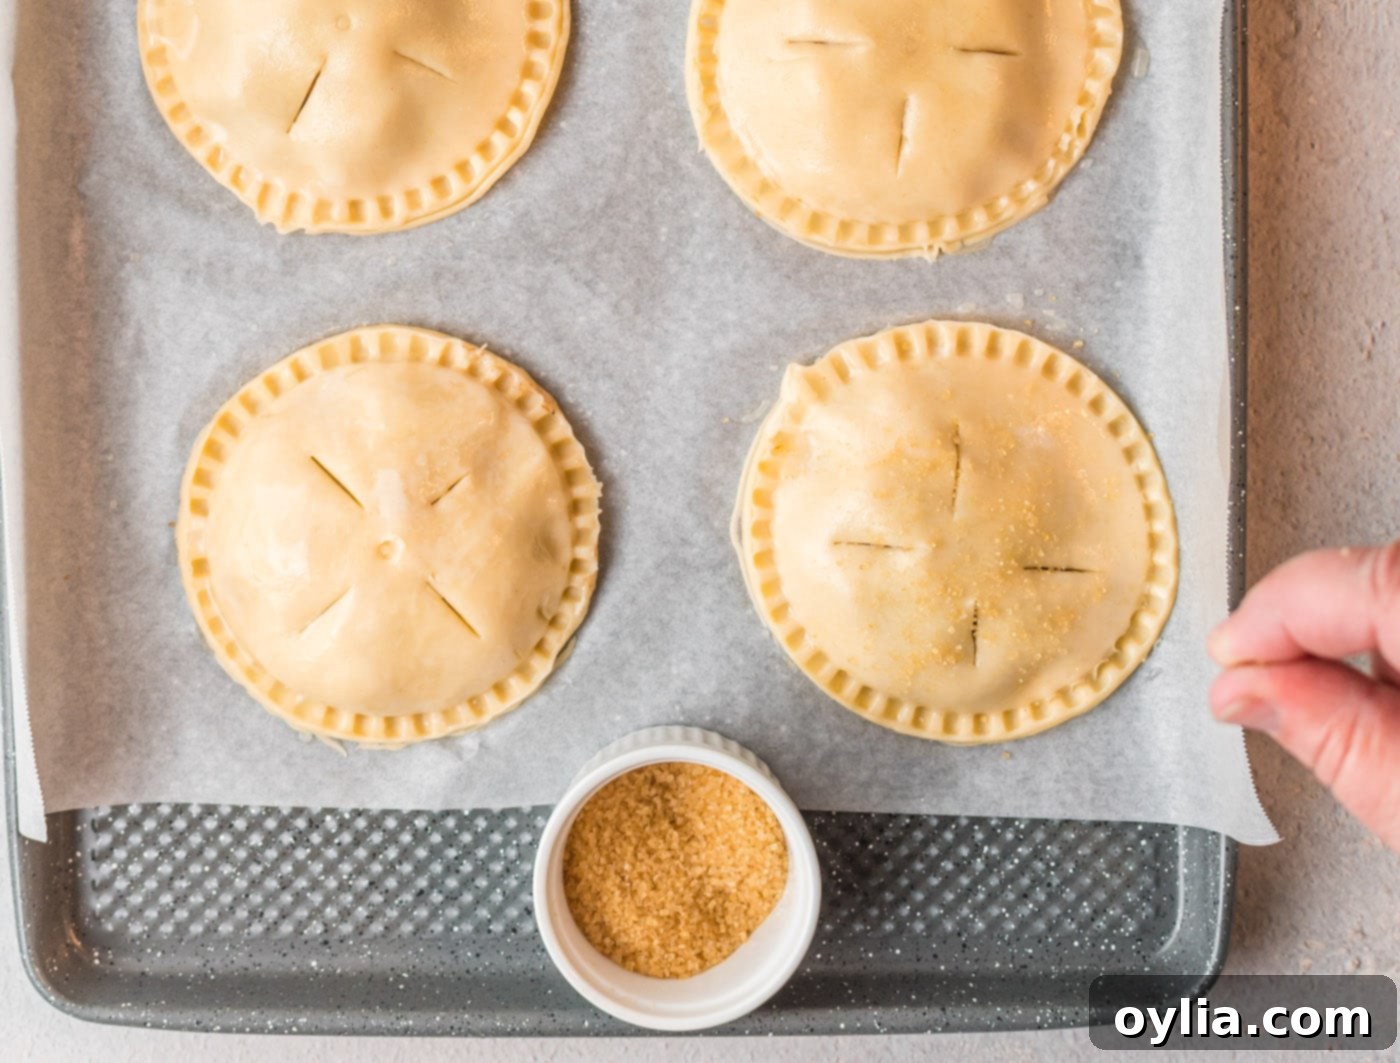
- Egg Wash & Sugar: In a small bowl, whisk the egg yolk with a teaspoon of water to create an egg wash. Lightly brush the tops of the hand pies with this mixture, then generously sprinkle them with granulated sugar. This will give them a beautiful golden-brown color and a delightful sugary crust.

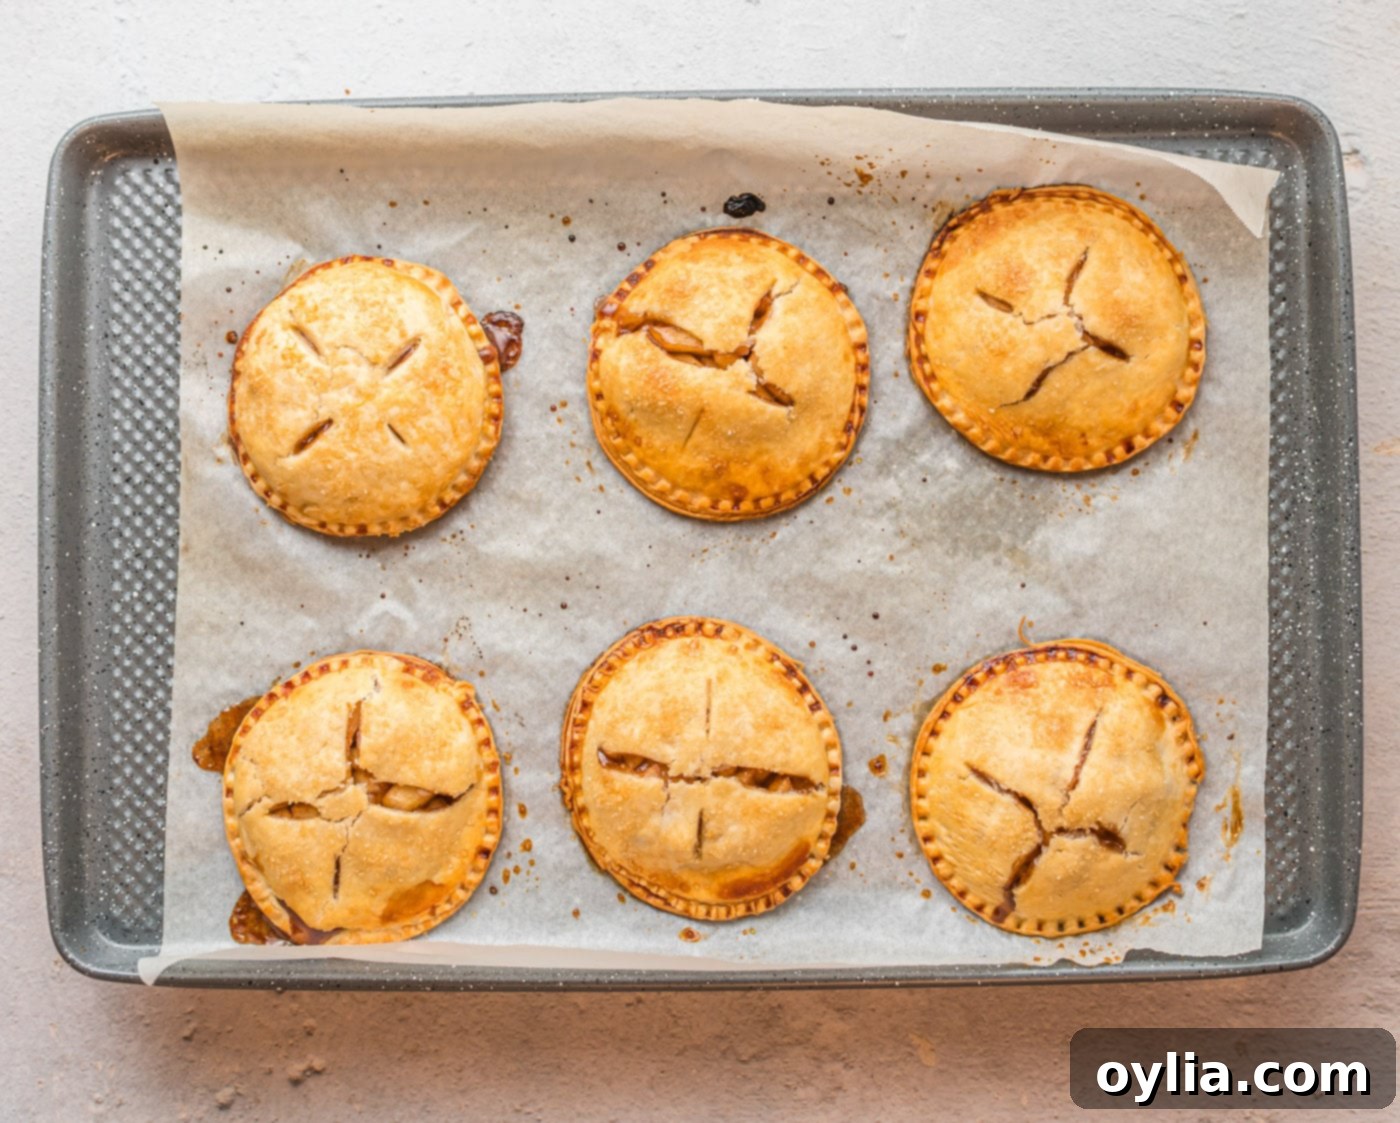
- Bake to Golden Perfection: Place the baking sheet with the hand pies into the preheated oven. Bake for approximately 18 minutes, or until the crust is beautifully golden brown and the filling is bubbly. Keep an eye on them towards the end of the baking time as ovens can vary.

- Serve Warm: Carefully remove the baked **apple hand pies** from the oven. Let them cool slightly on the baking sheet before transferring them to a wire rack. Serve them warm, ideally with a generous drizzle of caramel sauce for an extra touch of sweetness. Enjoy!
Frequently Asked Questions & Expert Tips for Perfect Apple Hand Pies
For the best **apple hand pies**, you’ll want to choose a firm, crisp baking apple that holds its shape well and offers a good balance of sweet and tart flavors. Our top recommendations include Granny Smith, Honeycrisp, Gala, Pink Lady, or Golden Delicious. Avoid softer apples like Red Delicious, as they can turn mushy during baking. A mix of varieties often creates a more complex and enjoyable flavor.
Absolutely! **Apple hand pies** are excellent for making ahead and freezing. To freeze, ensure the pies are completely cooled after baking. Place them on a baking sheet and pop them in the freezer for about an hour to flash freeze. Once individual pies are firm, transfer them to a large freezer-safe Ziploc bag or an airtight container. They will keep beautifully in the freezer for up to 2 months. To reheat, simply bake them from frozen at 350°F (175°C) for 15-20 minutes, or until warmed through and the crust is crisp again.
Leftover **apple hand pies** can be stored in an airtight container at room temperature for up to 2 days. For a slightly longer shelf life and to maintain freshness, you can store them in the refrigerator for 3-4 days. For best taste and texture, gently reheat them in a toaster oven or microwave before serving.
Refrigerator pie crusts need to be at the right temperature to be pliable. If your crust is cracking, it’s likely too cold. Let it sit on the counter at room temperature for an additional 10-15 minutes to warm up slightly before attempting to unroll it. You can also try gently patching any small cracks with your fingers.
Yes, you can! Many brands now offer excellent gluten-free pie crusts in the refrigerated section of grocery stores. Simply swap out the regular pie crust for a gluten-free alternative, and follow the rest of the recipe as instructed. The apple filling is naturally gluten-free.
No problem! A simple kitchen trick is to use an inverted bowl or a large glass (approximately 4-5 inches in diameter) as a template. Place it on the unrolled pie crust and use a sharp knife to carefully cut around its edge. This works just as effectively to create uniform circles for your **apple hand pies**.
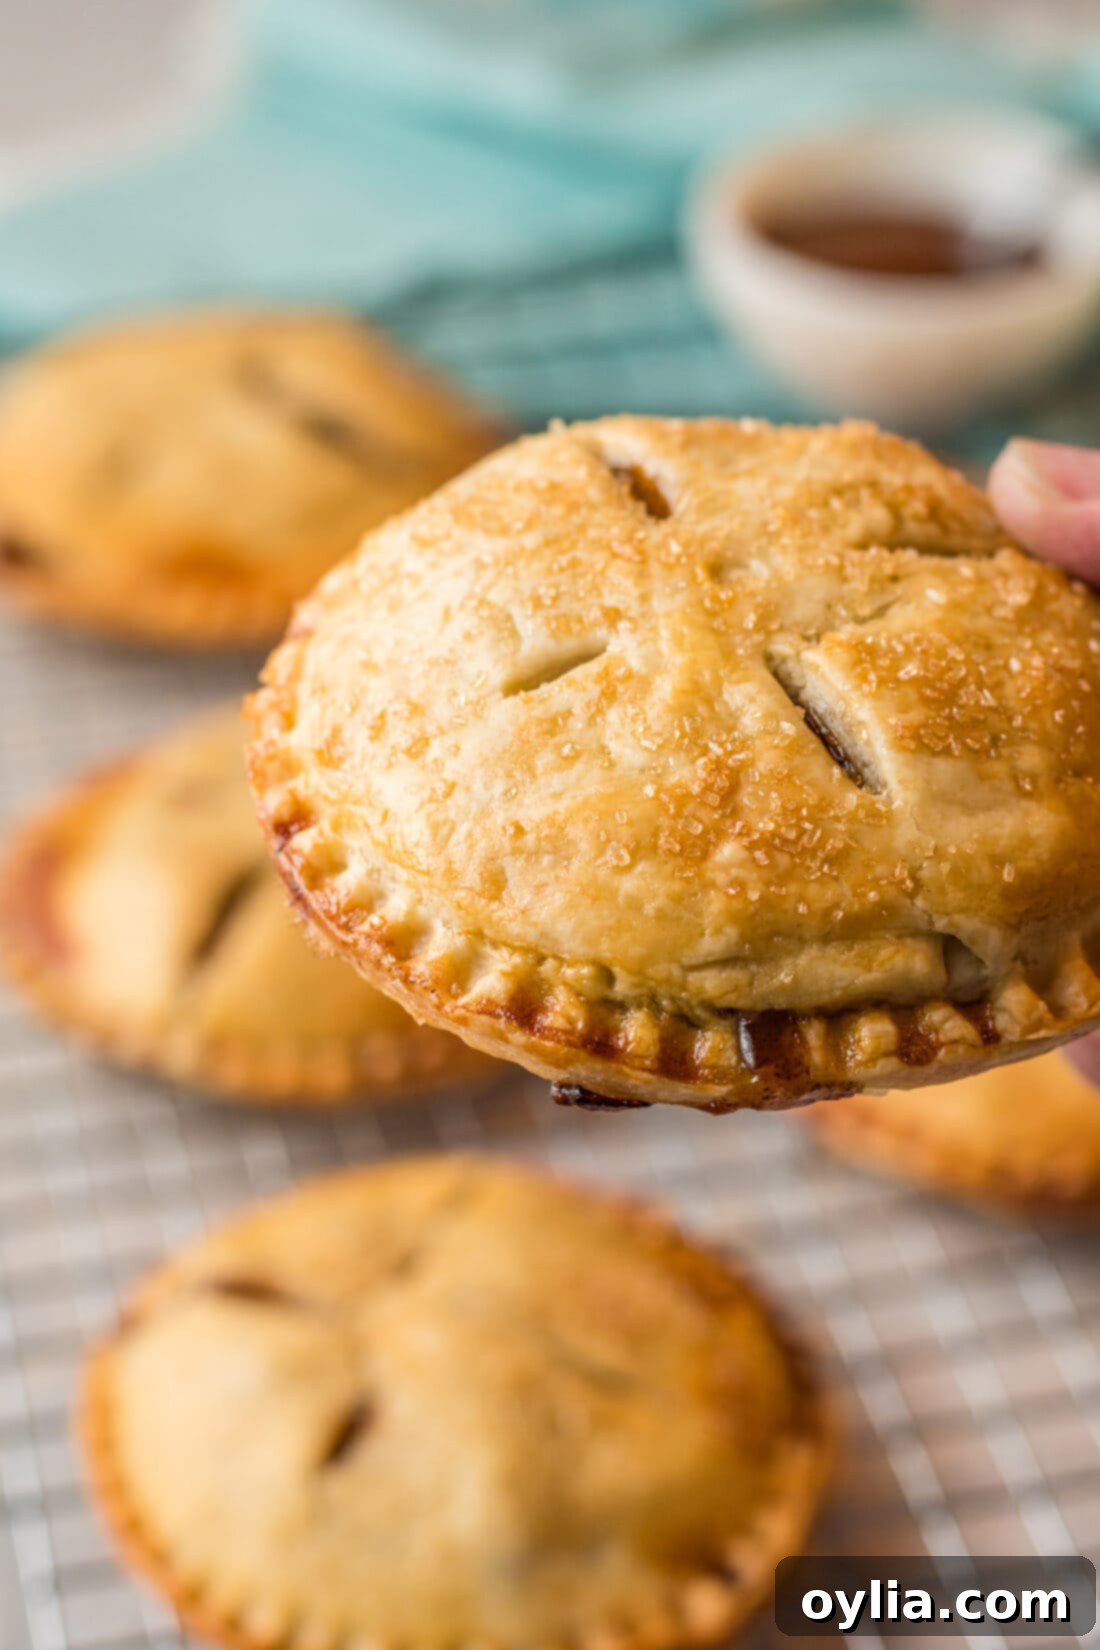
Serving Suggestions for Your Apple Hand Pies
These **apple hand pies** are incredibly versatile and can be enjoyed in so many delightful ways! They make a perfect individual dessert after a hearty fall dinner, offering all the comfort of a traditional pie in a convenient, personal package. Their portability also makes them ideal for:
- Holiday Gatherings: Bring them to Friendsgiving, Thanksgiving feasts, or any fall celebration. They’re a charming alternative to a full-sized pie.
- Casual Snacking: Enjoy them as a mid-day treat with a cup of coffee or tea.
- Breakfast or Brunch: A warm apple hand pie can even be a delightful start to your day, especially if you skip the caramel drizzle for breakfast!
- Dessert Upgrade: For an extra special touch, serve them warm with a small scoop of vanilla bean ice cream. The cold, creamy ice cream melting into the warm, spiced apples is pure heaven, just as you’d enjoy a slice of homemade apple pie.
Creative Ways to Top Your Apple Hand Pies
While a sprinkle of sugar and an egg wash create a beautiful finish, don’t stop there! There are many ways to elevate the presentation and flavor of your **apple hand pies**:
- Classic Caramel Drizzle: The ultimate indulgence! A generous drizzle of warm caramel sauce (store-bought or homemade) adds a rich, buttery sweetness that perfectly complements the apple and spices.
- Simple Glaze: Create a quick and easy powdered sugar glaze. Mix powdered sugar with a little milk or lemon juice until you reach a pourable consistency. This adds a sweet, slightly tangy finish, similar to the one we use on our blueberry hand pies.
- Cinnamon Sugar Dusting: Instead of plain granulated sugar, sprinkle the pies with a mix of cinnamon and sugar before baking for an extra layer of spice.
- Whipped Cream: Serve warm pies with a dollop of freshly whipped cream.
- Nutty Crunch: Before baking, sprinkle a few chopped pecans or walnuts on top of the egg-washed pies along with the sugar for added texture.
- Cream Cheese Frosting: For a decadent treat, top cooled hand pies with a thin layer of cream cheese frosting.
Imagine the aroma of sweet apples, fragrant fall spices, and flaky pie dough wafting through your home – it’s an experience in itself! These **apple hand pies** are truly crave-worthy and an absolutely delightful way to welcome the autumn season.
Discover More Delicious Apple Recipes
If you love apples as much as we do, you’ll want to explore these other fantastic apple-inspired recipes:
- Mini Apple Pies
- Hot Apple Cider
- Apple Pie Cookies
- Crockpot Cinnamon Apples
- 3-Ingredient Apple Pie Cupcakes
- Apple Pie Bites
I love to bake and cook and share my kitchen experience with all of you! Remembering to come back each day can be tough, that’s why I offer a convenient newsletter every time a new recipe posts. Simply subscribe and start receiving your free daily recipes!

Apple Hand Pies
IMPORTANT – There are often Frequently Asked Questions within the blog post that you may find helpful. Simply scroll back up to read them!
Print It
Pin It
Rate It
Save ItSaved!
Ingredients
- 2 large apples Granny Smith, Gala, or Honey Crisp
- 1 Tbsp butter
- 2 Tbsp granulated sugar
- 2 Tbsp light brown sugar
- 1 tsp ground cinnamon
- ¼ tsp ground nutmeg
- ¼ tsp allspice
- ¼ tsp salt
- 2 tsp bourbon
- 2 Tbsp water
- 2 tsp cornstarch
- 1 box refrigerator pie crust 1 box, 2 sheets
- 2 Tbsp egg yolk for egg wash
- caramel sauce for drizzling
Things You’ll Need
-
Baking sheets
-
Saucepan
-
Large round cookie cutter
Before You Begin
- You don’t want to add too much of the apple pie mixture to the circles. A heaping tablespoon should be enough, depending on the size of pie crust circles you make. You’ll want to leave enough space around the edges to properly seal the dough together to avoid the mixture leaking out while baking.
- You should be able to get about 6 or maybe 7 hand pies from 1 box (2 sheets) of store-bought refrigerator pie crust. You may need to roll out the dough after cutting the first 5 circles.
Instructions
-
In a medium sauce pan, combine the apples, butter, granulated sugar, brown sugar, cinnamon, nutmeg, allspice, salt and bourbon and stir to combine.
-
Combine the water and cornstarch and stir, then pour into the pan with the apples stirring again well.
-
Cook until the apples are soft and the sauce is thickened. Remove from the stove.
-
Preheat the oven to 425F and line a cookie sheet with parchment paper.
-
Unroll the pie crust and cut out large circles with a large cookie cutter or turn a bowl upside down and cut around the bowl with a knife.
-
Place a heaping tablespoon of apple filling in the middle of the circle. Wet your finger with water and run it around the edge of the circle. Place a top circle on top and press the edges together to seal.
-
Use a fork to crimp the edges together. Place the pies on the pan. Brush the pies with egg yolk and sprinkle with sugar.
-
Use a knife to cut a few slits onto the tops of the pies.
-
Place in the oven and bake for 18 minutes or until golden brown on top.
-
Remove and serve with a drizzle of caramel sauce.
Nutrition
The recipes on this blog are tested with a conventional gas oven and gas stovetop. It’s important to note that some ovens, especially as they age, can cook and bake inconsistently. Using an inexpensive oven thermometer can assure you that your oven is truly heating to the proper temperature. If you use a toaster oven or countertop oven, please keep in mind that they may not distribute heat the same as a conventional full sized oven and you may need to adjust your cooking/baking times. In the case of recipes made with a pressure cooker, air fryer, slow cooker, or other appliance, a link to the appliances we use is listed within each respective recipe. For baking recipes where measurements are given by weight, please note that results may not be the same if cups are used instead, and we can’t guarantee success with that method.
This post originally appeared on this blog on Aug 19, 2021, and has been updated with enhanced content and more detailed instructions for a better user experience.
