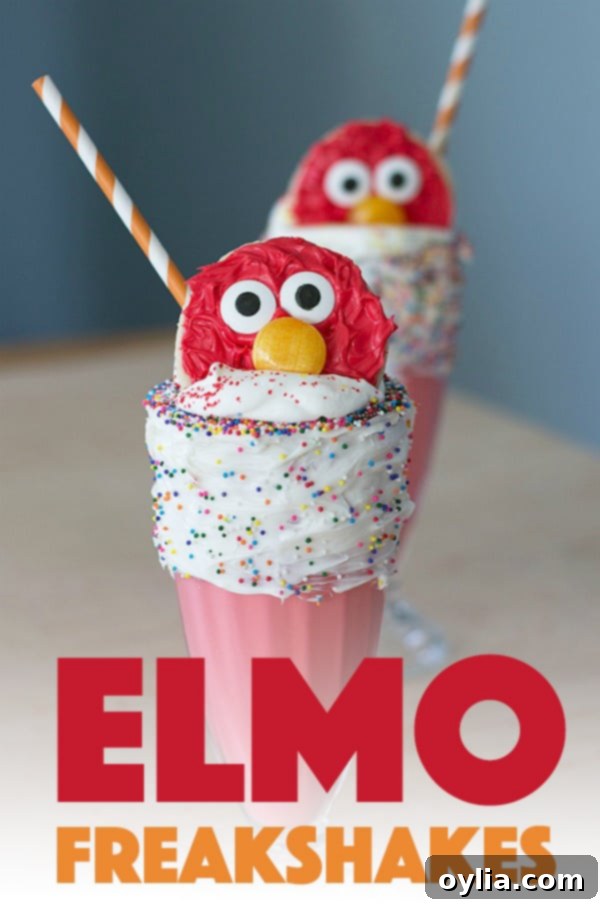
Make Super Easy & Adorable Elmo Freakshakes for Your Next Kids’ Party!
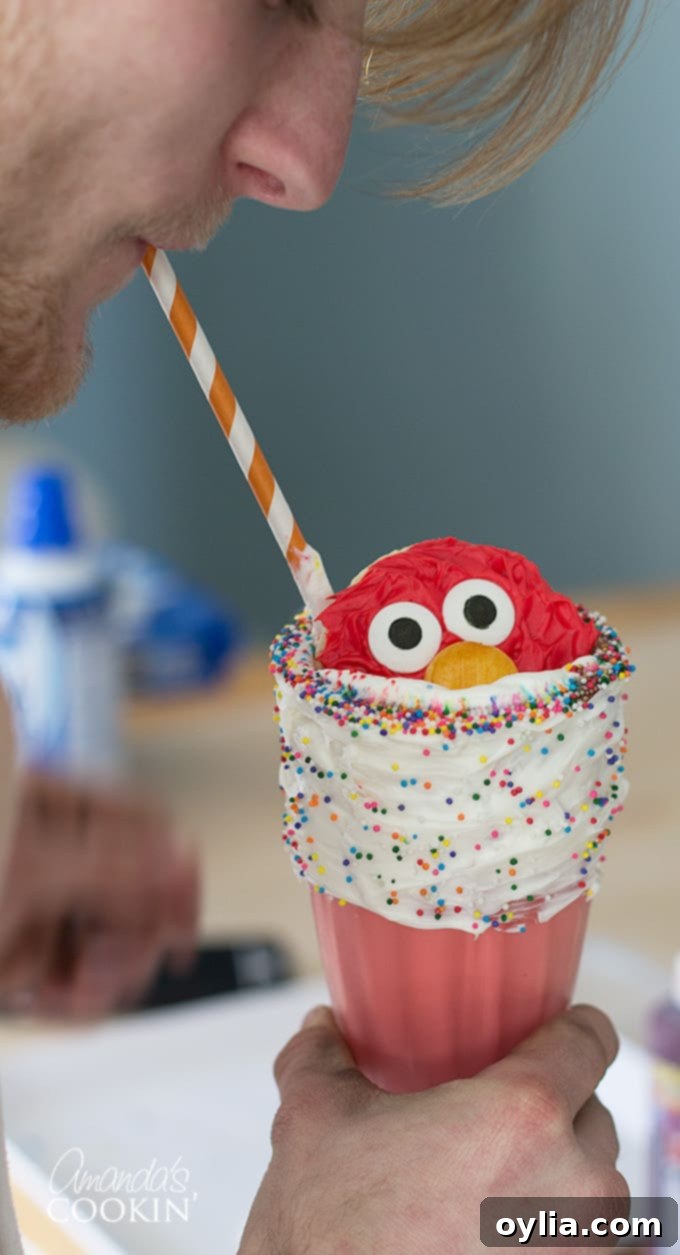
Get ready to bring a burst of joy and vibrant color to your next celebration with these incredibly fun and surprisingly simple Elmo Freakshakes! Last year, we had a blast creating our famous Cookie Monster Freakshakes, and to complement them, we also whipped up these utterly adorable Cookie Monster and Elmo cookies. It only made sense to complete the Sesame Street-inspired set with a treat dedicated to everyone’s favorite furry red monster. These Elmo Freakshakes are not just a beverage; they’re a full-blown dessert experience that will delight children and adults alike, making them an ideal choice for a birthday party, a special sleepover, or just a delightful “just because” treat that kids will absolutely adore.
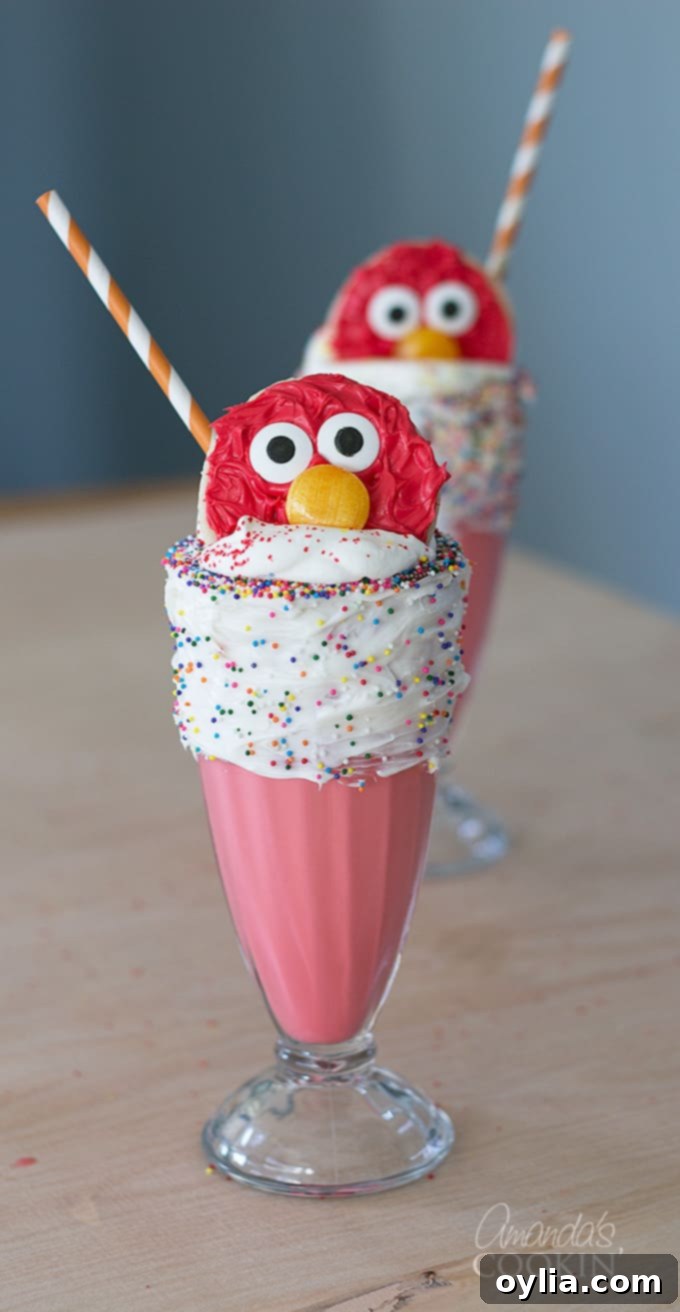
Crafting Your Own Elmo Freakshakes: An Easy & Fun Guide
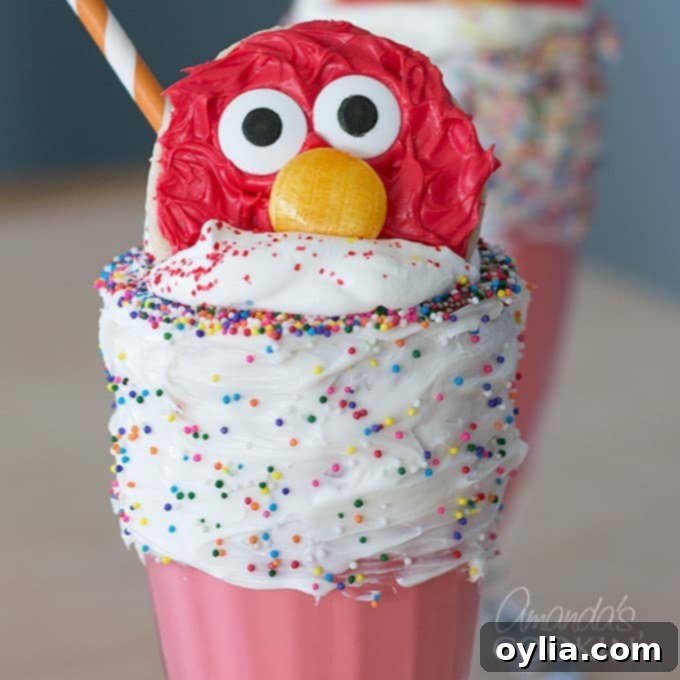
The term “freakshake” might sound intimidating, conjuring images of elaborate, impossible-to-replicate desserts. However, these Elmo-themed versions are much easier to assemble than you’d imagine! The magic lies in simple components brought together for a spectacular effect. At its core, we blend creamy vanilla ice cream with a touch of red gel food coloring – or for a naturally red alternative, you can opt for strawberry ice cream. This vibrant base is then crowned with our adorable (and equally easy-to-make) Elmo cookies. The final touch involves frosting the rim of your serving glass, adding a generous cascade of colorful sprinkles, and voilà – you have a super cute Elmo freakshake that’s ready for its close-up!
What makes these freakshakes truly special is their accessibility. You don’t need gourmet ingredients or professional baking skills. We lean on the convenience of simple store-bought sugar cookies and pre-made frosting. This means less time fussing in the kitchen and more time enjoying the creative process and the delicious outcome. Believe it or not, something this cute and impressive can be created with minimal effort, making it a perfect project for a busy day or a fun activity with the kids.
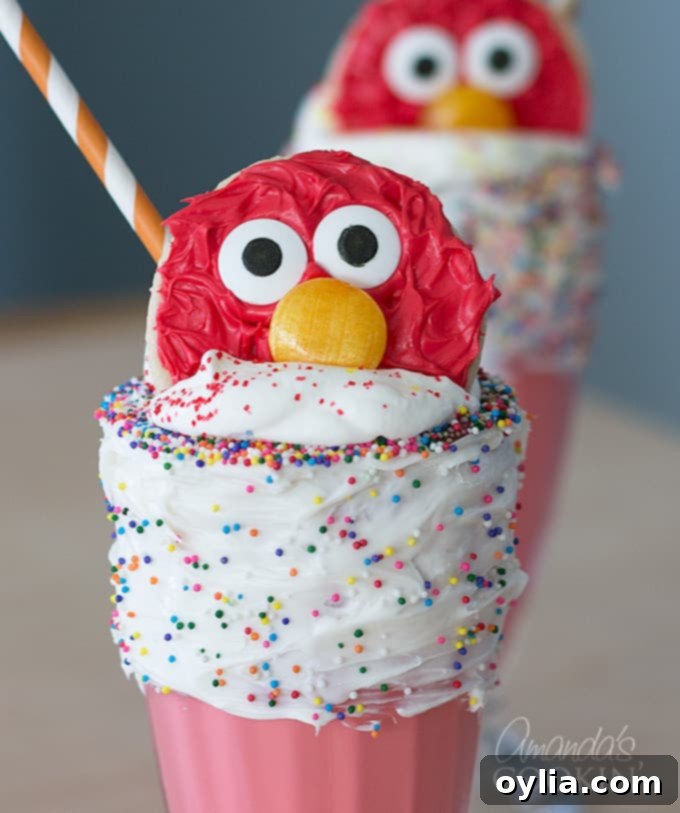
Children will absolutely adore these for a variety of occasions. Imagine the delight at a Sesame Street-themed birthday party, a fun sleepover with friends, or simply as a surprise treat on a regular afternoon. These Elmo Freakshakes are guaranteed to bring smiles! Even better, they offer a fantastic opportunity for kids to get involved in the kitchen. You can have them take charge of decorating the glasses and the Elmo cookies while you handle the blending of the milkshakes. This hands-on experience not only creates lasting memories but also makes the final treat even more special. And let’s be honest, even the “big kids” (us adults!) will find these irresistible. 😉
FIND THE FULL PRINTABLE VERSION AT THE END OF THIS POST
Essential Ingredients for Your Elmo Milkshake Base
This recipe is designed to make two delightful milkshakes. If you’re hosting a larger gathering or simply want more of this fantastic treat, feel free to double or triple the quantities accordingly!
- Vanilla Ice Cream: Approximately 5 generous scoops of your preferred vanilla ice cream. For a slight variation or a naturally rosy hue, strawberry ice cream works wonderfully too! Choose a good quality ice cream for the creamiest base.
- Reddi-Wip Whipped Topping: For that iconic cloud of whipped cream on top. You can also make fresh homemade whipped cream for an extra touch of decadence.
- Multicolored Sprinkles: A vibrant mix of sprinkles to adorn the glass rim and the whipped topping. Red and orange sprinkles would specifically enhance the Elmo theme!
- Red Gel Food Coloring: This is key for achieving Elmo’s signature bright red color. We strongly recommend using gel food coloring over liquid, as it provides a much more vibrant and intense color without diluting your milkshake. A little goes a long way!
- Vanilla Frosting: One tub of store-bought vanilla frosting works perfectly for coating the rim of the glasses and for decorating the Elmo cookies. It saves time and effort while providing a smooth, adhesive base for your sprinkles.
- Milk: About 1/2 cup of milk helps achieve the ideal milkshake consistency. You can use whole milk for a richer shake or a dairy-free alternative like almond or oat milk.
- Parchment Paper: Useful for neatly holding your sprinkles when decorating the glasses.
Gathering Supplies for the Adorable Elmo Cookies:
You can find the full, step-by-step printable recipe for creating both the Cookie Monster and Elmo Cookies here. These are an integral part of the freakshake’s charm!
- Refrigerated Sugar Cookie Dough: One package of pre-made, refrigerated sugar cookie dough (like Pillsbury) is a fantastic shortcut. Of course, if you have more time and enjoy baking from scratch, you can absolutely make your own sugar cookies.
- Red Gel Food Coloring: As mentioned for the milkshake, this ensures a bold, Elmo-red hue for your cookie frosting.
- Butterscotch Hard Candies: These make the perfect little orange nose for Elmo. If you can’t find butterscotch candies, a small piece of orange-colored candy or even an orange M&M could work.
- Tub of White/Vanilla Frosting: The same tub you use for the milkshake glasses can be utilized here. This will be tinted red for Elmo’s fur.
- Edible Jumbo Candy Eyeballs: These are crucial for bringing Elmo’s adorable face to life! You can often find them in the baking aisle of most grocery stores or craft stores.
Step-by-Step: Creating Your Elmo Cookies
Before diving into the milkshakes, your very first step should be to prepare the Elmo cookies. These will need some time to bake in the oven and then cool completely before you can apply the frosting and add them as the crowning glory to your milkshake. Rushing this step could lead to melty, messy cookies!
For convenience and speed, we highly recommend using refrigerated Pillsbury sugar cookies. They are incredibly quick to prepare and bake, making this project even more accessible for busy parents or enthusiastic young bakers. Alternatively, you can use pre-baked store-bought sugar cookies or, if you enjoy the process, make your own from scratch using your favorite recipe.
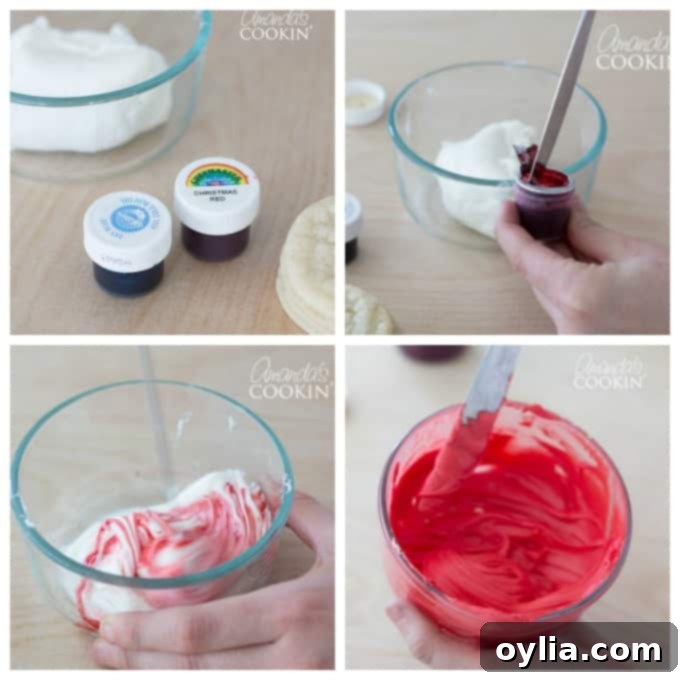
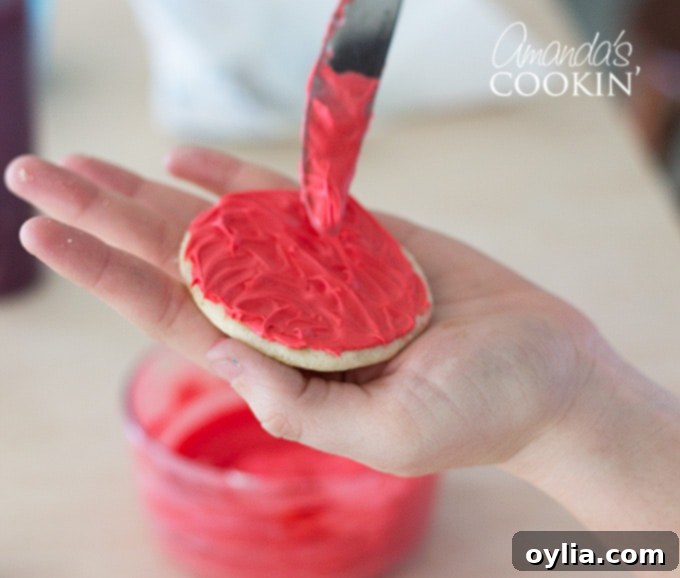
The decoration process for the Elmo cookies is wonderfully simple and artistic. Begin by taking a portion of your white or vanilla frosting and mixing it with a few drops of red gel food coloring until you achieve Elmo’s characteristic bright red hue. Once your cookies are thoroughly cooled, generously apply this red frosting to the surface of each sugar cookie. To create Elmo’s iconic fluffy, furry texture, use a butter knife or a small offset spatula to gently whisp the frosting upwards, creating soft peaks and a textured look. This small detail really brings the character to life!
Next, carefully place two edible candy eyeballs onto the frosted cookie. Finally, press a butterscotch hard candy onto the cookie for Elmo’s orange nose, positioned just below the eyes. And that’s it! You’ve got super easy, super cute Elmo cookies ready for action. This step is not just easy; it’s a fantastic way to involve younger children, letting their creativity shine.
Elevate Your Drinkware: Decorating the Milkshake Glass
A true freakshake is all about the presentation, and decorating your glasses is where the fun really begins! This step is simple but incredibly effective in transforming a regular milkshake into a show-stopping Elmo Freakshake. First, take your chosen milkshake glasses – tall, sturdy glasses work best to hold all the delicious toppings. Using a butter knife or an offset spatula, spread a generous layer of vanilla frosting around the top portion of the glass rim. Don’t be shy; a good amount of frosting ensures your sprinkles will stick well and create a visually appealing band of color.

Now for the sprinkles! Pour a handful of your multicolored sprinkles onto a flat surface or a shallow plate – parchment paper works great for easy cleanup. Carefully take the frosted rim of your milkshake glass and gently dip it into the sprinkles, rotating the glass to ensure the entire frosted area is covered in a festive, colorful array. You can gently press the glass into the sprinkles for better adherence. Feel free to use a mix of different sprinkles, like nonpareils, jimmies, or sanding sugar, to add texture and sparkle.


Once the rim is beautifully coated, take any remaining sprinkles from your hand and gently sprinkle them over any bare spots on the frosted area of the glass. This ensures a full and festive coating. To make sure your frosting and sprinkles stay perfectly in place and don’t slide off when the milkshake is added, place your decorated glasses into the freezer for a few minutes. This quick chill will help the frosting set, ensuring a clean and impressive presentation for your Elmo Freakshakes.

Whipping Up the Perfect Red Milkshake Base
With your Elmo cookies baked and cooled, and your glasses chilled and dazzling, it’s time to prepare the star of the show: the rich, red milkshake! This step is quick and straightforward, thanks to the magic of your blender. Begin by adding your 5 generous scoops of vanilla ice cream to the blender carafe. For the creamiest result, ensure your ice cream is slightly softened, but not fully melted. Then, pour in 1/2 cup of milk. You can adjust the amount of milk slightly to achieve your desired thickness – less milk for a thicker shake, a little more for a thinner, more sippable consistency.
Now for Elmo’s signature color! Add your red gel food coloring to the blender. It’s always best to start with a small amount, perhaps a pea-sized drop, and blend. Assess the color. If you desire a more intense, vibrant red, add a little more gel coloring and blend again until you reach your perfect Elmo hue. Remember, gel food coloring is highly concentrated, so a small amount can make a big difference. This method allows you to control the shade precisely, preventing an overly dark or pale result. Blend until the mixture is smooth, creamy, and evenly colored, with no streaks of white ice cream remaining.

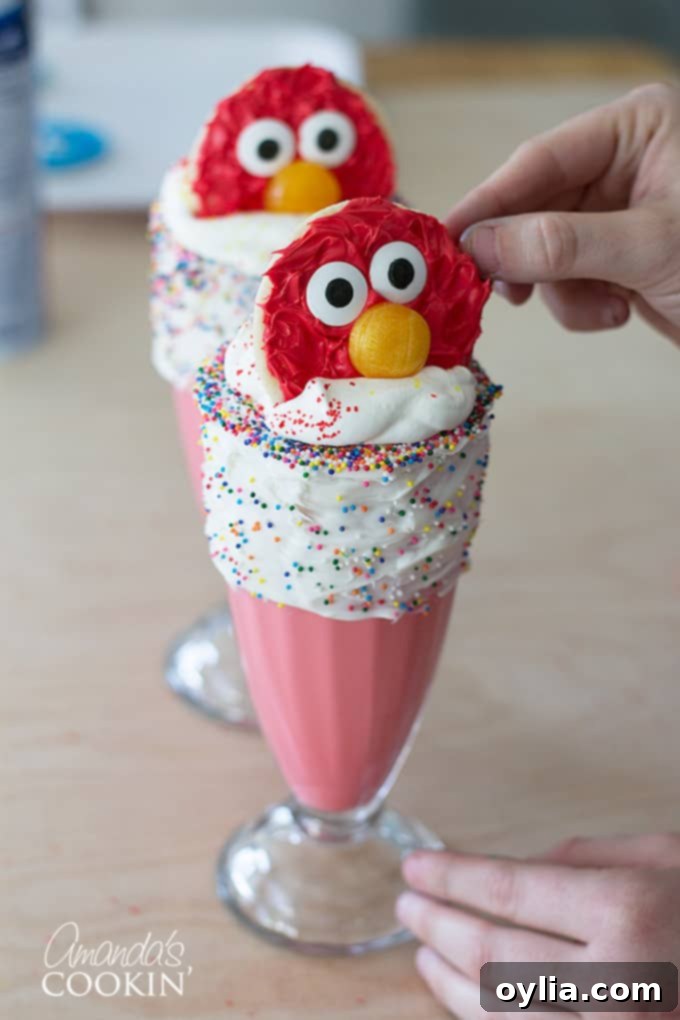
Once your milkshake mixture is perfectly blended and brightly colored, retrieve your chilled, sprinkle-rimmed glasses from the freezer. Carefully pour the creamy Elmo freakshake mixture into each glass, leaving a little room at the top for your generous toppings. Now for the crowning glory: add a swirl of Reddi-Wip whipped topping on top of each milkshake. For an extra festive touch, sprinkle a few more multicolored sprinkles over the whipped cream. This adds an extra layer of visual appeal and a delightful crunch.
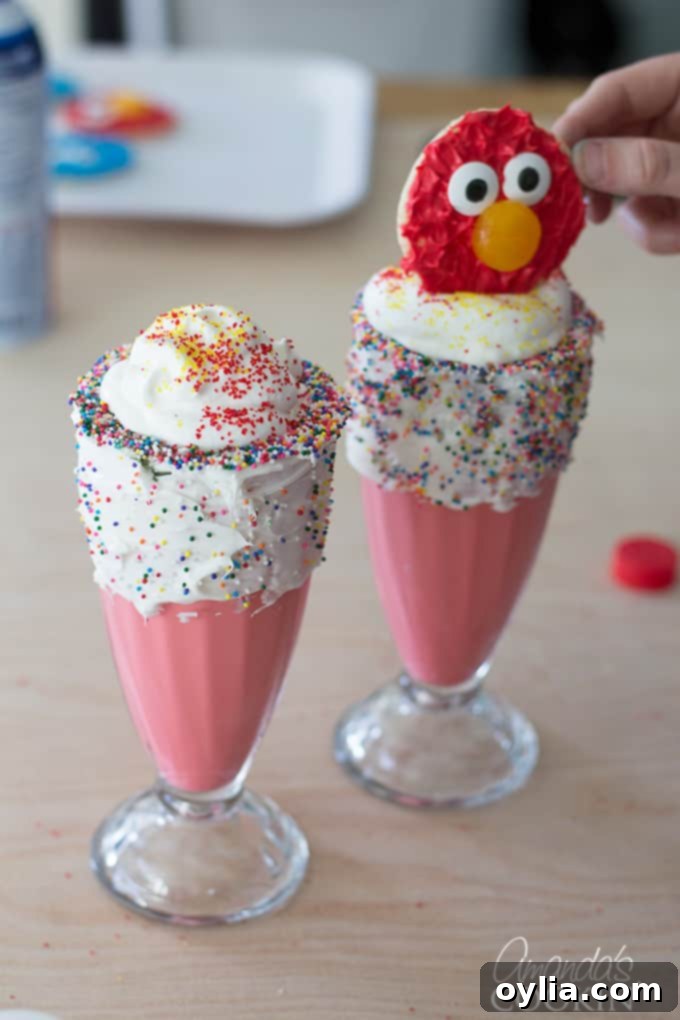
Finally, carefully place one of your finished Elmo cookies neatly on top of the whipped topping. You can gently press it into the whipped cream to secure it. Don’t forget to add a cute striped straw to complete the look and make it easy to sip this delightful concoction. These freakshakes are not only super adorable and incredibly simple to make, but they are also a huge hit at any gathering. We hope you have an absolute blast making (and enjoying!) these Elmo Freakshakes!
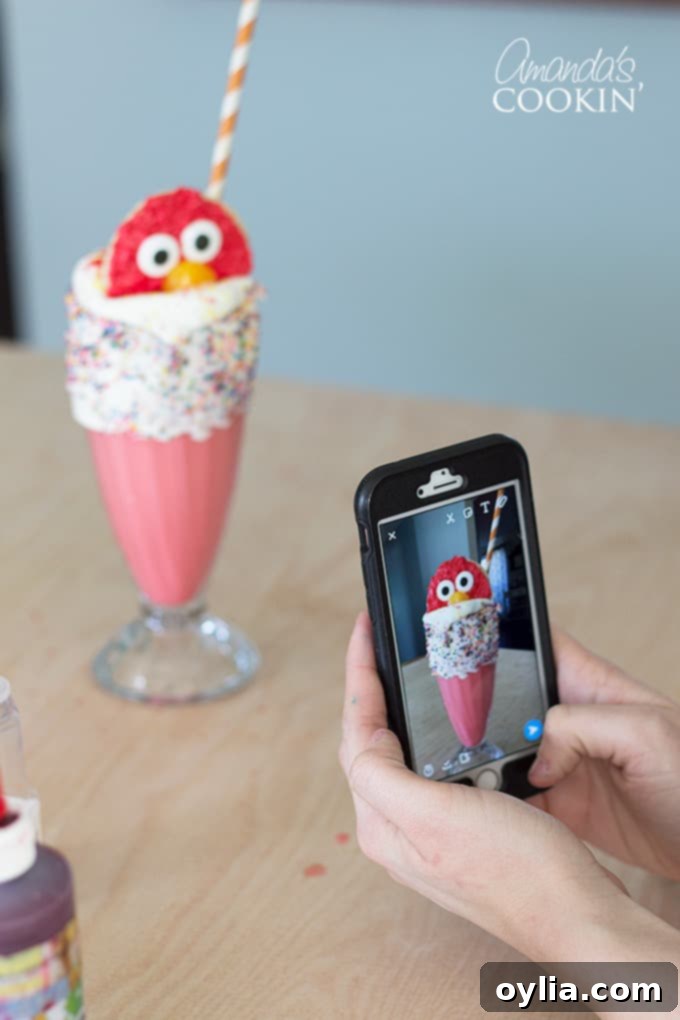
These vibrant, character-filled desserts also make for fantastic Instagrammable material! Share your creations with friends and family, and spread the Elmo joy.
We absolutely love Elmo and all things Sesame Street! If you share our enthusiasm for this lovable character, be sure to also try out these adorable Elmo Pretzels for another fun, Elmo-themed treat that’s perfect for any occasion.
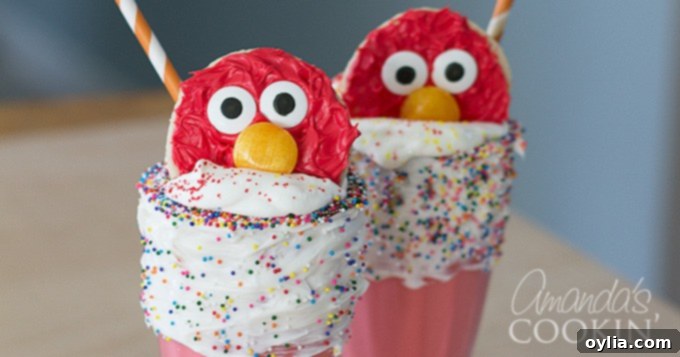
Don’t miss more fantastic milkshake ideas below to inspire your next sweet creation!
- Freakshakes – Extreme Milkshakes
- Nice Cream Milkshakes
- Cookie Monster Freakshakes
- Unicorn Freakshakes
Elmo Freakshakes
IMPORTANT – There are often Frequently Asked Questions within the blog post that you may find helpful. Simply scroll back up to read them!
Print It
Pin It
Rate It
Save ItSaved!
Ingredients
- 5 scoops vanilla ice cream (or strawberry for a natural red hue)
- Reddi Whip whipped topping (or homemade whipped cream)
- Multi colored sprinkles (red and orange optional)
- Red gel food coloring (for vibrant color, not liquid)
- Vanilla frosting (1 store-bought tub, or easily made from scratch)
- ½ cup milk (whole milk for richness, or your preferred dairy/non-dairy alternative)
- Parchment paper (for easy sprinkle management)
For the Elmo Cookies
- 1 package of refrigerated Pillsbury sugar cookies (or homemade sugar cookies, or store-bought pre-baked cookies)
- Vanilla or white frosting (use from the same tub as for the milkshake glasses)
- Red gel food coloring (for Elmo’s red fur)
- Edible jumbo candy eyeballs
- Butterscotch hard candies (for Elmo’s nose, or orange M&Ms)
Instructions
-
Prepare Your Elmo Cookies First: Begin by making your sugar cookies. Bake them according to package instructions (or your recipe’s instructions), and allow them to cool completely. Once cooled, decorate them to resemble Elmo using red frosting, candy eyeballs, and butterscotch candy for the nose. Refer to the link provided in the blog post above for detailed cookie decorating instructions.
-
Frost the Glass Rims: Take your milkshake glasses and spread an even layer of vanilla frosting around the outside rim of each glass. Use a butter knife or small spatula for a smooth application.
-
Add the Sprinkles: Pour your multicolored sprinkles onto parchment paper or a shallow dish. Dip the frosted rim of each glass into the sprinkles, rotating it gently to ensure the entire rim is coated in a vibrant, festive layer.
-
Chill the Glasses: If there are any bare spots, sprinkle remaining sprinkles onto the frosted part of your glass. Immediately place your decorated milkshake glasses in the freezer for a few minutes. This quick chill will help the frosting and sprinkles set firmly in place, preventing them from sliding off the glass when the milkshake is added.
-
Blend the Milkshake Base: In a blender, combine your 5 scoops of vanilla ice cream and 1/2 cup of milk.
-
Achieve Elmo’s Red: Add a small amount of red gel food coloring to the blender. Blend until smooth and check the color. If you desire a more vibrant red, add a little more gel coloring, blend again, and repeat until you reach your perfect Elmo hue.
-
Assemble the Freakshakes: Pour your beautifully blended Elmo freakshake mixture into your chilled, sprinkle-rimmed glasses. Leave a little space at the top for the whipped cream. Add a generous swirl of Reddi-Wip whipped topping to the top of each milkshake. If desired, add another dash of multicolored sprinkles over the whipped cream for extra flair.
-
Final Touch: Carefully place your finished Elmo cookies on top of the whipped topping in the middle of each milkshake. For the ultimate freakshake experience, don’t forget to insert a cute striped straw! Serve immediately and enjoy!
Nutrition
The recipes on this blog are tested with a conventional gas oven and gas stovetop. It’s important to note that some ovens, especially as they age, can cook and bake inconsistently. Using an inexpensive oven thermometer can assure you that your oven is truly heating to the proper temperature. If you use a toaster oven or countertop oven, please keep in mind that they may not distribute heat the same as a conventional full sized oven and you may need to adjust your cooking/baking times. In the case of recipes made with a pressure cooker, air fryer, slow cooker, or other appliance, a link to the appliances we use is listed within each respective recipe. For baking recipes where measurements are given by weight, please note that results may not be the same if cups are used instead, and we can’t guarantee success with that method.
