Craft the Perfect Festive Snowman Cheeseball: Your Ultimate Holiday Appetizer Guide
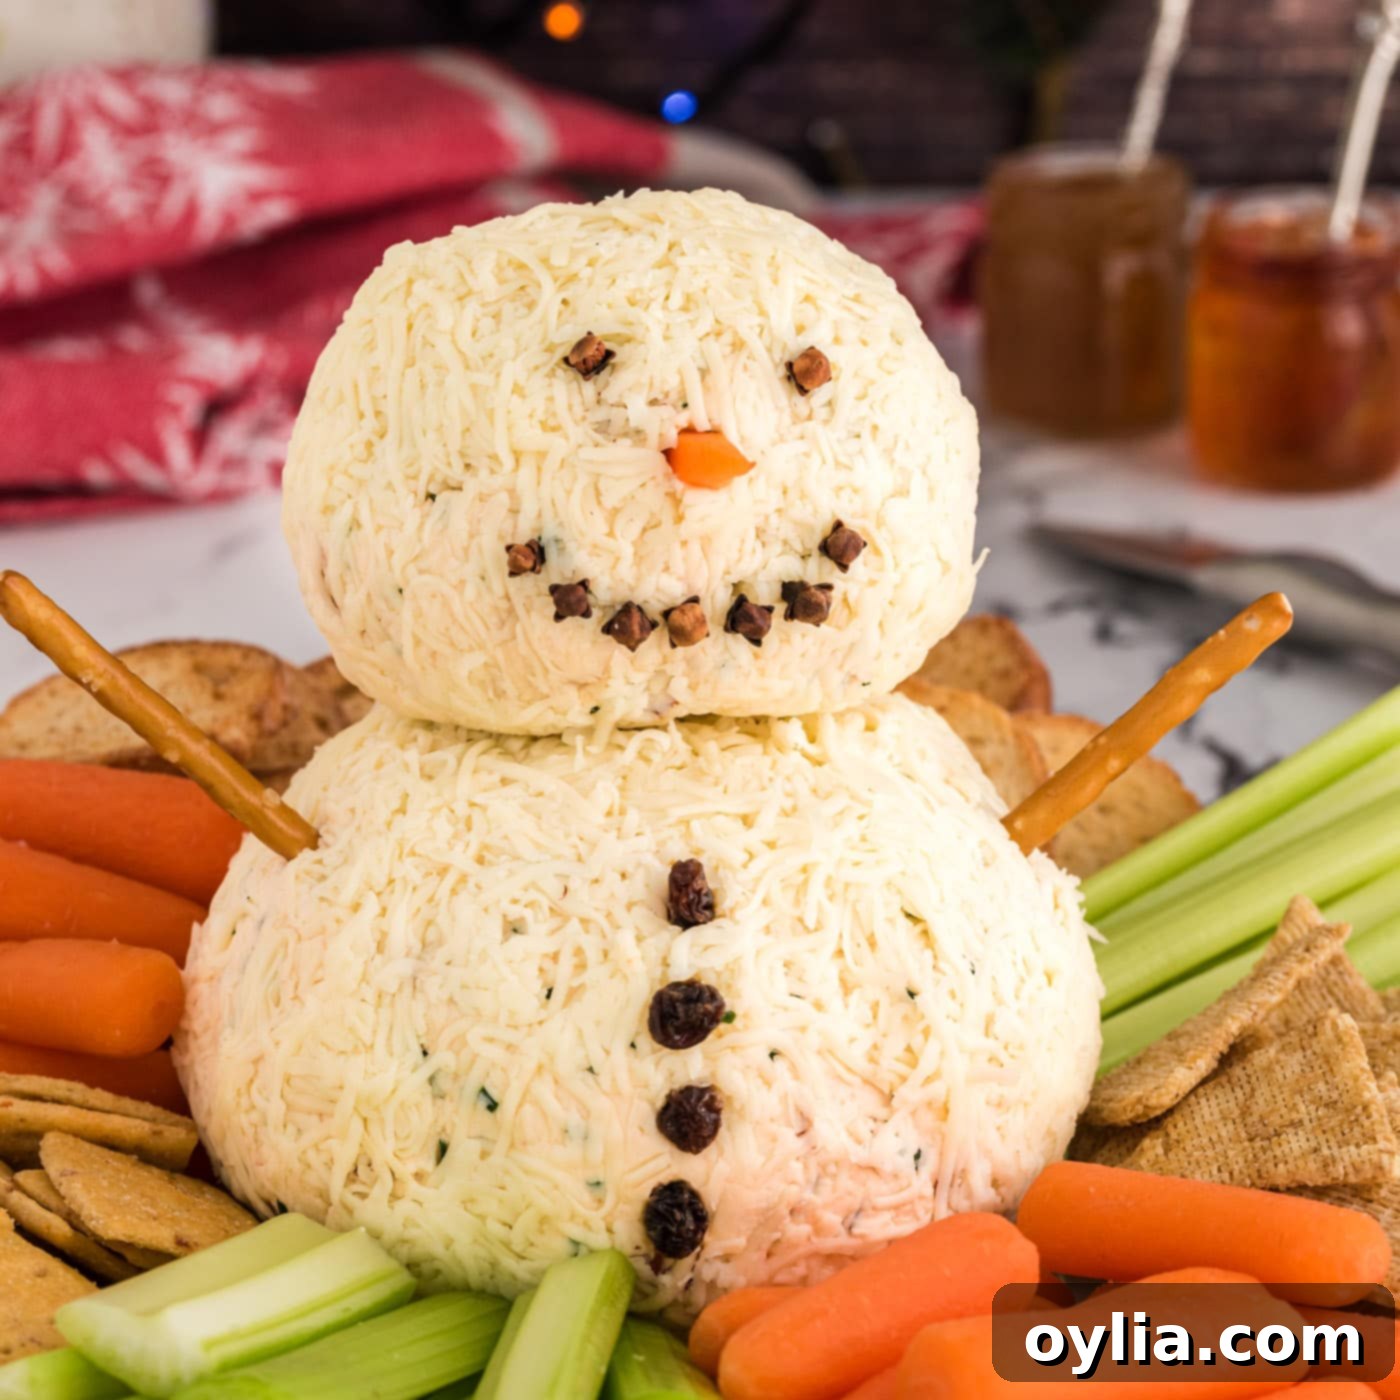
Get ready to elevate your holiday appetizer spread with a show-stopping, absolutely adorable, and incredibly delicious **Snowman Cheeseball**. This festive creation isn’t just a treat for the taste buds; it’s a delightful centerpiece that brings a touch of whimsical holiday cheer to any gathering. Infused with the rich, smoky notes of Gouda cheese and adorned as a charming snowman, this edible masterpiece is guaranteed to be the star of your party! It’s surprisingly simple to put together, making it an ideal choice for busy hosts who want to impress without the stress.
Why This Snowman Cheeseball Recipe is a Holiday Winner
The beauty of this snowman cheeseball lies in its remarkable versatility and undeniable charm. It’s more than just a recipe; it’s a canvas for your holiday creativity! While our version features the delightful combination of smoky Gouda and sun-dried tomatoes, the core concept of a festive cheeseball snowman can be adapted to suit any palate. If you’re not a fan of sun-dried tomatoes, for instance, you can easily switch up the base. Perhaps a sweet and savory cranberry cheeseball might be more to your liking, or a classic sharp cheddar blend. The possibilities are truly endless, allowing you to customize the flavors while maintaining that iconic festive shape.
The holiday season is a magical time that often sparks an incredible wave of culinary inspiration. We were thoroughly charmed by the original cheeseball snowman idea from No. 2 Pencil. Building on that delightful concept, we adapted our popular sun-dried tomato Gouda cheeseball recipe, adding a few thoughtful adjustments to create this spectacular, edible holiday decoration. This recipe works because it combines a universally loved appetizer—the cheeseball—with a universally adored holiday figure, making it an instant conversation starter and a guaranteed crowd-pleaser for Christmas parties, New Year’s Eve gatherings, or any winter celebration.

Gather Your Ingredients for This Delightful Snowman
Crafting this festive snowman cheeseball requires a handful of fresh ingredients and a sprinkle of imagination. The quality of your ingredients directly impacts the final flavor and texture, so aim for the best you can find. Below, you’ll find a visual guide to the main components. For precise measurements, detailed instructions, and a convenient printable version of this recipe, be sure to scroll to the end of this post where our complete recipe card awaits. Prepare to transform simple dairy into a holiday masterpiece!
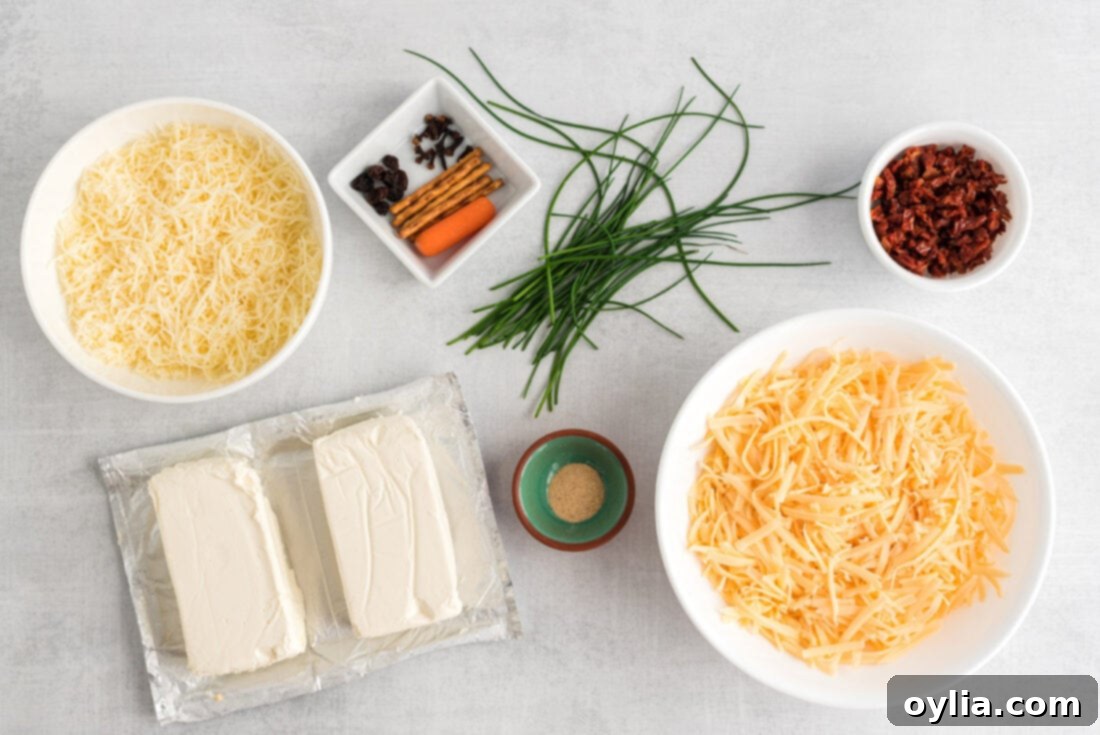
Ingredient Spotlight & Smart Substitutions for Your Cheeseball
Understanding each ingredient and its role is key to a perfect cheeseball. Here’s a closer look at what you’ll need and how you can adapt it to your taste:
- CHEESE: The foundation of our snowman cheeseball is a creamy blend of full-fat cream cheese and rich Gouda.
- Cream Cheese: Always start with softened cream cheese. This ensures a smooth, lump-free base that’s easy to mix and shape. Using a high-quality, full-fat variety will yield the best texture and flavor.
- Gouda: We love the depth that Gouda brings, whether it’s smoked Gouda for an extra layer of complexity or regular Gouda for a milder, nutty flavor. Both work beautifully. For the best consistency and taste, I strongly recommend shredding a block of cheese yourself rather than using pre-packaged shredded cheese, which often contains anti-caking agents that can alter the texture. However, if convenience is your priority, pre-shredded will still do the trick.
- Mozzarella: Finely shredded mozzarella is crucial for the “snowy” exterior of our snowman. Its mild flavor and white color make it the perfect edible blanket for our cheesy friend.
- Substitutions for Cheese: Feel free to experiment! Sharp cheddar, white cheddar, Monterey Jack, or even a blend of different semi-hard cheeses can replace or complement the Gouda. For the cream cheese base, you can sometimes substitute with goat cheese or mascarpone for different flavor profiles, but adjust other ingredients accordingly.
- CHIVES: Fresh chives add a delicate, mild onion flavor and a beautiful touch of green, breaking up the richness of the cheese.
- Substitutions: Finely chopped green onions (scallions) can be used as a slightly more pungent alternative. Fresh parsley also works for color, but with a different herbal note.
- SUN-DRIED TOMATOES: Oil-packed sun-dried tomatoes provide a wonderful chewy texture and intense, sweet-tart, umami flavor that pairs exceptionally well with Gouda. Remember to drain and chop them finely.
- Substitutions: If sun-dried tomatoes aren’t your preference, consider finely chopped roasted red peppers (patt dry well), pimentos, or even finely minced Kalamata olives for a different savory twist. Just ensure any liquid is thoroughly drained to prevent a watery cheeseball.
- GARLIC POWDER: A touch of garlic powder enhances the savory notes without adding moisture.
- Substitutions: Onion powder can offer a similar aromatic depth. A tiny pinch of fresh minced garlic could work, but be cautious as it can be strong and might introduce too much moisture.
- DECORATIONS: These are the elements that bring your snowman to life!
- Whole Cloves: These are excellent for the eyes and mouth, offering a rustic look and a subtle, festive aroma. Make sure they are whole cloves.
- Raisins: Used for the buttons, raisins add a touch of sweetness and a distinct texture.
- Pretzel Sticks: These make perfect, crunchy arms for your snowman.
- Baby Carrot: Essential for the classic snowman nose, a baby carrot is easy to shape and adds a fresh, crisp element.
- Alternative Decorations: See our “Other Decorating Ideas” section below for more creative options!
Step-by-Step: How to Craft Your Adorable Snowman Cheeseball
These step-by-step photos and detailed instructions are designed to help you visualize each stage of making this delightful recipe. For a quick reference or to print, you can Jump to Recipe to get the full printable version of this recipe, complete with precise measurements and instructions at the bottom of the page.
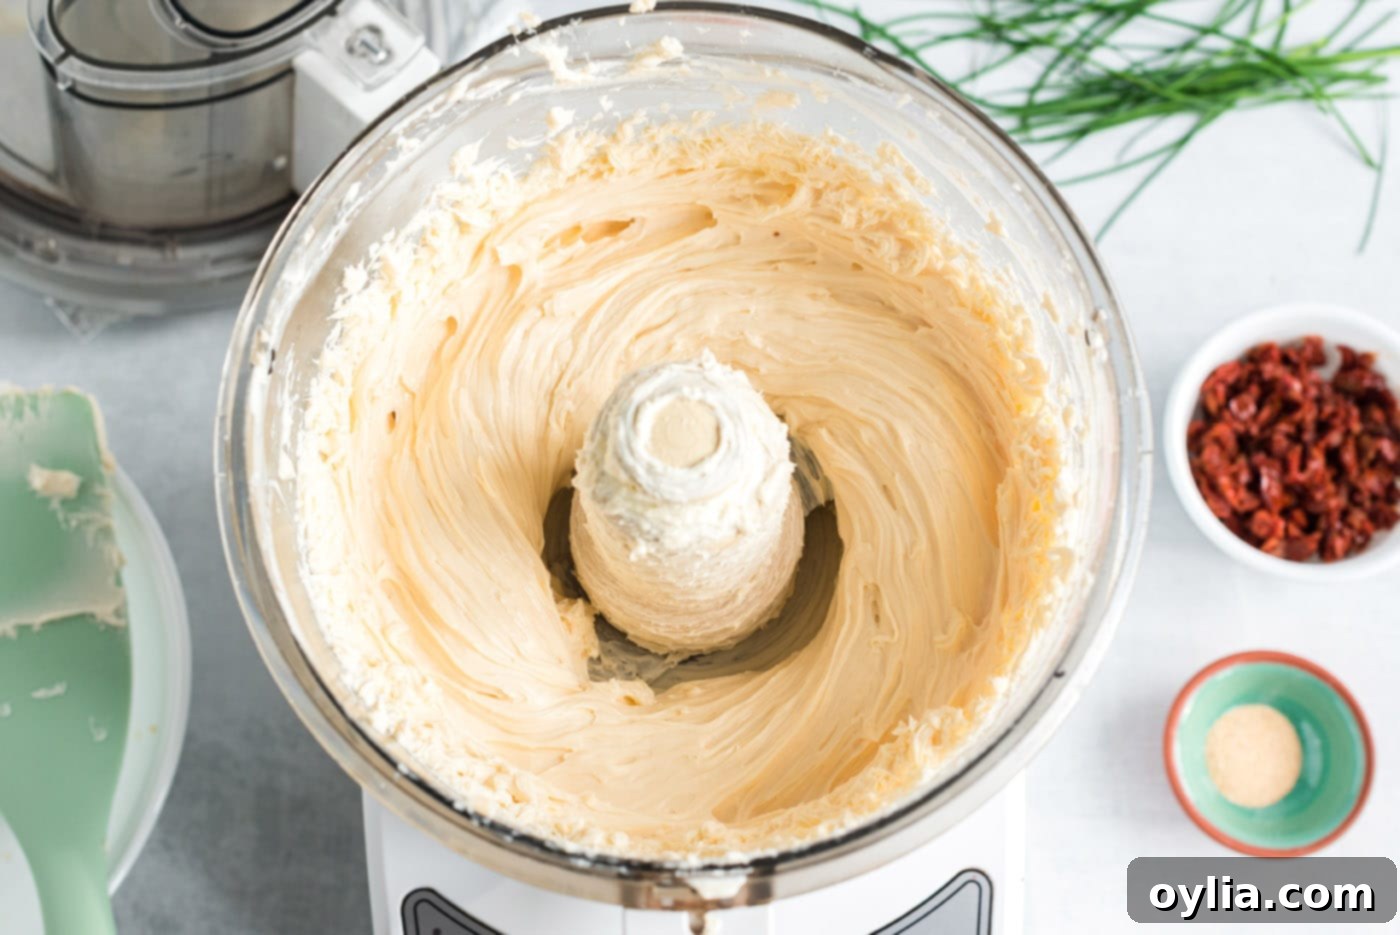
- Prepare the Cheese Base: In a food processor, combine your softened cream cheese and shredded Gouda cheese. Process until the mixture is beautifully creamy and well-combined. This step ensures a smooth, homogeneous texture for your cheeseball. Once creamy, remove the cheese mixture from the processor and transfer it to a medium-sized mixing bowl. Now, gently fold in the chopped chives, sun-dried tomatoes, and garlic powder. Mix thoroughly with a spoon until all ingredients are evenly distributed throughout the cheese base.
EXPERT TIP: While a food processor is highly recommended for achieving the creamiest consistency and best incorporation of the shredded Gouda with the cream cheese, you can certainly mix everything by hand with a sturdy wooden spoon. Just ensure your cream cheese is very soft, and be prepared for a bit more arm work to get it perfectly smooth!


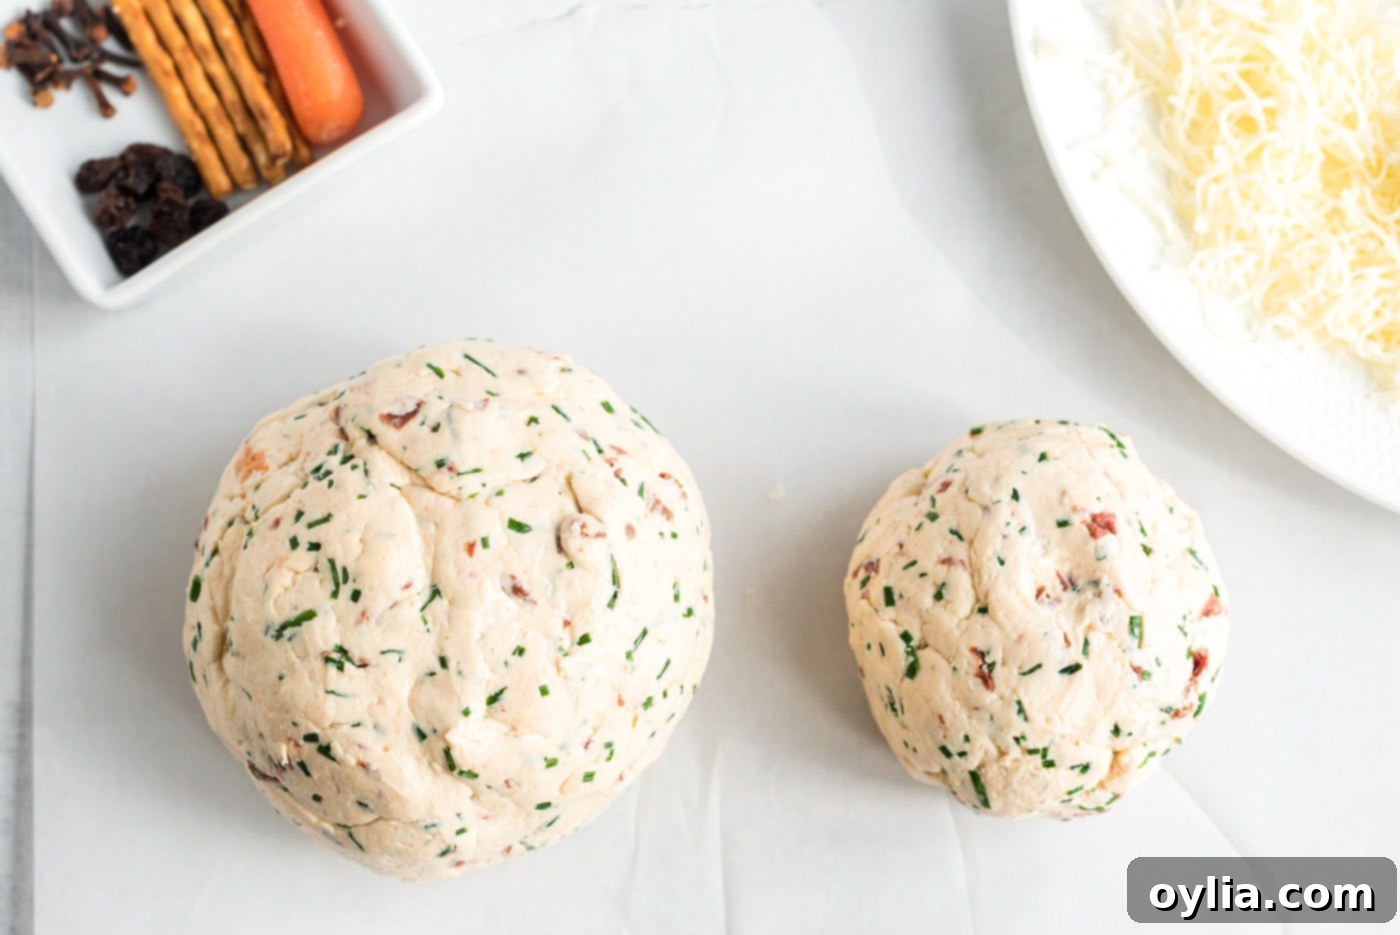
- Shape the Snowman Body: Divide the prepared cheese mixture into two portions: one larger portion for the snowman’s body and a slightly smaller portion for the head. Using your hands, gently shape each portion into a smooth, round ball. Aim for a distinct size difference to create a classic snowman silhouette.

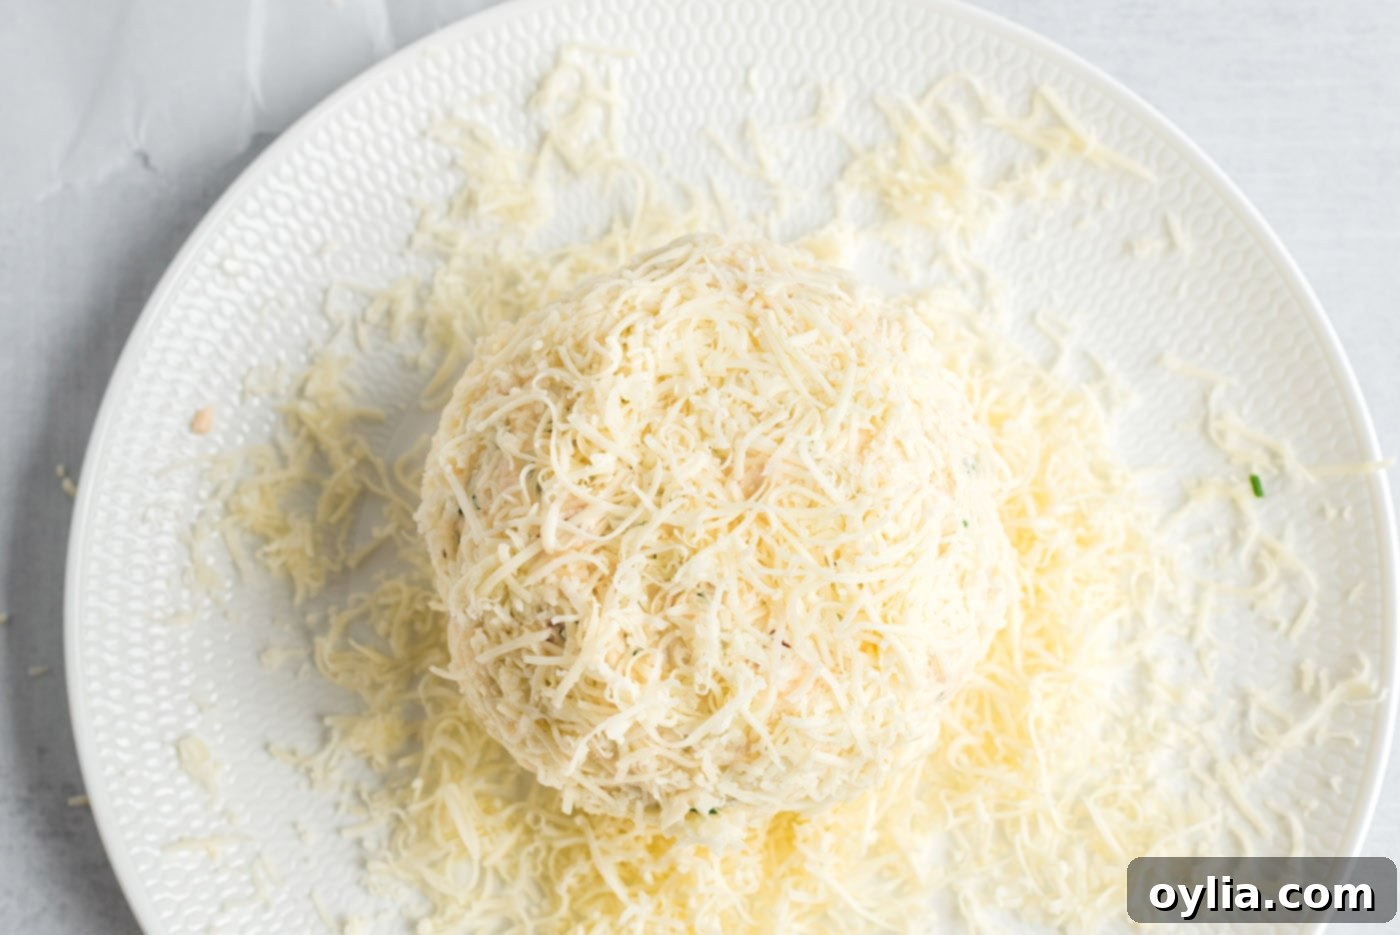
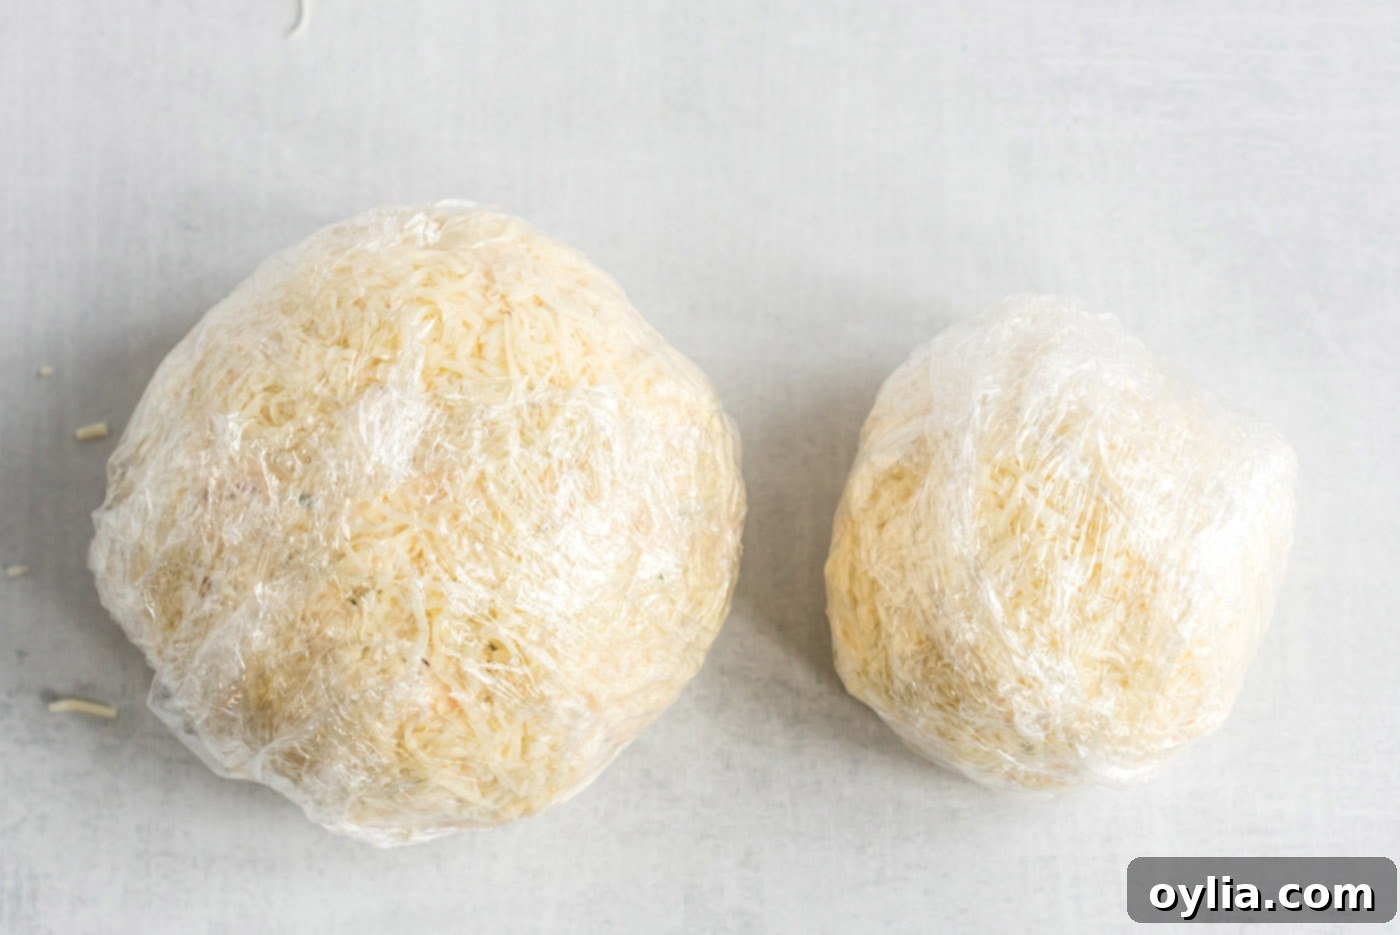
- Coat and Chill: Take your finely shredded mozzarella cheese and gently press it onto the surface of both cheese balls. Ensure they are completely covered to give them that pristine, snowy appearance. Once coated, carefully wrap each cheese ball individually in plastic wrap. This helps them hold their shape and firm up. Place them in the refrigerator to chill for at least 2 hours, or until they are firm enough to handle and stack without deforming. Chilling is crucial for stability and flavor development.


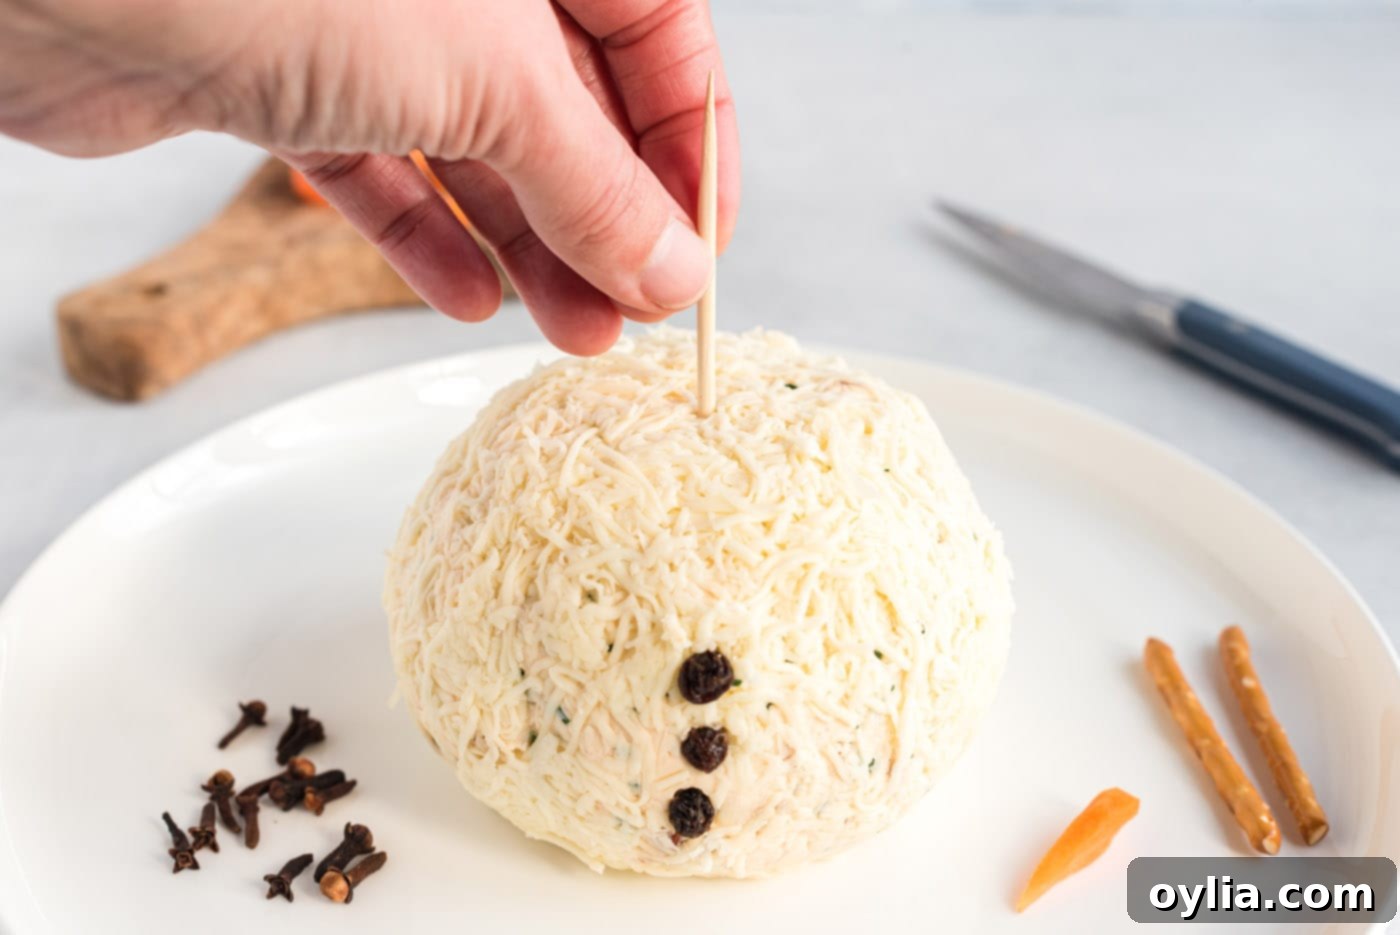
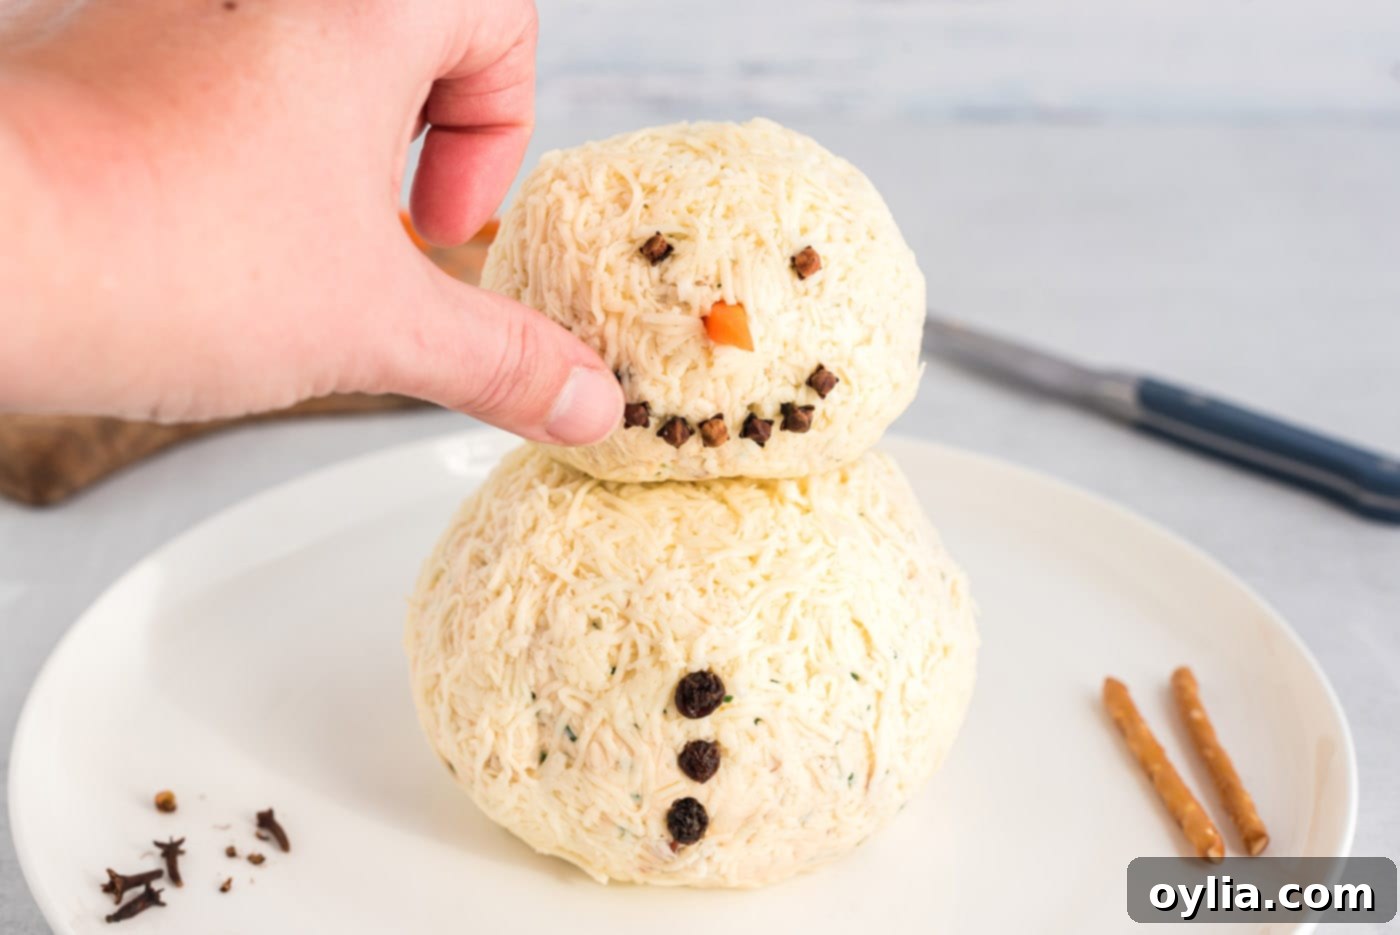
- Assemble the Snowman: Once the cheese balls are thoroughly chilled and firm, carefully unwrap them. Place the larger cheese ball on your serving platter first. Then, gently stack the smaller cheese ball on top of it to form the head. To stabilize your snowman and prevent it from toppling, insert a toothpick or a small wooden dowel through the center of both cheese balls, securing them together.

- Add the Buttons: Carefully press raisins sideways into the larger cheese ball (the body) to create the snowman’s buttons. You’ll typically want 3-4 buttons, depending on the size of your snowman. If you prefer, whole cloves can also be used for buttons, offering a darker, more aromatic touch.
- Create the Nose: To form the iconic carrot nose, take a baby carrot and slice it in half lengthwise. Then, take one of these halves and cut it again lengthwise, creating a slender, pointed piece. Gently press this piece into the center of the snowman’s head, positioning it to resemble a nose.
- Form the Eyes and Mouth: Use two whole cloves for the snowman’s eyes, pressing them gently but firmly into the upper part of the head. For the mouth, arrange about 7 whole cloves in a gentle curve, creating a cheerful, smiling expression.

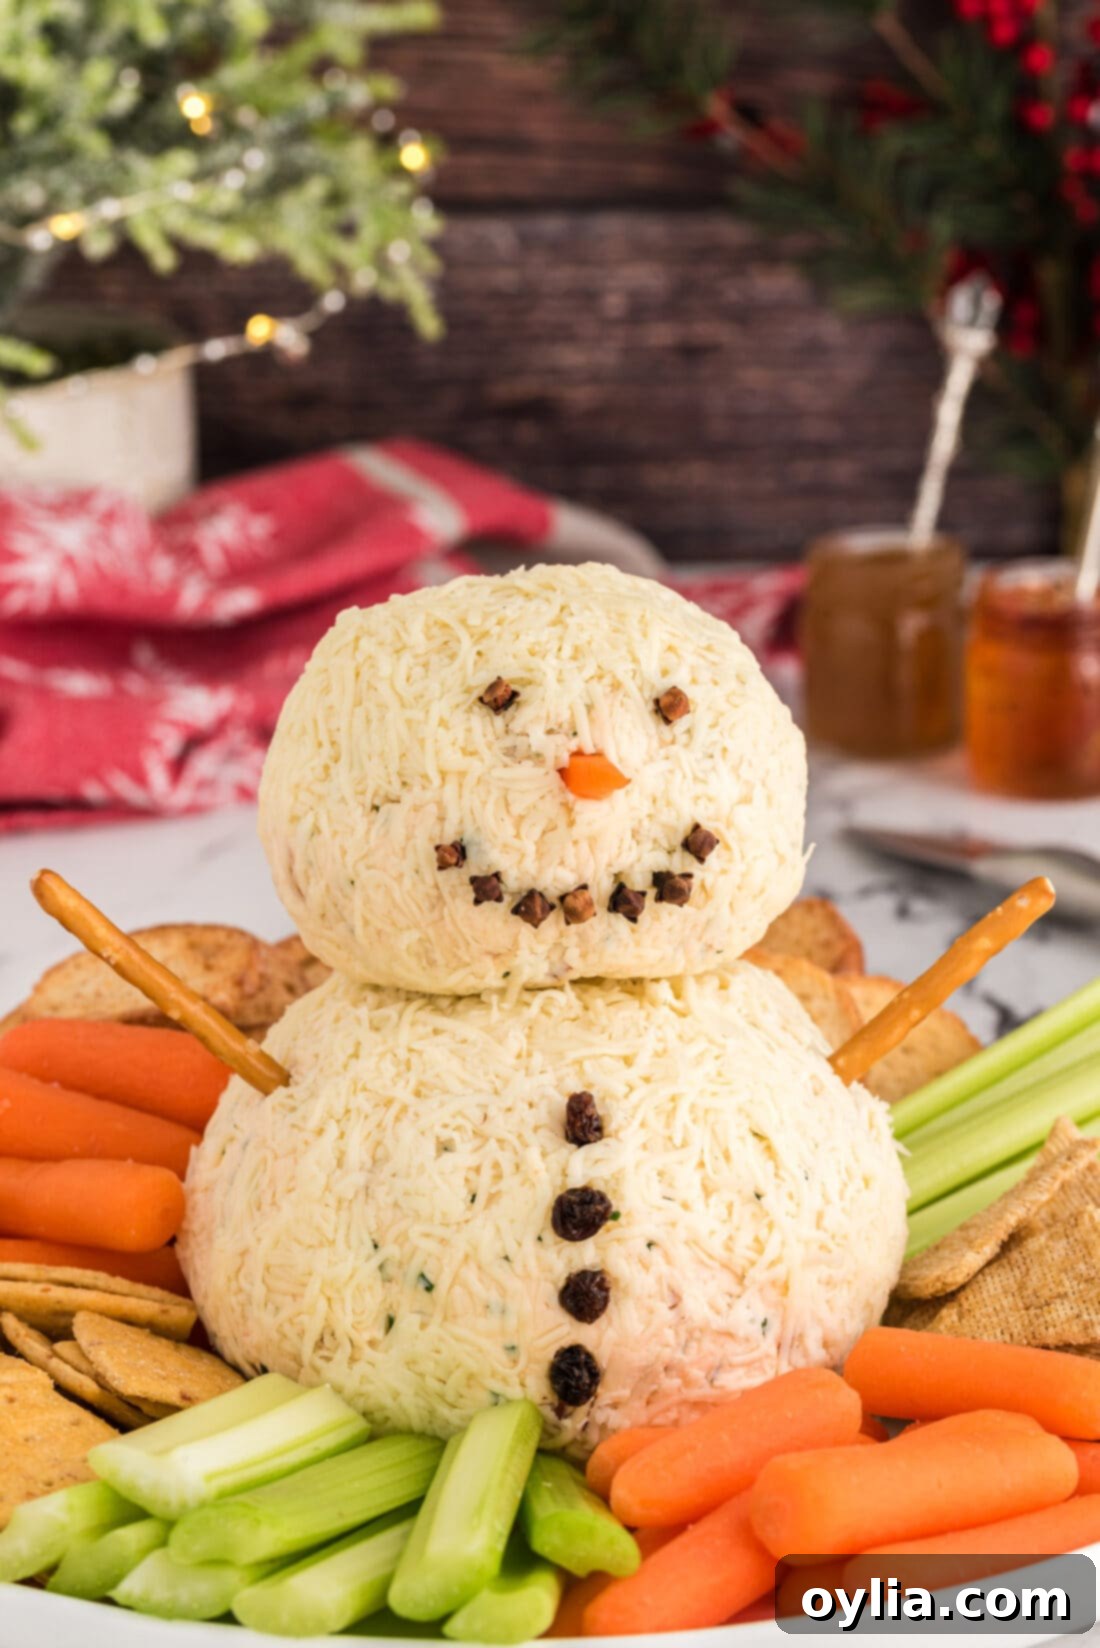
- Attach the Arms and Serve: Finally, insert two pretzel sticks into the sides of the larger cheese ball, positioning them as the snowman’s arms. Your festive snowman cheeseball is now complete and ready to delight! Serve it immediately with an assortment of sturdy crackers, crisp fresh vegetables, or sliced baguette for dipping.

Frequently Asked Questions & Expert Tips for Your Cheeseball Success
Absolutely! This snowman cheeseball is perfect for making in advance, which is a huge plus for holiday entertaining. Prepare the cheeseball mixture and shape the two balls as directed, but *do not* add the mozzarella coating or the decorative elements (eyes, nose, mouth, arms) just yet. Wrap the plain cheese balls tightly in plastic wrap and store them in the refrigerator. For the best freshness and flavor, you can make it 3-4 days in advance. However, if properly stored, it can easily be made up to a week ahead of time. When you’re ready to serve, simply unwrap, coat with mozzarella, assemble, decorate, and enjoy!
The best dippers are sturdy ones that won’t break when scooping up the creamy cheeseball. Think hearty crackers like Triscuits, Ritz crackers, or even artisan sourdough crisps. For a healthier option, fresh vegetable sticks are fantastic: celery, baby carrots, cucumber slices, and bell pepper strips all provide a satisfying crunch. Pretzel sticks (beyond the arms!) and sliced toasted baguette or crostini are also excellent choices.
A homemade cheeseball, when stored properly in an airtight container or tightly wrapped in plastic wrap, will typically last for up to 1-2 weeks in the refrigerator. However, for optimal taste and texture, especially with fresh herbs like chives, it’s best consumed within 3-5 days.
If the mixture is too soft, it might be that your cream cheese was too warm, or perhaps there was too much moisture from the sun-dried tomatoes (ensure they are well-drained!). You can try adding a little more shredded hard cheese (like Parmesan or another Gouda) to firm it up, or simply chill the mixture for 30 minutes before attempting to shape it. If it’s too crumbly, your cream cheese might not have been soft enough, or there wasn’t enough of it. Try letting it sit at room temperature longer or add another tablespoon or two of softened cream cheese and mix until smooth.
Yes, absolutely! While chilling is essential for shaping and firming, a cheeseball’s flavors truly shine and its texture becomes wonderfully spreadable when served at room temperature. Take your snowman cheeseball out of the refrigerator about 30 minutes to an hour before you plan to serve it. This allows the cheese to soften just enough, making it easier for guests to scoop and enjoy, enhancing all those delicious savory notes.

Serving Suggestions for Your Festive Snowman Cheeseball
Your beautiful snowman cheeseball deserves a grand presentation! Arrange it on a large platter surrounded by a variety of dippers to suit all tastes. Sturdy crackers like wheat thins, water crackers, or butter crackers are classic choices. For fresh crunch and vibrant color, include an array of raw vegetables such as crisp celery sticks, colorful bell pepper strips, carrot sticks or baby carrots, and cucumber slices. Pretzels, both sticks and twists, offer a salty counterpoint and additional texture. Thinly sliced baguette, lightly toasted or fresh, is another elegant option. Remember to take your cheeseball out of the refrigerator about 30-60 minutes before serving to allow it to soften slightly, making it easier and more enjoyable for your guests to spread. For a truly festive spread, consider pairing it with a light-bodied white wine like Sauvignon Blanc or a crisp sparkling wine.
Creative Other Decorating Ideas for Your Snowman
While our recipe provides classic snowman decorations, don’s hesitate to get creative! Here are a few more ideas to customize your cheesy friend:
- Dried Cranberries or Chopped Pecans for Buttons: If raisins aren’t your favorite, dried cranberries offer a tart, festive alternative, while chopped pecans can add a nutty flavor and different texture to the buttons.
- Raisins for Eyes and Mouth: If you don’t have cloves on hand, raisins can also be used effectively for the eyes and mouth, creating a softer, more whimsical look.
- Tie a Scarf Using Rosemary Sprigs: For an extra touch of greenery and a lovely aromatic scent, gently arrange a few sprigs of fresh rosemary around the snowman’s “neck” to mimic a festive scarf.
- Black Peppercorns for Eyes and Mouth: For a more subtle and spicy alternative to cloves, whole black peppercorns can be used to create the eyes and mouth.
- A Tiny Red Bell Pepper Hat: Cut a small circle from a red bell pepper for a festive hat base, and a small strip for the brim.
More Festive Holiday Recipes to Explore
If you’re planning a full holiday menu, don’t stop at the snowman cheeseball! We have a treasure trove of other delicious recipes perfect for festive celebrations:
- Sweet & Salty Saltine Toffee
- Rich & Creamy Homemade Eggnog
- Elegant Christmas Tree Cheese Platter
- Savory Christmas Tree Pull Apart Bread
- Our Best 12 Days of Christmas Cookies
- Beautiful Antipasto Wreath
I absolutely adore spending time in the kitchen, creating and sharing delicious recipes with all of you! It can be a challenge to remember to check back every day for new culinary inspiration, which is why I’ve made it easy for you. I offer a convenient newsletter that delivers a brand-new recipe straight to your inbox every time one posts. Simply subscribe today and start receiving your free daily recipes – never miss a delicious moment!
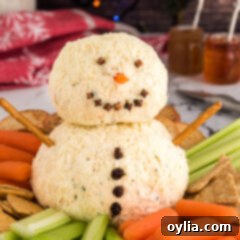
Snowman Cheeseball
IMPORTANT – There are often Frequently Asked Questions within the blog post that you may find helpful. Simply scroll back up to read them!
Print It
Pin It
Rate It
Save ItSaved!
Ingredients
- 16 oz cream cheese softened to room temperature
- 4 cups gouda cheese freshly shredded, smoked or regular
- ½ cup chives finely chopped
- ½ cup oil-packed sun dried tomatoes well-drained and finely chopped
- ½ tsp garlic powder
Decorations
- 1 ½ cups mozzarella cheese finely shredded, for the snowman’s “snow” coating
- 9 whole cloves approximately 2 for eyes, 7 for mouth
- 4 raisins 3-4, for snowman buttons
- 2 pretzel sticks for the snowman’s arms
- 1 baby carrot for the nose
Things You’ll Need
-
Food processor (optional, but highly recommended)
-
Large mixing bowl
-
Plastic wrap
-
Toothpicks or small dowel (for stability)
Before You Begin
- For the best flavor and spreadability, you’ll want to take your finished snowman cheeseball out of the refrigerator an hour or so before serving to allow it to soften up a bit. This brings out the full flavor of the cheeses and makes it easier for guests to enjoy.
- While this recipe suggests using a food processor to combine the cheeses, which results in a wonderfully creamy and smooth mixture, you can absolutely mix everything by hand with a sturdy wooden spoon. Just ensure your cream cheese is very well softened beforehand. The food processor simply creams the shredded cheese into the cream cheese much more efficiently and seamlessly than hand mixing.
- Ensure all your cheeses, especially the cream cheese, are at room temperature before mixing. This is crucial for a smooth, lump-free base.
- When shaping the cheese balls, lightly dampen your hands with water if the mixture feels too sticky. This helps create smooth, even spheres.
Instructions
-
In a food processor, combine softened cream cheese and shredded Gouda cheese. Process until the mixture is completely creamy and well-blended. Transfer this cheese mixture to a bowl and stir in the chopped chives, drained and chopped sun-dried tomatoes, and garlic powder until all ingredients are evenly distributed.
-
Divide the mixture and shape it into one larger ball for the body and one slightly smaller ball for the head of the snowman. Gently press the finely shredded mozzarella cheese onto both cheese balls, ensuring they are fully covered to create a snowy white exterior. Wrap each ball tightly in plastic wrap and refrigerate for at least 2 hours, or until firm.
-
Once chilled and firm, carefully unwrap the cheese balls. Place the larger ball on your serving platter, then stack the smaller ball on top. Insert a toothpick or small dowel through the center of both cheese balls to secure them together and provide stability.
-
To create the snowman’s nose, slice a baby carrot in half lengthwise. Take one of these halves and cut it lengthwise again, creating a slender, pointed piece. Gently press this into the center of the snowman’s head.
-
Use two whole cloves for the snowman’s eyes, pressing them carefully into the upper part of the head. Then, arrange about 7 whole cloves in a gentle curve below the nose to form a cheerful mouth.
-
Press raisins sideways into the larger cheese ball (the body) to represent the snowman’s buttons. You can use 3-4 raisins, or substitute with whole cloves if preferred.
-
Lastly, insert two pretzel sticks into the sides of the large cheese ball to form the snowman’s arms. Your festive snowman cheeseball is now ready to be served with sturdy crackers and fresh veggies!
Nutrition
The recipes on this blog are tested with a conventional gas oven and gas stovetop. It’s important to note that some ovens, especially as they age, can cook and bake inconsistently. Using an inexpensive oven thermometer can assure you that your oven is truly heating to the proper temperature. If you use a toaster oven or countertop oven, please keep in mind that they may not distribute heat the same as a conventional full sized oven and you may need to adjust your cooking/baking times. In the case of recipes made with a pressure cooker, air fryer, slow cooker, or other appliance, a link to the appliances we use is listed within each respective recipe. For baking recipes where measurements are given by weight, please note that results may not be the same if cups are used instead, and we can’t guarantee success with that method.
This post originally appeared on this blog on November 17, 2021, and has been updated and expanded for comprehensive holiday planning.
