Crispy Oven Fried Chicken Legs: Your Guide to Juicy, Flavorful, and Healthier Drumsticks
Are you craving the comforting taste of fried chicken but want a healthier alternative without sacrificing that irresistible crunch and juicy tenderness? Look no further! Our recipe for oven fried chicken legs is the perfect solution. This method allows you to enjoy wonderfully crispy chicken drumsticks that are baked, not deep-fried, making it a lighter option for your family meals. Not only is it a fantastic way to cut down on unhealthy fats, but it’s also incredibly kind to your wallet, especially when chicken drumsticks are often available at great prices.
Preparing your own coating from simple pantry staples like flour and seasonings is not only cost-effective but also gives you complete control over the flavors. This recipe takes convenience and taste to the next level, ensuring a satisfying meal that’s both delicious and smart.

The Secret to Unforgettable Flavor and Juiciness: Brining Your Chicken
One of the key elements that elevates this oven fried chicken recipe from good to absolutely phenomenal is brining. While it might sound like an extra step, brining is incredibly simple and makes a dramatic difference in the final product. It’s my secret weapon for ensuring the chicken legs are not just flavorful on the outside, but incredibly juicy and tender throughout. Think of it as an insurance policy against dry chicken!
So, what exactly is brining? In simple terms, it’s a process where meat is submerged in a solution of water, salt, and often sugar and other aromatics. The salt in the brine solution helps to denature the protein structure of the chicken, allowing it to absorb more moisture and flavor. This means that even if you slightly overcook your chicken, it will remain succulent and tender. The brown sugar in our brine recipe not only adds a subtle sweetness that complements the savory Italian dressing mix but also contributes to a beautiful golden-brown color during baking.
Don’t be intimidated if you’ve never tried brining before. It’s genuinely easy; it just requires a little bit of planning ahead. For these chicken legs, a basic brine of water, brown sugar, and kosher salt is all you need to transform ordinary drumsticks into something extraordinary. I routinely brine my Thanksgiving turkey every year, and since discovering its magic, I apply the same principle to chicken to enhance its natural deliciousness. The small amount of forethought required for brining pays off immensely in taste and texture.

Note: some links below are affiliate links. That means if you happen to buy something, a small percentage of that sale goes back into this site, which enables me to continue to bring you free recipes such as this one. So, thanks!
As always, a full printable ingredient list and directions are at the end of this post in the recipe card. However, continue reading for detailed tips, tricks, and explanations to ensure your oven-fried chicken legs are perfect every time!
For this recipe you will need the following supplies and ingredients to achieve the best crispy, juicy results:
Essential Ingredients for Crispy Oven Fried Chicken Legs
- Family pack chicken drumsticks (about a dozen) – These are ideal for oven frying because their bone-in structure helps them cook evenly and retain moisture. Plus, they’re typically very affordable!
- 1 cup flour – The base for our crispy coating.
- 1 envelope dry Italian dressing mix – This is where the primary flavor comes from. It’s a convenient shortcut for a complex spice blend.
- 2 tablespoons olive oil – Essential for achieving that golden-brown, crispy skin and helping the coating adhere.
For the Flavorful Brine
- 2 quarts water – The liquid base for our brine.
- 1/4 cup brown sugar – Adds a touch of sweetness and helps with browning.
- 1/4 cup kosher salt – The primary agent for tenderizing and moisturizing the chicken.
Kitchen Tools You Will Also Need:
- Stock pot – For brining the chicken. A large container or zip-top bag works too.
- Pastry brush – For evenly coating the drumsticks with olive oil.
- Wire rack – Crucial for air circulation, which leads to crispy skin all around.
- Cookie sheet – To catch any drips and ensure even baking when paired with the wire rack.
Step-by-Step Guide to Crispy Oven Fried Chicken Legs
1. Prepare the Brine and Chill
Begin by combining the water, brown sugar, and kosher salt in a large stock pot. Stir until the salt and sugar are fully dissolved. This creates our simple yet effective brine. Carefully add the chicken drumsticks to the brine, ensuring they are fully submerged. Place the pot (or a large, sealed container) in the refrigerator for at least 2 hours. This brining time is crucial for developing the juiciness and flavor. You can even brine them for up to 4 hours for maximum effect, but 2 hours is a great minimum.
2. Preheat and Prepare Your Baking Setup
About 15 minutes before you’re ready to bake, preheat your oven to 400 degrees F (200 degrees C). This ensures the oven is at the correct temperature for immediate crisping once the chicken goes in. While the oven heats, set up your baking sheet: place a wire rack over a sturdy baking sheet. The wire rack is a non-negotiable step for truly crispy oven-fried chicken. It allows air to circulate around the drumsticks, preventing the bottoms from getting soggy and promoting even browning on all sides.
3. Create Your Flavorful Coating
In a shallow dish, combine the flour with the dry Italian dressing mix. Whisk them together until thoroughly blended. This mixture will adhere to the chicken, creating a delicious and crispy crust. The Italian dressing mix offers a convenient blend of herbs and spices, providing a savory, aromatic flavor profile that everyone loves.

4. Rinse, Dry, and Coat the Chicken
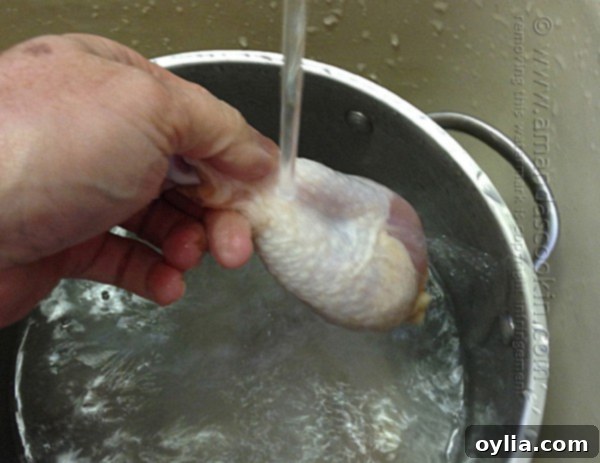
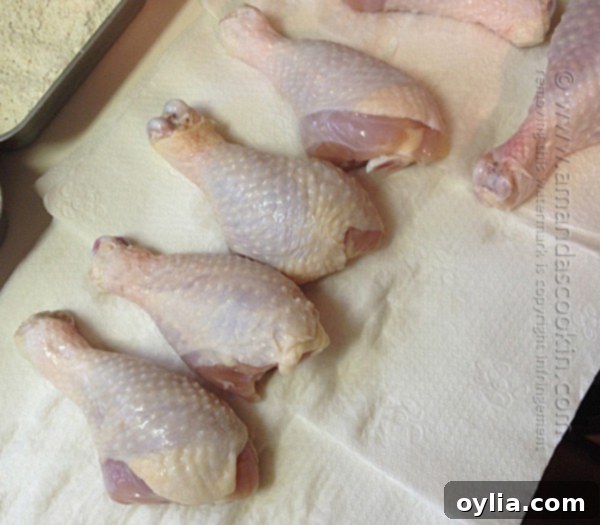
Once the brining time is complete, remove the drumsticks from the brine. It’s critical to rinse them thoroughly under cold running water to remove any excess salt. This prevents the chicken from becoming too salty. After rinsing, pat each drumstick completely dry with paper towels. This step is incredibly important for achieving a crispy skin – moisture is the enemy of crispiness! The drier the chicken, the crispier your coating will be.

Next, using a pastry brush, lightly brush each drumstick with olive oil. This thin layer of oil helps the flour mixture adhere beautifully and contributes to the “fried” texture and golden color. Finally, dredge each olive-oiled drumstick in the flour and Italian dressing mixture, ensuring it’s completely coated. Gently shake off any excess flour.


5. Arrange and Bake to Perfection
Place the coated drumsticks on the prepared wire rack, making sure they are evenly spaced and not touching each other. This spacing is key for even cooking and optimal crispiness. Crowding the chicken will trap steam and prevent a truly crispy crust from forming.
Bake in the preheated oven for 30 minutes. After the first 30 minutes, carefully turn each drumstick over to ensure both sides get golden brown and crispy. Continue baking for another 30 minutes, or until the juices run clear when pierced with a knife, and an instant-read thermometer inserted into the thickest part of the meat (without touching the bone) reads 165°F (74°C).

Tips for Success and Delicious Variations
Homemade Italian Dressing Mix
While a packaged dry Italian dressing mix offers incredible convenience and consistent flavor, you can absolutely make your own! If you prefer to avoid store-bought mixes or simply want to experiment with your own blend, a homemade version is easy to assemble. A good starting point would be a combination of dried oregano, basil, thyme, rosemary, garlic powder, onion powder, salt, and pepper. You can find excellent recipes for homemade Italian dressing mix over at All Recipes or create your own signature blend. Adjust herbs and spices to your personal taste!
Other Flavor Variations
Feel free to get creative with your seasoning! Instead of Italian dressing mix, consider using:
- Smoked Paprika & Garlic Powder: For a deeper, smoky flavor.
- Cajun/Creole Seasoning: If you like a spicy kick.
- Lemon Pepper: For a bright, zesty twist.
- Herb de Provence: For a more refined, French-inspired taste.
Remember to adjust the salt content in your brine or coating if your chosen seasoning mix already contains a significant amount of salt.
Serving Suggestions
These crispy oven fried chicken legs are incredibly versatile and pair well with a wide variety of sides. Serve them alongside mashed potatoes and gravy, a fresh garden salad, roasted vegetables like asparagus or broccoli, or classic corn on the cob. For a complete meal, consider adding some homemade coleslaw or mac and cheese.
Why Choose Oven Fried Over Deep Fried?
The benefits of oven frying extend beyond just convenience. By using the oven, you significantly reduce the amount of oil needed, leading to a much healthier dish. Deep frying often involves submerging food in several cups of oil, which dramatically increases the calorie and fat content. Oven frying, on the other hand, uses only a couple of tablespoons of olive oil to achieve a comparable crispy texture, allowing the natural flavors of the chicken and seasoning to shine through. It’s a win-win: all the satisfying crunch you love, with less guilt.
We truly hope you give this recipe for crispy oven fried chicken legs a try. It’s a game-changer for weeknight dinners and special occasions alike. Please let us know in the comments if you enjoy it – we love hearing your feedback!
More Delicious “Fried” Recipes You’ll Love:
- Oven Fried Chicken Breasts – A great alternative if you prefer white meat.
- Spicy Oven Fried Chicken – For those who enjoy a little heat.
- Chicken Fried Steak – A classic comfort food.
- Pork Tenderloin Sandwiches – Another crispy favorite, reminiscent of schnitzel.

Oven Fried Chicken Legs
IMPORTANT – There are often Frequently Asked Questions within the blog post that you may find helpful. Simply scroll back up to read them!
Print It
Pin It
Rate It
Save ItSaved!
Ingredients
- Family pack chicken drumsticks about a dozen
- 1 cup flour
- 1 envelope dry Italian dressing mix
- 2 tablespoons olive oil
Brine
- 2 quarts water
- ¼ cup brown sugar
- ¼ cup kosher salt
Instructions
-
Combine brine ingredients in a large stock pot and add the chicken. Place in refrigerator for 2 hours.
-
Preheat oven to 400 degrees F. Place a wire rack over a baking sheet.
-
Mix flour with dry Italian dressing and place into a shallow dish.
-
Remove drumsticks from brine and rinse then dry with paper towels. Brush each drumstick with olive oil and coat in flour mixture. Place drumsticks, on wire rack so that they are evenly spaced and not touching each other.
-
Bake in preheated oven for 30 minutes. Turn all drumsticks over and bake another 30 minutes. Juices should run clear.
The recipes on this blog are tested with a conventional gas oven and gas stovetop. It’s important to note that some ovens, especially as they age, can cook and bake inconsistently. Using an inexpensive oven thermometer can assure you that your oven is truly heating to the proper temperature. If you use a toaster oven or countertop oven, please keep in mind that they may not distribute heat the same as a conventional full sized oven and you may need to adjust your cooking/baking times. In the case of recipes made with a pressure cooker, air fryer, slow cooker, or other appliance, a link to the appliances we use is listed within each respective recipe. For baking recipes where measurements are given by weight, please note that results may not be the same if cups are used instead, and we can’t guarantee success with that method.
