Indulge in the Ultimate No-Bake Biscoff Icebox Cake: An Easy 5-Ingredient Dessert Recipe
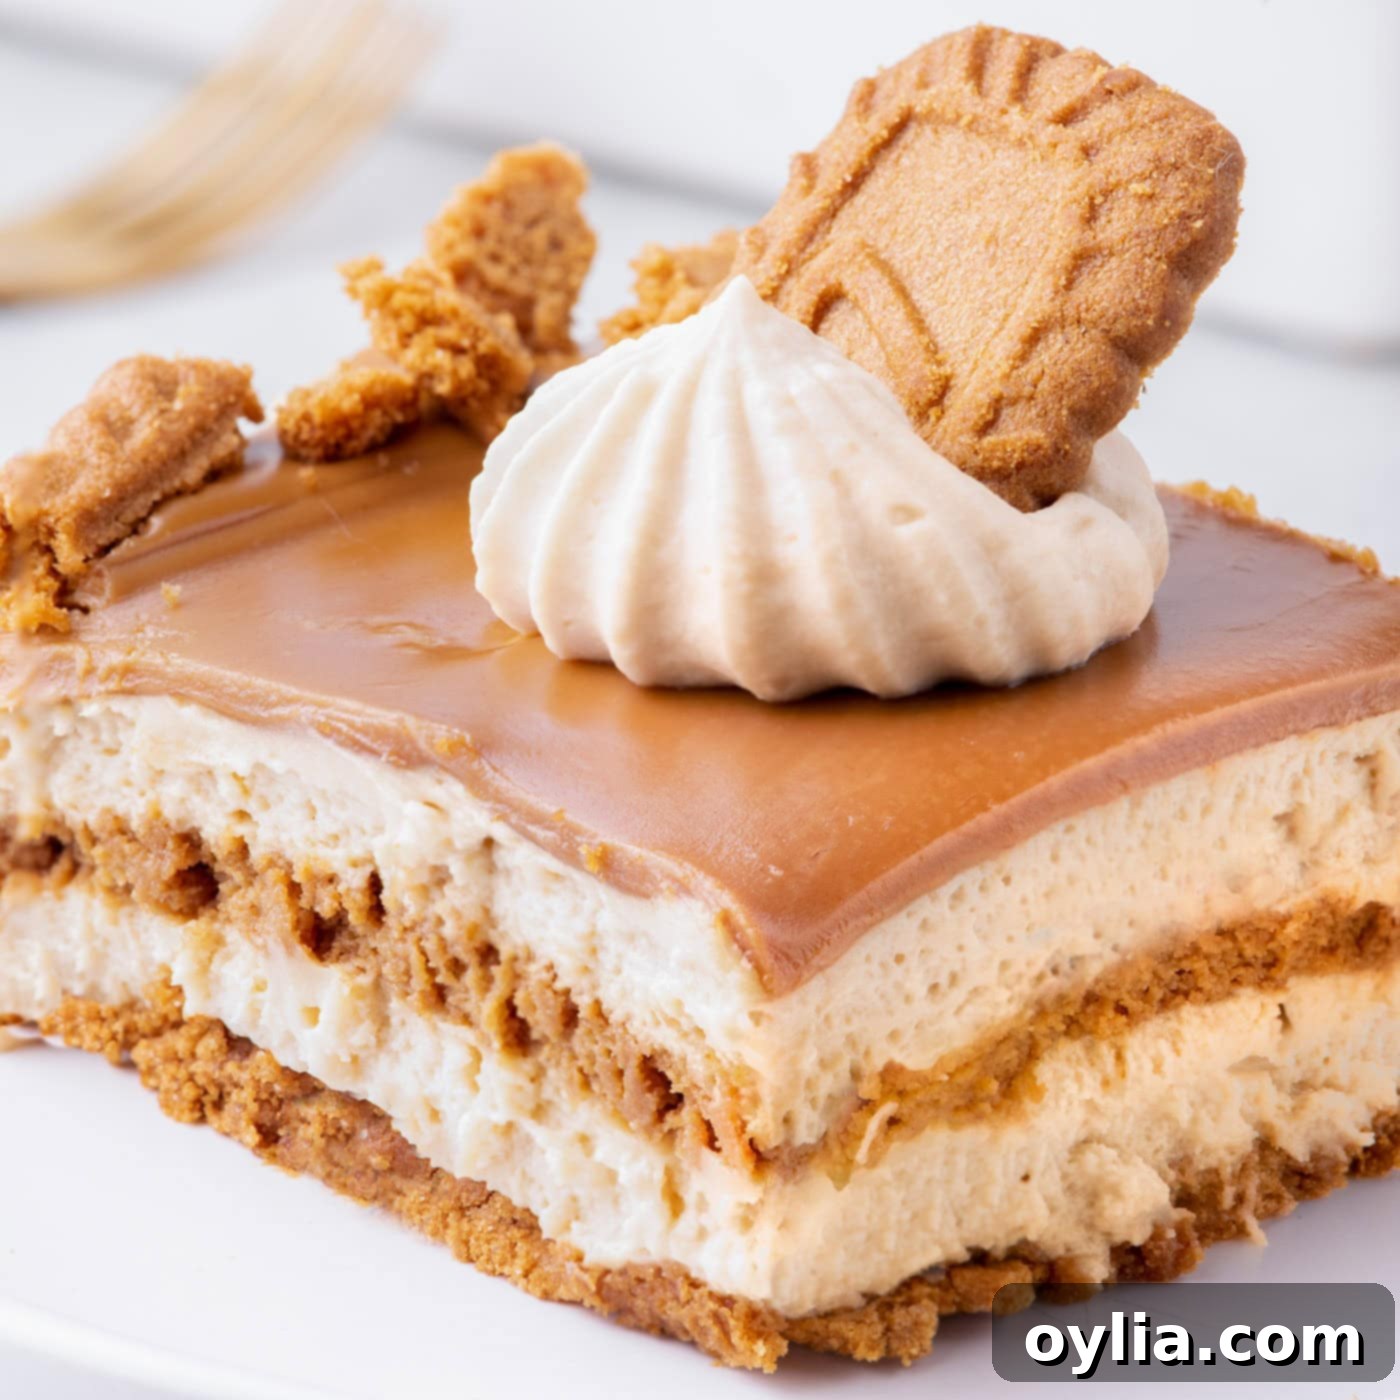
Prepare to be enchanted by a dessert that’s as effortless as it is exquisite: our dreamy no-bake Biscoff icebox cake. This show-stopping treat is crafted from simple layers of velvety whipped cream, classic Lotus Biscoff cookies, and a rich, irresistible cookie butter ganache. The best part? It comes together with only 5 core ingredients, promising a show-stopping dessert with minimal fuss. Perfect for any occasion, this icebox cake delivers maximum flavor for minimal effort.
Why This Easy Biscoff Icebox Cake Recipe Works So Well
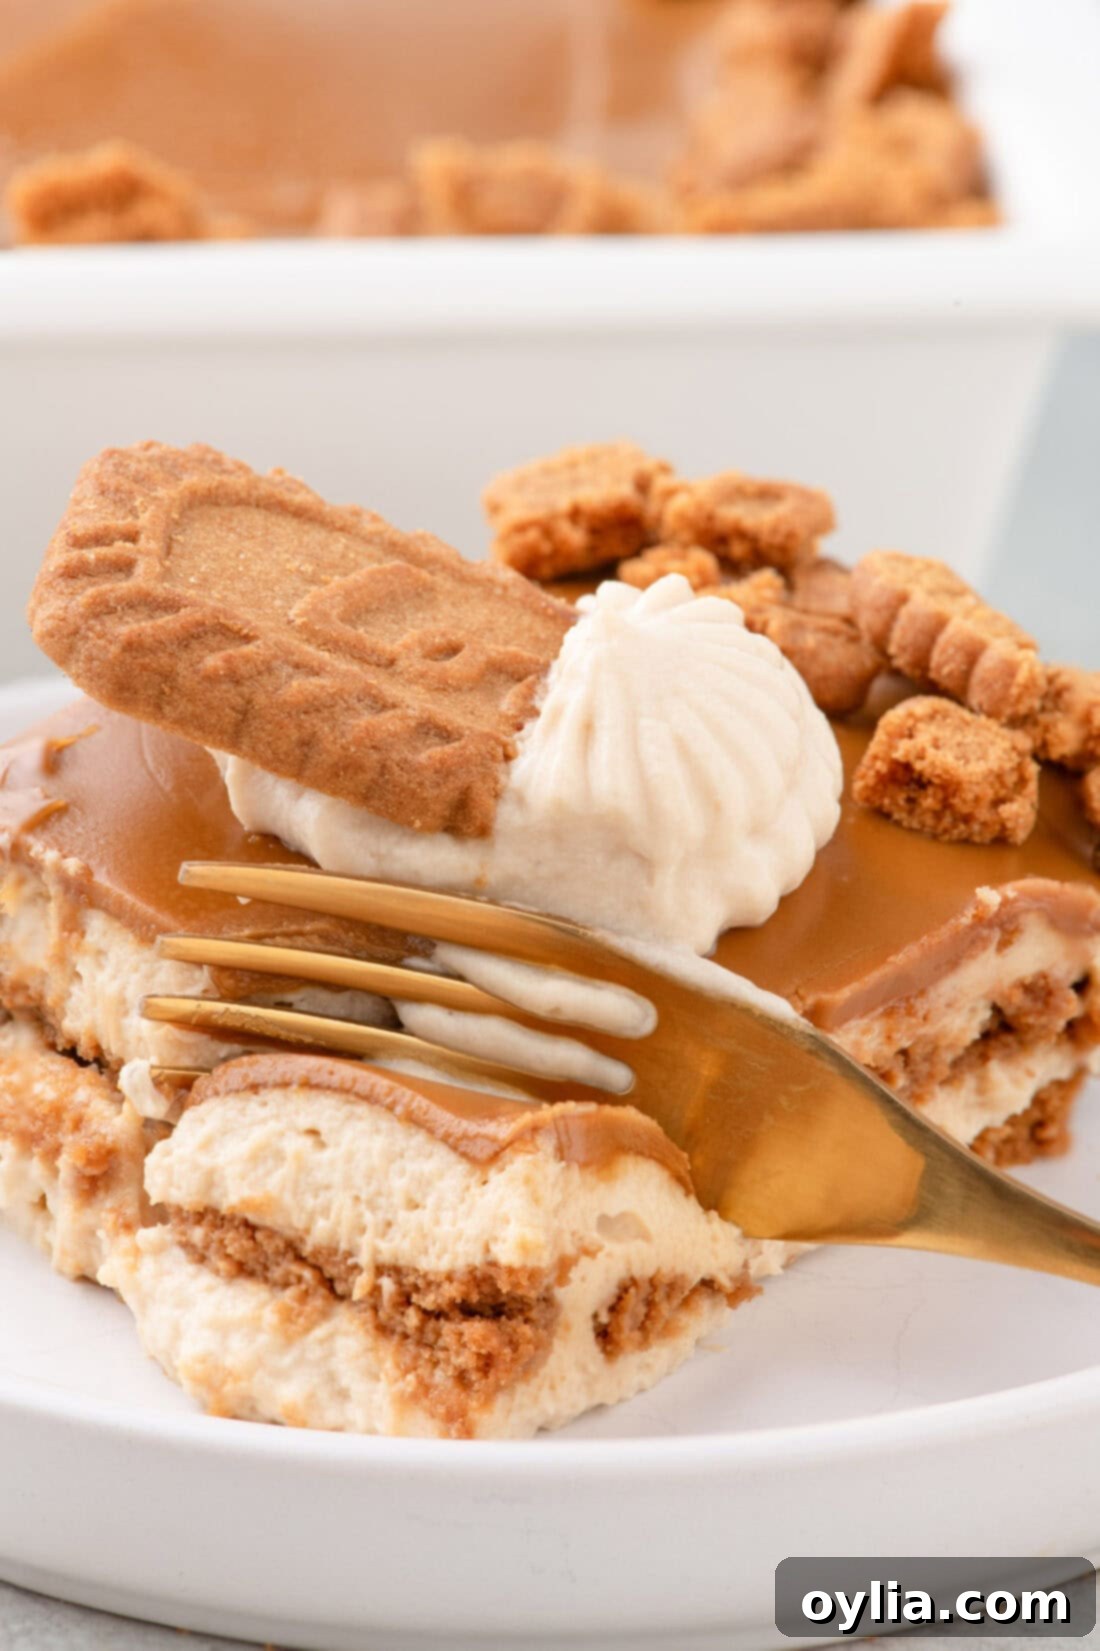
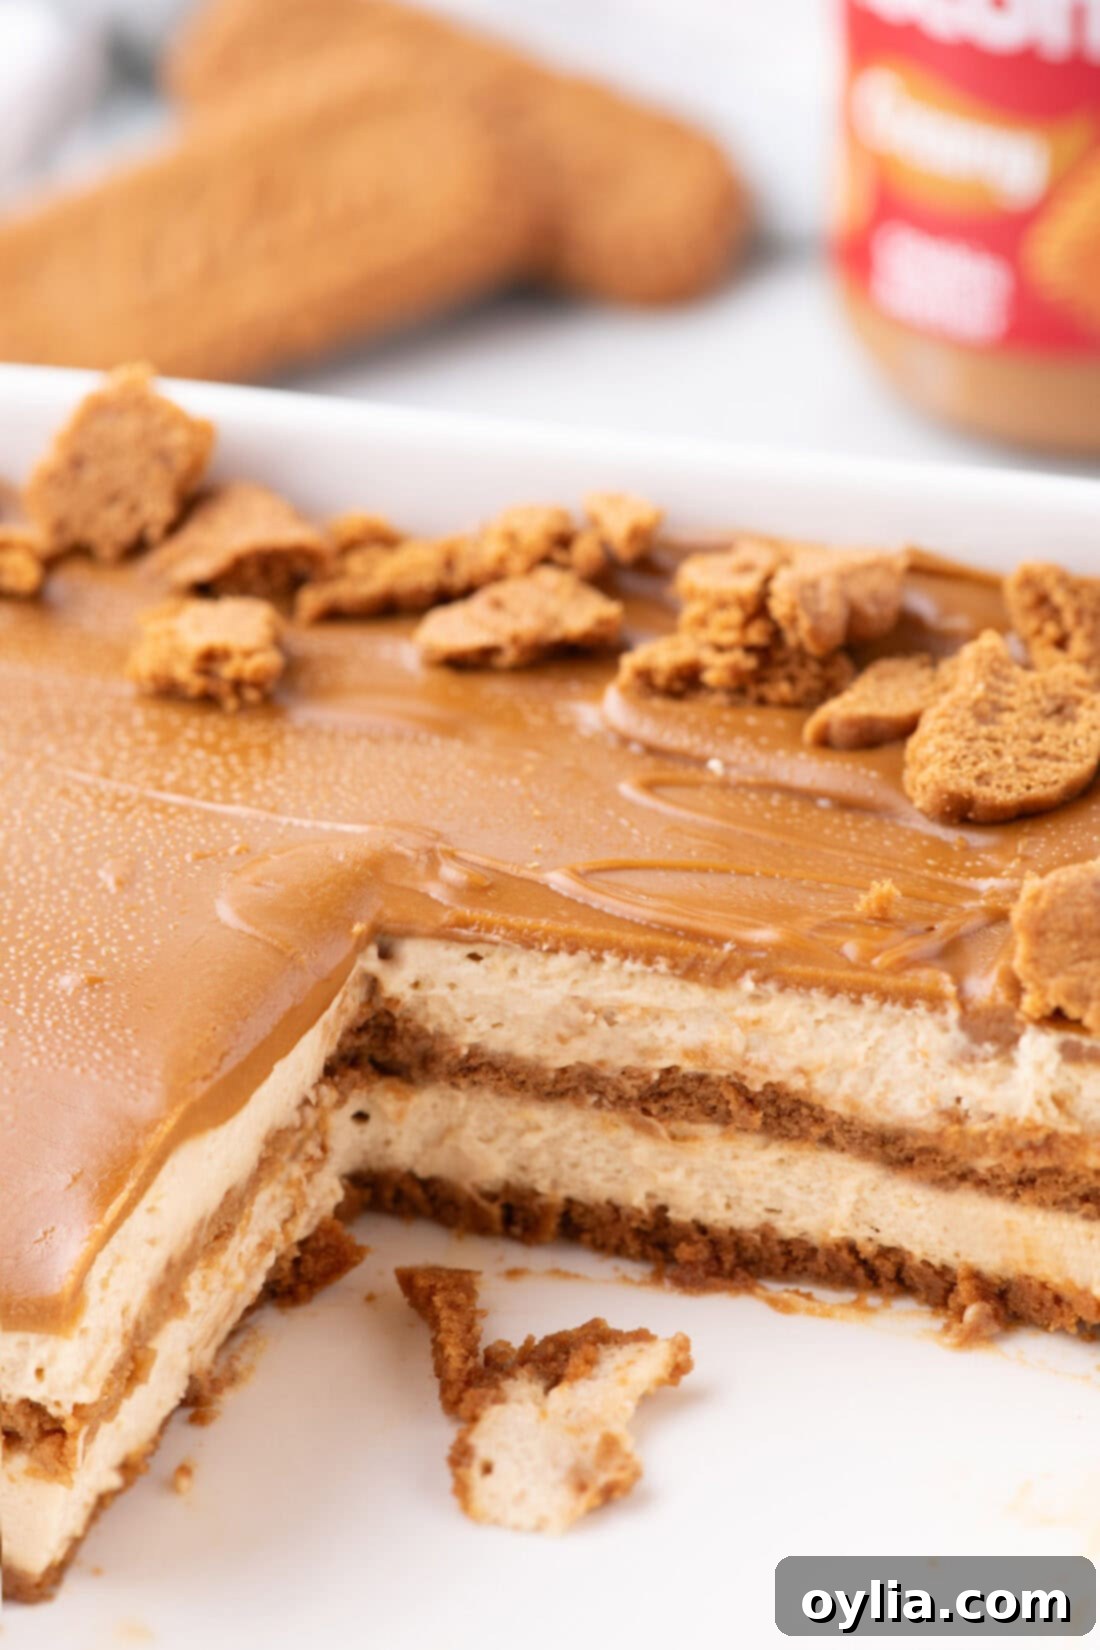
This Biscoff icebox cake is a testament to the magic of simplicity. Its assembly is a breeze, requiring no baking whatsoever – the hardest part truly is allowing it enough time to chill and firm up in the refrigerator. Within its elegant layers, you’ll discover the delightful combination of crisp Biscoff cookies and a luscious, airy whipped cream mixture, all crowned with a decadent cookie butter ganache. Those iconic, spiced Lotus cookies are transformed during the chilling process; they miraculously absorb the surrounding whipped cream, turning them soft and supple, like biting into a cloud. It’s a truly dreamy and harmonious blend of flavors and textures that will captivate your taste buds.
The inherent simplicity of icebox cakes is what makes them so universally loved and ensures we keep coming back for more. Typically, these desserts require only a handful of ingredients, skillfully layered together in a dish. These layers often consist of a rich whipped cream base, sometimes combined with cream cheese for extra tang and stability, as seen in popular treats like our Oreo icebox cake. Other variations might include a burst of flavor from pudding mix, similar to our refreshing lemon icebox cake. Add a foundational element like biscuits, cookies, or graham crackers to embellish these creamy layers, and you’ve created an incredibly easy yet impressive dessert that’s perfect for feeding a crowd without breaking a sweat.
This particular Biscoff version elevates the classic icebox cake experience by focusing on the unique, caramelized notes of Biscoff cookies and cookie butter. The no-bake method means less time in the kitchen and more time enjoying a delightful treat. It’s an ideal dessert for warm weather, potlucks, holidays, or any moment you crave something sweet and satisfying without the oven’s heat.
Key Ingredients for Your Biscoff Icebox Cake
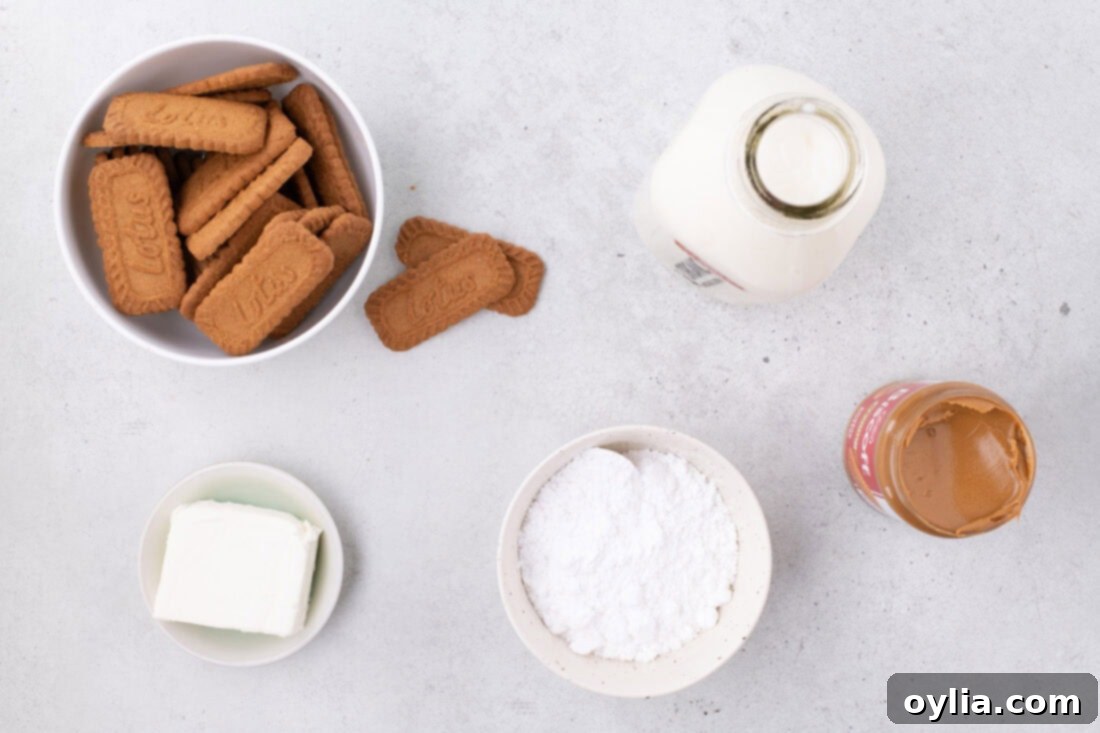
This delightful Biscoff icebox cake relies on a handful of readily available ingredients to create its signature flavor and texture. You’ll find all precise measurements, ingredient details, and comprehensive instructions in the printable recipe card located at the end of this post. For now, let’s dive into the core components that make this dessert so special.
Ingredient Insight and Smart Substitution Tips
- BISCOFF COOKIES – These iconic Belgian spiced cookies are the heart of our icebox cake. Ensure you purchase the original, crisp Biscoff cookies, not the sandwich cream variety, as their texture and ability to soften in the cream are crucial for this recipe’s success. Their distinctive caramelized flavor adds a unique depth to every bite.
- CREAM CHEESE – For the perfect texture and stability in your whipped cream mixture, it’s imperative to use only brick-style cream cheese. Tub or spreadable cream cheese contains more water and will not yield the desired firm consistency. Always allow your cream cheese to come to room temperature by leaving it on the counter for at least an hour. Do not attempt to microwave it to speed up this process, as uneven heating can compromise its structure and negatively impact the final whipped cream mixture. The cream cheese should be slightly firm to the touch, but soft enough to create a small indent when gently pressed. This ensures it blends smoothly without lumps.
- POWDERED SUGAR – Also known as confectioners’ sugar, this fine sugar dissolves easily into the cream cheese and heavy cream mixture, ensuring a smooth and lump-free sweetness without any grainy texture. It also helps stabilize the whipped cream.
- HEAVY CREAM – The colder your heavy cream, the better it will whip into light and fluffy peaks. Make sure your heavy cream is thoroughly chilled and keep it in the refrigerator until the very moment you are ready to use it. For an extra boost, you can even chill your mixing bowl and whisk attachment in the freezer for 10-15 minutes before whipping, which significantly aids in achieving a stable, voluminous whipped cream.
- BISCOFF COOKIE BUTTER (GANACHE) – The luscious top layer, our Biscoff ganache, simply requires a jar of Biscoff cookie butter from your local grocery store. This spreadable treat adds an intense caramelized flavor and a smooth, glossy finish. If the Biscoff brand is unavailable, any other brand of cookie butter will work beautifully to achieve that signature taste.
How to Assemble Your Irresistible Biscoff Icebox Cake
These step-by-step photos and instructions are here to guide you visually through the process of making this incredibly delicious Biscoff icebox cake. For the complete printable version of this recipe, including all precise measurements and detailed instructions, simply Jump to Recipe at the bottom of this post.
- Begin by lightly greasing an 8×8-inch square baking pan. This small step helps ensure your finished Biscoff icebox cake releases cleanly and easily when it’s time to serve.
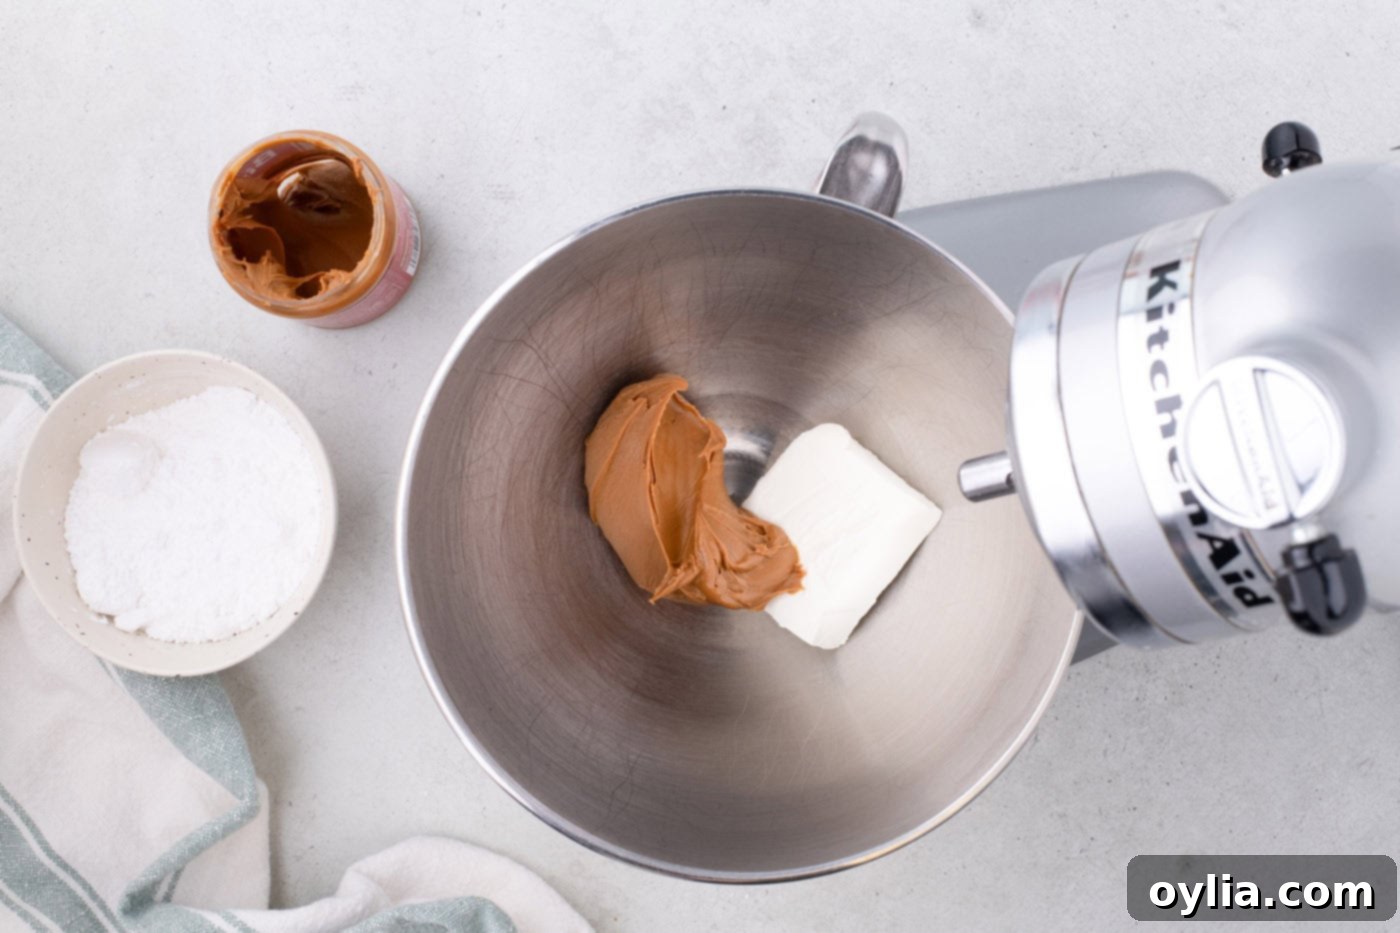
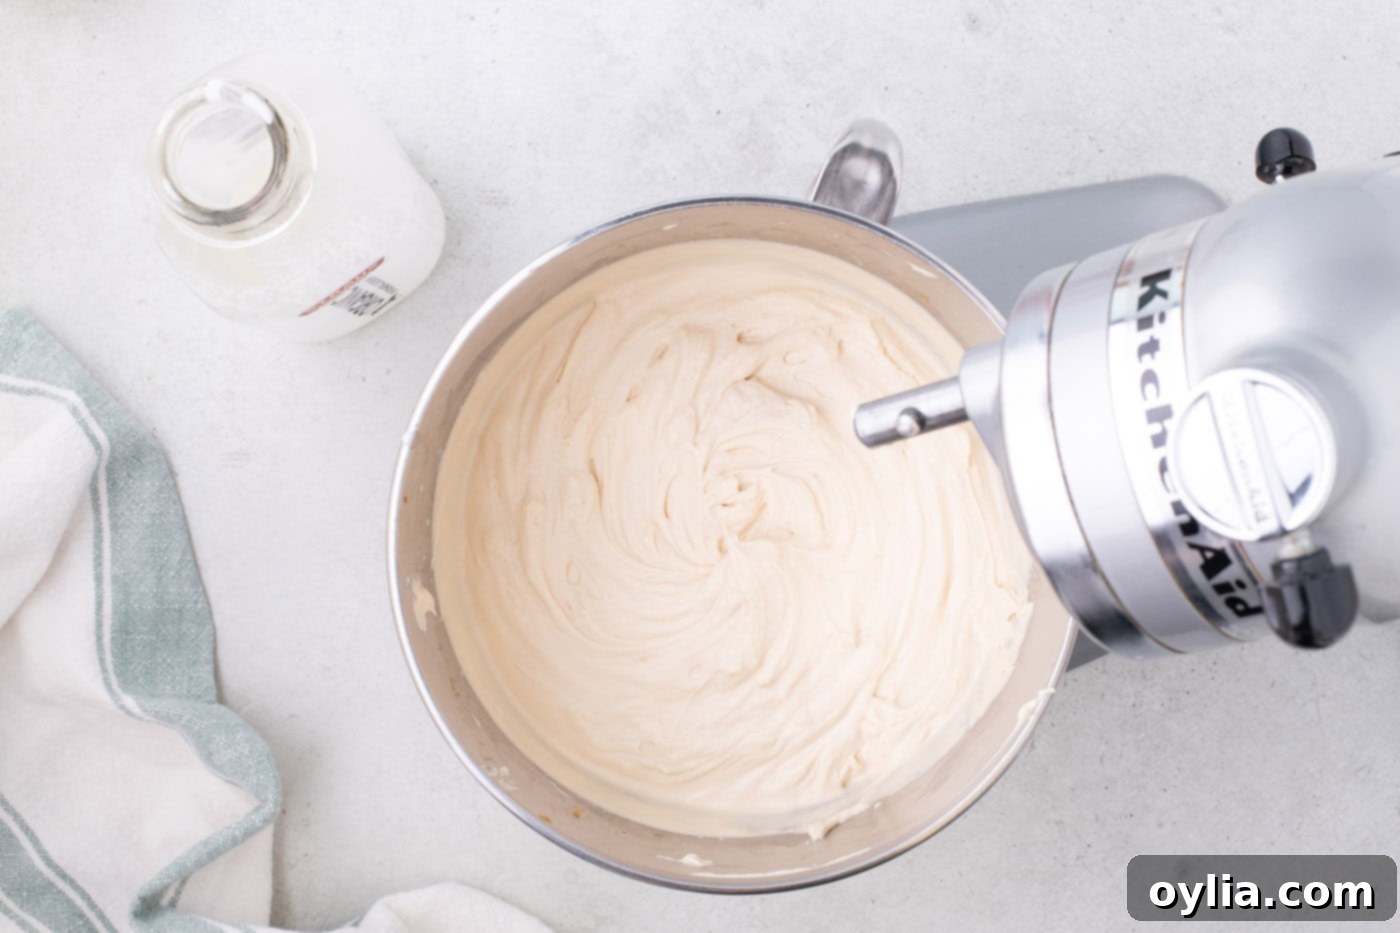
- In the spacious bowl of a stand mixer, fitted with the whisk attachment, combine your softened brick-style cream cheese and ¾ cup of the Biscoff cookie butter. Start mixing on medium speed and continue until the mixture is perfectly smooth and free of any lumps. This forms the creamy, flavorful base for your whipped layers.

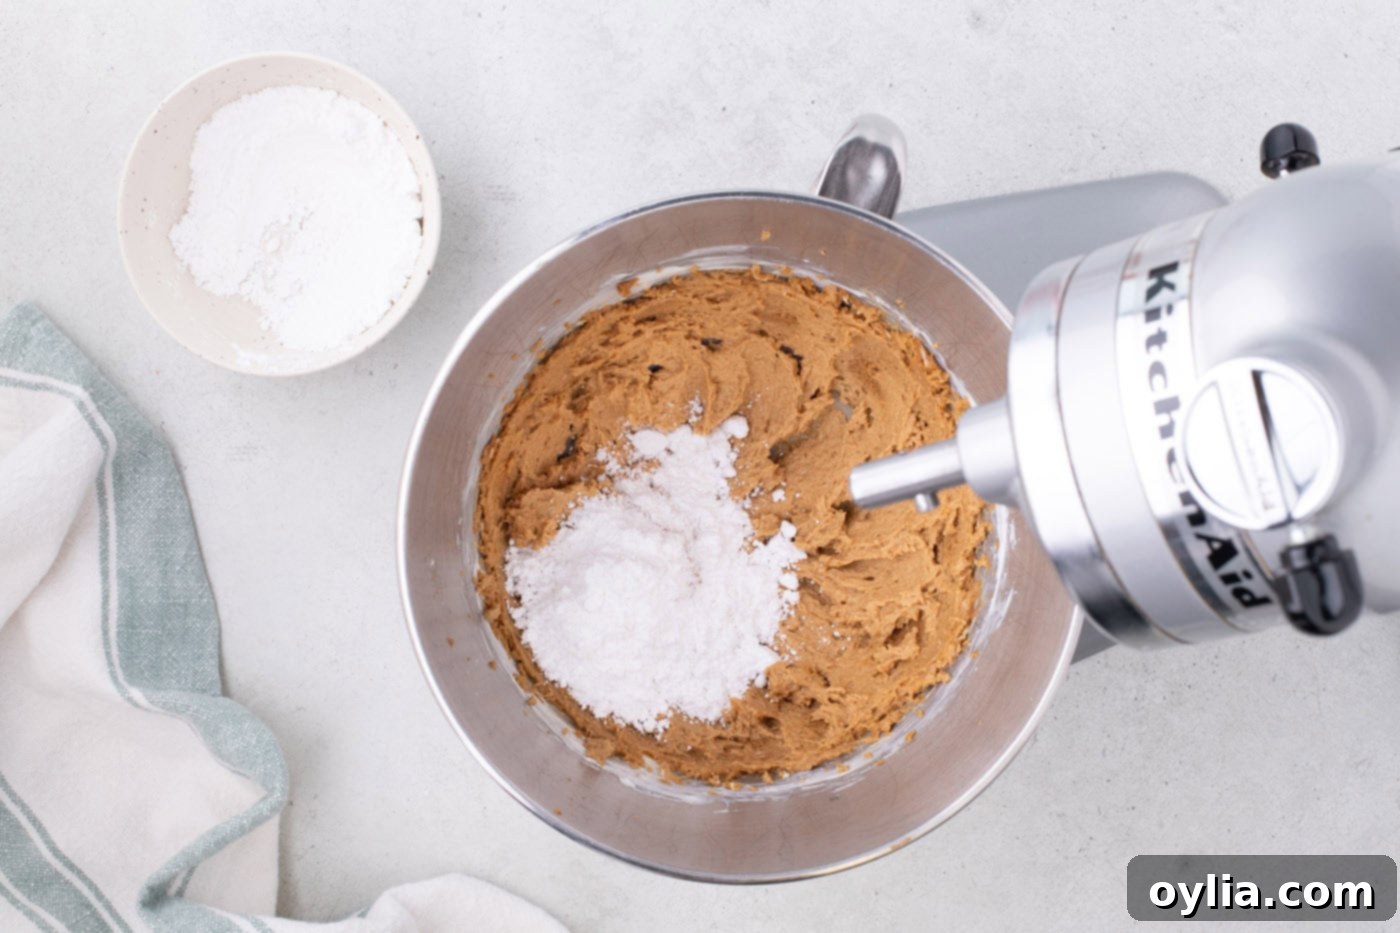
- Gradually add the powdered sugar into the cream cheese and cookie butter mixture, a little at a time. Mix on low speed initially to prevent a cloud of sugar from forming, then continue until it’s thoroughly combined and smooth. This step sweetens and further stabilizes the base.

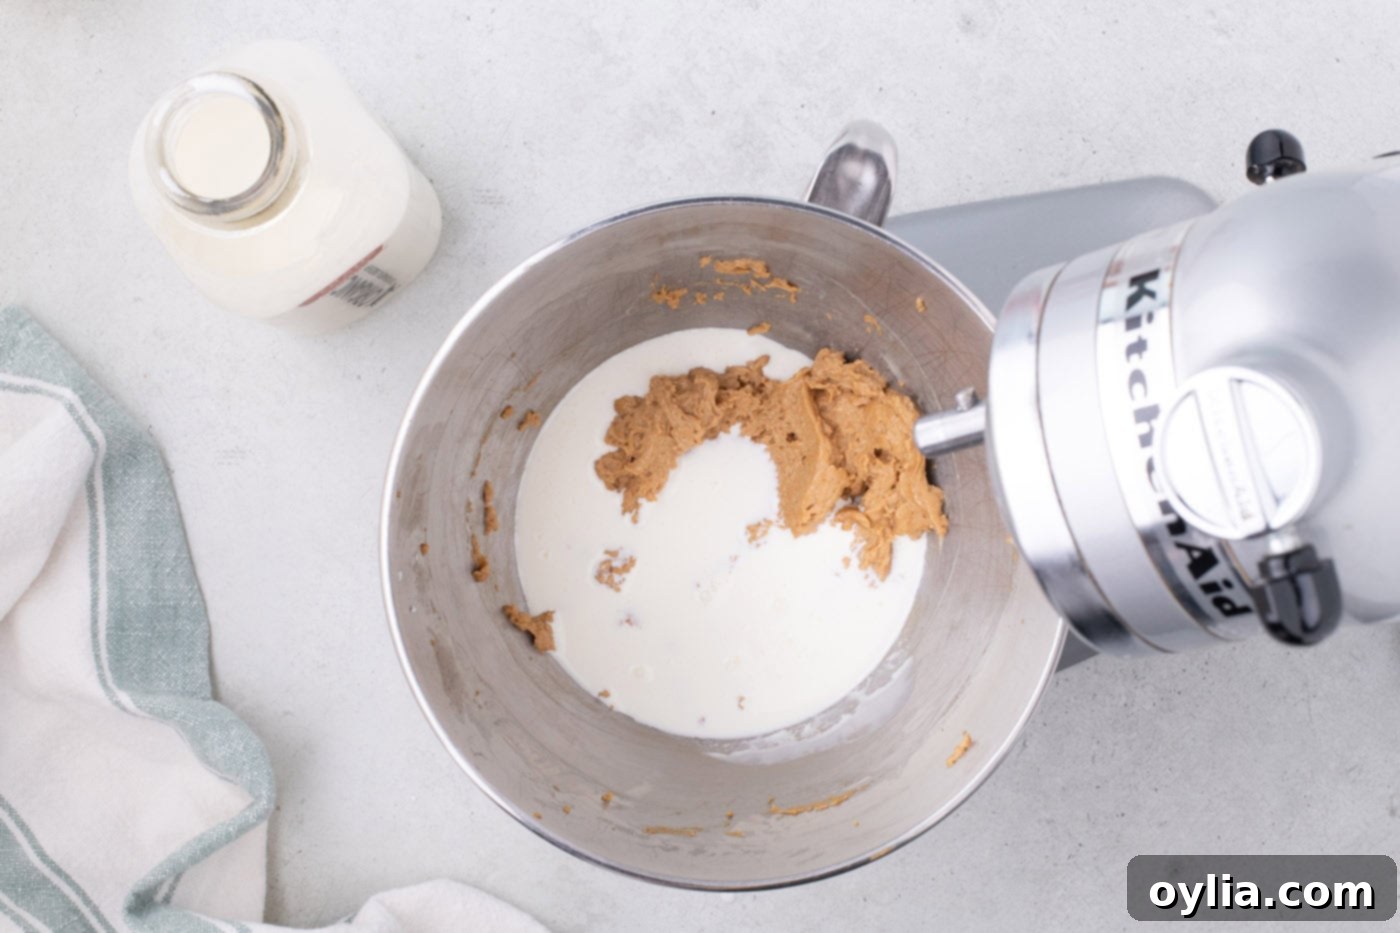
- Now it’s time to create that wonderfully airy texture! Add ½ cup of the chilled heavy whipping cream to the Biscoff/cream cheese mixture and mix on low speed until just combined. Next, add another ½ cup of heavy cream and continue mixing on low speed until smooth. Proceed by adding the remaining heavy cream in 1-cup increments, mixing on low speed after each addition until fully incorporated and smooth. Once all the cream is added, increase the mixer speed to high and beat until the mixture thickens and forms soft, billowy peaks. Be vigilant and watch closely! As soon as soft peaks form, stop mixing. Overmixing can cause the mixture to separate and become grainy, a point of no return for whipped cream. Set this decadent mixture aside.
EXPERT TIP – The secret to perfect whipped cream for your icebox cake is careful mixing. Avoid overmixing at all costs! The mixture can easily separate and turn into ‘butter’ if beaten for too long, and unfortunately, once this happens, it cannot be salvaged. The key is to build volume slowly by mixing the initial ingredients on low speed until smooth. Only then should you beat on high speed, and crucially, stop beating the moment you observe the mixture starting to form soft peaks. This technique ensures a light, fluffy, and stable cream for your cake.


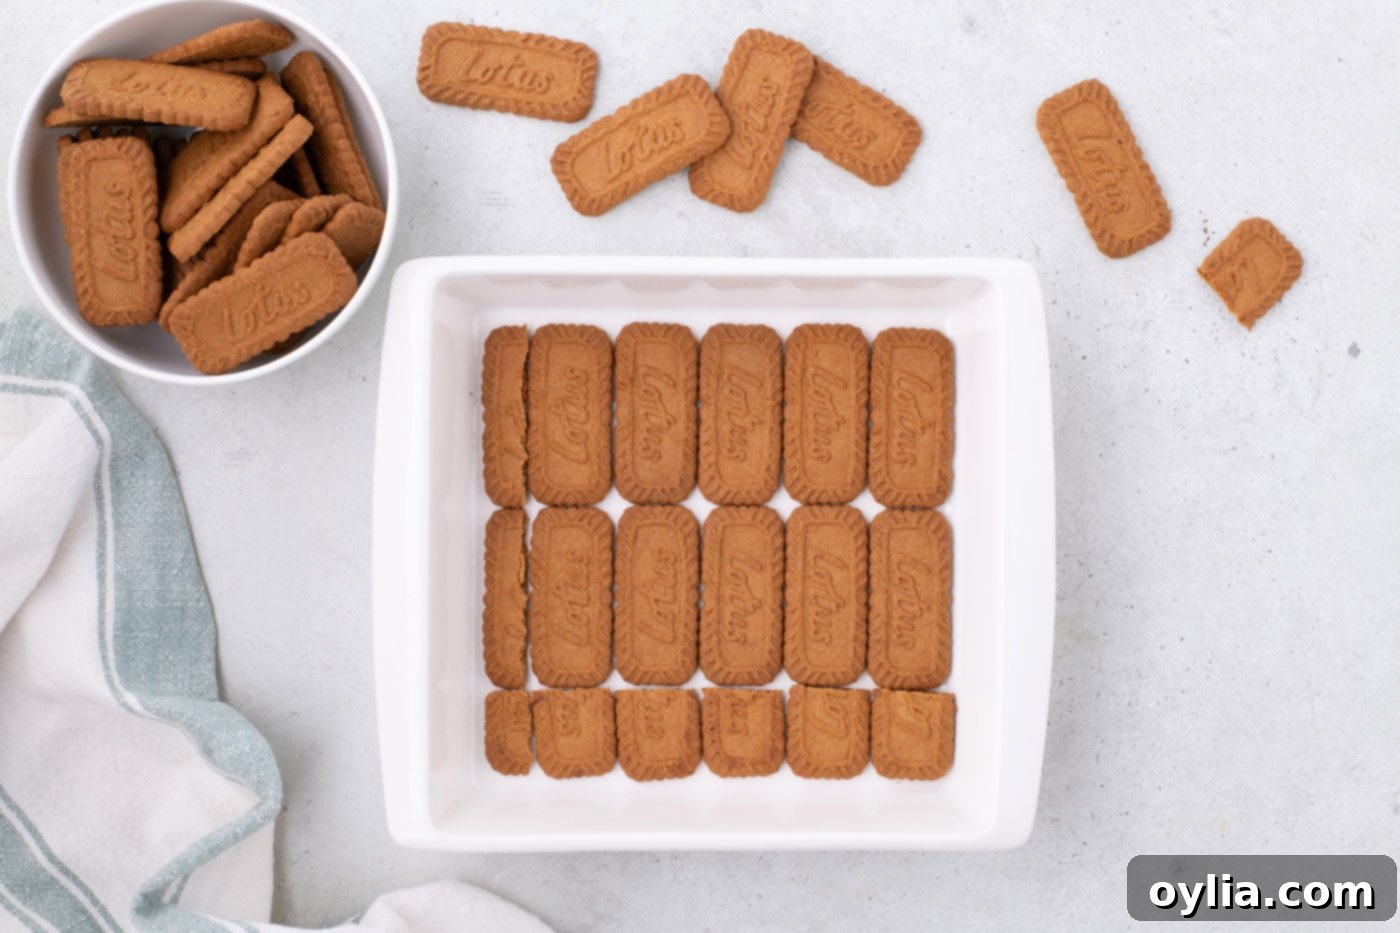
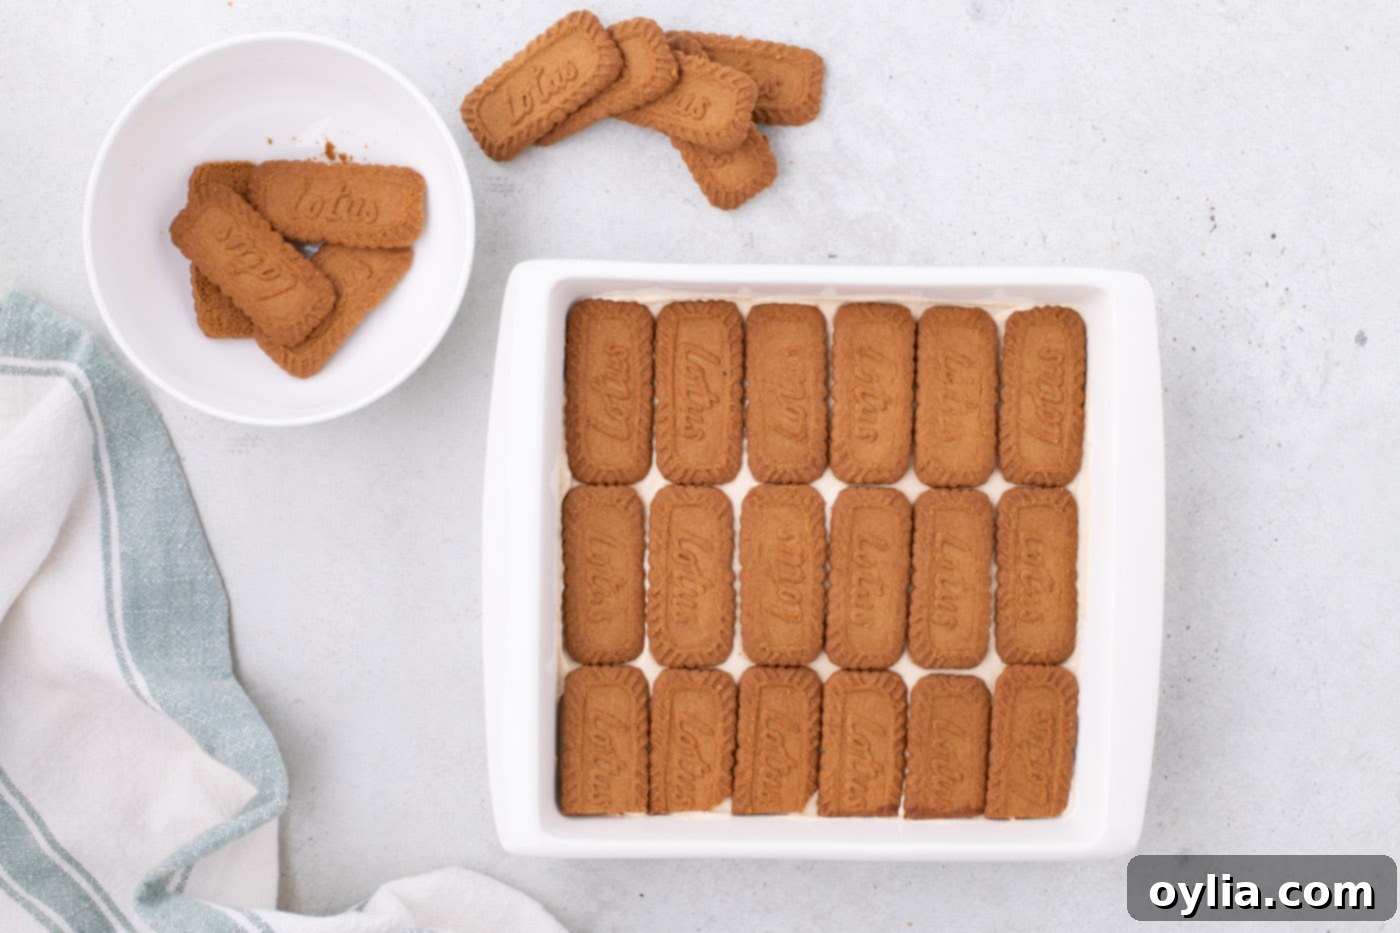
- Carefully arrange a single layer of Biscoff cookies onto the bottom of your prepared baking pan. Aim for a snug fit. If necessary, don’t hesitate to cut some of the cookies in half or into smaller pieces to fill any large gaps, ensuring a solid, even foundation for your cake.

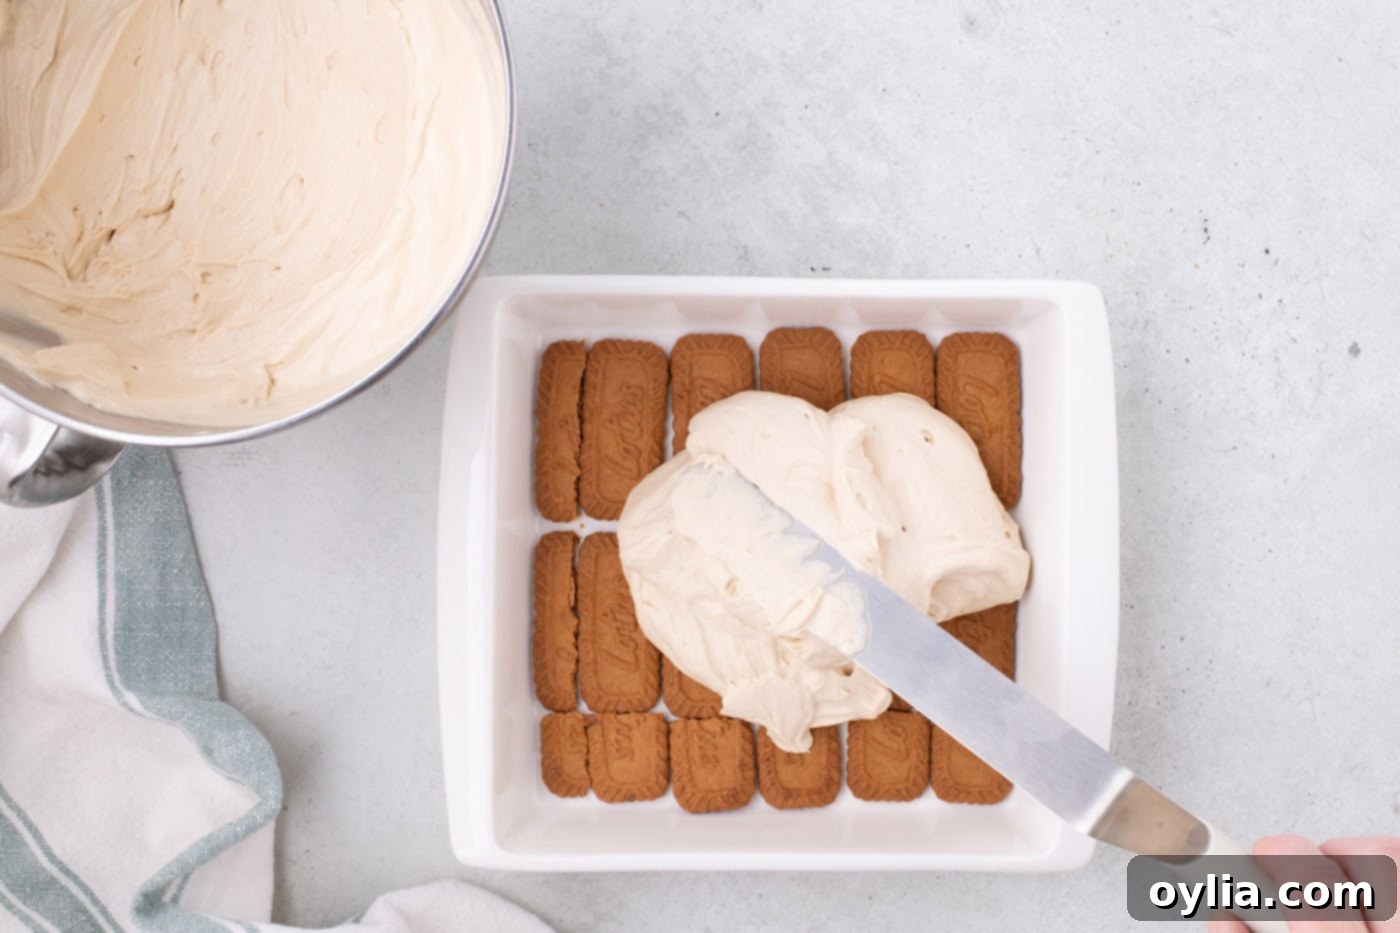
- Gently spoon 2 ½ cups of the prepared whipped cream mixture evenly over the layer of Biscoff cookies. Be cautious to avoid shifting the cookies too much as you spread the cream. Use an offset spatula to carefully smooth the top, ensuring a consistent layer.


- Place a second, equally snug layer of Biscoff cookies directly on top of the whipped cream. Again, ensure the cookies fit closely together, cutting them as needed to fill any remaining gaps. This creates a beautiful, layered effect and ensures every bite has a perfect cookie-to-cream ratio.

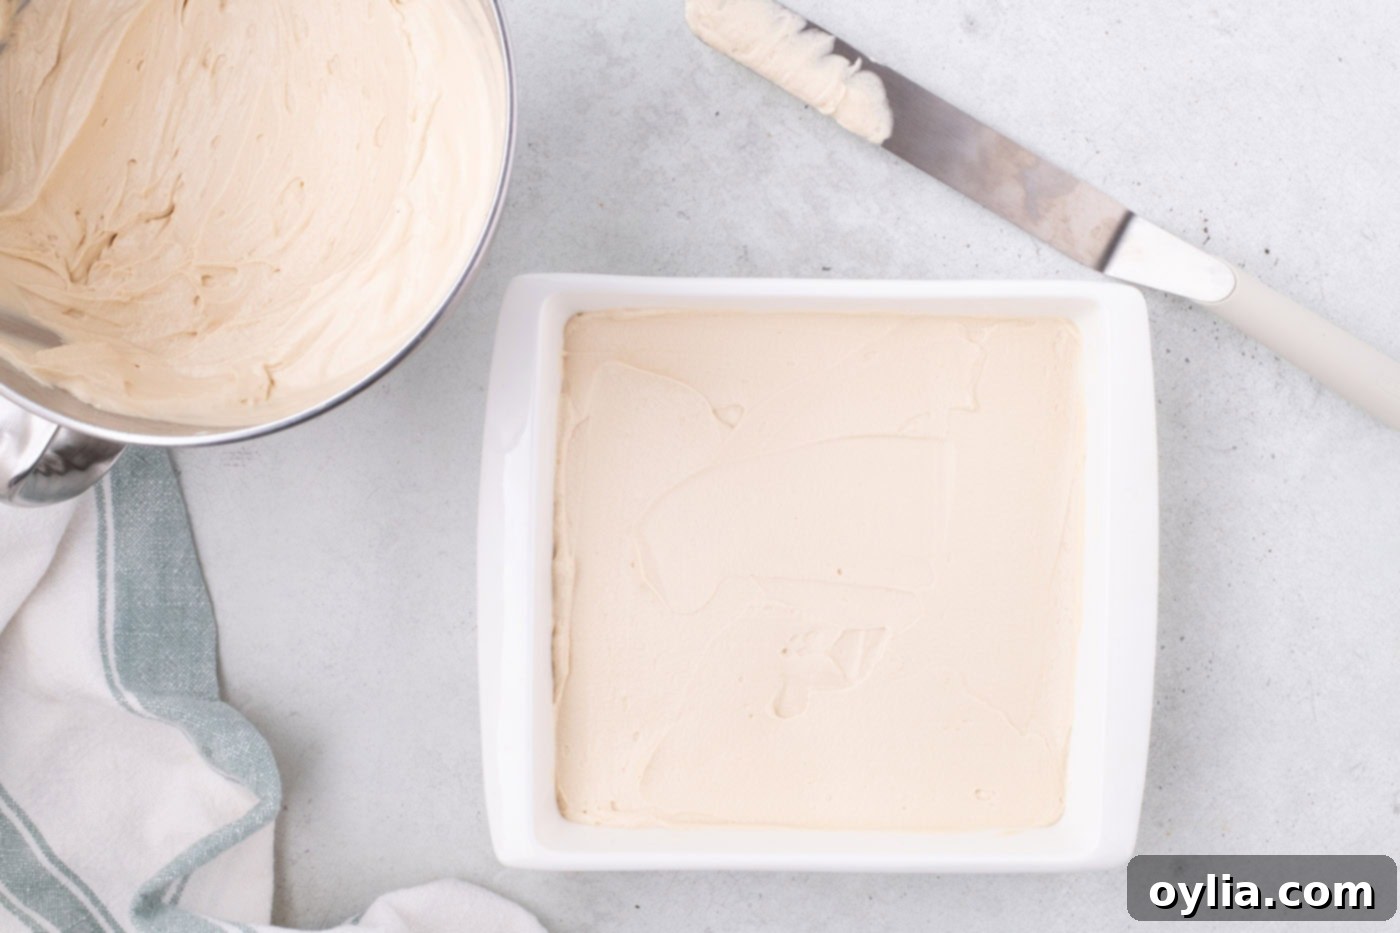
- Finally, add the remaining 2 ½ cups of whipped cream mixture over this second layer of Biscoff cookies. Carefully smooth out the cream, making sure to spread it into all corners of the pan for a neat and even finish. Cover the pan tightly with plastic wrap and refrigerate for a minimum of 1 hour. This initial chill helps to set the layers before adding the ganache.
Finishing Touches: Assembling the Biscoff Icebox Cake
Once your Biscoff icebox cake has had its initial chill, it’s time to add the irresistible cookie butter ganache and a final decorative flourish.
- Take about 10 Biscoff cookies and break them into smaller, irregular pieces. Set these aside, as they will be used for a beautiful garnish later.
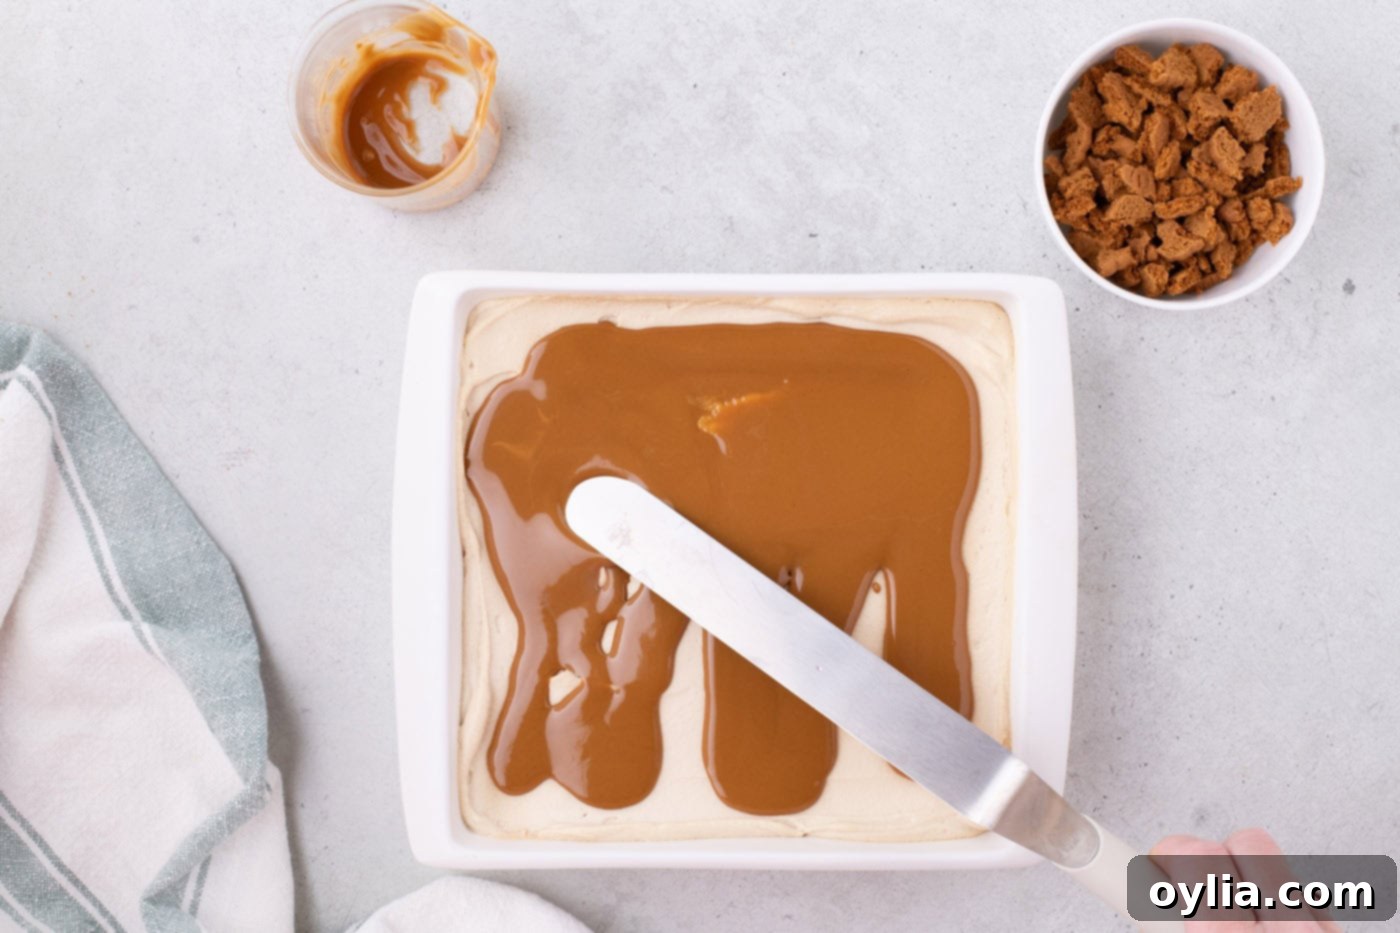
- To create the rich Biscoff ganache, spoon 1 cup of the Biscoff cookie butter into a microwave-safe container. Heat it in the microwave for approximately 30 seconds, or until it becomes warm and fluid enough to pour easily. Pour this melted cookie butter evenly over the chilled whipped cream layer, then use an offset spatula to gently spread it, creating a smooth, glossy top layer. This ganache will firm up as it chills, adding another delicious texture and intense Biscoff flavor.

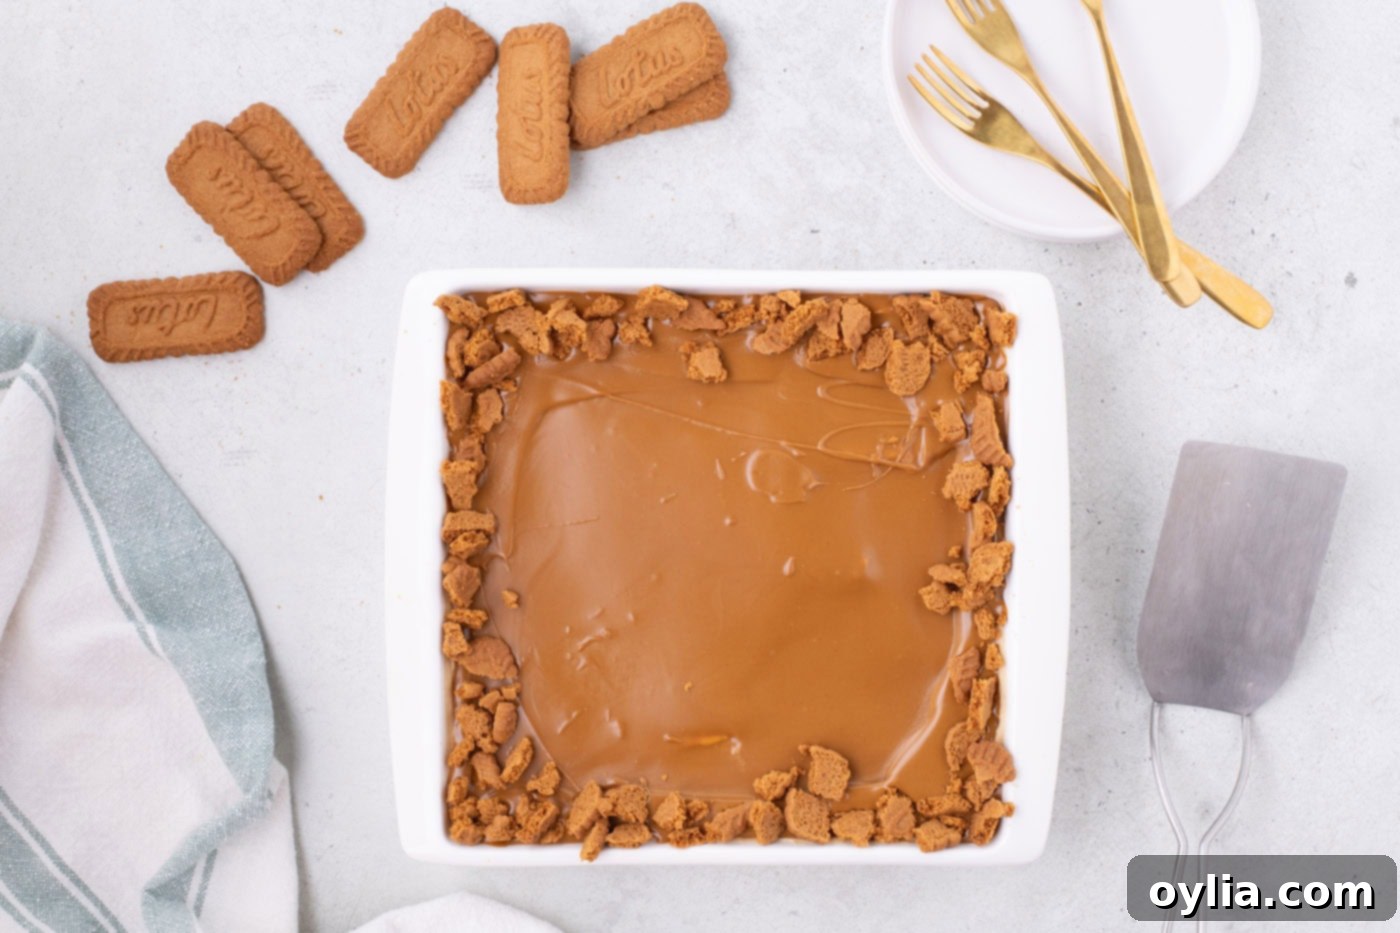
- Finally, take the broken Biscoff cookie pieces you set aside earlier and artfully sprinkle them along the sides of the newly spread ganache layer. This creates an attractive, textured border and adds another layer of Biscoff goodness. Once decorated, return the entire Biscoff icebox cake to the refrigerator. It needs to chill for a minimum of 4 hours, or ideally overnight, to allow the cookies to soften perfectly and all the layers to set into a cohesive, sliceable cake.

Frequently Asked Questions & Expert Tips for Your Biscoff Icebox Cake
To maintain its freshness and delightful texture, store your Biscoff icebox cake tightly wrapped with plastic wrap or covered with an airtight lid. It will keep beautifully in the refrigerator for up to 5 days. Ensure it’s well-sealed to prevent it from absorbing any refrigerator odors or drying out.
Absolutely, making this icebox cake ahead of time is highly recommended! For the very best texture, it’s advised to prepare it at least 4-5 hours in advance. However, for maximum convenience and flavor development, you can easily assemble it the day before you plan to serve it. Storing it in the refrigerator overnight allows the Biscoff cookies ample time to fully soften and meld with the creamy layers, resulting in wonderfully soft, perfectly sliceable layers that practically melt in your mouth. This makes it an ideal dessert for entertaining or busy schedules.
While some desserts freeze well, I would not recommend freezing this Biscoff icebox cake. Freezing and then thawing will likely alter the consistency of the delicate whipped cream layer, making it less appealing. For optimal taste and texture, any leftovers should be stored in the refrigerator, where it will remain delicious for several days.
Achieving perfectly neat slices is easier than you think! The key is to keep the cake as cold as possible; a firm cake is easier to cut cleanly. Before each slice, dip a sharp, thin-bladed knife into hot water, then wipe it completely dry. This heated blade will glide smoothly through the layers, creating a pristine cut. Repeat this hot water and wipe-dry process before every single cut you make for picture-perfect slices.
If your whipped cream isn’t thickening, ensure your heavy cream is very cold, as mentioned in the tips. Also, make sure your mixing bowl and whisk are chilled. Sometimes, humid conditions can affect whipping. If it’s still not thickening, try adding a tiny bit more powdered sugar (which has cornstarch) or a teaspoon of cream of tartar, which can act as a stabilizer. Make sure you’re using heavy cream (not whipping cream or light cream), as it has the highest fat content necessary for stiff peaks.
While an 8×8-inch pan is ideal for the specified layers and proportions, you could potentially use a slightly larger or smaller pan. However, be aware that this will alter the thickness of your layers and potentially the chilling time. A larger pan might result in thinner layers and require fewer cookies per layer, while a smaller pan would mean thicker layers and potentially more cookies to fill. Adjust cookie arrangement and cream distribution accordingly, and ensure the cake chills long enough to set firmly.
Delightful Serving Suggestions for Your Biscoff Icebox Cake
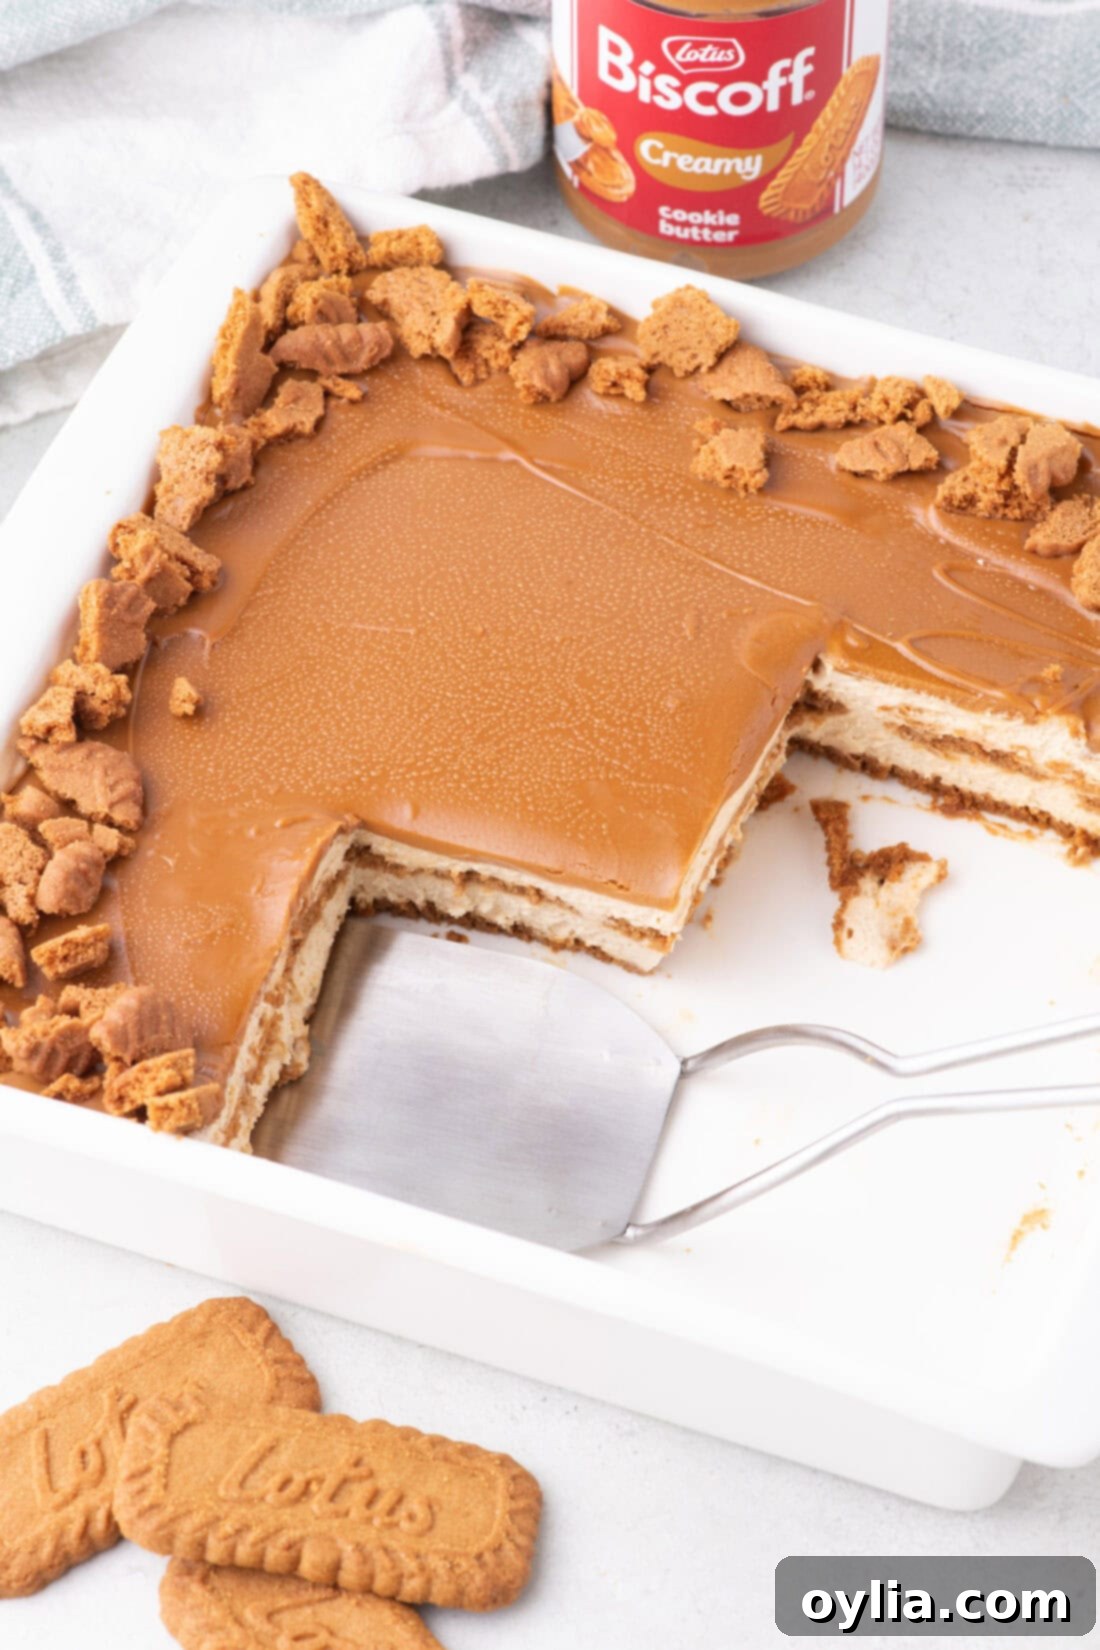
Once your Biscoff icebox cake has thoroughly chilled and the layers have set into that perfect, cloud-like consistency, it’s ready to be served and savored! For an elegant presentation, you can garnish individual slices with an optional dollop of freshly whipped cream and half of a whole Lotus Biscoff cookie placed artfully on top. Alternatively, for a simpler yet equally appealing touch, crush a few extra Biscoff cookies and sprinkle the crumbs generously over the whipped cream or ganache layer before serving. Remember, keeping your cake chilled until just before serving is essential for maintaining its firm structure and optimal deliciousness. Enjoy every heavenly bite of this easy, no-bake Biscoff creation!
Explore More Irresistible Icebox Cake Recipes
If you’ve fallen in love with the simplicity and decadent taste of this Biscoff icebox cake, you’re in for a treat! The world of no-bake icebox desserts is vast and full of delicious possibilities. Here are some more fantastic icebox cake recipes to inspire your next sweet creation:
- Strawberry Icebox Cake: A refreshing and fruity option perfect for summer.
- Nutter Butter Icebox Cake: For peanut butter lovers, this rich and creamy cake is a dream come true.
- Banana Cream Pie Icebox Cake: All the classic flavors of banana cream pie in an easy, no-bake format.
- Chocolate Chip Cookie Icebox Cake: A comforting dessert that combines beloved chocolate chip cookies with creamy layers.
I absolutely adore spending my time in the kitchen, crafting delicious recipes and sharing my culinary adventures with all of you! Remembering to visit the blog daily for new inspirations can sometimes be a challenge, which is precisely why I offer a convenient newsletter delivered straight to your inbox every time a new recipe is published. Simply subscribe here and start receiving your free daily dose of delightful recipes, ensuring you never miss a tasty update!
Biscoff Icebox Cake
IMPORTANT – There are often Frequently Asked Questions within the blog post that you may find helpful. Simply scroll back up to read them!
Print It
Pin It
Rate It
Save ItSaved!
Ingredients
- 4 ounces cream cheese brick style cream cheese, at room temperature*
- 14.1 ounces Biscoff cookie butter divided
- ½ cup powdered sugar
- 3 cups heavy whipping cream chilled
- 12 ounces Biscoff cookies divided. 1 1/2 packages
Things You’ll Need
-
8×8 baking pan
-
Stand mixer
-
Offset icing spatula
Before You Begin
- Make sure to buy the regular Biscoff cookies and not the ones with the sandwich cream center.
- Only use brick-style cream cheese; you won’t get the same texture if you use anything else.
- Leave the cream cheese on the counter to soften. Do not try microwaving it to speed up the process – this may alter the outcome of the whipped cream mixture. The cream cheese block should be slightly firm to the touch yet create a little indent when touched.
- I like to keep the bowl of my stand mixer and whisk attachment in the freezer (for about 10 minutes) until ready to use. This ensures the heavy cream is cold enough when making my whipped cream mixture.
- Be sure that your heavy cream is chilled and only take it out of the refrigerator when you are ready to use it.
Instructions
-
Grease an 8×8-inch square baking pan.
-
In the bowl of a stand mixer fitted with the whisk attachment, combine the softened cream cheese and ¾ cup Biscoff cookie butter. Mix on medium speed until smooth.
-
Add the powdered sugar a little at a time and mix on low speed until thoroughly combined.
-
Add ½ cup of the heavy whipping cream to the Biscoff/cream cheese mixture and mix on low speed until combined. Add another 1/2 cup of the heavy cream and continue mixing until smooth. Continue to add the remaining heavy cream in 1 cup increments mixing on low speed until smooth. Increase the speed to high and beat until the mixture thickens and soft peaks form. Set aside.
TIP – It’s important not to overmix the whipped cream. The mixture can easily separate and turn to ‘butter’ if mixed too long. When this happens it can no longer be salvaged. The key is to build volume slowly by mixing the ingredients on low speed until smooth. Only then beat on high speed and stop beating until you see the mixture starting to form soft peaks.
-
Place a layer of Biscoff cookies onto the bottom of the prepared baking pan. If they don’t fit evenly or you have large gaps, you may need to cut some of the cookies in half to make them fit snugly into the base of the pan.
-
Spoon 2 ½ cups of the whipped cream mixture on top of the layer of cookies, (be careful not to move the cookies around too much). Smooth the top using an offset spatula.
-
Place a second layer of Biscoff cookies on top of the whipped cream layer, making sure they fit snugly next to each other. Cut cookies in half to fill any gaps.
-
Add the remaining 2 ½ cups of whipped cream to the layer of Biscoff cookies, smoothing out the whipped cream mixture and getting into all the corners. Chill for 1 hour.
-
Break 10 Biscoff cookies into smaller pieces and set aside.
-
To make the Biscoff ganache, place 1 cup of the cookie butter in a microwave-safe container and heat for 30 seconds. Pour the melted cookie butter over the chilled whipped cream layer, smoothing it out with an offset spatula.
-
Sprinkle the broken Biscoff cookies along the sides of the ganache layer, creating a square border. Refrigerate for a minimum of 4 hours.
Expert Tips & FAQs
- It is best to keep the cake cold, this will make it easier to slice. Dip a sharp knife into hot water, pat dry, and slice to get clean cuts. Do this before every cut you make.
- Store the icebox cake tightly wrapped with plastic wrapped or covered with an air-tight lid in the refrigerator for up to 5 days.
- Make Ahead – It’s recommended to make this icebox cake at minimum 4-5 hours ahead of time for the best texture. However, you can easily prepare it the day before and store it in the refrigerator until you are ready to serve. Allowing it plenty of time to rest in the refrigerator will leave you with soft, sliceable layers to sink your teeth into.
- I would not recommend freezing this cake as it will change the consistency of the whipped cream layer when thawed. For storage, I recommend placing leftovers in the refrigerator.
Nutrition
The recipes on this blog are tested with a conventional gas oven and gas stovetop. It’s important to note that some ovens, especially as they age, can cook and bake inconsistently. Using an inexpensive oven thermometer can assure you that your oven is truly heating to the proper temperature. If you use a toaster oven or countertop oven, please keep in mind that they may not distribute heat the same as a conventional full sized oven and you may need to adjust your cooking/baking times. In the case of recipes made with a pressure cooker, air fryer, slow cooker, or other appliance, a link to the appliances we use is listed within each respective recipe. For baking recipes where measurements are given by weight, please note that results may not be the same if cups are used instead, and we can’t guarantee success with that method.
