The Ultimate Homemade Marble Cake: A Swirl of Chocolate and Vanilla Perfection
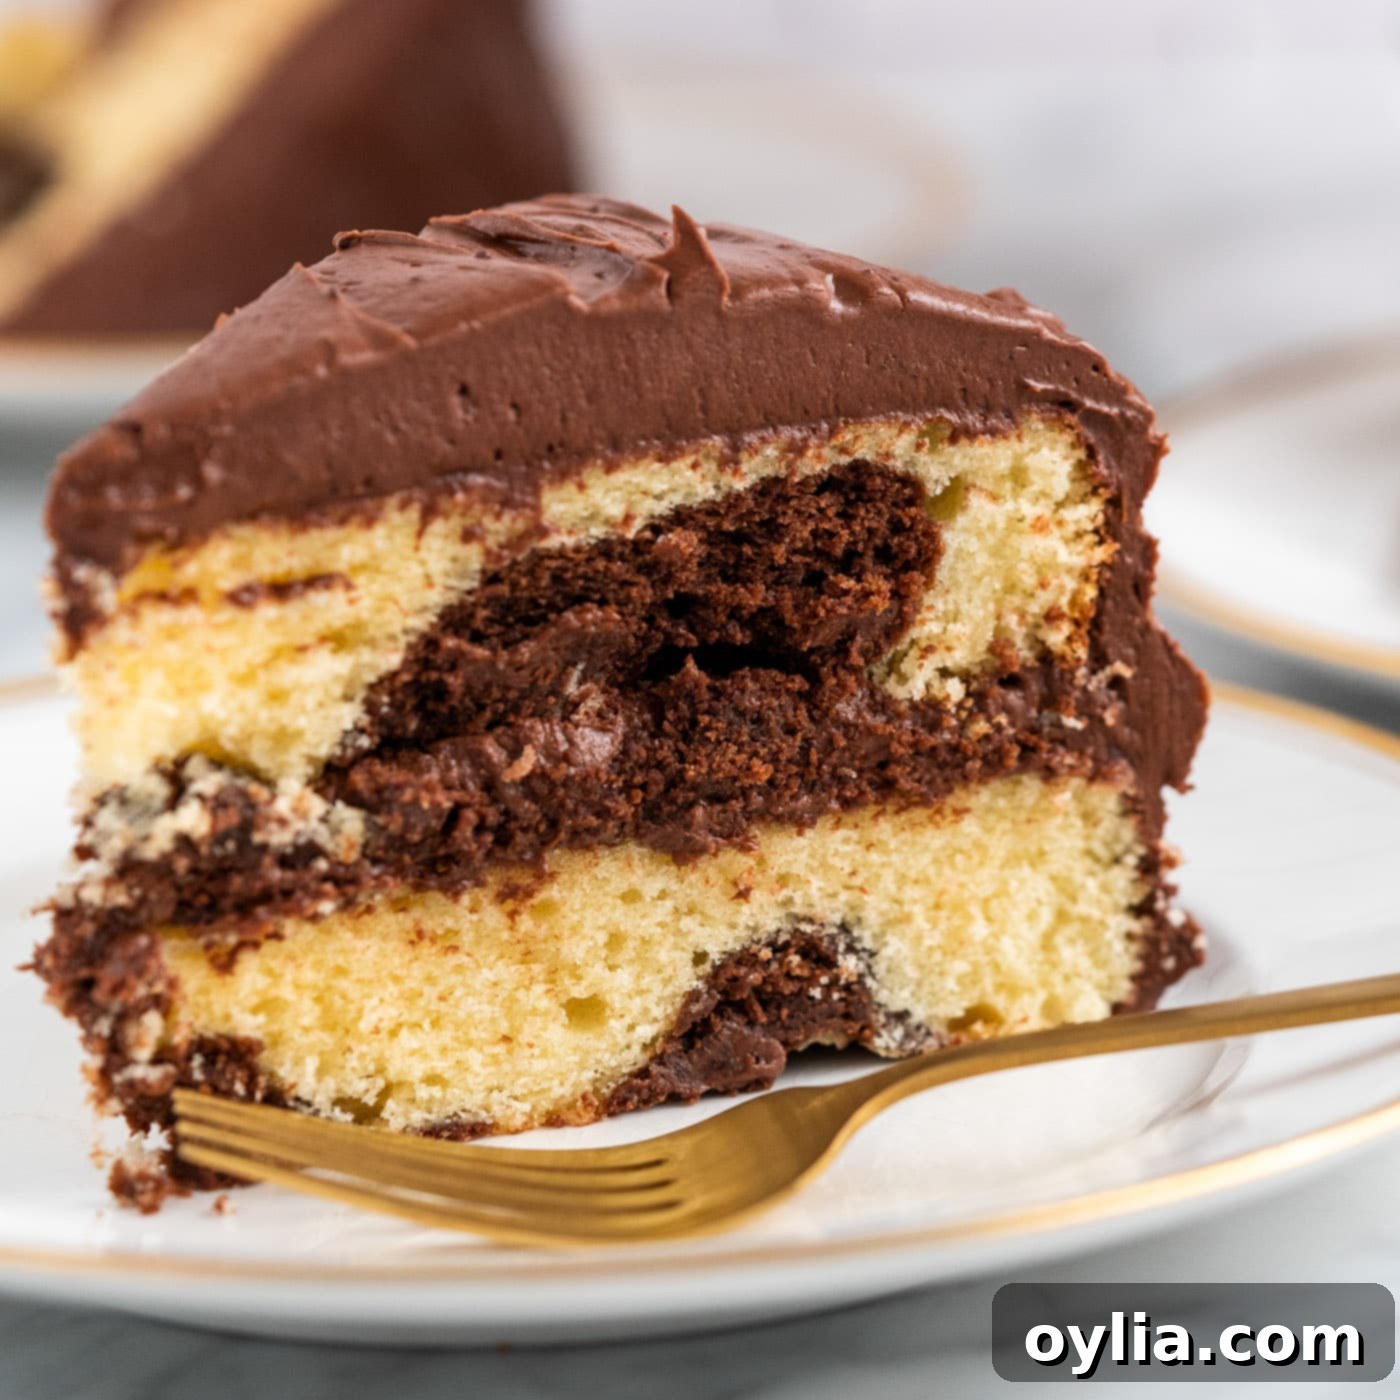
Prepare to delight your taste buds with our ultimate homemade Marble Cake, a dessert that truly brings the best of both worlds to your table. Imagine soft, pillowy layers of moist chocolate and tender yellow cake, elegantly swirled together in a harmonious dance of flavor and color. Each bite offers a perfect balance, leading to a grand finale of rich, fudgy frosting that envelops the entire creation. When you find yourself caught between a craving for chocolate and a desire for classic vanilla, this beautiful and utterly delicious cake is the undisputed champion, offering pure satisfaction in every decadent slice.
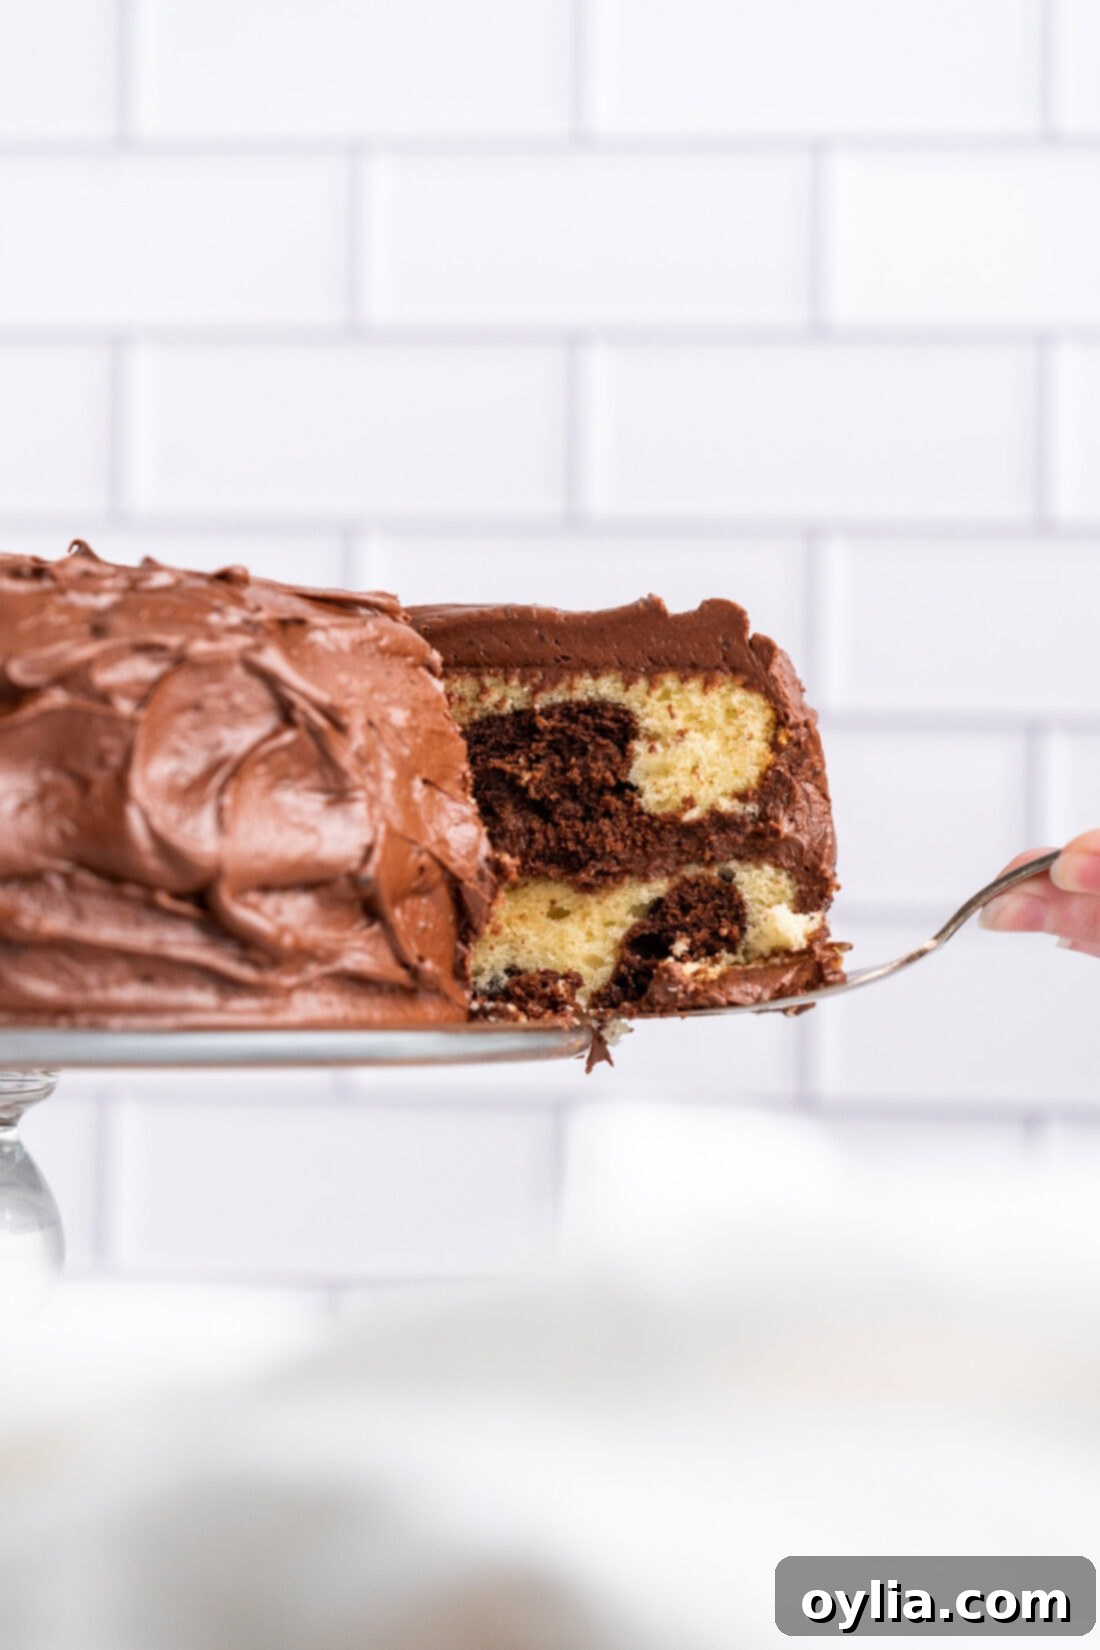
Why This Homemade Marble Cake Recipe Works Wonders
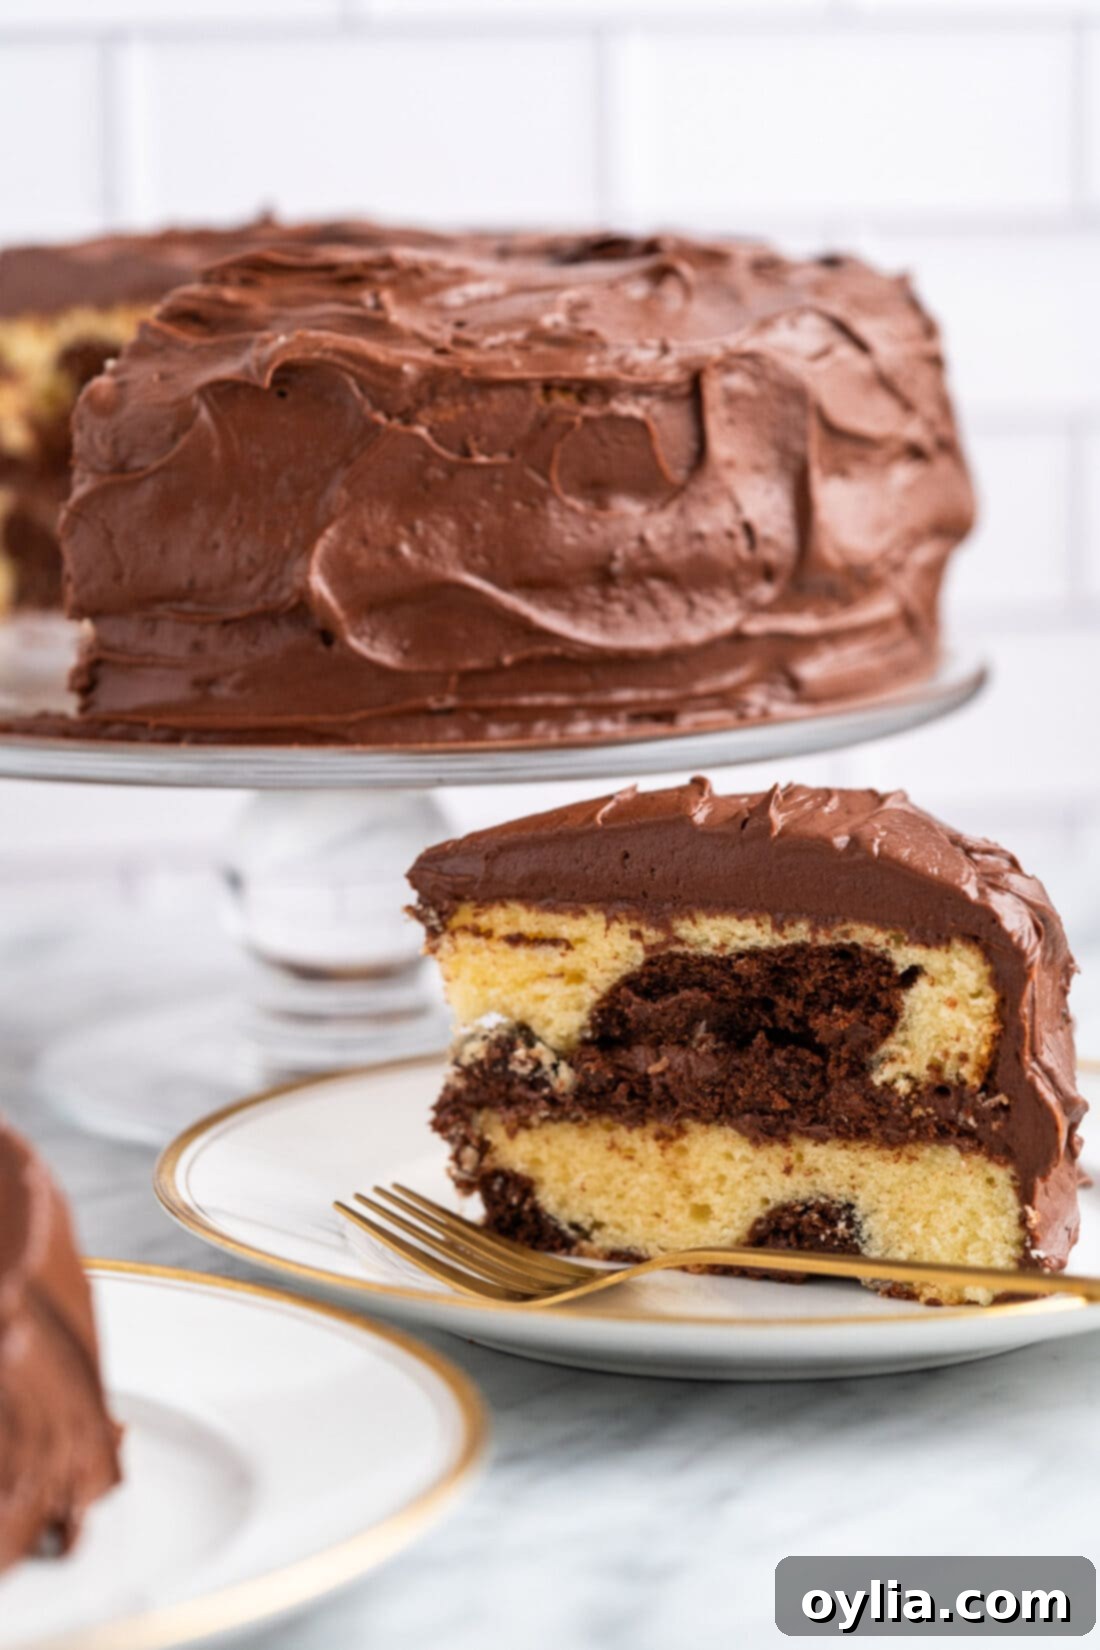
Our Marble Cake recipe isn’t just a dessert; it’s a celebration of a true baking classic, elevated to perfection. This particular recipe stands out because it combines the nostalgic charm of a marble cake with an incredibly straightforward, from-scratch approach. We’re talking about a decadent chocolate batter expertly swirled together with a rich vanilla (yellow) batter, baked until each layer is beautifully soft and golden. The magic is then sealed with our signature homemade chocolate fudge frosting, which is undeniably the best complement to these swirled cake layers. Every component, from the delicate crumb of the cake to the luxurious spread of the frosting, is made from scratch, yet designed to be as easy and approachable as possible for home bakers of all skill levels.
One of the most enchanting aspects of baking a marble cake is the inherent uniqueness of each creation. The beauty of this cake lies in its unpredictability; every slice reveals a one-of-a-kind marble pattern, a culinary work of art that’s never duplicated. While the swirling technique might seem intimidating, it’s actually quite simple to master. The key is gentle handling – avoid over-mixing when you’re blending the batters. This careful approach ensures that the distinct chocolate and vanilla hues remain separate yet intertwined, creating those eye-catching, mesmerizing swirls without blurring into a single muddy color. It’s this meticulous yet easy method that makes each cake a delightful surprise, promising both visual appeal and a truly unforgettable flavor experience.
Essential Ingredients for Your Perfect Marble Cake
Crafting a truly spectacular homemade marble cake begins with selecting the right ingredients. For this recipe, we focus on simple, high-quality components that you likely already have in your pantry or can easily find at any grocery store. Before you start, ensure all your cold ingredients, such as butter, eggs, and milk, are at room temperature. This is a crucial step in baking, as room-temperature ingredients emulsify more effectively, leading to a smoother, more uniform batter and a cake with a much finer, tender crumb. Accurate measurement is also key, so grab your measuring cups and spoons! For a complete list of all measurements, ingredients, and detailed instructions, please refer to the printable version of this recipe conveniently located at the end of this post.
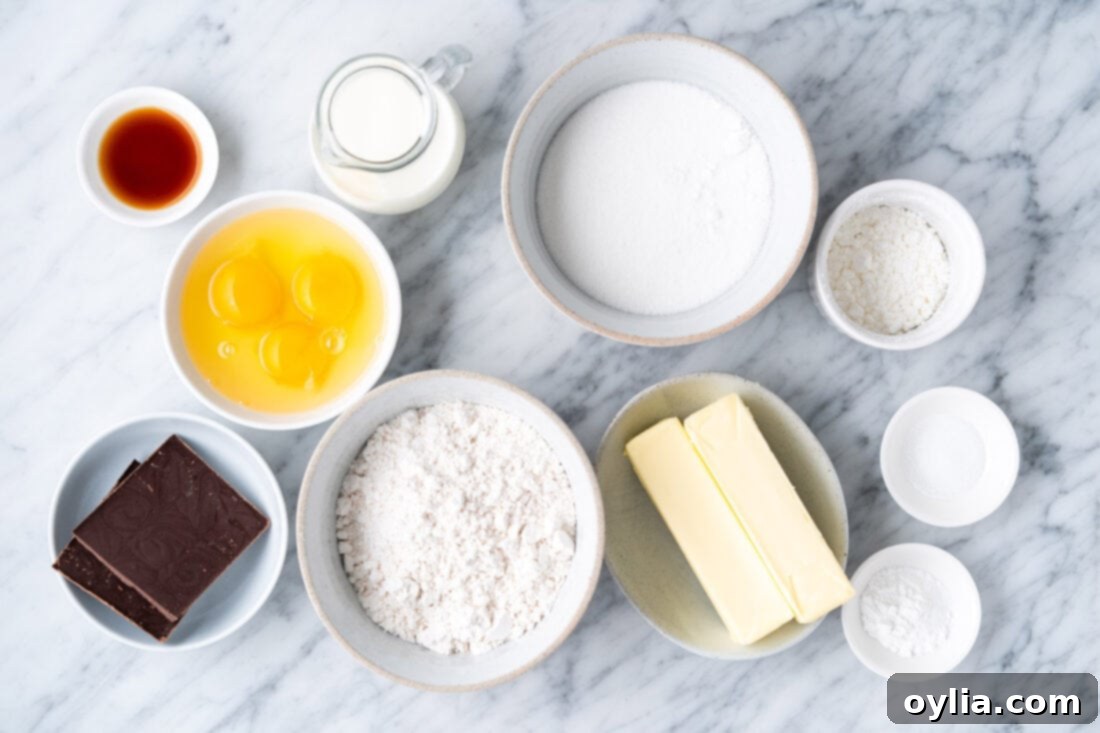
Ingredient Insights and Smart Substitutions for Your Marble Cake
Understanding the role of each ingredient can significantly enhance your baking experience and the final outcome of your marble cake. Here’s a deeper dive into what makes this recipe special and how you can adapt it to your preferences:
For the Cake Batter: Crafting the Perfect Swirl
CAKE – Our base for this beautiful marble creation is a classic yellow cake, renowned for its tender crumb and rich vanilla flavor. We use fundamental ingredients that are likely staples in your kitchen – all-purpose flour for structure, cornstarch for an extra tender crumb, baking powder for lift, salt for flavor balance, unsalted butter for richness, granulated sugar for sweetness, large eggs for moisture and binding, and pure vanilla extract for that essential aromatic warmth. The magic for the chocolate portion begins by simply removing about one cup of this exquisite yellow batter. Into this smaller portion, we mix melted semi-sweet chocolate. It’s crucial to use baking chocolate for this step, rather than chocolate chips. Baking chocolate melts more smoothly and incorporates seamlessly into the batter, ensuring a uniform chocolate flavor and color, whereas chocolate chips contain stabilizers that can prevent them from fully melting and blending. If you’re a true chocoholic and desire even more pronounced chocolate swirls, feel free to remove an additional 1/2 cup or so of yellow cake batter. Just remember to add a corresponding amount of extra melted chocolate to maintain the right consistency and flavor intensity in your expanded chocolate batter portion.
For the Frosting: The Crowning Glory
FROSTING – The frosting is not just a topping; it’s an integral part of the marble cake experience. For unparalleled richness and a truly luxurious texture, I wholeheartedly recommend our homemade chocolate fudge frosting. Its deep chocolate flavor and creamy consistency perfectly complement the subtle interplay of chocolate and vanilla within the cake layers, creating a truly decadent dessert that will impress everyone. However, if you have a different preference or dietary need, this versatile marble cake graciously accepts other frostings. Our light and tangy cream cheese frosting offers a delightful contrast, while a classic buttercream frosting provides a sweet, familiar richness. For those moments when time is of the essence, a high-quality store-bought frosting can also be a convenient and acceptable alternative, allowing you to enjoy this magnificent cake with minimal fuss.
Step-by-Step Guide: How to Make a Perfect Marble Cake
These step-by-step photos and detailed instructions are here to help you visualize how to make this delightful recipe with confidence. For a concise, printable version of this recipe, complete with precise measurements and instructions, you can easily Jump to Recipe at the bottom of this post.
-
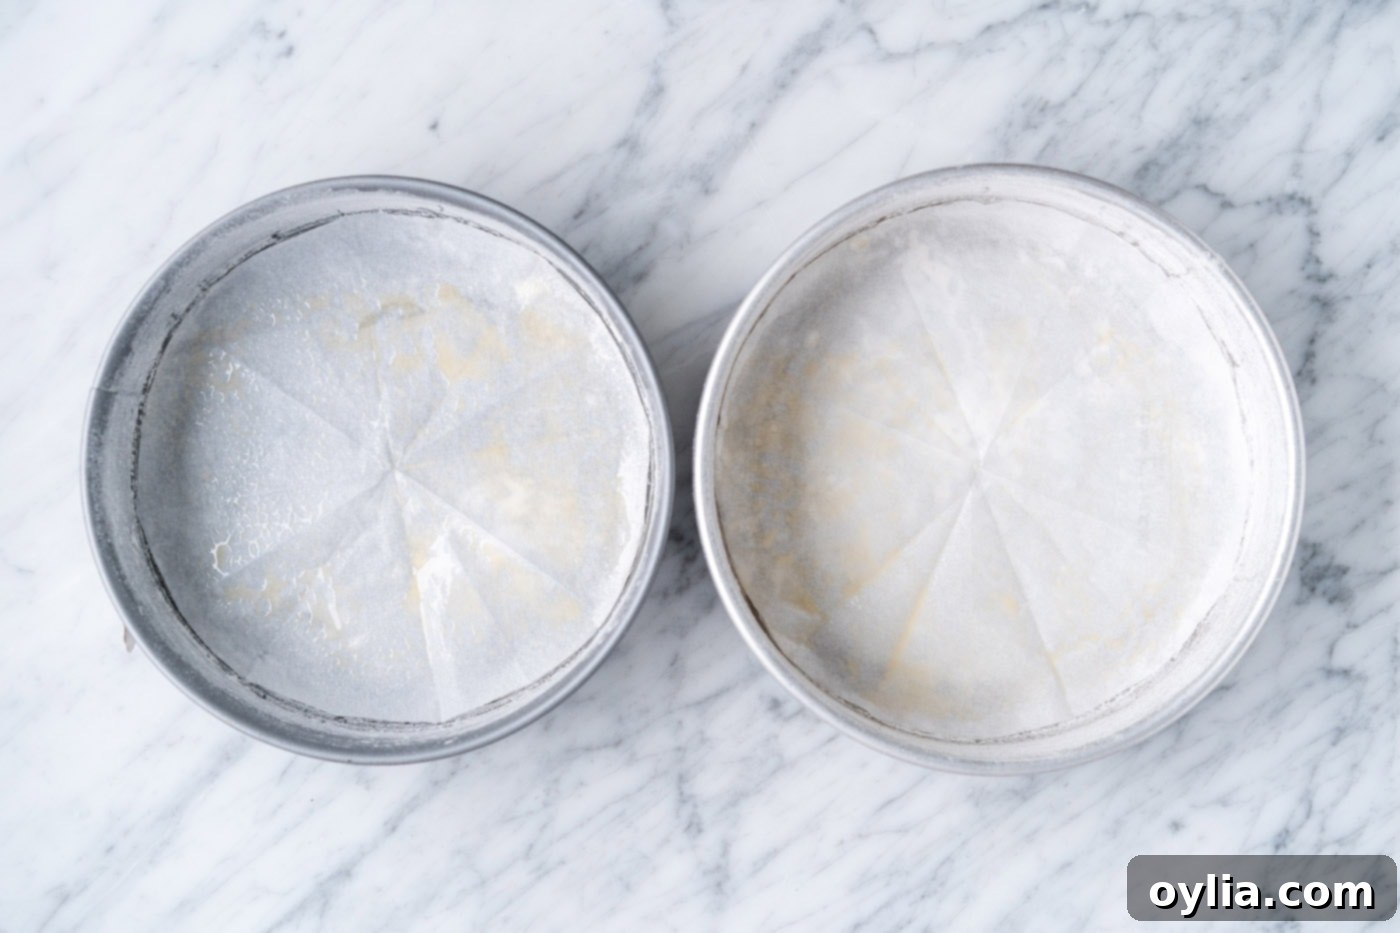
Preheat your oven to 350°F (175°C). Properly preparing your cake pans is essential for a beautiful, intact cake. Generously butter and flour two 9-inch round cake pans. This creates a non-stick barrier. Next, cut a piece of parchment paper to fit perfectly into the bottom of each buttered and floured pan. Lightly spray the parchment paper with a nonstick cooking spray for an extra layer of protection. These steps ensure your cake layers release effortlessly, preventing any sticking or tearing.

- In a medium-sized bowl, whisk together all your dry ingredients: the all-purpose flour, cornstarch, baking powder, and salt. Whisking ensures that these ingredients are thoroughly combined and evenly distributed, preventing pockets of leavening agent and guaranteeing a consistent rise and texture throughout your cake.
-
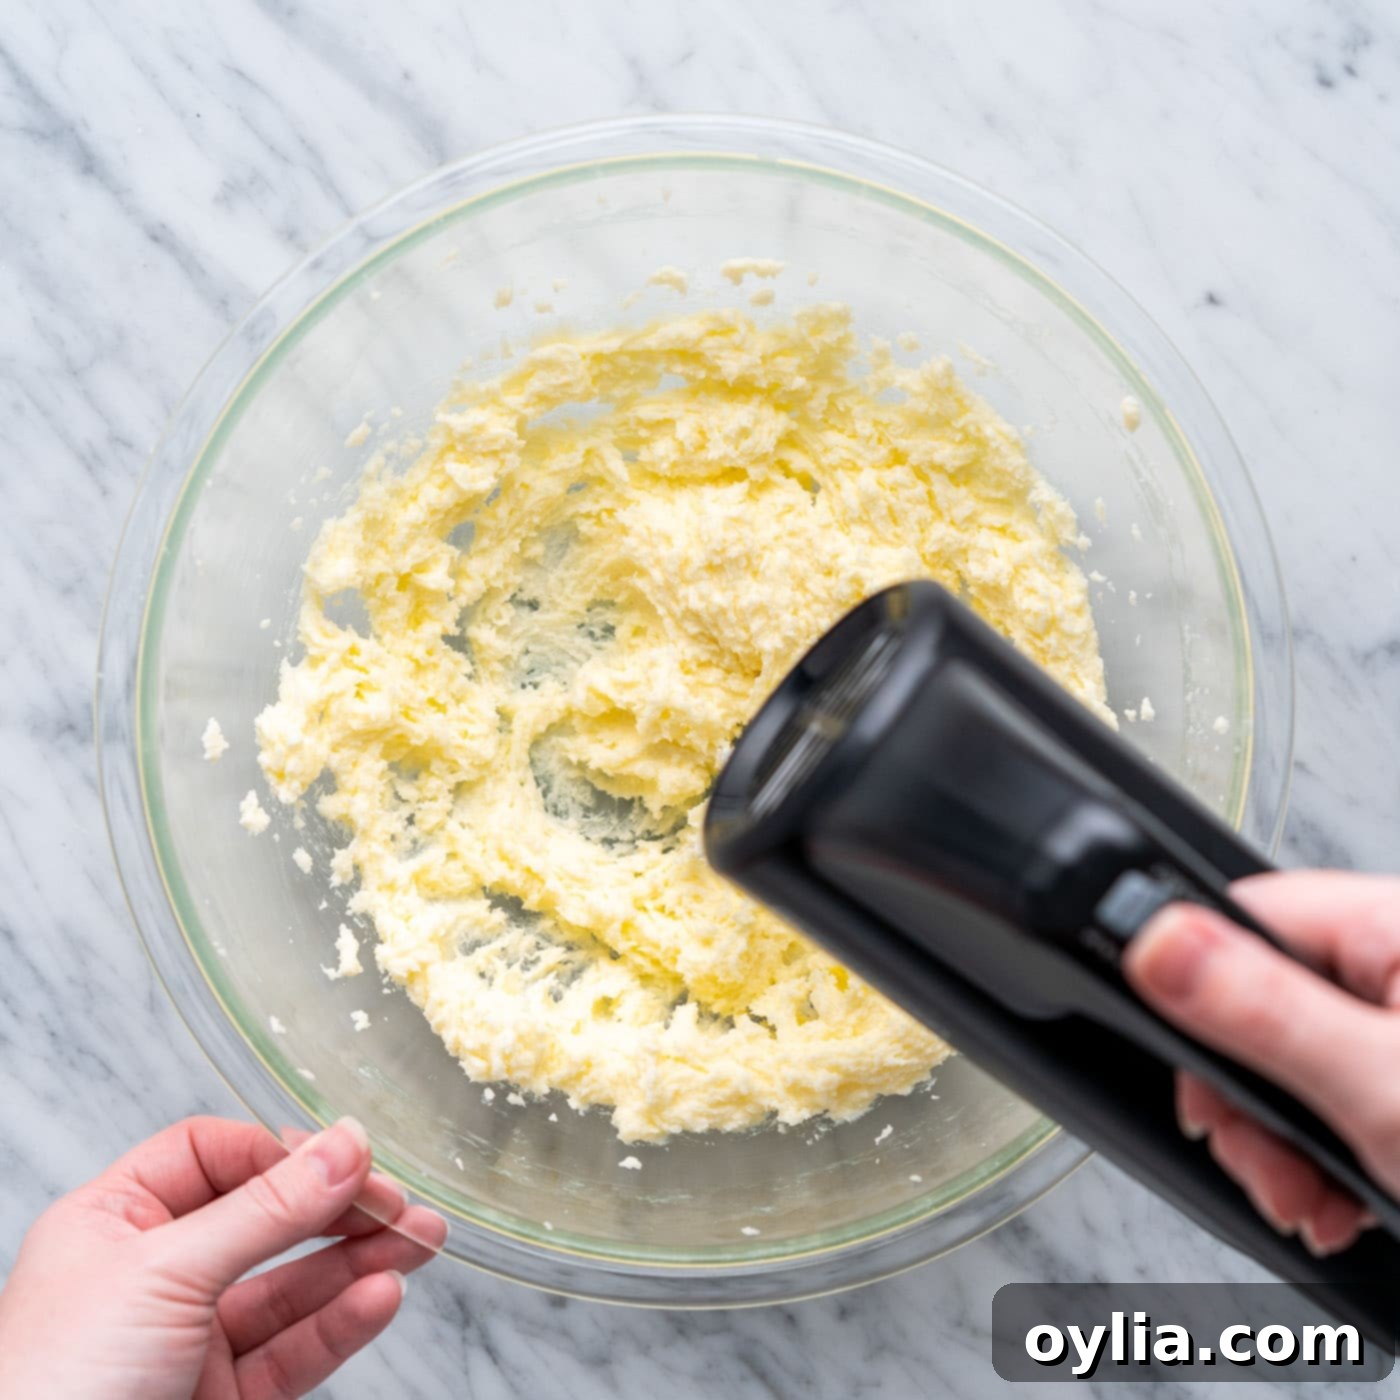
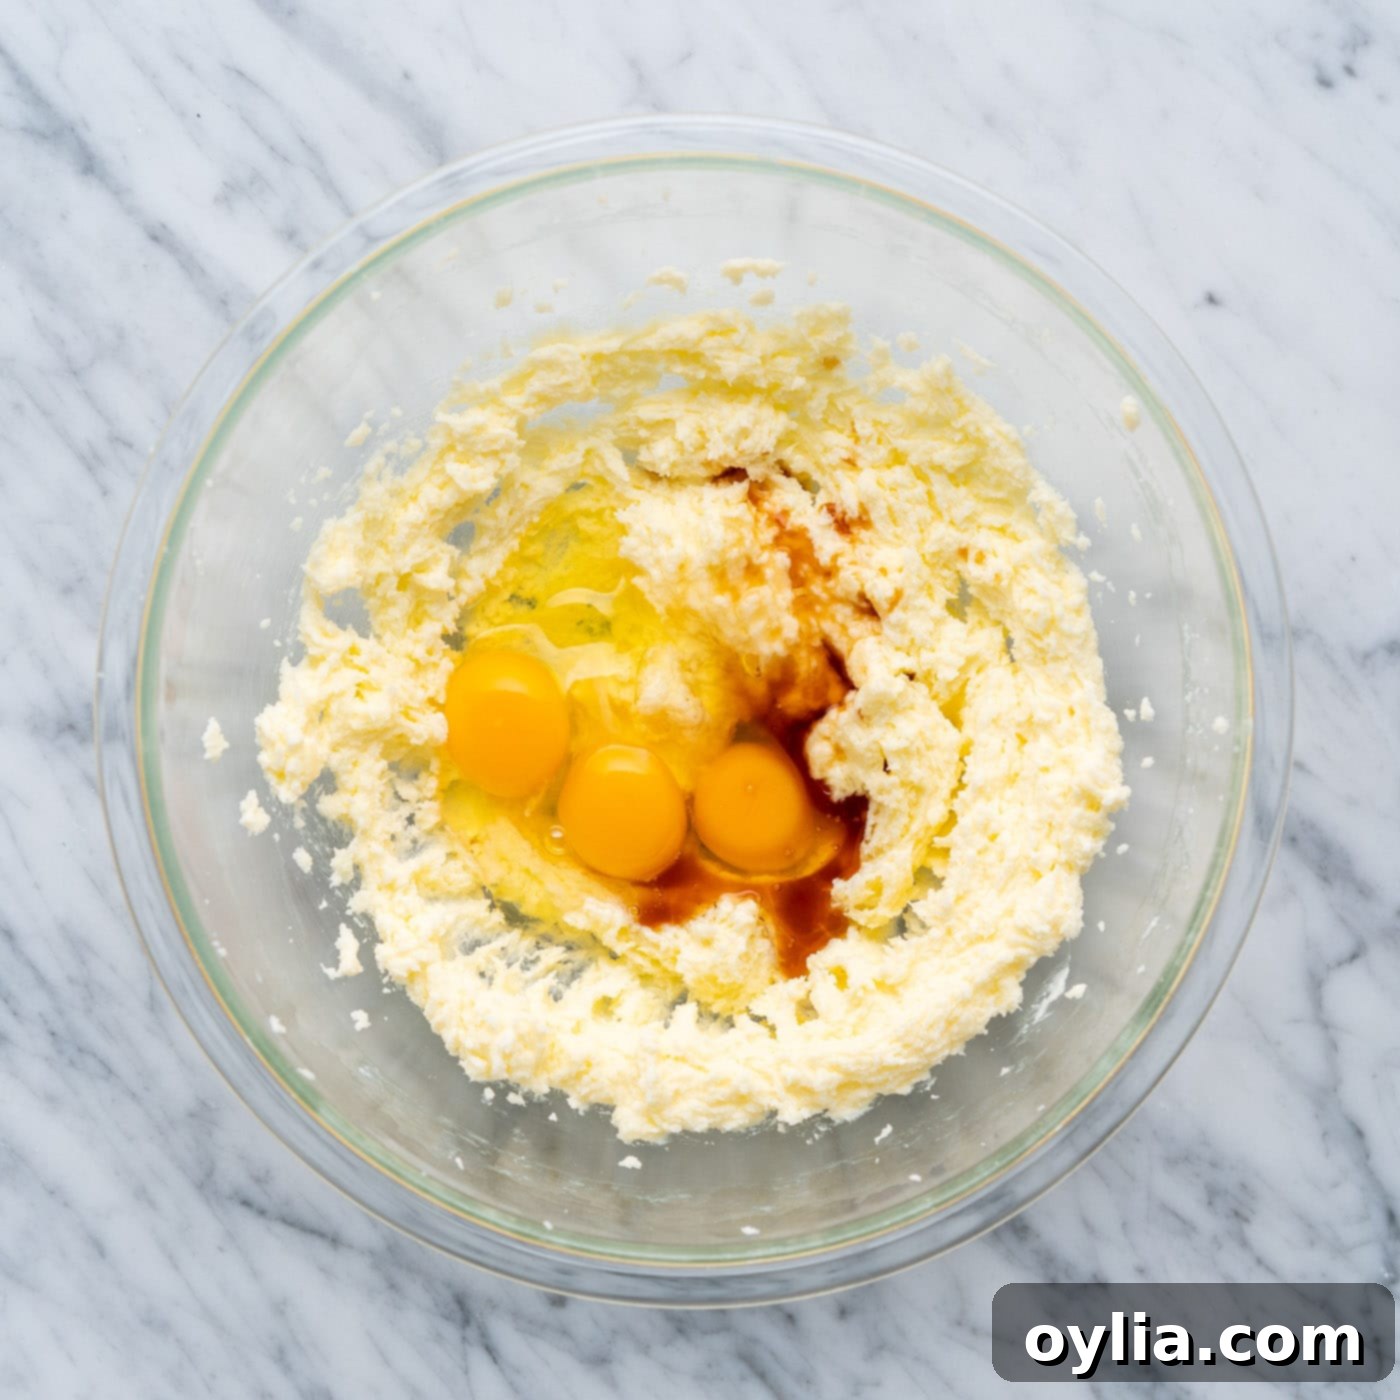
In a large mixing bowl, use a handheld electric mixer (or stand mixer) to cream together the softened unsalted butter and granulated sugar until the mixture becomes light and fluffy. This “creaming” process is vital as it incorporates air into the butter and sugar, which contributes significantly to the cake’s light and airy texture. Next, beat in the eggs one at a time, followed by the pure vanilla extract, continuing to mix until the batter is smooth, pale, and thoroughly combined.


-
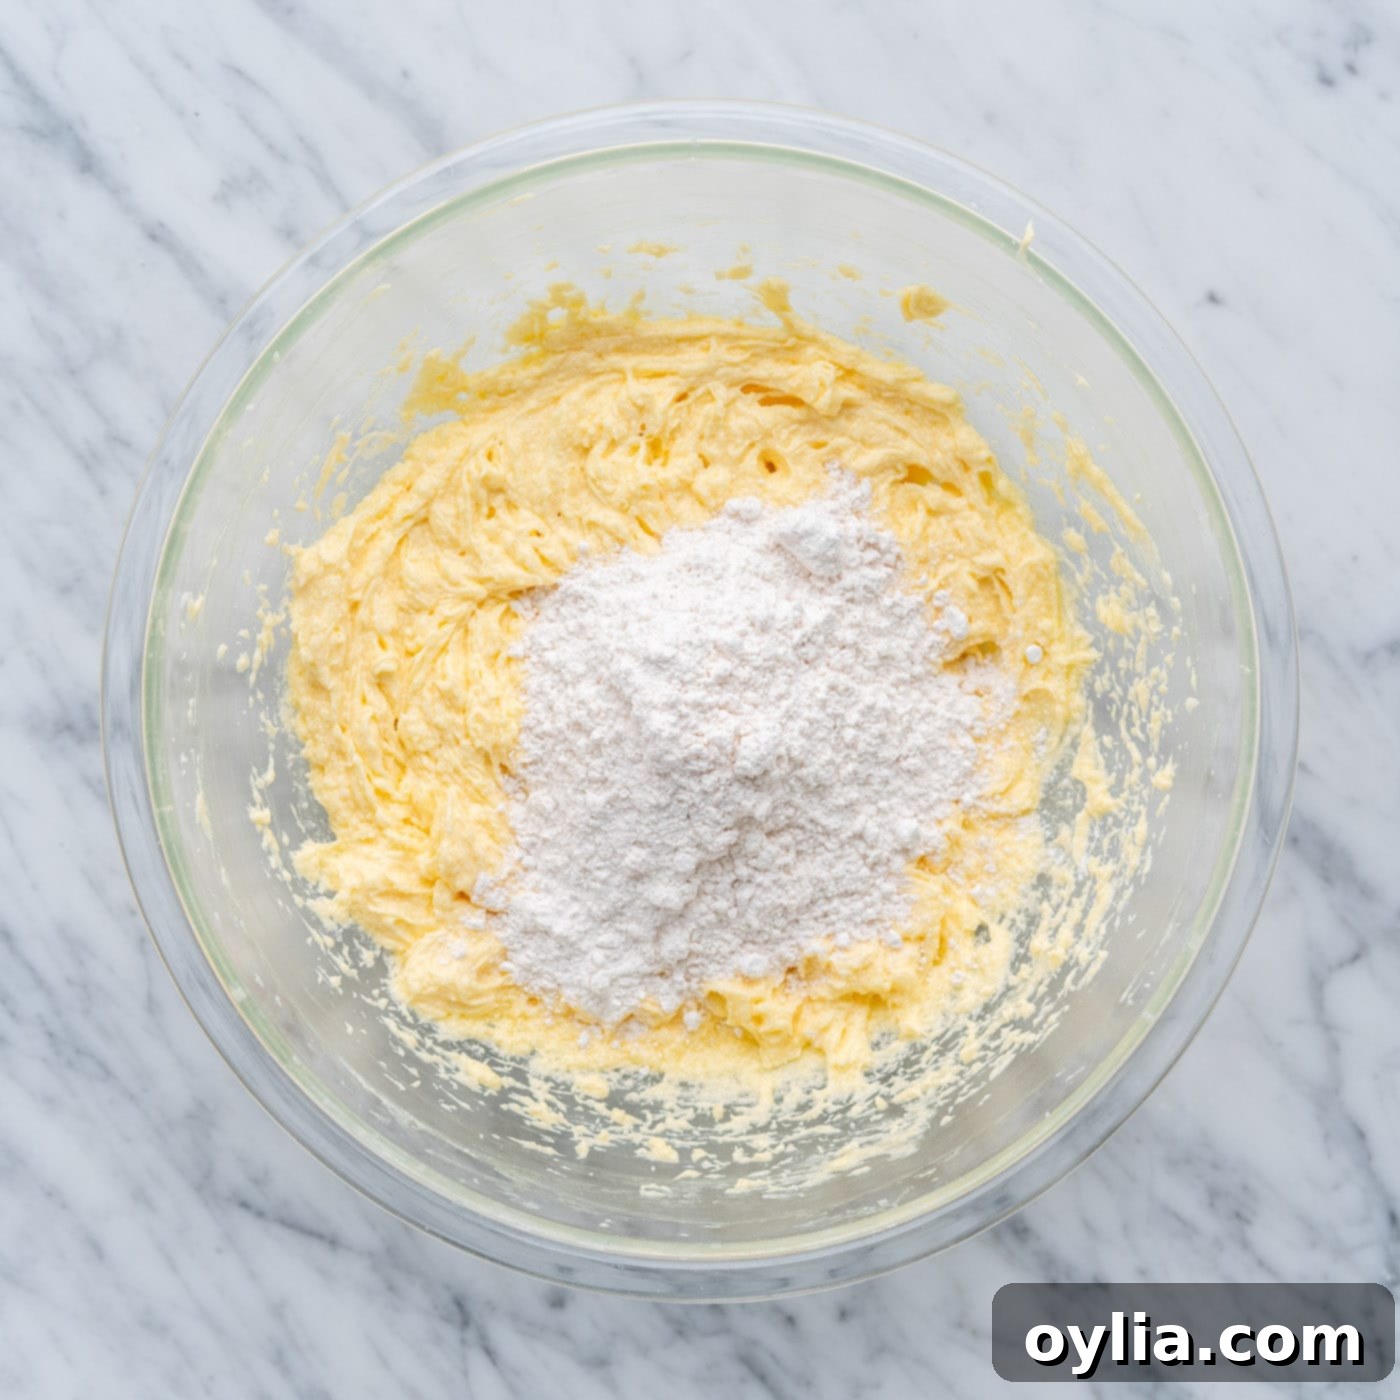
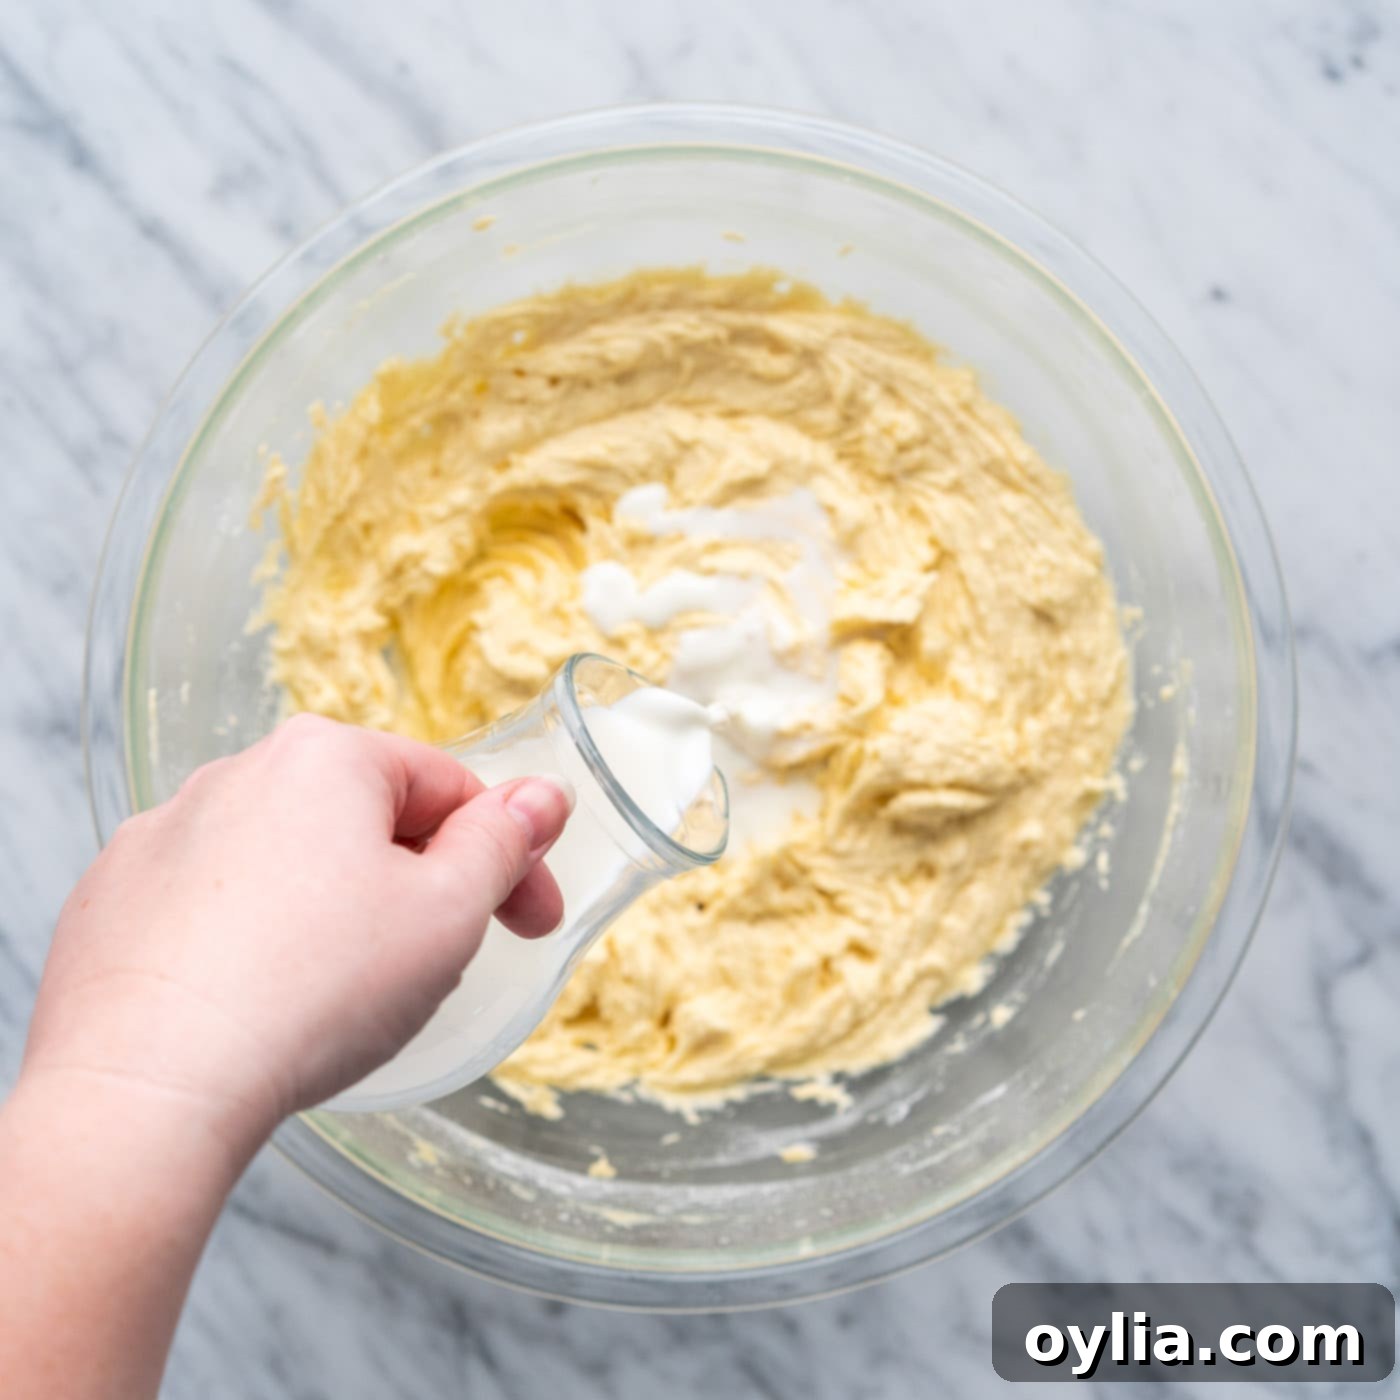
Now, you’ll alternate between adding the whisked dry ingredients and the whole milk to the wet mixture. Begin and end with the dry ingredients, adding them in three additions, with two additions of milk in between. Mix on low speed just until each addition is incorporated. This method helps prevent over-mixing and ensures a tender cake. The batter will be thick, which is exactly what you want for a robust cake structure. Remember, over-mixing at this stage can develop too much gluten, resulting in a tough cake, so mix until just combined.


-
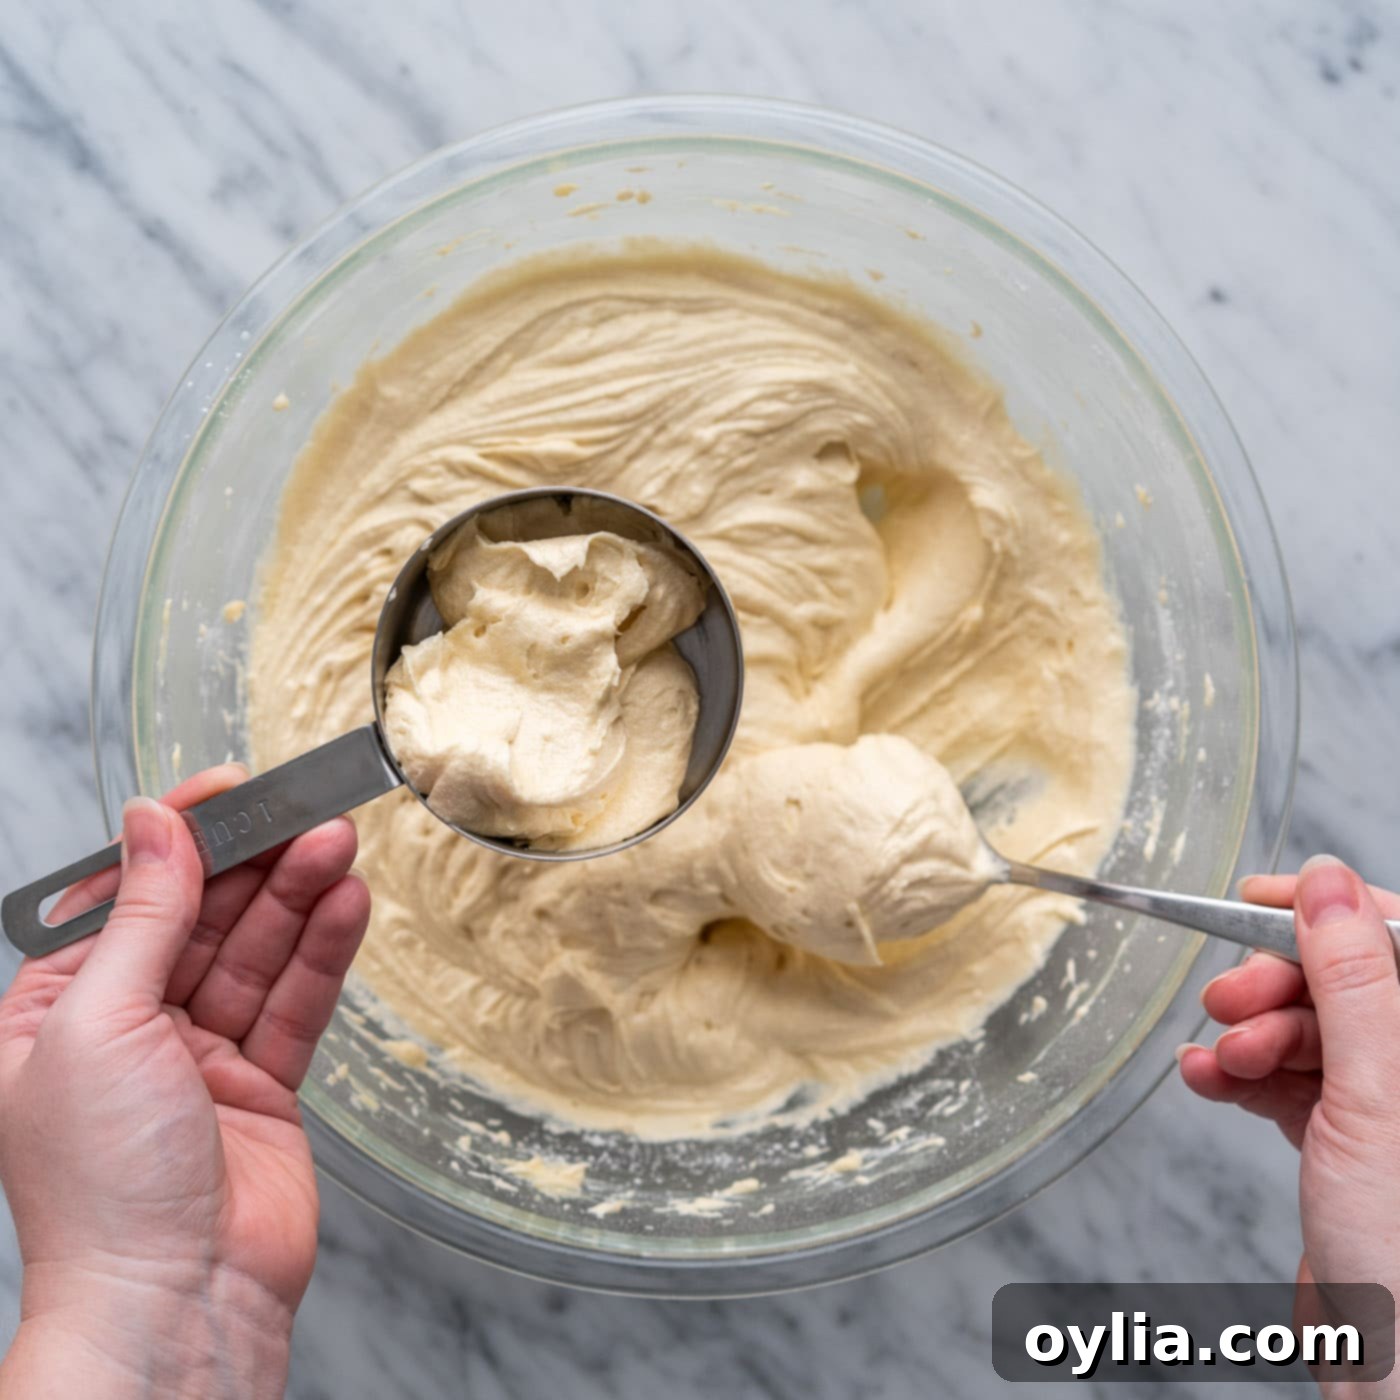
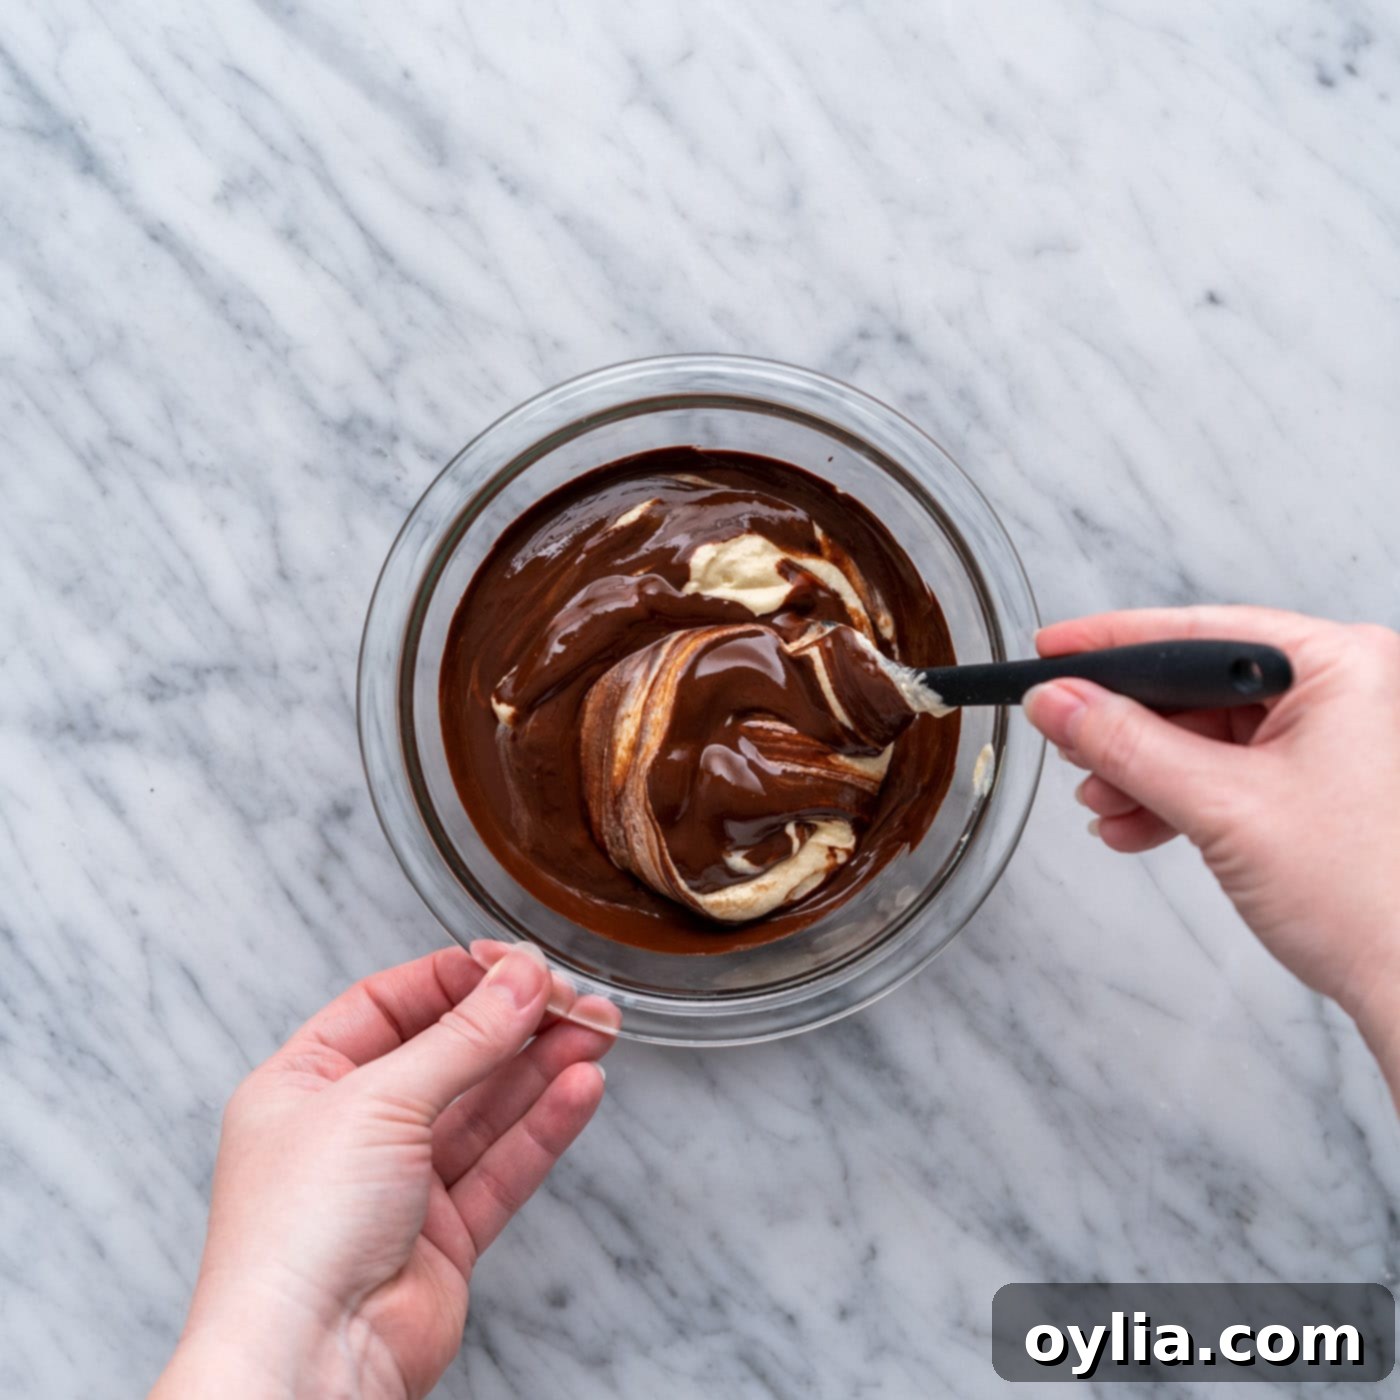
Carefully remove 1 cup of the prepared yellow cake batter and transfer it to a separate bowl. Into this smaller bowl, pour the melted semi-sweet chocolate. Gently stir the chocolate into the yellow batter until it’s just combined and uniformly colored a rich chocolate brown. Be careful not to over-mix here either, as we want to preserve the tender structure of the batter.


-
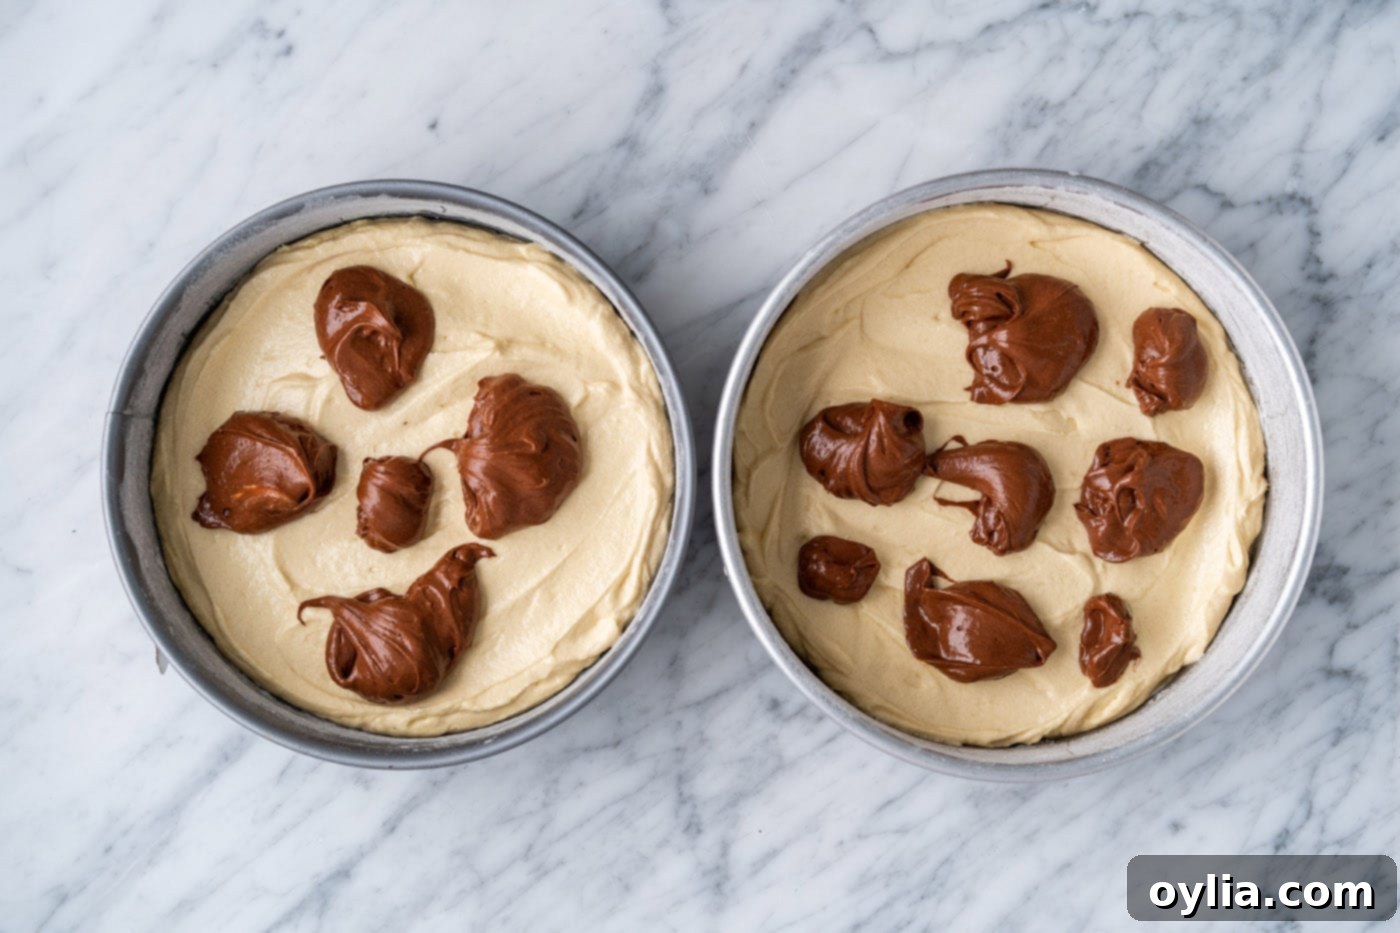
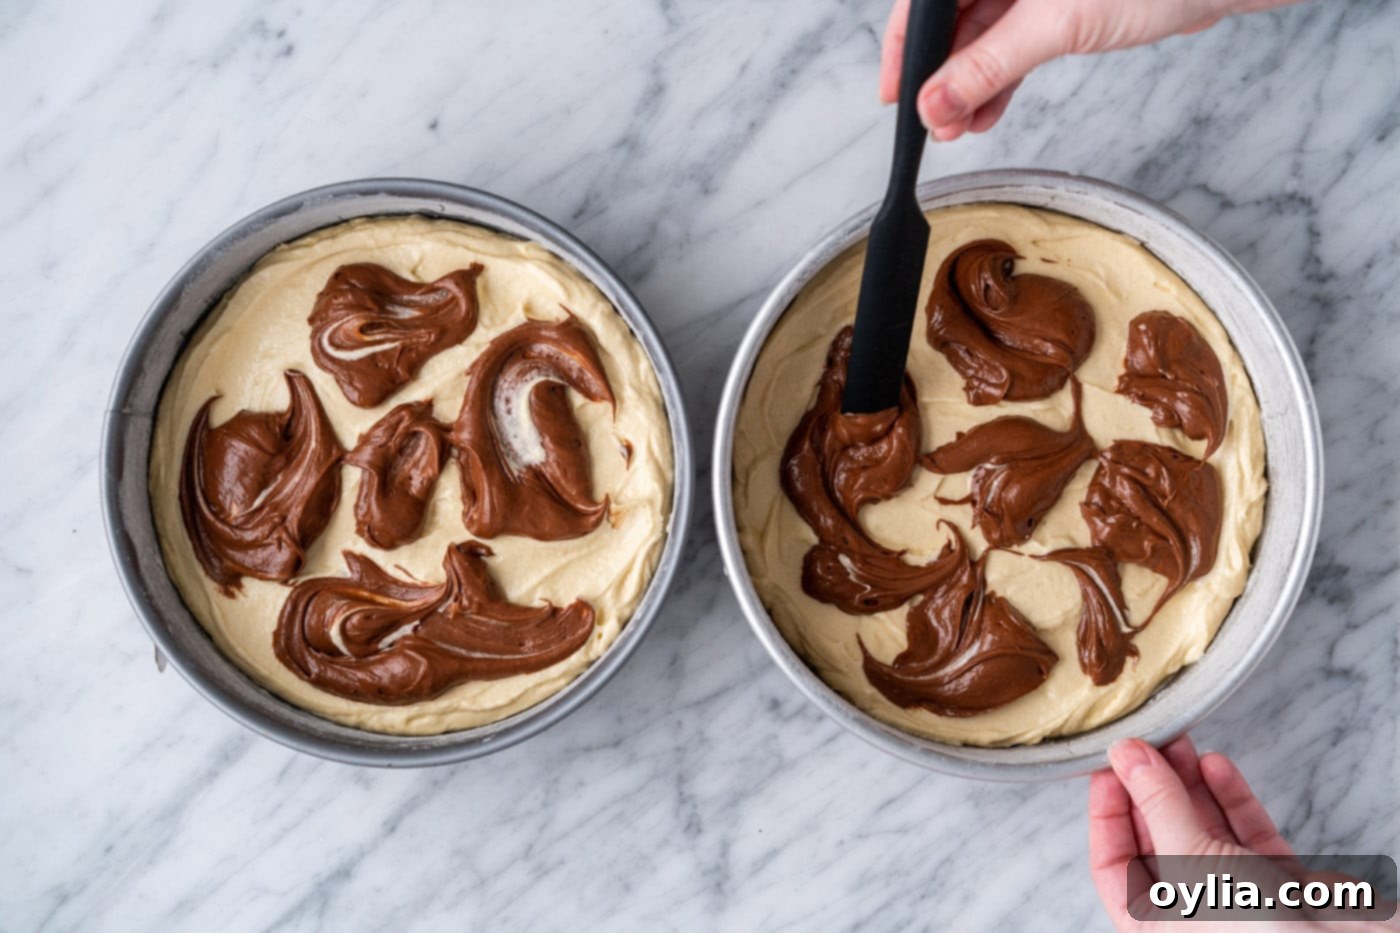
Divide the main yellow batter evenly between your two prepared cake pans. Then, using a spoon or small scoop, dollop spoonfuls of the chocolate batter over the yellow batter in each pan. Don’t worry about perfect placement; variety creates beautiful swirls. Once the chocolate batter is distributed, take a thin spatula, butter knife, or even a toothpick, and gently swirl the chocolate into the yellow batter a few times. The key is to create “S” or figure-eight patterns without over-mixing, which would cause the colors to blend completely. You want distinct streaks and swirls, not a single light brown batter.


- Transfer the pans to your preheated oven and bake until the cakes are beautifully golden along the edges, and a toothpick inserted into the center of each cake comes out clean. Baking times can vary slightly, but this typically takes about 27 to 34 minutes. Trust the toothpick test for perfect doneness!
- Once baked, remove the cakes from the oven and let them cool in their pans for about 15 minutes. This allows the cake to set and prevents it from crumbling when inverted. After 15 minutes, carefully turn the cakes out onto a wire rack to finish cooling completely. This usually takes another 15 minutes or more, ensuring the cakes are fully cooled before frosting. Don’t forget to peel off the parchment paper once they are on the rack.
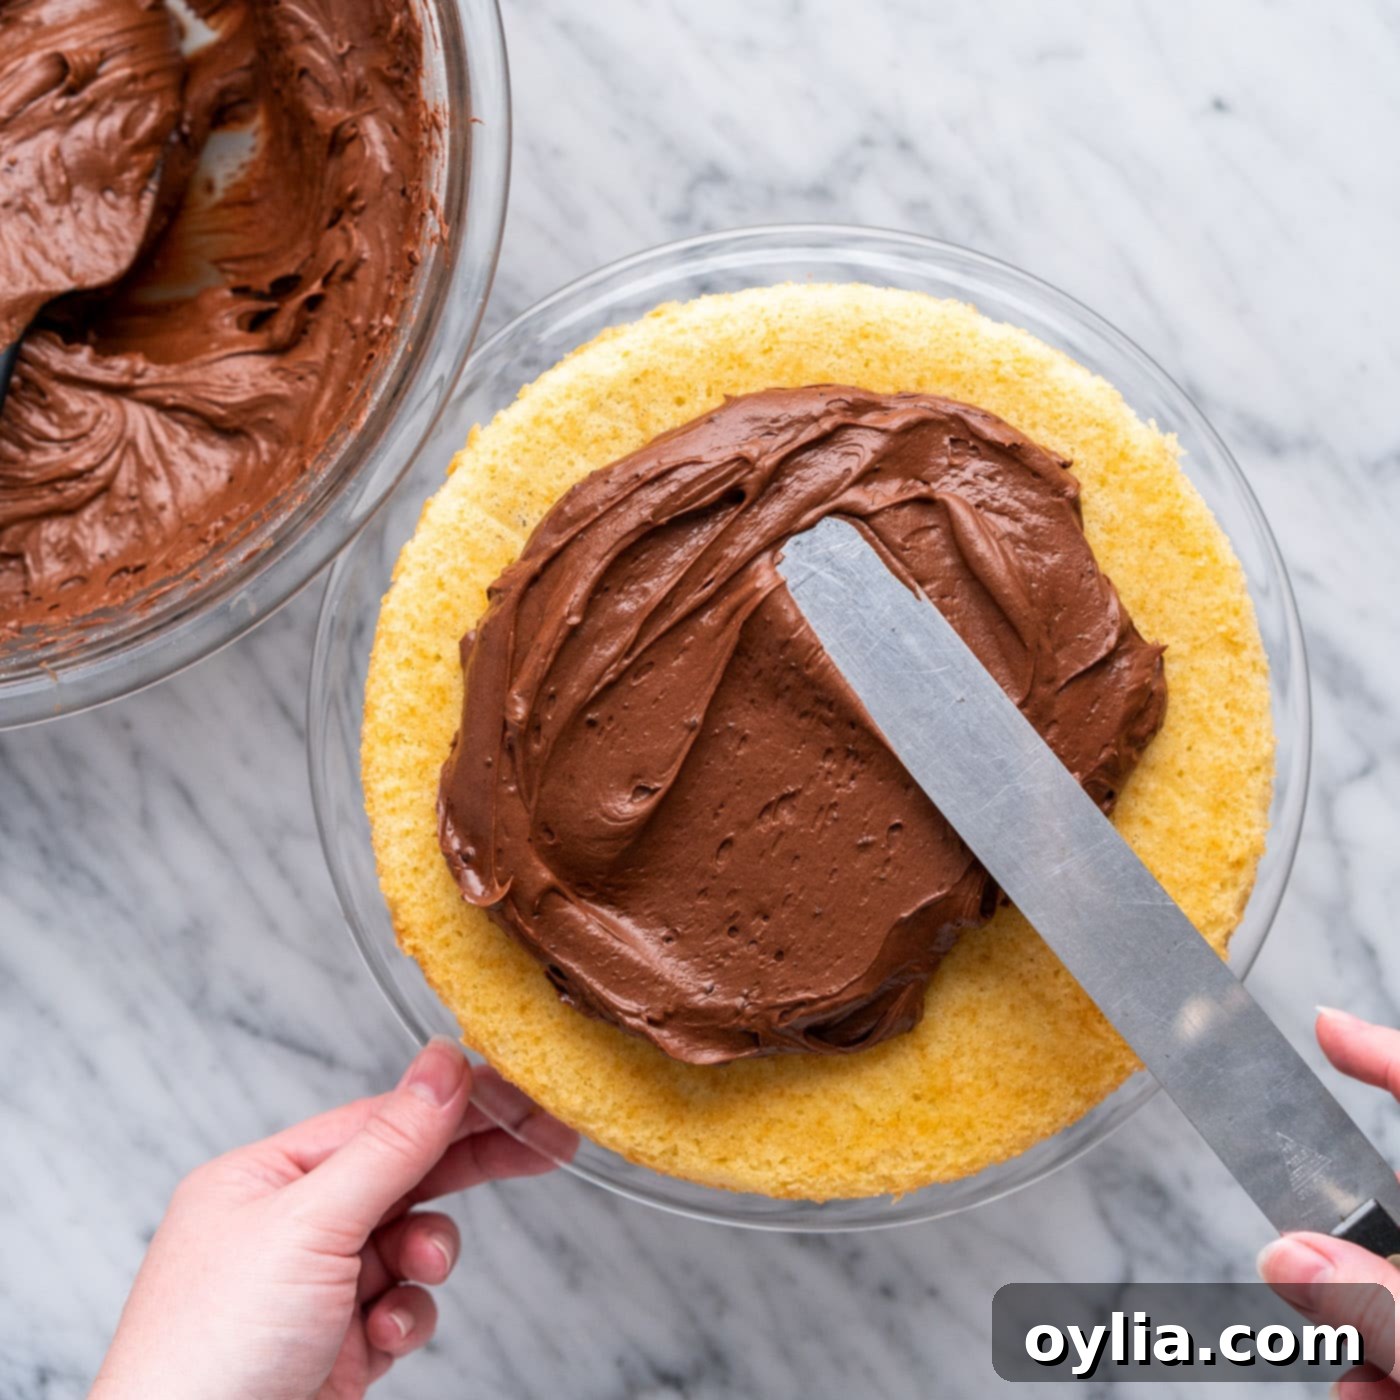
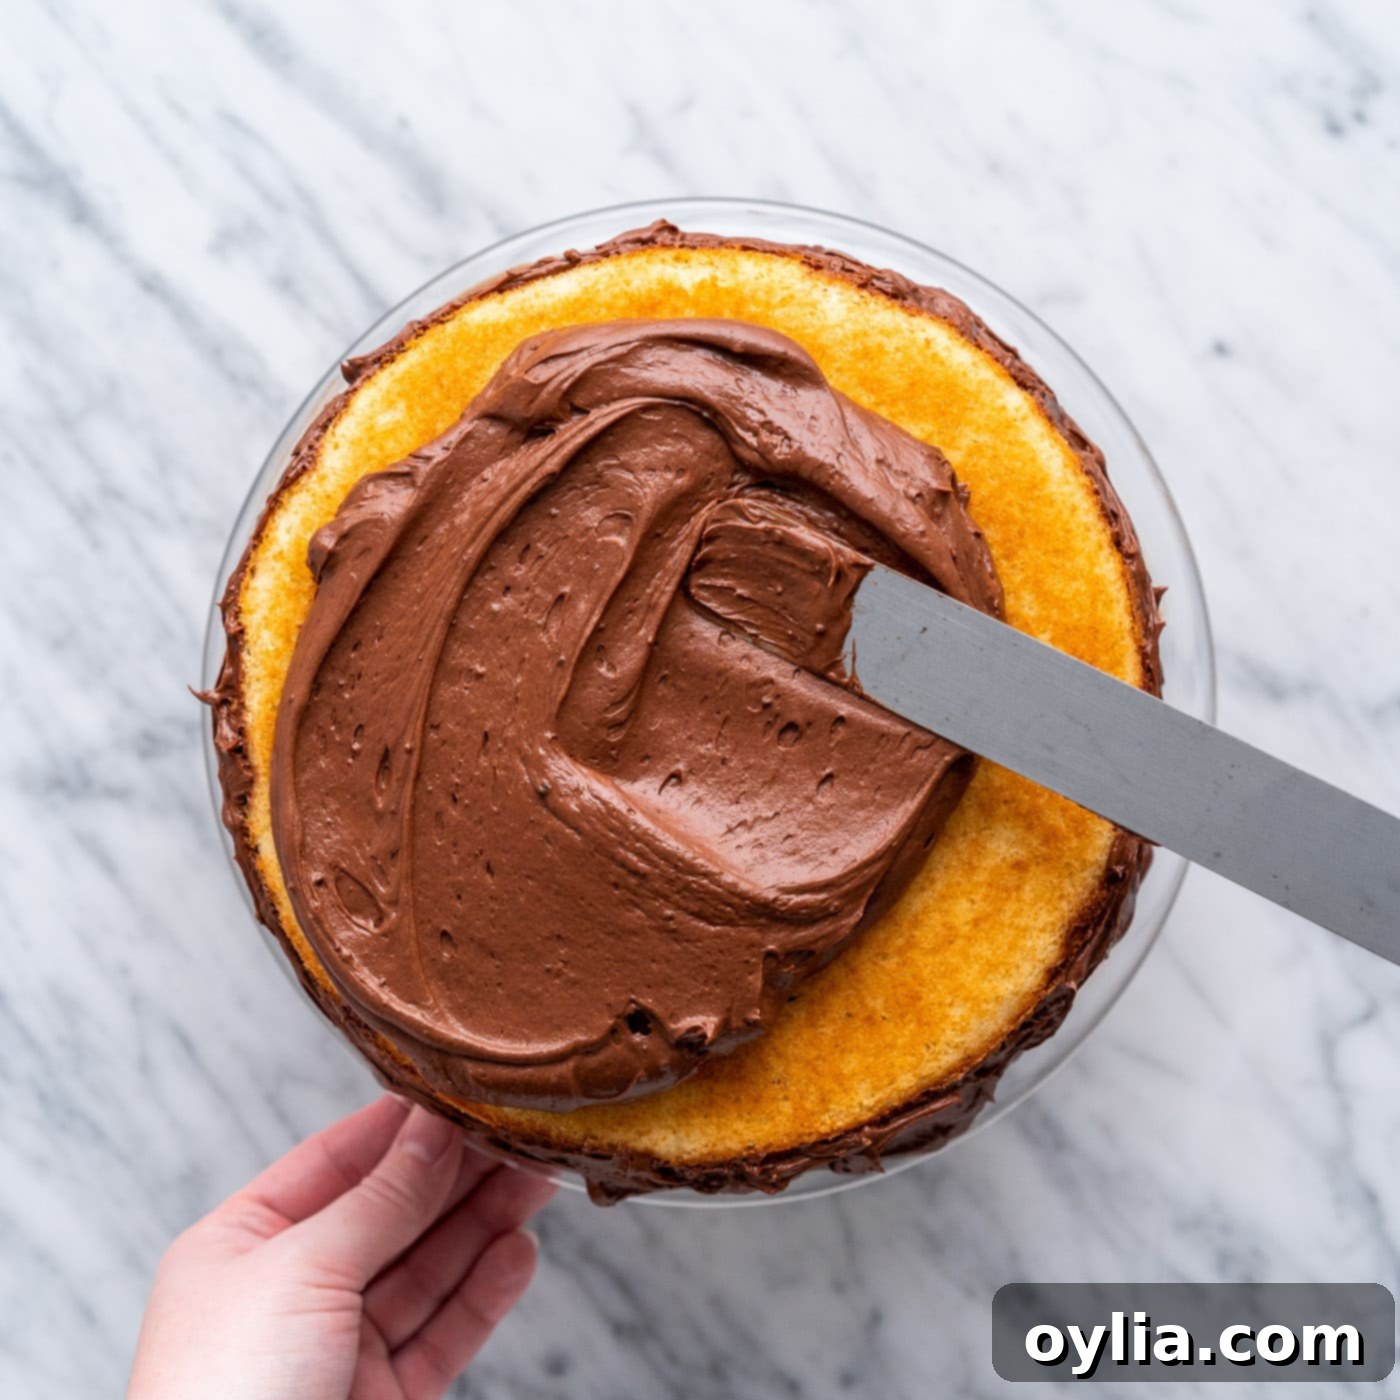
- Once your cake layers have cooled to room temperature, it’s time for the exciting part: assembling and frosting! Place one cake round onto your chosen cake platter or serving dish. Spread a generous, even layer of your homemade chocolate fudge frosting over the top. Carefully place the second cake round directly on top of the frosted layer. Finally, use an offset spatula to frost the top and sides of the entire cake, creating a smooth and elegant finish.


Frequently Asked Questions & Expert Tips for Marble Cake Success
Absolutely! Freezing marble cake is a fantastic way to prepare ahead or preserve leftovers. You can freeze individual unfrosted layers, or even freeze the entire frosted cake, for up to 3 months. For unfrosted cake layers, wrap each layer tightly in freezer wrap, followed by one or two layers of aluminum foil to prevent freezer burn. If freezing an entire frosted cake, ensure the frosting is firm before wrapping. You can also prepare the homemade fudge frosting in advance; store it in an air-tight container in the freezer for 3-4 months or in the refrigerator for up to 5 days. Thaw in the refrigerator overnight before bringing to room temperature and re-whipping if needed.
Yes, this recipe is quite adaptable! If you prefer a single-layer cake or a larger format for serving a crowd, you can certainly use a 13×9 inch cake pan in place of the two 9-inch round cake pans. When using a larger pan, be prepared for a slightly longer baking time, as the batter will be deeper. Always use the toothpick method – inserted into the center of the cake – to check for doneness. It should come out clean or with a few moist crumbs attached.
To maintain the delicious flavor and moist texture of your marble cake, proper storage is crucial. If the cake is unfrosted, gently wrap it tightly in cling wrap. For frosted cake, the best method is to place it inside a cake container or an air-tight container. Stored at room temperature, your marble cake will stay fresh and delightful for 3-4 days. The most important tip for storage is to always keep the cake covered. This prevents it from drying out and helps retain its delightful moisture and freshness.
The secret to beautiful, distinct marble swirls lies in a light hand. After dolloping the chocolate batter onto the yellow base, use a butter knife, skewer, or thin spatula to make a few gentle “S” or figure-eight motions through the batters. Don’t stir vigorously or for too long. About 3-5 gentle swirls per pan are usually sufficient to create that signature marbled effect without completely mixing the colors.
Using room temperature ingredients, especially butter and eggs, is fundamental for achieving a light and airy cake texture. Room temperature butter creams better with sugar, incorporating more air into the mixture, which creates tiny pockets for the leavening agents to expand into during baking. Similarly, room temperature eggs emulsify more easily with the butter-sugar mixture, creating a smoother, more stable batter. Cold ingredients can cause the batter to curdle, leading to a denser cake.
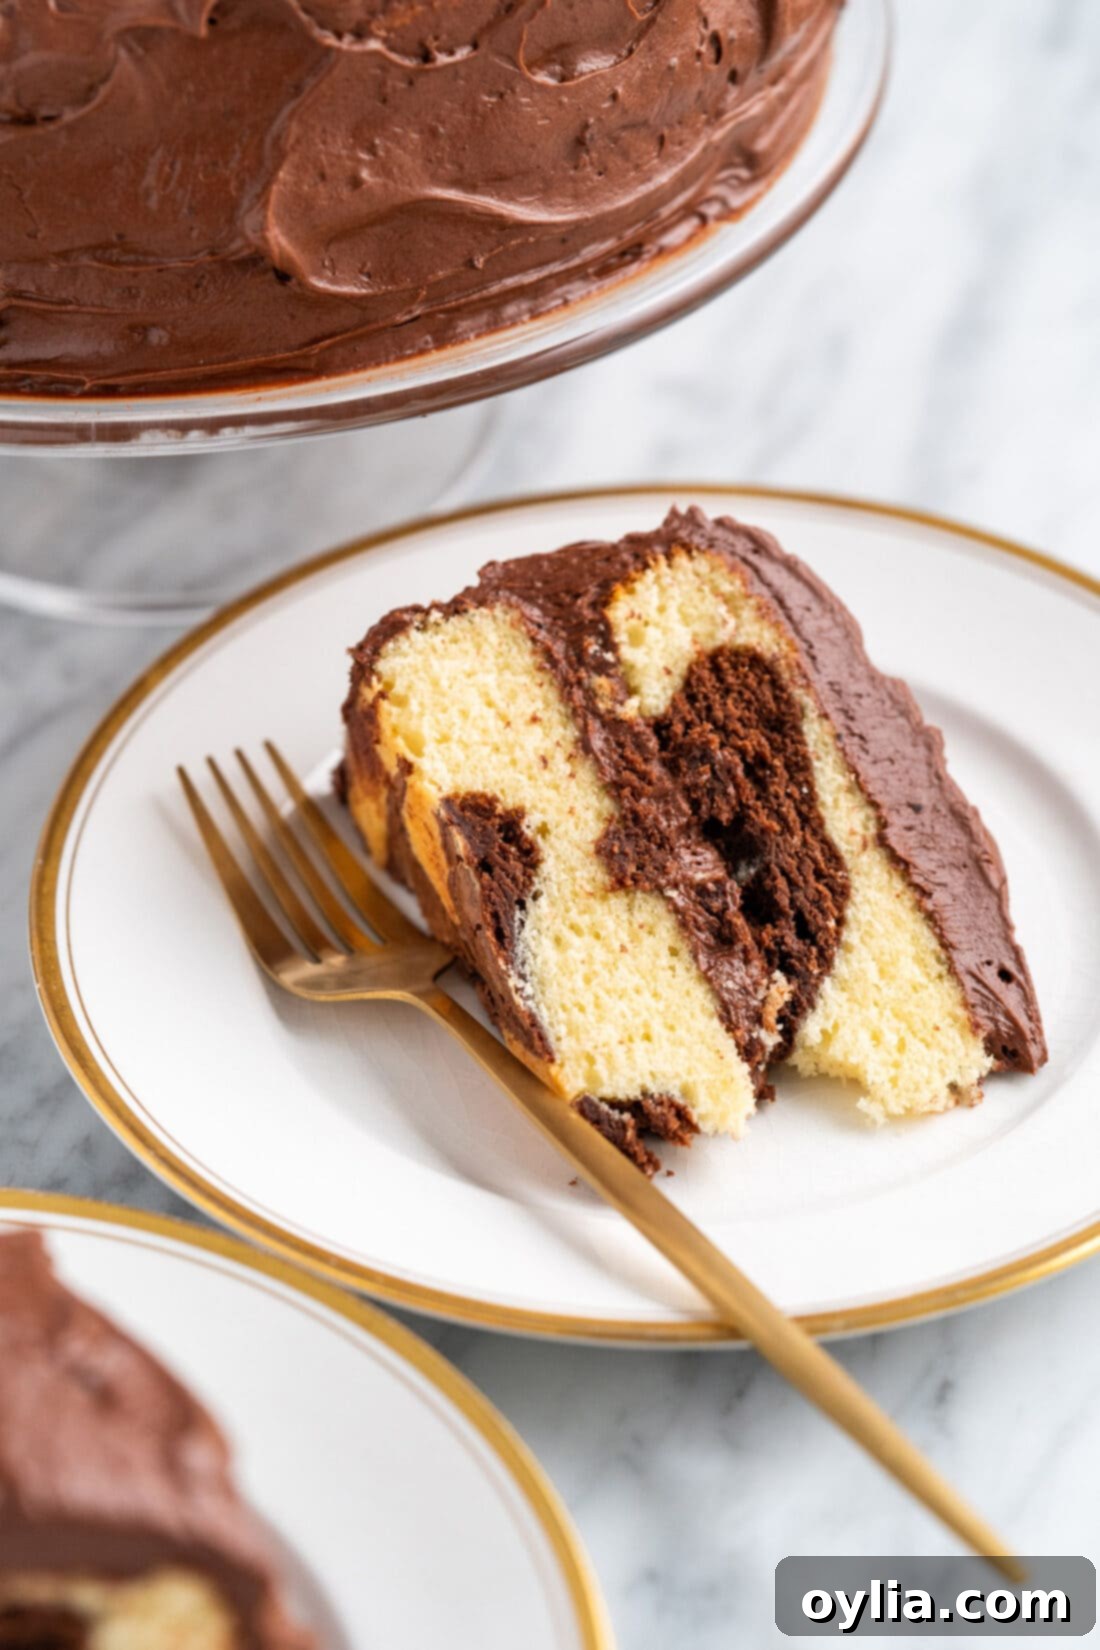
Delightful Serving Suggestions for Your Marble Cake
The beauty of homemade marble cake lies not only in its exquisite flavor but also in its versatility for presentation. For the best taste and texture, always serve your marble cake at room temperature. This allows the cake’s tender crumb and the frosting’s creamy richness to truly shine. Feel free to unleash your creativity with toppings and decorations! You can effortlessly match your cake to any theme by adding fun cake toppers, colorful sprinkles, or intricate designs piped with extra frosting. A dusting of cocoa powder or chocolate shavings can also add an elegant touch.
What’s even more fantastic about this marble cake recipe is its adaptability beyond traditional round layers. You can easily transform this batter into beautiful marble cupcakes! Simply scoop alternating dollops of yellow and chocolate batter into a lined cupcake tin, then use a toothpick to create charming swirls in each cup. Bake for a shorter duration (typically 18-22 minutes for standard cupcakes), checking for doneness with a toothpick. These marbled cupcakes are perfect for parties, lunchboxes, or when you want a delightful individual treat. Whether as a grand centerpiece or charming individual servings, your homemade marble cake is sure to be a hit. Enjoy every delightful bite!
Explore More Irresistible Cake Recipes
If you loved baking and enjoying this classic marble cake, you’ll be thrilled to discover more delicious cake recipes from our kitchen. Expand your baking repertoire and find your next favorite dessert:
- Zesty Lemon Cake
- Classic Carrot Cake with Cream Cheese Frosting
- Tropical Pineapple Cake
- Velvety Red Velvet Cake
- Elegant Chantilly Cake
- Simple & Moist Banana Cake
- Cracker Barrel Coca Cola Cake
I absolutely adore sharing my passion for baking and cooking with all of you, offering delicious recipes that are tested and loved! Remembering to come back each day for new culinary inspiration can sometimes be a challenge, which is why I’ve made it easy for you. I offer a convenient newsletter delivered directly to your inbox every time a new recipe is posted. Simply subscribe today and start receiving your free daily recipes, ensuring you never miss out on your next favorite dish!
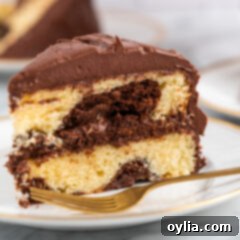
Homemade Marble Cake with Fudge Frosting
IMPORTANT – There are often Frequently Asked Questions within the blog post that you may find helpful. Simply scroll back up to read them!
Print It
Pin It
Rate It
Save ItSaved!
Ingredients
For the Cake:
- 1 ¾ cups all-purpose flour
- ¼ cup cornstarch
- 2 teaspoons baking powder
- ½ teaspoon salt
- 1 cup unsalted butter at room temperature
- 1 ⅓ cups granulated sugar
- 3 large eggs
- 1 Tablespoon pure vanilla extract
- ⅔ cup whole milk
- 4 ounces semi-sweet chocolate melted (baking chocolate recommended)
For the Rich Chocolate Fudge Frosting:
- 16 Tablespoons unsalted butter
- 2 cups unsweetened cocoa powder
- 8 cups powdered sugar
- 1 ⅓ cup heavy whipping cream
- 4 teaspoons pure vanilla extract
Essential Equipment
-
2 9-inch round cake pans
-
Offset icing spatula
-
Hand mixer (or stand mixer)
-
Wire cooling rack
Before You Begin: Important Tips for Success
- Pan Size Flexibility: This recipe is designed for two 9-inch round cake pans, yielding beautiful layer cakes. However, you can also make this cake in a single 9×13-inch baking dish for a more casual sheet cake. If you choose the 9×13-inch pan, it will require a slightly longer baking time due to its depth. Always use the toothpick test to ensure it’s fully cooked through.
- Check Doneness Accurately: If you are using two separate cake pans (especially if they are of different materials), it’s vital to test both cakes individually for doneness using a toothpick. Baking times can vary slightly, and this ensures both layers are perfectly baked.
- Choose the Right Chocolate: For the chocolate batter, it’s highly recommended to use baking chocolate (like a bar of semi-sweet chocolate) over chocolate chips. Baking chocolate melts and incorporates much more smoothly into the batter, yielding a more uniform color and flavor for your swirls.
- Customize Your Swirls: For those who love a more pronounced chocolate flavor and dramatic swirls, you can remove an additional 1/2 cup (or slightly more) of the yellow cake batter to make a larger chocolate portion. If you do this, ensure you add an equivalent amount of extra melted semi-sweet chocolate to the chocolate batter to maintain its rich flavor and proper consistency.
- Room Temperature Ingredients: Always ensure your butter, eggs, and milk are at room temperature. This is key for creating a smooth, emulsified batter that bakes evenly and results in a tender, fluffy cake.
- Avoid Over-Mixing: Whether you are creaming butter and sugar or incorporating dry ingredients, avoid over-mixing. Over-mixing can develop too much gluten, leading to a tough, dry cake. Mix until just combined for a perfectly tender crumb.
Instructions for the Cake
-
Preheat the oven to 350F (175°C). Butter and flour two 9-inch cake pans. Place a piece of parchment paper, trimmed to fit, in the bottom of each pan. Lightly spray the parchment paper with nonstick cooking spray to ensure easy release.
-
In a medium bowl, whisk together the all-purpose flour, cornstarch, baking powder, and salt until thoroughly combined.1 3/4 cups all-purpose flour, 1/4 cup cornstarch, 2 teaspoons baking powder, 1/2 teaspoon salt
-
In a large bowl, use a handheld electric mixer to cream together the room temperature unsalted butter and granulated sugar until light and fluffy. Beat in the eggs one at a time, then add the pure vanilla extract, mixing until fully incorporated and smooth.1 cup unsalted butter, 1 1/3 cups granulated sugar, 3 large eggs, 1 Tablespoon pure vanilla extract
-
Alternately add the whisked dry ingredients and the whole milk to the wet mixture, beginning and ending with dry. Mix on low speed just until each addition is incorporated. Be careful not to over-mix; the batter will be thick.2/3 cup whole milk
-
Remove 1 cup of the yellow batter to a separate bowl, and stir in the melted semi-sweet chocolate until just combined.4 ounces semi-sweet chocolate
-
Divide the remaining yellow batter evenly between the 2 prepared cake pans. Dollop spoonfuls of the chocolate batter on top of the yellow batter. Gently swirl the chocolate batter into the yellow batter using a thin spatula or butter knife to create marble patterns, taking care not to over-mix.
-
Bake for approximately 27 to 34 minutes, or until the cakes are golden along the outside and a toothpick inserted into the center comes out clean.
-
Cool the cakes in their pans for 15 minutes. Then, invert them onto a wire rack to finish cooling completely, about another 15 minutes. Carefully peel off the parchment paper. Ensure cakes are fully cooled before frosting.
Making the Rich Chocolate Fudge Frosting
-
In a small saucepan or skillet, melt the unsalted butter over low heat, ensuring it doesn’t brown.16 Tablespoons butter
-
Remove from heat and mix in the unsweetened cocoa powder, stirring until the mixture is nice and thick and no lumps remain.2 cups unsweetened cocoa powder
-
Transfer the warm chocolate mixture to the bowl of a stand mixer (or a large mixing bowl if using a hand mixer). Add about half of the powdered sugar and mix on low speed until well combined.
-
Next, add half of the heavy whipping cream and all of the vanilla extract. Mix until combined. Continue by adding the remaining powdered sugar and the rest of the heavy cream, mixing thoroughly after each addition.4 teaspoons pure vanilla extract
-
Increase mixer speed to medium and beat for 5 minutes until the frosting is incredibly smooth, creamy, and lightened in color.
-
Once both cake layers are completely cooled, it’s time to assemble. Place one cake round onto your serving platter. Spread a generous, even layer of the chocolate fudge frosting on top. Carefully place the second cake round over the frosted layer. Finally, frost the top and sides of the entire cake, smoothing with an offset icing spatula for a beautiful finish.
Nutrition Information
The recipes on this blog are tested with a conventional gas oven and gas stovetop. It’s important to note that some ovens, especially as they age, can cook and bake inconsistently. Using an inexpensive oven thermometer can assure you that your oven is truly heating to the proper temperature. If you use a toaster oven or countertop oven, please keep in mind that they may not distribute heat the same as a conventional full sized oven and you may need to adjust your cooking/baking times. In the case of recipes made with a pressure cooker, air fryer, slow cooker, or other appliance, a link to the appliances we use is listed within each respective recipe. For baking recipes where measurements are given by weight, please note that results may not be the same if cups are used instead, and we can’t guarantee success with that method.
