Sweet & Simple: Easy Conversation Heart Cookies with a Store-Bought Frosting Hack for Valentine’s Day
Valentine’s Day is a time for heartfelt gestures, and what better way to express your affection than with a batch of adorable, custom-made conversation heart cookies? These iconic candies, with their sweet messages, have been a symbol of love for generations. Now, you can recreate that nostalgic charm in your own kitchen with surprising ease. Forget complicated baking projects; our recipe utilizes simple, readily available store-bought ingredients and a clever frosting hack that will have you decorating like a pro in no time, even if you’re a beginner baker.
This method transforms ordinary canned frosting into a “faux” royal icing that sets beautifully, giving your cookies that professional, bakery-quality finish without the usual fuss. It’s the perfect way to craft a personalized treat for your sweetheart, family, or friends, making this Valentine’s Day extra special and undeniably delicious.

Why This Easy Conversation Heart Cookie Recipe Works Wonders
Making beautifully decorated sugar cookies often comes with the intimidating challenge of mastering royal icing. While traditional royal icing yields a stunning, hard finish, it requires specific techniques, multiple consistencies, and a significant time commitment for drying. Many home bakers find it tricky and time-consuming, especially when they’re simply looking to create a charming batch of cookies for a special occasion like Valentine’s Day.
This recipe sidesteps all those complexities with its ingenious frosting hack. The secret lies in using ordinary canned white frosting, readily available at any grocery store, and transforming it into a “faux” royal icing. By gently warming the frosting, we achieve a pourable consistency that effortlessly spreads and levels on your cookies, drying to a smooth, elegant finish that perfectly mimics the look of professional cookie decoration. This simple trick allows you to create vibrant, pastel-colored heart cookies with clean edges and a delightful texture, all without the stress. Whether you opt for the convenience of store-bought sugar cookie dough or prefer to bake a batch of homemade classic sugar cookies, this method ensures stunning results every time. It’s truly a game-changer for anyone wanting beautiful, easy-to-decorate Valentine’s Day treats.

Essential Ingredients for Your Valentine’s Heart Cookies
One of the best aspects of this recipe is its reliance on accessible ingredients that simplify your baking process without compromising on taste or appearance. You won’t need any specialty items or complex tools, just a few pantry staples and readily available store-bought components.
For a complete list of all measurements, ingredients, and detailed instructions, please refer to the printable recipe card located at the very end of this blog post. This section provides a helpful overview and tips for selecting the best ingredients to ensure your conversation heart cookies are a resounding success.
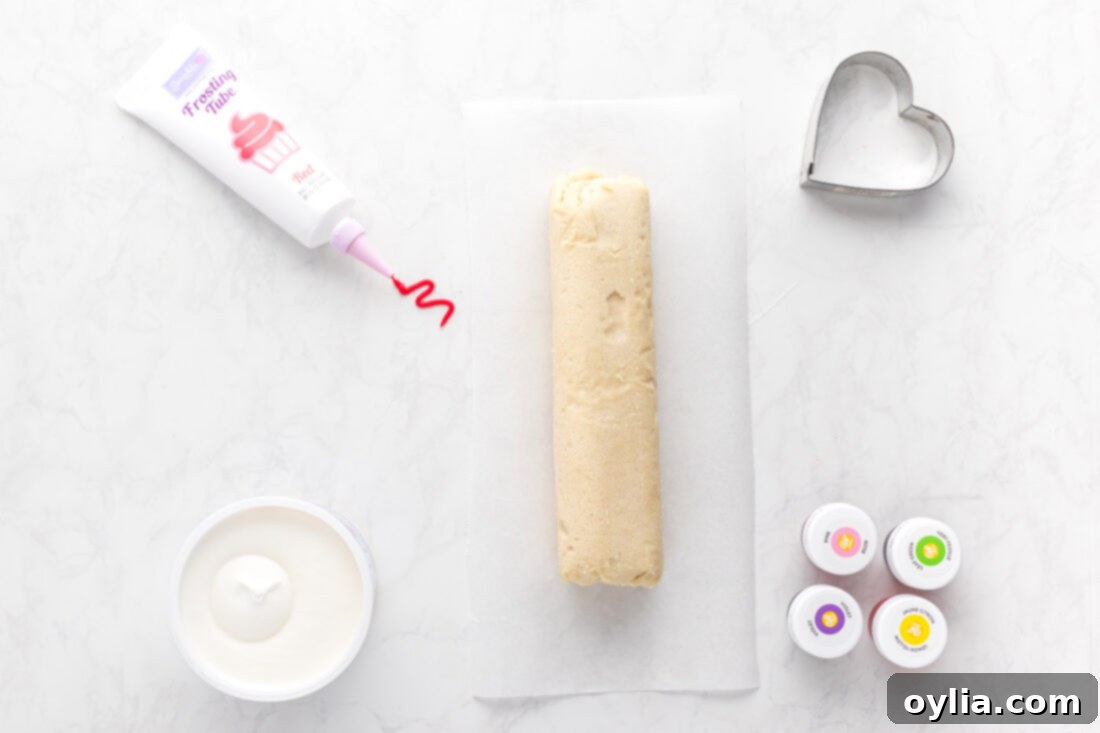
Ingredient Information & Smart Substitution Suggestions
- COOKIE BASE – The foundation of any great decorated cookie is, of course, the cookie itself! For ultimate convenience and consistent results, we highly recommend using a tube of store-bought refrigerated sugar cookie dough. This option saves you significant time and effort, allowing you to focus on the fun part: decorating. If you’re a seasoned baker or prefer a truly homemade touch, feel free to whip up your favorite classic sugar cookie recipe from scratch. Both options will yield delicious heart-shaped cookies perfect for this project. Just ensure your chosen dough bakes up firm enough to handle the frosting without breaking.
- FROSTING FOR DECORATION – This is where our famous hack comes in! You’ll need just 1 can of white frosting (be sure to pick “white,” NOT “vanilla”). The distinction is important because vanilla frosting often has a slightly off-white or yellowish tint, which can muddy your vibrant pastel colors. White frosting provides a neutral base, allowing your gel food colors to shine through brightly and clearly.
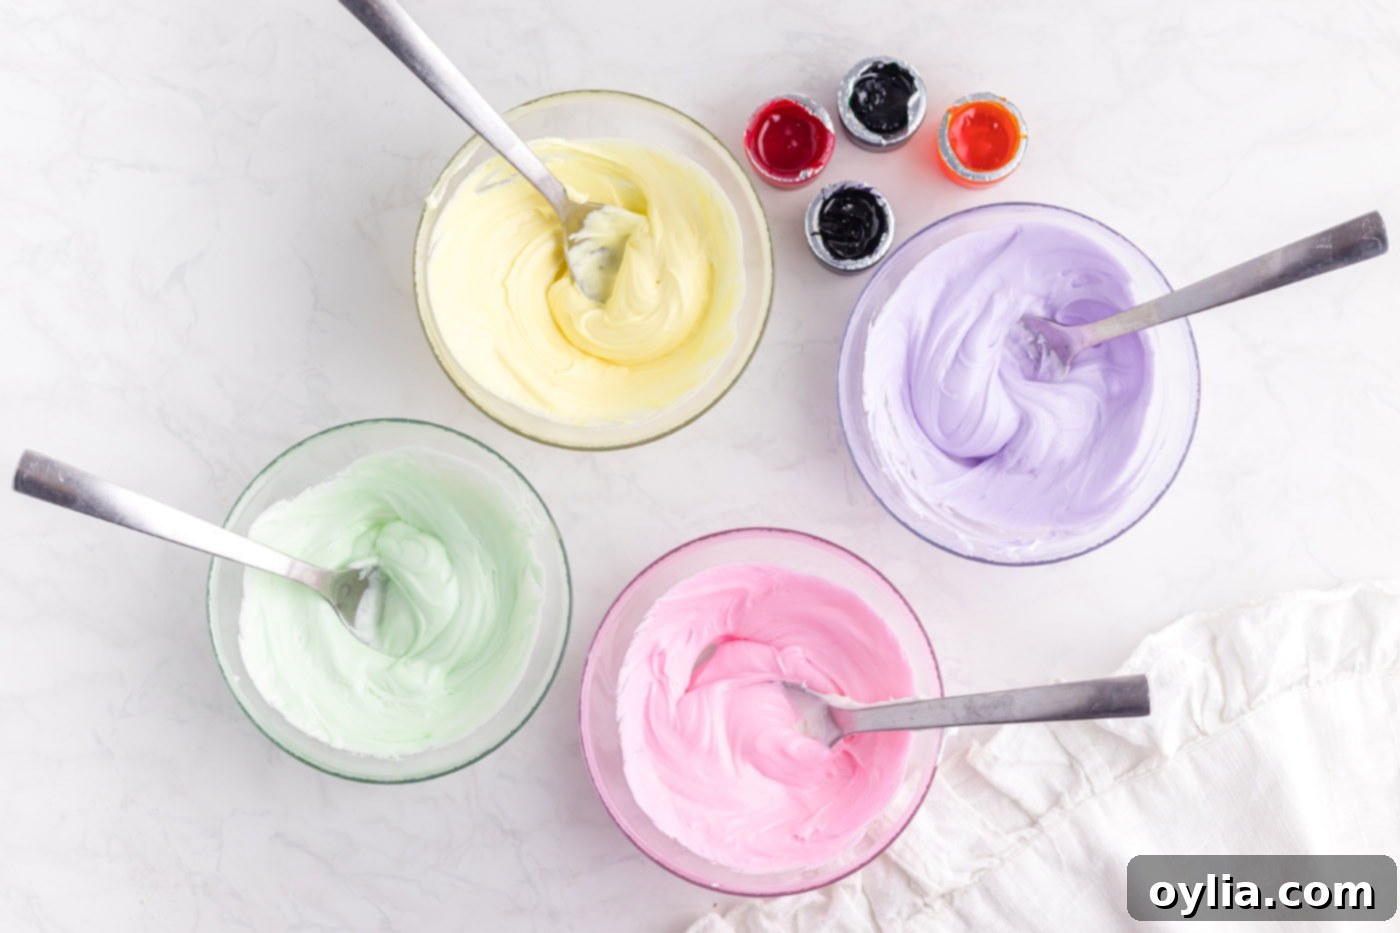
- COLORING YOUR FROSTING – To achieve those iconic soft pastel shades reminiscent of classic conversation heart candies, you’ll separate the white frosting and tint it with pink, yellow, green, and violet gel food colors. We strongly recommend using gel food coloring over liquid food coloring. Gel colors are highly concentrated, meaning you only need a tiny amount to achieve rich, vibrant hues without thinning out your frosting’s consistency. Liquid food coloring can add too much moisture, making the frosting runny and harder to work with for this specific technique.
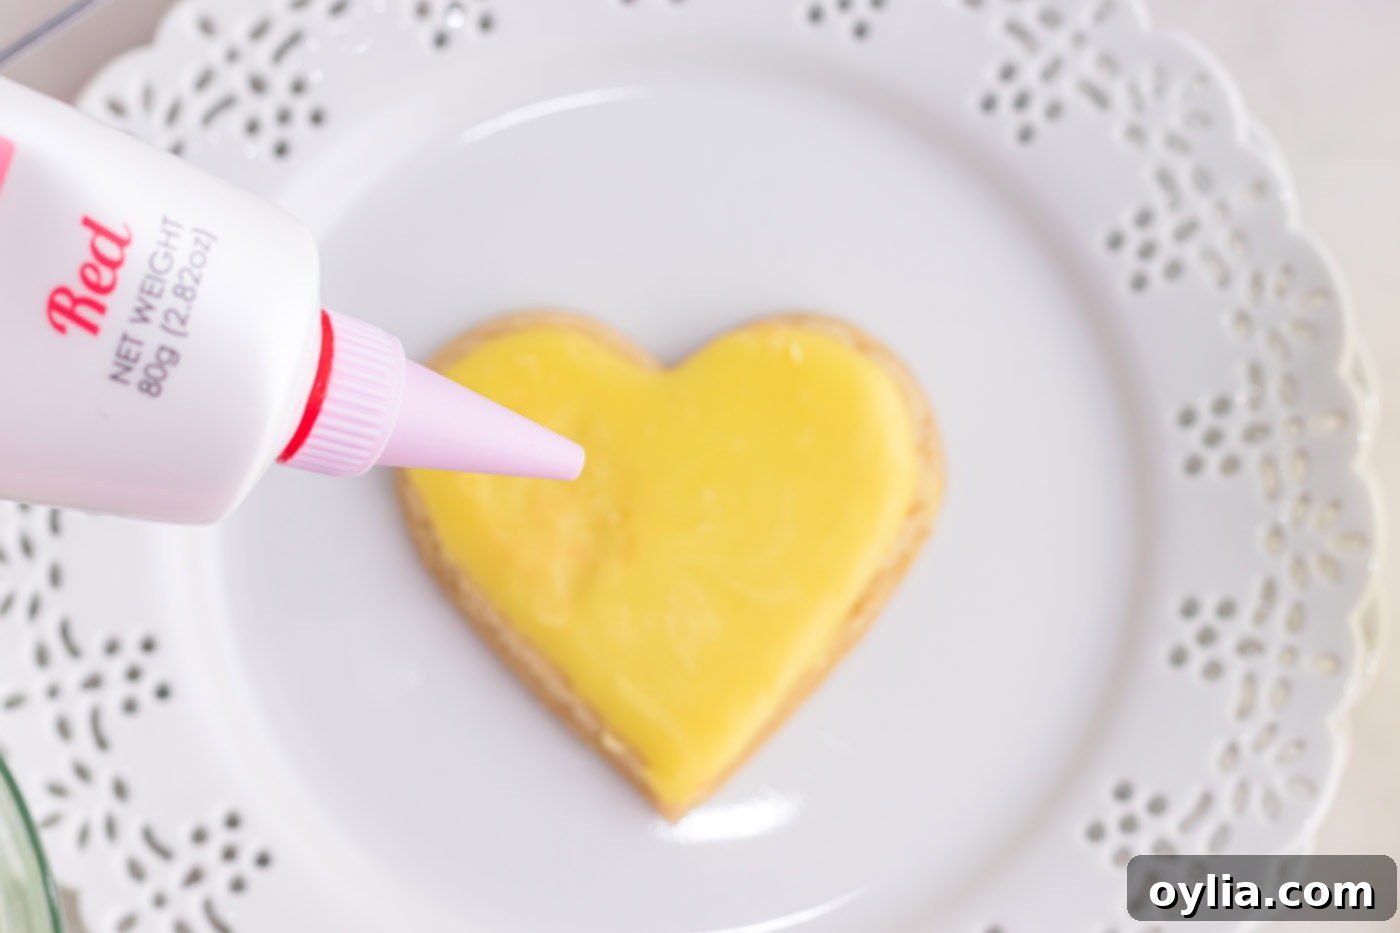
- WRITING MESSAGES – For the final touch of sweet messages, a tube of red icing with a fine writing tip is ideal. This pre-made icing is specifically designed for writing and details, ensuring clean, legible messages on your cookies. Its consistency is perfect right out of the tube, saving you from having to adjust another batch of frosting.
How to Make Easy Conversation Heart Cookies: A Step-by-Step Guide
These step-by-step photos and instructions are designed to help you visualize each stage of this simple recipe. For a convenient printable version, complete with precise measurements and comprehensive instructions, you can jump to the recipe card at the bottom of this post.
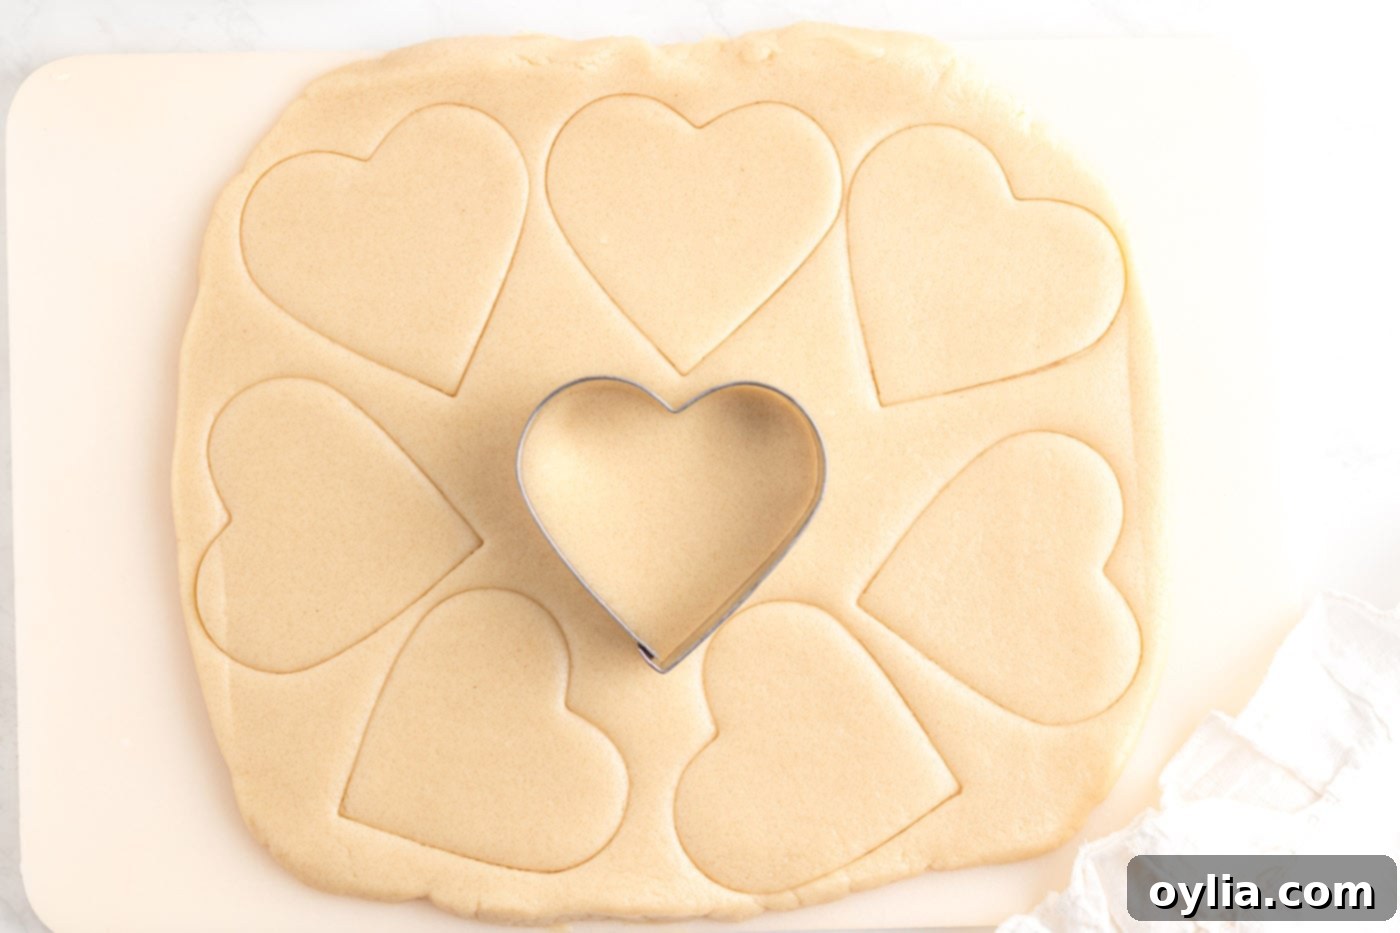
- Prepare and Bake the Cookies: Begin by rolling out your sugar cookie dough to an even thickness (typically about 1/4 inch, but follow package directions). Use a 3-inch heart-shaped cookie cutter to create perfectly uniform shapes. Carefully transfer the cutouts to a baking sheet lined with parchment paper. Bake the cookies according to the package instructions until the edges are lightly golden. Baking them until just done ensures a tender crumb while still providing a sturdy base for your frosting.

- Cool Completely: Once baked, immediately transfer the hot cookies from the baking sheet to a wire cooling rack. This prevents them from overbaking and becoming brittle. It is crucial that the cookies cool completely before you begin decorating. Any residual warmth will melt your frosting, leading to a messy, undesirable result. Patience here ensures perfect cookies!

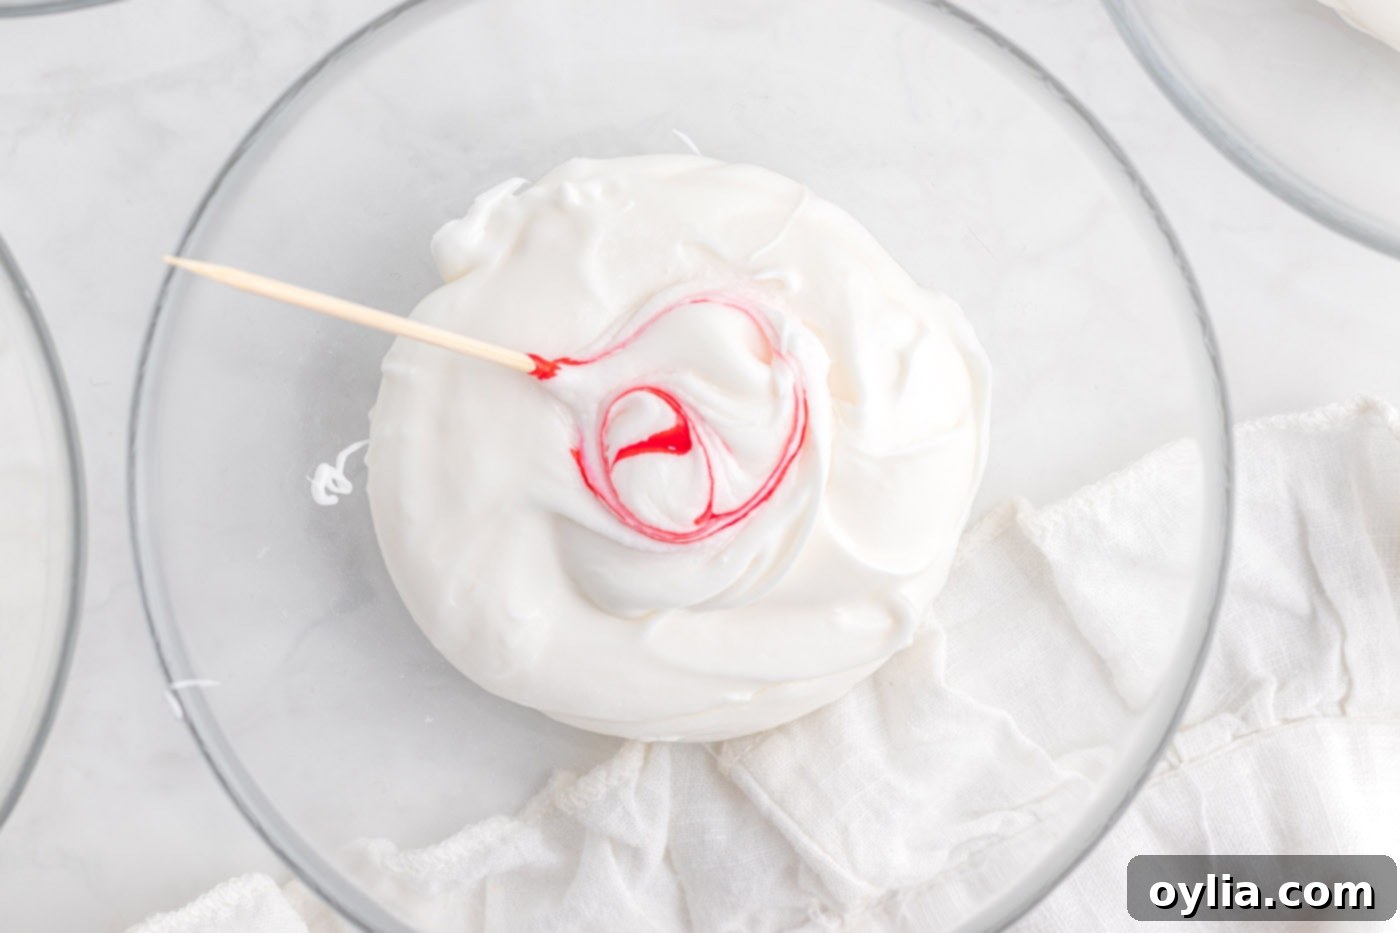
- Color the Frosting: Open your can of white frosting and divide it evenly into four separate microwave-safe bowls. Using a clean toothpick, add a tiny drop of gel food color to each bowl: pink, yellow, green, and violet. Stir well until the color is uniformly distributed and you achieve your desired pastel shade. Remember, a little gel color goes a long way, so start with a small amount and add more gradually to avoid overly intense colors or thinning the frosting.


- Prepare for Frosting: Ensure your baked cookies are completely cool to the touch. This is essential for the frosting to set properly without melting or running. Gather your colored frostings and get ready to start the most fun part of the process!
- Melt the Frosting in Batches: To achieve the “faux” royal icing consistency, you’ll melt the frosting in small batches. Start with one color and approximately 3 cookies. Place one bowl of colored frosting into the microwave for just 5 seconds. Stir thoroughly. If it’s not yet pourable but still quite thick, microwave for another 3-5 seconds, stirring again. The goal is a smooth, flowing consistency, similar to pancake batter, but without the oils separating. Be careful not to overheat it.
- Decorate the Cookies: Working quickly, spoon about a tablespoon of the melted frosting into the center of a cookie. Gently tilt the cookie from side to side, allowing the frosting to spread and evenly cover the surface right up to the edges. You can use the back of your spoon or a toothpick to gently guide the icing or pop any air bubbles. Immediately place the frosted cookies back onto the cooling rack to dry. You may need to reheat your icing in 5-second increments between cookies to maintain the ideal consistency.

- Allow to Set: Continue the frosting process with the remaining cookies and colors until each cookie is beautifully covered. Each color should be sufficient for approximately 3 cookies. Once all cookies are frosted, allow them to air dry on the cooling rack for at least 1 hour, or until the frosting is completely set and firm to the touch. This drying time is crucial for preventing smudges when you add the messages.

- Add Your Messages: Once the base frosting is fully set, grab your red icing tube (which should already be fitted with a writing tip). Now comes the fun part: pipe your favorite classic Valentine’s messages onto the cookies! Think “BE MINE,” “SWEET PEA,” “LOVE YOU,” “KISS ME,” or get creative with your own personal sayings.

Frequently Asked Questions & Expert Tips for Success
Once fully decorated and the frosting is completely set, you can store your charming conversation heart cookies in an airtight container at room temperature. They will remain fresh and delicious for about 3-4 days. For optimal freshness, consider placing a slice of bread in the container to help keep them soft, just like you would with other soft cookies.
This is a critical tip for achieving those bright, clean pastel colors. White frosting provides a pure, neutral base, which allows the gel food colors to appear vibrant and true to their shade. Vanilla frosting, on the other hand, typically has a yellowish tint, which will mix with your food coloring and result in muddier, less appealing colors. For example, pink might turn peach, and green might become a dull olive. Always reach for “white” frosting for the best results!
Yes, absolutely! Decorated sugar cookies freeze beautifully, making them perfect for preparing ahead of time. Ensure the frosting is completely set and dry before freezing. Line a cookie sheet with waxed paper and arrange the decorated cookies in a single layer. Place the sheet in the freezer for 2-3 hours, or until the cookies are thoroughly frozen solid. Once frozen, carefully wrap each cookie in waxed paper, then transfer them to zipper freezer bags or an airtight container with a tight-fitting lid. This double-layer protection helps prevent freezer burn. These cookies can be frozen for up to 3 months. To thaw, simply remove them from the freezer, unwrap them, and let them come to room temperature on a cooling rack. Do not try to rush thawing, as condensation can affect the frosting.
Additional Expert Tips for Perfect Conversation Heart Cookies:
- Getting the Right Icing Consistency: Achieving the perfect flowing consistency for your frosting might take a few attempts. It’s a great idea to designate one cookie as a “practice cookie.” If the frosting is too thick, microwave for another 3-5 seconds. If it becomes too runny, let it sit for a few minutes to thicken slightly, or stir in a tiny bit of un-melted white frosting if you reserved some. Every microwave is different, so learn what works for yours!
- Coloring Caution: Gel food coloring is highly potent. Always add just a tiny amount (like the tip of a toothpick) at a time, mix thoroughly, and then assess the color. You can always add more to deepen the shade, but you cannot remove it if you’ve added too much. Consider reserving a small portion of plain white frosting to help lighten a color if you accidentally make it too dark.
- Keep Tools Handy: A few toothpicks are invaluable during the decorating process. Use them to gently push frosting to the edges, pop any tiny air bubbles that appear on the surface of the wet frosting, or clear a clogged writing tip. A clean paper towel is also useful for quick clean-ups.
- Drying Time is Key: While the frosting sets relatively quickly, ensure it’s completely dry to the touch before attempting to stack or write messages. Rushing this step can lead to smudged designs and frustration.
- Creative Messages: Don’t limit yourself to traditional conversation heart sayings. You can customize messages for specific people, inside jokes, or even holiday greetings for other occasions!

Delightful Serving & Gifting Suggestions
These adorable conversation heart cookies are much more than just a treat; they’re a delightful way to spread love and joy! Imagine the smiles when you present these charming, personalized cookies. They are perfect for gifting to friends, family, teachers, or neighbors. Wrap them individually in clear cellophane bags tied with a pretty ribbon, or arrange a thoughtful assortment in a decorative box for an impressive homemade present.
Beyond gifting, these cookies make a wonderful addition to any Valentine’s Day party spread, a school treat for classmates (check school policies first!), or a sweet ending to a romantic dinner. Children especially love helping with the decorating process, from applying the base colors to writing their own messages, making it a fun family activity. We first discovered the magic of this frosting hack with our easy decorated sugar cookies for Christmas, and it was a huge hit! This versatility means you can easily adapt this technique for any holiday or celebration by simply changing your cookie cutter shapes, frosting colors, and messages. Think spooky ghosts for Halloween, festive trees for Christmas, or pastel eggs for Easter!
More Irresistible Valentine’s Day Recipes to Love
If you’re looking to continue your Valentine’s Day culinary adventures, we have a variety of other delightful recipes that are perfect for celebrating love. From sweet sips to decadent desserts, there’s something to make every moment special:
- Pink Mudslide: A creamy, dreamy cocktail perfect for a romantic evening.
- Valentine Cherry Hand Pies: Individual, flaky pies filled with sweet cherry goodness.
- Chocolate Peanut Butter Hearts: A classic flavor combination shaped into adorable hearts.
- Valentine’s Day Heart Cupcakes: Easy-to-decorate cupcakes that capture the spirit of love.
- Chocolate Covered Fruit Truffles: Elegant and luscious, a delightful treat for any occasion.
- Valentine Muddy Buddies: A fun, snackable mix that’s perfect for sharing.
I absolutely adore spending time in the kitchen, crafting delicious recipes and sharing my culinary experiences with all of you! It can be a challenge to remember to check back daily for new inspirations, which is why I offer a convenient newsletter. Each time a new recipe is posted, it’s delivered straight to your inbox. Simply subscribe here and start receiving your free daily recipes, ensuring you never miss out on a tasty idea!

Conversation Heart Cookies
IMPORTANT – There are often Frequently Asked Questions within the blog post that you may find helpful. Simply scroll back up to read them!
Print It
Pin It
Rate It
Save It
Saved!
Prevent your screen from going dark
Course:
Dessert
Cuisine:
American
12
cookies
1 hour
50 minutes
328
Amanda Davis
Ingredients
-
16.5
oz
sugar cookie dough
1 tube -
16
oz
white frosting
1 can -
1
tube
red frosting
for writing -
gel food color
in pink, yellow, green, and violet
Things You’ll Need
-
3 inch heart shaped cookie cutter
Before You Begin
- Getting the right icing consistency may take a few tries. Use one cookie as a practice cookie. You can always scrape it off and start over. Every microwave is different so you may need to figure out the correct melting time for your particular microwave.
- A little bit of gel color goes a long way, add a little gel at a time to reach your desired color. You can always add more but can’t remove it if you’ve put too much. You can reserve a bit of the white icing in the event that you need to lighten colors.
- Keep toothpicks handy to straighten icing or clean up lettering or to clear the icing tip if it becomes clogged.
Instructions
-
Roll, cut, and bake cookies according to package directions.
-
Transfer baked cookies to a cooling rack to cool completely before decorating.
-
Divide frosting into 4 microwave-safe bowls. Using a toothpick tint each bowl of icing with a different color.
-
When the cookies are completely cool begin covering them with your base icing.
-
Begin with one color and 3 cookies at a time. Microwave your icing for 5 seconds, stir, and then microwave for up to 5 seconds more. The consistency should be smooth but the oils should not be separated.
-
Spoon a tablespoon of the icing in the center of the cookie and then tilt from side to side until the cookie is evenly filled. You may have to guide your icing with the back of your spoon. Working quickly set the cookies back on the cooling rack to fully dry. You may have to reheat icing in between cookies. 5 seconds at a time.
-
Continue with remaining cookies and icing colors until each cookie is filled. Each color will fill 3 cookies. Allow cookies to cool for 1 hour to set.
-
Using the red icing tube fitted with a writing tip, pipe your favorite Valentine messages on the cookies!
Nutrition
Serving:
1
cookie
|
Calories:
328
cal
|
Carbohydrates:
50
g
|
Protein:
2
g
|
Fat:
14
g
|
Saturated Fat:
3
g
|
Polyunsaturated Fat:
4
g
|
Monounsaturated Fat:
6
g
|
Cholesterol:
4
mg
|
Sodium:
183
mg
|
Potassium:
70
mg
|
Fiber:
1
g
|
Sugar:
38
g
|
Vitamin A:
14
IU
|
Calcium:
4
mg
|
Iron:
1
mg
Tried this Recipe? Pin it for Later!
Follow on Pinterest @AmandasCookin or tag #AmandasCookin!
The recipes on this blog are tested with a conventional gas oven and gas stovetop. It’s important to note that some ovens, especially as they age, can cook and bake inconsistently. Using an inexpensive oven thermometer can assure you that your oven is truly heating to the proper temperature. If you use a toaster oven or countertop oven, please keep in mind that they may not distribute heat the same as a conventional full sized oven and you may need to adjust your cooking/baking times. In the case of recipes made with a pressure cooker, air fryer, slow cooker, or other appliance, a link to the appliances we use is listed within each respective recipe. For baking recipes where measurements are given by weight, please note that results may not be the same if cups are used instead, and we can’t guarantee success with that method.

