Delicious & Easy Edible Earth Rice Krispy Treats: A Perfect Earth Day Craft for Kids
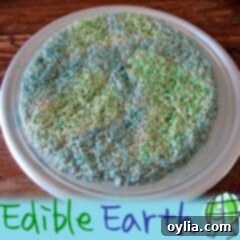
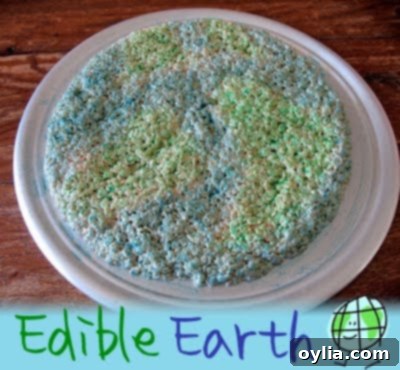
Earth Day is a wonderful occasion to celebrate our planet and teach children about environmental awareness in a fun, engaging way. What better method than to combine learning with a delicious, hands-on activity? This “Edible Earth” Rice Krispy Treat recipe offers a creative and tasty approach to honoring our world. Imagine a giant Rice Krispy treat, meticulously shaped and colored to resemble our beautiful blue and green planet – it’s pure genius, and surprisingly simple to create!
While the initial spark for this fantastic idea came from The Idea Box (where you might even spot one of my photos!), the joy of bringing it to life in my own kitchen made it truly special. I was browsing through potential craft ideas to photograph for the site when I stumbled upon this gem. The moment I shared the concept with my 11-year-old son, Dominic, his eyes lit up with excitement. There’s something truly heartwarming about seeing that enthusiasm, especially when he’s eager to join me in the kitchen. He’s my youngest, and the only one of my four children who still loves to putter around with me, making these shared moments all the more precious.
Why an Edible Earth? Blending Fun, Learning, and Deliciousness
Creating an Edible Earth isn’t just about making a snack; it’s an experience. It’s an opportunity to discuss geography, talk about the importance of our oceans and landmasses, and reinforce the values of Earth Day – caring for our environment. This project is perfectly suited for children of all ages. Younger kids will enjoy the tactile experience of shaping the treat and applying colors, while older children can take on more responsibility, from mixing ingredients to adding intricate details to their planetary masterpiece.
Rice Krispy treats provide the ideal canvas for this edible craft. They are incredibly versatile, forgiving, and require no baking (mostly), making them a fantastic choice for kitchen adventures with kids. Their sticky, yet pliable, texture means they can be molded into various shapes, and they hold food coloring beautifully. Plus, who can resist the satisfying crunch and sweet taste of a classic Rice Krispy treat?
Getting Started: Your Ingredients & Tools for a Perfect Planet
Before diving into the delicious creation of your Edible Earth, gather your materials. The recipe is straightforward, primarily relying on standard Rice Krispy treat ingredients, plus a few items to bring our planet to life. The magic happens with just a few drops of food coloring and a simple pastry brush.
For the basic Rice Krispy treat, you’ll need butter, marshmallows (either a 10-ounce package of regular marshmallows or 4 cups of mini marshmallows), and crispy rice cereal. For the artistic touch, grab blue and green food coloring, two small dishes with a couple of tablespoons of water in each, and a clean pastry brush or even a new, clean paintbrush. To make the handling easier, have two plastic baggies and two rubber bands ready, along with some cooking spray and a pizza pan for shaping.
Crafting Your Planet: Step-by-Step Instructions
Follow these simple steps to bring your Edible Earth to life:
- Prepare the Rice Krispy Treat Base: In a large stock pot, melt 3 tablespoons of butter over medium heat. Once melted, add the marshmallows. Stir constantly until the marshmallows are completely melted and smooth. This step is crucial for an even base. Be careful not to burn the marshmallow mixture – low to medium heat is key. Remove the pot from the heat as soon as the marshmallows are fully melted.
- Mix in the Cereal: Add 6 cups of crispy rice cereal to the melted marshmallow mixture. Stir quickly and thoroughly until all the cereal is evenly coated. Work swiftly, as the mixture will start to cool and stiffen.
- Prepare for Shaping: Lightly spray your pizza pan with cooking spray. This will prevent the sticky mixture from adhering to the pan. Now, here’s a fun tip for your little helpers: have them put plastic baggies on their hands, securing them around their wrists with rubber bands. Then, spray the palm side of these baggies with cooking spray. This creates a non-stick surface, making it much easier and less messy for small hands to handle the sticky treat mixture.
- Shape Your Earth: Dump the cereal mixture out onto the prepared pizza pan. Guide your child to gently press and shape the mixture into a large, round circle, mimicking the shape of our planet. It’s important not to pack the cereal mixture down too hard. If compacted too densely, the treats will become tough and difficult to chew. Aim for a gently molded, cohesive circle.
- Color Your World: Now for the creative part! In one of your small dishes of water, add a few drops of blue food coloring and stir. In the other dish, add a few drops of green food coloring and stir. Using a clean pastry brush (or a dedicated craft paintbrush for food use), begin to “paint on” the land and water. Encourage your child to look at a globe or map for inspiration. Use the blue for oceans and the green for continents. You can create distinct landmasses or a more abstract representation. Don’t worry about perfection; part of the fun is the artistic freedom! The lightly watered-down food coloring will allow for easier spreading and a more watercolor-like effect.
- Enjoy Your Edible Earth: Once you’ve finished decorating, your Edible Earth is ready to be admired and, most importantly, enjoyed! Use a knife to cut slices, just like you would a pizza.
Variations and Educational Opportunities for Endless Fun
This Edible Earth recipe is wonderfully adaptable. Here are a few ideas to make it even more unique and educational:
- Add More Colors: Consider using a tiny bit of white food coloring for clouds, or brown for mountains in specific regions. You could even use red or yellow for volcanic areas or deserts, sparking discussions about different biomes and climates.
- Sparkle and Shine: Edible glitter or sprinkles in shades of blue and green can add a magical touch to your planet, making it even more appealing to young creators.
- Individual Planets: Instead of one large Earth, make several smaller, individual “mini-Earths.” This is perfect for parties, individual servings, or for letting each child design their own unique planet.
- Geography Lesson in Action: While coloring, use a real globe or map as a reference. Challenge your children to identify continents and oceans as they “paint” them onto their treat. This makes for a highly engaging and memorable geography lesson that’s much more interactive than a textbook.
- Environmental Discussions: Use the activity as a springboard to talk about environmental issues. Why are our oceans blue and our land green? What can we do to keep them that way? Discuss simple actions like recycling, saving water, and planting trees.
The beauty of this project lies not only in its delicious outcome but also in the process. It fosters creativity, fine motor skills, and provides a wonderful opportunity for family bonding. Plus, there’s immense satisfaction in creating something beautiful and then getting to eat it!
More Earth Day Crafting Fun and Inspiration
If you and your kids enjoy this edible craft, you might love exploring other Earth-themed projects that combine creativity with learning. For those interested in a tactile experience, try my textured globe Earth craft, which allows children to explore different textures representing land and water. If you have younger children, they’ll adore this simple yet charming coffee filter Earth from The Idea Box, perfect for practicing fine motor skills and color blending.

Edible Earth: Rice Krispy Treats for Earth Day
IMPORTANT – There are often Frequently Asked Questions within the blog post that you may find helpful. Simply scroll back up to read them!
Print It
Pin It
Rate It
Save ItSaved!
Ingredients
- 3 tablespoons butter
- 1 10- oz package of marshmallows or 4 cups mini marshmallows
- 6 cups crispy rice cereal
- blue and green food coloring
- 2 small dishes with 2 tablespoons of water in each
- pastry brush
- 2 plastic baggies
- 2 rubber bands
- cooking spray
- pizza pan
Instructions
-
Melt the butter over medium heat in a stock pot. Add the marshmallows and continue cooking, stirring constantly, until marshmallows are melted. Remove from heat and add cereal. Stir to combine, then dump out onto the pizza pan.
-
Have child put baggies on their hands, secure them around their wrists with rubber bands. Spray the palm side of the baggies with cooking spray.
-
Have child shape the cereal mixture into a large circle on the pizza pan. Don’t pack the cereal mixture down too hard or they will become tough and hard to chew.
-
Add a few drops of blue food coloring to one of the dishes of water, and add a few drops of green to the other. Use a clean pastry brush to “paint on” the land and the water.
-
Cut and enjoy!
The recipes on this blog are tested with a conventional gas oven and gas stovetop. It’s important to note that some ovens, especially as they age, can cook and bake inconsistently. Using an inexpensive oven thermometer can assure you that your oven is truly heating to the proper temperature. If you use a toaster oven or countertop oven, please keep in mind that they may not distribute heat the same as a conventional full sized oven and you may need to adjust your cooking/baking times. In the case of recipes made with a pressure cooker, air fryer, slow cooker, or other appliance, a link to the appliances we use is listed within each respective recipe. For baking recipes where measurements are given by weight, please note that results may not be the same if cups are used instead, and we can’t guarantee success with that method.
Connect with Us for More Crafty & Culinary Ideas!
While this recipe might be a bit different from the usual content I share on my craft blog, it perfectly blends the joy of crafting with the delight of cooking. To see some other awesome projects and explore more creative ideas, be sure to visit these craft carnivals where this project is featured!
And for even more delicious recipes, creative crafts, and helpful tips, be sure to subscribe to my newsletter, Foodie in the Craftroom! You’ll receive regular updates and insights from both Amanda’s Cookin’ and Crafts by Amanda. Don’t miss out on new ideas and inspiration – visit amandascookin.com/p/subscribe-to-newsletter.html to sign up today.
