Irresistible Chocolate Pumpkin Magic Cake: The Ultimate Fall Dessert Recipe
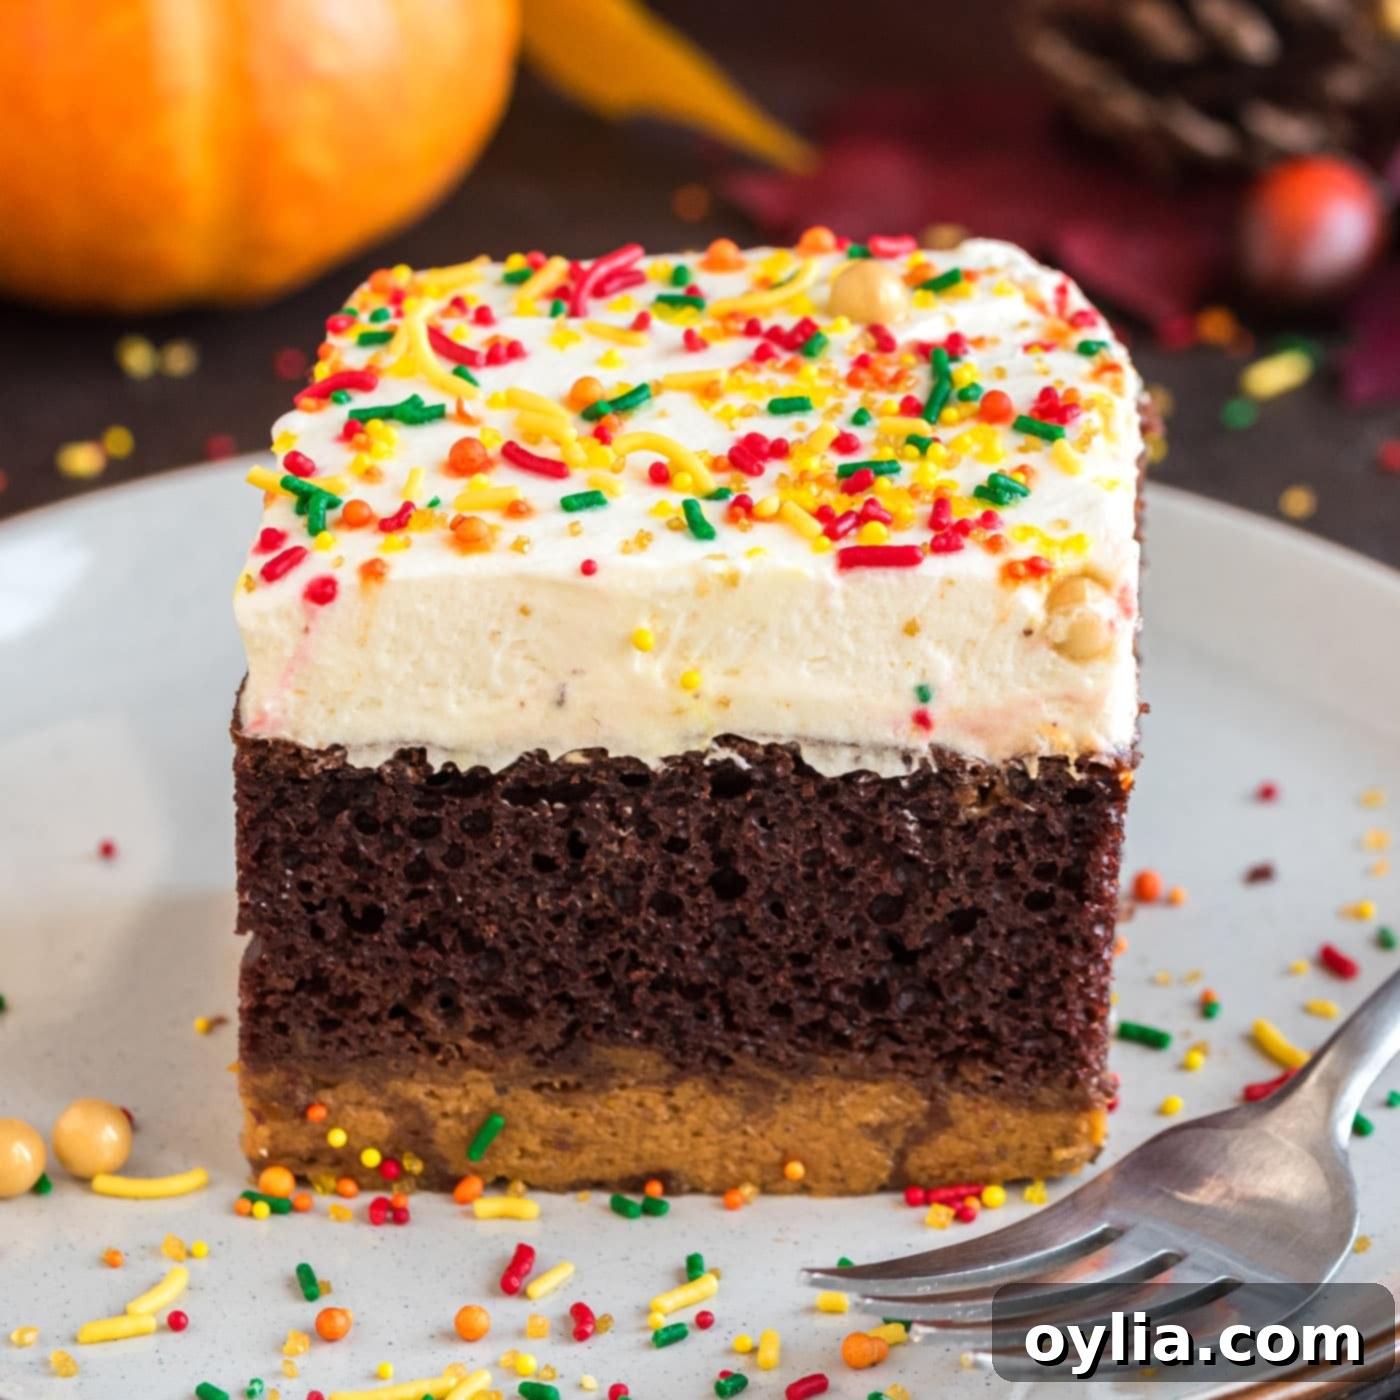
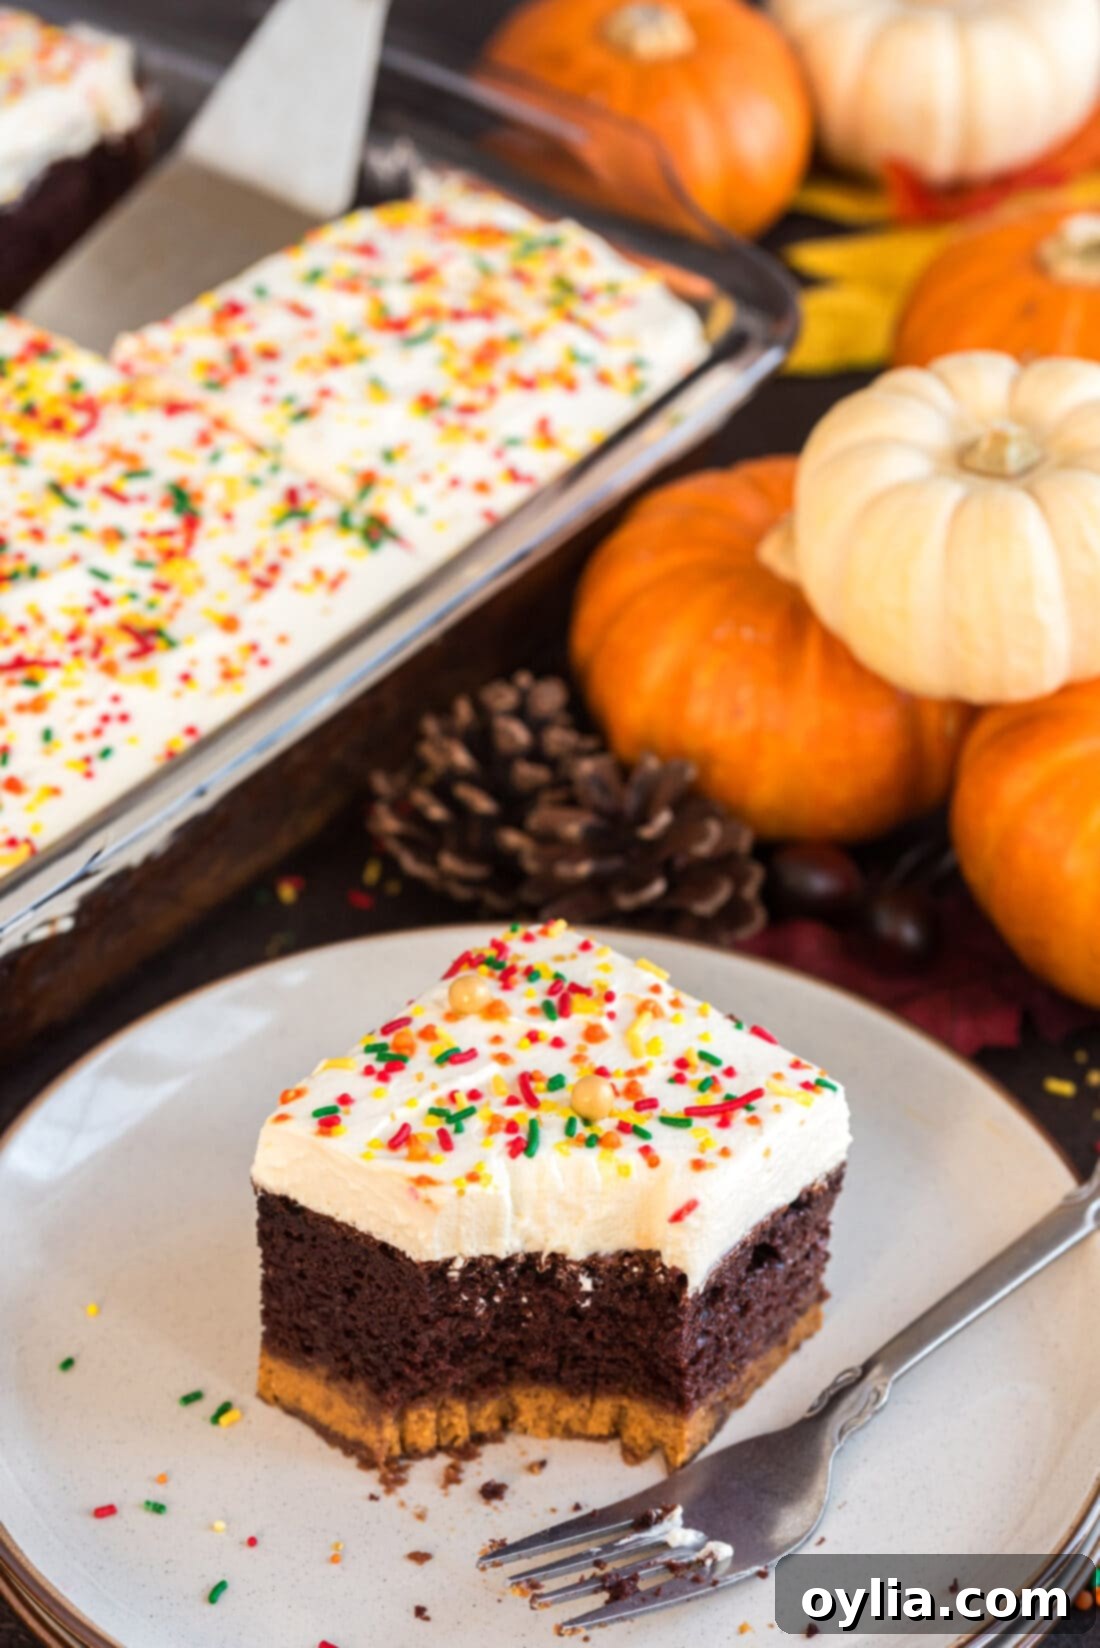
Prepare to be enchanted by the **Chocolate Pumpkin Magic Cake**, a truly extraordinary dessert that masterfully blends three distinct yet complementary layers into one magnificent creation. Imagine a rich, moist chocolate cake, a wonderfully spiced pumpkin pie, and a light, airy vanilla mousse, all coming together in a harmonious symphony of flavors and textures. This isn’t just a cake; it’s a magical experience, especially perfect for ushering in the cozy vibes of fall and holiday gatherings.
This recipe delivers an incredibly moist and flavorful cake that promises to be the star of any dessert table. Its unique baking process creates a delightful surprise, revealing its signature layers only when sliced. Whether you’re a devoted pumpkin spice enthusiast or simply seeking a unique and impressive dessert, this Chocolate Pumpkin Magic Cake is designed to captivate and satisfy every palate.
Why This Chocolate Pumpkin Magic Cake Recipe Works So Well
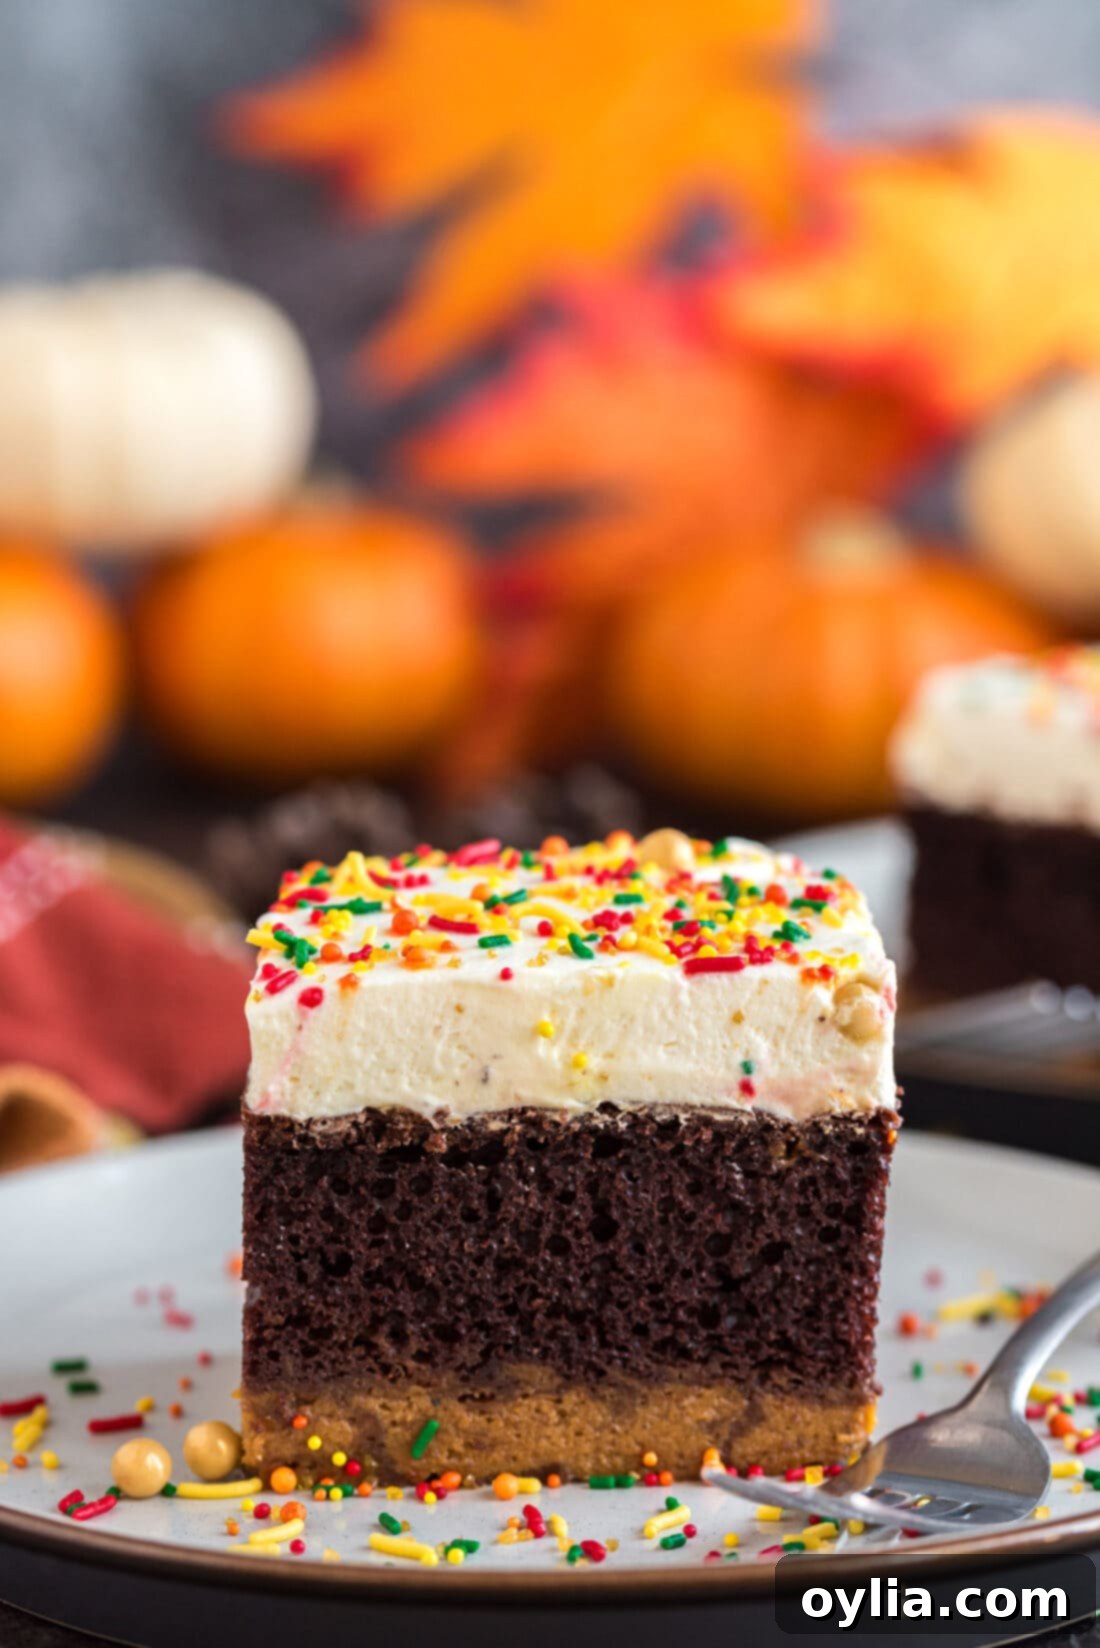
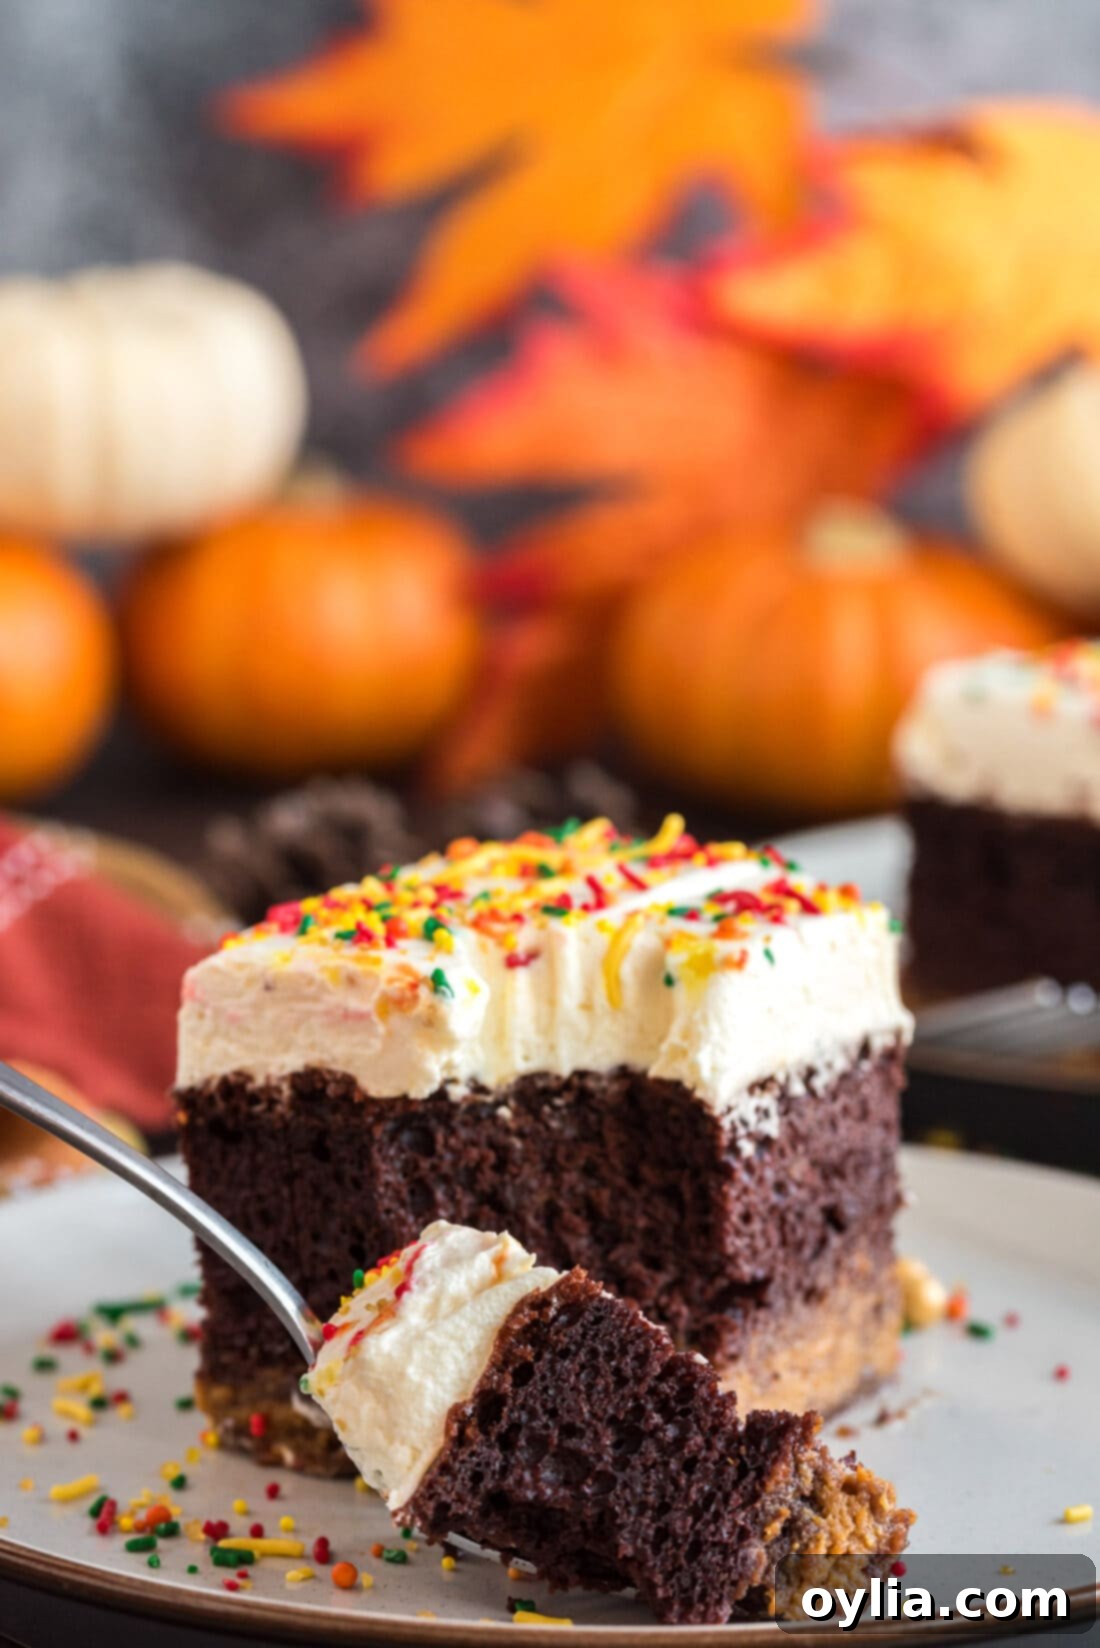
This particular version of our beloved pumpkin magic cake is specifically crafted to captivate all the chocolate lovers out there! The Chocolate Pumpkin Magic Cake truly lives up to its name, baking in a uniquely mysterious way to form three incredible layers: a creamy vanilla mousse on top, a rich and moist chocolate cake in the middle, and a delightful pumpkin pie layer at the bottom. It’s essentially a three-in-one dessert that offers a complex flavor profile with every bite.
One of the most remarkable aspects of this cake is its ability to please even those who aren’t typically fond of strong pumpkin spice flavors. The pumpkin component is perfectly balanced, offering a warm and inviting, yet subtle, complementary note that never overpowers the decadent chocolate. This makes it a fantastic choice for diverse palates at any gathering.
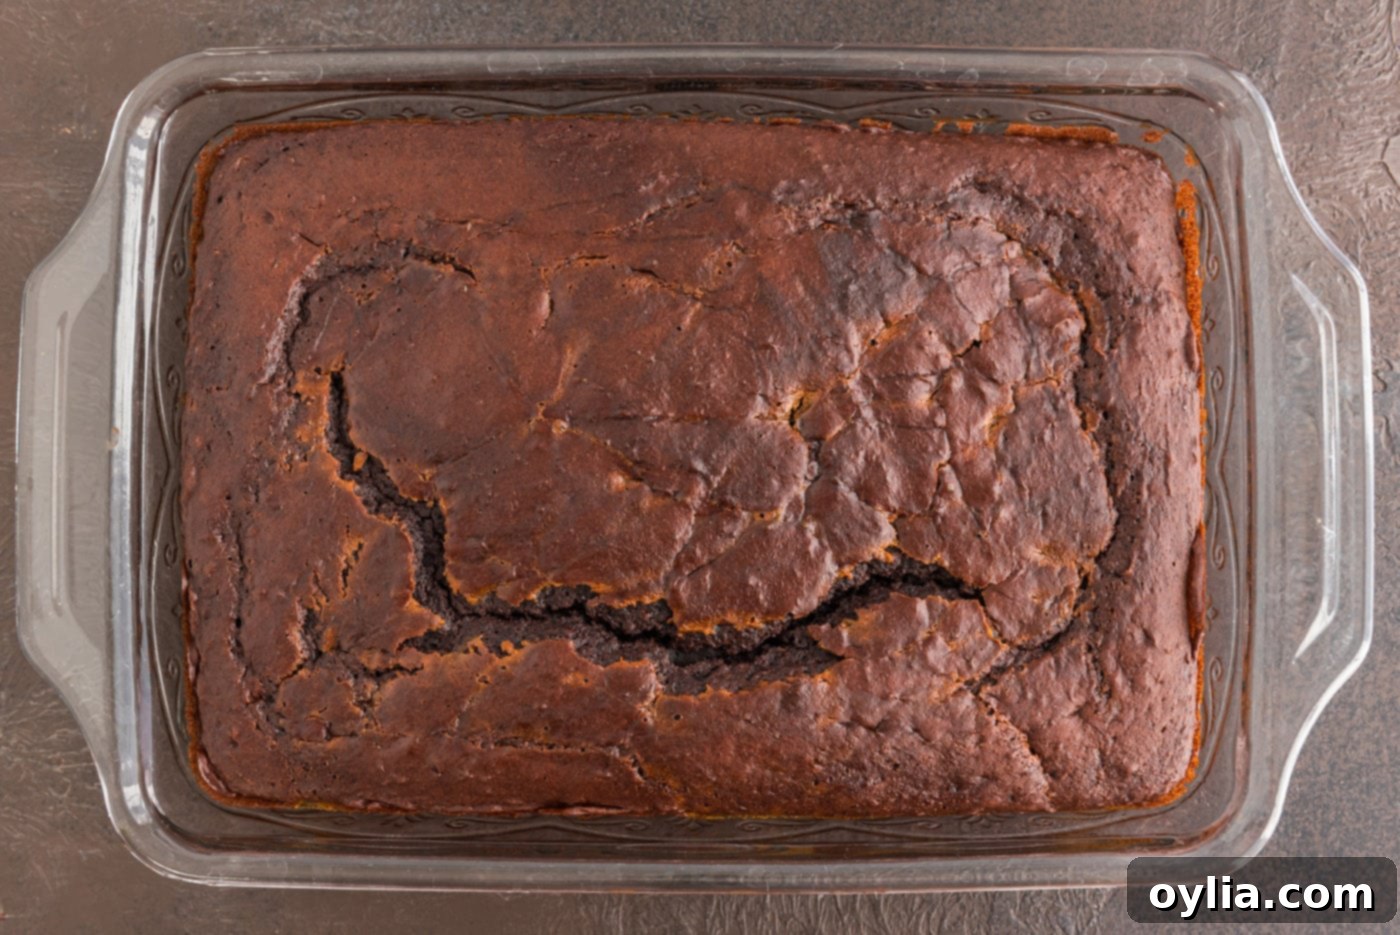
Don’t be alarmed when you first pull this cake out of the oven and don’t immediately see the distinct pumpkin layer. That’s precisely where the “magic” unfolds! The pumpkin batter, initially layered over the chocolate cake batter, possesses a higher density. During the baking process, it gracefully sinks through the lighter chocolate cake, not only settling onto the bottom to form its own distinct layer but also infusing the chocolate cake with an incredible amount of moisture. This unique gravitational dance ensures that once the cake is sliced, all three beautiful layers of this fun and flavorful dessert are revealed, promising a delightful surprise for everyone.
Key Ingredients for Your Chocolate Pumpkin Magic Cake
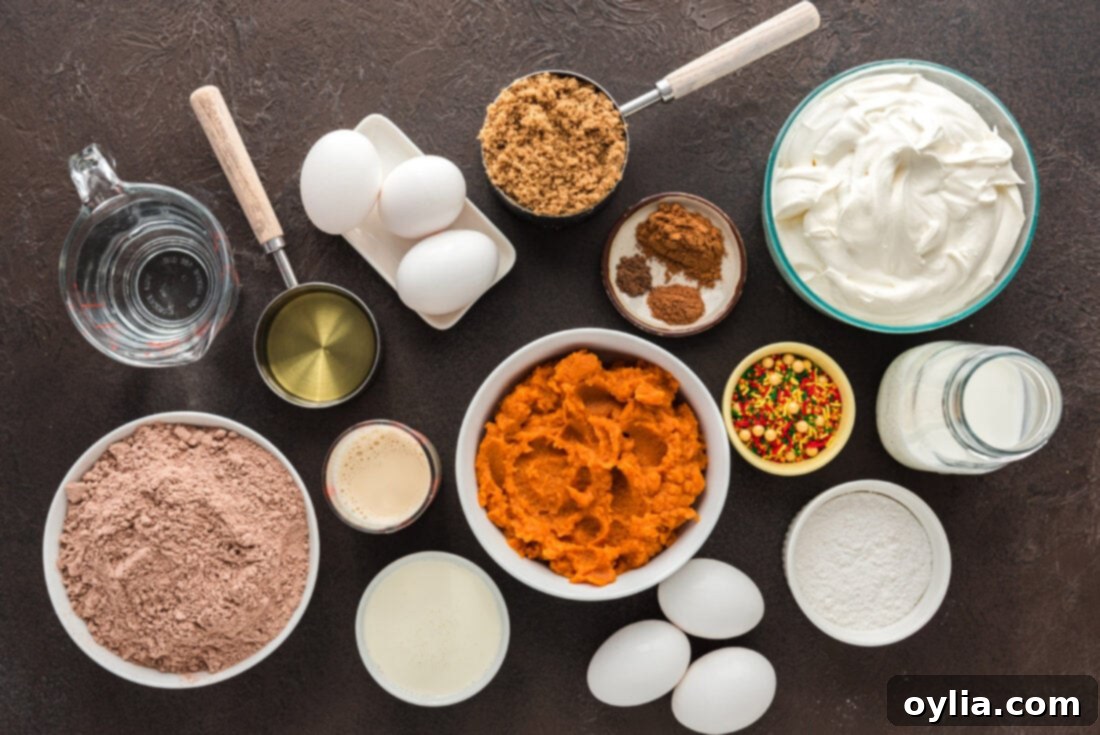
To create this magnificent Chocolate Pumpkin Magic Cake, you’ll need a carefully selected list of ingredients for each of its three distinct layers. For precise measurements and a detailed step-by-step guide, please refer to the printable recipe card located at the end of this post. Gathering all your ingredients before you begin baking will ensure a smooth and enjoyable process.
Ingredient Spotlight & Substitution Tips
Understanding the role of each ingredient can elevate your baking game and even inspire creative substitutions. Here’s a closer look at the components that make our Chocolate Pumpkin Magic Cake so special:
PUMPKIN LAYER: The vibrant and flavorful pumpkin pie layer is crafted from a blend of evaporated milk, rich heavy whipping cream, fresh eggs, sweet brown sugar, and a comforting medley of warm fall spices. Our carefully chosen spices – cinnamon, nutmeg, and allspice – create a beautifully aromatic profile. This combination ensures the pumpkin flavor is perfectly subtle, not overwhelming, complementing the other layers with just the right touch of seasonal warmth.
CAKE LAYER: For an exceptionally rich and delightfully fluffy texture, we highly recommend using a standard-sized box of devil’s food cake mix (typically 15.25 ounces). This specific mix, along with the oil, water, and eggs it calls for, produces a deep chocolate flavor that truly elevates the entire dessert. While Devil’s food cake mix makes a significant difference, you can certainly experiment with other chocolate cake mixes or even different flavors if you prefer. For those who enjoy a lighter cake base, check out our original pumpkin magic cake, which uses a yellow cake mix for equally delicious results.
MOUSSE LAYER: The dreamy vanilla mousse relies on one crucial ingredient: a 3.4-ounce box of instant vanilla pudding mix. It’s essential to use instant pudding for this recipe, as the cook-and-serve varieties will not achieve the desired light and airy consistency. This quick-setting pudding is then gently folded with thawed Cool Whip, creating a stable yet incredibly creamy topping that beautifully balances the richness of the cake and pumpkin layers.
How to Make Chocolate Pumpkin Magic Cake: Step-by-Step Instructions
These step-by-step photos and instructions are designed to help you visualize each stage of making this incredible dessert. For a convenient printable version of this recipe, complete with all measurements and detailed instructions, simply Jump to Recipe at the bottom of this page.
- Preheat your oven to 350°F (175°C). Ensuring your oven is at the correct temperature is crucial for even baking, so consider using an oven thermometer for accuracy.
- Prepare a 9×13 baking dish by lining it with parchment paper or generously greasing and flouring it. This prevents sticking and makes for easy removal later.
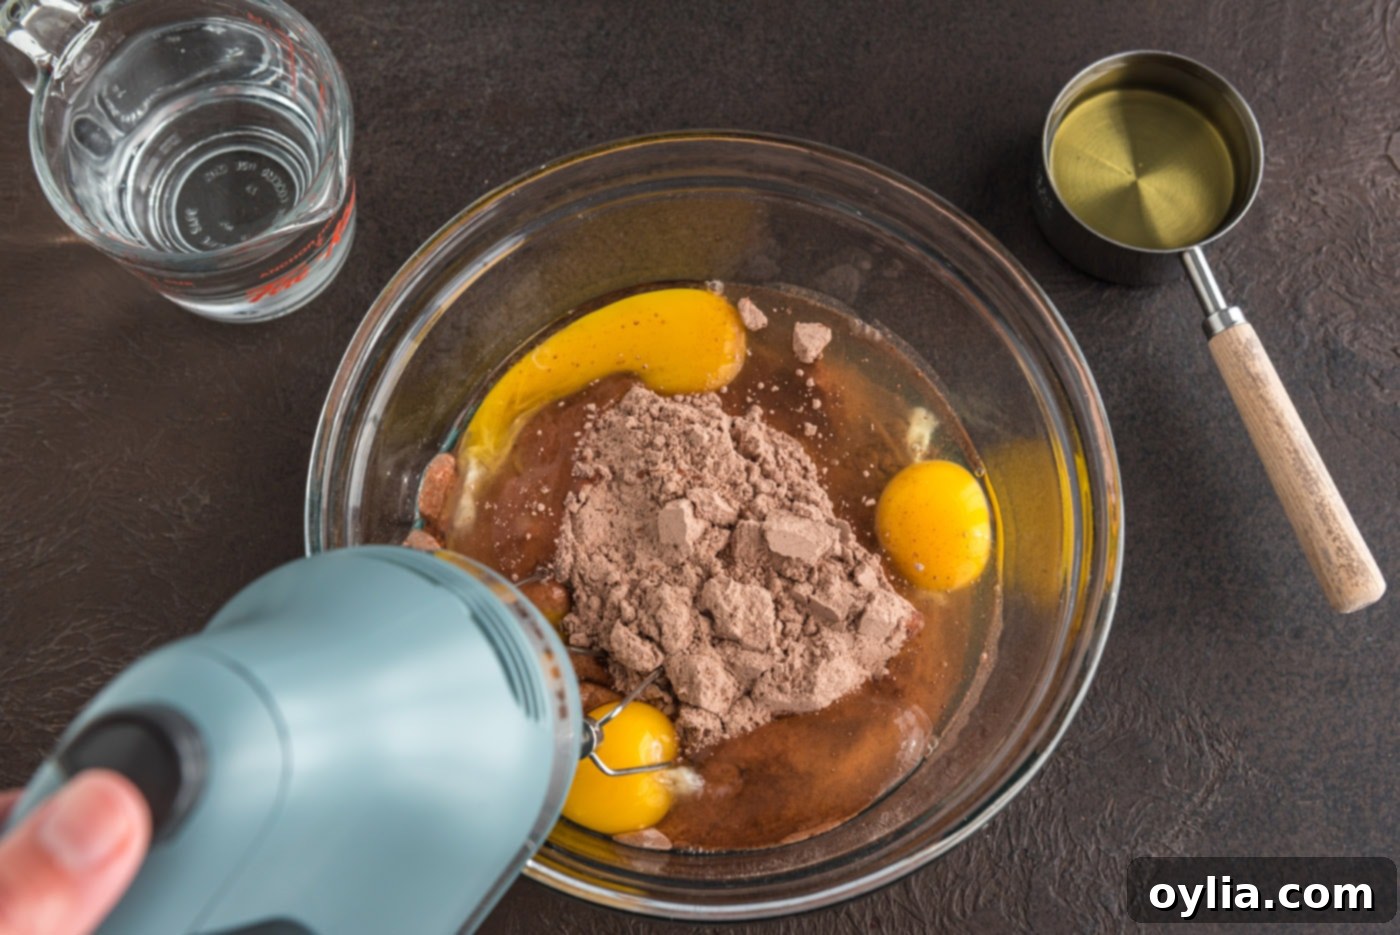
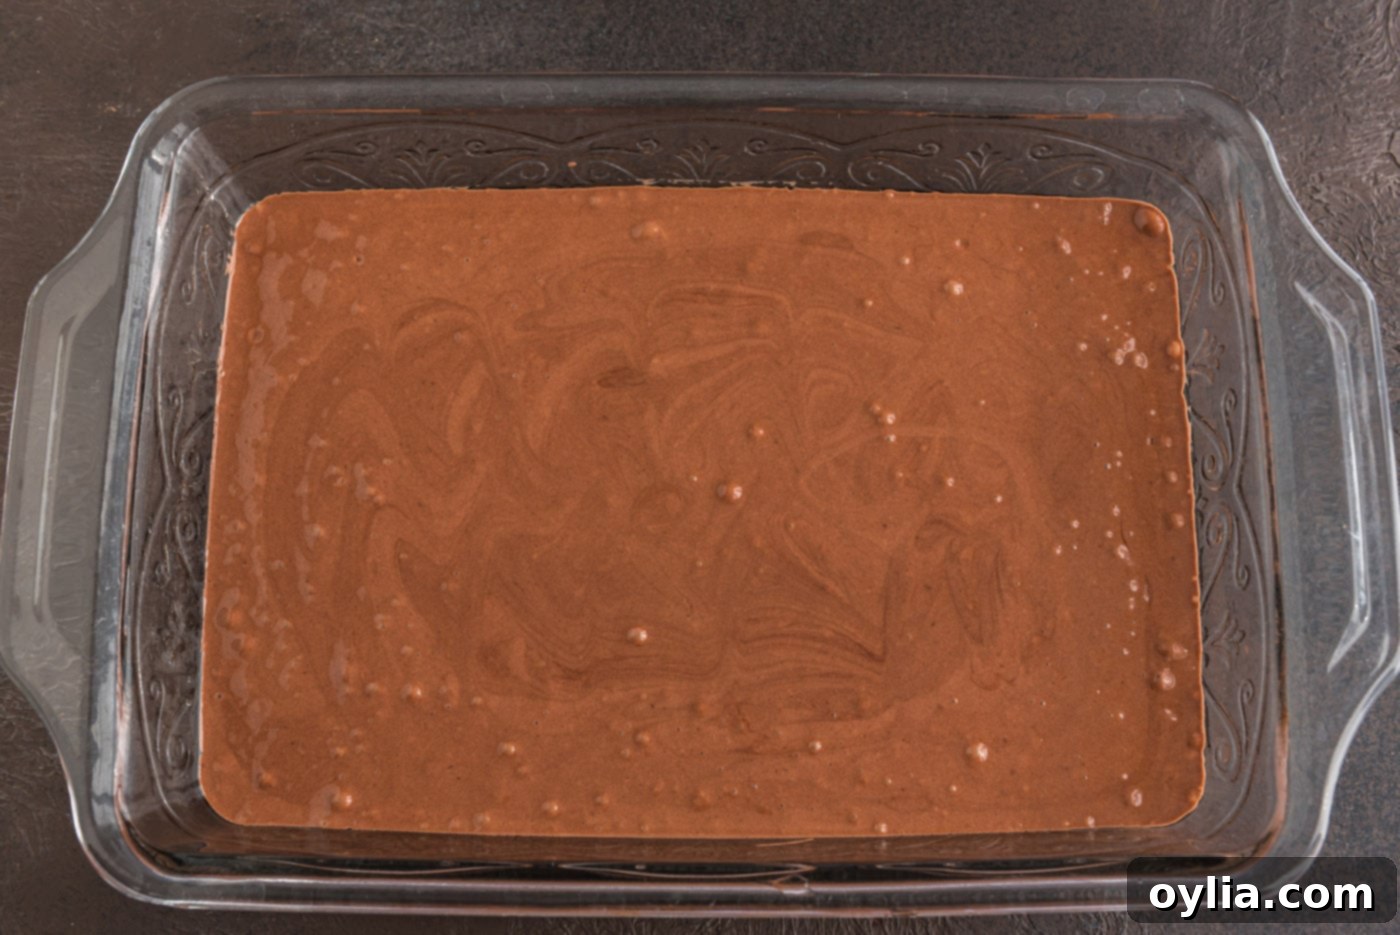
- Prepare the boxed cake mix according to the specific instructions provided on its packaging. Typically, this involves combining the mix with oil, water, and eggs. Once thoroughly mixed, pour the smooth chocolate cake batter into your prepared baking dish. **DO NOT BAKE YET.** Set this aside while you prepare the next layer.


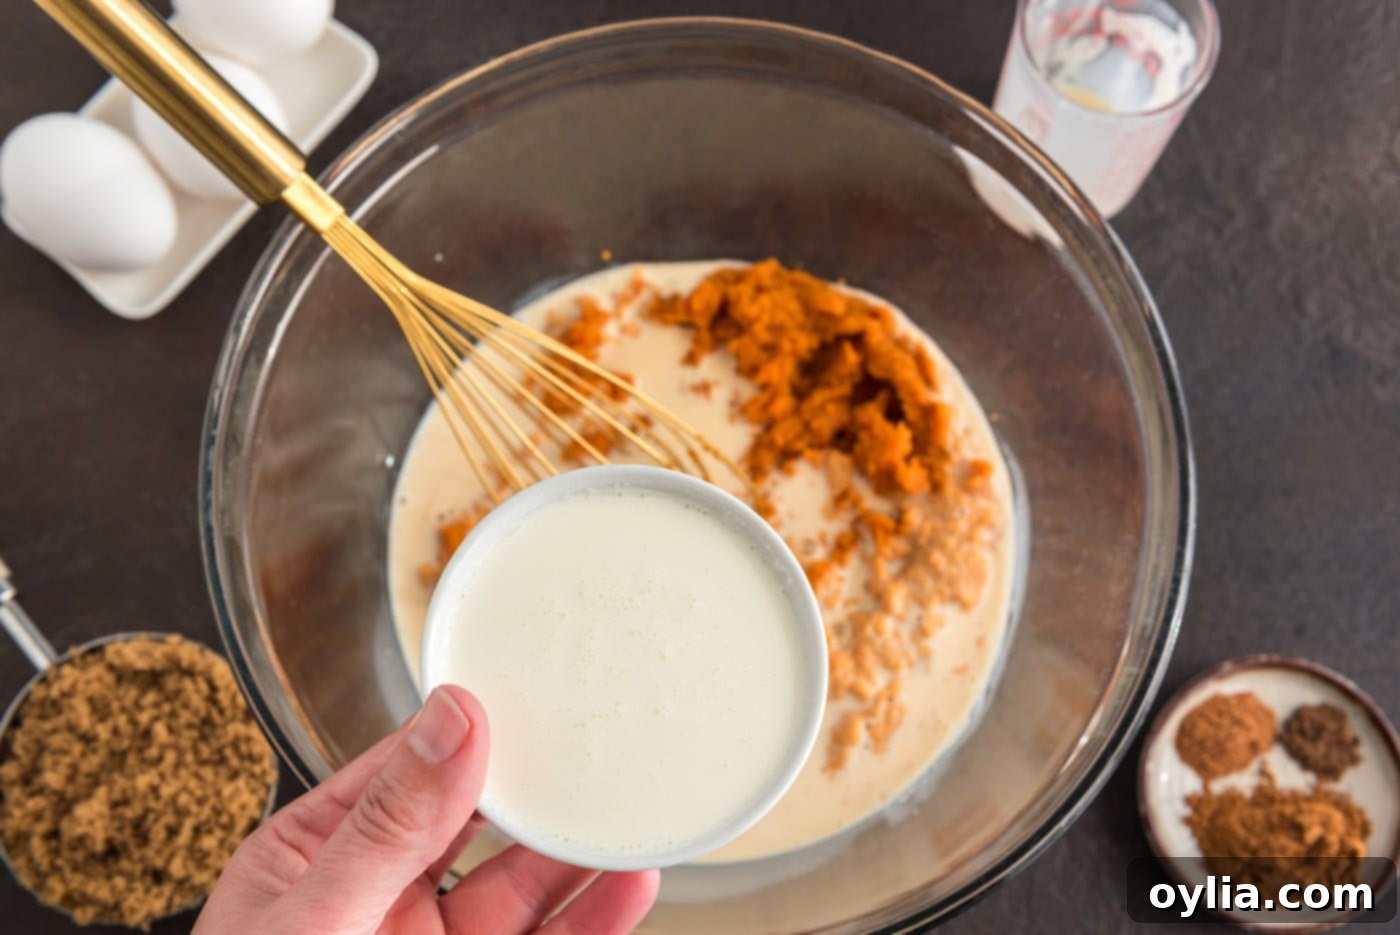
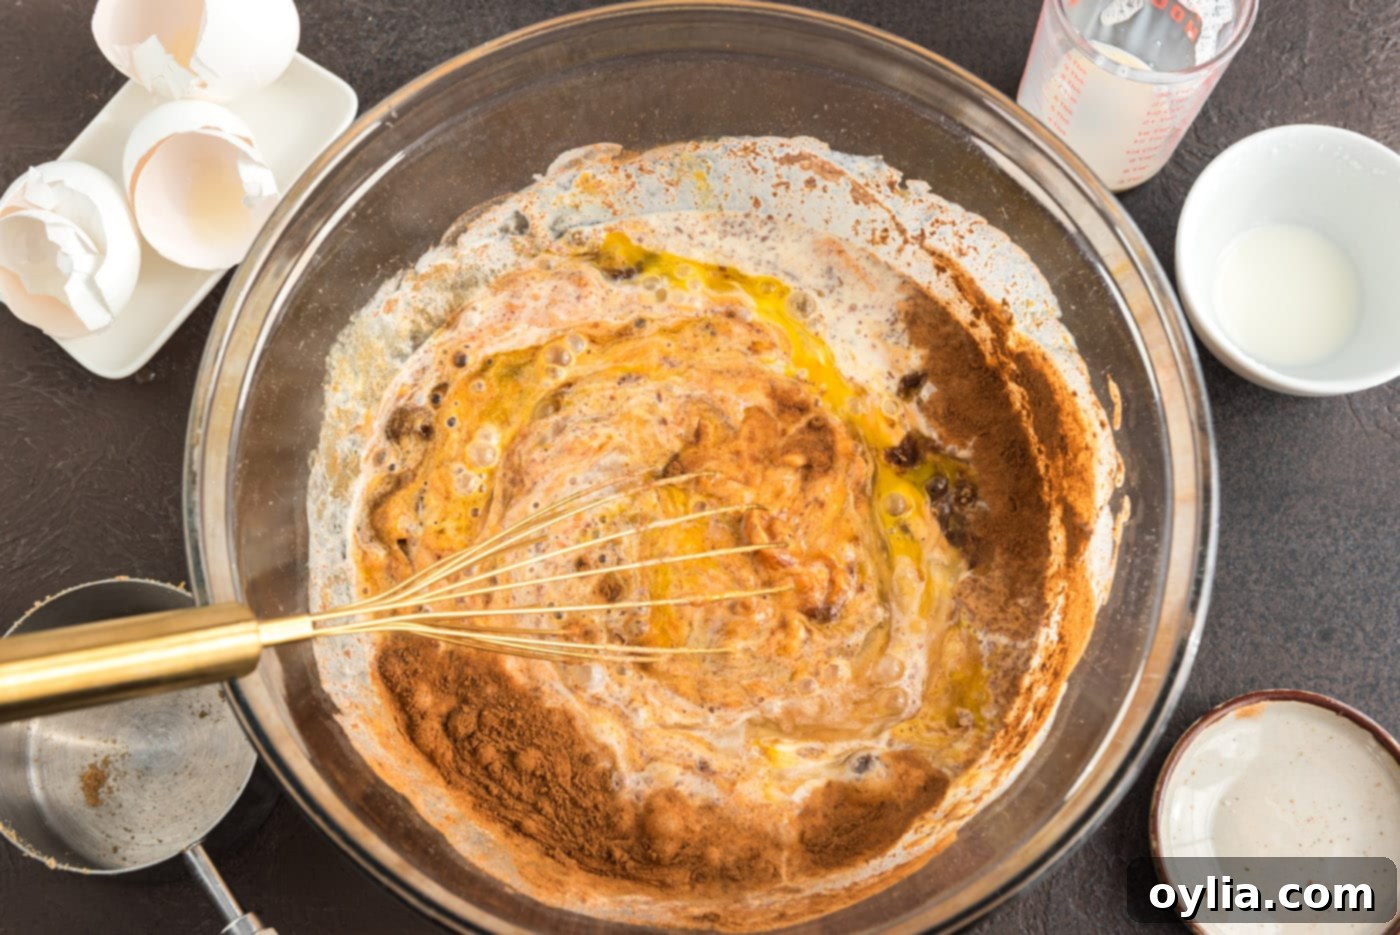
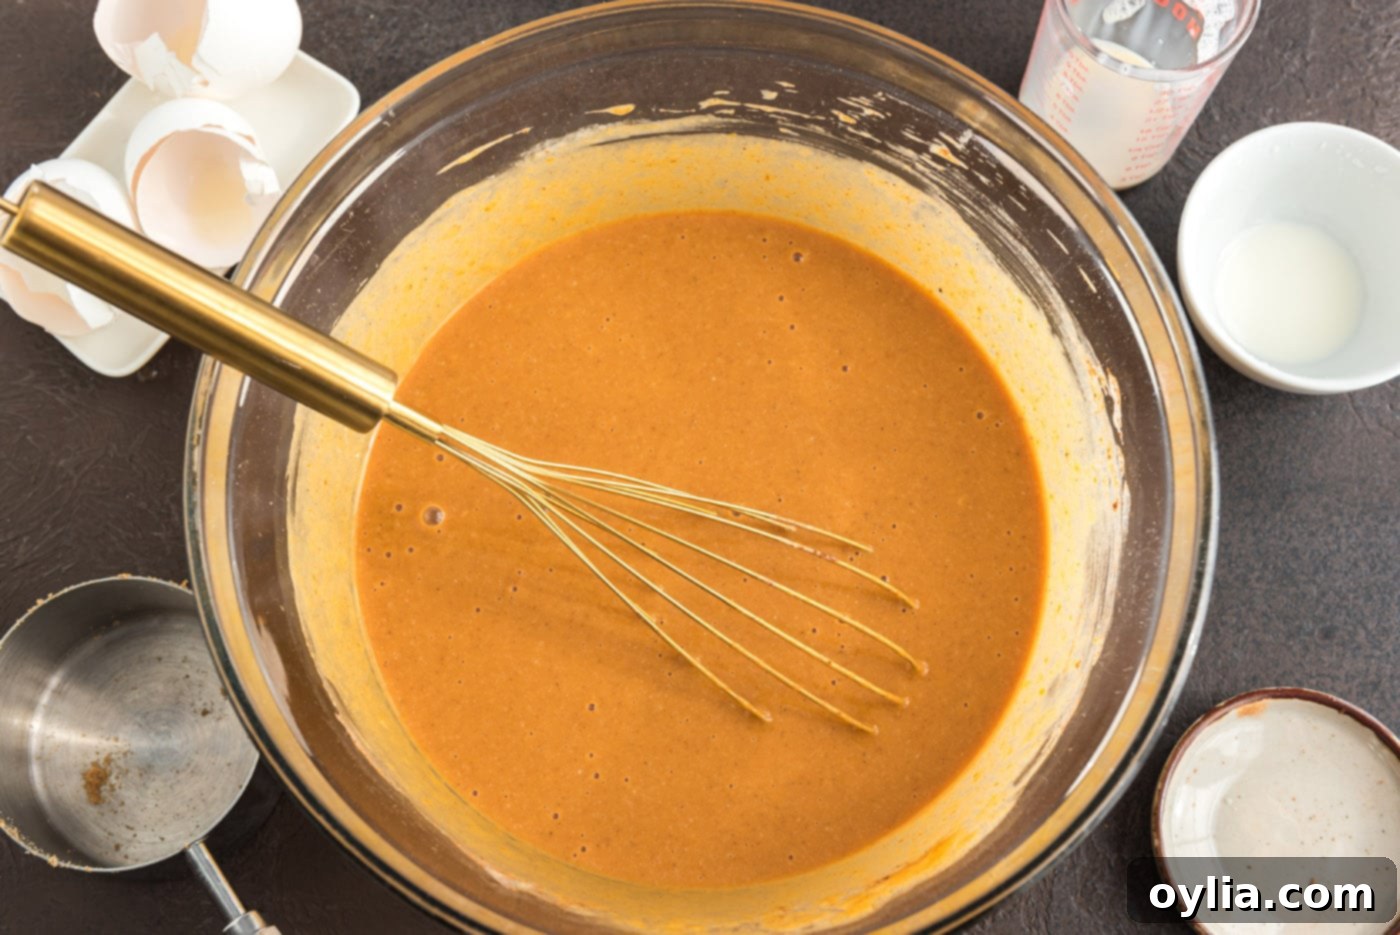
- In a separate, large mixing bowl, whisk together all the ingredients designated for the pumpkin pie layer. Continue whisking until the mixture is completely smooth and well combined, ensuring no lumps remain.


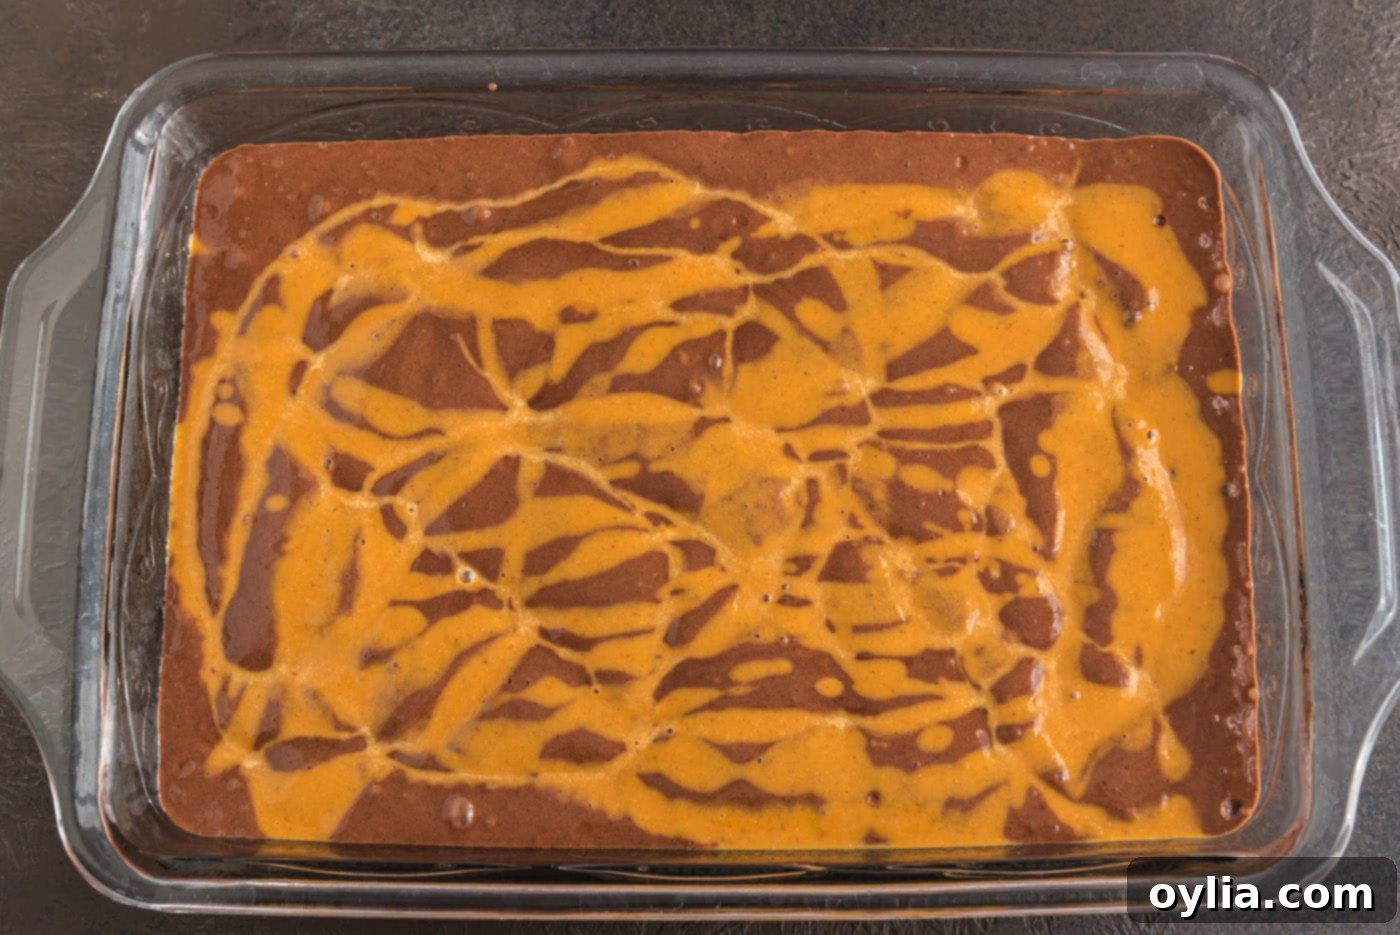
- Carefully and slowly pour the pumpkin mixture directly over the chocolate cake batter in the baking dish. Aim to make this layer as even as possible. It’s important **not to spread or attempt to fix uneven pouring** with a spatula, as the unique density of the pumpkin batter will cause it to settle and self-level during the baking process, creating the “magic” layer.

- Bake the cake for 50-60 minutes. You’ll know it’s done when the center is no longer jiggly when the pan is gently shifted, and a toothpick inserted into the center of the cake comes out clean (without wet batter). Be careful not to overbake, as this can dry out the cake.

- Allow the baked cake to cool completely to room temperature on a wire rack before proceeding. This step is vital to ensure the vanilla mousse sets properly and doesn’t melt into the warm cake. While the cake cools, you can begin preparing the vanilla mousse.
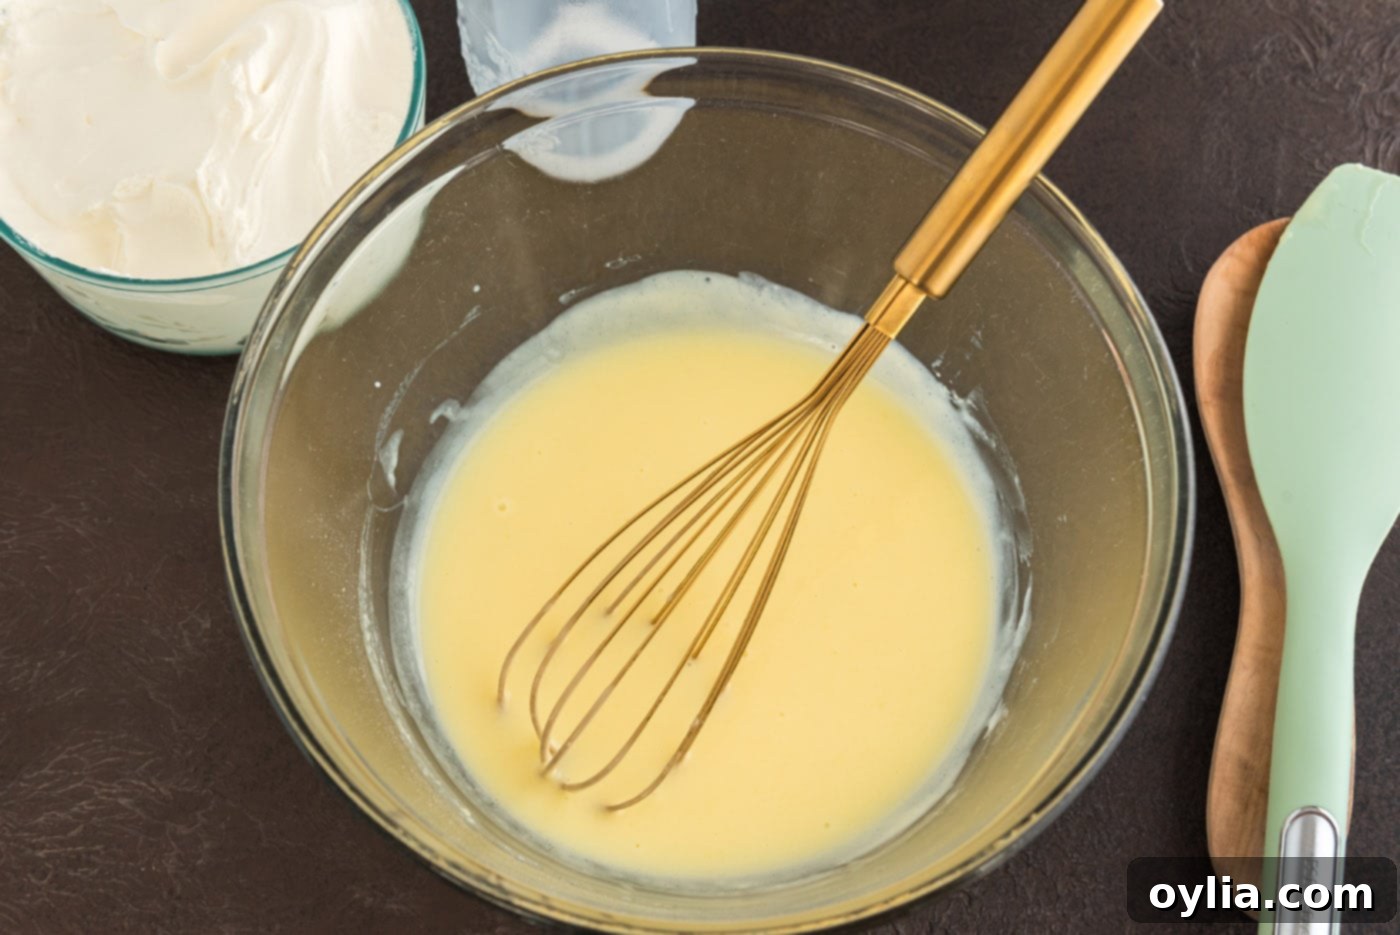
- In a large bowl, combine the instant vanilla pudding mix with the cold milk. It’s important to use cold milk as it helps the pudding set quickly and properly.

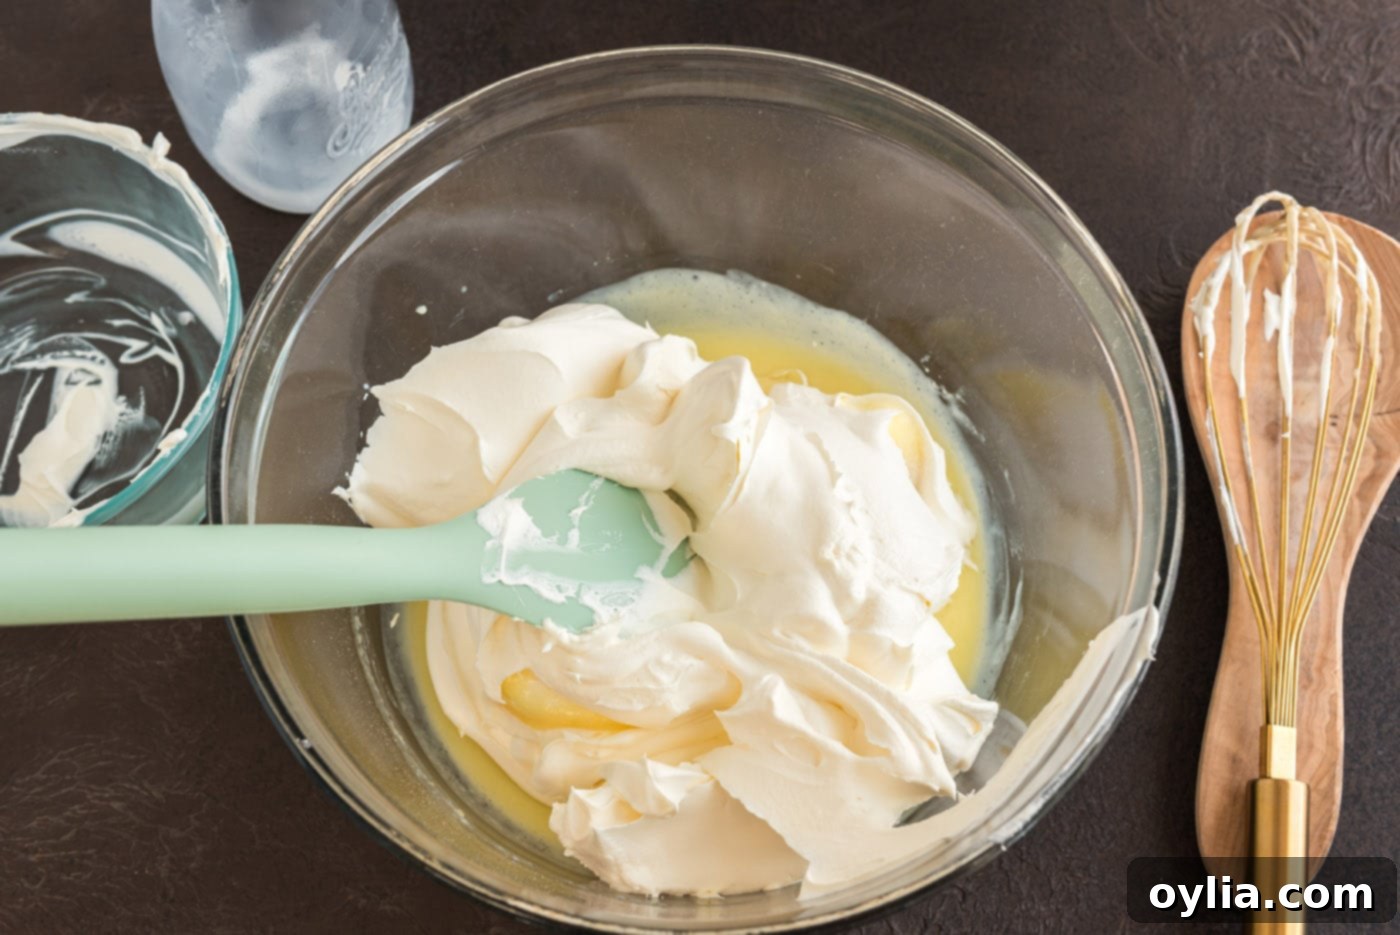
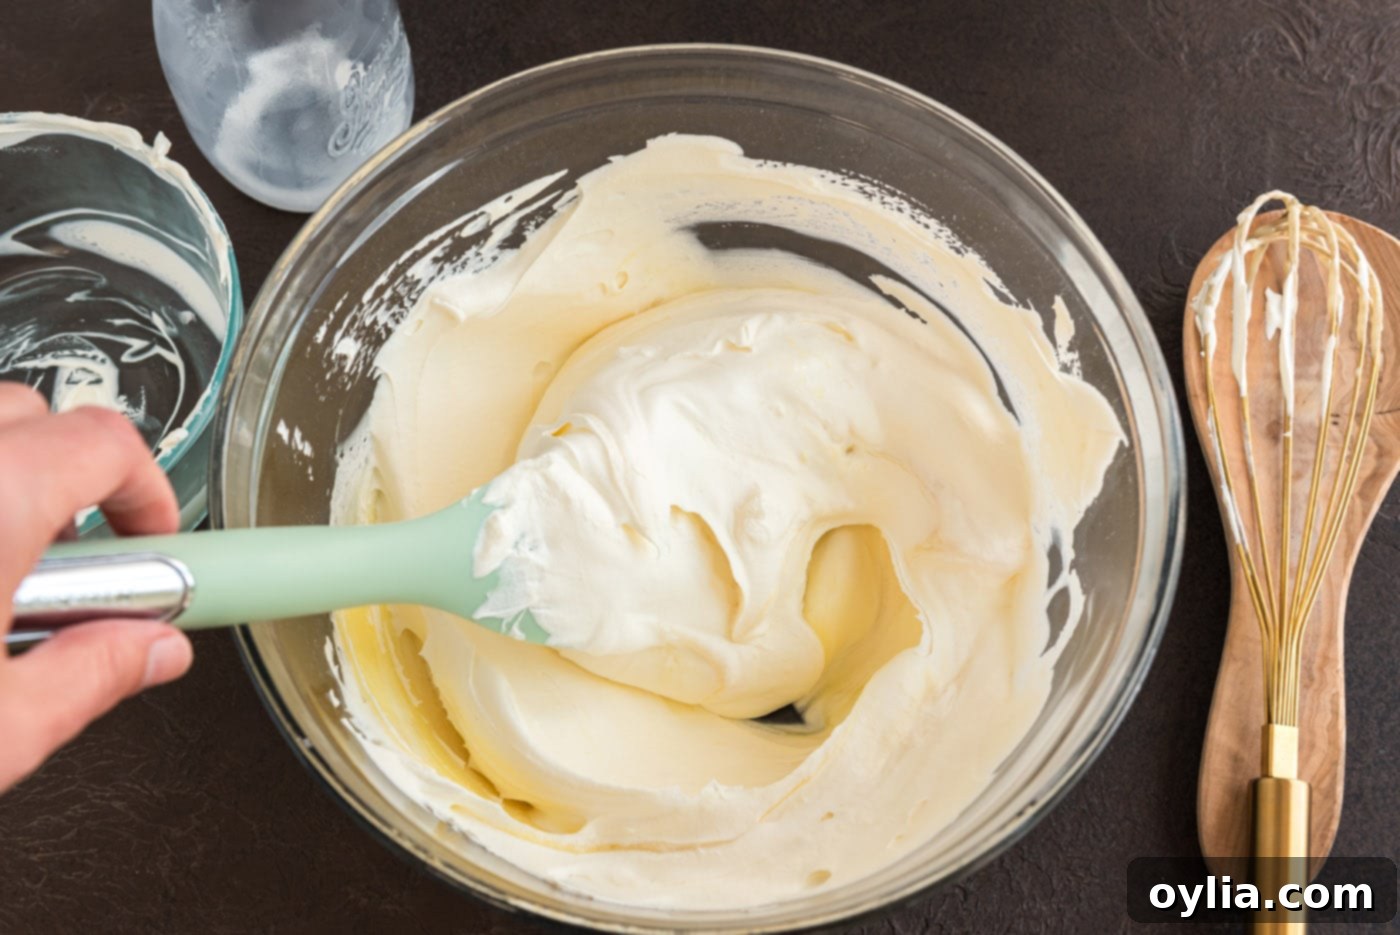
- Whisk the pudding and milk vigorously until they are well combined and the mixture begins to thicken. Once thickened, gently fold in the thawed Cool Whip using a rubber spatula until it’s completely incorporated and the mousse is light and airy. Overmixing can deflate the mousse, so fold carefully.


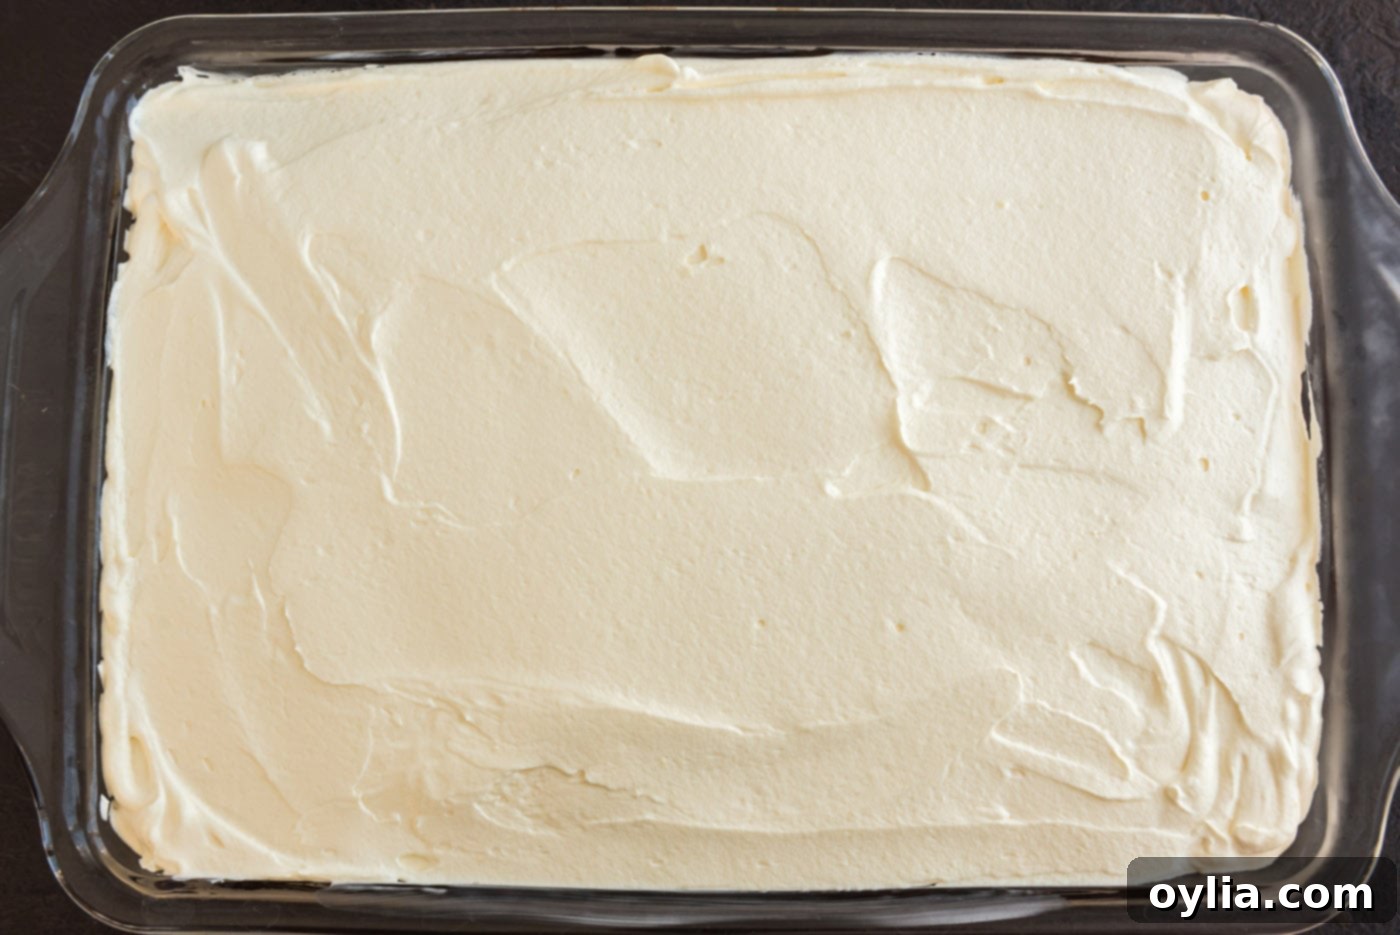
- Once the cake is fully cooled, spoon the prepared vanilla mousse evenly over the top. Use an offset spatula to gently spread the mousse to the edges, creating a smooth and appealing top layer.
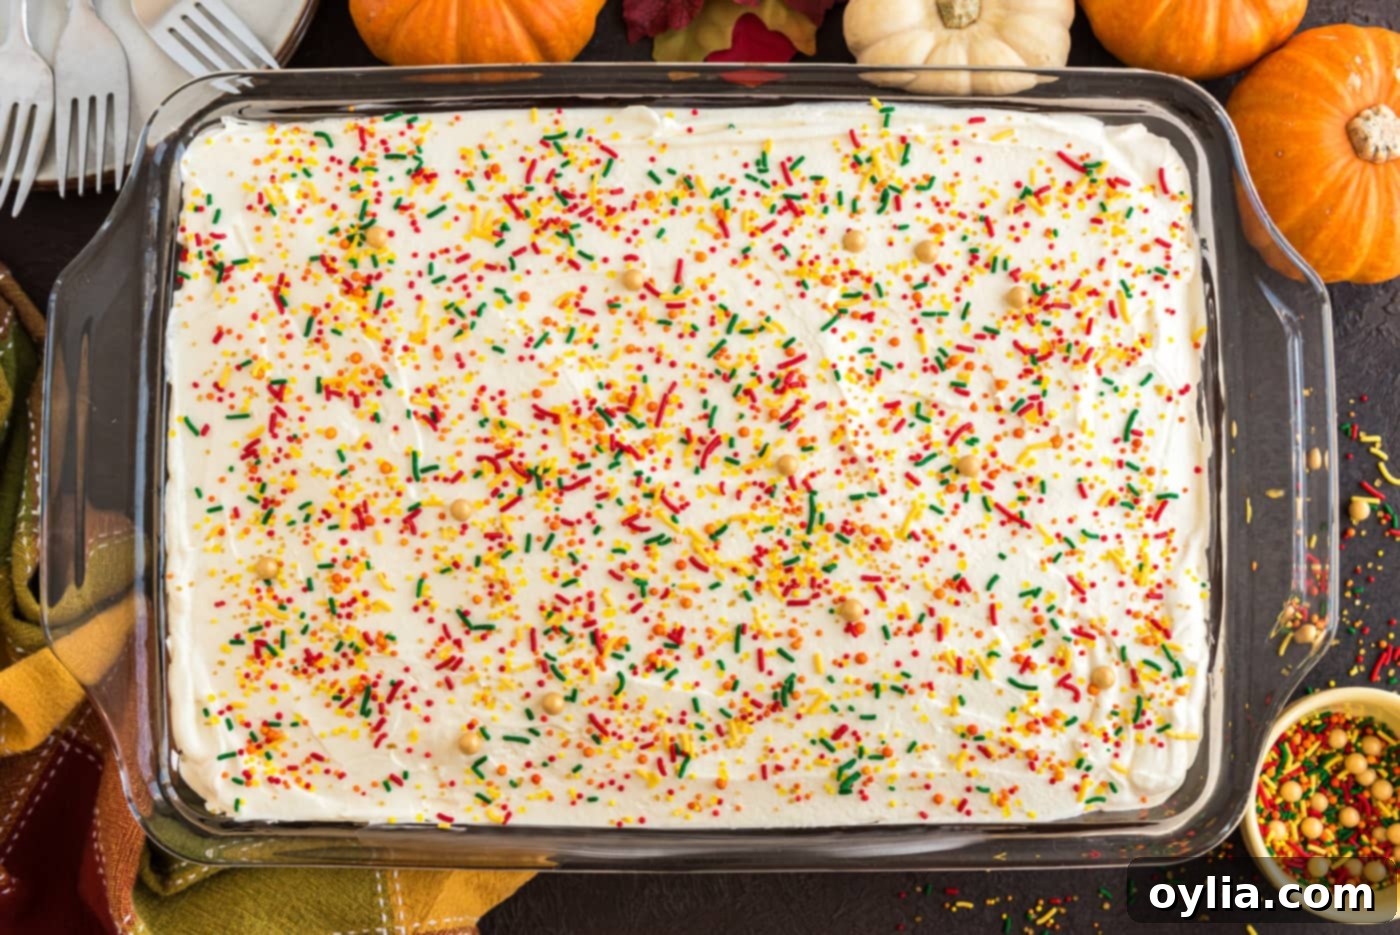
- For a festive touch, garnish your finished Chocolate Pumpkin Magic Cake with fall-inspired sprinkles or a dusting of cinnamon just before serving.
Frequently Asked Questions & Expert Tips for Perfect Baking
To maintain its freshness and delightful texture, particularly the creamy vanilla mousse layer, store the cooled Chocolate Pumpkin Magic Cake in the refrigerator. Ensure it’s covered with an airtight lid or tightly wrapped with plastic wrap to prevent it from drying out or absorbing other odors. Stored correctly, it will remain delicious for up to 5 days.
Absolutely! This cake is an excellent choice for making ahead, which can be a real time-saver when preparing for parties or holiday meals like Thanksgiving. You can bake the cake a day in advance and store it, covered, in the refrigerator. For the best presentation, we recommend holding off on adding any decorative sprinkles until an hour or two before you plan to serve it. This prevents the colors from bleeding into the beautiful vanilla mousse layer, keeping your cake looking picture-perfect.
Yes, you can freeze Chocolate Pumpkin Magic Cake. While the texture of the mousse may change slightly upon freezing and thawing, becoming a bit softer or having a slightly icier consistency, the cake itself freezes wonderfully. To freeze, ensure the cake is completely cooled. Then, wrap it securely first in plastic wrap, followed by a layer of aluminum foil. This double-layer protection helps prevent freezer burn. It can be stored in the freezer for up to 1 month. Thaw in the refrigerator before serving.
It is crucial to use 100% pure pumpkin puree, not pumpkin pie filling. Pumpkin pie filling comes pre-spiced and sweetened, which will throw off the flavor balance of this recipe. Look for cans explicitly labeled “100% Pure Pumpkin” or “Pumpkin Puree” for the best results and control over your spices.
While this recipe is designed for convenience using a cake mix and simple pumpkin pie ingredients, experienced bakers could adapt it to use homemade chocolate cake and a scratch-made pumpkin pie filling. However, you would need to ensure the consistency of your homemade batters closely matches the density of the mix-based components to achieve the signature “magic” layering effect. Adjustments to baking times might also be necessary.
Delightful Serving Suggestions for Your Magic Cake
The Chocolate Pumpkin Magic Cake is a showstopper all on its own, but a few simple touches can make it even more special. For a vibrant and festive appearance, a generous sprinkle of fall-inspired sprinkles is a fantastic choice. Alternatively, a light dusting of ground cinnamon, pumpkin pie spice, or even a sprinkle of cocoa powder can add an elegant finish and enhance the aromatic qualities of the cake.
Beyond autumn festivities, this versatile cake can easily double as a fun Halloween dessert! Simply opt for sprinkles in classic Halloween colors like purple, black, orange, and green to transform it into a spooky-sweet treat. Serve this delightful dessert chilled, allowing the vanilla mousse to maintain its creamy texture. It’s an ideal centerpiece for fall parties, a memorable addition to your Thanksgiving feast, or a comforting treat for any casual get-together with loved ones. Pair it with a cup of coffee or a glass of milk for the ultimate indulgence.
More Irresistible Pumpkin Recipes to Try
If you’ve fallen in love with the warm, comforting flavors of pumpkin, you’re in luck! We have a collection of other fantastic pumpkin-inspired recipes that are perfect for the season:
- Classic Pumpkin Roll
- Creamy Pumpkin Pie Dip
- Adorable Mini Pumpkin Pies
- Fluffy Pumpkin Spice Donuts
- Easy No-Bake Pumpkin Cheesecake
I love to bake and cook and share my kitchen experience with all of you! Remembering to come back each day can be tough, that’s why I offer a convenient newsletter every time a new recipe posts. Simply subscribe and start receiving your free daily recipes!
Chocolate Pumpkin Magic Cake
IMPORTANT – There are often Frequently Asked Questions within the blog post that you may find helpful. Simply scroll back up to read them!
Print It
Rate It
Save ItSaved!
Ingredients
For the Chocolate Cake Layer
- 15.25 ounce box of devil’s food cake mix plus ingredients called for on back of the box (oil, water, eggs)
For the Pumpkin Pie Layer
- 15 ounces Pumpkin Puree (1 can, ensure it’s pure pumpkin, not pie filling)
- ½ cup evaporated milk
- ½ cup heavy whipping cream
- 3 large eggs
- 1 cup brown sugar
- 2 teaspoon ground cinnamon
- ½ teaspoon ground nutmeg
- ¼ teaspoon ground allspice
For the Vanilla Mousse Layer
- 3.4 ounces instant vanilla pudding mix (1 box, must be instant, not cook-and-serve)
- 1 cup cold milk
- 8 ounces Cool Whip (thawed)
- Fall sprinkles for garnish (optional)
Things You’ll Need
-
13×9 baking dish
-
Mixing bowls
-
Whisk
-
Rubber spatula or offset spatula
Before You Begin
- For a truly rich and moist cake, we used a standard-sized box of devil’s food cake mix (15.25 ounces), prepared with the ingredients specified on the box (oil, water, eggs). Devil’s food cake mix provides a deeper chocolate flavor and a fluffier texture than regular chocolate cake mixes. However, you can substitute with another flavor if desired; for a yellow cake variation, explore our pumpkin magic cake recipe.
- Ensure you use one 3.4-ounce box of instant vanilla pudding mix. Cook-and-serve pudding will not set correctly for this recipe.
- STORAGE: Store the cooled Chocolate Pumpkin Magic Cake, covered tightly with an airtight lid or plastic wrap, in the refrigerator for up to 5 days.
- MAKE AHEAD: This cake can be prepared and baked a day in advance. Store it in the refrigerator until ready to serve. For best results, add any decorative sprinkles an hour or two before serving to prevent color bleeding on the vanilla mousse.
- FREEZING: Chocolate Pumpkin Magic Cake can be frozen for up to 1 month. Wrap the completely cooled cake first in plastic wrap and then in aluminum foil to prevent freezer burn. Note that the mousse texture might slightly change after freezing and thawing.
Instructions
-
Preheat oven to 350°F (175°C).
-
Line or grease a 9×13 casserole dish or cake pan thoroughly.
-
Prepare the box of cake mix according to package instructions, then pour the mixture into the prepared baking dish. DO NOT BAKE YET. Set aside.
-
In a separate bowl, whisk together the ingredients for the pumpkin layer (pumpkin puree, evaporated milk, heavy cream, eggs, brown sugar, cinnamon, nutmeg, allspice) until smooth.
-
Slowly pour the pumpkin mixture over the chocolate cake batter, aiming for an even layer. Do not spread or attempt to fix uneven pouring; the layers will separate naturally during baking.
-
Bake for 50-60 minutes, or until the center is no longer jiggly when the cake pan is shifted, and a toothpick inserted into the cake comes out clean.
-
Let the cake cool completely to room temperature on a wire rack as you prepare the vanilla mousse.
-
Place the instant vanilla pudding mix and cold milk in a large bowl.
-
Whisk until combined and beginning to thicken. Gently fold in the thawed Cool Whip until completely combined and fluffy.
-
Spoon the vanilla mousse over the cooled cake and spread it evenly with an offset spatula.
-
Garnish with fall-inspired sprinkles or a dusting of spice before serving, if desired.
Nutrition
The recipes on this blog are tested with a conventional gas oven and gas stovetop. It’s important to note that some ovens, especially as they age, can cook and bake inconsistently. Using an inexpensive oven thermometer can assure you that your oven is truly heating to the proper temperature. If you use a toaster oven or countertop oven, please keep in mind that they may not distribute heat the same as a conventional full sized oven and you may need to adjust your cooking/baking times. In the case of recipes made with a pressure cooker, air fryer, slow cooker, or other appliance, a link to the appliances we use is listed within each respective recipe. For baking recipes where measurements are given by weight, please note that results may not be the same if cups are used instead, and we can’t guarantee success with that method.
This post originally appeared here on Oct 10, 2016, and has since been updated to include new photos, enhanced instructions, and expert tips for an even better baking experience.
