Crispy Garlic Parmesan Smashed Broccoli: Your Easy & Flavorful Side Dish
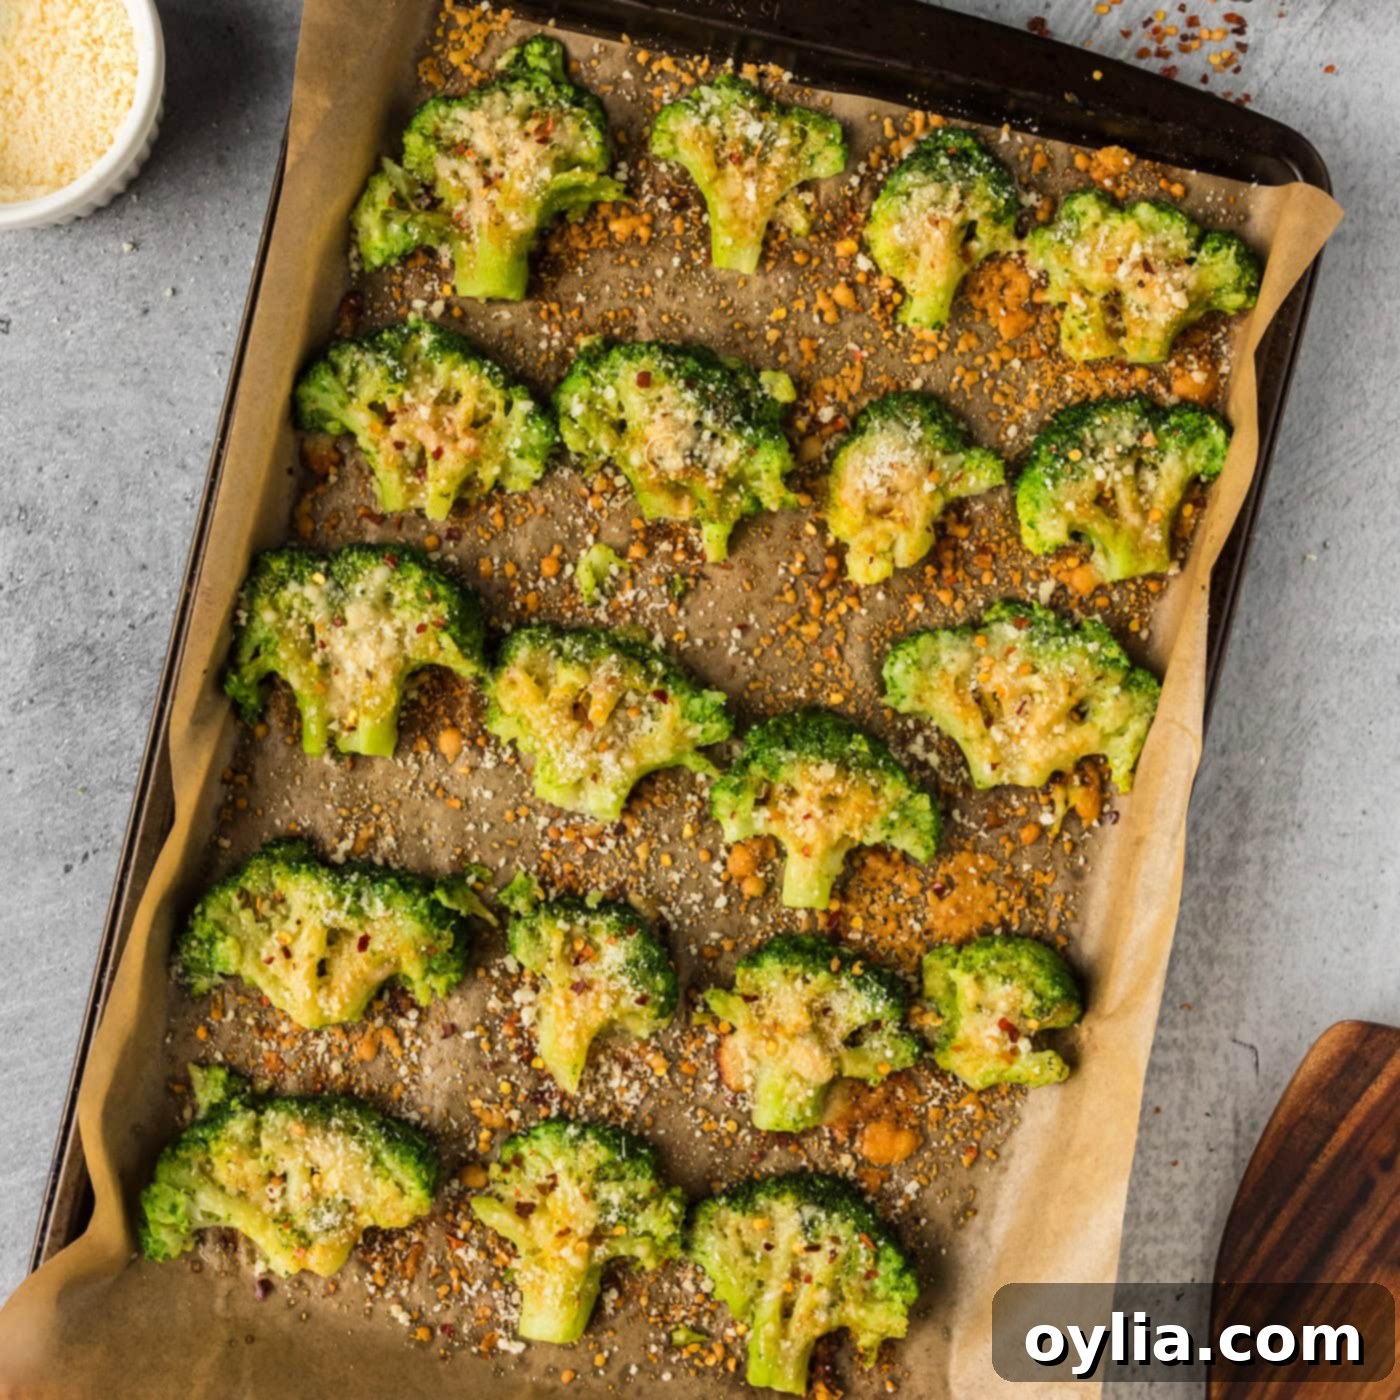
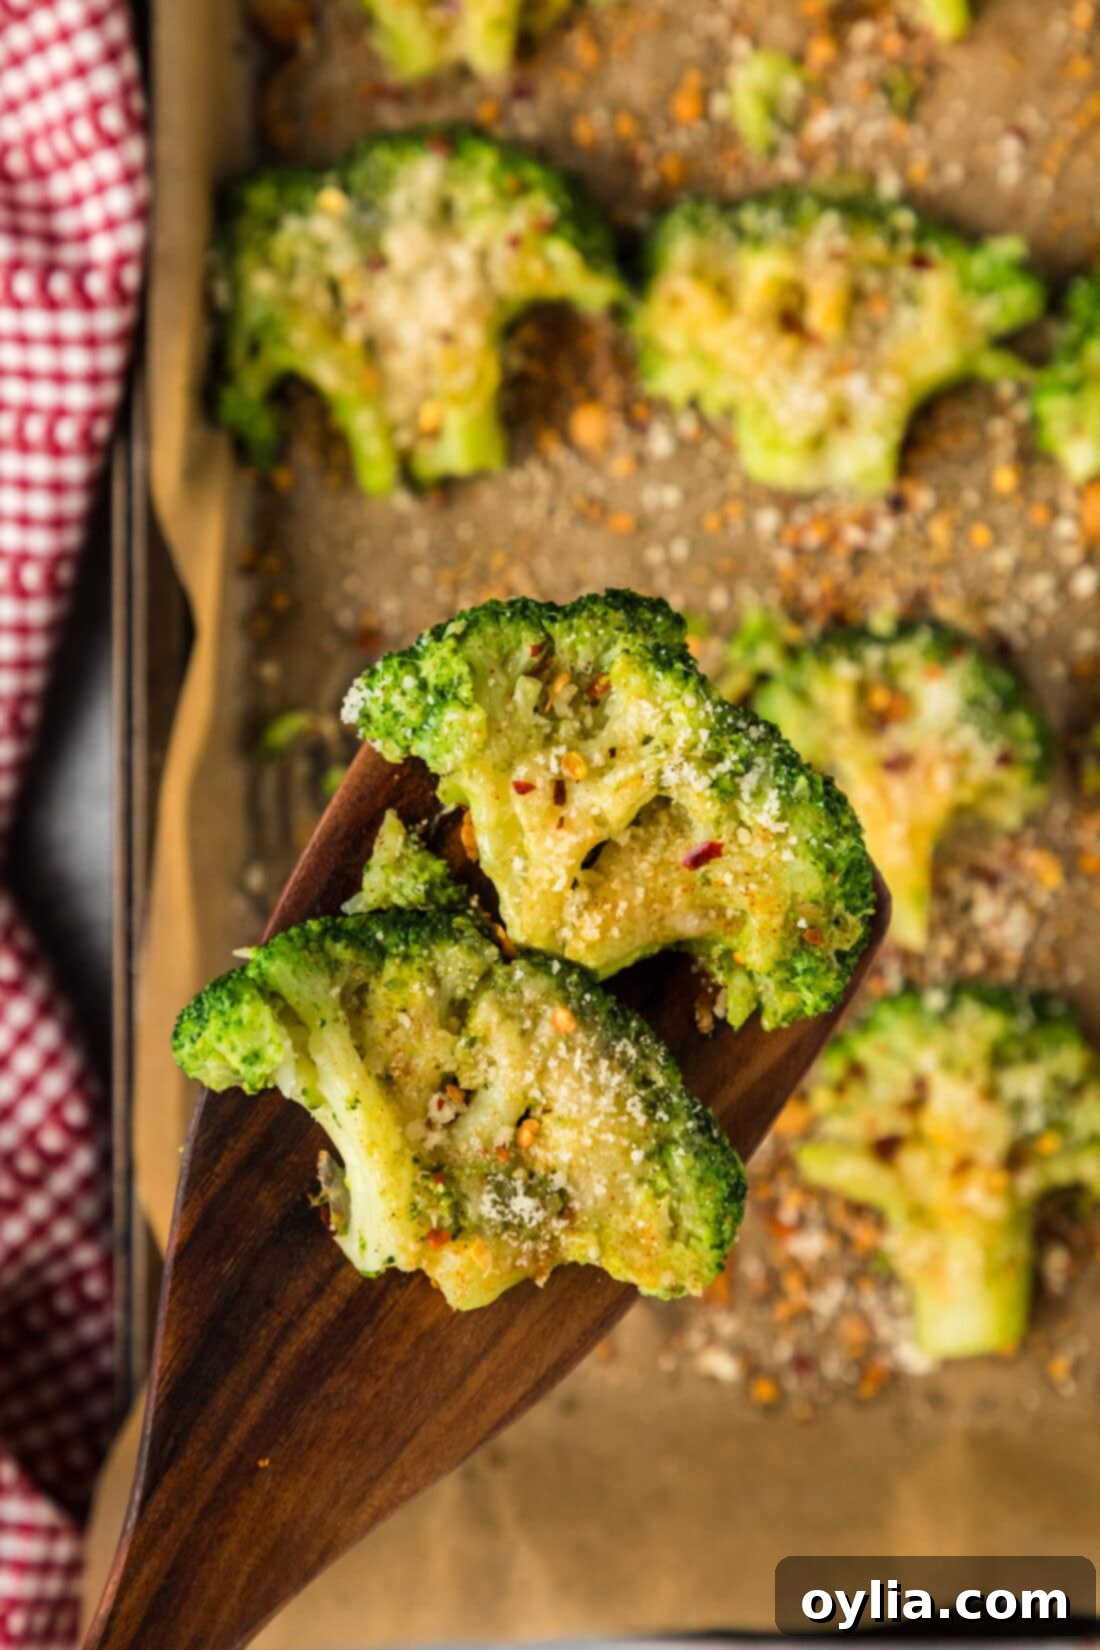
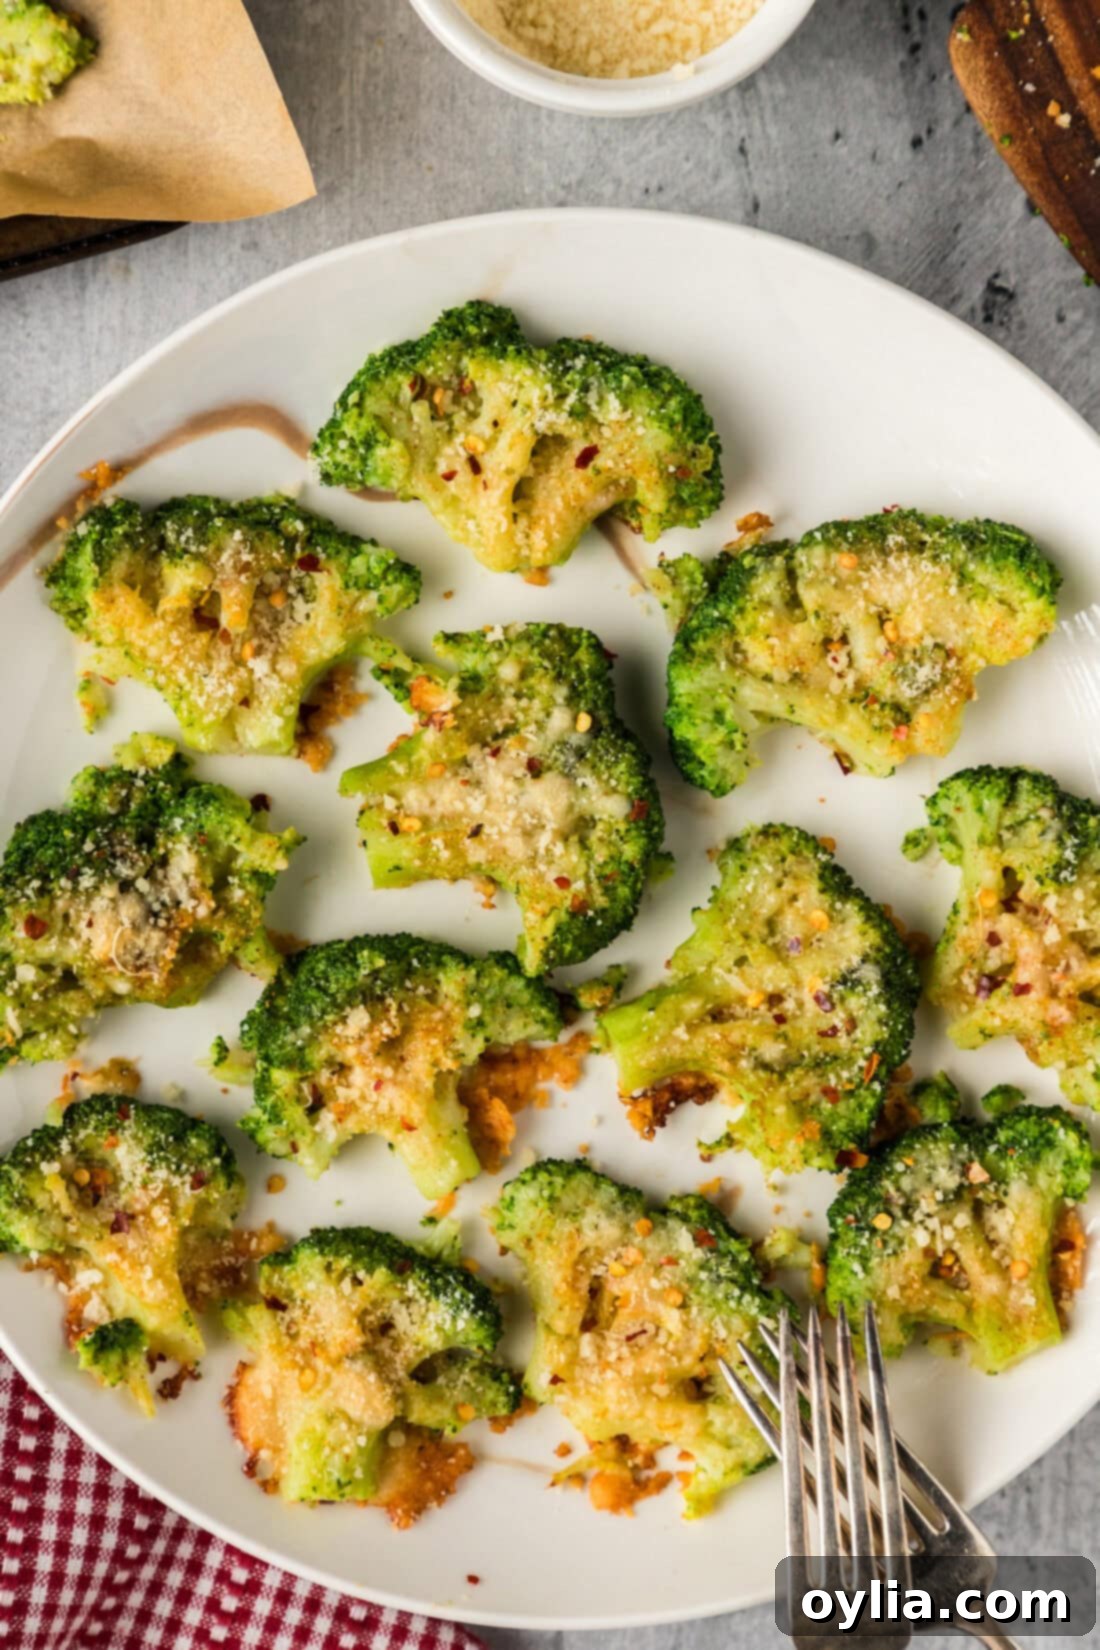
Transform ordinary broccoli into an extraordinary side dish with this incredible smashed broccoli recipe! Imagine super tender, bite-sized pieces of broccoli, perfectly seasoned with savory garlic, onion, and paprika, then topped with a generous sprinkle of salty parmesan cheese. Baked until golden and wonderfully crispy, this simple technique elevates humble broccoli into a star on your dinner table. It’s an effortless yet incredibly flavorful way to enjoy your greens, making it a guaranteed keeper for busy weeknights and special occasions alike.
Why Smashed Broccoli Will Be Your New Favorite Side Dish
If you’re tired of the same old steamed or simply roasted vegetables, smashed broccoli offers a delightful and exciting change of pace. This method brings a fantastic textural contrast that regular roasting often misses. Like its popular cousin, smashed cauliflower, the secret lies in par-boiling the florets to tender perfection before lightly smashing them. This technique creates more surface area, allowing the exterior to crisp up beautifully in the oven while the interior remains incredibly soft and succulent.
Beyond the amazing texture, this recipe is incredibly simple and customizable. A sprinkle of rich Parmesan cheese and a thoughtful blend of garlic powder, onion powder, and paprika infuse the broccoli with a fresh, savory flavor that complements almost any meal. The ease of preparation makes it ideal for a quick weeknight side, yet its impressive results are perfect for entertaining. You start with a quick boil to soften, a simple press to smash, a quick season, and then into the oven it goes. It’s a method that promises delicious results with minimal fuss, transforming a humble vegetable into a truly memorable dish.
Essential Ingredients for Perfect Smashed Broccoli
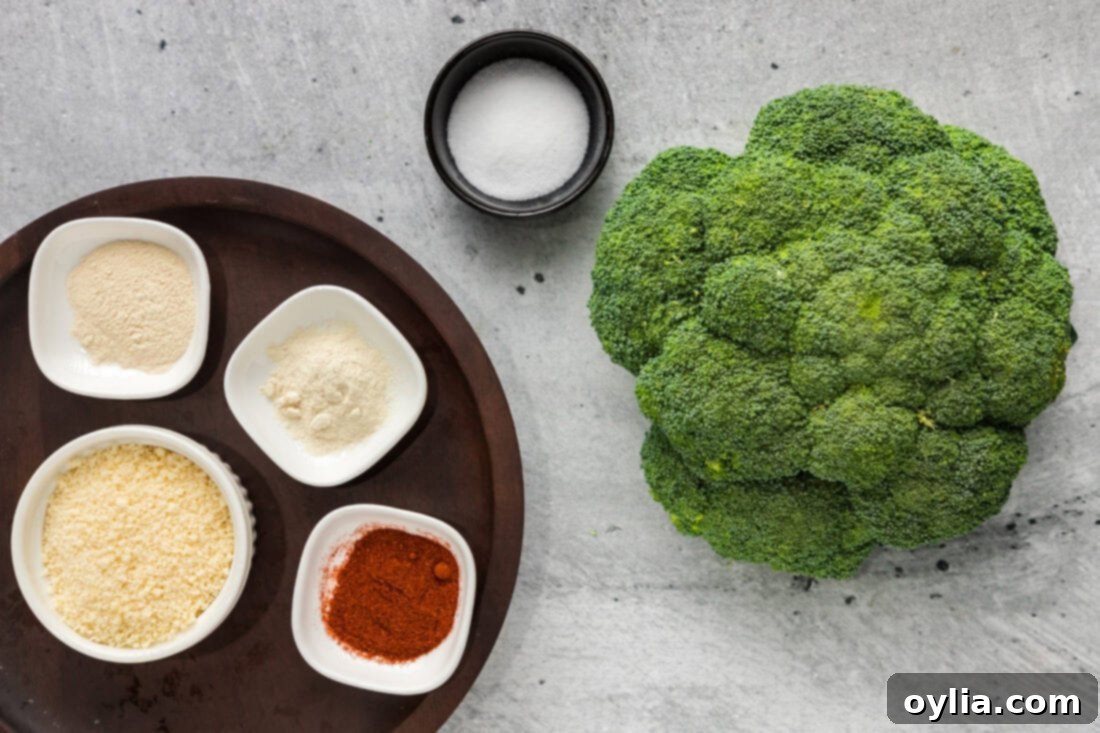
Gathering your ingredients is the first step to creating this delectable side dish. You’ll find all precise measurements and detailed instructions in the printable recipe card located at the very end of this post. Here’s a quick overview of what you’ll need and why each component is key to achieving that irresistible crispy, tender texture and savory flavor:
Ingredient Insights and Creative Swaps
Understanding each ingredient not only helps you make the recipe perfectly but also empowers you to customize it to your taste.
BROCCOLI: We recommend using a fresh broccoli crown for the best results. To prepare it for smashing, start by placing the crown on a cutting board with the stem facing up. Carefully trim off the thick, woody center stem. Then, holding the crown steady, make small cuts around the base of the florets to separate them. You can also gently pull them apart with your hands. The key is to aim for florets that are roughly uniform in size, making sure each piece has at least one relatively flat side. This flat side will be crucial for effective smashing and ensuring maximum contact with the baking sheet for crispiness. For even more crispy bits, you can cut some florets smaller, or leave some a bit larger for a more tender bite. Broccoli is packed with vitamins C and K, fiber, and antioxidants, making this a healthy and delicious choice.
OLIVE OIL: While not explicitly stated in all ‘smashed’ recipes, a good quality olive oil is vital for achieving that desirable crispy texture and rich flavor. It helps the seasonings adhere to the broccoli and promotes browning in the oven. You can use extra virgin olive oil for a more robust flavor or a lighter olive oil. Avocado oil is also an excellent neutral-tasting alternative with a high smoke point, perfect for baking at higher temperatures.
SEASONING BLEND: Our go-to blend includes garlic powder, onion powder, paprika, and a good amount of salt. This combination creates a balanced, savory flavor profile that truly enhances the natural taste of the broccoli. Garlic and onion powder provide aromatic depth, while paprika adds a subtle smokiness and a beautiful reddish hue. Salt is essential for bringing out all the flavors. Feel free to get creative with your spices!
- Spicy Kick: If you enjoy a bit of heat, try adding a dash of Cajun seasoning, a pinch of red pepper flakes, or a touch of cayenne pepper to the mix.
- Herbaceous Notes: Dried Italian seasoning, oregano, or thyme can add a lovely Mediterranean twist. Freshly chopped rosemary or parsley can be added after baking for a burst of freshness.
- Lemon Zest: A little lemon zest tossed with the broccoli before baking, or a squeeze of fresh lemon juice after, brightens all the flavors.
- Everything Bagel Seasoning: This trendy blend offers a fantastic mix of sesame seeds, poppy seeds, garlic, and onion, creating a unique and delicious crust.
- Dairy-Free/Vegan Option: For a cheesy flavor without dairy, nutritional yeast is an excellent substitute for parmesan cheese.
PARMESAN CHEESE: Grated parmesan cheese adds a salty, umami-rich layer that crisps up beautifully in the oven, creating a delicious crust. Use freshly grated parmesan for the best flavor and texture. If you don’t have parmesan, other hard, salty cheeses like Pecorino Romano or even a sharp aged cheddar can work, though they will alter the flavor profile slightly. For best results, add the parmesan after the initial seasoning but before baking. This allows it to melt and form a delicious, golden-brown crust on top of the smashed florets.
Step-by-Step Guide: Crafting Your Smashed Broccoli
These step-by-step photos and detailed instructions are designed to help you visualize each stage of making this delicious recipe. For a convenient printable version, complete with precise measurements and full instructions, simply jump to the recipe card at the bottom of this post.
- Preheat Your Oven: Begin by preheating your oven to 400°F (200°C). A hot oven is crucial for achieving that desired crispy texture. While the oven heats, you can prepare your broccoli.
- Prepare the Broccoli Florets: Start by cutting your broccoli crown into large, manageable florets. Then, cut each floret in half lengthwise. This ensures that each piece has a flat side, which is essential for stable smashing and maximum contact with the baking sheet. Aim for pieces that are roughly the same size so they cook evenly.
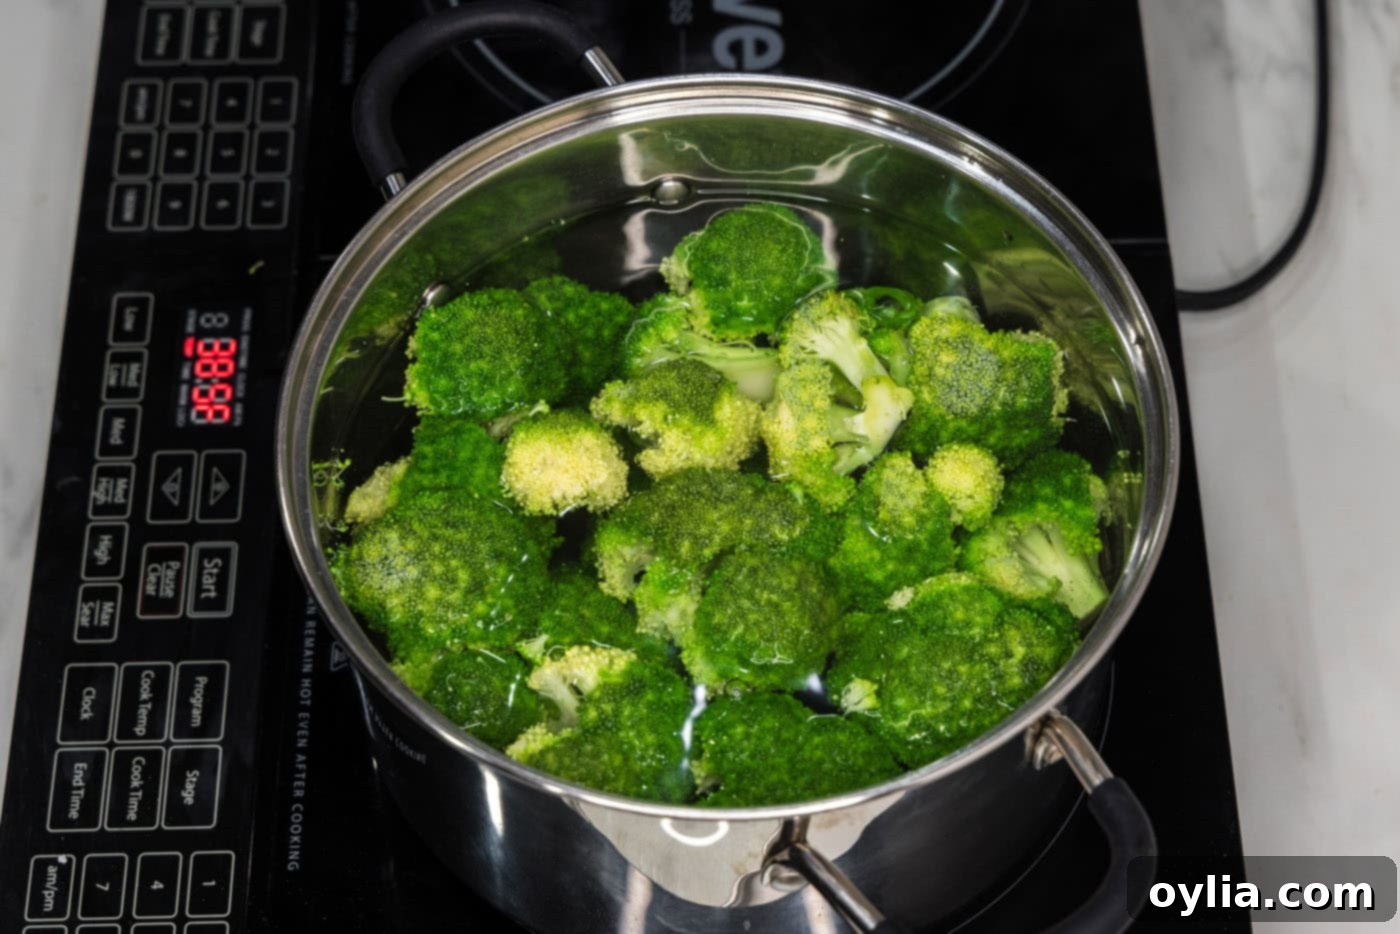
- Par-Boil for Tenderness: Bring a large pan of water to a rolling boil over medium-high heat. Carefully drop the prepared broccoli florets into the boiling water. Allow the water to return to a boil, then cook the broccoli for just 3-4 minutes. The goal here is to make them fork-tender but not overly soft or mushy. You should be able to easily pierce them with a fork, but they should still hold their shape. Overcooking at this stage will result in “smushed” rather than “smashed” broccoli.
- Drain and Dry Thoroughly: Once the broccoli is fork-tender, immediately drain it in a colander. Transfer the drained broccoli to a layer of paper towels or a clean kitchen towel. Pat them thoroughly to absorb any excess liquid. This step is critical! Moisture is the enemy of crispiness, so take your time to ensure the florets are as dry as possible before moving on.

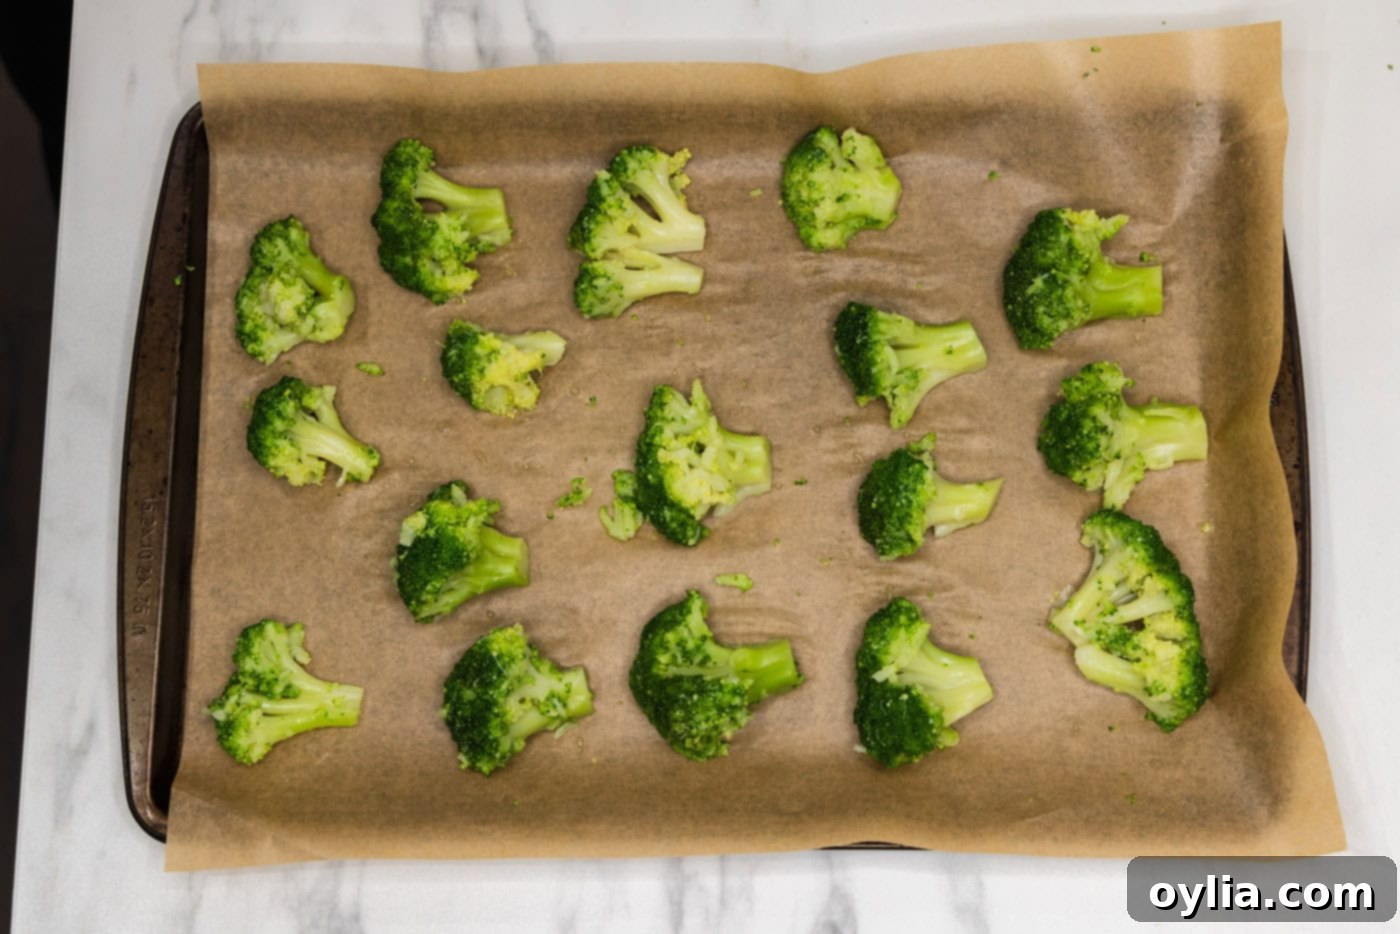
- Prepare for Smashing: While the broccoli is drying, line a baking sheet with parchment paper. This prevents sticking and makes cleanup a breeze. Arrange the dried broccoli florets on the parchment paper, ensuring they are placed flat side down and have enough space between them (a single layer is key for crisping).
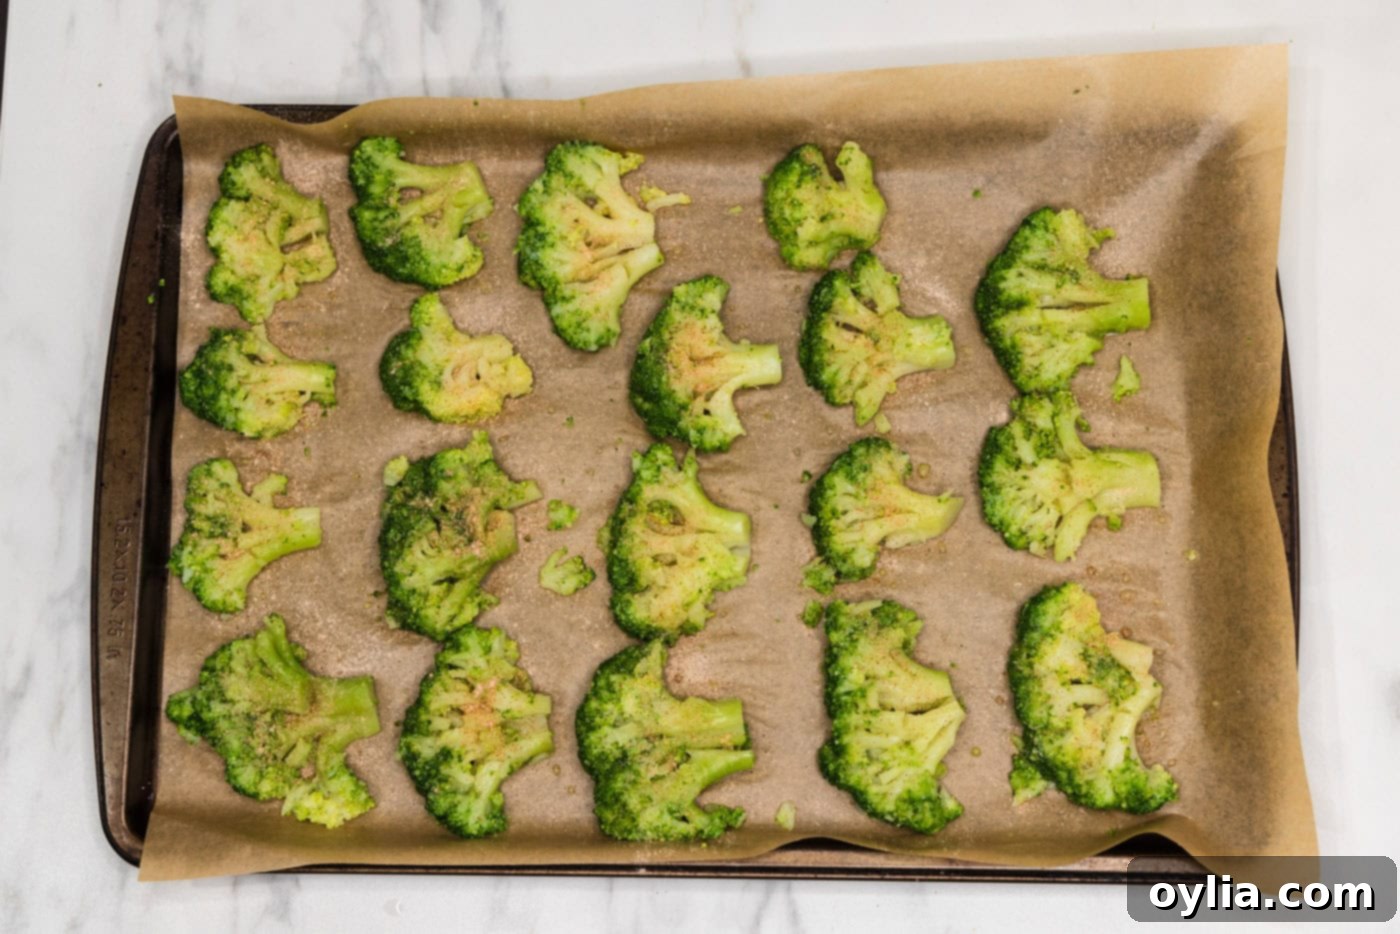
- The Smash: Use the flat bottom of a sturdy drinking glass or a potato masher to gently “smash” each floret. Apply firm, even pressure until the broccoli is flattened to about ¼ to ½ inch thick. Be careful not to completely obliterate them; you want them flattened but still mostly intact. This increases the surface area for maximum crispiness!

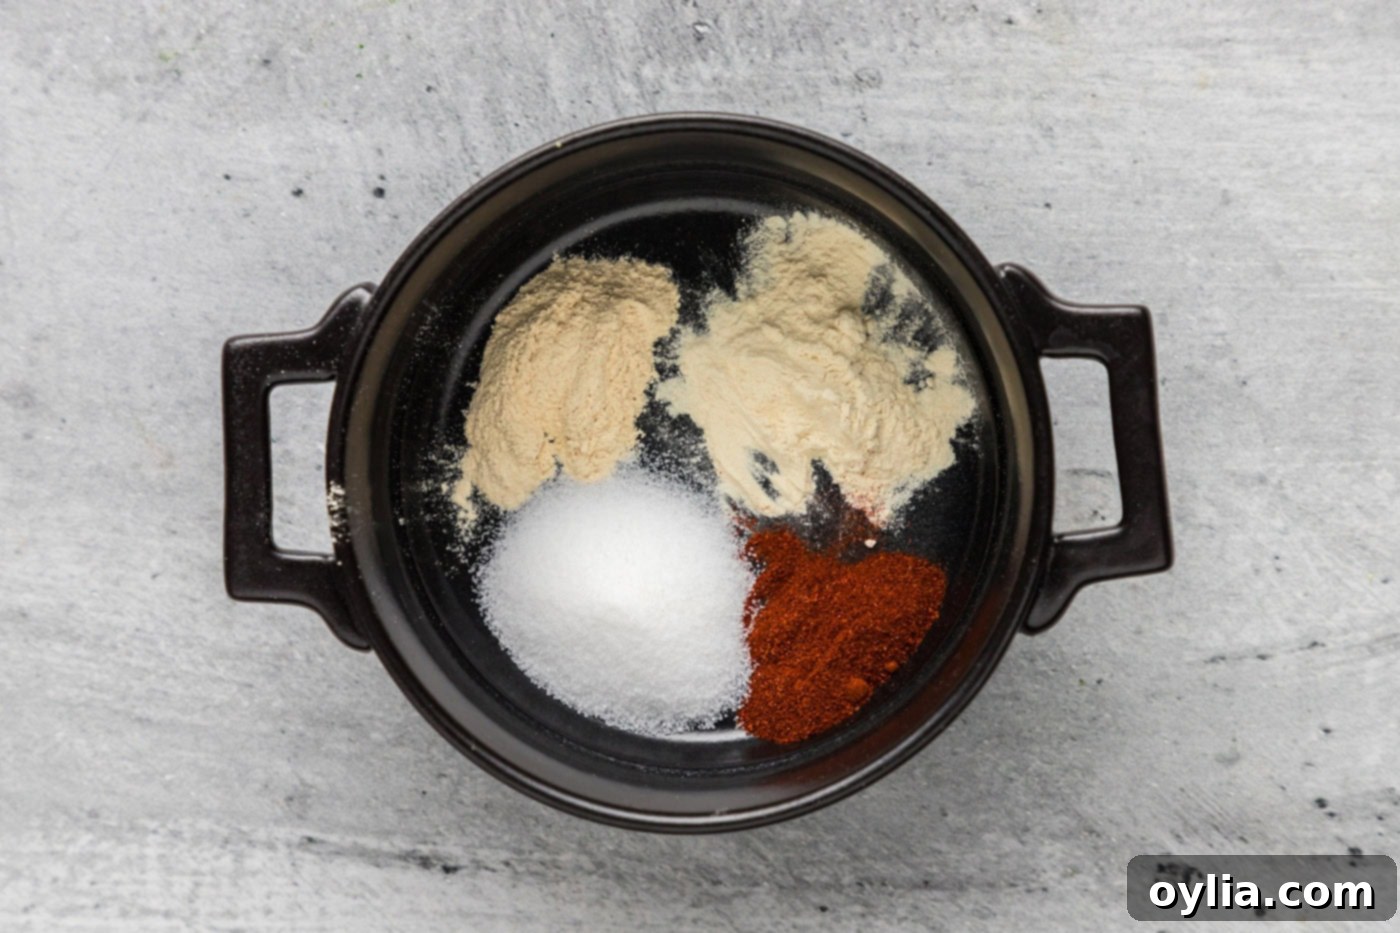
- Season and Coat with Oil: In a small bowl, combine the garlic powder, onion powder, paprika, and salt. Drizzle the smashed broccoli florets lightly with olive oil (or avocado oil). Toss gently to ensure each piece is coated. Then, generously sprinkle the seasoning mixture evenly over all the florets. The oil helps the spices adhere and promotes a beautiful golden crust.


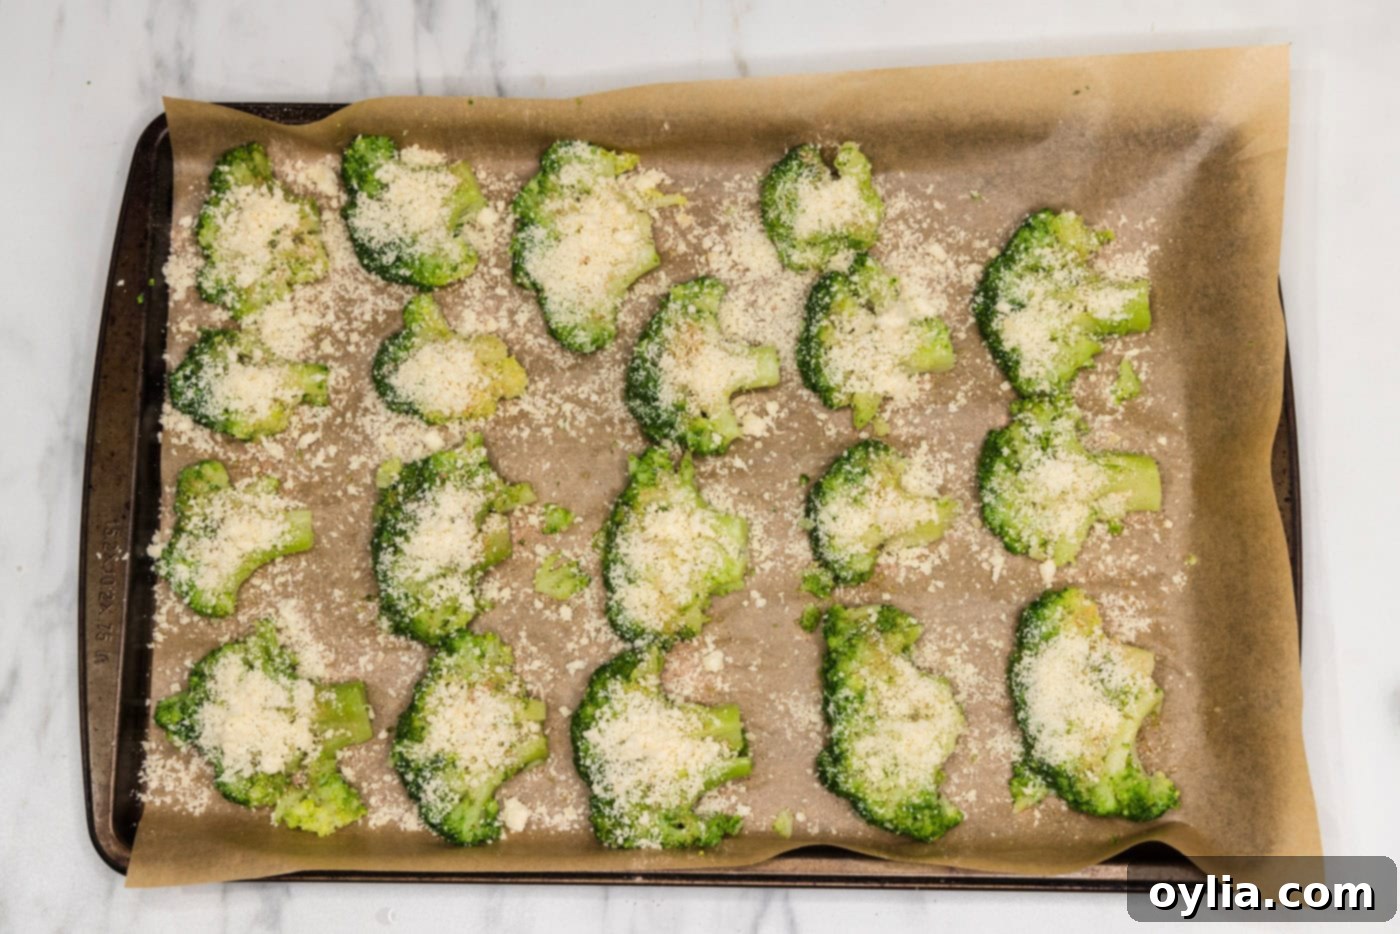
- Add the Parmesan: Evenly sprinkle each smashed floret with grated parmesan cheese. This will melt and crisp up, forming a delicious cheesy crust.

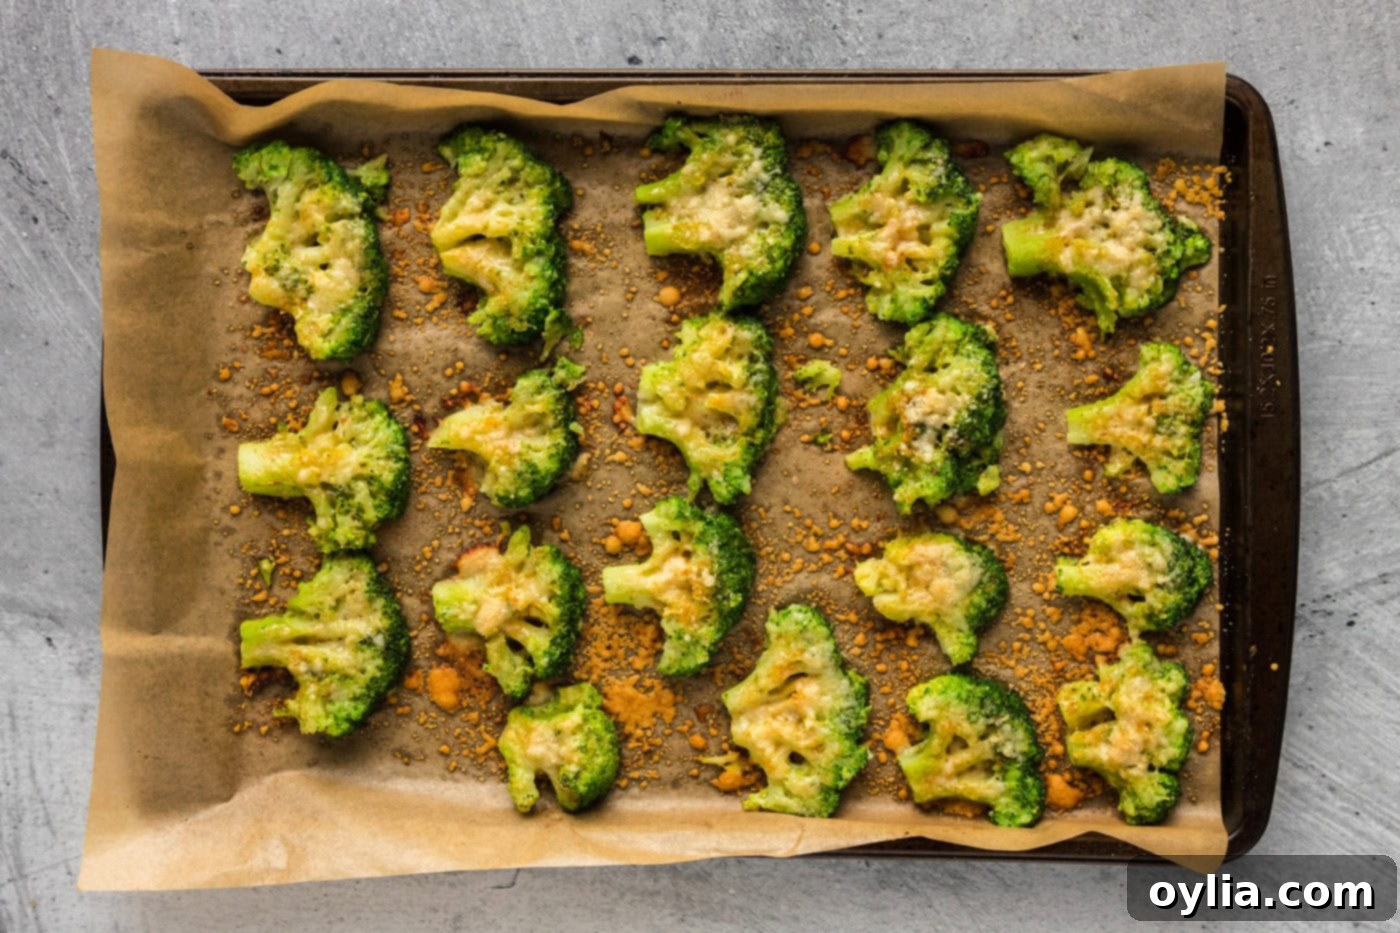
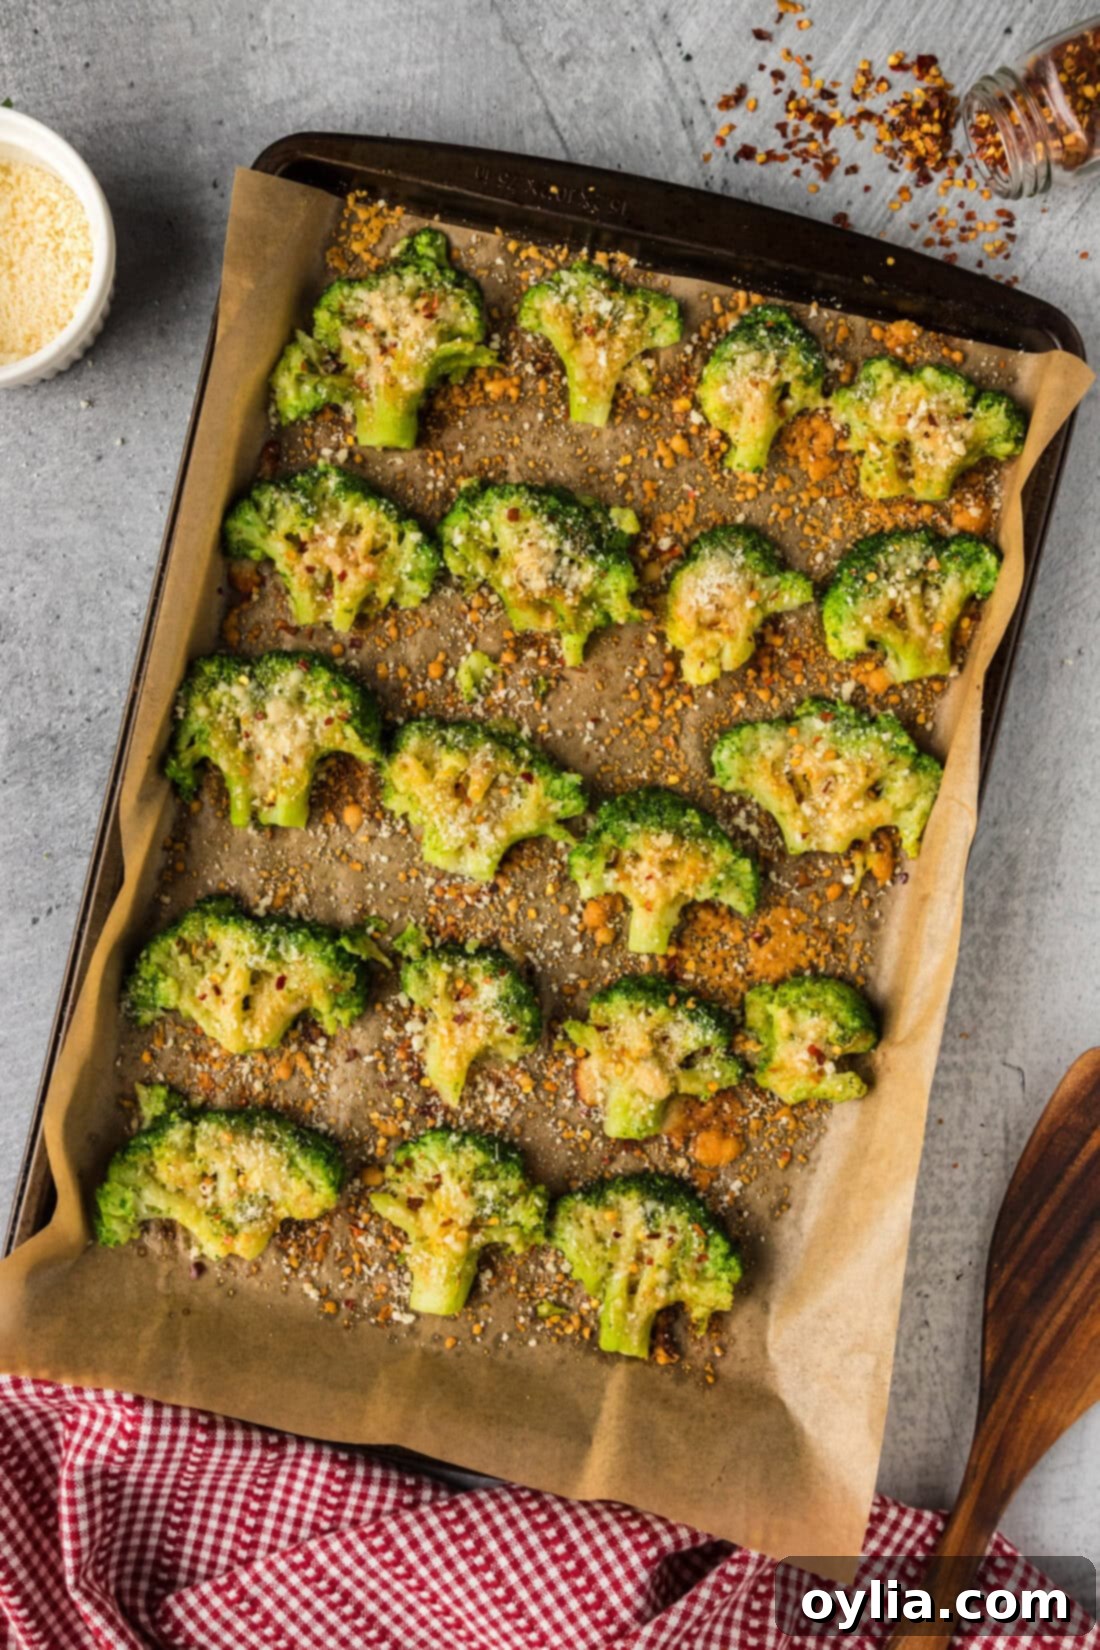
- Bake to Perfection: Place the baking sheet in your preheated oven and bake for 15-20 minutes. The cooking time may vary slightly depending on your oven and the size of your florets. Look for the edges of the broccoli to turn golden brown and crispy, and the cheese to be melted and slightly browned.

Frequently Asked Questions & Expert Tips for Smashed Broccoli
We’ve found that using the flat bottom of a sturdy drinking glass is the easiest and most effective tool for smashing broccoli. A potato masher can also work well, especially for larger batches. The key to successful smashing is ensuring your broccoli is perfectly par-boiled – meaning fork-tender but not overly soft. If the florets are too mushy, they’ll simply flatten into a paste rather than forming distinct smashed pieces with crispy edges. You want them just tender enough to yield to pressure, allowing them to flatten while still maintaining their structural integrity for baking. This “al dente” tenderness is crucial for the crispy-tender contrast.
Leftover smashed broccoli should be stored in an airtight container in the refrigerator for up to 3-4 days. To bring back its delicious crispiness, reheating is best done in a 350°F (175°C) oven or a toaster oven until warmed through and the edges are crisp again, usually about 5-10 minutes. You can also use an air fryer on its reheat or air fry setting for a few minutes. Avoid microwaving, as this will make the broccoli soggy and lose its desirable texture.
While fresh broccoli is highly recommended for the best texture, you can use frozen broccoli with some adjustments. Thaw the frozen broccoli completely and then pat it excessively dry with paper towels to remove as much moisture as possible. You will still need to par-boil it for 2-3 minutes (less time than fresh since it’s already partially blanched) to get it fork-tender, and then again, ensure it’s extremely dry before smashing and seasoning. Be aware that frozen broccoli may not get quite as crispy as fresh, but it will still be delicious.
Several factors contribute to maximum crispiness. Firstly, thoroughly drying the par-boiled broccoli is paramount – excess moisture creates steam, which prevents browning. Secondly, don’t overcrowd the baking sheet; ensure each floret has space to breathe and roast, rather than steam. Use two baking sheets if necessary. Lastly, using a good amount of olive oil (or other high-smoke point oil) helps achieve that golden, crispy exterior. A final minute or two under the broiler at the end can also add a perfect char, but watch it very closely to prevent burning.
Delicious Ways to Serve Smashed Broccoli
Smashed broccoli is incredibly versatile and makes a fantastic addition to almost any meal. Serve it as a vibrant and flavorful side dish alongside main courses like roasted chicken, grilled fish, seared steak, or even as an accompaniment to your favorite pasta dish. Its crispy texture and savory flavor provide a wonderful contrast to richer main courses.
Beyond being a side, these bite-sized wonders can also be enjoyed as a delightful appetizer. Pair them with your favorite dipping sauce – classic ranch, a tangy yum yum sauce, a creamy aioli, or even a simple lemon-tahini dressing. For an extra touch of freshness, consider a squeeze of fresh lemon juice just before serving, or a sprinkle of chopped fresh parsley or chives. If you like your broccoli extra crispy, don’t hesitate to pop them under the broiler for a minute or two at the end of the baking time – just be sure to watch them closely as they can burn quickly!
Explore More Smashed Vegetable Recipes
Loved this smashed broccoli? You’re in for a treat! The “smashing” technique works wonders on a variety of other vegetables, creating equally irresistible crispy, tender results. Discover your next favorite side dish with these related smashed veggie recipes:
- Crispy Smashed Potatoes
- Flavorful Smashed Cauliflower
- Easy One-Pan Roasted Broccoli
- Quick Instant Pot Broccoli
- Sweet & Savory Smashed Carrots
I love sharing delicious recipes and kitchen tips with all of you! To make sure you never miss a new post, I offer a convenient newsletter delivered straight to your inbox every time a fresh recipe goes live. Simply subscribe here and start receiving your free daily recipes!
Smashed Broccoli
IMPORTANT – There are often Frequently Asked Questions within the blog post that you may find helpful. Simply scroll back up to read them!
Print It
Pin It
Rate It
Save ItSaved!
Ingredients
- 1 pound broccoli crown
- 2 tablespoons olive oil
- 1 teaspoon garlic powder
- 1 teaspoon onion powder
- 1 teaspoon paprika
- 2 teaspoons salt
- ½ cup grated parmesan cheese
Things You’ll Need
-
Stockpot or large saucepan
-
Baking sheet
-
Parchment paper
-
Drinking glass or potato masher
Before You Begin
- To cut a broccoli crown into florets, place the crown on a cutting board with the stem facing up and trim off the thick center stem. Holding the crown steady, make small cuts around the base of the florets to separate them, using your hands to gently pull them apart. Aim for pieces with a flat side for optimal smashing.
- We found that using the bottom of a drinking glass was easiest to smash with. It’s important that you don’t overcook the broccoli when boiling. If the florets are too tender then they’ll end up “smushed” not “smashed”. You want them tender enough to pierce easily with a fork, but still holding their shape – that’s how you’ll know they’re ready to be smashed and baked.
- Don’t skip the step of patting the broccoli completely dry after boiling. Excess moisture will prevent them from getting crispy in the oven.
Instructions
-
Preheat oven to 400°F (200°C).
-
Cut broccoli into large florets, then cut florets in half so that each piece has a flat side.
-
Bring a pan of water to a boil over medium-high heat. Drop broccoli in and allow it to begin boiling again, then cook for 3-4 minutes, just enough to make them fork tender. You don’t want them too soft.
-
Drain the broccoli then lay on paper towels to allow any excess liquid to be absorbed and thoroughly dry them.
-
Meanwhile, line a baking pan with parchment paper. Place each dried floret, flat side down, onto the parchment. Use the flat bottom of a drinking glass to “smash” each floret to about ¼ to ½ inch thick.
-
Drizzle the smashed broccoli with olive oil. Combine garlic powder, onion powder, paprika, and salt in a small bowl. Sprinkle the seasoning mixture evenly onto the florets.
-
Sprinkle each floret generously with grated parmesan cheese.
-
Bake for 15-20 minutes, or until the broccoli is golden brown and crispy at the edges.
Expert Tips & FAQs
- For extra crispiness, ensure your broccoli is as dry as possible after boiling. Don’t overcrowd the baking sheet – use two if needed to ensure a single layer.
- If you prefer your broccoli to be even crispier, you can pop them under the broiler for a minute or two at the end – but keep a very close eye on them to prevent burning!
- Store leftovers in an air-tight container kept in the refrigerator for up to 4 days. Smashed broccoli is best reheated in a 350°F (175°C) oven or air fryer until warmed through and re-crisped.
- Experiment with different seasonings like Cajun spice, lemon pepper, or a sprinkle of everything bagel seasoning for variety.
Nutrition
The recipes on this blog are tested with a conventional gas oven and gas stovetop. It’s important to note that some ovens, especially as they age, can cook and bake inconsistently. Using an inexpensive oven thermometer can assure you that your oven is truly heating to the proper temperature. If you use a toaster oven or countertop oven, please keep in mind that they may not distribute heat the same as a conventional full sized oven and you may need to adjust your cooking/baking times. In the case of recipes made with a pressure cooker, air fryer, slow cooker, or other appliance, a link to the appliances we use is listed within each respective recipe. For baking recipes where measurements are given by weight, please note that results may not be the same if cups are used instead, and we can’t guarantee success with that method.
