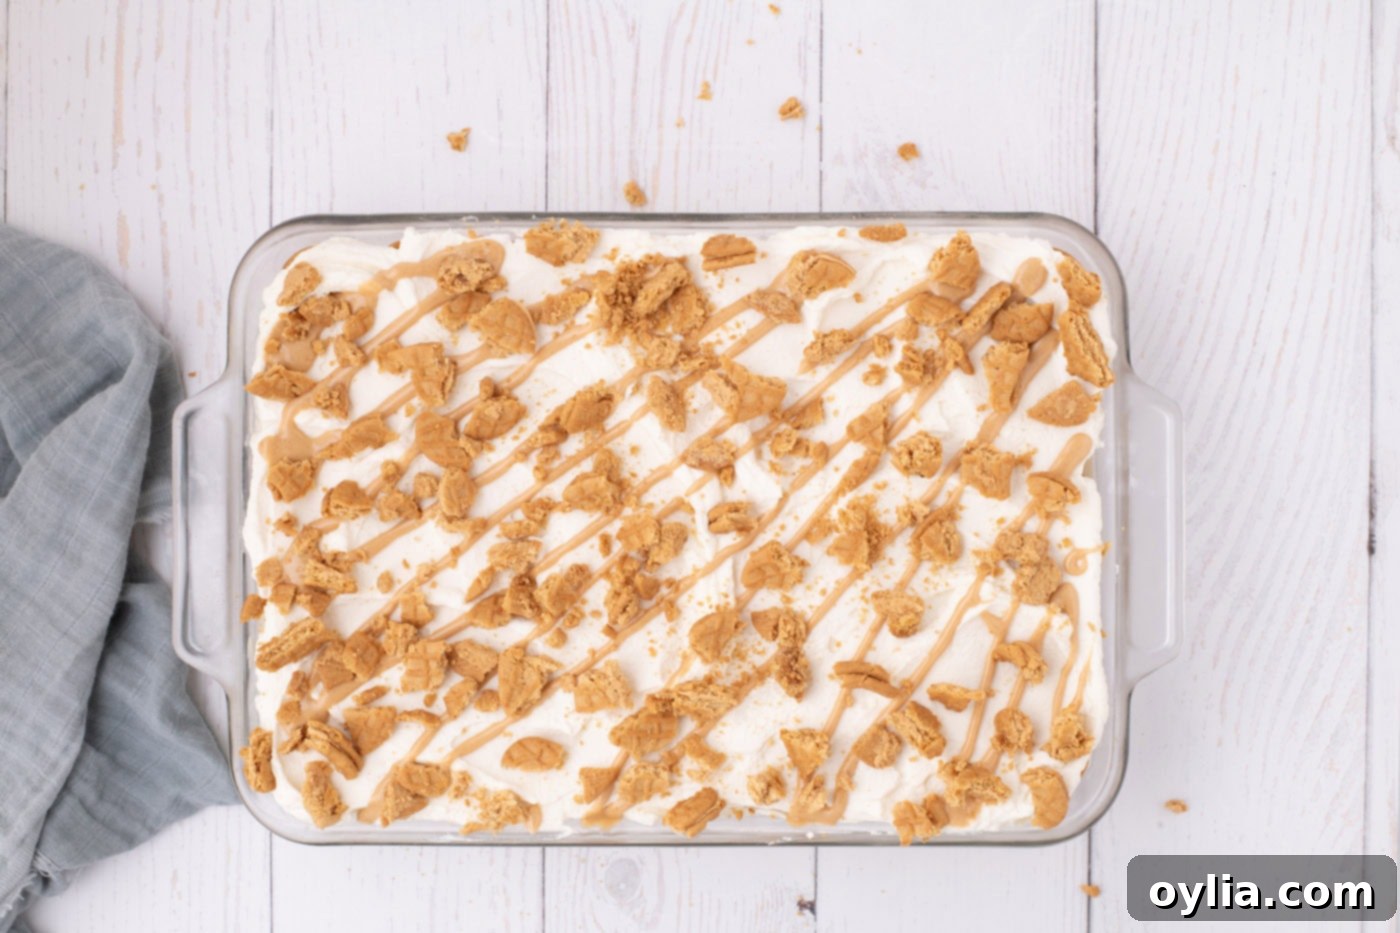
Indulge in the Ultimate No-Bake Nutter Butter Icebox Cake: Your Dreamy Peanut Butter Summer Dessert
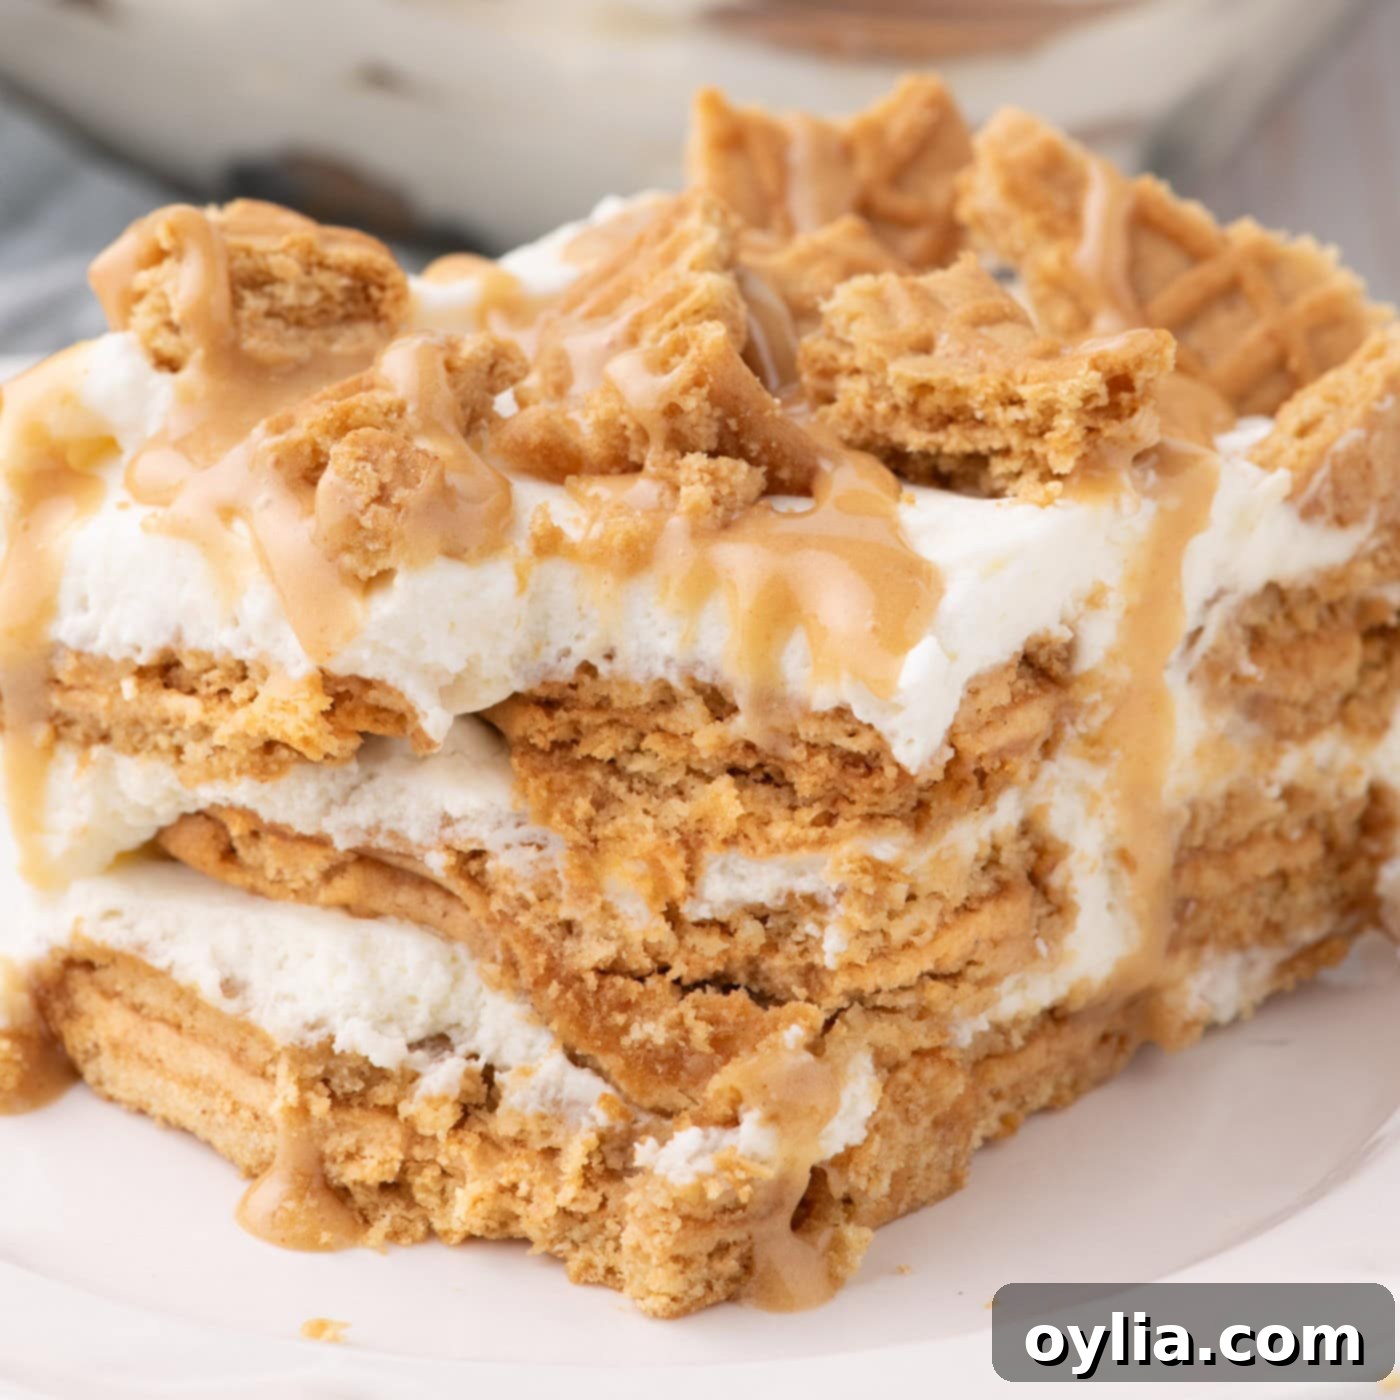
Prepare to fall in love with this incredibly simple and utterly delicious No-Bake Nutter Butter Icebox Cake! This is more than just a dessert; it’s a creamy, dreamy experience waiting to happen. Featuring layers of luscious whipped cream cheese and the unmistakable flavor of soft peanut butter sandwich cookies, this treat is designed for pure summer bliss. The magic of an icebox cake is in its effortless preparation and the delightful transformation of its ingredients – the cookies slowly absorb moisture from the creamy filling, becoming wonderfully tender, almost like a fluffy peanut butter cake. The best part? It only gets better as it sits, allowing all those irresistible flavors to meld into perfection. Perfect for warm weather gatherings or a simple family treat, this dessert promises to be a showstopper without ever needing to turn on your oven.
Why This Nutter Butter Icebox Cake Recipe Works So Well
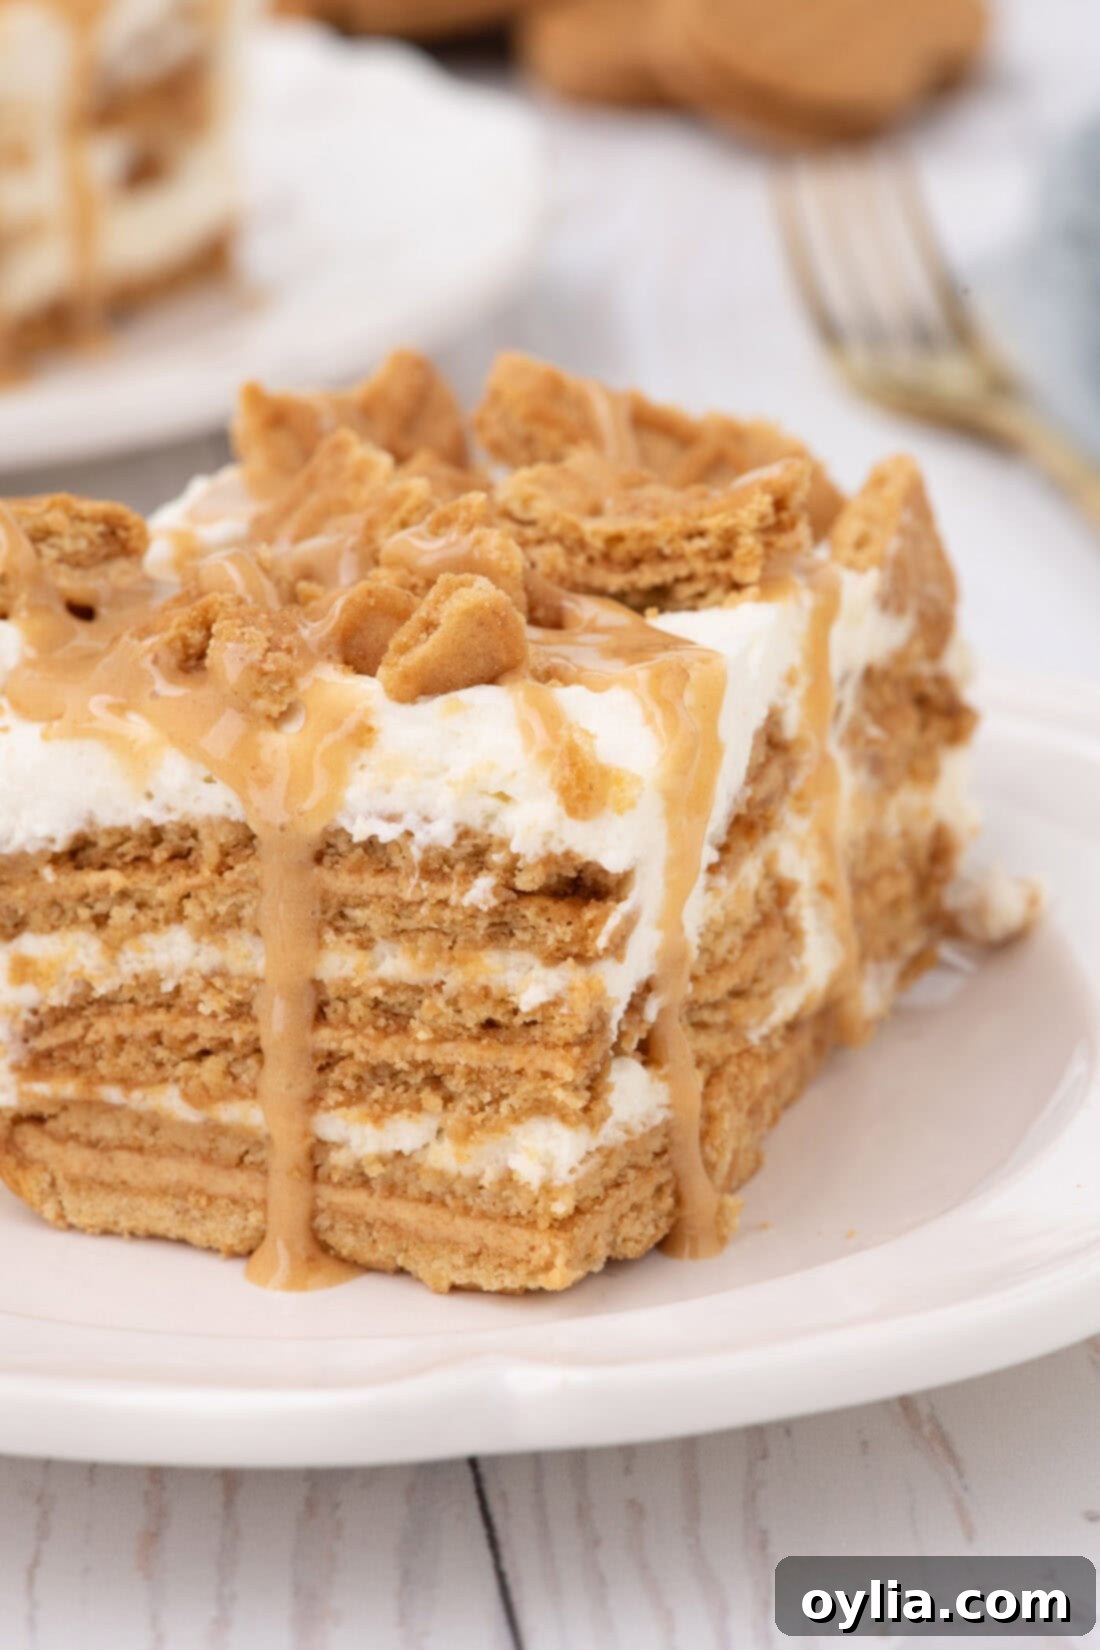
This Nutter Butter Icebox Cake is a testament to the power of simple ingredients creating something truly spectacular. Following in the footsteps of beloved no-bake desserts like our Oreo Icebox Cake and Chocolate Chip Cookie Icebox Cake, it relies on the brilliant concept of layering crisp cookies with a rich, airy cream. What makes this recipe particularly special is the way the classic Nutter Butter cookies interact with the whipped cream cheese mixture. As the cake chills in the refrigerator, the cookies slowly soak up the moisture from the surrounding layers. This isn’t just about softening them; it’s about a complete transformation. Those once-crisp peanut butter sandwich cookies become incredibly sweet, tender, and melt-in-your-mouth soft, almost like biting into a cloud of fluffy peanut butter cake or a delicate mousse.
The resulting texture is unbelievably light yet wonderfully rich and perfectly creamy, reminiscent of a decadent tiramisu or a gourmet mousse cake. It’s a sophisticated dessert disguised as an easy, no-fuss treat. But beyond the incredible taste and texture, this recipe’s biggest advantage is its sheer simplicity. There’s absolutely no baking required, making it an ideal choice for hot summer days when you want to avoid heating up your kitchen, or for busy schedules that demand quick yet impressive desserts. Just a few steps of layering, and your refrigerator does all the hard work. The visual appeal of its perfectly defined layers is just another reason why this Nutter Butter Icebox Cake will have everyone asking for seconds. Yes, please, to every single creamy, dreamy layer!
Key Ingredients for Your Nutter Butter Icebox Cake
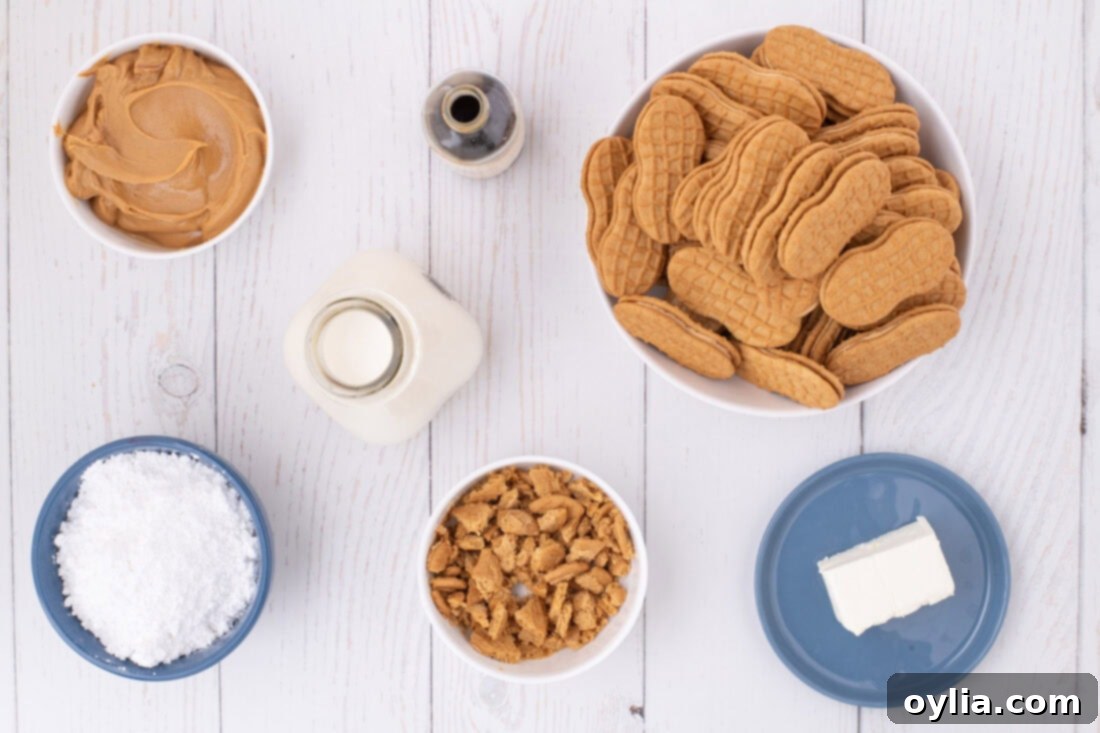
Gathering your ingredients for this delightful Nutter Butter icebox cake is a breeze. Each component plays a vital role in creating the ultimate no-bake peanut butter dessert. While the full list of measurements and detailed instructions can be found in the printable recipe card at the end of this post, here’s a sneak peek at the star players you’ll need to make this creamy wonder.
Ingredient Spotlight: Tips for Perfect Peanut Butter Layers
Understanding your ingredients is key to any successful recipe, and this Nutter Butter Icebox Cake is no exception. Here’s a closer look at the components that make this dessert so special, along with some helpful tips and substitution suggestions:
- PEANUT BUTTER – For this particular recipe, stick with a classic creamy peanut butter. I strongly advise against using natural nut butters, as their oil tends to separate over time and can make your cream mixture too runny, leading to a less stable and less creamy cake. Brands like Skippy or Jif are perfect here, providing the consistent texture and classic peanut butter flavor that makes this dessert truly shine. The smooth, emulsified texture of these traditional peanut butters is crucial for achieving the desired rich and velvety consistency in both the whipped cream filling and the decadent drizzle.
- NUTTER BUTTER COOKIES – These iconic peanut butter sandwich cookies are, quite literally, the foundation of this icebox cake. You’ll need three 16-ounce packages to create the multiple layers that give this dessert its incredible height and texture. The magic of an icebox cake hinges on these cookies absorbing the moisture from the cream mixture. Initially crisp, they transform into soft, supple, cake-like layers after chilling in the refrigerator for at least 4 hours (though longer is always better!). Their distinct peanut butter flavor permeates every bite, creating a harmonious blend with the creamy filling. Don’t underestimate the power of these humble cookies to create such a spectacular dessert.
- HEAVY WHIPPING CREAM – This is what gives our cake its light, airy, and fluffy texture. When whipped, heavy cream incorporates air, creating a stable base for our layers. Ensure it’s very cold before whipping for the best results and maximum volume.
- CREAM CHEESE – A touch of softened cream cheese is the secret to making our whipped cream extra stable and adding a wonderful subtle tang that beautifully balances the sweetness of the cookies and peanut butter. It gives the filling a richer, more luxurious mouthfeel, distinguishing it from a simple whipped cream. Make sure it’s at room temperature to prevent lumps when mixing.
- POWDERED SUGAR (CONFECTIONERS’ SUGAR) – This finely milled sugar dissolves easily, ensuring a smooth, grit-free cream and drizzle. It sweetens the mixture without adding unwanted texture.
- VANILLA EXTRACT – A classic flavor enhancer, vanilla brings out the best in both the peanut butter and cream cheese, adding depth and warmth to the overall profile of the cake.
- WATER – Used to thin the peanut butter drizzle to a perfect consistency, allowing it to flow beautifully over the top of your finished cake.
How to Assemble Your Dreamy No-Bake Nutter Butter Icebox Cake
These step-by-step photos and instructions are here to help you visualize how to make this delightful Nutter Butter Icebox Cake. For a convenient printable version of this recipe, complete with precise measurements and detailed instructions, simply Jump to Recipe at the bottom of this post.
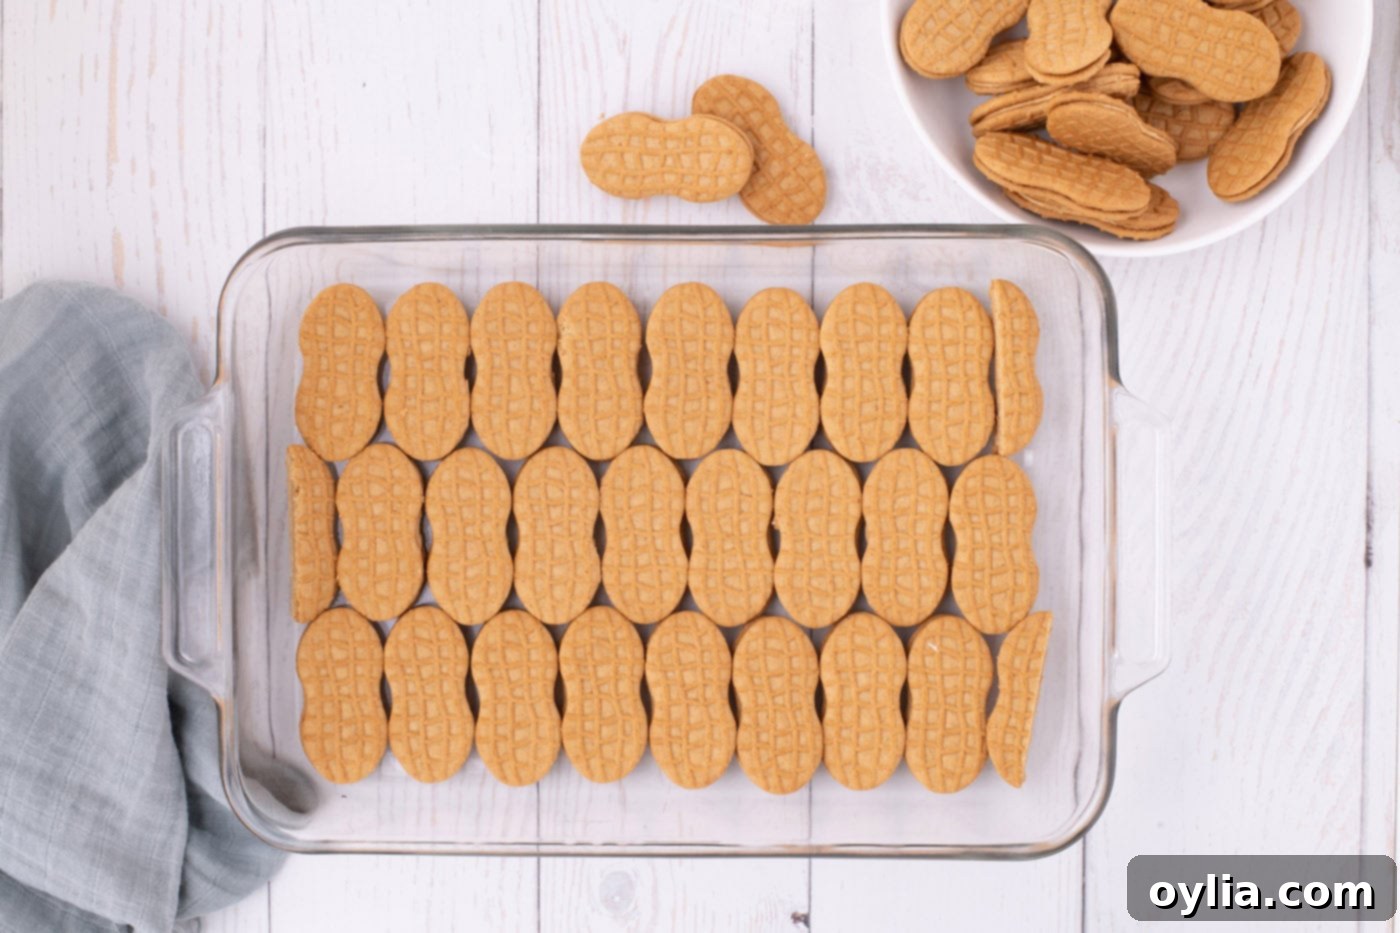
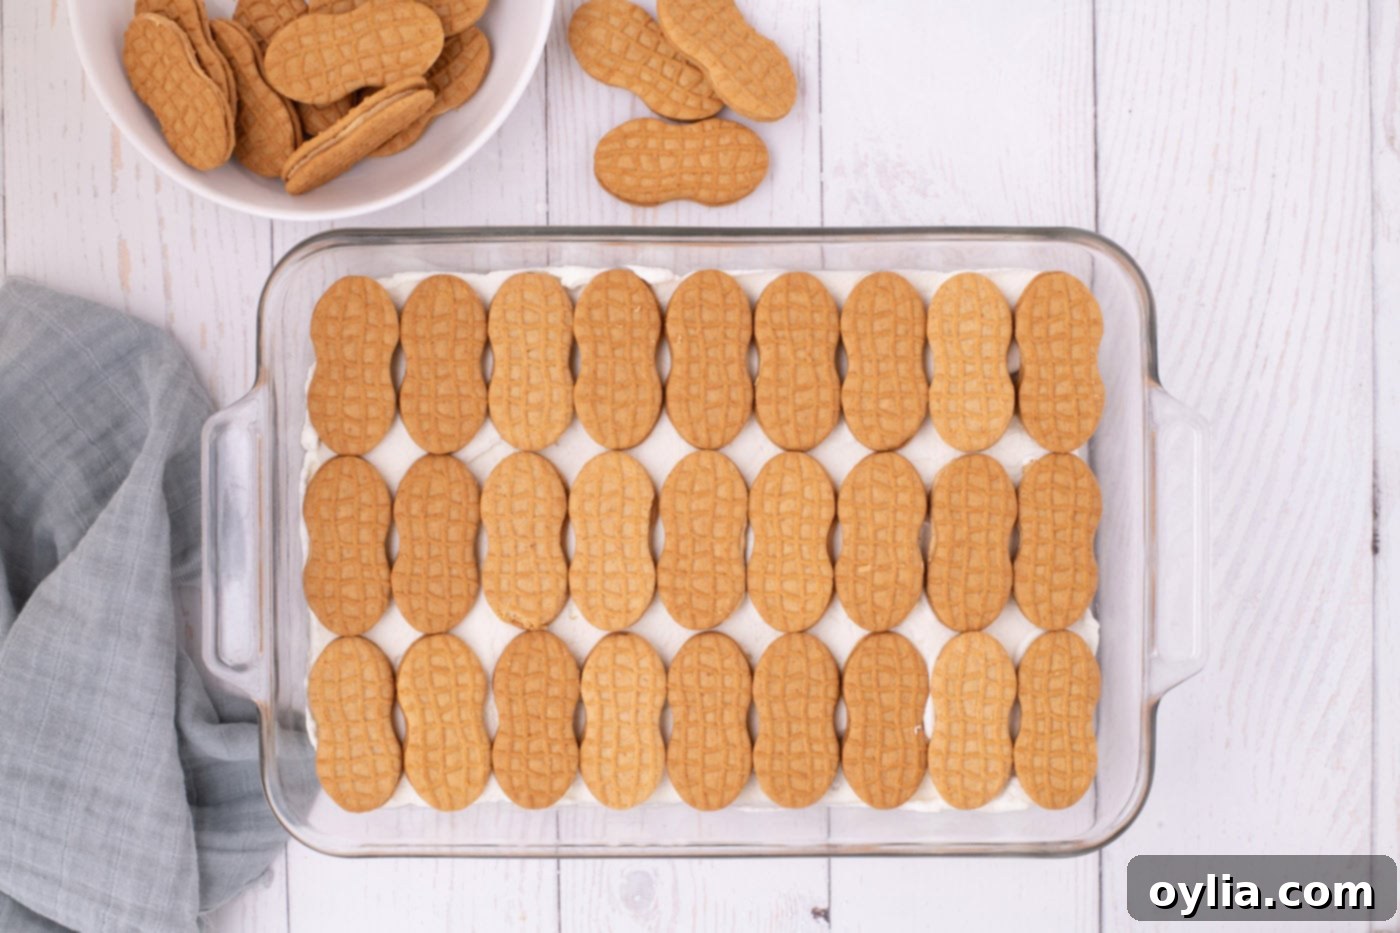
- Prepare Your First Cookie Layer: Begin by lining an ungreased 9×13-inch baking dish with your Nutter Butter cookies. Aim for approximately 24 cookies, arranged in three neat rows of eight. Baking dishes can vary slightly in dimension, so you might find it helpful to cut two Nutter Butter cookies in half. These half-pieces can then be strategically placed at the end of each row to fill any small gaps, ensuring a solid cookie base. Once your first layer is complete, set the dish aside.

- Start the Whipped Cream Cheese Base: In the clean bowl of a stand mixer (or a large mixing bowl with a hand mixer) fitted with the whisk attachment, combine 1/4 cup of the heavy cream with the softened cream cheese. Mix on a low speed initially until the mixture is completely smooth and no lumps of cream cheese remain. This step ensures a wonderfully uniform and silky cream cheese base.
- Whip to Soft Peaks: Now, add the remaining heavy cream and 2 teaspoons of vanilla extract to the bowl. Increase the mixer speed to medium-high and beat until soft peaks begin to form. The cream should hold its shape somewhat but still have a gentle, wavy appearance.
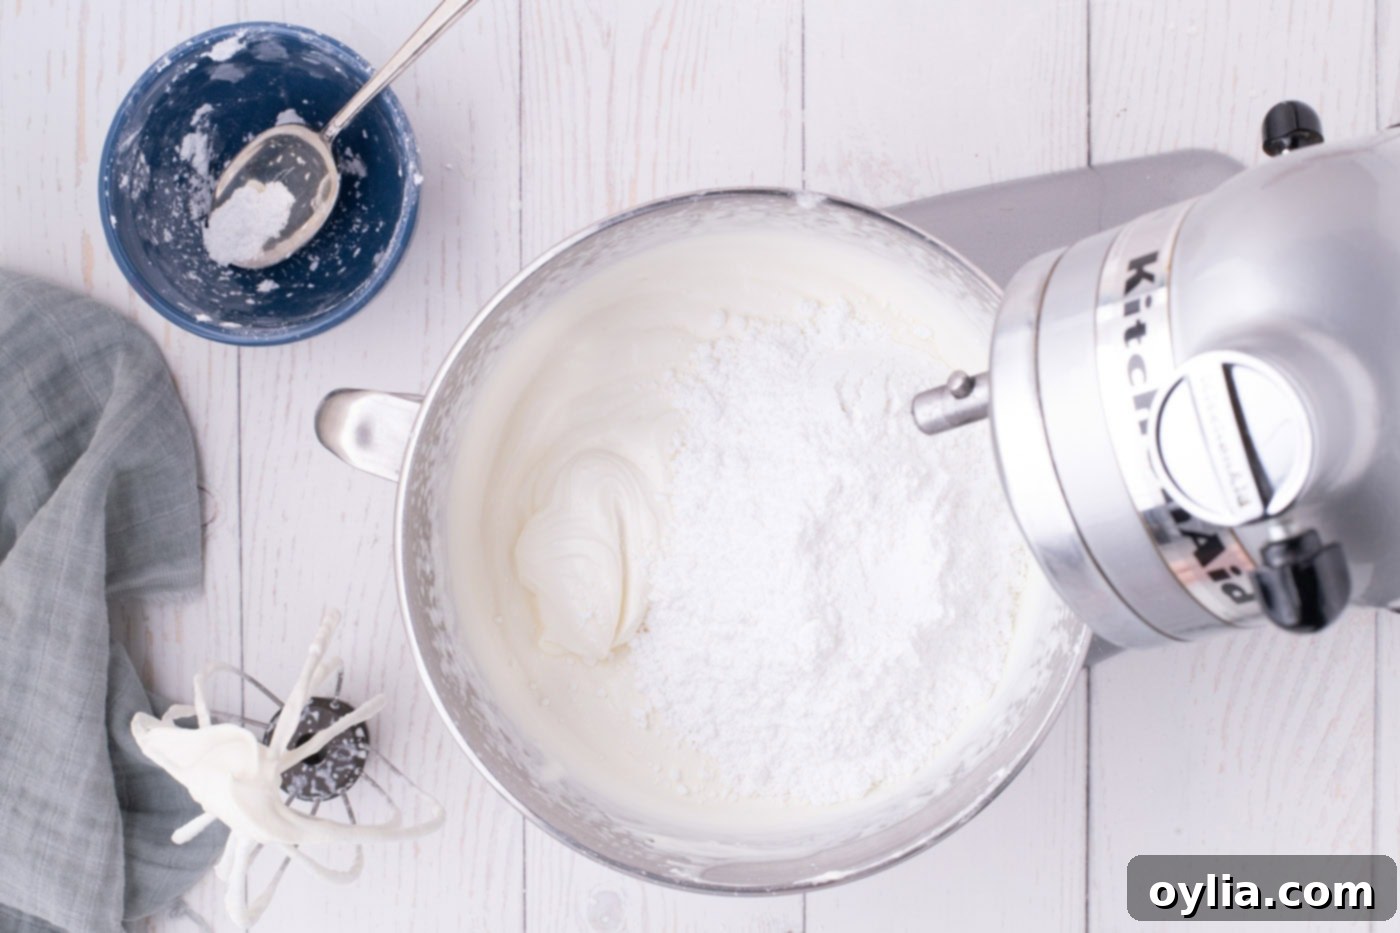
- Sweeten and Stabilize: Carefully add 3/4 cup of the powdered sugar to the whipped cream mixture. Continue beating on medium-high speed until medium-stiff peaks are formed. At this stage, the cream should hold firm peaks when the whisk is lifted. Once achieved, divide this glorious whipped cream into three approximately equal portions, as these will form your delicious layers.

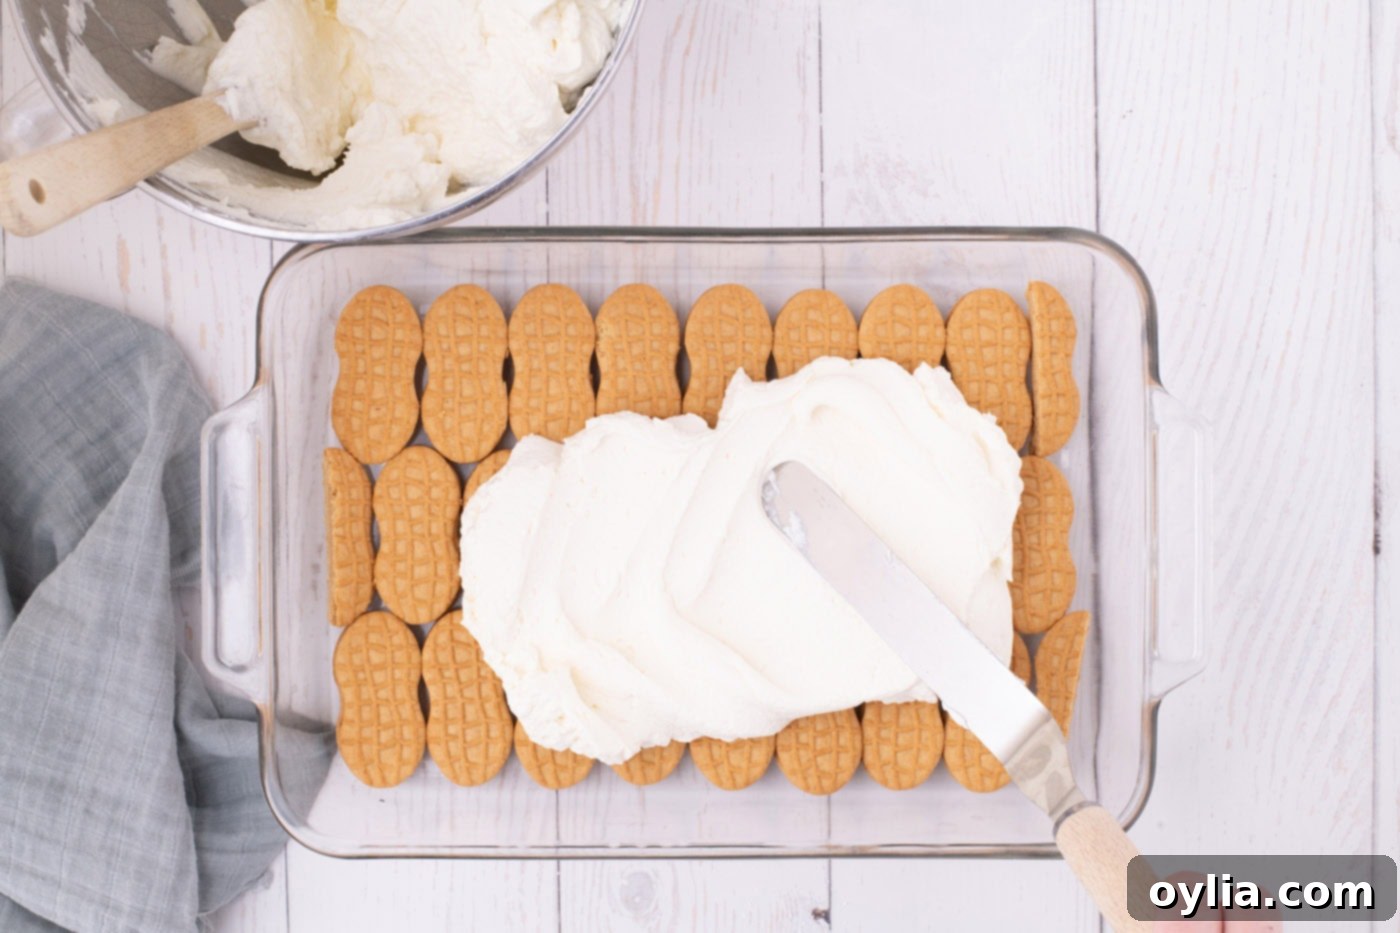
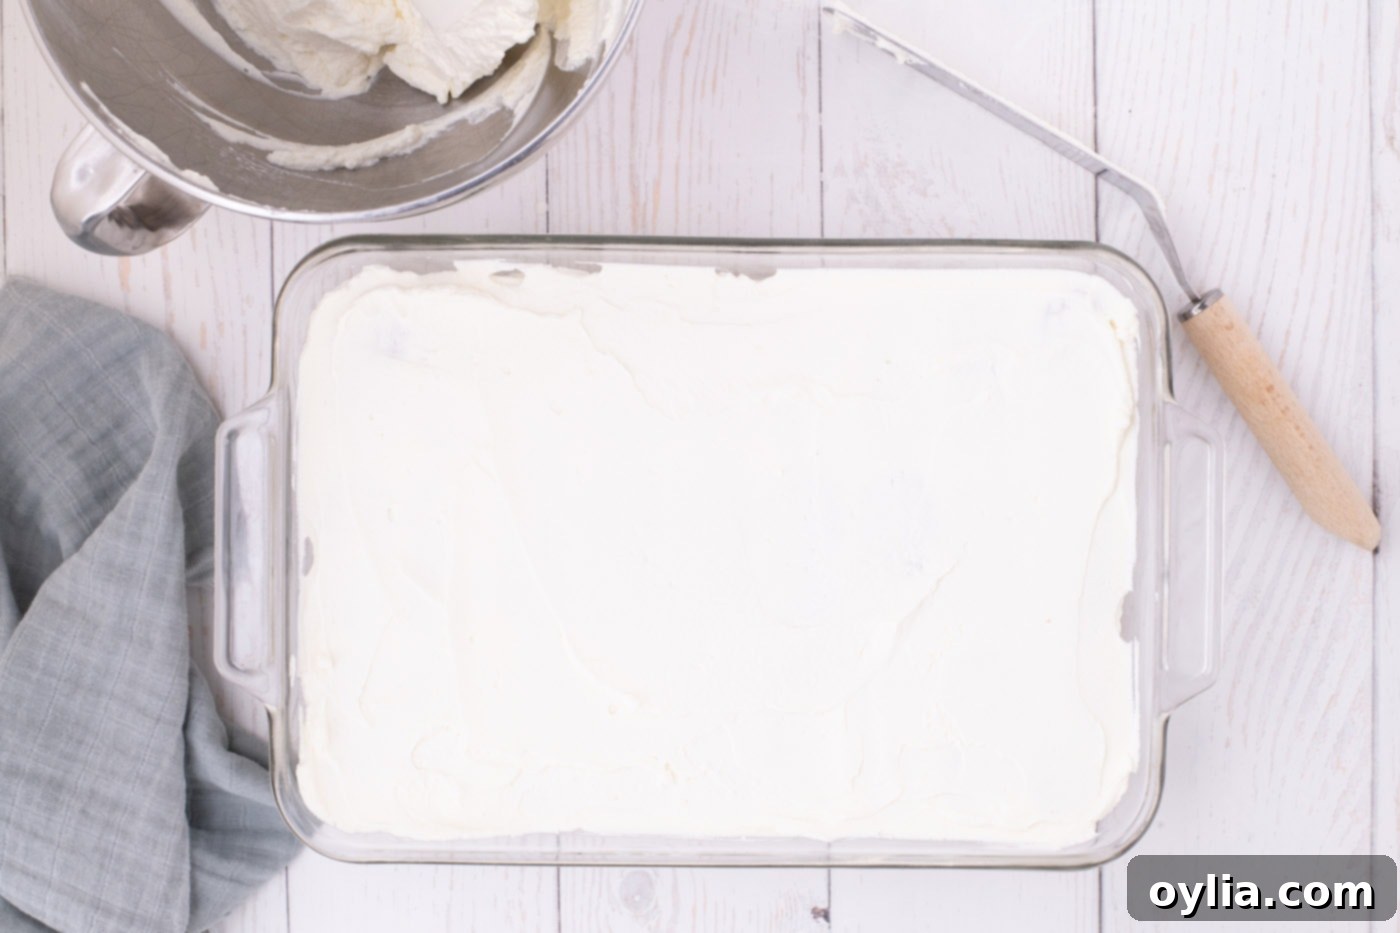
- First Cream Layer: Take one-third of your prepared whipped cream and gently spoon it over the initial layer of Nutter Butter cookies in the baking dish. Using an offset spatula, carefully and evenly smooth out the cream, ensuring it reaches all the corners and fills any small gaps between the cookies. Be mindful not to disturb the cookie layer underneath.

- Second Cookie Layer: Carefully place the second layer of Nutter Butter cookies directly on top of the smooth whipped cream. You might notice that the sides of most baking dishes angle outwards slightly, creating a wider surface area for subsequent layers. This means you’ll likely need to use a few more cookies for this layer to ensure full coverage. My dish typically takes about 27 Nutter Butter cookies, arranged in three rows of nine.

- Second Cream Layer: Spoon the second portion of whipped cream over this new cookie layer, once again using your offset spatula to spread it smoothly and evenly across the entire surface. Ensure there are no exposed cookies, allowing them to fully absorb the creamy goodness.

- Final Cookie Layer: Arrange the final layer of Nutter Butter cookies on top of the second whipped cream layer. Again, expect to use around 27 cookies for this topmost layer to cover the larger surface area of the pan.
- Top with Cream and Chill: Add the final portion of whipped cream over the last cookie layer. Smooth the top meticulously with your offset spatula to create an attractive finish. At this point, your Nutter Butter Icebox Cake is assembled! Place the entire dish in the refrigerator to begin chilling while you prepare the irresistible peanut butter drizzle. This initial chill will help set the layers and make the topping process easier.
Crafting the Perfect Peanut Butter Drizzle and Crunchy Topping
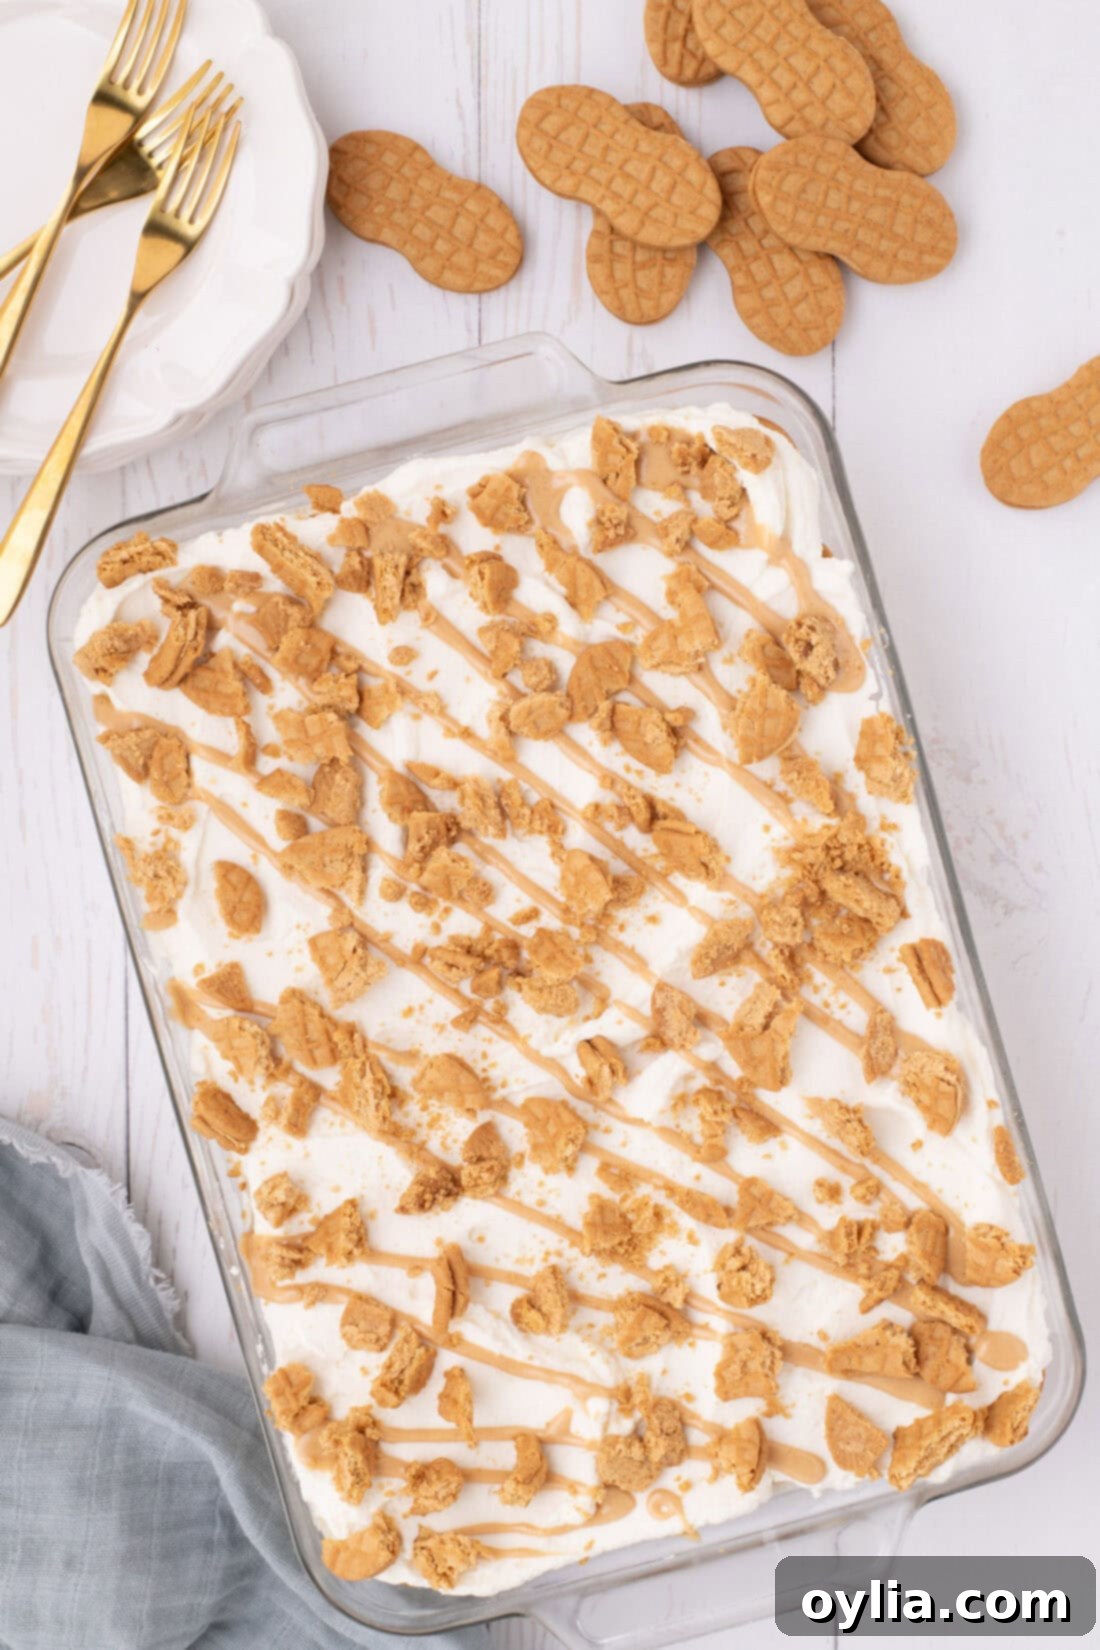
No Nutter Butter Icebox Cake is complete without a glorious topping! This combination of creamy peanut butter drizzle and crunchy crushed cookies adds both visual appeal and an extra layer of flavor and texture that truly elevates the dessert.
- Prepare Crushed Cookies: Take the remaining Nutter Butter cookies (those not used in the layers) and crush them. You can do this by placing them in a Ziploc bag and gently crushing them with a rolling pin, or for a finer crumb, pulse them briefly in a food processor. Set these delightful crumbs aside; they’ll be the finishing touch.
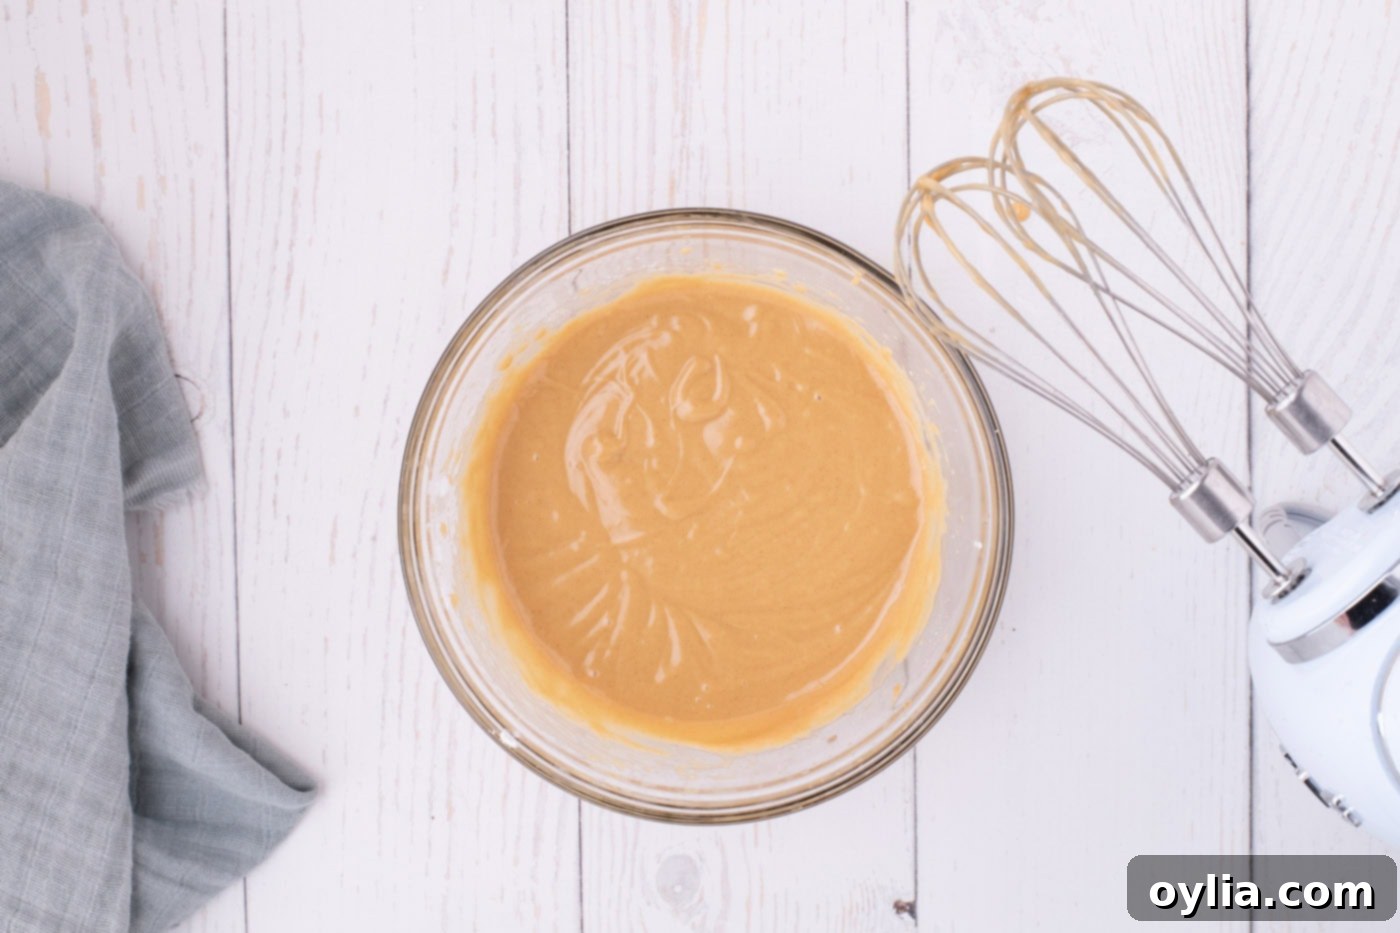
- Whip Up the Peanut Butter Drizzle: In a medium-sized bowl, combine the creamy peanut butter, the remaining powdered sugar, 1 teaspoon of vanilla extract, and 4 tablespoons of water. Use a hand mixer to blend these ingredients until they are perfectly smooth and creamy. The goal is a pourable, drizzle-friendly consistency. If your glaze seems too thick, add more water, one tablespoon at a time, mixing well after each addition until you reach your desired consistency. This ensures a beautifully flowing, rich peanut butter topping.

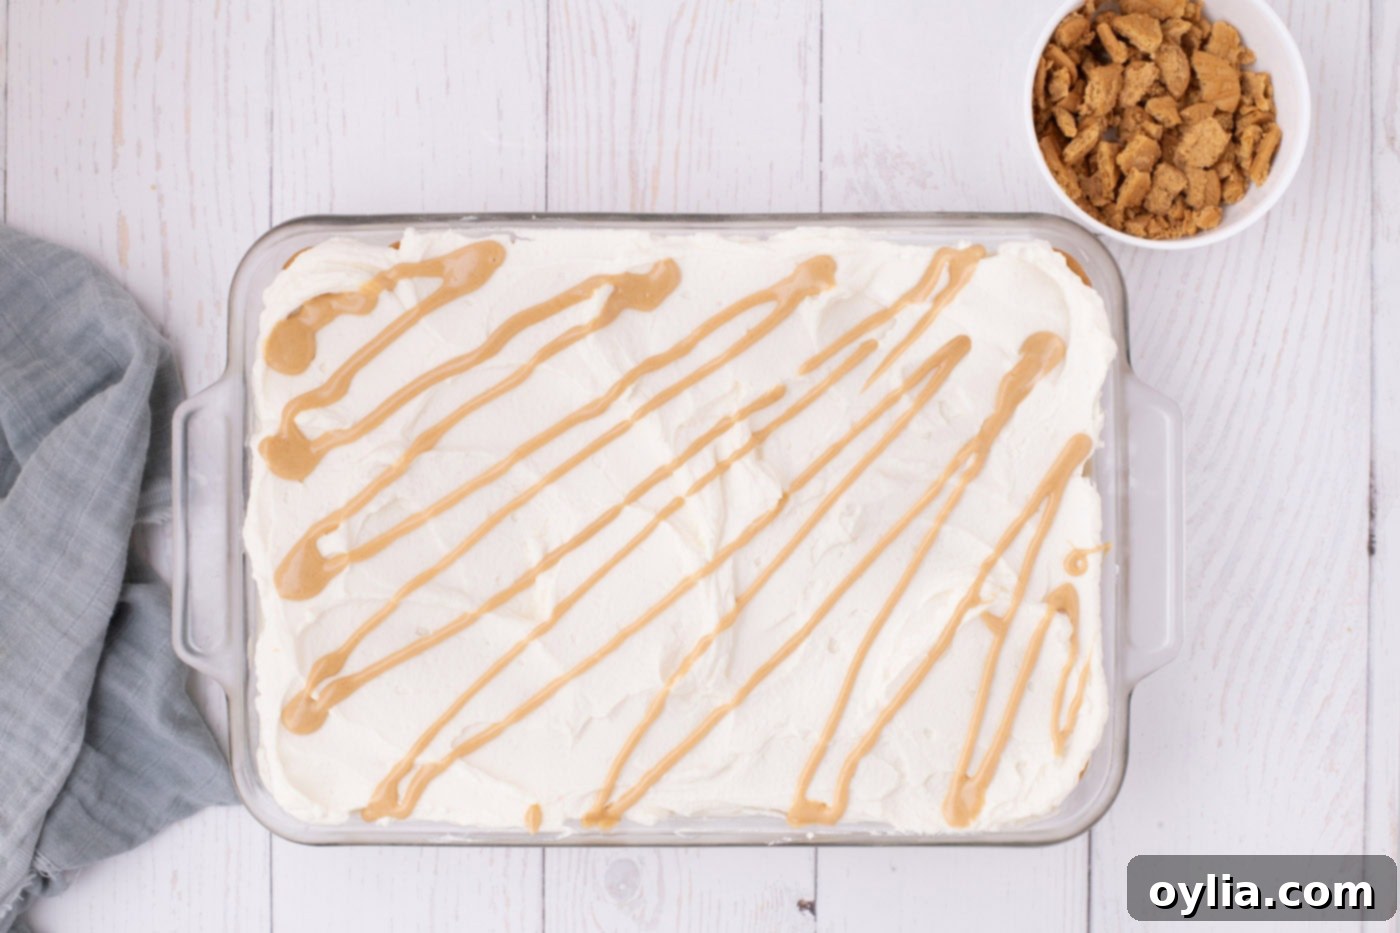
- Drizzle and Garnish: Retrieve your chilled icebox cake from the refrigerator. Generously drizzle the smooth peanut butter mixture over the top layer of whipped cream, creating an appealing pattern. Finish by sprinkling the reserved crushed Nutter Butter cookies evenly over the drizzle. This not only adds a beautiful presentation but also a delightful textural contrast.


- Final Refrigeration for Perfection: This is arguably the most crucial step! Once topped, return the Nutter Butter Icebox Cake to the refrigerator. It needs to chill for a minimum of 4 hours before serving. This extended chilling time allows the Nutter Butter cookies to fully soften, the flavors to deeply meld, and the entire cake to set into a sliceable, spoon-tender masterpiece. Patience here will be greatly rewarded!
Frequently Asked Questions & Expert Tips for Your Nutter Butter Icebox Cake
Even the simplest recipes can benefit from a few insider tips and answers to common questions. Here’s everything you need to know to make your Nutter Butter Icebox Cake absolutely perfect:
To maintain its freshness and delightful texture, store your Nutter Butter Icebox Cake properly. Cover the baking dish tightly with an airtight lid or several layers of plastic wrap. This prevents the cake from drying out and absorbing any unwanted odors from your refrigerator. When stored correctly in the refrigerator, it will stay fresh and delicious for up to 5 days. For the best taste and texture, consume it within the first 2-3 days.
Absolutely, and in fact, it’s highly recommended! This Nutter Butter Icebox Cake truly benefits from being made ahead of time. While a minimum of 4 hours of chilling is necessary for the cookies to soften and the layers to set, the cake’s flavors deepen and meld beautifully when allowed to rest overnight or even for a full day. It tastes its absolute best when eaten 24 to 48 hours after assembly. This extended chilling period allows the cookies to achieve that perfect sponge-like, cake-like texture, making every bite even more satisfying. The cream cheese stabilized whipped cream holds up wonderfully over time, so you can confidently prepare this dessert 1-2 days in advance for any gathering.
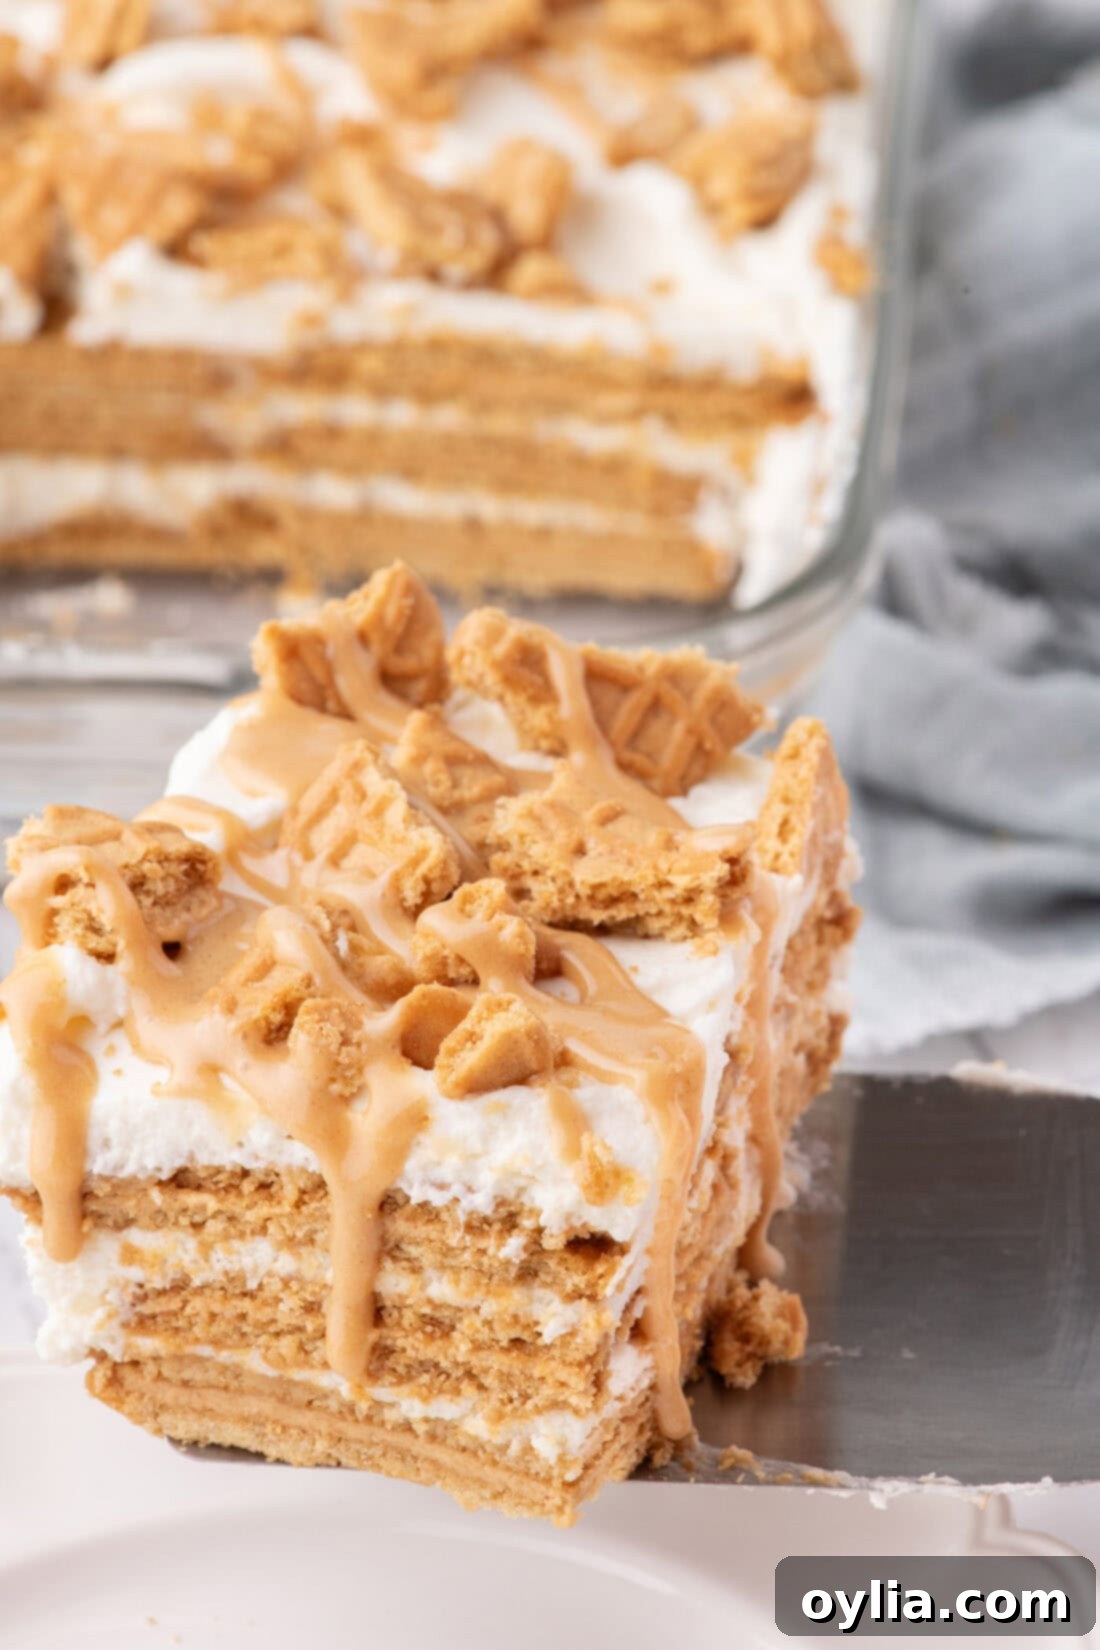
For those picture-perfect, clean-cut slices that showcase the beautiful layers of your Nutter Butter Icebox Cake, proper chilling is essential. The cake must be fully chilled and the cookie layers completely softened – this typically takes at least 4 hours, but again, longer is better. Once adequately chilled, use a sharp knife. For each slice, wipe the knife clean with a warm, damp cloth before making the cut. This simple trick prevents the creamy layers from sticking to the blade and dragging, ensuring each piece comes out looking pristine and ready for its close-up.
Yes, you certainly can! If you’re looking to make a smaller batch of this delicious Nutter Butter Icebox Cake, simply halve the entire recipe. You can then assemble the icebox cake perfectly in an 8×8 inch square pan. Adjust the chilling time accordingly, though it will still require at least 4 hours to achieve the optimal texture.
Absolutely! While the classic recipe is divine, you can easily customize your Nutter Butter Icebox Cake:
- Chocolate Lover’s Twist: Swirl in some melted chocolate into one of your whipped cream layers or drizzle extra chocolate syrup on top with the peanut butter. You could even use a layer of chocolate ganache!
- Crunch Factor: Add a sprinkle of chopped roasted peanuts, mini chocolate chips, or even some toffee bits between the layers for extra texture.
- Slightly Salty: A tiny pinch of sea salt flakes sprinkled over the top drizzle can really enhance the peanut butter flavor and balance the sweetness.
- Coffee Kick: For an adult twist, you could lightly dip the Nutter Butter cookies in a very small amount of cooled coffee or espresso before layering, similar to tiramisu.
Ensuring your heavy cream and cream cheese are very cold is crucial. If they are not cold enough, they won’t whip properly. Place your mixing bowl and whisk attachment in the freezer for 10-15 minutes before starting. If your cream is still refusing to thicken, you might be in a very warm environment; try placing the bowl over an ice bath while you whip. Another common issue is over-beating, which can cause the cream to separate. Stick to medium-high speed until medium-stiff peaks form, then stop. If it’s still too loose, a little more powdered sugar can sometimes help stabilize it further.
Delightful Serving Suggestions for Your Nutter Butter Icebox Cake
Once your magnificent Nutter Butter Icebox Cake is perfectly chilled and ready, it’s time to serve it up in style! Slice the cake into generous squares, making sure to show off those beautiful, distinct layers. For an extra touch of indulgence and visual appeal, consider these serving suggestions:
- Extra Drizzle: Offer an additional small pitcher of the peanut butter drizzle on the side for guests who want to add an extra layer of creamy goodness.
- Crushed Cookie Extravaganza: A small bowl of extra crushed Nutter Butter cookies can be provided, allowing everyone to sprinkle more crunchy texture onto their slice.
- Chocolate Chips: A sprinkle of mini chocolate chips, peanut butter chocolate chips, or even some finely grated chocolate adds another dimension of flavor and a beautiful contrasting color.
- A Scoop of Ice Cream: While this cake is already a chilled dessert, a small scoop of vanilla or chocolate ice cream on the side can create an even more decadent treat, especially on a hot day.
- Fresh Whipped Cream: If you want to go above and beyond, a dollop of freshly whipped cream (without cream cheese) adds a cloud-like lightness.
- Beverage Pairings: This rich dessert pairs wonderfully with a cold glass of milk, a warm cup of coffee, or even a shot of espresso for an after-dinner delight.
More No-Bake & Peanut Butter Desserts You’ll Love
If you’re a fan of no-bake desserts, especially those with irresistible peanut butter, you’re in luck! Here are some more fantastic recipes that deliver on flavor and ease:
- Nutter Butter Balls
- No Bake Peanut Butter Pie
- Strawberry Icebox Cake
- Chocolate Peanut Butter Lasagna
- Biscoff Icebox Cake
I absolutely adore creating and sharing my kitchen adventures with all of you! Remembering to visit daily for new recipes can be a challenge, which is why I offer a convenient newsletter delivered straight to your inbox every time a fresh recipe is posted. Simply subscribe here and start receiving your free daily recipes to inspire your next delicious creation!
Nutter Butter Icebox Cake
IMPORTANT – There are often Frequently Asked Questions within the blog post that you may find helpful. Simply scroll back up to read them!
Print It
Pin It
Rate It
Save ItSaved!
Ingredients
- 80 Nutter Butter cookies three 16 ounce packages
- 1 quart heavy whipping cream 4 cups
- 3 ounces cream cheese softened at room temperature
- 3 teaspoons vanilla extract divided
- ¼ cup creamy peanut butter such as Skippy or Jif
- 1 ½ cups powdered sugar divided
- 4-6 Tablespoons water
Things You’ll Need
-
13×9 baking dish
-
Stand mixer
-
Offset icing spatula
Before You Begin
- I wouldn’t recommend using natural nut butters in this recipe as they tend to be too runny and can separate as it sits. Regular creamy peanut butter is your best bet here, such as Skippy or Jif, for optimal texture and flavor.
- Only crush the remaining Nutter Butter cookies once you have finished building the layers in your dessert. This ensures you have the correct amount of cookies left for the topping. You may find you need more (or less) Nutter Butter cookies for the layers than initially called for, depending on how wide the base of your particular 9×13-inch baking dish is (not all have the exact same base width).
Instructions
-
Line an ungreased 9 x 13-inch baking dish with approximately 24 Nutter Butter cookies (3 rows of 8 cookies). If there are gaps, cut two Nutter Butter cookies in half and use the three half-pieces to fill the ends of each row. Set the dish aside.
-
In the bowl of a stand mixer fitted with the whisk attachment, add 1/4 cup heavy whipping cream and the softened cream cheese. Mix on low speed until smooth and fully combined.3 ounces cream cheese
-
Add the remaining 3 3/4 cups of heavy whipping cream and 2 teaspoons of vanilla extract. Beat on medium-high speed until soft peaks form, indicating it’s starting to thicken.
-
Add ¾ cup of the powdered sugar and continue beating until medium-stiff peaks are formed. The cream should hold its shape firmly. Divide the whipped cream mixture into three equal portions.
-
Spoon one-third of the whipped cream evenly over the first Nutter Butter cookie layer. Gently smooth it out with an offset spatula, ensuring even coverage and filling all gaps without shifting the cookies.
-
Place the second layer of Nutter Butter cookies on top of the whipped cream layer. Due to the typical angling of baking dish sides, you will likely need to lay down a few more cookies for this layer. (My dish took 27 Nutter Butter cookies, arranged in 3 rows of 9 cookies).
-
Add the second portion of whipped cream over this second Nutter Butter layer, smoothing it out with the offset spatula to cover all cookies.
-
Place the final layer of Nutter Butter cookies on top of the whipped cream. Again, expect to use about 27 Nutter Butter cookies (3 rows of 9 cookies) for this top layer.
-
Add the final portion of whipped cream, smooth the top surface, and place the cake in the refrigerator to chill thoroughly while you prepare the peanut butter drizzle.
-
Crush the remaining Nutter Butter cookies into crumbs and set them aside for garnish.
-
In a medium-sized bowl, combine the peanut butter, remaining 3/4 cup of powdered sugar, 1 teaspoon vanilla extract, and 4 tablespoons of water. Blend with a hand mixer until the mixture is smooth and has a pourable, drizzling consistency. Add more water (1 tablespoon at a time) if the glaze is too thick.1/4 cup creamy peanut butter
-
Retrieve your chilled cake. Drizzle the prepared peanut butter mixture generously over the top whipped cream layer, then evenly sprinkle the crushed Nutter Butter cookies over the drizzle for a beautiful finish.
-
Refrigerate the completed Nutter Butter Icebox Cake for at least 4 hours (or preferably overnight) before serving to allow all the flavors to meld and the cookies to soften to a delightful cake-like texture.
Expert Tips & FAQs
- Store your icebox cake, covered tightly with an airtight lid or wrapped thoroughly with plastic wrap, in the refrigerator for up to 5 days. This maintains freshness and prevents dryness.
- Make Ahead Advantage: This dessert is a fantastic make-ahead option! It’s best to prepare it at a minimum of 4 hours ahead of time, or ideally, 1 to 2 days in advance. The icebox cake truly tastes best when the flavors have had ample time to meld together and the cookies have softened to a wonderfully sponge-like texture. Thanks to the cream cheese, the whipped cream is stabilized and will hold up beautifully when kept refrigerated over time.
- To achieve nice, clean-cut slices that show off those beautiful layers, the cake must be fully chilled beforehand. The cookie layers need to soften completely, which will take approximately 4 hours, making the cake much easier to slice without crumbling. Additionally, for the cleanest cuts, I highly recommend wiping a sharp knife clean with a warm, damp cloth before each slice.
- For a smaller dessert, you can easily halve this recipe and assemble your Nutter Butter icebox cake in an 8×8 inch square pan. The proportions will remain perfect for a smaller crowd.
Nutrition
The recipes on this blog are tested with a conventional gas oven and gas stovetop. It’s important to note that some ovens, especially as they age, can cook and bake inconsistently. Using an inexpensive oven thermometer can assure you that your oven is truly heating to the proper temperature. If you use a toaster oven or countertop oven, please keep in mind that they may not distribute heat the same as a conventional full sized oven and you may need to adjust your cooking/baking times. In the case of recipes made with a pressure cooker, air fryer, slow cooker, or other appliance, a link to the appliances we use is listed within each respective recipe. For baking recipes where measurements are given by weight, please note that results may not be the same if cups are used instead, and we can’t guarantee success with that method.
