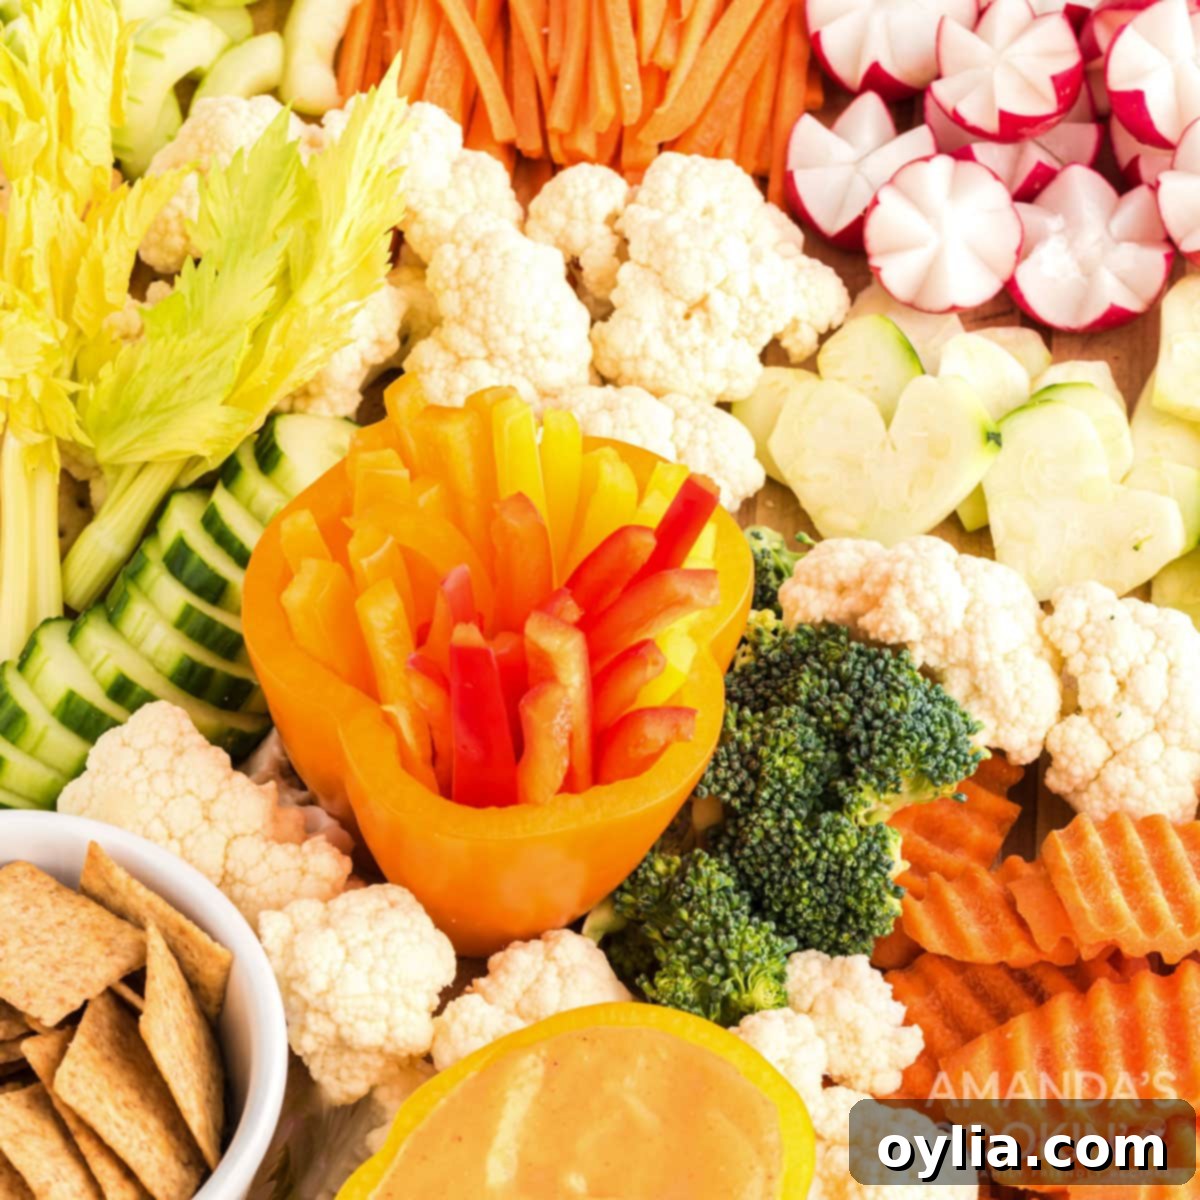
Create Stunning Decorative Vegetable Platters: Your Ultimate Guide to Beautiful Edible Displays
A holiday table, a festive birthday party, or a casual barbecue – whatever the occasion, a spread adorned with decorative vegetables is always a showstopper. It’s not just pleasing to the eye; it’s an inviting and appetizing centerpiece that subtly encourages healthy eating. You might think making fresh vegetables look like they were prepared by a professional chef requires extensive skill or complicated tools, but that’s simply not true! With a few simple techniques and a touch of creativity, you can transform ordinary produce into stunning edible art that will leave your guests impressed and reaching for more.
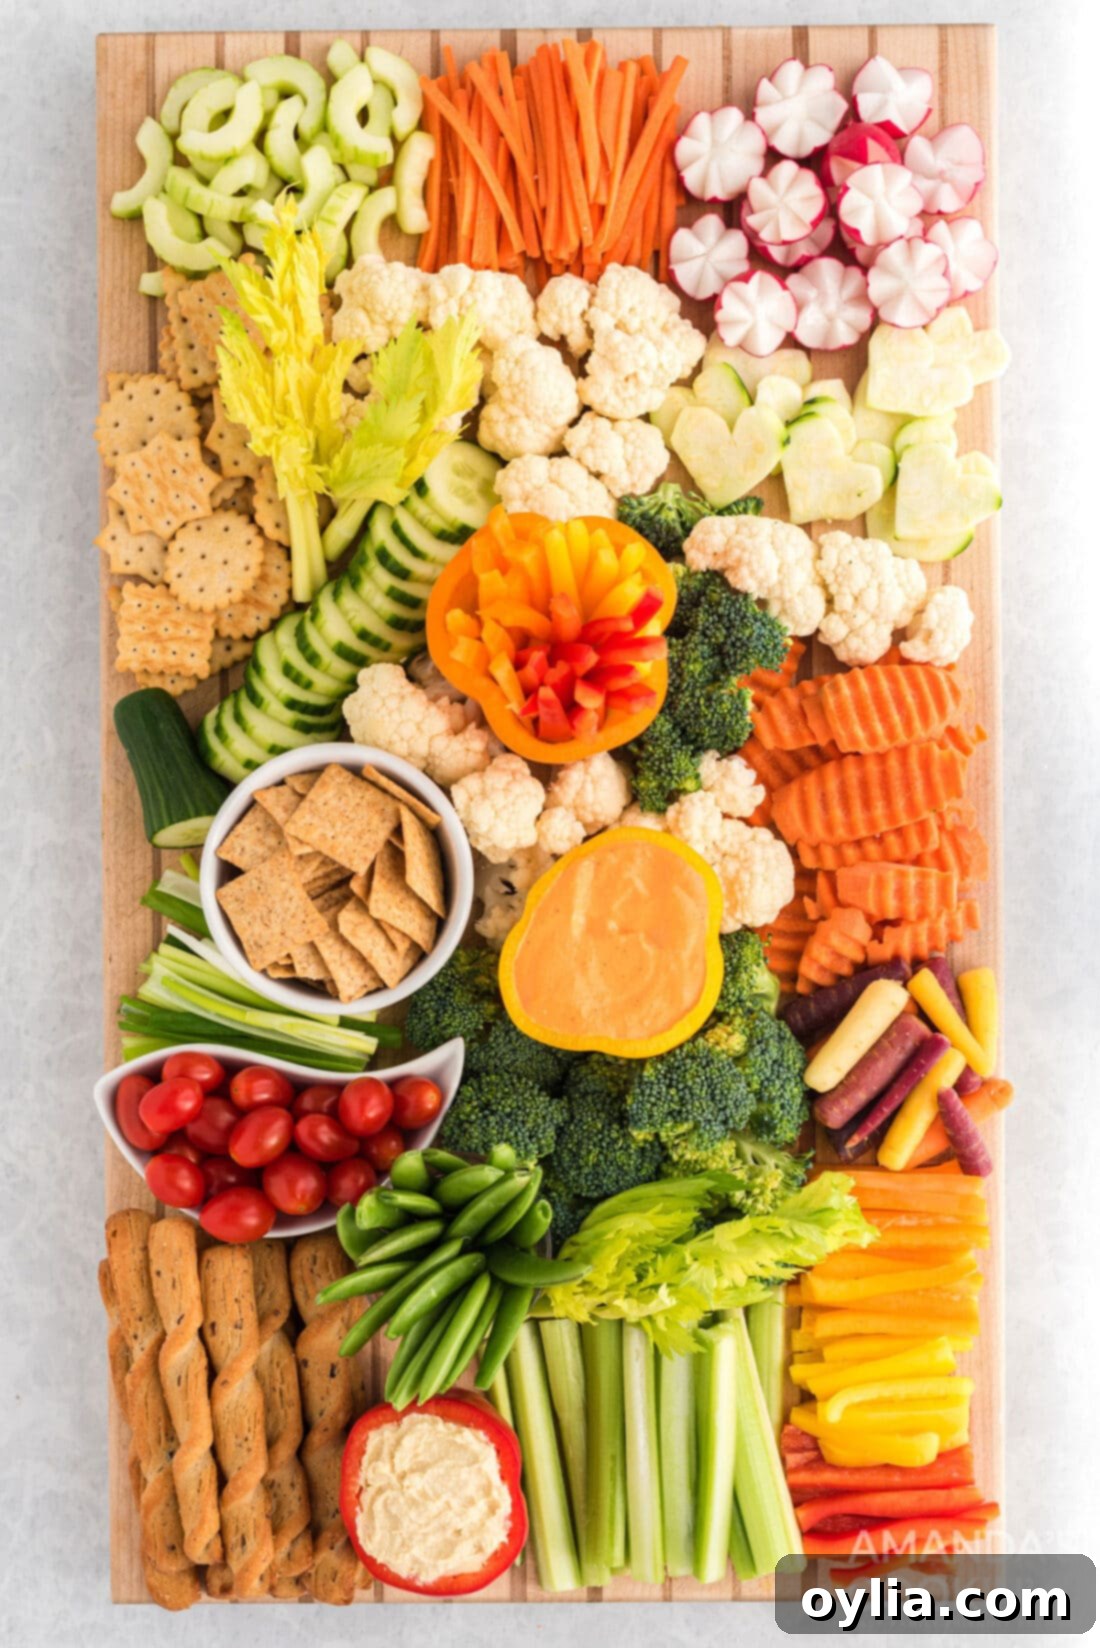
Transforming Vegetables: Simple Techniques for Stunning Displays
Whether it’s for holidays, birthdays, or casual get-togethers, a board full of colorful, creatively cut raw vegetables – often called a crudité platter – is always a huge hit. Vegetables are incredibly good for you, and let’s be honest, most of us don’t get enough in our daily diets. There’s something inherently appealing about beautiful food that makes it more inviting. By transforming your veggies into decorative elements, you can easily entice your family and guests to enjoy these healthy snacks. These decorative vegetable tips and ideas will not only add visual appeal to your table but also make eating vegetables a more delightful experience.
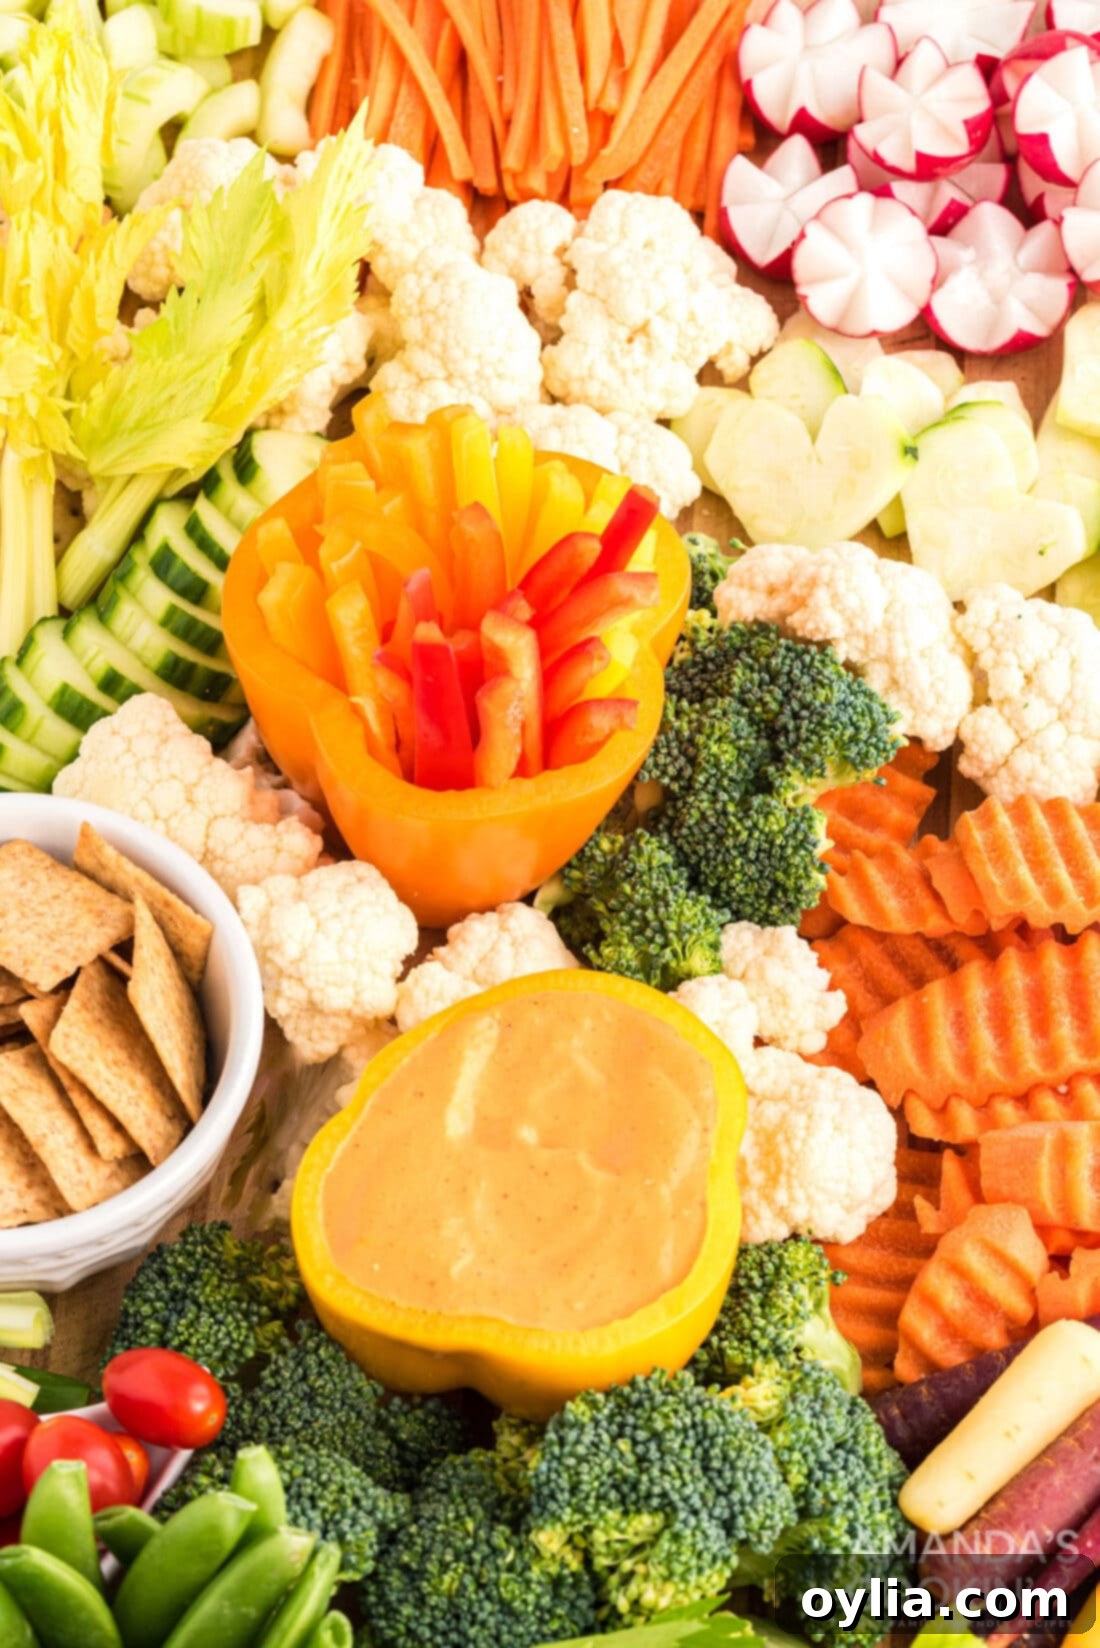
Creative Cucumber Cuts: Stripes, Half Moons, and More
Cucumbers are a refreshing, crisp, and low-calorie vegetable that makes a perfect addition to any decorative platter. Their firm texture and vibrant green skin (or pale flesh when peeled) offer fantastic opportunities for artistic cuts. Here’s how you can make your cucumbers truly stand out:
Striped Cucumbers: A Visual Delight
This simple technique adds a sophisticated flair to your cucumber slices, creating an elegant pattern that’s surprisingly easy to achieve.
- Start with a fresh, washed cucumber. Trim off both ends to create clean, even surfaces.
- Grab a standard potato peeler. Carefully peel one long strip all the way down the cucumber’s length.
- Next, move the peeler over by approximately the width of the strip you just removed, ensuring you leave the skin in that section intact.
- Repeat this alternating pattern: peel a strip, then leave a strip of skin. Continue this process until you’ve worked your way around the entire cucumber, resulting in a distinct striped effect.
- Finally, slice the striped cucumber into uniform 1/4-inch thick rounds. These rounds, with their beautiful alternating green and white edges, are perfect for dipping or arranging.
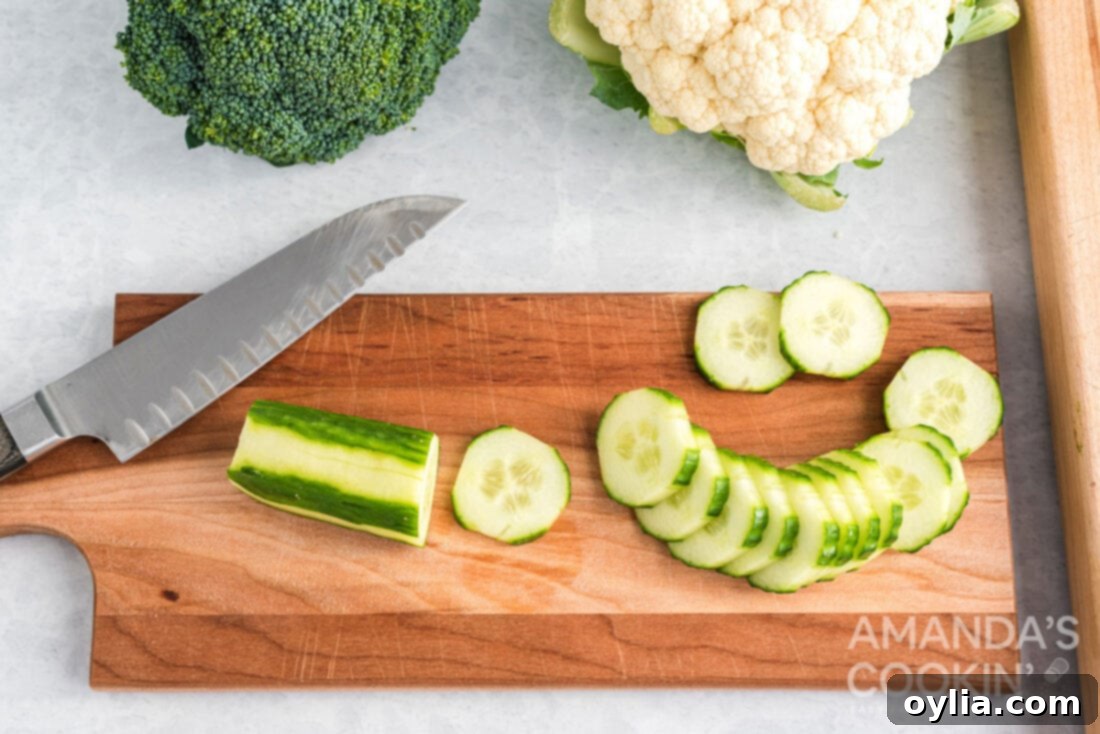
Elegantly Cored Cucumbers: Perfect for Fillings or Unique Shapes
Coring cucumbers not only allows for interesting shapes but also transforms them into perfect edible cups for various fillings, elevating a simple vegetable into a gourmet bite-sized appetizer.
- Wash the cucumber thoroughly and trim off both ends.
- Using your potato peeler, remove the entire skin of the cucumber. This will give you a uniform, pale green or white appearance.
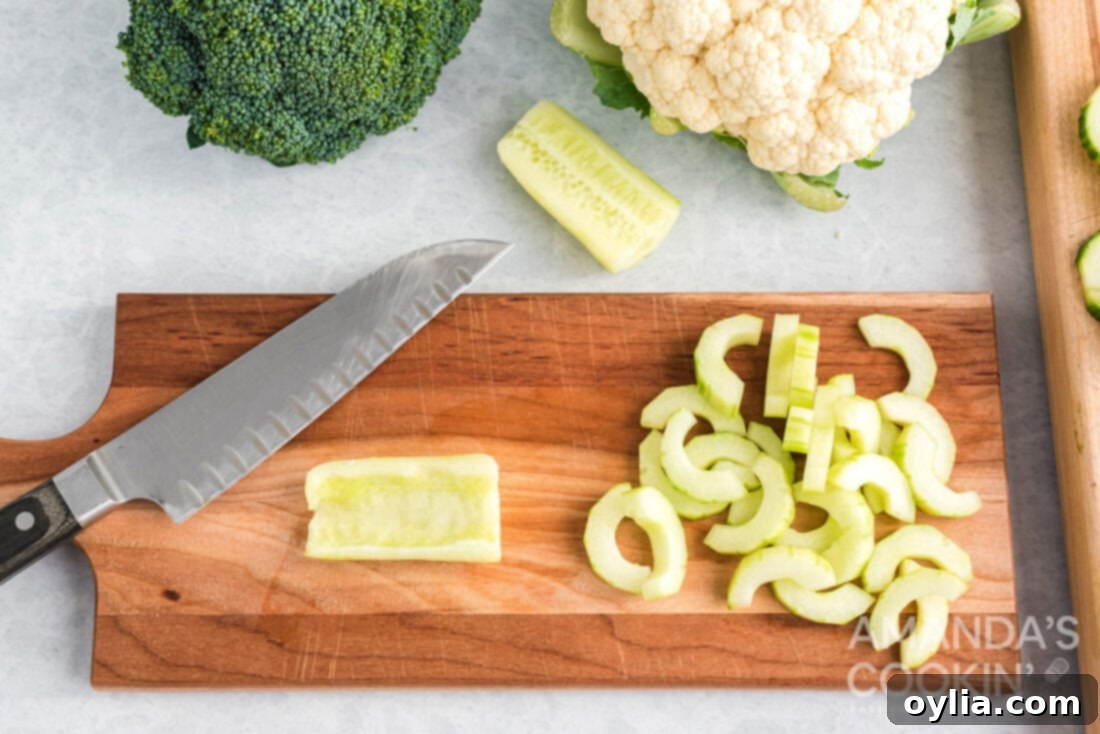
- Carefully slice the peeled cucumber in half lengthwise, creating two long, boat-like pieces.
- Gently scoop out the seeds and the watery pulp from the center of each cucumber half using a spoon. You might need to loosen the seeds first with the tip of a small knife. This process creates a neat cavity.
- Slice these cored cucumber halves into 1/4-inch thick pieces. The result will be elegant half-moon shapes, which are excellent for dipping or can be filled with your favorite spreads.
- Alternative: “Donut Hole” Slices. For a different playful shape, after peeling the cucumber, cut it in half crosswise (not lengthwise). Then, carefully use a small knife or melon baller to remove the central pulp, creating a circular “donut hole” effect. Once cored, slice these pieces into rounds as described above. These rings are visually appealing and also make charming holders for small dollops of dip or other tiny fillings.
Dynamic Carrot Cuts: Crinkles, Juliennes, and Beyond
Carrots are a classic crudité item, offering a vibrant pop of orange, satisfying crunch, and natural sweetness. Moving beyond basic carrot sticks, you can make them much more visually engaging for your platter.
Crinkle Carrots: Fun and Textured
For a playful, ridged texture reminiscent of crinkle-cut fries, perfect for appealing to both children and adults:
- First, thoroughly peel your carrots and trim off both ends to ensure clean edges.
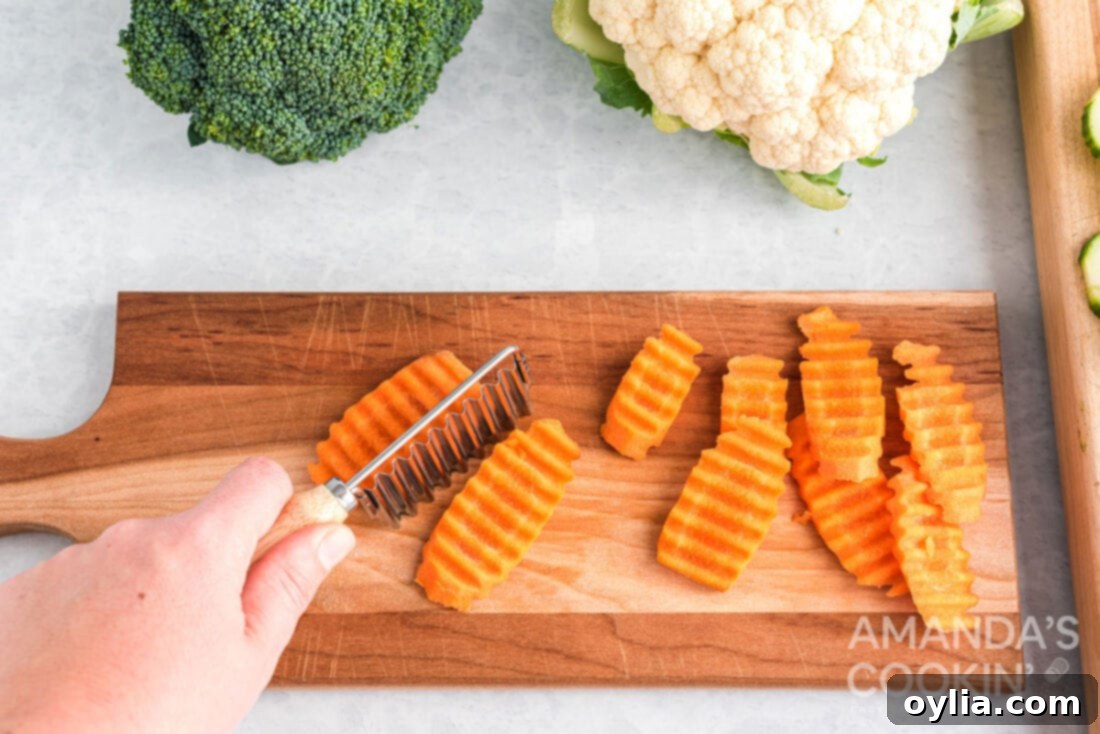
- Next, cut the peeled carrots in half lengthwise. This creates a flatter, more stable surface for cutting.
- Now, use a crinkle cutter (a specialized tool designed for making wavy cuts). Press the cutter firmly and evenly through each carrot half. The result will be attractive, crinkled vegetable pieces, as beautifully illustrated in the accompanying picture. This simple tool instantly adds visual interest.
Julienne Carrots: Delicate and Refined
For a more delicate and refined presentation, julienned carrots add a fine texture to your platter and are also excellent for use in salads or wraps.
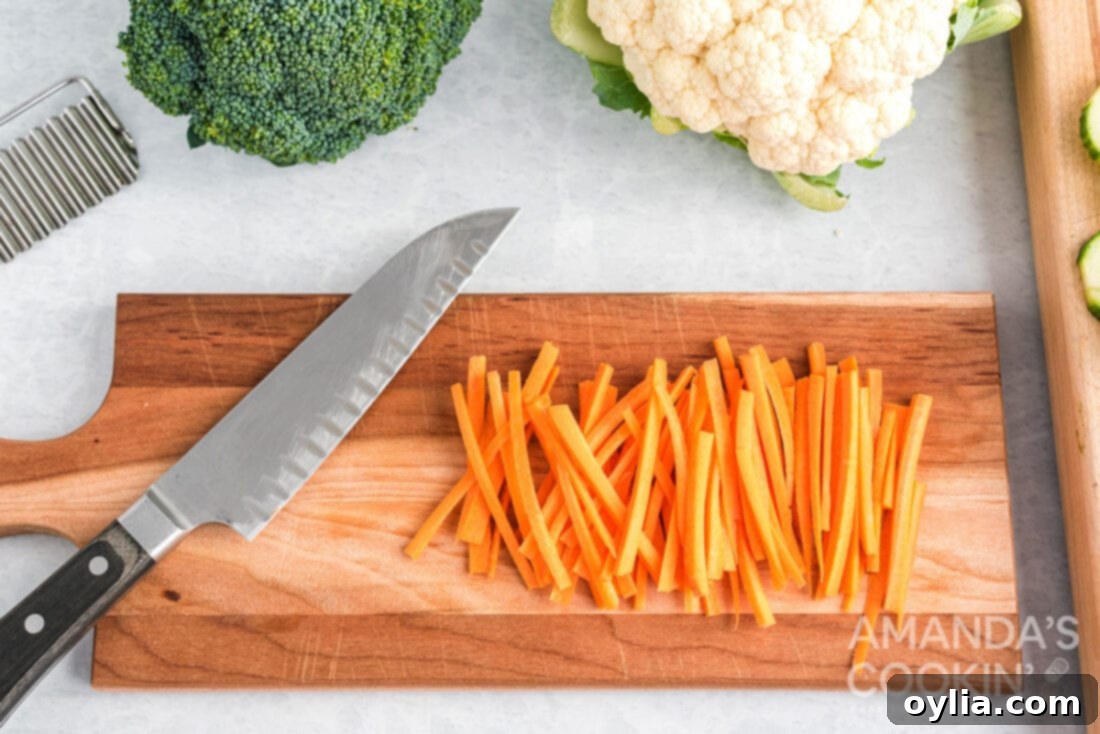
- Peel your carrots and neatly trim off the ends.
- With a sharp chef’s knife, a mandoline with a julienne setting, or a specialized julienne peeler, slice the carrots into thin, uniform strips, approximately 1/4-inch thick. The goal is consistency for a professional look.
Lovely Zucchini Hearts: A Touch of Whimsy and Elegance
Zucchini, with its mild flavor and relatively soft yet firm texture, is an excellent candidate for creating playful and elegant shapes. These heart-shaped zucchini pieces are perfect for adding a touch of romance or whimsy to your vegetable platter, making them ideal for themed parties, Valentine’s Day, or simply to delight your guests.
- Wash the zucchini thoroughly and trim off both ends to prepare it for slicing.
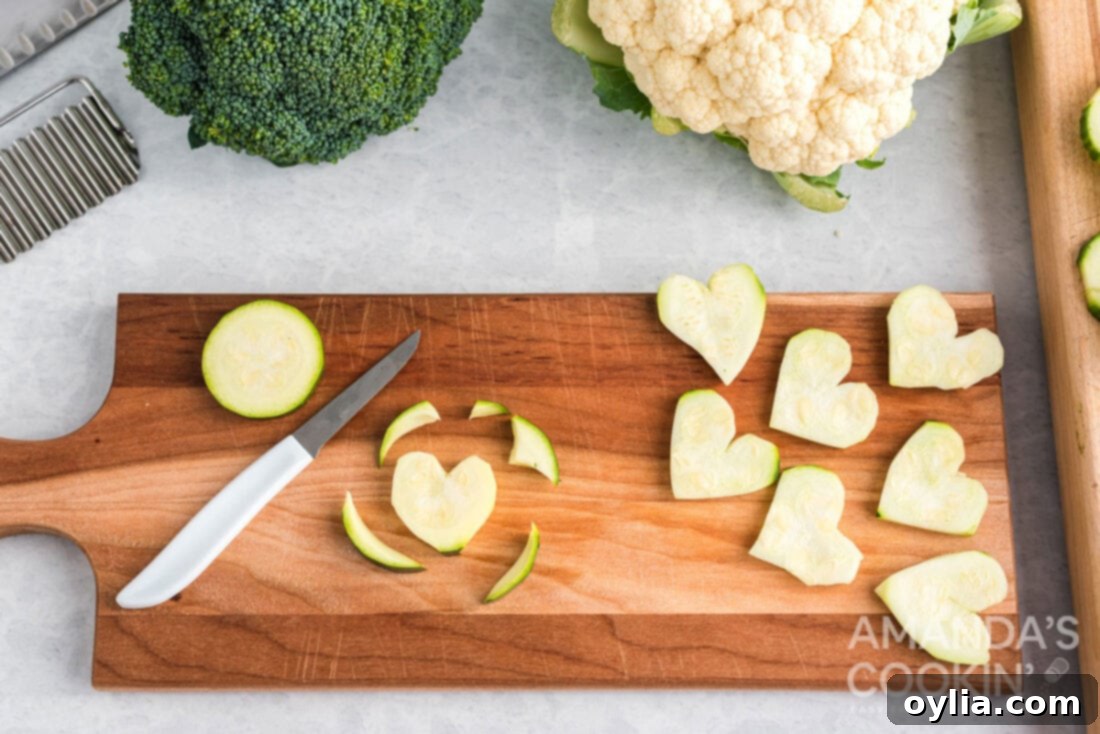
- Slice the zucchini into rounds. Aim for a thickness of about 1/4 to 1/2 inch; thinner slices will be more delicate, while thicker ones will hold their shape better.
- Now, take a small heart-shaped cookie cutter and firmly press it through the center of each zucchini slice. This will yield perfectly shaped zucchini hearts. If you don’t have a cookie cutter, a sharp paring knife can be used to carefully hand-cut heart shapes, though it requires a bit more precision.
- Arrange these adorable zucchini hearts artfully among your other vegetables. Their unique shape provides a delightful contrast to round or stick-cut veggies.
Exquisite Radish Flowers: A Blooming Display for Your Platter
Radishes, with their striking red skin and crisp white interior, are perfect candidates for carving into intricate and beautiful flowers. These edible blossoms add a sophisticated touch and a burst of color to any crudité platter, transforming a humble vegetable into an eye-catching centerpiece.
- Begin by selecting firm, round radishes. Wash them thoroughly under cold water and gently scrub any dirt. Trim off the root end and the stem end. For a more natural look, you can leave a very small portion of the stem intact.
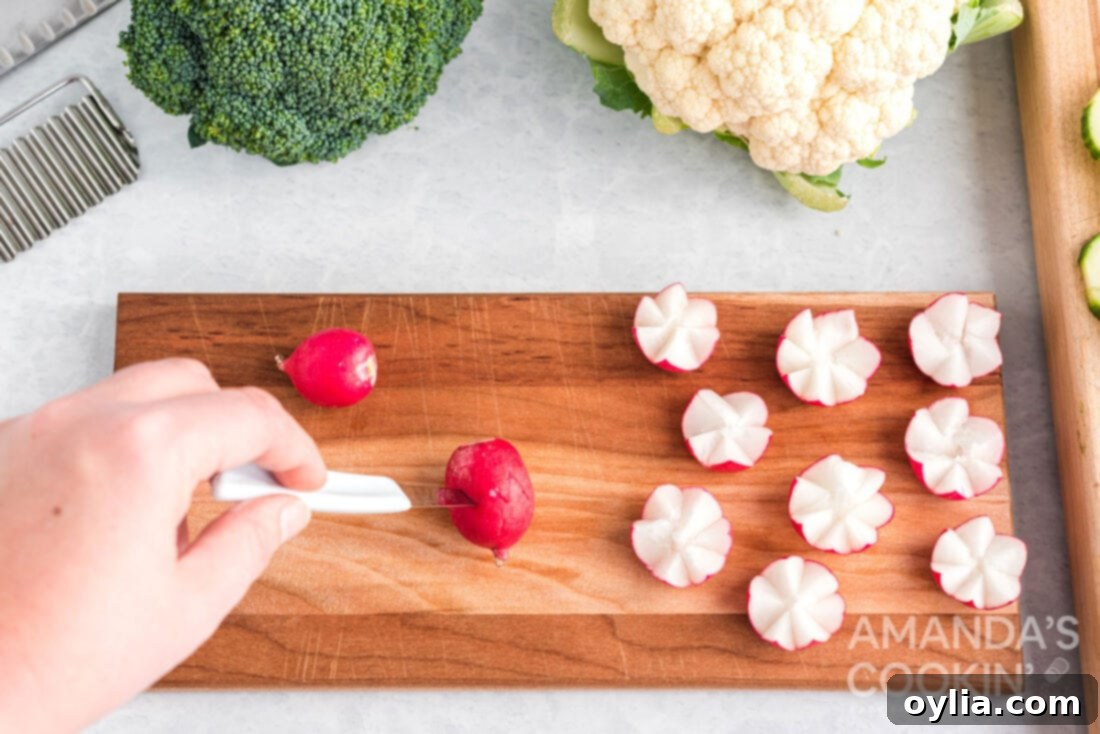
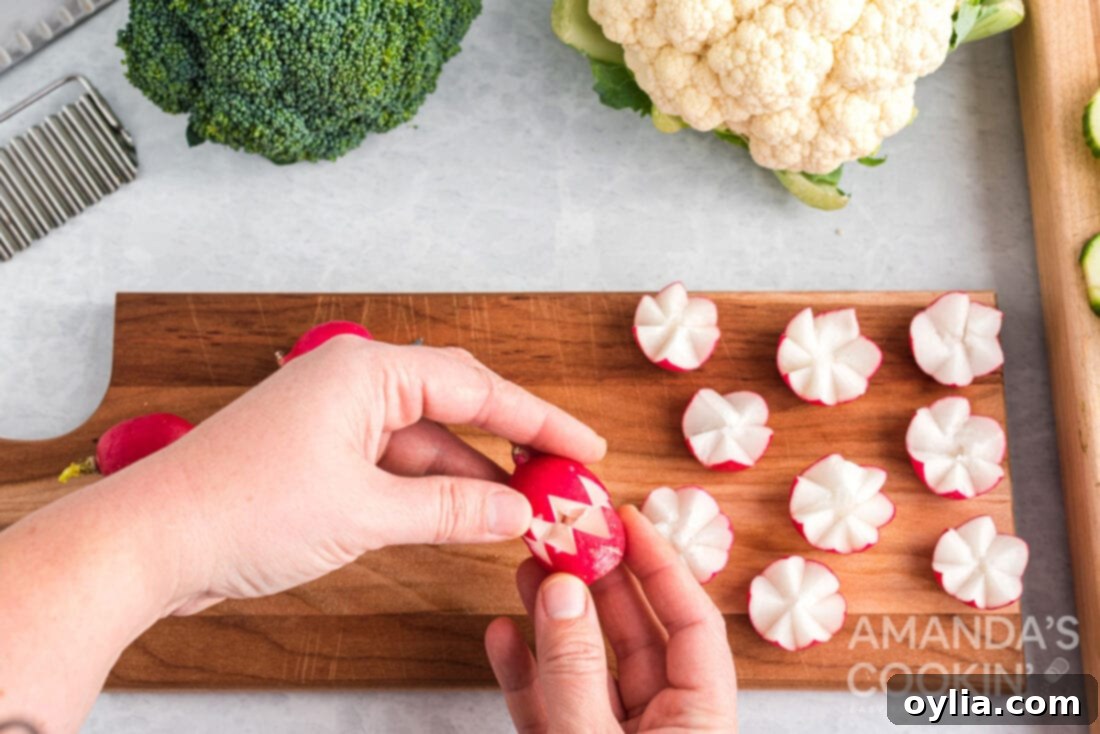
- Using a very sharp paring knife, carefully make vertical zigzag cuts around the center of the radish. Imagine cutting a zig-zag line all the way around the equator of the radish, but only cut halfway deep into the radish. Ensure that your cuts meet precisely to create a continuous zigzag pattern.
- Once you’ve completed the zigzag cuts all around the radish, gently separate the two halves by twisting them apart. The goal is to create two distinct halves, each with a decorative zigzag edge.
- Immediately place the cut radishes into a bowl filled with iced water. Let them soak for at least 30 minutes, or even longer. The cold water will cause the radish “petals” to unfurl and crisp up, creating a beautiful blooming flower effect. This step is crucial for achieving the desired open, vibrant look. For a detailed visual guide, you can search online for “how to carve flower radish” videos.
Simple Elegance: Enhancing Other Popular Vegetables
While some vegetables lend themselves to elaborate carving, many popular crudité items look fantastic with minimal effort. Sometimes, a simple, thoughtful cut or a natural presentation is all it takes to make them shine. Embrace their inherent beauty and let their colors and textures speak for themselves. Here are some easy ideas for enhancing other common vegetables:
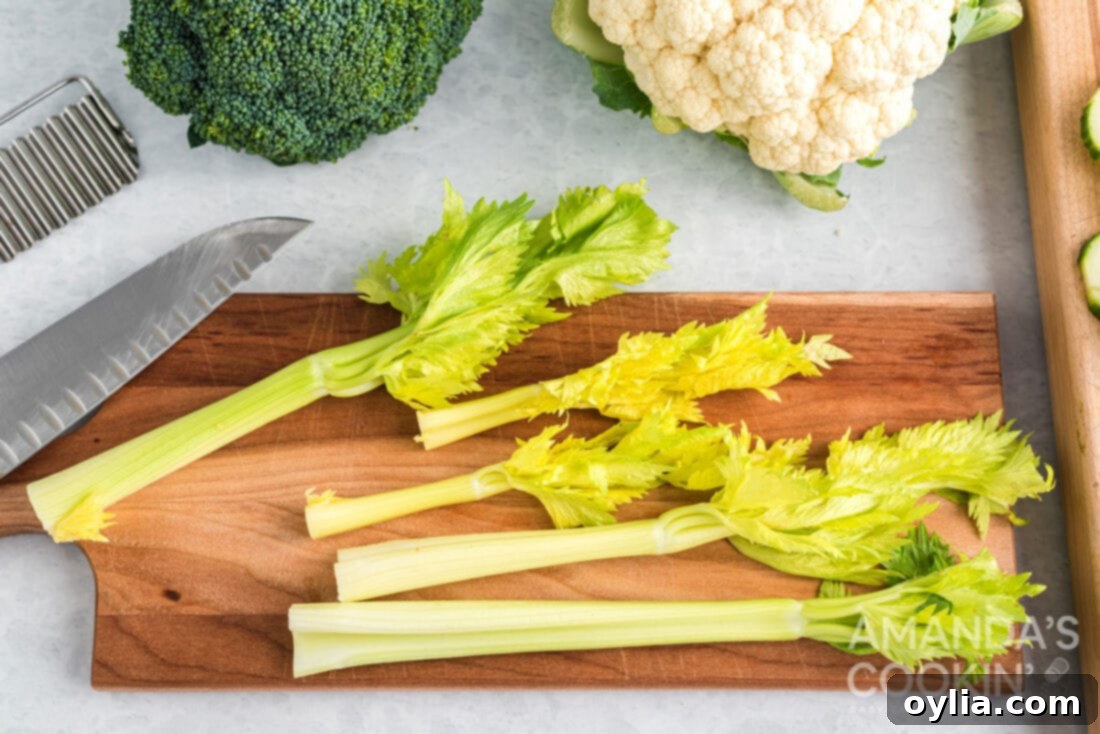
- Celery: For a wonderfully fresh and natural aesthetic, consider leaving the leafy green ends intact when you cut celery stalks. This small detail adds a beautiful burst of green and a charming rustic appeal to your platter. Simply wash the stalks thoroughly and cut them into your desired lengths, typically 3-4 inches.
- Scallions (Green Onions): These slender, vibrant green onions contribute a mild, zesty onion flavor and a striking linear element to your display. To prepare them, just trim off the root ends and the very tips of the green stalks. You can arrange them whole or cut them into more manageable two-inch pieces. Their natural elegance means they are beautiful on their own and require no further decoration.
- Bell Peppers: Sliced bell peppers are a staple for a reason! Available in a rainbow of colors—red, yellow, orange, and green—they instantly create a kaleidoscope of vibrancy and offer a satisfying, sweet crunch. Cut them into long, even strips or smaller, bite-sized pieces. No special carving is needed; their vivid hues and crisp texture are appealing enough.
- Cherry Tomatoes: These small, juicy bursts of flavor are absolutely lovely when served whole. For an extra touch of creativity, however, you can slice them in half, gently scoop out the seeds, and fill them with a savory mixture. Think a dollop of tuna fish salad, a herbed cream cheese, a pesto drizzle, or even a tiny amount of hummus for a sophisticated, bite-sized gourmet treat.
- Broccoli and Cauliflower Florets: These cruciferous vegetables are packed with nutrients and offer wonderful texture. Simply break or cut them into bite-sized florets. Their natural, intricate shapes are already appealing and perfect for dipping into your favorite sauces. They truly need no dressing up to make a statement.
- Sliced Hard-Boiled Eggs: While not a vegetable, hard-boiled eggs are a fantastic addition to a crudité platter, offering a protein-rich element and a contrasting pale yellow and white color. Slice them into neat rounds or halves and arrange them beautifully among your vegetables for an extra touch of elegance and substance, providing a more filling option.
Creative Veggie Holders: Edible Containers for Your Crudités
Elevating your vegetable display isn’t just about how you cut the vegetables; it’s also about how you present them. Creative, edible holders can add an extra layer of charm, color, and functionality to your table, often reducing the need for extra serving dishes. They’re a fantastic way to make your spread even more unique and appealing.
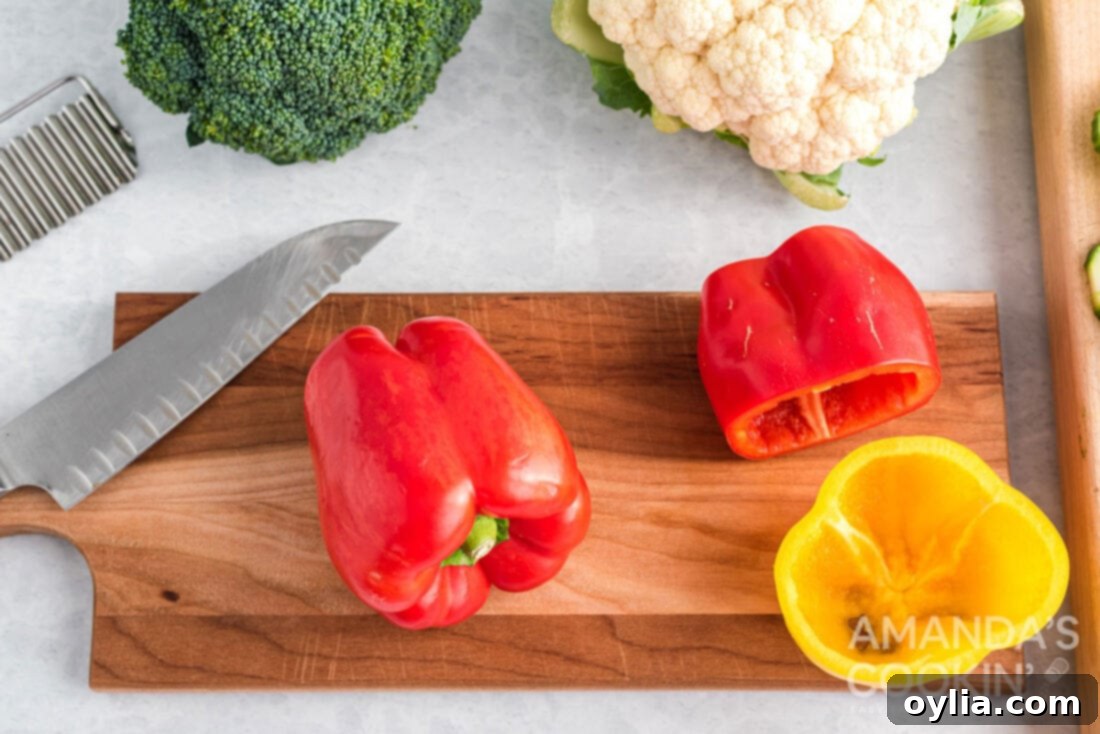
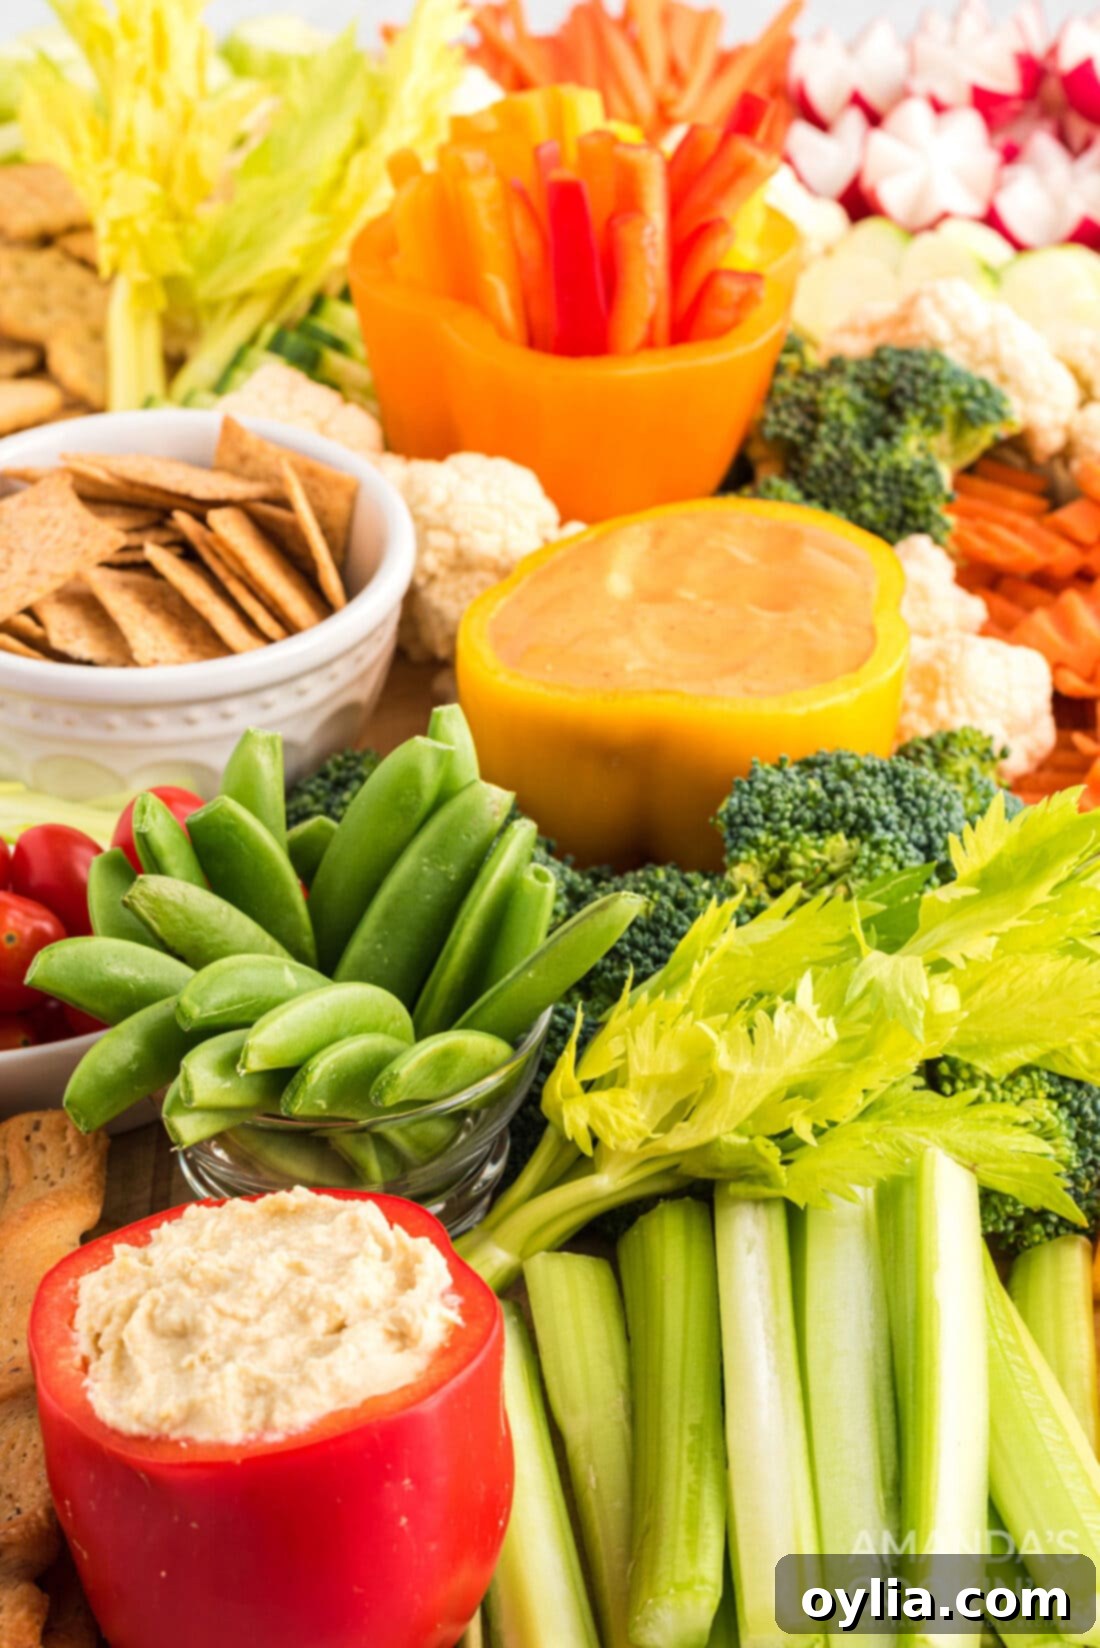
- Bell Pepper Bowls: Yellow, red, or green bell peppers are not only delicious but also make fantastic, vibrant, and completely edible containers for your other crudités or dips. To create these natural bowls, simply cut open the top of a bell pepper, remove all the seeds and white membranes from the inside, and give it a quick rinse.
- Filling Your Edible Holders: Once your bell pepper bowls are ready, the fun begins! Fill these colorful “vessels” with an assortment of sliced vegetables. Consider using bell pepper strips of a contrasting color, crunchy celery sticks, slender carrot spears, crisp breadsticks, or even a creamy dip. The contrasting colors and textures inside the pepper create an incredibly eye-catching display. The possibilities for fillings are truly endless – get creative with your favorite healthy combinations!
- Other Edible Vessels: Don’t limit yourself to bell peppers! For a rustic touch, especially for fall gatherings, consider using small, hollowed-out cabbages or even mini pumpkins as unique serving containers. A large, firm tomato can also be carefully scooped out to hold a smaller portion of dip. These edible containers add an organic, charming element that your guests will surely appreciate.
The Art of Arranging: Tips for a Visually Stunning Crudité Platter
Once your vegetables are beautifully prepared and cut, the final step in creating a truly impressive display is the art of arrangement. Think of your platter as a blank canvas waiting to be filled with vibrant colors and diverse textures. Start with a large, attractive serving platter, a rustic wooden board, or even a clean baking sheet lined with parchment paper. Begin by placing your central dip bowls first; these often serve as anchors for the entire display. Then, fan out your colorful vegetables around them, either grouping similar items together for a clean look or creating contrasting color blocks for a more dynamic visual. Use height and texture to add interest – stand up carrot and celery sticks in small, clear glasses, or arrange delicate radish flowers like blooming jewels. Don’t be afraid to mix and match shapes and sizes to create visual variety. The ultimate goal is to craft an abundant display that looks both bountiful and thoughtfully organized. A well-arranged crudité platter isn’t just food; it’s an edible centerpiece that elevates the entire dining experience and makes healthy eating irresistible.
As you can see, creating a gorgeous, healthy, and edible display isn’t difficult at all. With these simple tips, a few basic tools, and a little bit of creativity, you can transform ordinary vegetables into extraordinary culinary delights. The elegant French name for such a beautiful vegetable assortment is a “crudité platter,” and it perfectly encapsulates the sophisticated yet approachable nature of these fresh, vibrant dishes. So, go ahead – impress your guests this holiday season, at your next family gathering, or even just for a healthy snack with a platter that’s as delightful to look at as it is to eat. It’s a wonderful, simple way to offer healthy options that everyone will genuinely enjoy!
Perfect Pairings: Delicious Dip Recipes for Your Decorative Veggies
No decorative vegetable platter is truly complete without a selection of tantalizing dips to complement the fresh flavors. A great dip can elevate the entire crudité experience, offering a creamy, tangy, or savory contrast to the crisp vegetables. Here are some fantastic recipes that will perfectly pair with your beautifully prepared produce:
- Buttermilk Ranch Dressing: A timeless, creamy, and tangy classic that is universally loved and pairs wonderfully with almost any vegetable.
- Creamy Dill Dressing: Light, fresh, and subtly herby, this dip adds a refreshing zest, making it an excellent match for cucumbers, radishes, and bell peppers.
- How to Make Hummus: A healthy, protein-packed, and wonderfully savory choice, ideal for a Mediterranean-inspired spread and a staple for any veggie platter.
- Cranberry Cheese Ball: For a festive touch, especially during the holidays, this unique sweet and savory option offers a surprising and delightful flavor profile.
- Baba Ganoush Hummus: This smoky, rich, and creamy dip brings an exotic and deeply flavorful profile, fantastic with carrots and bell peppers.
- Creamy Onion Dip: A perennial crowd-pleaser, this dip is irresistibly smooth and bursts with savory onion flavor – a guaranteed hit.
- Gouda & Sun-Dried Tomato Cheese Ball: A sophisticated and flavorful choice, offering a burst of savory, umami notes with a hint of sweetness from the sun-dried tomatoes.
- Skinny French Onion Dip: Enjoy all the classic, comforting flavor of French onion dip but with a lighter, healthier twist.
I love to bake and cook and share my kitchen experience with all of you! Remembering to come back each day can be tough, that’s why I offer a convenient newsletter every time a new recipe posts. Simply subscribe and start receiving your free daily recipes!

How to Create Decorative Vegetables for Any Occasion
For more detailed tips, additional ideas, and serving suggestions, be sure to scroll up and read the full article!
Print It
Pin It
Rate It
Save ItSaved!
Ingredients for Your Decorative Platter
- Fresh Cucumbers (for striped, cored, and half-moon slices)
- Crisp Carrots (for crinkle and julienne cuts)
- Medium Zucchini (for heart shapes)
- Bright Red Radishes (for edible flowers)
- Assorted Bell Peppers (for slices and edible holders)
- Celery Stalks (with leaves on for decorative touch)
- Optional: Cherry Tomatoes, Broccoli Florets, Cauliflower Florets, Scallions, Hard-boiled Eggs
Essential Tools You’ll Need
-
Potato peeler
-
Paring knife
-
Crinkle cutter
-
Small Heart-shaped Cookie Cutter (optional)
Step-by-Step Instructions for Decorative Vegetables
Cucumbers: Striped & Cored
-
For Striped Rounds: Wash a cucumber and cut off both ends. Using a potato peeler, peel one strip, leave the next strip of skin intact, then peel again, creating a striped pattern down the cucumber. Slice into 1/4-inch thick rounds.
-
For Cored Half-Moons or Rings: Peel an entire cucumber. Slice it in half lengthwise and gently scoop out the seeds with a spoon (loosen with a knife if needed). Slice these halves into 1/4-inch thick half-moons. Alternatively, cut the peeled cucumber crosswise, core out the center to make “donut holes,” then slice.
Carrots: Crinkle & Julienne
-
For Crinkle Cuts: Peel carrots, trim ends, and cut in half lengthwise. Use a crinkle cutter to press through the carrot halves, creating wavy, attractive pieces.
-
For Julienne Strips: Peel carrots and trim ends. Slice into thin, uniform strips, approximately 1/4″ thick, using a sharp knife or julienne peeler.
Zucchini Hearts
-
Wash zucchini, cut off ends, and slice into rounds. Use a small heart-shaped cookie cutter or a sharp knife to cut each round into a heart shape.
Radish Flowers
-
Wash radishes and trim ends. With a paring knife, make vertical zigzag cuts halfway through the radish, all the way around, until the cuts meet. Gently separate the halves and place in iced water for 30 minutes to unfurl into flowers.
Other Decorative Vegetable Ideas
-
Celery: Leave leafy ends on for a natural look. Scallions & Bell Peppers: Slice as desired; their natural colors are vibrant. Cherry Tomatoes: Serve whole, or halve, scoop out seeds, and fill with tuna salad or cream cheese for a gourmet bite. Broccoli & Cauliflower: Break into bite-sized florets. Boiled Eggs: Slice and arrange for added protein and color.
DIY Veggie Holders (Bell Peppers)
-
Cut off the top of a bell pepper, clean out seeds and membranes. Fill with sliced vegetables (e.g., contrasting bell peppers, celery, carrot spears) or breadsticks to create an attractive, edible serving container.
The recipes on this blog are tested with a conventional gas oven and gas stovetop. It’s important to note that some ovens, especially as they age, can cook and bake inconsistently. Using an inexpensive oven thermometer can assure you that your oven is truly heating to the proper temperature. If you use a toaster oven or countertop oven, please keep in mind that they may not distribute heat the same as a conventional full sized oven and you may need to adjust your cooking/baking times. In the case of recipes made with a pressure cooker, air fryer, slow cooker, or other appliance, a link to the appliances we use is listed within each respective recipe. For baking recipes where measurements are given by weight, please note that results may not be the same if cups are used instead, and we can’t guarantee success with that method.
