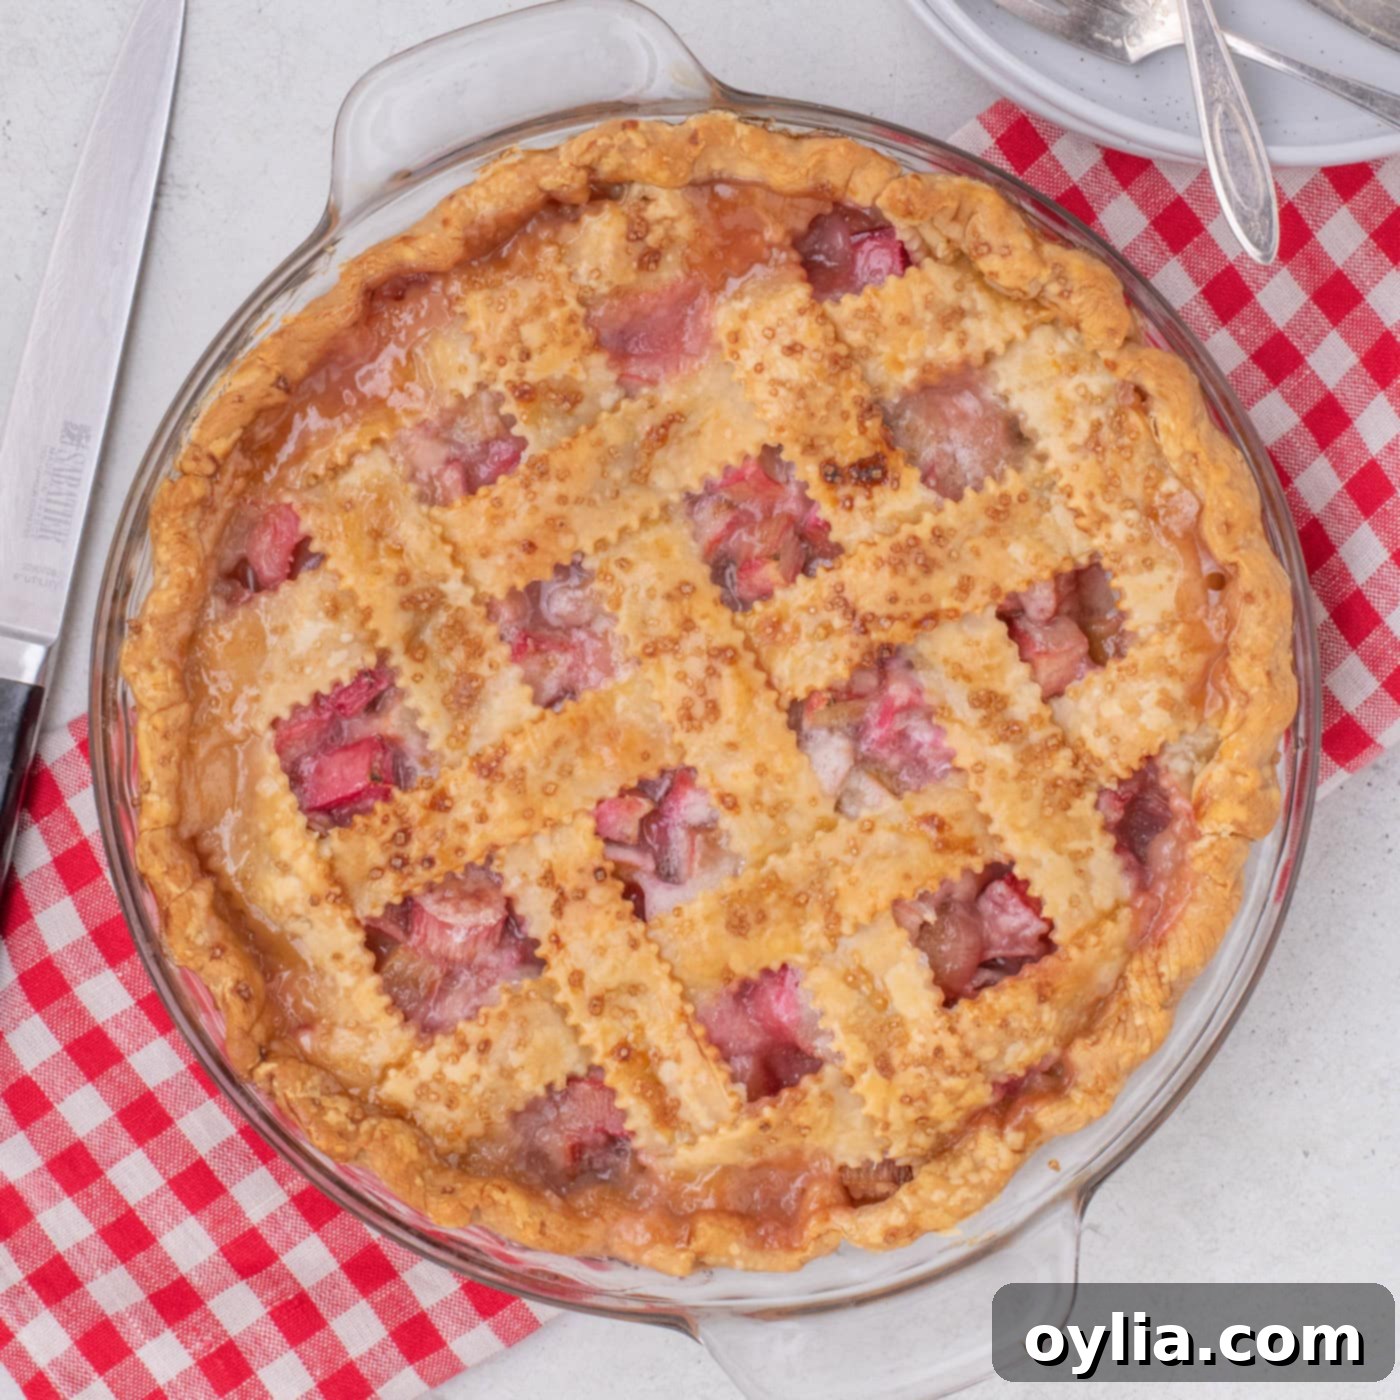
Classic Sweet and Tart Rhubarb Pie: Your Go-To Recipe for a Flaky, Flavorful Dessert
Indulge in the delightful flavors of spring with this classic homemade rhubarb pie recipe! This cherished dessert offers an exquisite balance of sweet and tart, with a vibrant rhubarb filling encased in a perfectly flaky, buttery pie crust. Crowned with an elegant, sugar-studded lattice top, each slice promises a burst of sunshine. Whether you’re gathering fresh rhubarb from your garden or picking up vibrant stalks from the market, this recipe makes creating a show-stopping dessert easier than you think. Get ready to bake a truly memorable rhubarb pie that will be the star of any table.
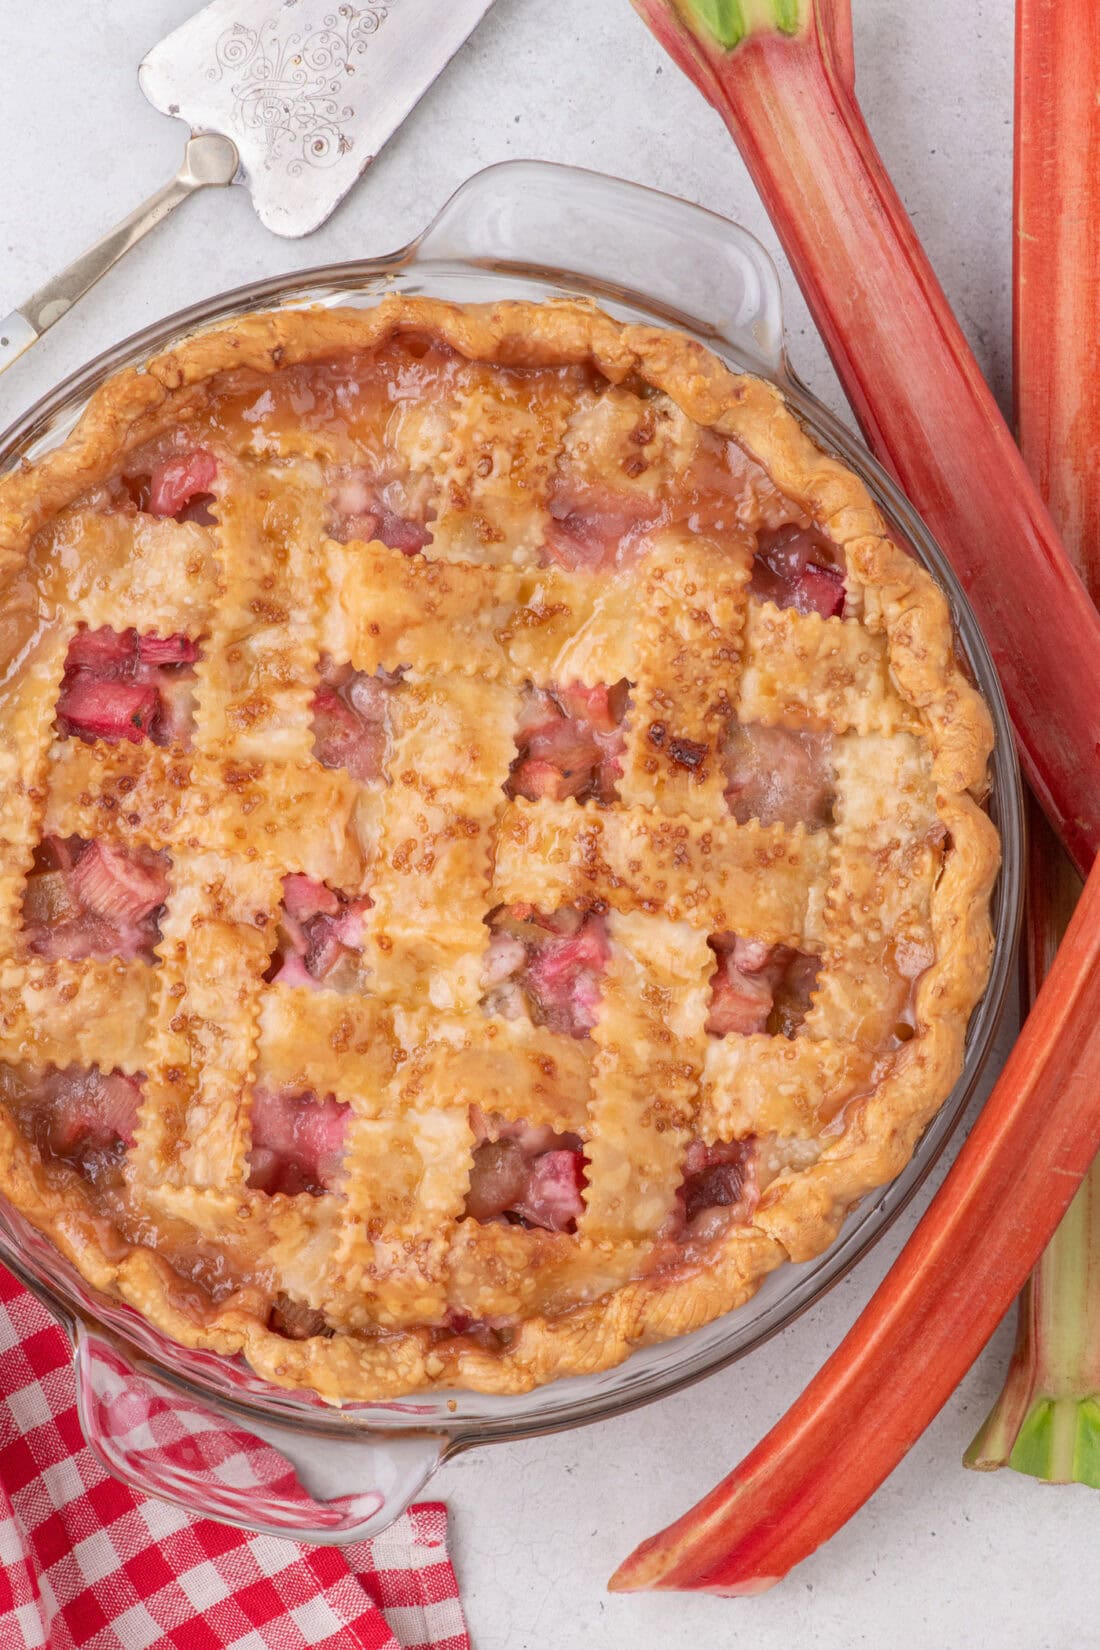
Why This Easy Rhubarb Pie Recipe Is a Must-Try
This recipe truly shines as it beautifully showcases the unique flavor of rhubarb, often considered the herald of spring. It’s a remarkably easy-to-make dessert that delivers an utterly delicious experience. Imagine a golden, buttery crust encasing a luscious filling that perfectly balances rhubarb’s natural tartness with just the right amount of sweetness. As it bakes, the filling gently bubbles, transforming into a beautiful, golden-brown masterpiece that’s as pleasing to the eye as it is to the palate.
One of the best aspects of this homemade rhubarb pie is its accessibility. You don’t need exotic ingredients or complicated techniques. With convenient store-bought pie crusts, fresh, seasonal rhubarb, and a few everyday pantry staples, this delightful pie comes together quickly and effortlessly. This isn’t about fancy chef-level skills; it’s about wholesome ingredients, a dash of passion, and a generous cup of sugar creating pure comfort food.
If you’ve found your way to this page, chances are you’re already a fan of this incredible “pie plant.” And while our award-winning berry rhubarb crumble offers a fantastic alternative for using up your fresh rhubarb bounty, there’s something undeniably special about a classic rhubarb pie. It’s often the first thing that comes to mind when those beautiful red and green stalks emerge in the garden each spring. The versatility of rhubarb means there’s always room to enjoy both a comforting crumble and a traditional pie when the season is in full swing!
Essential Ingredients for Your Delicious Rhubarb Pie
Before you dive into baking this incredible rhubarb pie, let’s gather all the necessary ingredients. Most of these are likely already in your pantry or easily found at your local grocery store, ensuring a smooth and enjoyable baking process. For precise measurements and detailed instructions, remember to check the printable recipe card at the end of this post.
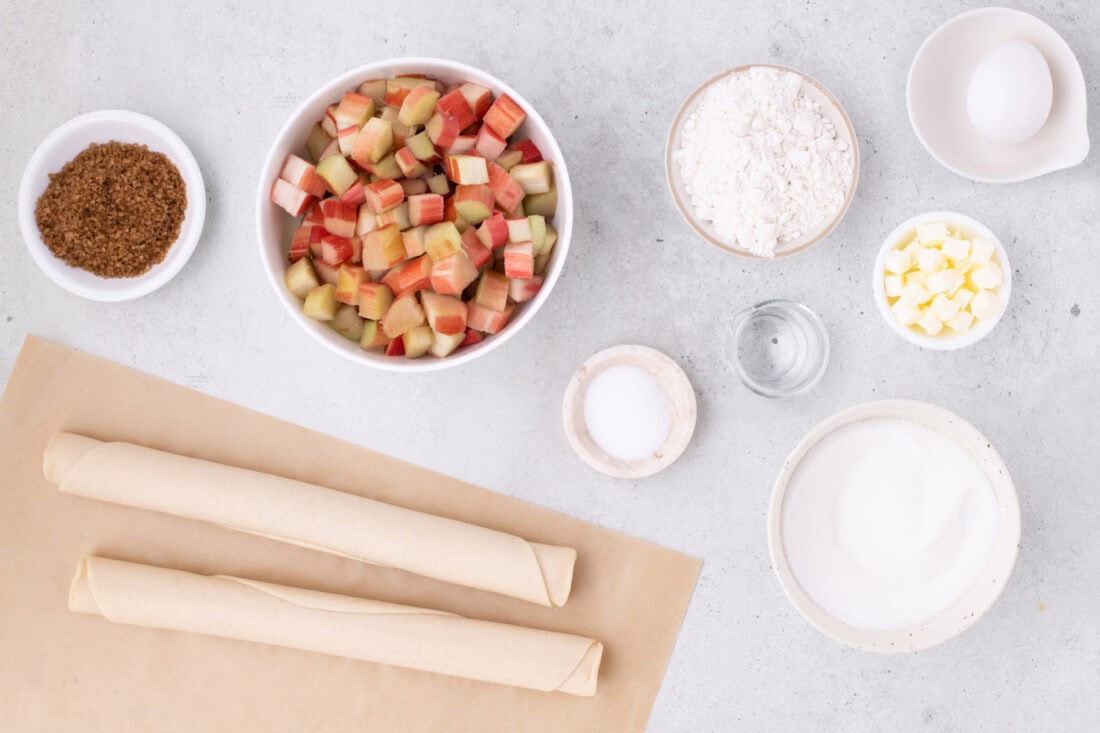
Key Ingredients & Expert Substitution Tips for Your Rhubarb Pie
Crafting the perfect rhubarb pie begins with understanding your ingredients. Here’s a closer look at what you’ll need and how to make the best choices for a truly exceptional dessert.
- RHUBARB: Surprisingly, rhubarb is botanically classified as a vegetable, though it’s typically used in sweet applications like a fruit. Its intensely tart flavor makes it a perfect companion for sugar, which transforms it into a delightful sweet-and-sour filling. When harvesting from your garden, wait until the stalks are at least 10 inches long for optimal flavor and texture. To harvest, gently twist and pull the stalk near the base; avoid cutting, as this can damage the plant. If purchasing from a grocery store or farmer’s market, select firm, crisp stalks that are free from soft spots or discoloration. Both red and green varieties work beautifully; redder stalks often indicate a sweeter flavor and more vibrant color in the final pie, but green rhubarb is equally delicious.
- PIE CRUST: For ultimate convenience and a quicker baking process, this recipe calls for store-bought pie crusts. They provide a reliable, flaky foundation without the extra effort of scratch-making dough. However, if you’re a seasoned baker or simply prefer the satisfaction of homemade, we’ve got you covered! You can learn how to make a perfect flaky pie crust from scratch, which can add an extra layer of rich, buttery flavor to your pie. Just ensure your homemade crust is well-chilled before assembly.
- GRANULATED SUGAR: This is the primary sweetener that balances rhubarb’s sharp tartness. Adjust the amount slightly based on the sweetness of your rhubarb and your personal preference. For a less sweet pie, you can slightly reduce the sugar, but be mindful not to overdo it, as rhubarb can be very sour.
- ALL-PURPOSE FLOUR: Flour acts as a thickening agent for the pie filling, preventing it from becoming too watery. It helps create that beautifully set, spoonable consistency you want in a pie. Cornstarch or tapioca flour can also be used as thickeners; generally, use half the amount of cornstarch or slightly less tapioca flour compared to all-purpose flour.
- KOSHER SALT: Just a touch of salt enhances all the other flavors, particularly the sweetness, bringing balance to the overall taste profile. Don’t skip it!
- UNSALTED BUTTER: Cubes of butter dotted over the filling melt as the pie bakes, creating a rich, flavorful sauce and contributing to a tender, luxurious texture in the filling. If using salted butter, reduce the added kosher salt slightly.
- EGG WASH (Egg + Water): This simple mixture is brushed over the lattice top before baking. It gives the crust a beautiful golden-brown sheen and helps the turbinado sugar adhere, creating a lovely sparkling finish.
- TURBINADO SUGAR: Also known as “sugar in the raw,” turbinado sugar has larger crystals than granulated sugar, providing a wonderful textural crunch and a glistening appearance on the finished crust. Regular granulated sugar can be used as a substitute if turbinado isn’t available, but you’ll miss out on that extra sparkle and crunch.
How to Make the Perfect Rhubarb Pie: Step-by-Step Instructions
These step-by-step photos and instructions are designed to help you visualize exactly how to make this delicious rhubarb pie. For the complete printable version of this recipe, including all measurements and instructions, simply jump to the recipe card at the bottom of the page.
- Prepare the Pie Crusts: Take your pre-packaged pie crusts out of the refrigerator. Allow them to sit at room temperature for about 10 minutes. This makes the dough more pliable and easier to roll without cracking, but still cold enough to maintain its flaky texture.
- Chop the Rhubarb: While the crusts are warming slightly, prepare your fresh rhubarb by trimming the ends and slicing the stalks into uniform ½-inch cubes. Set the chopped rhubarb aside in a medium bowl.
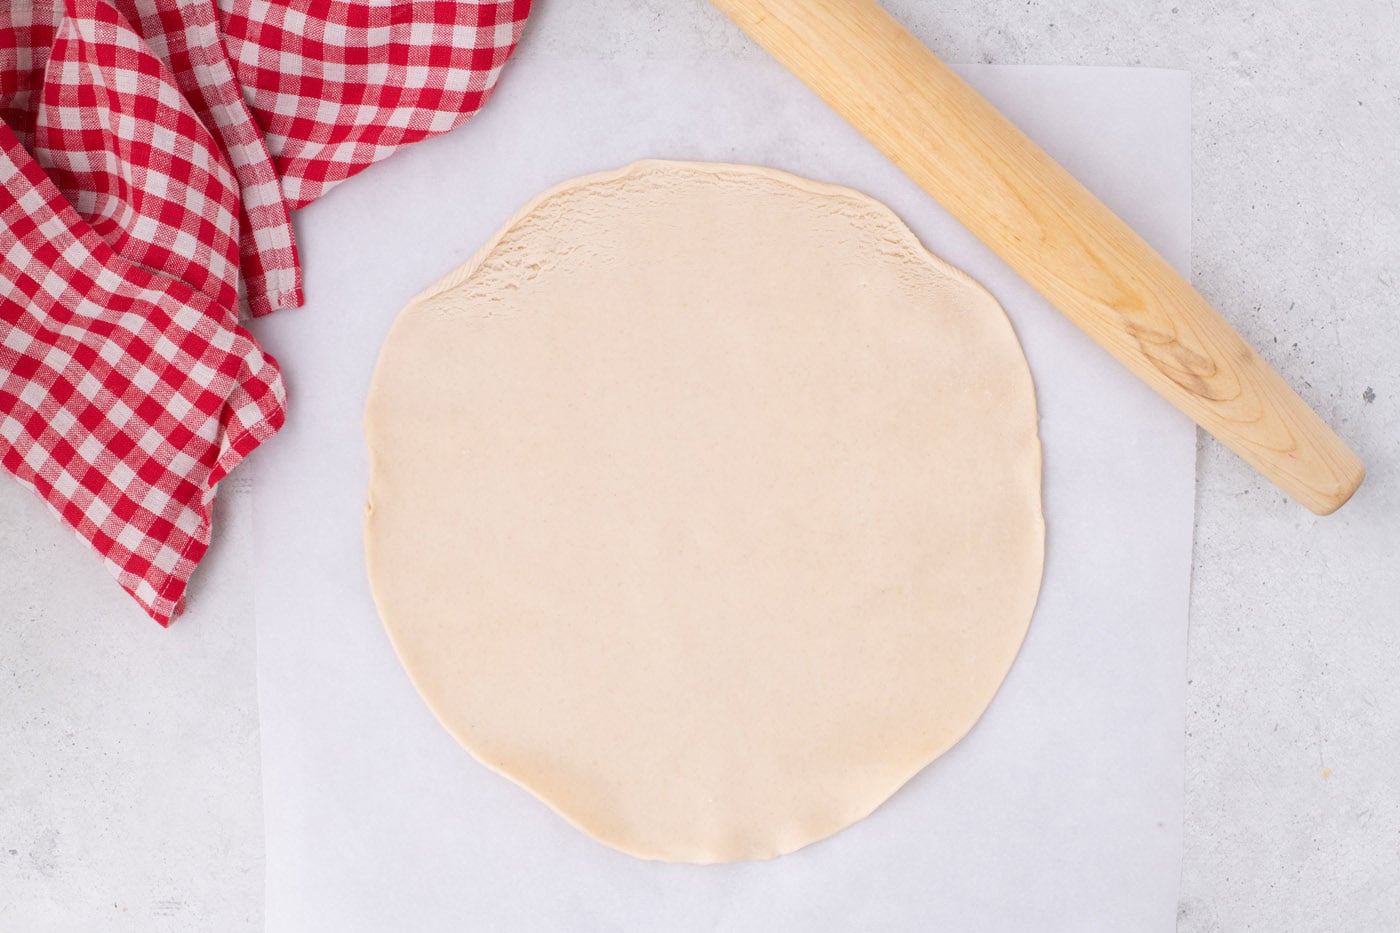
- Roll Out the Bottom Crust: On a surface lightly dusted with flour or covered with parchment paper, gently roll out one of your pie crusts. Aim for a diameter that is approximately 2 inches larger than your pie plate. For instance, if you’re using a 9 ½-inch pie plate, your rolled crust should measure about 11 ½ inches in diameter. This extra margin will ensure a nice overhang for sealing the lattice top later.
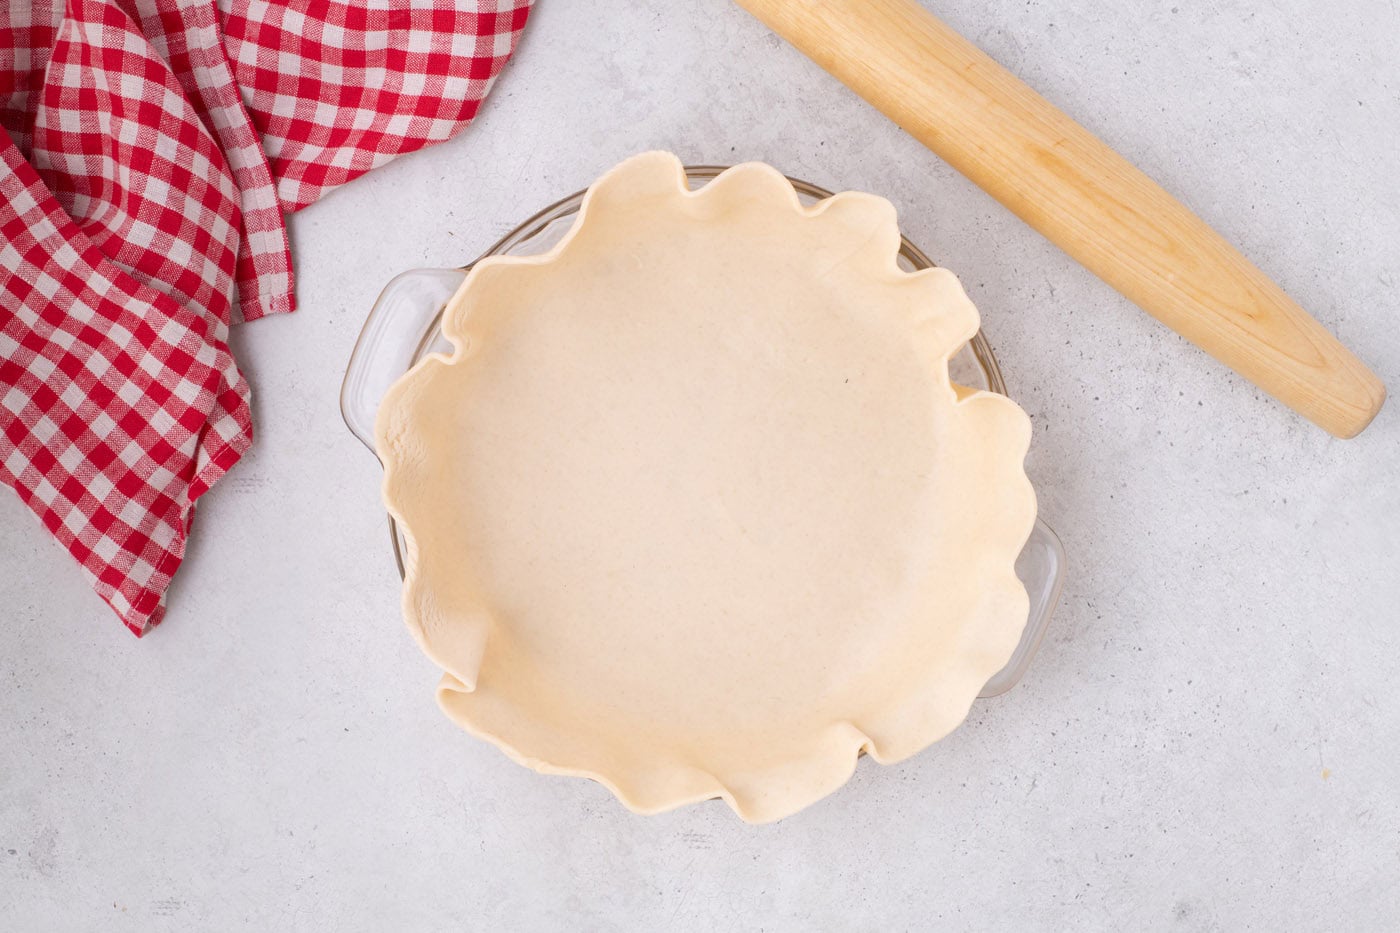
- Line the Pie Plate: Carefully drape the rolled pie crust over your rolling pin, then gently unroll it into your pie plate. Press the crust down lightly, ensuring it settles snugly into the bottom and sides of the plate without stretching it, which can cause shrinkage during baking.
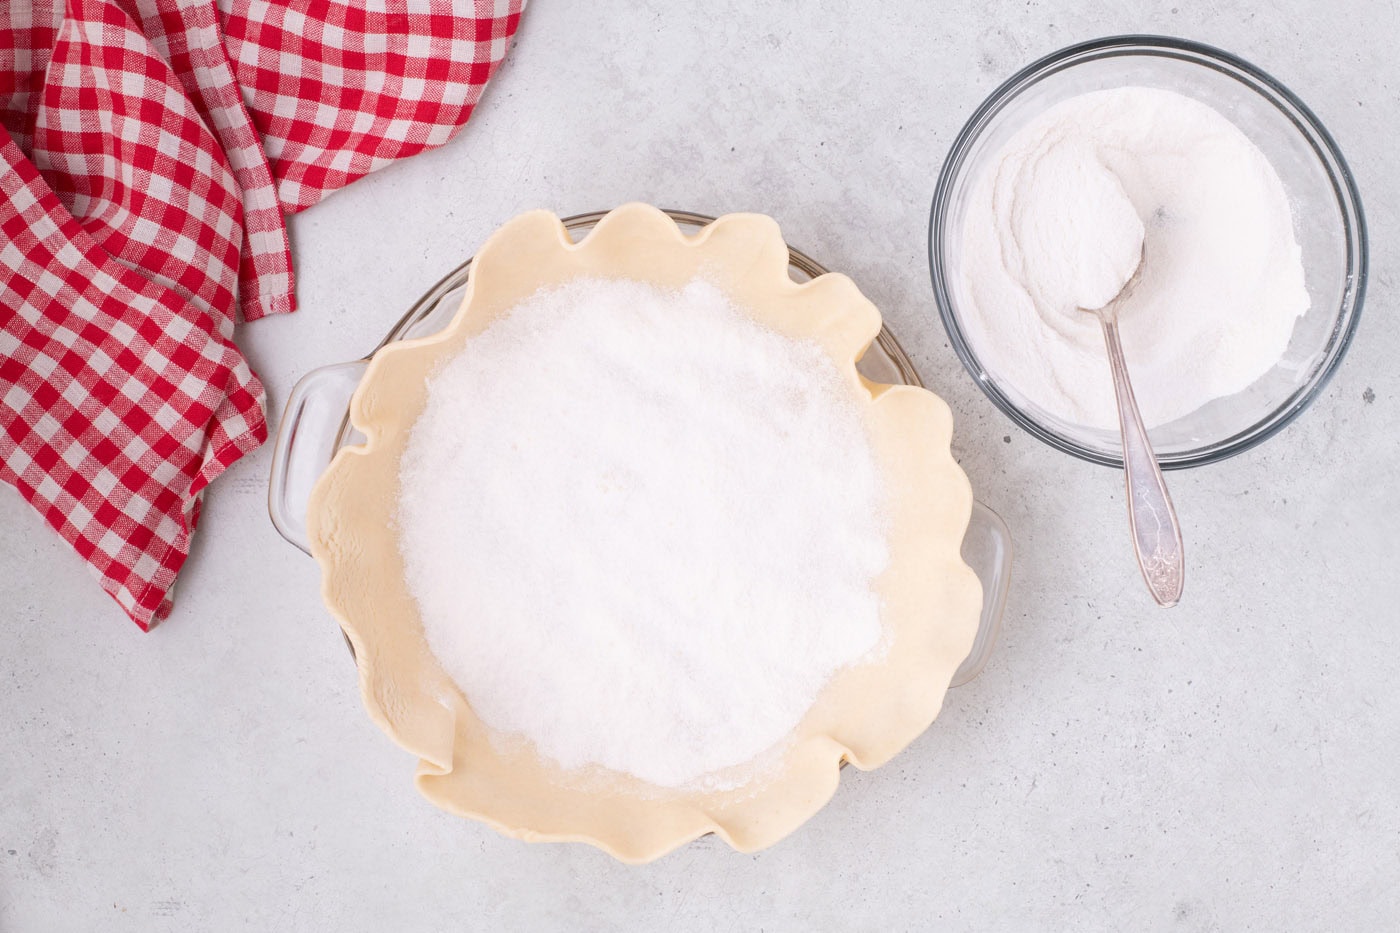
- Prepare the Sugar Mixture: In a small bowl, whisk together the granulated sugar, all-purpose flour, and kosher salt until well combined. This mixture will sweeten and thicken your rhubarb filling.
- Layer the Filling: Sprinkle ¼ cup of the prepared sugar mixture evenly over the bottom pie crust. This serves as an important barrier. Then, add half of your chopped rhubarb on top of this sugar layer.
EXPERT TIP – Adding a sprinkle of the sugar-flour mixture to the base of the pie crust creates a protective layer, helping to absorb moisture from the filling and prevent a dreaded ‘soggy bottom’ – ensuring your crust stays flaky and crisp!
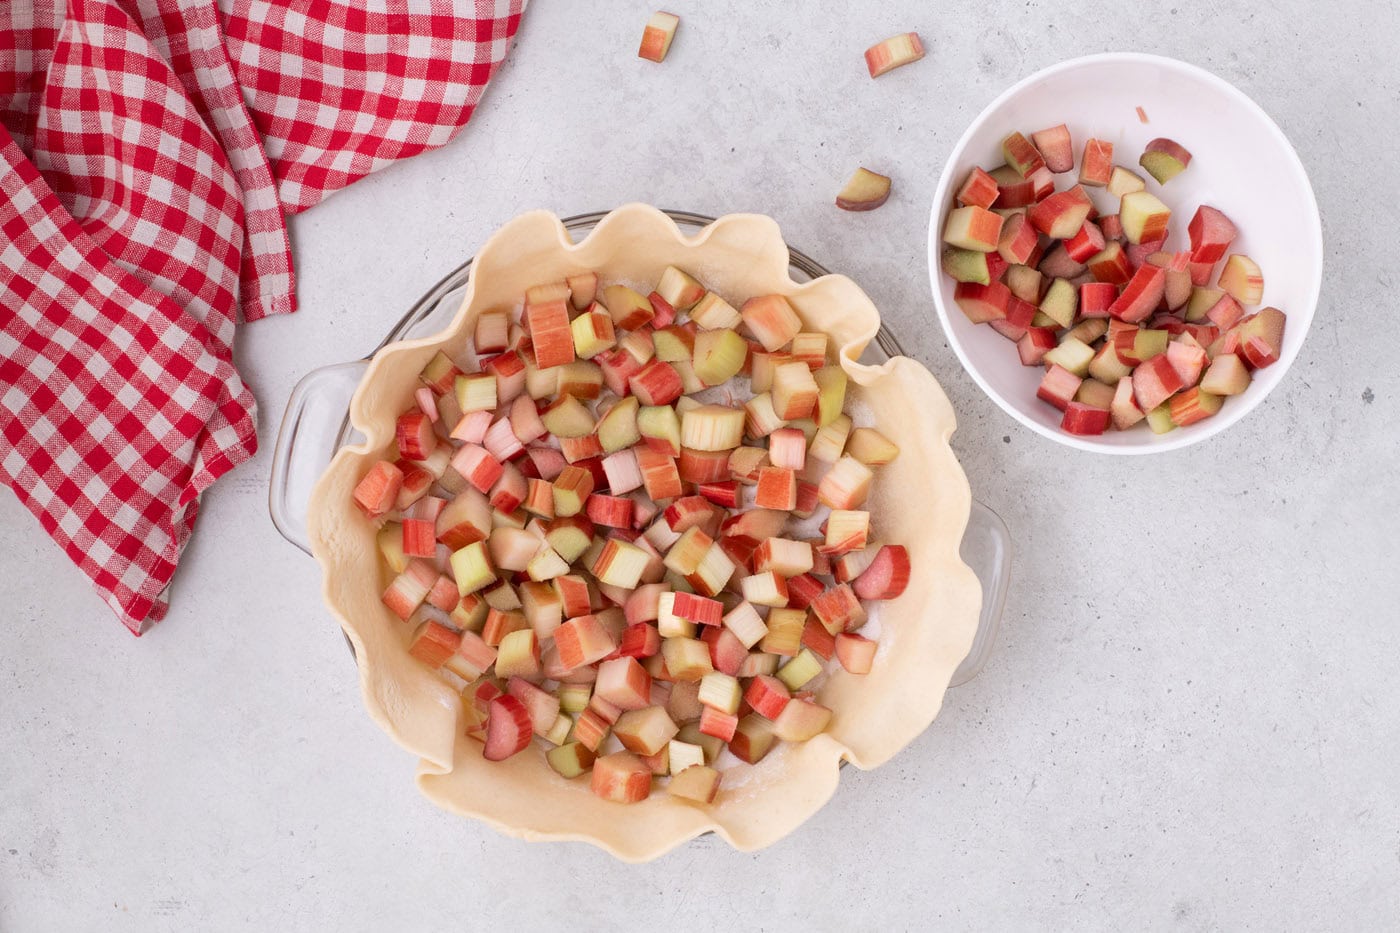
- Complete the Rhubarb Layer: Sprinkle an additional ½ cup of the sugar mixture over the rhubarb layer. Then, add the remaining chopped rhubarb, distributing it evenly across the pie plate.
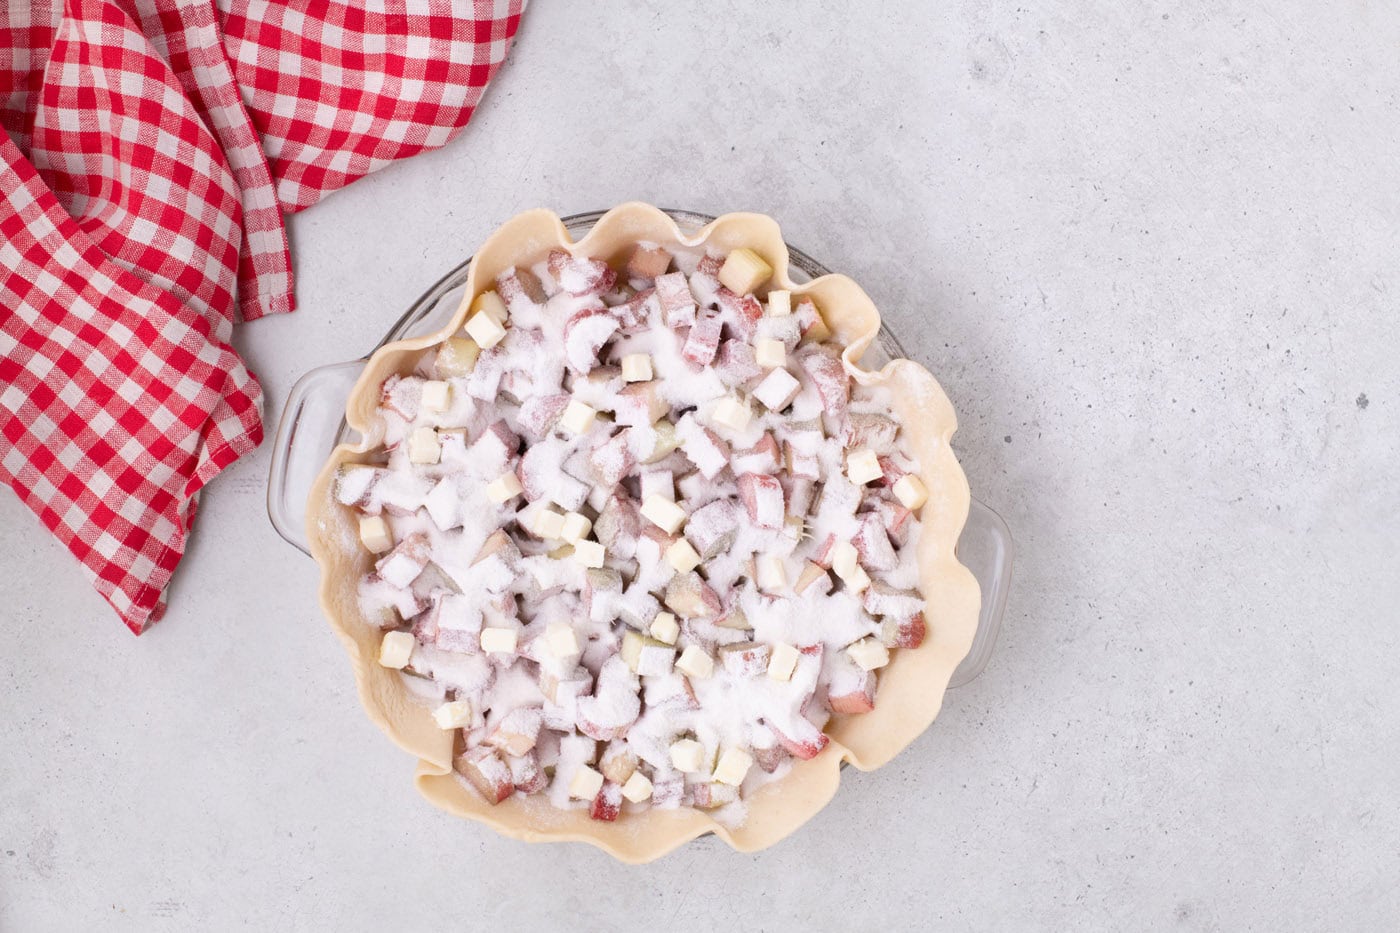
- Add Butter: Sprinkle the remaining sugar mixture over the rhubarb, then dot the surface with your cubed unsalted butter. These butter pieces will melt into the filling, adding richness and a luscious texture.
- Chill While Preparing Lattice: Place the assembled pie plate into the refrigerator. Keeping it chilled while you prepare the lattice top helps the crust maintain its shape and flakiness during baking.
Crafting the Perfect Lattice Top for Your Rhubarb Pie
A lattice top not only looks impressive but also allows steam to escape, preventing the crust from becoming soggy. Follow these steps for a beautiful woven design:
- Roll Out the Top Crust: Place your second pie crust on a parchment-lined or lightly floured surface. Roll it out slightly larger than the diameter of your pie plate, about 1 inch larger.
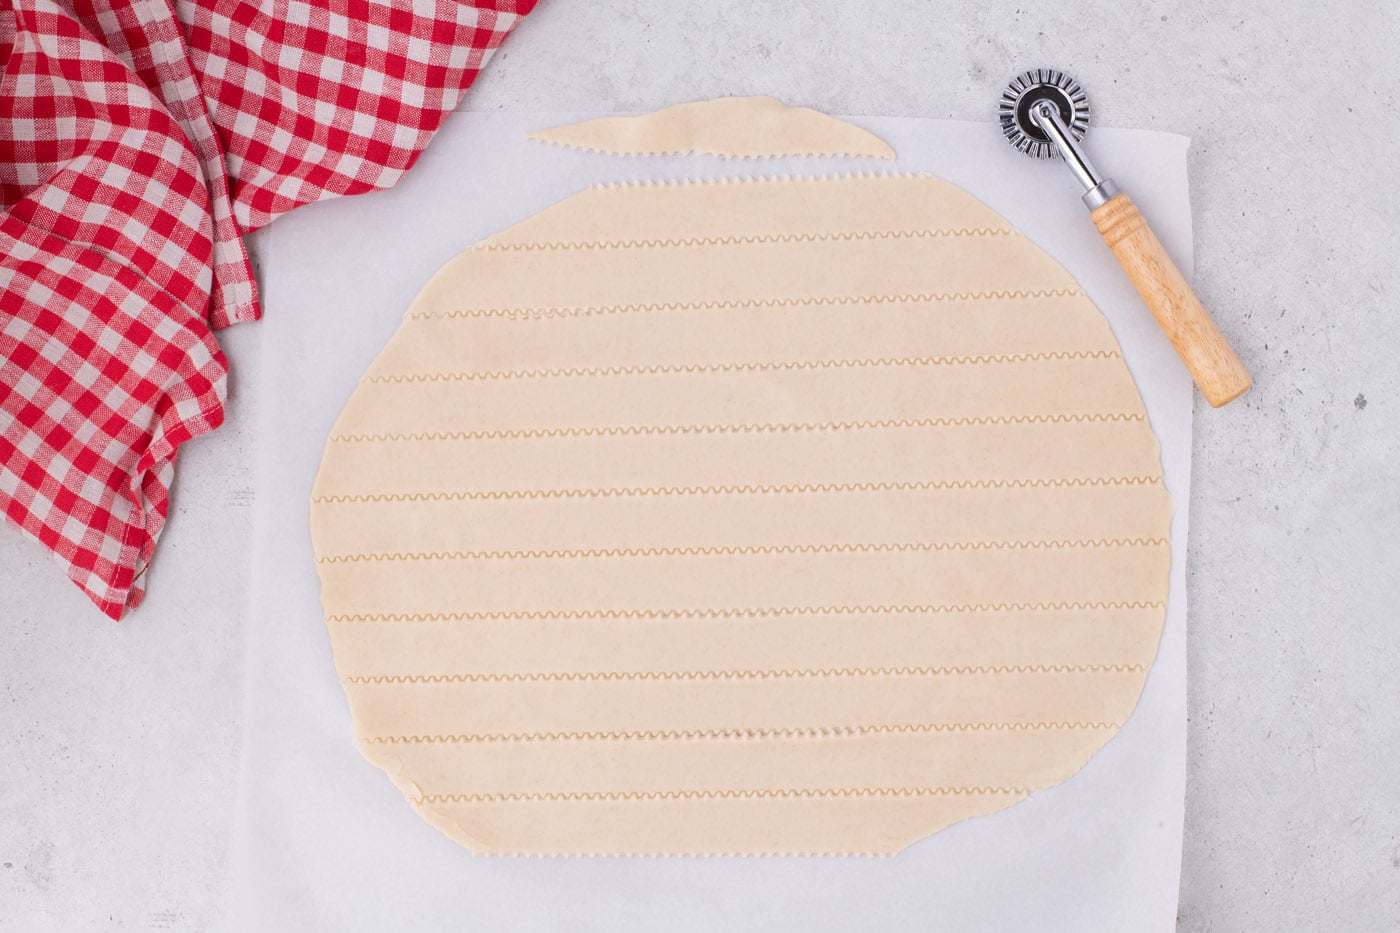
- Cut the Strips: Using a pastry cutter (or a sharp knife and a ruler for precision), measure and cut 10 uniform 1-inch-thick strips from the rolled dough.
- Start the Lattice Weave (Horizontal): Take five of these strips and lay them evenly spaced (approximately 1 ½ inches apart) over the rhubarb filling in your chilled pie, running them in one direction (e.g., horizontally).
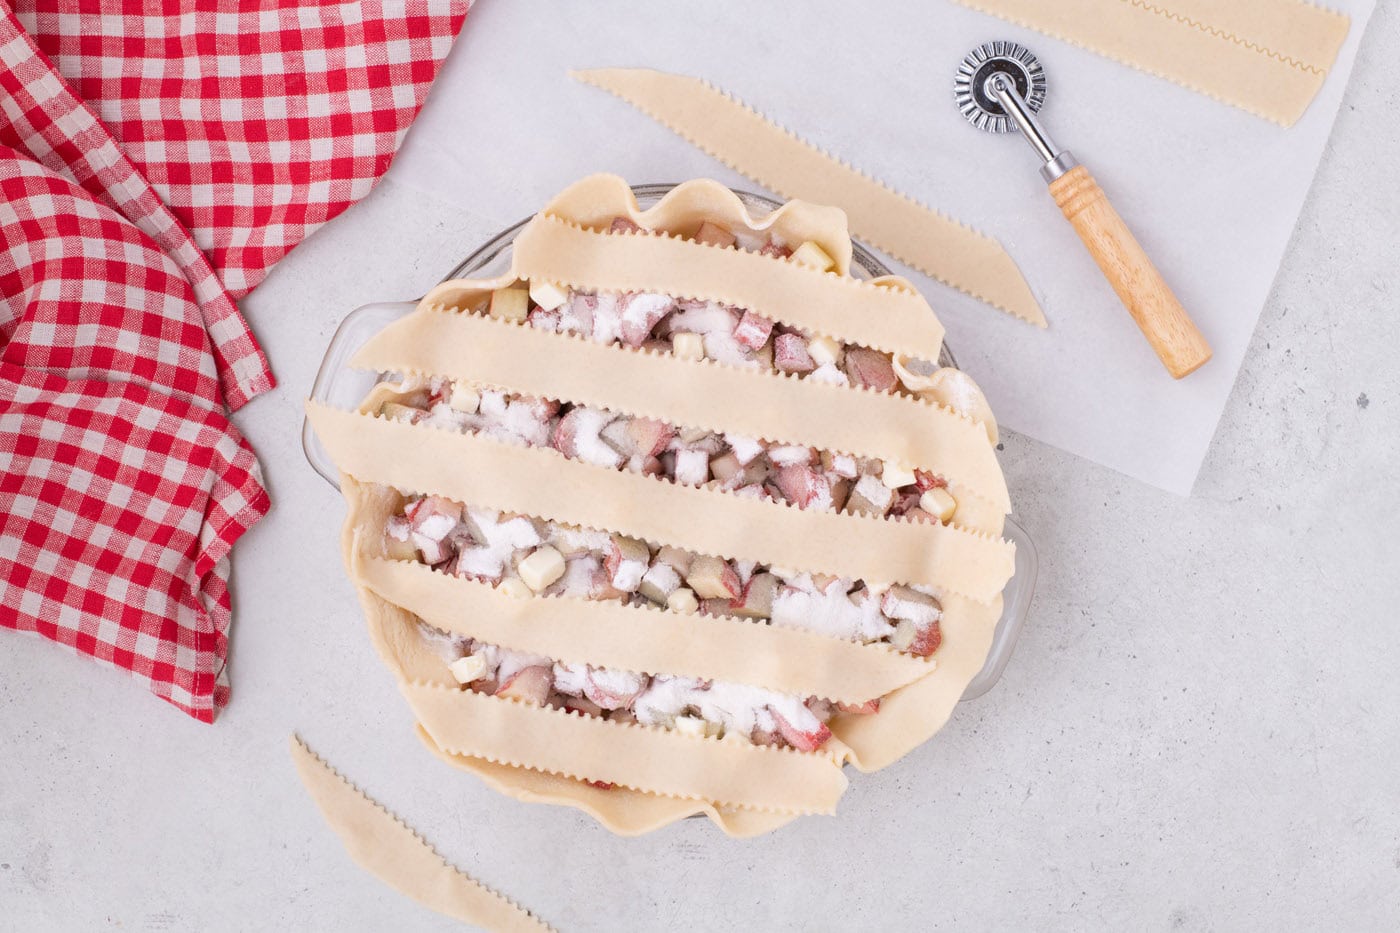
- Begin the Weave (Step 1): Fold back every other horizontal strip (e.g., strips 1, 3, and 5) by about halfway from the center towards the edge of the pie.
- Place First Vertical Strip: Take one of your remaining strips and lay it along the center of the pie, perpendicular to the folded-back strips. Once this strip is in place, unfold strips 1, 3, and 5 back over it, securing it into the weave.
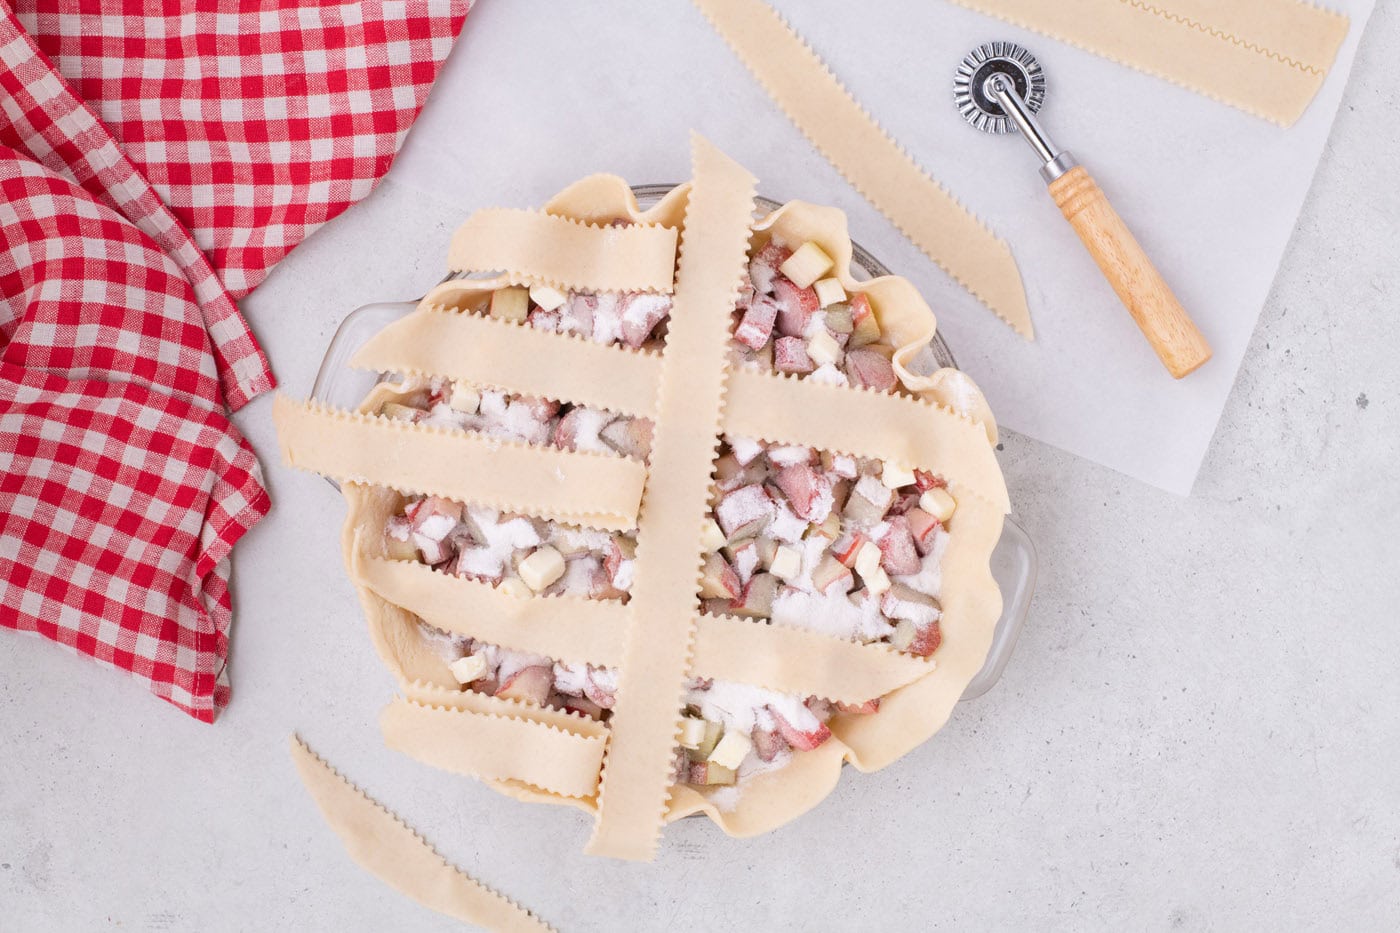
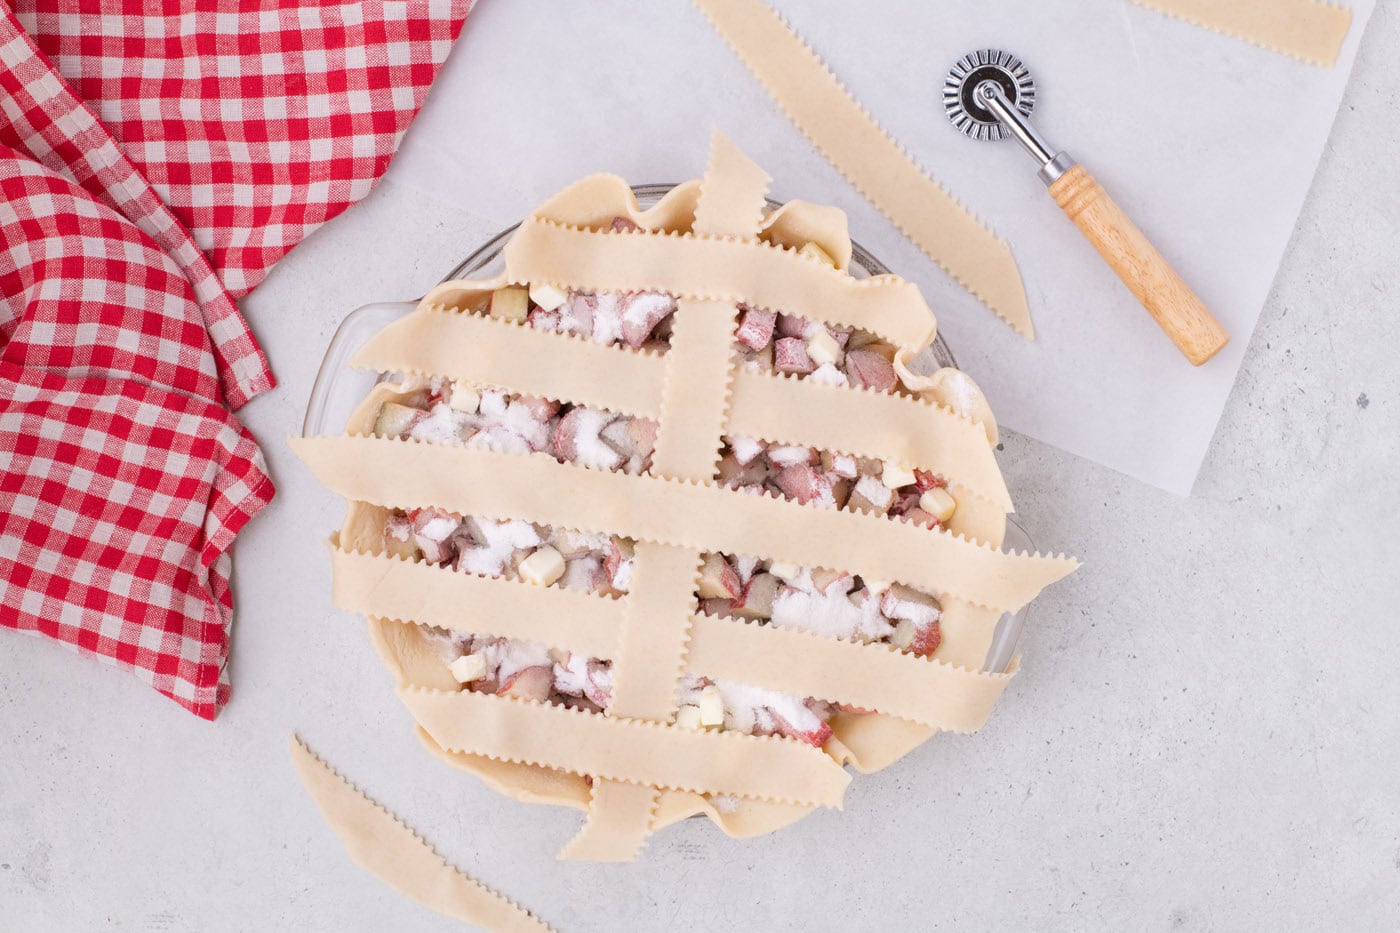
- Continue the Weave (Step 2): Now, fold back the *other* set of horizontal strips (e.g., strips 2 and 4) halfway from the center. Lay your second vertical strip about 1 ½ inches away from the first vertical strip. Unfold strips 2 and 4 back over this second vertical strip.
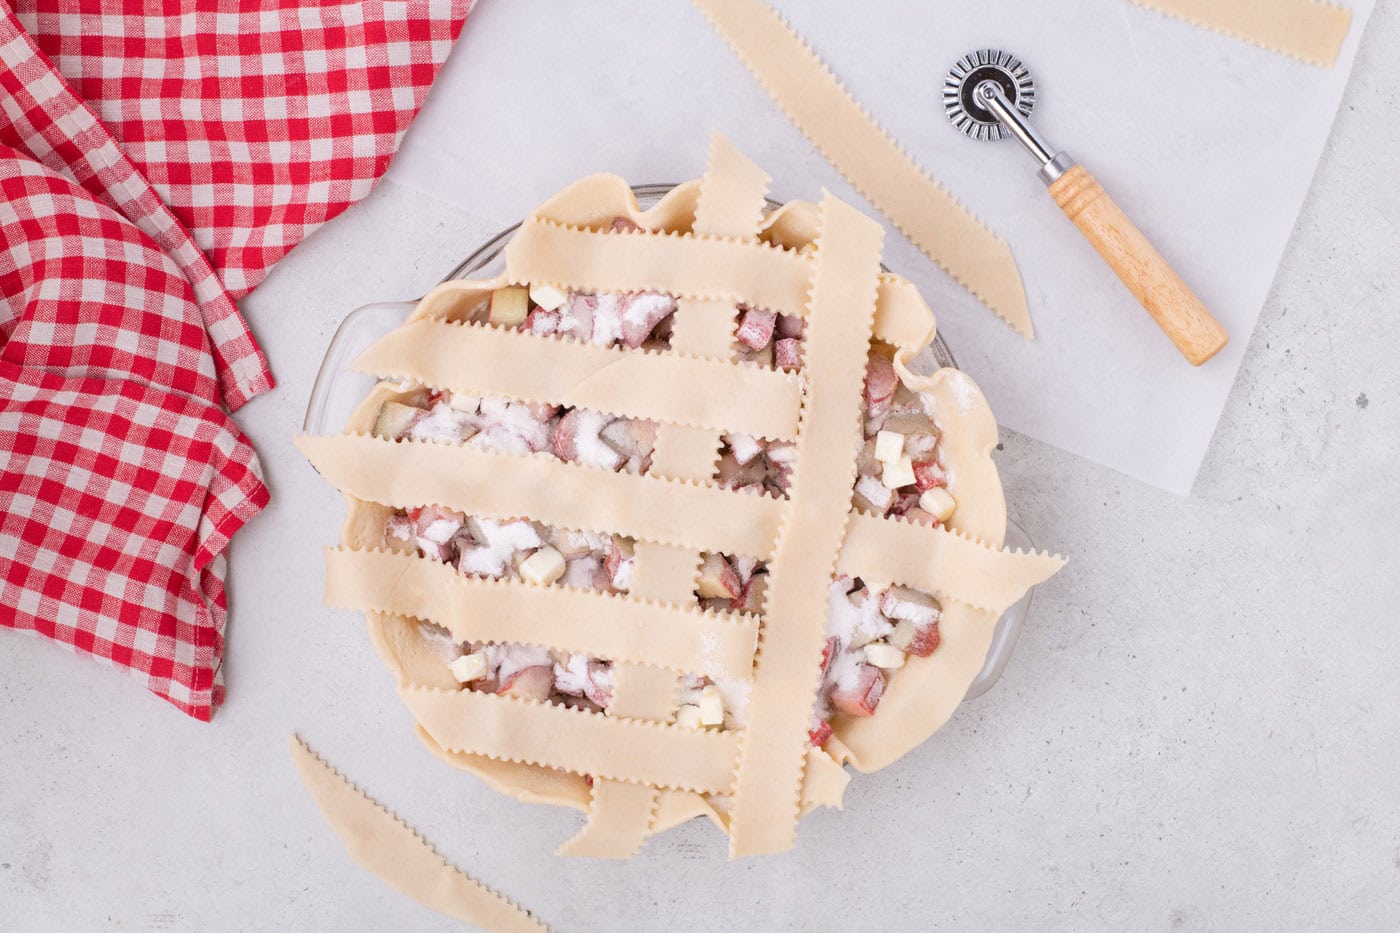
- Complete the Lattice: Repeat steps 13 and 14, alternating which horizontal strips you fold back, until all of your vertical strips are woven into place, creating a beautiful and even lattice pattern across your pie.
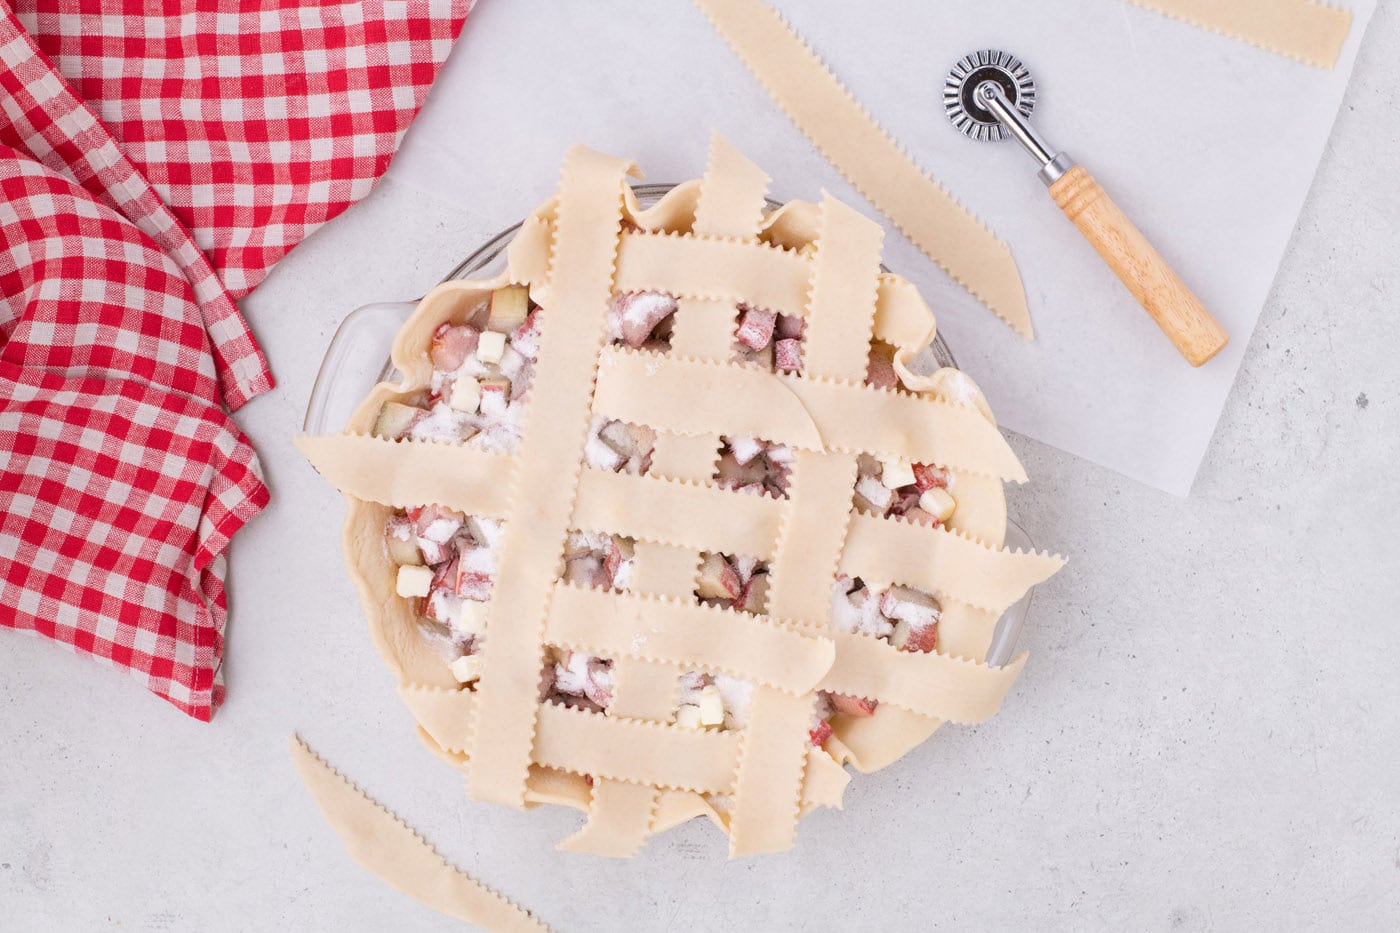
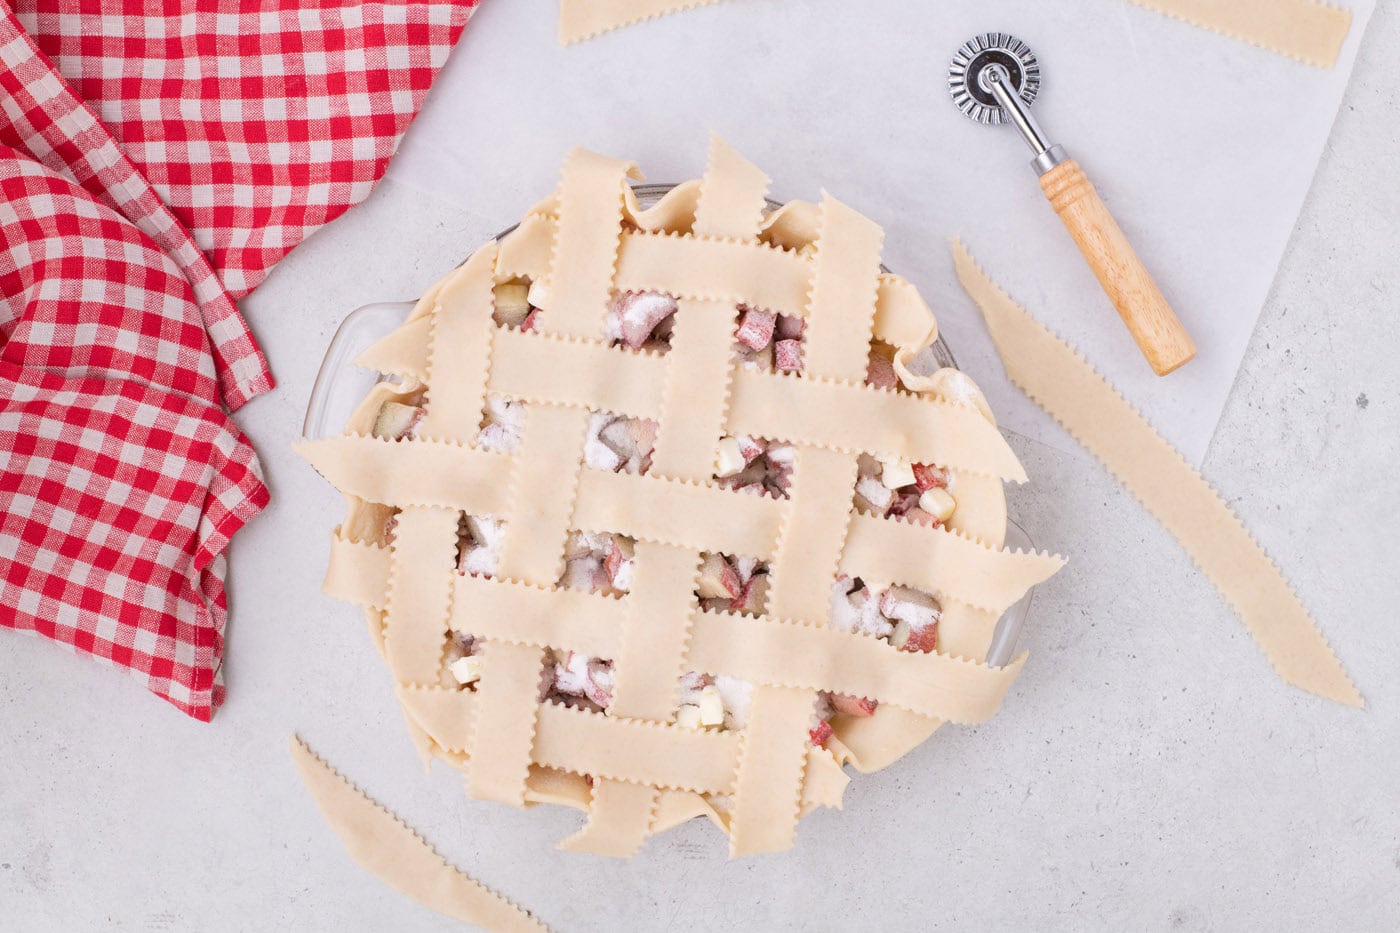
- Seal the Edges: Once the lattice is complete, trim any excess dough strips that hang over the edge of the pie plate. Then, gently fold the bottom crust over the lattice strips and pinch them together securely all around the rim to create a tight seal. You can crimp the edges decoratively if desired.
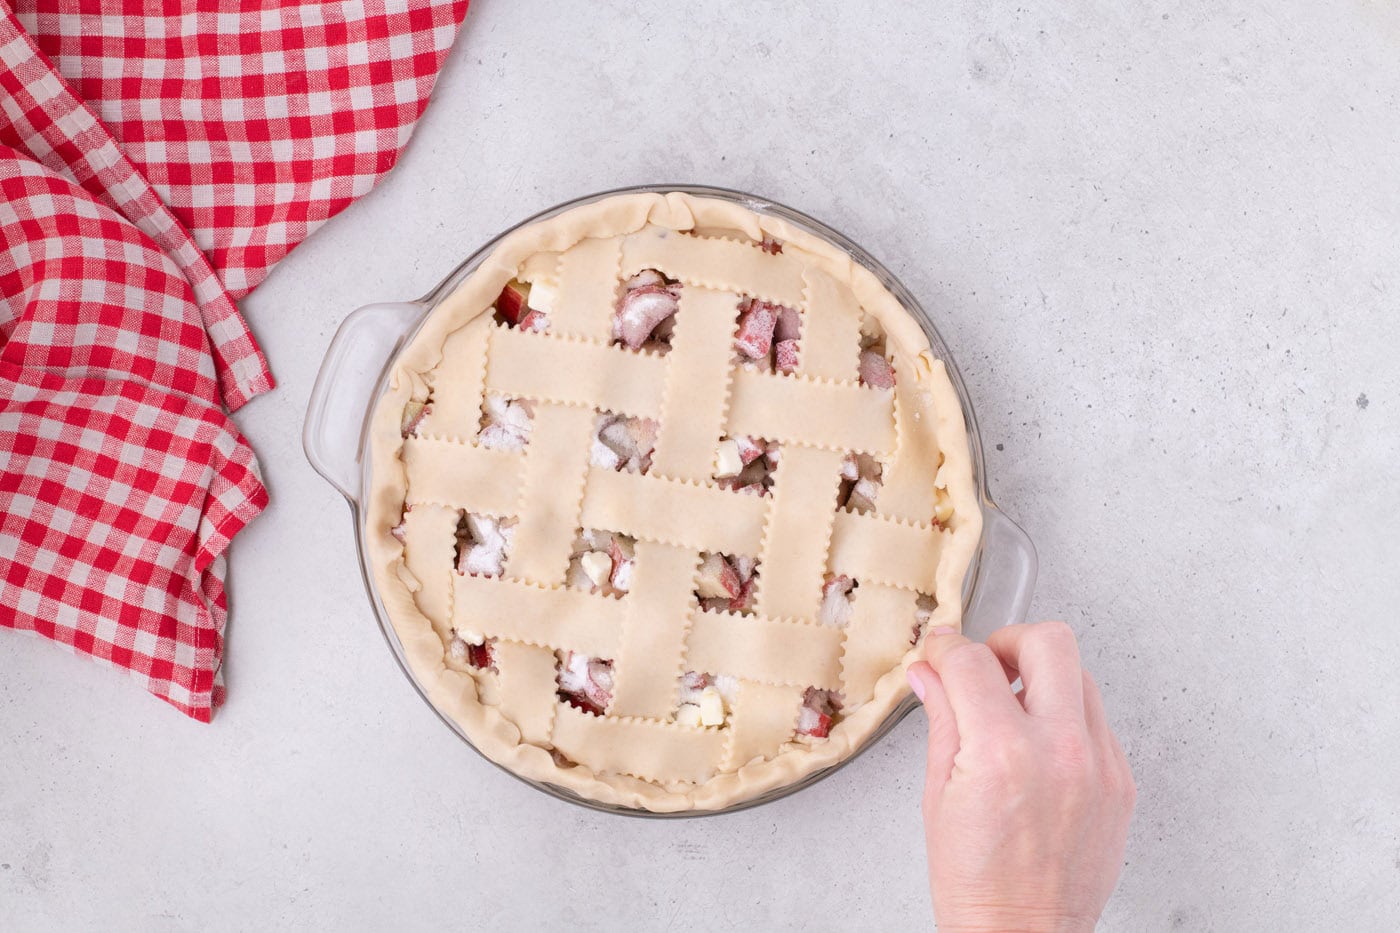
- Preheat Oven & Chill Pie: Place the pie back into the refrigerator to chill while your oven preheats to 425°F (220°C). Chilling the pie before baking helps prevent the crust from shrinking and ensures it holds its beautiful shape.
Baking Your Perfect Rhubarb Pie
Now for the exciting part – baking your pie to golden, bubbling perfection!
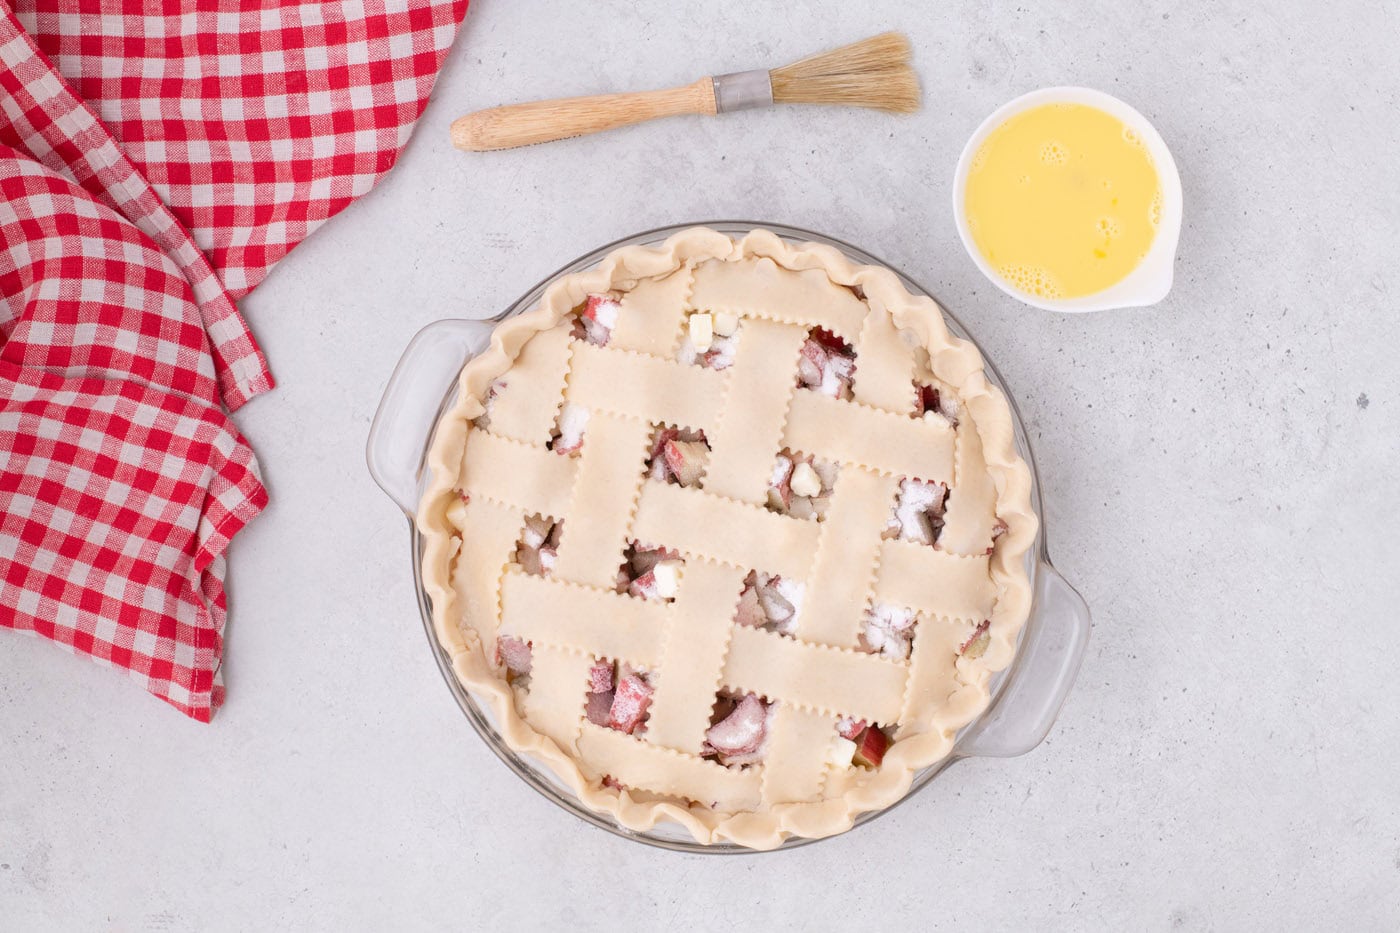
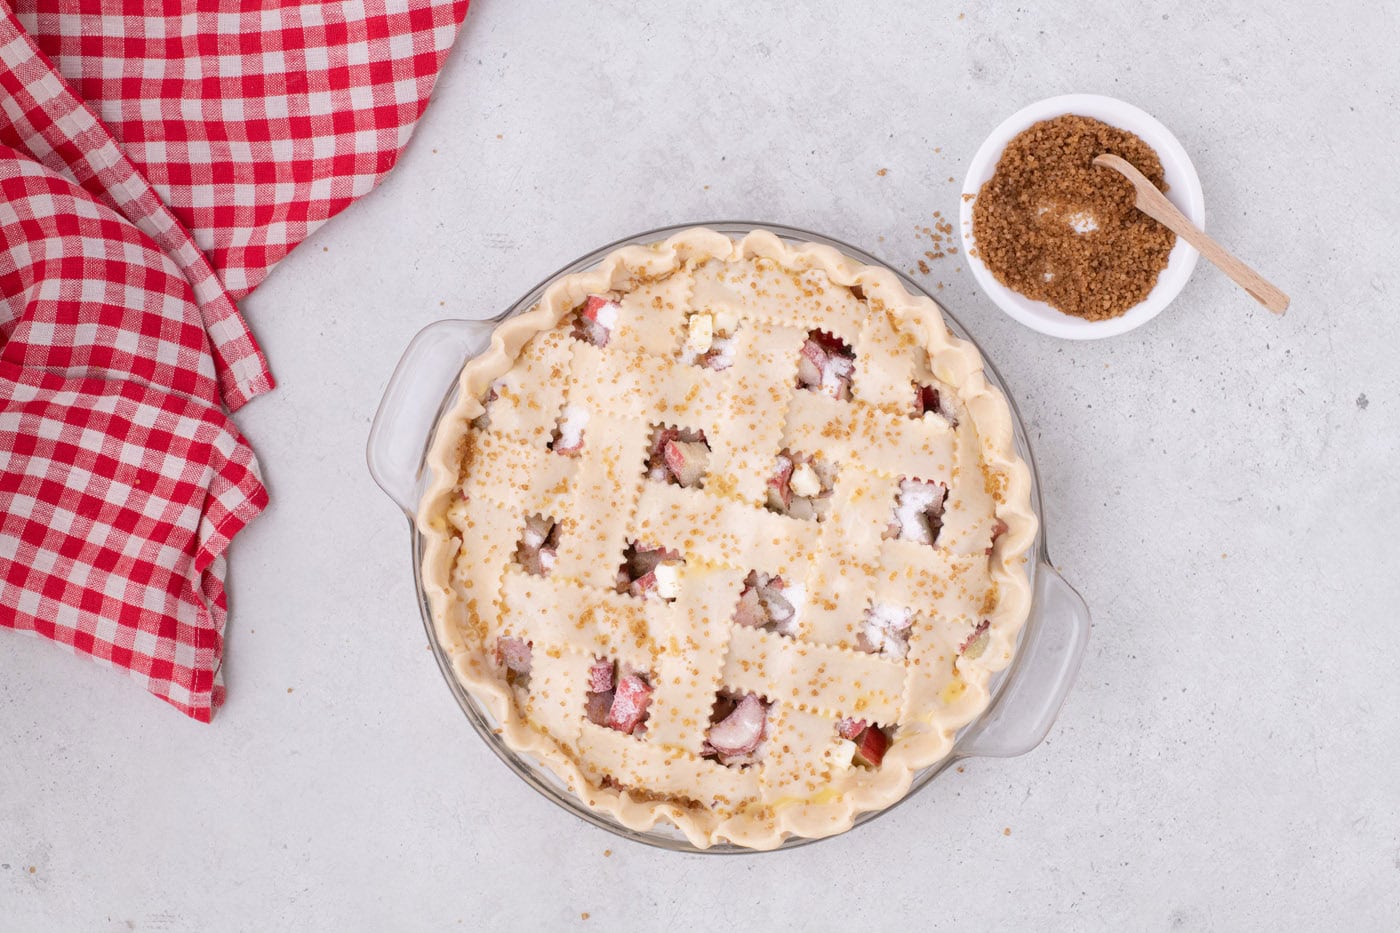
- Apply Egg Wash and Sugar: Once the oven is fully preheated, retrieve your pie from the refrigerator. In a small bowl, whisk together the egg and water to create an egg wash. Lightly brush this mixture over the entire lattice top. Immediately sprinkle generously with turbinado sugar for a beautiful sparkle and crunch. Place the pie onto a large cookie sheet.
EXPERT TIP – Placing the pie plate on a baking sheet is a simple but essential step! It acts as a safety net, catching any delicious juices that might bubble over during baking, thus preventing a messy oven cleanup.
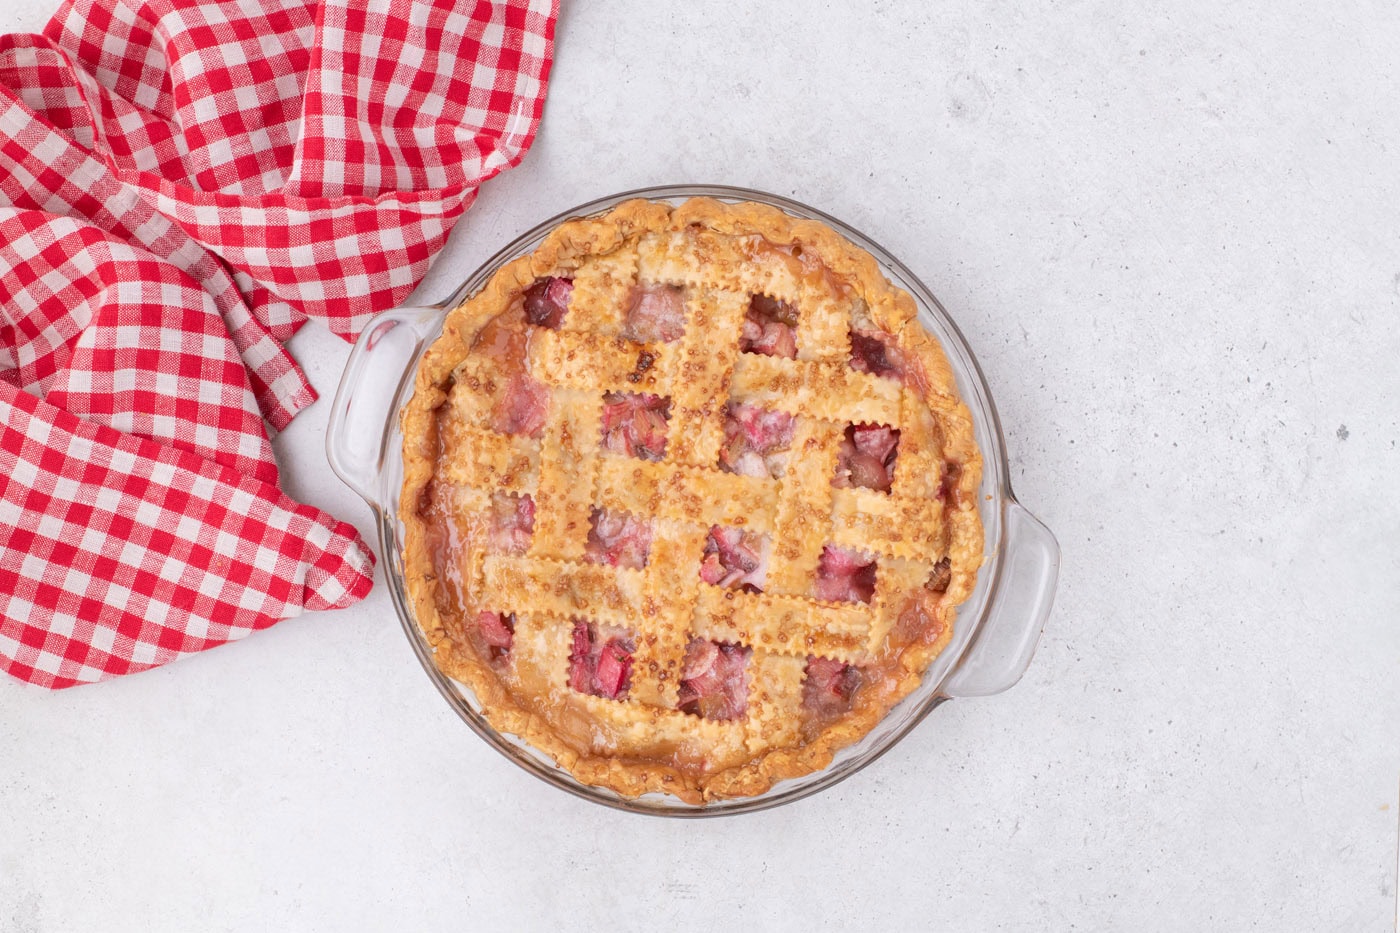
- Bake at Two Temperatures: Carefully place the cookie sheet with the pie into the preheated oven. Bake at 425°F (220°C) for the initial 10 minutes. This high heat helps to set the crust quickly and encourages flakiness. After 10 minutes, reduce the oven temperature to 350°F (175°C) and continue baking for another 45-55 minutes, or until the rhubarb filling is visibly bubbling through the lattice and the crust is a rich golden brown.
EXPERT TIP – Keep a close eye on your pie as it bakes! If you notice the lattice top browning too quickly, loosely cover the entire pie with a sheet of aluminum foil. Alternatively, use a pie crust shield around the edges to prevent over-browning while the filling finishes cooking.
- Cool Completely: Once baked, carefully remove the pie from the oven and place it on a wire rack to cool completely. This crucial step takes approximately 2-3 hours and allows the filling to properly set and thicken. Resist the temptation to cut into it too soon, as a warm pie often results in a runny filling!
Frequently Asked Questions & Expert Tips for Rhubarb Pie Success
Absolutely! This pie recipe is quite forgiving and works wonderfully with frozen rhubarb. There’s no need to thaw the rhubarb before adding it to the pie; simply add it frozen and proceed with the recipe as directed. However, be aware that frozen rhubarb tends to release more moisture and can shrink more than fresh rhubarb. To account for this, we recommend increasing your total quantity of rhubarb by an additional 1/3 cup when using frozen. This ensures your pie will still have a generous and perfectly set filling.
For the ultimate experience, rhubarb pie is best enjoyed on the very day it’s made. This is when the crust is at its crispiest and most buttery, providing a delightful contrast to the tender filling. As time passes, the moisture from the filling can migrate into the crust, making it softer. However, if you have leftovers, you can store the pie, loosely covered with plastic wrap or foil, in the refrigerator for up to 4 days. While the crust may soften slightly, the flavor will still be fantastic!
Yes, this rhubarb pie is an excellent candidate for making ahead of time and freezing for later! To do so, follow all the instructions for assembling the pie, including preparing the filling and the lattice top, but do NOT bake it. Once assembled, wrap the unbaked pie very tightly with a layer of plastic wrap, followed by a layer of heavy-duty aluminum foil. This double-layer protection helps prevent freezer burn. Place it in the freezer, where it can be stored for up to 3 months. When ready to bake, simply remove it from the freezer and bake from frozen, adding about 15-20 minutes to the baking time at 350°F (175°C), or until the filling is bubbling and the crust is golden.
Certainly! Rhubarb pie freezes well even after baking. As mentioned above, you can prepare and freeze the pie unbaked to bake at a later date. Alternatively, if you’ve already baked your pie and have leftovers you wish to save, allow the pie to cool completely to room temperature. Once thoroughly cooled, wrap it securely with plastic wrap, followed by a layer of aluminum foil. This prevents freezer burn and protects its flavor. Freeze the baked pie for up to 3 months. When you’re ready to enjoy it, thaw the pie in the refrigerator overnight. You can gently rewarm it in a low oven (around 300°F/150°C) for 15-20 minutes to crisp up the crust before serving.
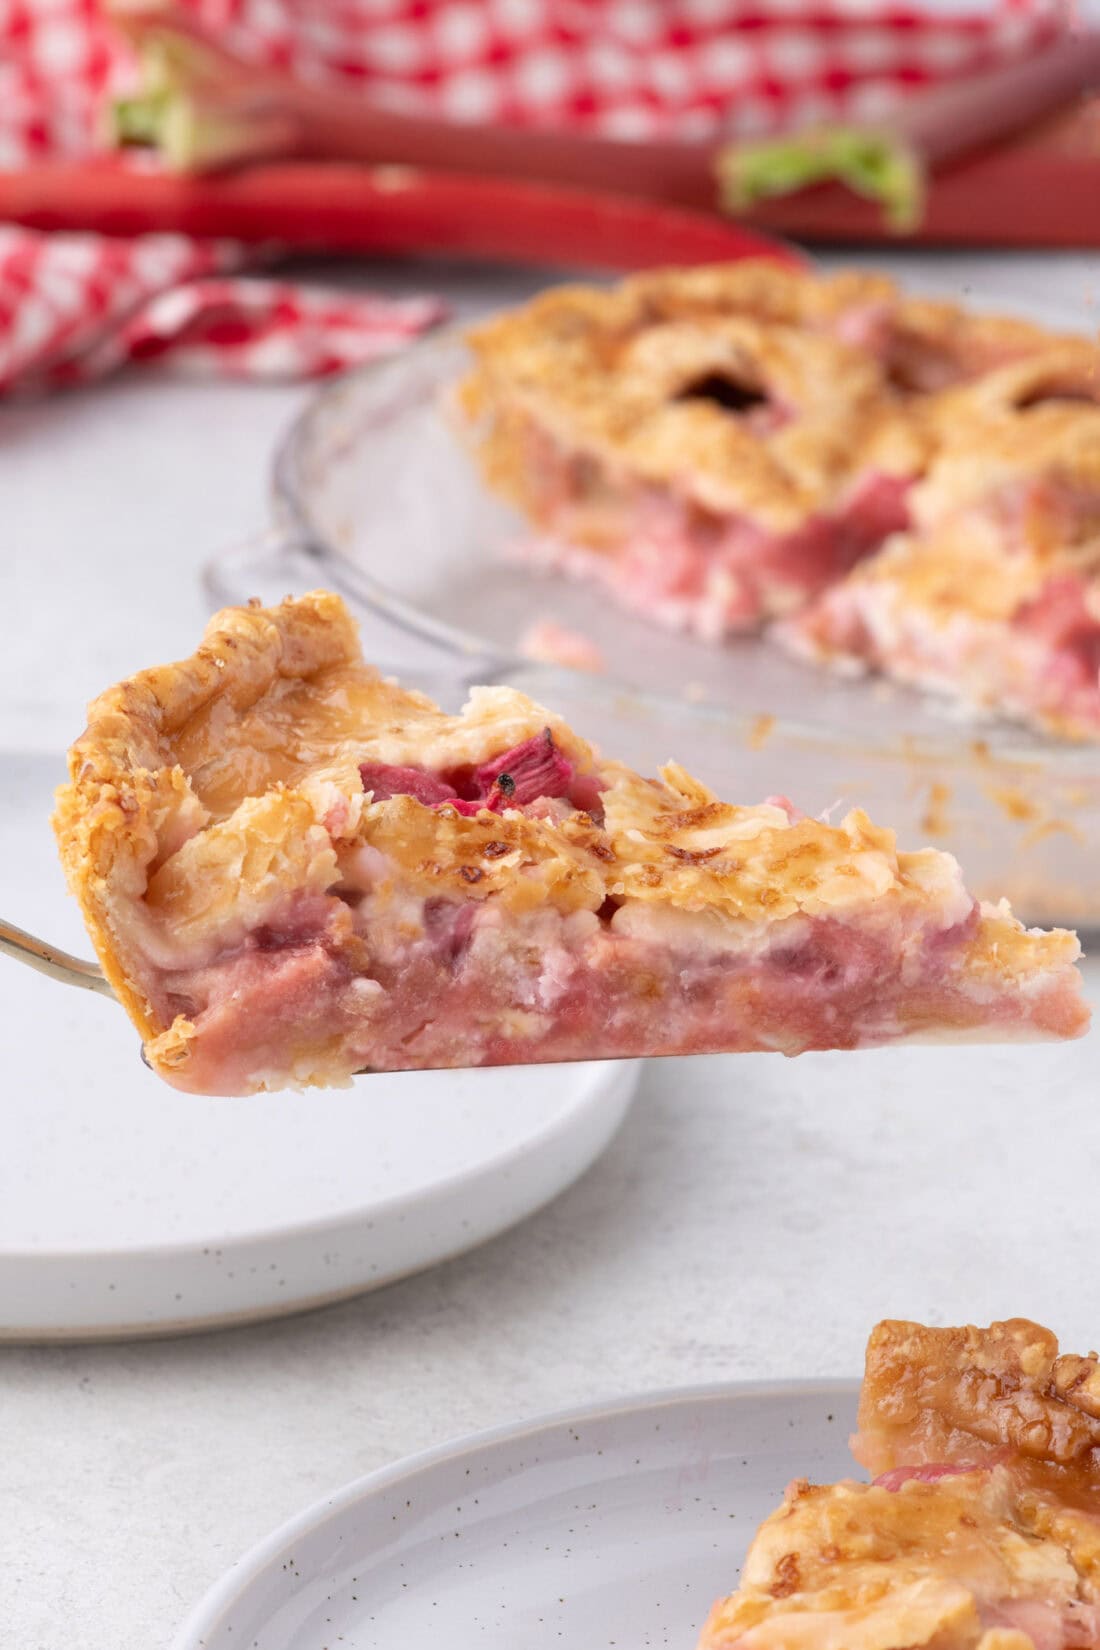
Delightful Serving Suggestions for Your Rhubarb Pie
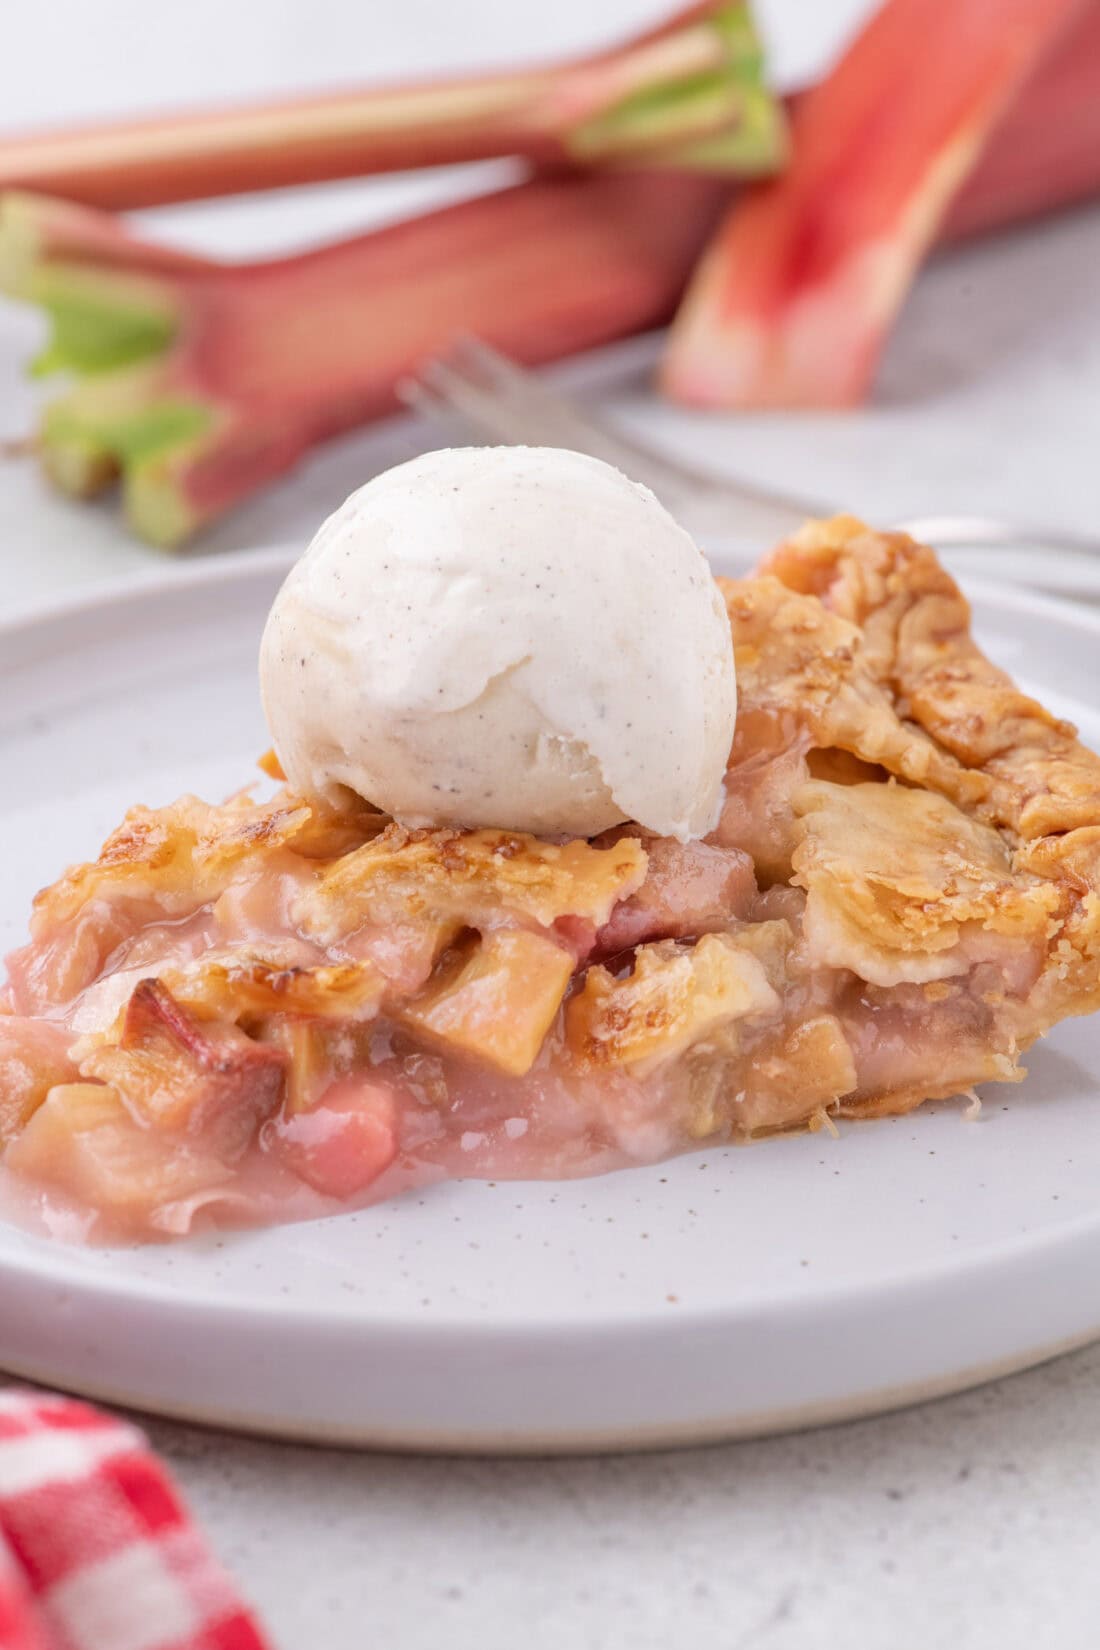
Rhubarb pie, with its perfect balance of sweet and tart, is a versatile dessert that pairs beautifully with a variety of accompaniments. It’s truly a perfect candidate for a generous dollop of freshly whipped cream, its lightness complementing the rich filling. Alternatively, a heaping scoop of creamy vanilla ice cream is a classic choice, melting slightly over a warm slice and creating an irresistible combination of textures and temperatures.
While it’s especially delicious served warm, fresh from the oven, don’t hesitate to enjoy it chilled on a warm spring or summer day. The flavors truly sing no matter how you prefer it. For an extra touch, consider garnishing with a few fresh mint leaves or a sprinkle of toasted almonds. However you choose to serve it, this homemade rhubarb pie is sure to be a heavenly treat. Enjoy every blissful bite!
Explore More Delicious Pie Recipes!
If you loved this rhubarb pie, you’re in for a treat! We have a collection of other fantastic pie recipes that are perfect for any occasion. From classic fruit pies to innovative twists, there’s a pie for everyone:
- Classic Blueberry Pie
- Easy Cherry Slab Pie
- Fresh Strawberry Pie
- Comforting Deep Dish Peach Pie
I love to bake and cook and share my kitchen experience with all of you! Remembering to come back each day can be tough, that’s why I offer a convenient newsletter every time a new recipe posts. Simply subscribe and start receiving your free daily recipes!
Rhubarb Pie
IMPORTANT – There are often Frequently Asked Questions within the blog post that you may find helpful. Simply scroll back up to read them!
Print It
Pin It
Rate It
Save It
Saved!
Ingredients
- 6 cups chopped fresh rhubarb (about eight 12 inch stalks)
- 14.1 ounce store-bought pie crusts (we used 1 box of Pillsbury refrigerated pie crusts)
- 1 cup granulated sugar
- 6 Tablespoons all-purpose flour
- ¼ teaspoon kosher salt
- 2 Tablespoons unsalted butter (cubed)
- 1 egg
- 1 Tablespoon water
- 1 Tablespoon turbinado sugar
Equipment You’ll Need
-
9-inch pie plate
-
Rolling pin
-
Pastry cutter
-
Baking sheet
Before You Begin: Important Tips for Success
- Harvesting Rhubarb: If you’re using rhubarb from your garden, make sure the stalks are at least 10 inches tall. Harvest by gently twisting and pulling the stalk near the base. Avoid cutting, as this can damage the plant.
- Selecting Rhubarb: When buying from a store, look for firm, crisp stalks that are free of blemishes. Both red and green rhubarb varieties work well and contribute a wonderful tart flavor.
- Using Frozen Rhubarb: This recipe can easily accommodate frozen rhubarb. Simply add the rhubarb to the pie filling while it is still frozen. As frozen rhubarb tends to shrink more once thawed and releases additional water, increase your total quantity of rhubarb by an additional 1/3 cup to ensure a full pie.
Instructions
-
Remove the pie crusts from the refrigerator and let them sit out for 10 minutes so they are pliable but still cold.
-
Cut the rhubarb into 1/2-inch cubes and set aside.
-
On a parchment-lined (or floured) surface, roll out one of the two pie crusts so that it measures 2 inches larger than the diameter of the pie plate. (I used a 9 ½-inch pie plate, so my crust measured 11 ½ inches in diameter).
-
Drape the pie crust over the rolling pin and place the crust carefully into the pie plate, gently pressing the pie crust to the bottom of the plate.
-
In a small bowl, whisk together the sugar, flour, and salt.
-
Sprinkle ¼ cup of the sugar mixture over the pie crust and add half of the chopped rhubarb.
-
Continue to sprinkle an additional ½ cup of the sugar mixture over the rhubarb and top with the remaining rhubarb.
-
Sprinkle with the remaining sugar mixture and dot with the butter cubes.
-
Place the pie plate in the refrigerator while you prepare the lattice top.
Making the Lattice Top
-
Place the second pie crust on a parchment-lined (or floured) surface and roll it out so it measures 1 inch larger than the diameter of the pie plate.
-
Using a metal ruler and pastry cutter, measure out and cut 10 1-inch-thick strips. Portion out half of the strips and lay them over the rhubarb so that they are evenly spaced (about 1 ½ inches apart).
-
To make the lattice top, fold every other strip (ie: strips 1, 3, and 5) halfway back from the center to the edge.
-
Place the first of the second set of strips along the center of the pie (and perpendicular to the strips already there). Once the strip is in place unfold strips 1, 3, and 5 to cover the strip you just placed down.
-
Continue by folding every other strip (ie: strips 2, and 4) halfway back from the center to the edge and laying your second strip 1 ½ inches apart from the previous one. Once the second strip is in place unfold strips 2 and 4 to cover that second strip.
-
Repeat this process in steps 13 and 14 until you have woven all strips into place.
-
Trim any excess strips of dough that are hanging over the pie plate and fold the crust from the bottom over the lattice strips, pinching them together to create a seal.
-
Refrigerate the pie while you preheat the oven to 425°F.
-
Once the oven has preheated, remove the pie plate from the refrigerator and brush the lattice with an egg wash made by mixing the egg and the water in a small bowl. Sprinkle with turbinado sugar and place the pie on a large cookie sheet.
-
Place the cookie sheet and pie plate in the oven and bake for 10 minutes. Reduce the temperature to 350°F and continue baking for another 45 minutes or until the fruit is bubbling and the crust is golden brown.
TIP – During baking, check to make sure the lattice top is not getting too brown, if it is, tightly cover the pie with aluminum foil (or a pie crust shield) for the remainder of the bake.
-
Remove the pie from the oven and let it sit on a wire rack for 2-3 hours to allow the filling to properly set before cutting and serving.
Expert Tips & FAQs
- Best Enjoyed Fresh: Rhubarb pie is truly at its peak on the day it’s baked, offering the best crispy, buttery crust texture. While still delicious, the crust can soften over time due to moisture from the filling. Store any leftovers, covered, in the refrigerator for up to 4 days.
- Make Ahead Option: This pie can be prepared in advance and frozen unbaked. Assemble the pie completely, then wrap it tightly with plastic wrap and a layer of aluminum foil. Freeze for up to 3 months. Bake directly from frozen, adding approximately 15-20 minutes to the total baking time.
- Freezing Baked Pie: If you prefer to freeze a baked pie, allow it to cool completely before wrapping tightly in plastic wrap and then foil. Freeze for up to 3 months. Thaw overnight in the refrigerator, and for a refreshed crust, you can warm it gently in a low oven (300°F/150°C) for 15-20 minutes before serving.
Nutrition Information
The recipes on this blog are tested with a conventional gas oven and gas stovetop. It’s important to note that some ovens, especially as they age, can cook and bake inconsistently. Using an inexpensive oven thermometer can assure you that your oven is truly heating to the proper temperature. If you use a toaster oven or countertop oven, please keep in mind that they may not distribute heat the same as a conventional full sized oven and you may need to adjust your cooking/baking times. In the case of recipes made with a pressure cooker, air fryer, slow cooker, or other appliance, a link to the appliances we use is listed within each respective recipe. For baking recipes where measurements are given by weight, please note that results may not be the same if cups are used instead, and we can’t guarantee success with that method.
