Effortlessly Delicious: The Ultimate 3-Ingredient Microwave Chili Cheese Dip for Any Gathering
With game day looming large or a last-minute get-together on the horizon, finding quick and impressive appetizers is key to hosting success. Look no further! This incredible recipe for chili cheese dip is an absolute game-changer. It’s not just easy; it’s practically effortless, requiring only three simple ingredients and the convenience of your microwave. Say goodbye to complicated culinary endeavors and hello to a dip that will have your friends and family raving in minutes. This is truly the perfect appetizer and snack for any occasion, from the biggest football showdowns to impromptu movie nights.
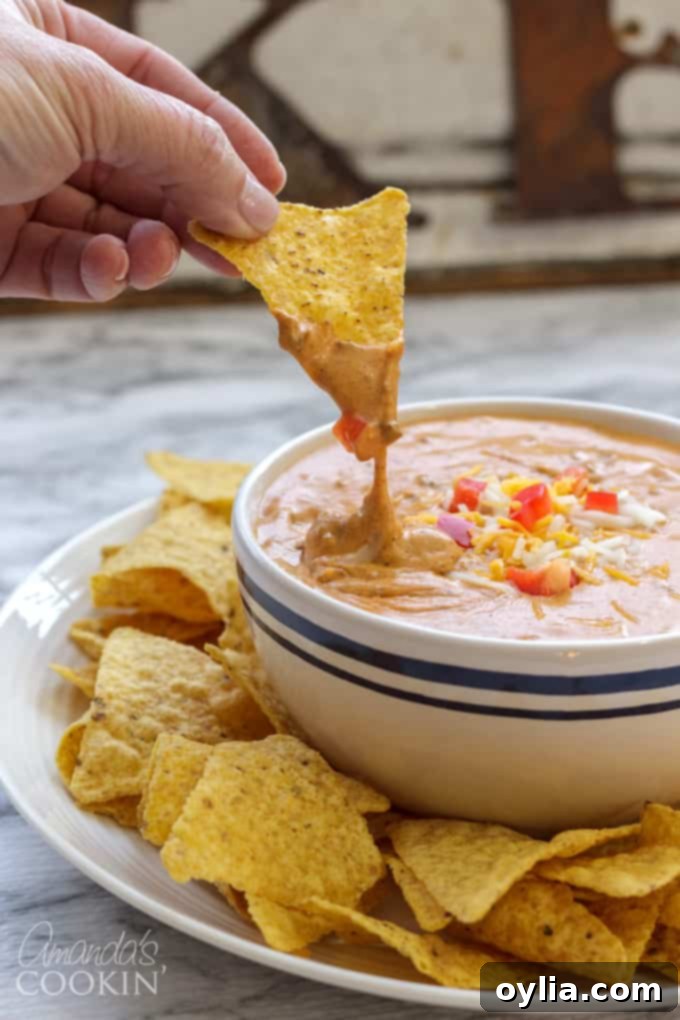
Why This 3-Ingredient Chili Cheese Dip is Your Go-To Appetizer
There’s a reason this chili cheese dip stands out in a crowded field of party snacks: its unbeatable simplicity combined with incredible flavor. In a world where elaborate recipes often demand hours of prep and a pantry full of specialized ingredients, this dip is a breath of fresh air. You literally need only three common items – chili, cream cheese, and shredded cheddar – and a microwave to bring it all together. This means less stress in the kitchen, more time enjoying your guests, and a guaranteed hit that everyone will adore. It’s a testament to the fact that sometimes, the best food is the simplest to make.
I stumbled upon a different rendition of this classic on the Hormel website, but I quickly realized I could elevate the flavor and texture by making a few strategic tweaks. My preference leans towards real, wholesome ingredients, so I opted for creamy cream cheese and sharp shredded cheddar over processed cheese blocks. This combination yields a richer, more authentic cheese flavor and a wonderfully smooth, dippable consistency that simply can’t be matched by pre-packaged processed options. The beauty of this approach is that it allows you to literally throw it together in minutes and serve it piping hot to your guests immediately, making it ideal for those unexpected gatherings or when time is of the essence.

Unleash Your Inner Chef: Customizing Your Easy Chili Cheese Dip
While the classic combination of cream cheese and mild cheddar is undeniably delicious, this dip offers a fantastic canvas for customization. Don’t be afraid to experiment with different cheese flavors to suit your palate or match the occasion! I used a mild cheddar for a universally appealing taste, but imagine the delightful twist a smoked Gouda would bring, adding a depth of smoky richness. For those who crave a little heat, some shredded Pepper Jack cheese would provide just the right amount of kick to awaken the taste buds. Monterey Jack or Colby Jack are also excellent choices for a milder, creamier profile. No matter which cheese you choose, this chili cheese dip remains incredibly simple to prepare, ensuring it’s always ready to impress your guests the moment they walk through the door.
Beyond the cheese, the chili itself offers another avenue for personalization. My first batch used Hormel’s turkey chili without beans, which resulted in a wonderfully smooth and consistent dip. However, for a heartier texture and a boost of fiber, I later tried it with turkey chili that included beans, and both versions were absolutely delicious! You could even experiment with beef chili, vegetarian chili, or a spicier variety if you prefer. A dash of your favorite hot sauce or a sprinkle of cayenne pepper can easily amp up the heat if you’re serving a crowd that loves a fiery kick. Consider stirring in a tablespoon of taco seasoning or a pinch of garlic powder for an extra layer of savory flavor.
Serving Suggestions and Keeping Your Chili Cheese Dip Warm
Timing is everything when it comes to serving hot dips. My best advice would be to wait until all your guests have arrived and are ready to mingle before spending the few minutes to microwave the chili cheese dip. This ensures it’s at its most irresistible, gooey, and warm state. However, if you need to prepare it slightly in advance or want it to stay warm throughout a long gathering, you have excellent options. Transferring the freshly made dip into a small slow cooker set to a “warm” setting is a brilliant way to maintain its perfect temperature without overcooking. Just stir it occasionally to prevent any cheese from sticking to the bottom.
That being said, this dip is so incredibly good and so universally loved that it probably won’t last long enough for you to worry about it getting cold! It tends to disappear rather quickly, a true testament to its irresistible nature. For dippers, classic tortilla chips are always a hit, but don’t limit yourself! Consider serving it with sturdy corn chips like Fritos, pita bread wedges, or even a colorful array of fresh vegetable sticks like carrot and celery sticks, cucumber slices, or bell pepper strips for a lighter option. For an extra touch of flair, garnish your warm dip with some chopped fresh green onions, a sprinkle of extra shredded cheddar, a dollop of sour cream, or fresh cilantro. These simple additions not only enhance the visual appeal but also add delightful layers of flavor and texture.

Essential Ingredients You’ll Need for Your Easy Chili Cheese Dip
Gathering your ingredients for this incredibly simple dip is as easy as the recipe itself. Here’s exactly what you’ll need to create this crowd-pleasing appetizer:
- 15 oz can Hormel Turkey Chili, with or without beans (choose your preference for texture)
- 8 oz package cream cheese, cut into cubes (softened at room temperature for easier melting)
- 2 cups shredded cheddar cheese (freshly shredded for the best melt and flavor)
Helpful Kitchen Tools for a Smooth Preparation
While this recipe is minimalist, having a few basic kitchen tools on hand will make the process even smoother and more enjoyable. These are the items I recommend for preparing and serving your delicious chili cheese dip:
- Cheese grater (for superior shredded cheese, if not buying pre-shredded)
- Measuring cups (to accurately measure your cheese)
- Chips and dip bowl (for a stylish presentation)
- Microwave safe bowl (essential for quick heating)
- A sturdy spoon or spatula for stirring

Frequently Asked Questions (FAQs) About Chili Cheese Dip
To ensure your chili cheese dip experience is absolutely perfect, here are answers to some common questions:
- Can I make this dip ahead of time? You can certainly prepare the ingredients in advance by having your cream cheese cubed and cheddar shredded. However, for the best texture and flavor, I recommend combining and heating the dip just before serving. If you must make it entirely ahead, store it covered in the refrigerator and reheat gently in the microwave or a slow cooker, stirring frequently, until warm and bubbly.
- What if I don’t have a microwave? Can I use the stovetop or oven? Absolutely! To make this on the stovetop, combine all ingredients in a saucepan over low to medium heat, stirring constantly until the cheeses are melted and the dip is smooth and hot. For the oven, combine ingredients in an oven-safe dish, cover with foil, and bake at 350°F (175°C) for 20-25 minutes, or until bubbly and heated through, stirring halfway.
- How long does chili cheese dip last? Leftovers should be stored in an airtight container in the refrigerator for up to 3-4 days.
- Can I freeze chili cheese dip? Freezing dairy-based dips can sometimes alter the texture, making it grainy or separated upon reheating. While technically possible, it’s generally not recommended for optimal quality. This dip is so quick to make fresh, you won’t need to freeze it!
- How can I make this dip spicier? Besides using Pepper Jack cheese, you can stir in diced pickled jalapeños, a dash of your favorite hot sauce, a pinch of cayenne pepper, or even some chili powder directly into the mix before heating.
- What are the best dippers for chili cheese dip? Tortilla chips are classic, but also consider Fritos, corn chips, pita bread, crusty baguette slices, or even fresh vegetable sticks like carrots, celery, and bell peppers for a healthier option.
Explore More Delicious Dip Recipes
If you loved this easy chili cheese dip, you’re in for a treat! We have a fantastic collection of other crowd-pleasing dip recipes that are perfect for any party or game day. Get ready to expand your appetizer repertoire:
- Hot Spinach Dip
- Smoked Queso Dip
- Buffalo Chicken Dip
- Crockpot Crack Dip
- Pizza Dip
- Crockpot Cheese Dip
- Beer Cheese Dip
- Dill Pickle Dip
- Million Dollar Dip

Chili Cheese Dip
IMPORTANT – There are often Frequently Asked Questions within the blog post that you may find helpful. Simply scroll back up to read them!
Print It
Pin It
Rate It
Save ItSaved!
Ingredients
- 15 oz can Hormel Turkey Chili with or without beans
- 8 oz package cream cheese cut into cubes
- 2 cups shredded cheddar cheese
Things You’ll Need
-
Cheese grater
-
Measuring cups and spoons
-
Chips and dip bowl
-
Microwave safe bowl
Instructions
-
Combine all three ingredients (chili, cubed cream cheese, and shredded cheddar) in a microwave-safe bowl. For best results, ensure the cream cheese is cut into smaller cubes so it melts more evenly. Microwave on high for 2-3 minutes. After the initial heating, remove the bowl and stir the mixture thoroughly, ensuring the melting cheese and chili are well combined. Continue to microwave in 30-second intervals, stirring after each, until all the cheese is completely melted, smooth, and the chili is heated through and bubbling slightly.
-
Serve warm immediately with your favorite tortilla chips or other dippers. Enjoy this quick, easy, and incredibly flavorful appetizer!
Nutrition
The recipes on this blog are tested with a conventional gas oven and gas stovetop. It’s important to note that some ovens, especially as they age, can cook and bake inconsistently. Using an inexpensive oven thermometer can assure you that your oven is truly heating to the proper temperature. If you use a toaster oven or countertop oven, please keep in mind that they may not distribute heat the same as a conventional full sized oven and you may need to adjust your cooking/baking times. In the case of recipes made with a pressure cooker, air fryer, slow cooker, or other appliance, a link to the appliances we use is listed within each respective recipe. For baking recipes where measurements are given by weight, please note that results may not be the same if cups are used instead, and we can’t guarantee success with that method.

This recipe originally published here on January 18, 2016, and has been updated for clarity, detail, and enhanced reader experience.
