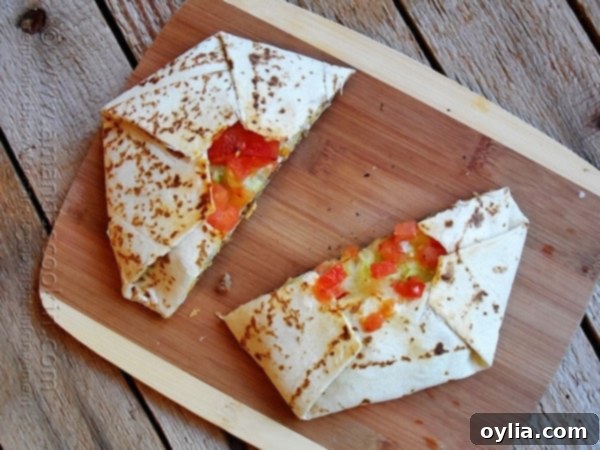
Homemade Taco Bell Crunchwrap Supreme: The Ultimate Copycat Recipe
There’s something undeniably satisfying about a Taco Bell Crunchwrap Supreme – that perfect combination of seasoned beef, warm nacho cheese, a crispy tostada, fresh lettuce, juicy tomatoes, and cool sour cream, all neatly wrapped in a grilled tortilla. It’s a symphony of textures and flavors that has captivated fast-food lovers for years. But what if you could recreate that magic in your own kitchen, with fresh ingredients and flavors customized to your liking? You absolutely can! This recipe guides you through making a spectacular homemade Crunchwrap Supreme that rivals the original, delivering all the deliciousness without ever leaving your home.
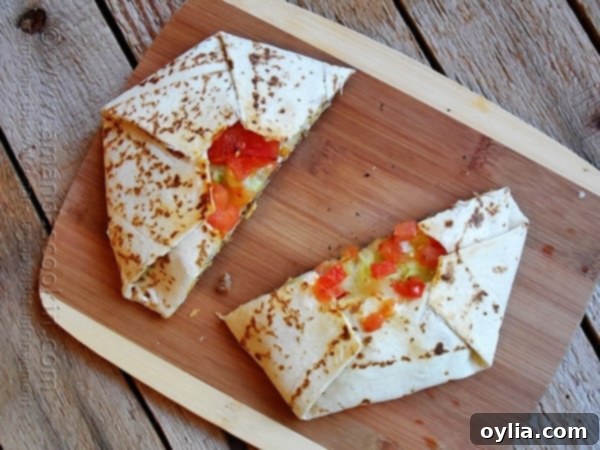
While this isn’t an exact replica using Taco Bell’s secret ingredients (after all, my homemade taco seasoning is far superior, and who truly knows their nacho cheese secret?), the construction and overall flavor profile are incredibly authentic. It captures the essence of what makes the Crunchwrap Supreme so beloved. And the best part? These are surprisingly fun to assemble! You might need to make them one at a time unless you’re blessed with an industrial-sized griddle, but the process is part of the charm and truly rewarding.
Why Make Your Own Taco Bell Crunchwrap Supreme?
Beyond the simple satisfaction of a delicious meal, there are several compelling reasons to try your hand at this homemade Crunchwrap Supreme:
- Unmatched Freshness: You control every ingredient, ensuring fresh, high-quality components go into your meal. No mystery meat or highly processed cheese here!
- Customizable to Perfection: Want extra spicy taco meat? More cheese? Less sour cream? No tomatoes? The power is in your hands to tailor each Crunchwrap exactly to your preferences or dietary needs. This is especially great for picky eaters or those with allergies.
- Budget-Friendly: Eating out, especially at fast-food restaurants, can add up quickly. Making Crunchwraps at home is a much more economical option, allowing you to feed a crowd without breaking the bank.
- Fun Family Activity: Assembling Crunchwraps can be a fantastic and interactive cooking project for the whole family. Kids and teenagers, especially, will love building their own personalized wraps, making dinner preparation an enjoyable experience.
- A Meal That Impresses: Your friends and family will be amazed when you serve up these impressive, restaurant-quality Crunchwraps. It’s a guaranteed crowd-pleaser for game nights, casual dinners, or just when you’re craving something special.
- Versatile Ground Beef Dinner: If you’re constantly looking for fresh ground beef dinner ideas, this recipe is a fantastic addition to your rotation. It transforms a common ingredient into an exciting and unique meal.
Ingredients: The Heart of Your Homemade Crunchwrap
Creating the perfect Crunchwrap Supreme starts with gathering the right ingredients. Each component plays a vital role in delivering that signature taste and texture:
- Large Flour Tortillas (10-inch): These are crucial for wrapping all the delicious fillings. Their flexibility allows for the iconic hexagonal fold that holds everything together. Make sure they are fresh and pliable.
- Taco Meat: The flavorful foundation of your Crunchwrap. I highly recommend using my homemade taco seasoning mix with 1 pound of ground beef for an authentic, savory, and perfectly spiced flavor that beats any store-bought packet. However, a good quality seasoning packet will work in a pinch. Cook the ground beef, drain any excess fat, and then mix in your chosen seasoning according to package directions.
- Nacho Cheese Sauce: This adds a creamy, cheesy, and slightly spicy kick that is characteristic of the original. You can use your favorite brand of jarred nacho cheese or make a quick homemade version. Just ensure it’s warmed through for easy spreading.
- Tostada Shells: The secret to the “crunch” in Crunchwrap! These crispy corn tortillas add a satisfying textural contrast to the soft fillings.
- Sour Cream: A dollop of cool, tangy sour cream balances the rich flavors of the meat and cheese, adding essential creaminess.
- Shredded Lettuce: Fresh, crisp shredded iceberg lettuce provides a refreshing crunch and vibrant color.
- Chopped Tomato: Diced fresh tomatoes add a burst of juicy, bright flavor.
Optional Additions for Customization:
- Spicy Kick: Add sliced jalapeños (fresh or pickled), a dash of hot sauce, or a pinch of cayenne pepper to your taco meat.
- Extra Cheese: Sprinkle some shredded cheddar or a Mexican cheese blend on top of the nacho cheese for an even cheesier experience.
- Avocado or Guacamole: For a rich, creamy, and healthy fat addition.
- Salsa: A spoonful of your favorite salsa can add another layer of flavor and moisture.
- Refried Beans: For a more substantial filling, spread a thin layer of refried beans.
Step-by-Step Guide to Crafting Your Crunchwrap Supreme
Follow these detailed steps to build your perfect homemade Crunchwrap. Remember, practice makes perfect when it comes to the folding!
Step 1: Prepare Your Tortilla and Taco Meat
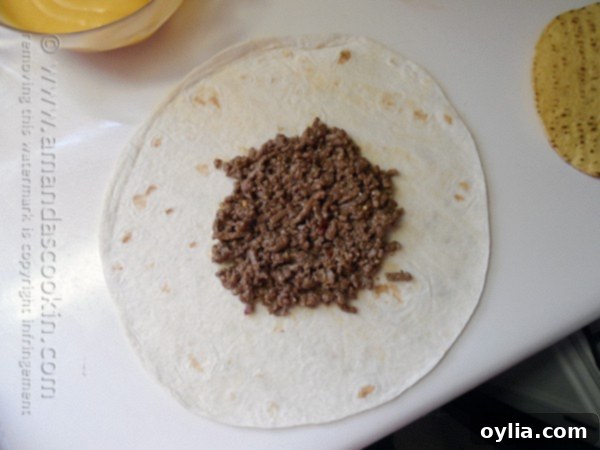
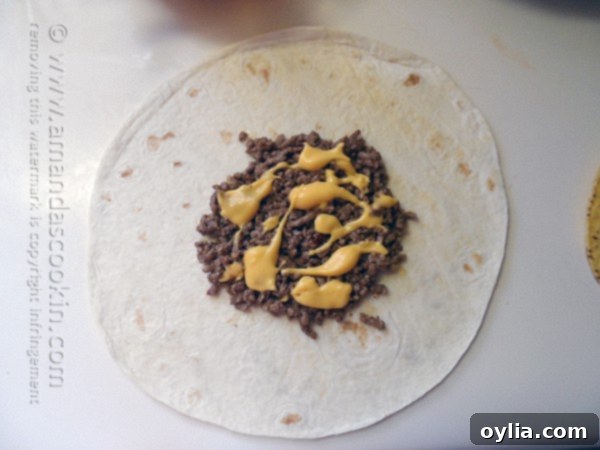
Begin by warming one 10-inch flour tortilla. You can do this quickly in a dry skillet over medium heat for about 10-15 seconds per side until it’s pliable, or simply microwave it for 10-15 seconds. This makes it easier to fold without tearing. Place the warm tortilla flat on a clean surface. Take approximately ½ cup of your prepared taco meat and place it directly in the center of the tortilla. Spread the meat out evenly, forming a circle that matches the diameter of your tostada shell. This creates a solid base for your layers.
Step 2: Layering the Flavor Foundation
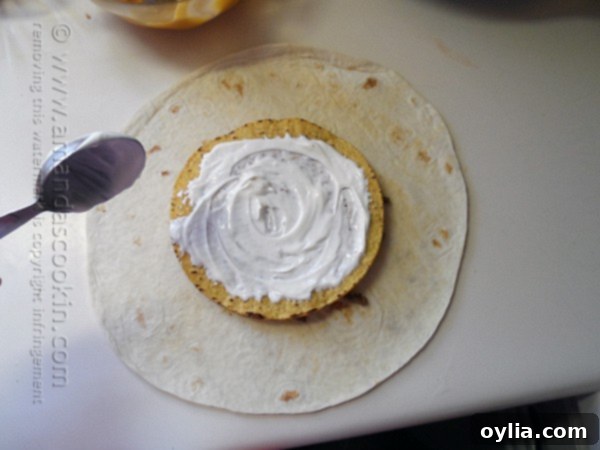
Generously spoon about 2 teaspoons of warmed nacho cheese sauce over the top of the taco meat, spreading it slightly to cover the meat layer. The warmth of the cheese will also help to soften the subsequent layers. Immediately place one crispy tostada shell directly on top of the nacho cheese layer. Gently press down on the tostada to secure it in place and help distribute the cheese, ensuring a firm foundation for the fresh ingredients.

Step 3: Freshness and Creaminess
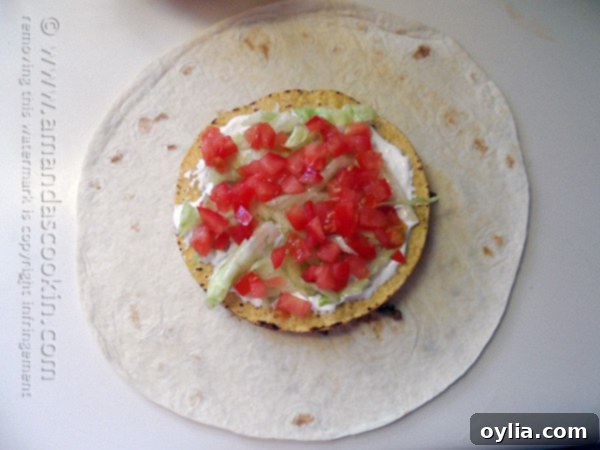
Now it’s time for the cool and fresh components. Spread approximately 1 tablespoon of sour cream evenly over the top of the tostada shell. This acts as a binder and adds a delightful tangy creaminess. Then, sprinkle about 2 tablespoons of shredded lettuce and 1 tablespoon of chopped tomato directly over the sour cream. Feel free to adjust these quantities to your liking, ensuring you don’t over-pile the ingredients.
Step 4: The Signature Fold
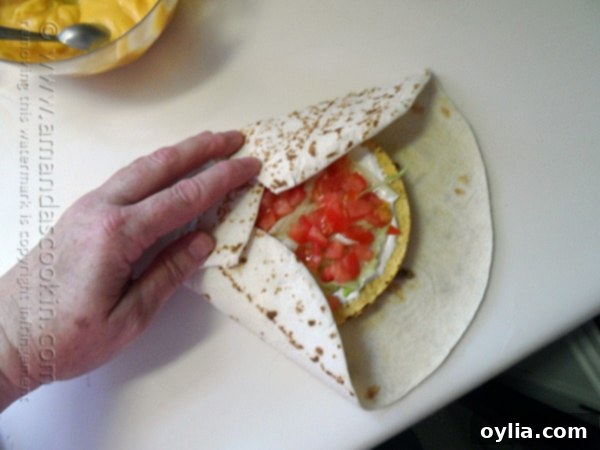
This is where the magic happens! To ensure all your delicious fillings stay securely inside, you’ll need to create the iconic Crunchwrap fold. Place a clean skillet over medium-high heat while you fold. Now, carefully bring the edges of the large flour tortilla up and over the tostada shell, towards the center. Work your way around the entire circumference, creasing each fold as you go. You’ll create a series of overlapping folds that meet in the middle, effectively sealing all the ingredients inside a neat, hexagonal package. If you find there’s a small opening in the center, you can use a smaller round piece of tortilla (cut from another tortilla or a small street taco tortilla) to cover it, but for most 10-inch tortillas, careful folding should be enough to completely enclose the fillings.
Step 5: Grilling to Golden Perfection
Once your Crunchwrap is securely folded, gently pick it up and place it seam-side down in the preheated skillet. This ensures the folds seal as the tortilla cooks. Using a spatula, gently press down on the Crunchwrap to ensure even contact with the hot pan. Let it cook for 2-4 minutes, or until the bottom is beautifully golden brown and crispy. The exact time will depend on your skillet and heat level, so keep an eye on it to prevent burning.
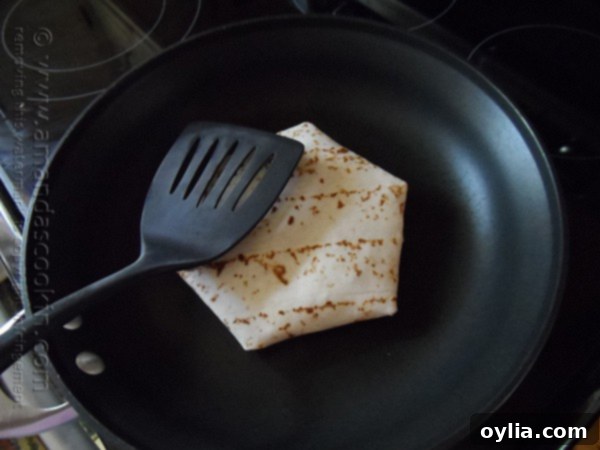
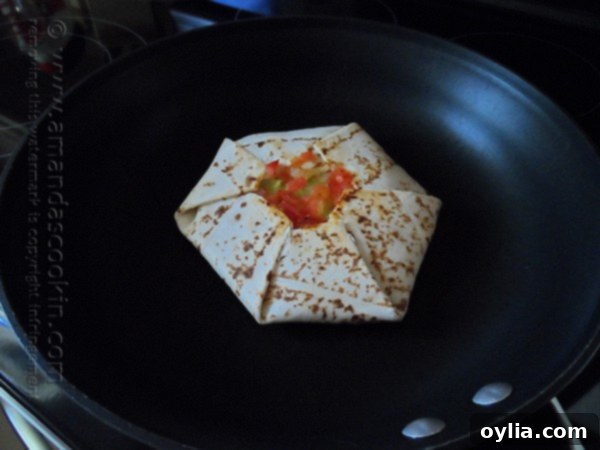
After the first side is golden, carefully flip the Crunchwrap over using your spatula and brown the other side for another 2-4 minutes. This step ensures that both sides of the tortilla are crispy and warm, and that the internal ingredients are heated through.
Step 6: Serve and Enjoy
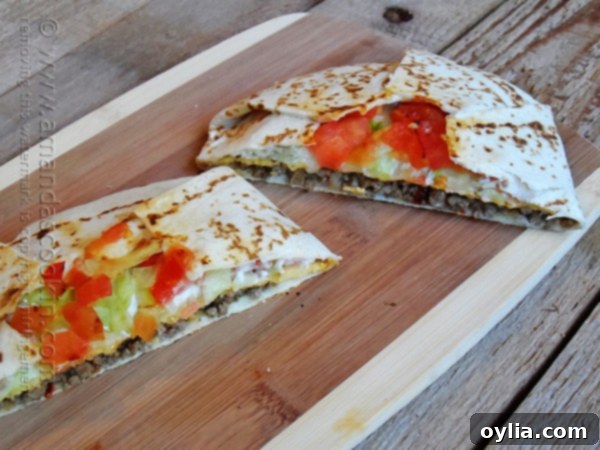
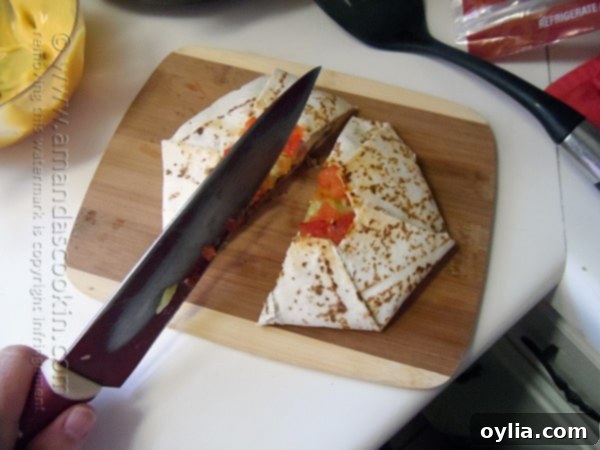
Once both sides are perfectly browned and crispy, remove the Crunchwrap from the pan. For the ultimate eating experience, place it on a cutting board and carefully slice it in half with a sharp knife. This reveals all the glorious layers inside and makes it easier to handle. Serve immediately while it’s still warm and the tostada is at its crunchiest! Enjoy the fruits of your labor and savor every delicious bite of your homemade Taco Bell Crunchwrap Supreme.
Tips for a Perfectly Crispy and Delicious Crunchwrap
- Don’t Skip Warming the Tortilla: A warm tortilla is more flexible and less likely to tear when you fold it. This is a small step that makes a big difference in assembly.
- Even Spreading is Key: Distribute the taco meat and other wet ingredients evenly. This ensures every bite has a balanced flavor and helps maintain the Crunchwrap’s structural integrity.
- Mind the Heat: Use medium-high heat for grilling. Too low, and it won’t get crispy; too high, and it will burn before warming through. Adjust as needed for your stove.
- Press Gently: When cooking, pressing down lightly with a spatula helps create good contact with the pan, leading to a uniformly golden and crispy crust.
- Don’t Overfill: While tempting to load it up, overfilling makes folding difficult and can lead to ruptures during cooking. Stick to the suggested amounts for the best results.
- Serve Immediately: For the ultimate experience, serve your Crunchwrap as soon as it comes off the skillet. This is when the tostada is crispiest, and the fillings are perfectly warm.
Variations & Customization Ideas
One of the best things about making Crunchwraps at home is the endless possibilities for customization:
- Protein Power: Substitute ground beef with ground turkey, ground chicken, shredded chicken, or even black beans for a vegetarian option. Season them similarly to taco meat.
- Cheese, Please! Experiment with different cheeses. A spicy Monterey Jack, a sharp cheddar, or a smoky queso fresco can add new dimensions of flavor.
- Veggies Galore: Add diced onions, bell peppers (sautéed or raw), corn, or even finely chopped spinach for extra nutrients and crunch.
- Saucy Swaps: Replace or complement the nacho cheese with a homemade queso, a spicy salsa, or even a creamy avocado ranch dressing.
- Mini Crunchwraps: Use smaller tortillas (8-inch) and smaller tostadas for a snack-sized version, perfect for appetizers or lighter meals.
Frequently Asked Questions (FAQs)
Here are some common questions about making homemade Crunchwraps:
- Can I prepare these ahead of time? You can prepare the taco meat and chop your fresh ingredients a day or two in advance. However, it’s best to assemble and cook the Crunchwraps just before serving to ensure the tostada remains crispy and the outer tortilla doesn’t get soggy.
- How do I store leftovers? If you have leftovers, wrap them tightly in plastic wrap or foil and refrigerate for up to 2-3 days. Reheat in a dry skillet over medium-low heat until warmed through and re-crisped, or in an air fryer for a few minutes.
- What kind of nacho cheese sauce should I use? A good quality store-bought jarred nacho cheese sauce (like Tostitos or Frito-Lay brand) works well. You can also make your own simple queso by melting Velveeta with a little milk and diced jalapeños for a richer flavor.
- Can I use ground turkey instead of ground beef? Absolutely! Ground turkey is a fantastic lean alternative. Just make sure to season it well to achieve that delicious taco flavor.
- What if my tortilla won’t fold without tearing? Ensure your tortilla is sufficiently warm and pliable. If it’s still tearing, try microwaving it for an additional 5-10 seconds, or slightly dampening the edges with a bit of water before folding. Using a fresh pack of tortillas also helps.
More Mexican Recipes
If you loved this Crunchwrap Supreme, you’ll definitely want to explore more of our delicious Mexican-inspired dishes:
- Taco Dip
- Taco Soup
- Taco Casserole
- Taco Empanadas
- Taco Pasta Salad
- 7 Layer Taco Dip
- Taco Pie
- Walking Tacos

Copycat Crunchwrap Supreme
IMPORTANT – There are often Frequently Asked Questions within the blog post that you may find helpful. Simply scroll back up to read them!
Print It
Pin It
Rate It
Save ItSaved!
Ingredients
- 5 10-inch flour tortillas
- 1 pound taco meat (1 lb ground beef prepared with one taco seasoning packet or my homemade taco seasoning mix)
- ¾ cup nacho cheese sauce
- 5 tostada shells
- ⅓ cup sour cream
- ¾ cup shredded lettuce
- ⅓ cup chopped tomato
Per 1 Crunchwrap Supreme:
- 1 10-inch flour tortilla
- ½ cup taco meat
- 2 teaspoons nacho cheese sauce
- 1 tostada shell
- 1 tablespoon sour cream
- 2 tablespoons shredded lettuce
- 1 tablespoon chopped tomato
Instructions
-
Warm your large flour tortilla in a skillet or microwave until pliable. Place the taco meat in the center, spreading it to the same diameter as your tostada shell. Spoon warmed nacho cheese over the meat. Gently place the tostada shell on top and press down. Spread sour cream over the tostada, then sprinkle with shredded lettuce and chopped tomato.
-
Heat a skillet over medium-high heat. Carefully fold the sides of the flour tortilla up and over the tostada shell, creasing each fold to create a sealed package. Place the entire Crunchwrap, seam-side down, into the hot skillet. Gently press with a spatula. Cook until golden brown and crispy, about 2-4 minutes. Flip and cook the other side for another 2-4 minutes. Remove from the pan, cut in half, and serve hot.
The recipes on this blog are tested with a conventional gas oven and gas stovetop. It’s important to note that some ovens, especially as they age, can cook and bake inconsistently. Using an inexpensive oven thermometer can assure you that your oven is truly heating to the proper temperature. If you use a toaster oven or countertop oven, please keep in mind that they may not distribute heat the same as a conventional full sized oven and you may need to adjust your cooking/baking times. In the case of recipes made with a pressure cooker, air fryer, slow cooker, or other appliance, a link to the appliances we use is listed within each respective recipe. For baking recipes where measurements are given by weight, please note that results may not be the same if cups are used instead, and we can’t guarantee success with that method.
