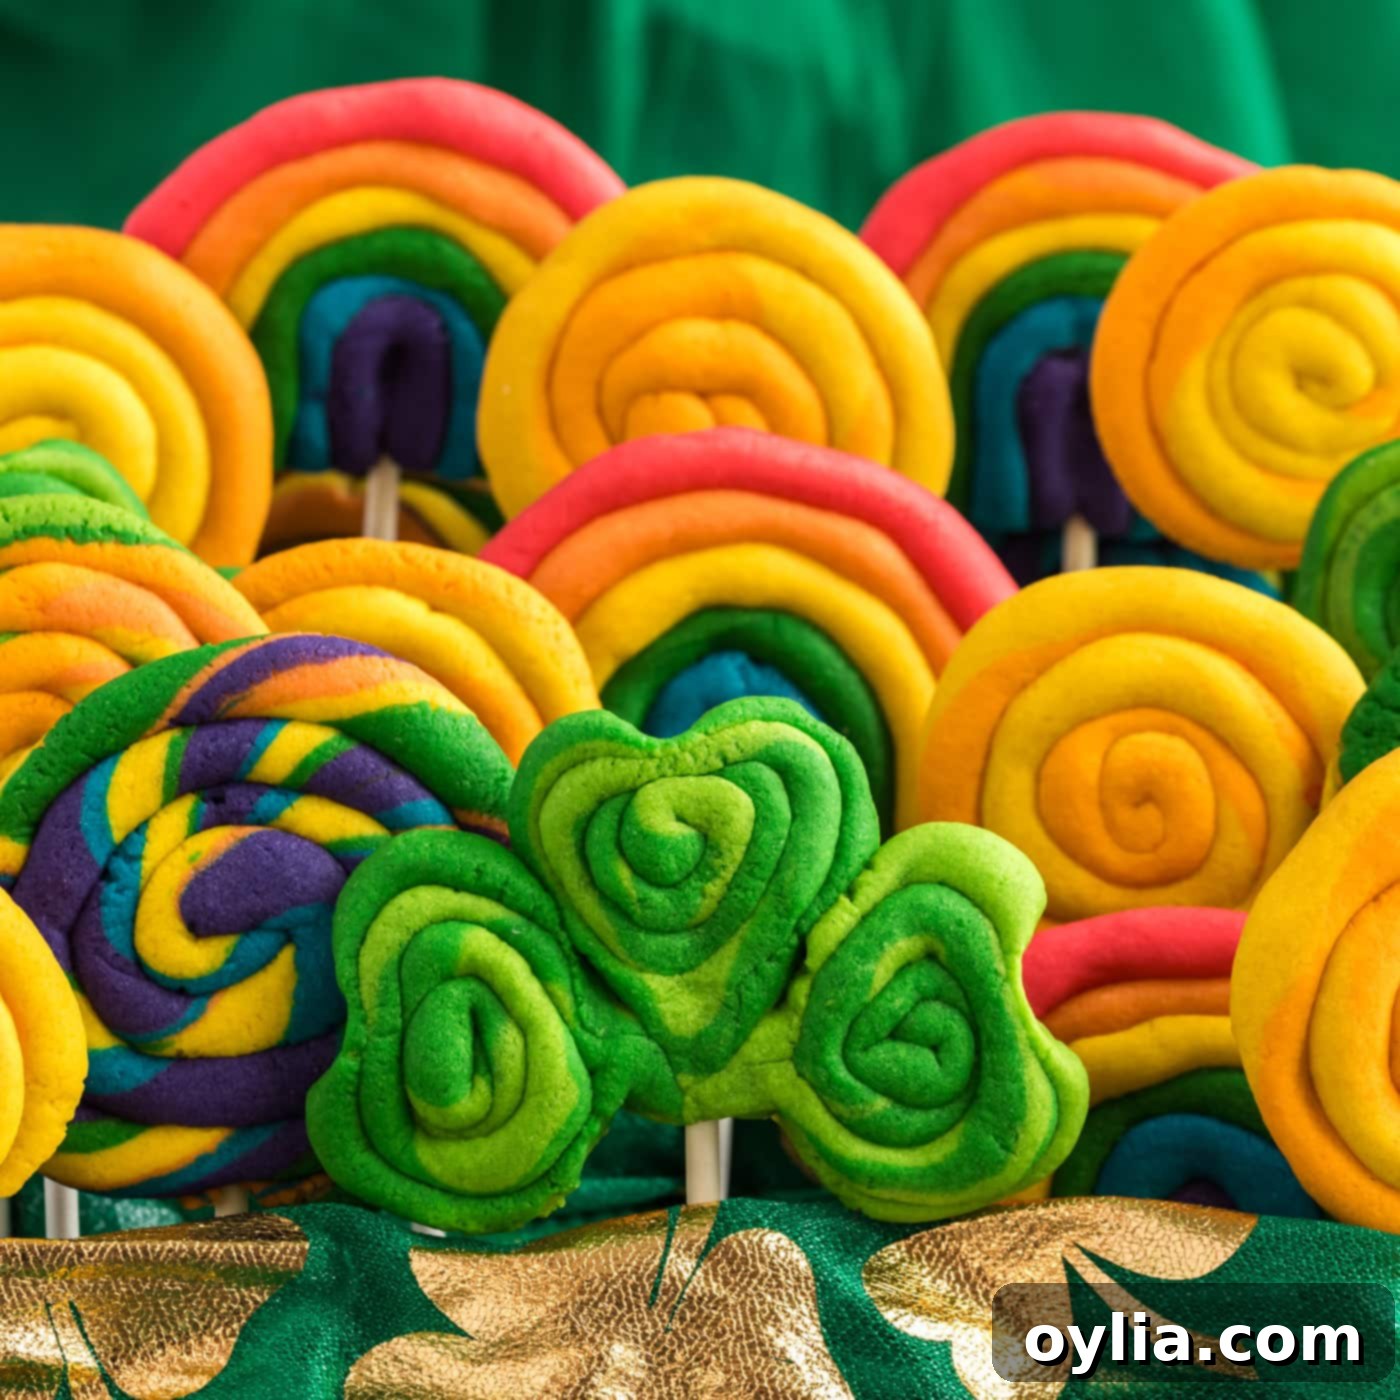
Magical St. Patrick’s Day Cookies: Easy Recipe for Rainbows, Shamrocks, and Gold Coins
Get ready to infuse your kitchen with a burst of color and a touch of Irish luck! These delightful St. Patrick’s Day cookies are a celebration in every bite, featuring a spectrum of fun, festive shapes. Starting with a simple, reliable sugar cookie base, a dash of food coloring, and a sprinkle of your own creativity are all you need to conjure up these edible works of art. Perfect for sharing, gifting, or simply enjoying with family, this recipe transforms basic ingredients into whimsical treats that capture the spirit of the holiday.
Why This St. Patrick’s Day Cookie Recipe is a Winner
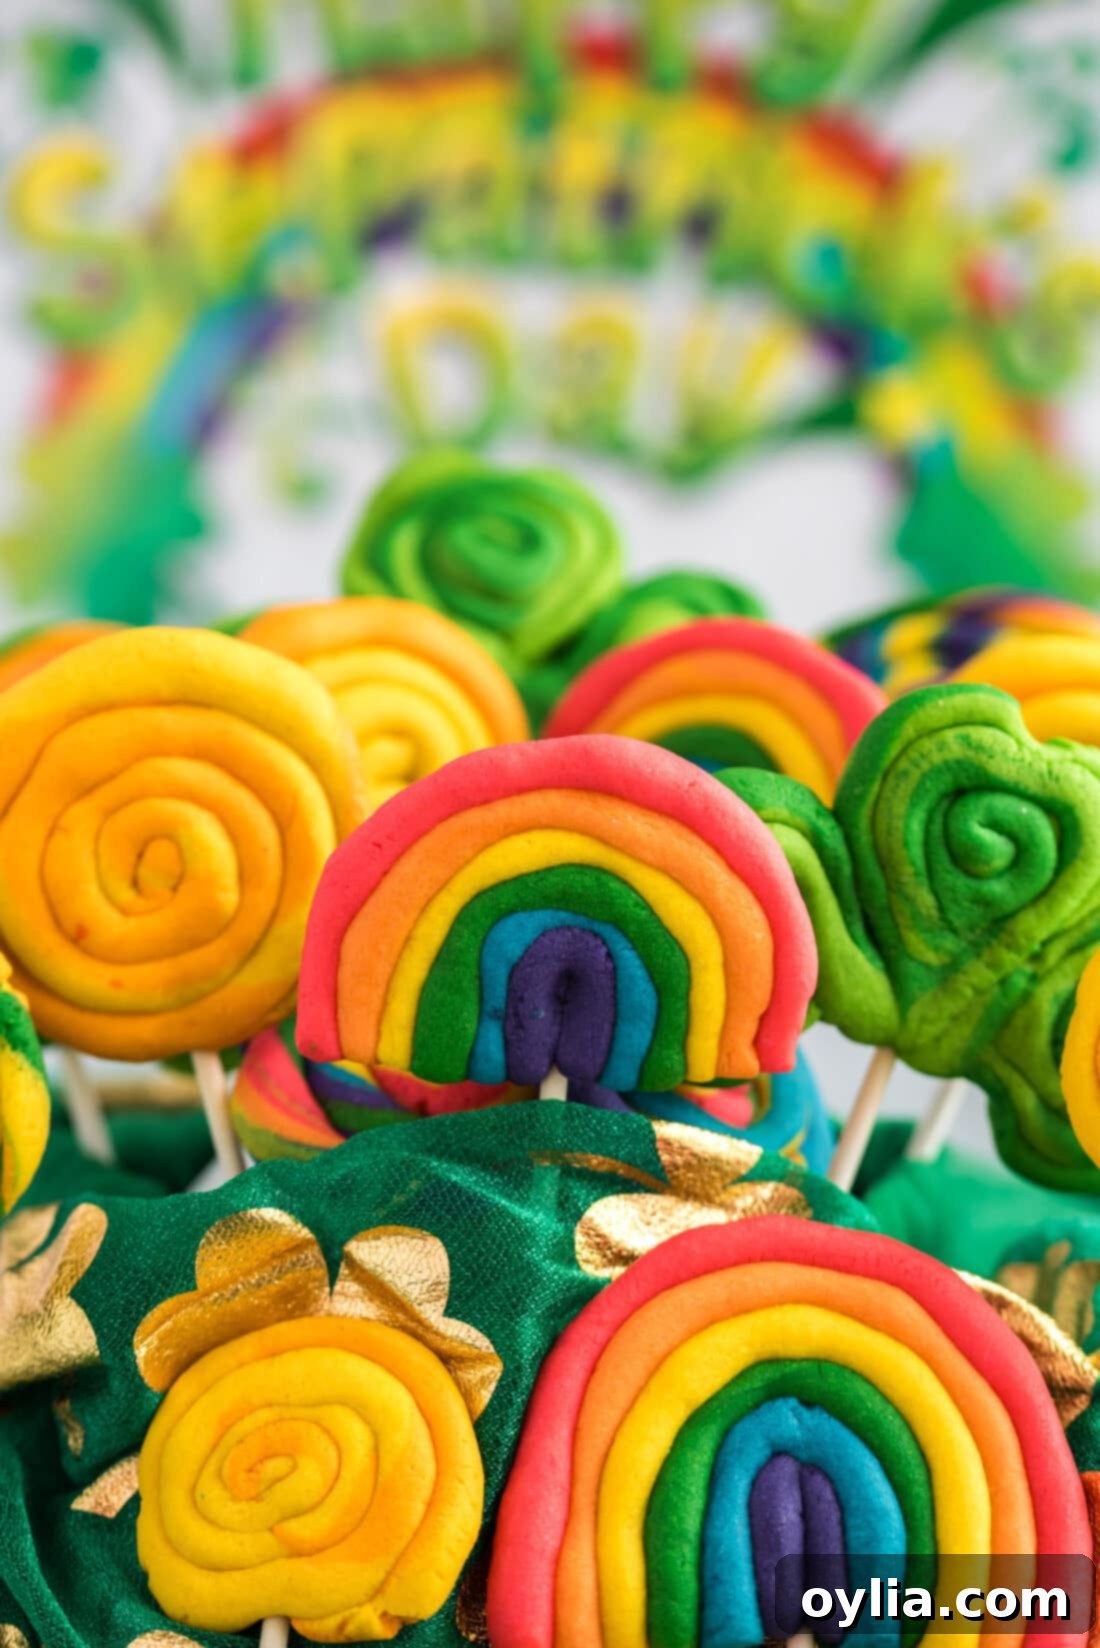
This St. Patrick’s Day cookie recipe isn’t just a recipe; it’s an invitation to a world of vibrant color and baking fun! What makes it truly special is the incredible combination of ease, visual appeal, and delicious flavor. Our sugar cookie base, enhanced with cream cheese, yields a remarkably soft and tender cookie that holds its shape beautifully while baking, making it perfect for intricate designs. Whether you’re crafting simple gold coins, lucky green clovers, sweeping rainbow arches, or mesmerizing spiral rounds bursting with every hue of the rainbow, you’ll adore the process and the stunning results.
These festive St. Patrick’s Day sugar cookies are surprisingly simple to master, even for novice bakers. The key to success lies in setting aside adequate time for the dough to chill in the refrigerator, ensuring it’s firm enough to handle and shape without sticking. This chill time is crucial for preventing your delightful shapes from spreading in the oven, guaranteeing those crisp edges and defined patterns. The beauty of this recipe also lies in its versatility: feel free to mix and match shapes and colors to your heart’s content, or focus on a single iconic design. It’s entirely up to you how you bring your St. Patrick’s Day vision to life!
Essential Ingredients for Your St. Patrick’s Day Cookies
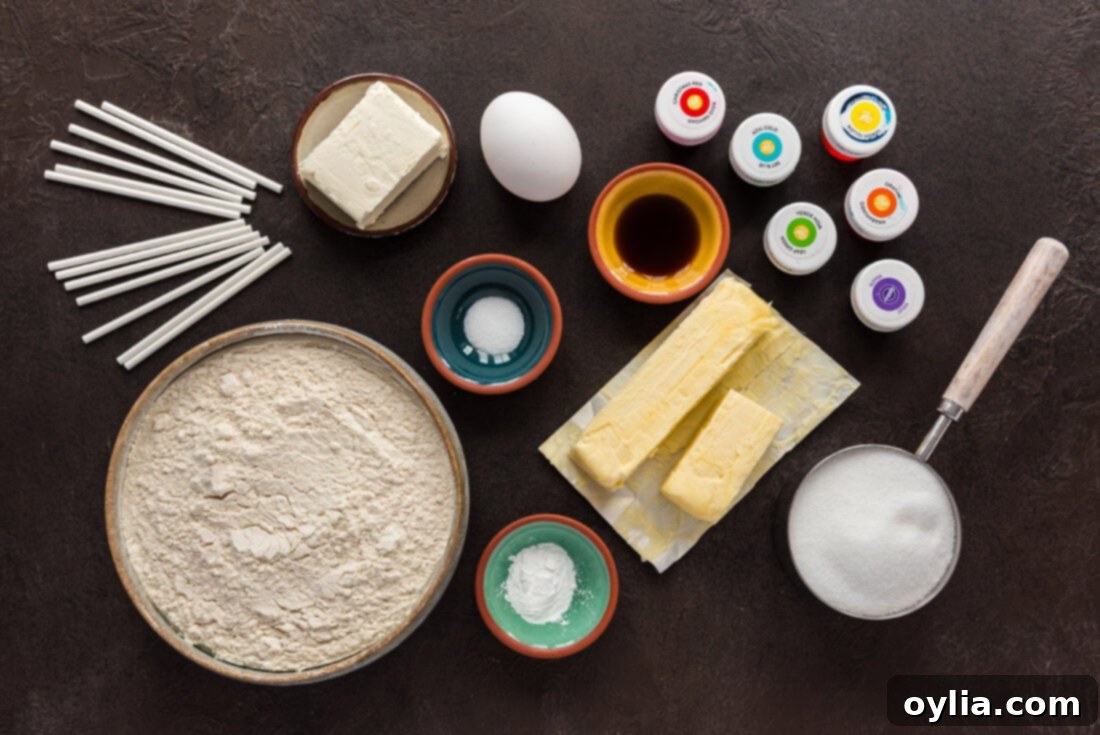
Gathering your ingredients is the first step towards a batch of festive cookies. While the full, precise measurements and detailed instructions are available in the printable recipe card at the end of this post, here’s a quick overview of what you’ll need to get started on these enchanting St. Patrick’s Day treats:
Ingredient Spotlight & Expert Tips
Understanding your ingredients is key to baking success. Here’s a closer look at the components that make these St. Patrick’s Day sugar cookies so special, along with some helpful tips:
The Cookie Dough: Our base is a simple yet incredibly delicious sugar cookie dough, elevated with cream cheese for an extra tender, soft, and slightly tangy crumb. This addition not only enhances the flavor but also helps the cookies maintain their shape during baking, which is crucial for intricate designs. You have the freedom to divide the dough into multiple sections, as we did, to create a variety of cookie types like shamrocks, rainbows, gold coins, or twisted coil cookies. We affectionately refer to the raw, chilled dough as “play dough” because of its vibrant colors and pliable texture, which makes shaping so much fun! Rest assured, though, these are 100% edible and utterly delightful sugar cookies that everyone will adore. This same versatile dough has been used for other themed treats, like our adorable Valentine’s Play Dough Cookies, proving its adaptability for any festive occasion.
Food Coloring: For truly stunning and vibrant St. Patrick’s Day cookies, we highly recommend using paste gel food coloring. Unlike liquid food coloring, gel colors are highly concentrated, delivering rich, intense hues without significantly altering the dough’s consistency. This means you’ll achieve brighter colors with less product, preventing your dough from becoming too wet or sticky. Start with a small amount on a toothpick and gradually add more until you reach your desired shade. Remember, a little gel goes a long way, so it’s always better to build up the color slowly than to add too much at once.
Crafting Your St. Patrick’s Day Cookies: A Step-by-Step Guide
These step-by-step photos and instructions are here to help you visualize how to make this recipe a success. For the complete printable version of this recipe, including all precise measurements and detailed instructions, simply Jump to Recipe at the bottom of this post.
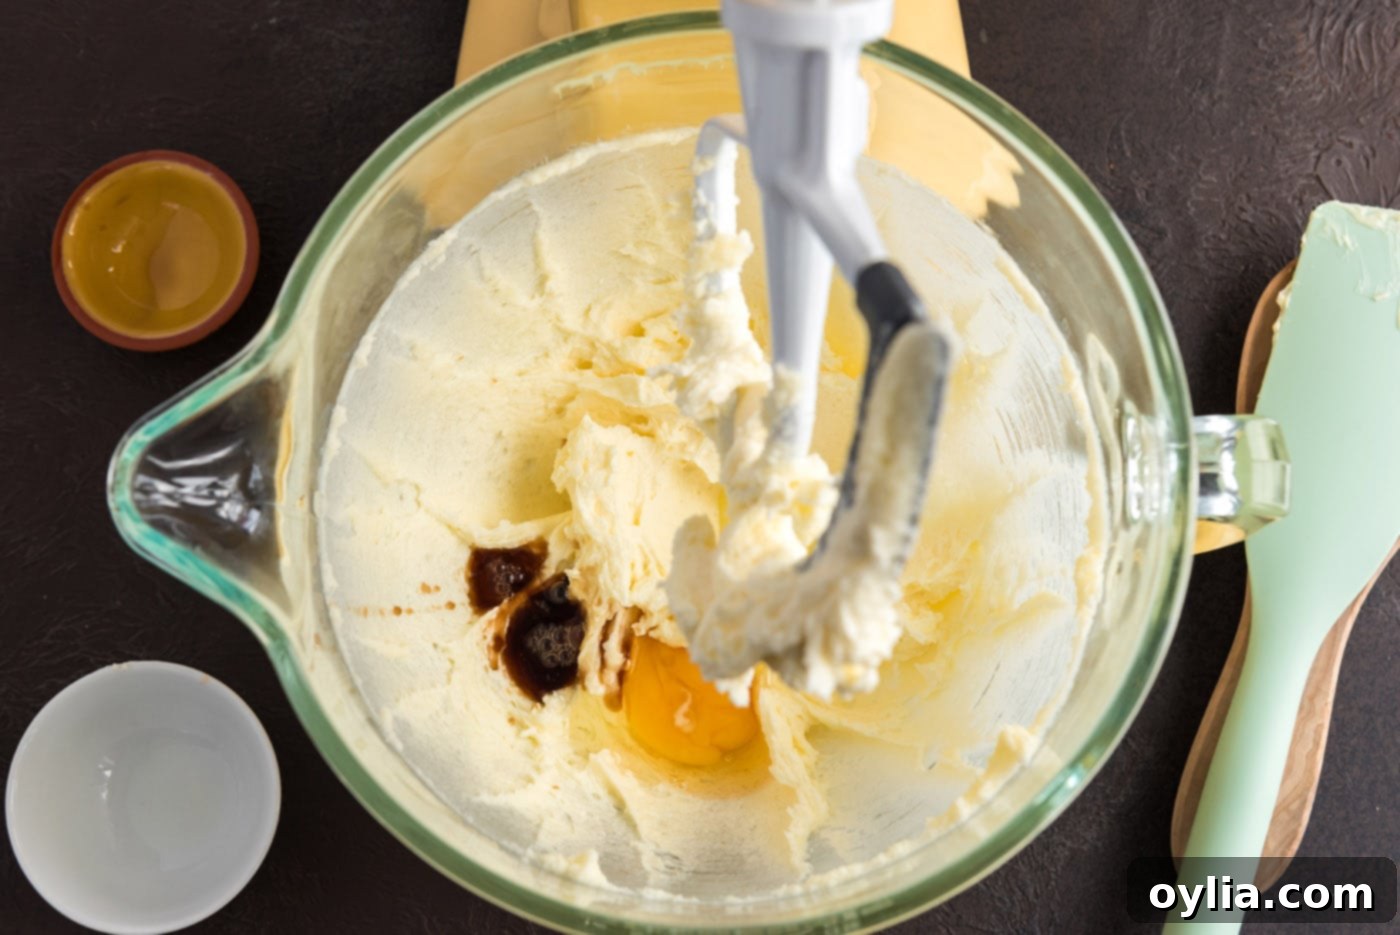
- Begin by creaming together the softened butter, cream cheese, and granulated sugar in a large bowl. Beat until the mixture is light, fluffy, and well combined. This process incorporates air, giving your cookies a tender texture. Next, beat in the large egg and vanilla extract until the mixture is smooth and thoroughly integrated.
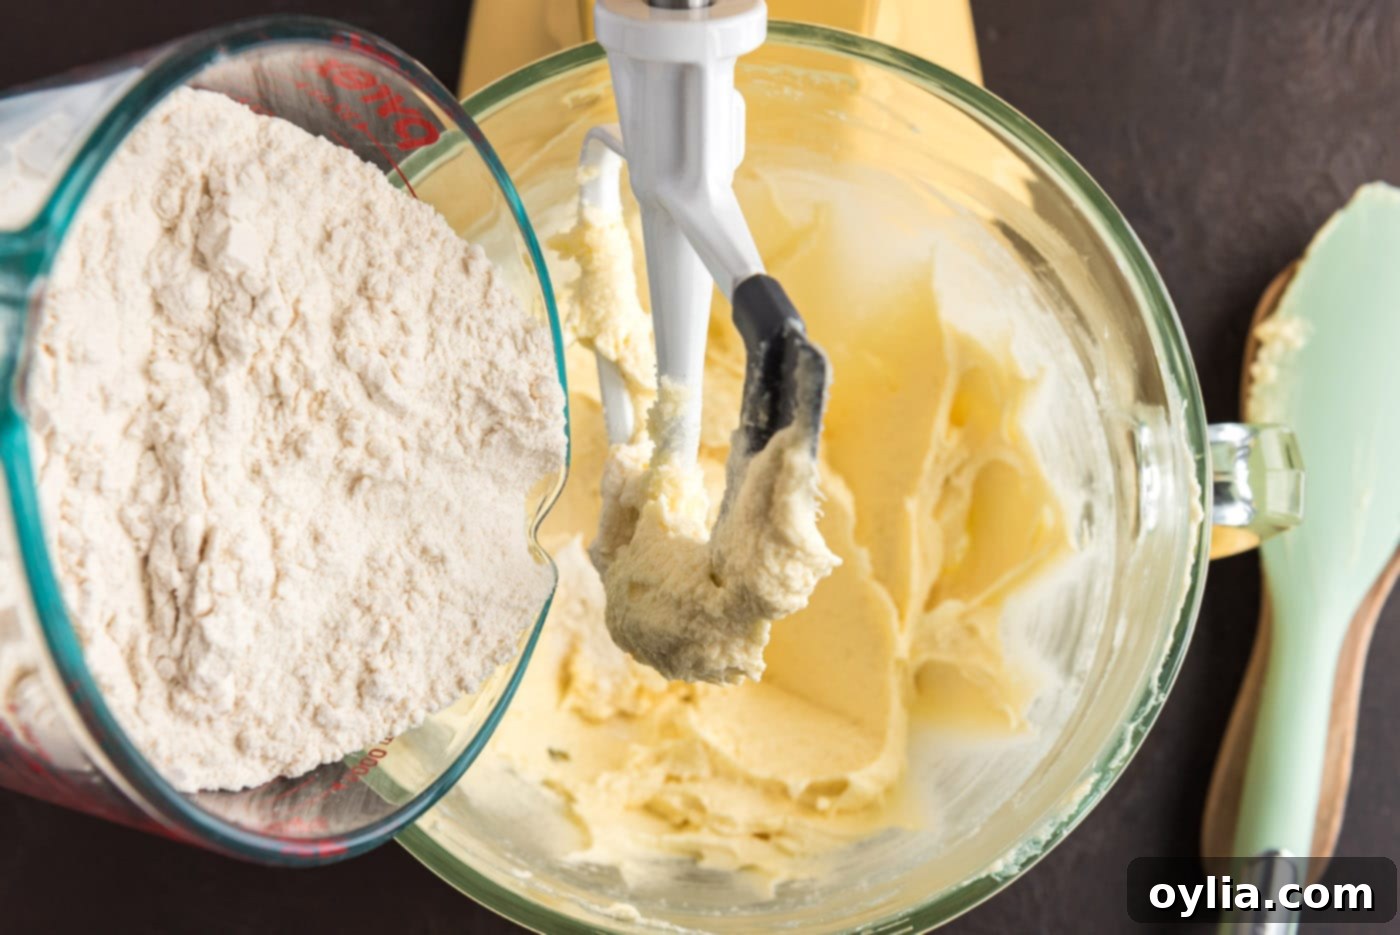
- In a separate medium bowl, whisk together the all-purpose flour, baking powder, and salt. Gradually add these dry ingredients to your creamed wet mixture, mixing until a soft, cohesive dough just begins to form. Be careful not to overmix, as this can lead to tough cookies. Stop mixing as soon as no dry streaks of flour remain.
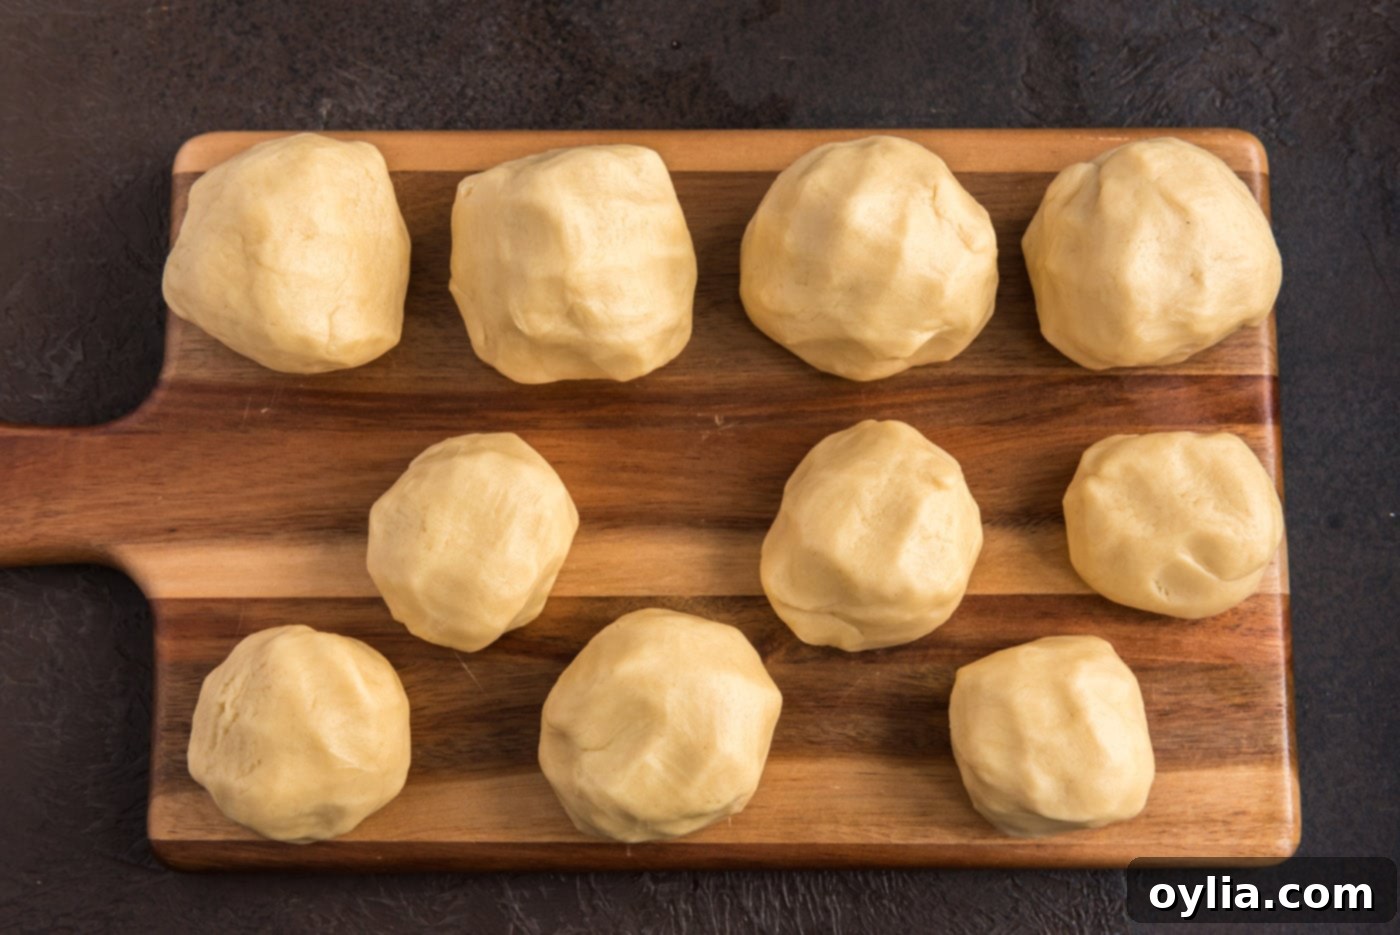
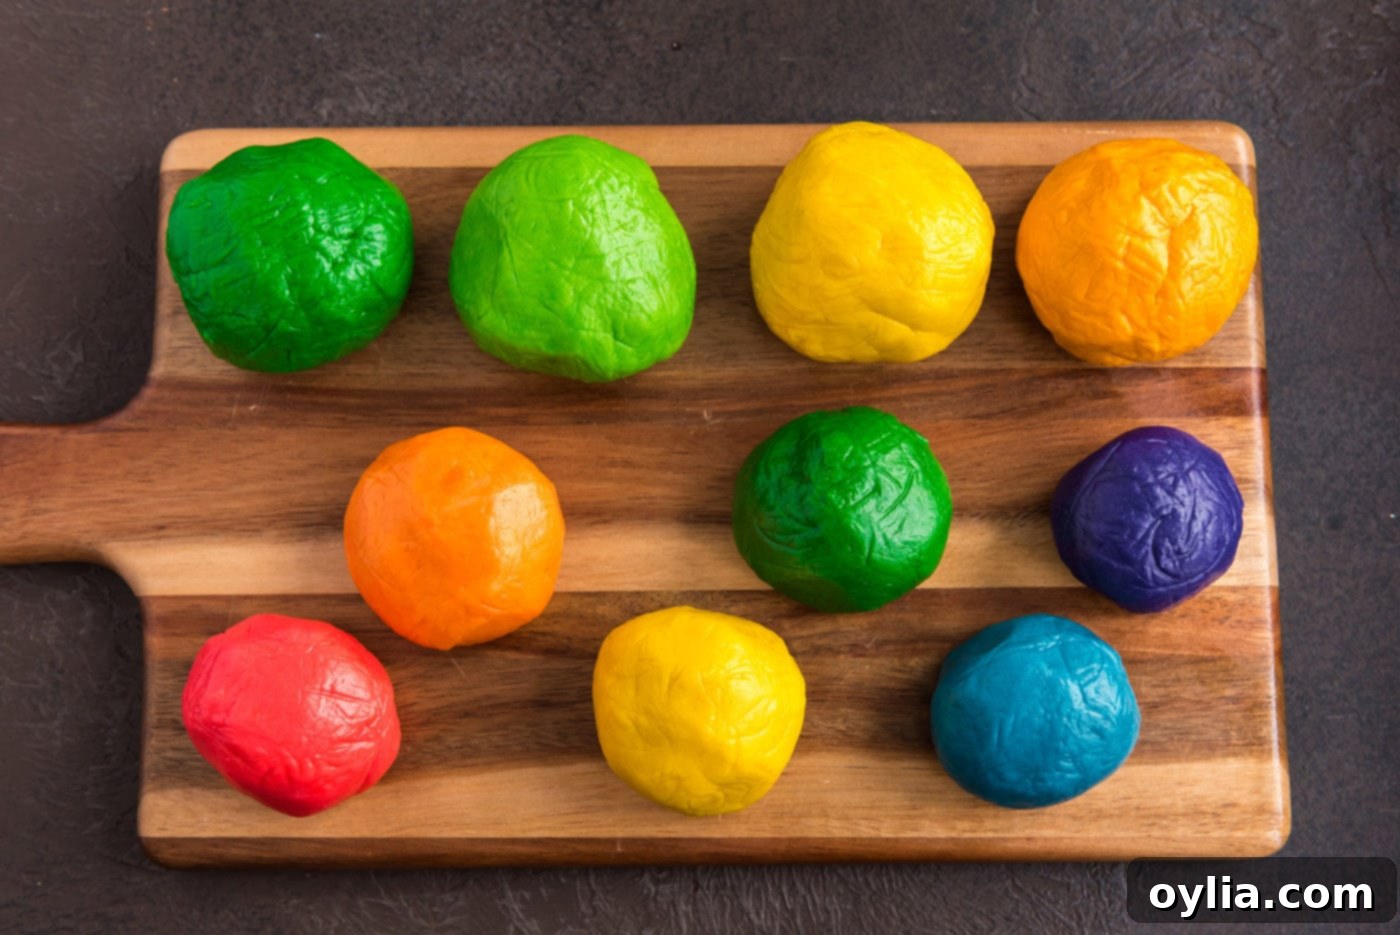
- Now for the fun part: coloring the dough! Separate your dough into two main batches. For creating the vibrant rainbow cookies, divide one batch into six equal pieces. Using paste gel food coloring, tint each section a distinct color of the rainbow: red, orange, yellow, green, blue, and indigo (or purple). Work the color into the dough thoroughly until evenly distributed.
- For the other main batch, which will become your gold coins and shamrocks, divide it into four pieces. Tint two of these pieces green – one a darker shade, the other a lighter green for contrast. The remaining two pieces should be tinted yellow. In retrospect, if you desire a noticeable contrast between the yellow gold coins, consider adding a tiny touch of orange to one of the yellow batches. Once all your dough sections are colored, wrap each individual color securely in plastic wrap and chill them in the refrigerator for at least two hours. This chilling step is essential for firming up the dough, making it easier to handle and preventing it from spreading during baking.
- Once you begin shaping your cookies, preheat your oven to 350 degrees F (175 degrees C).
Crafting Your Golden Coin Cookies
These delightful gold coin cookies are wonderfully straightforward to create, making them a fantastic starting point! To achieve their unique swirled effect:
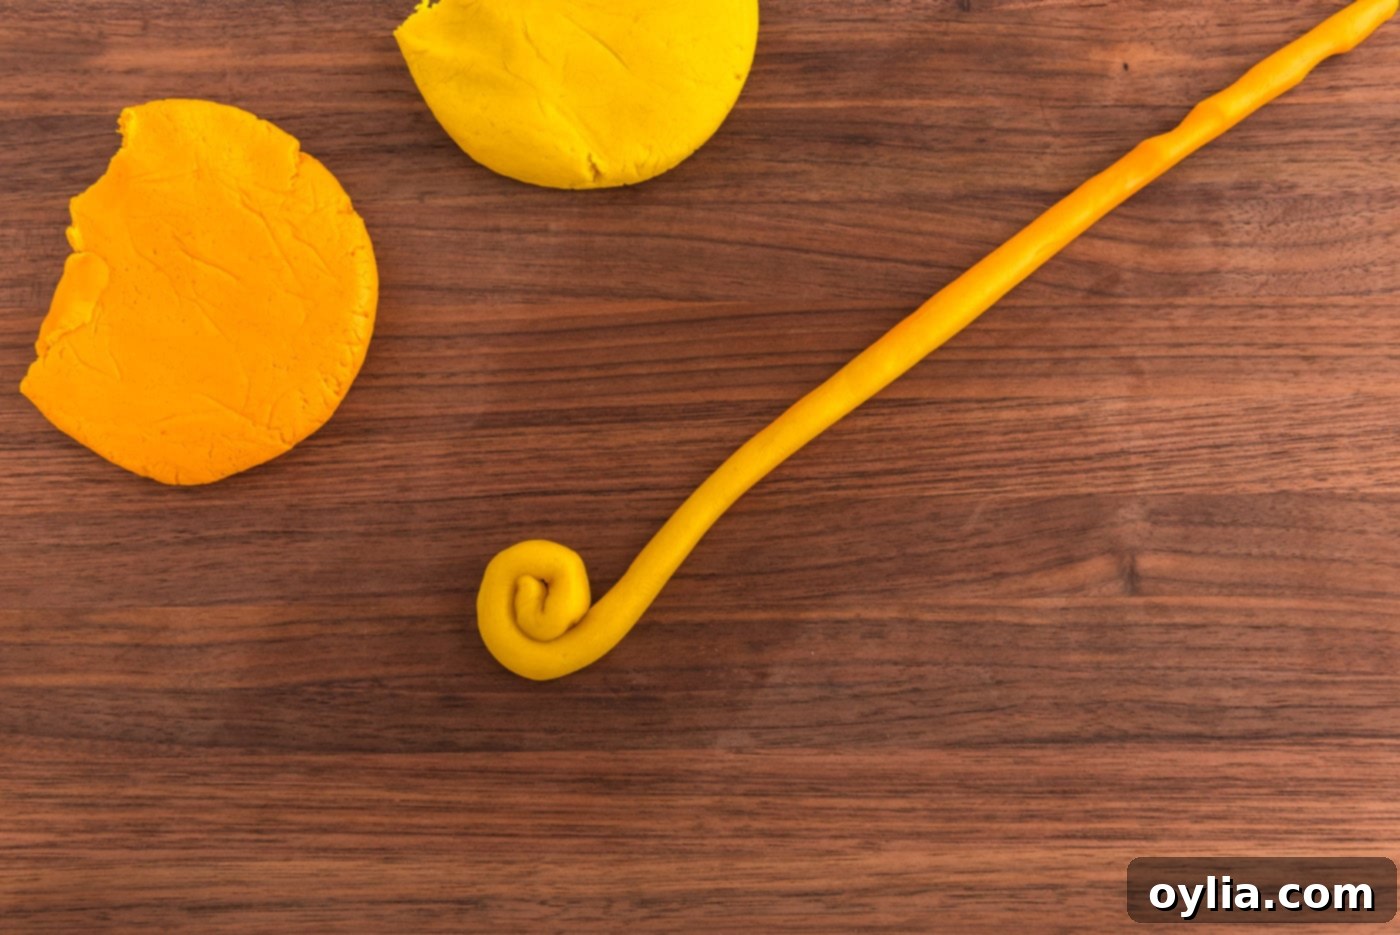
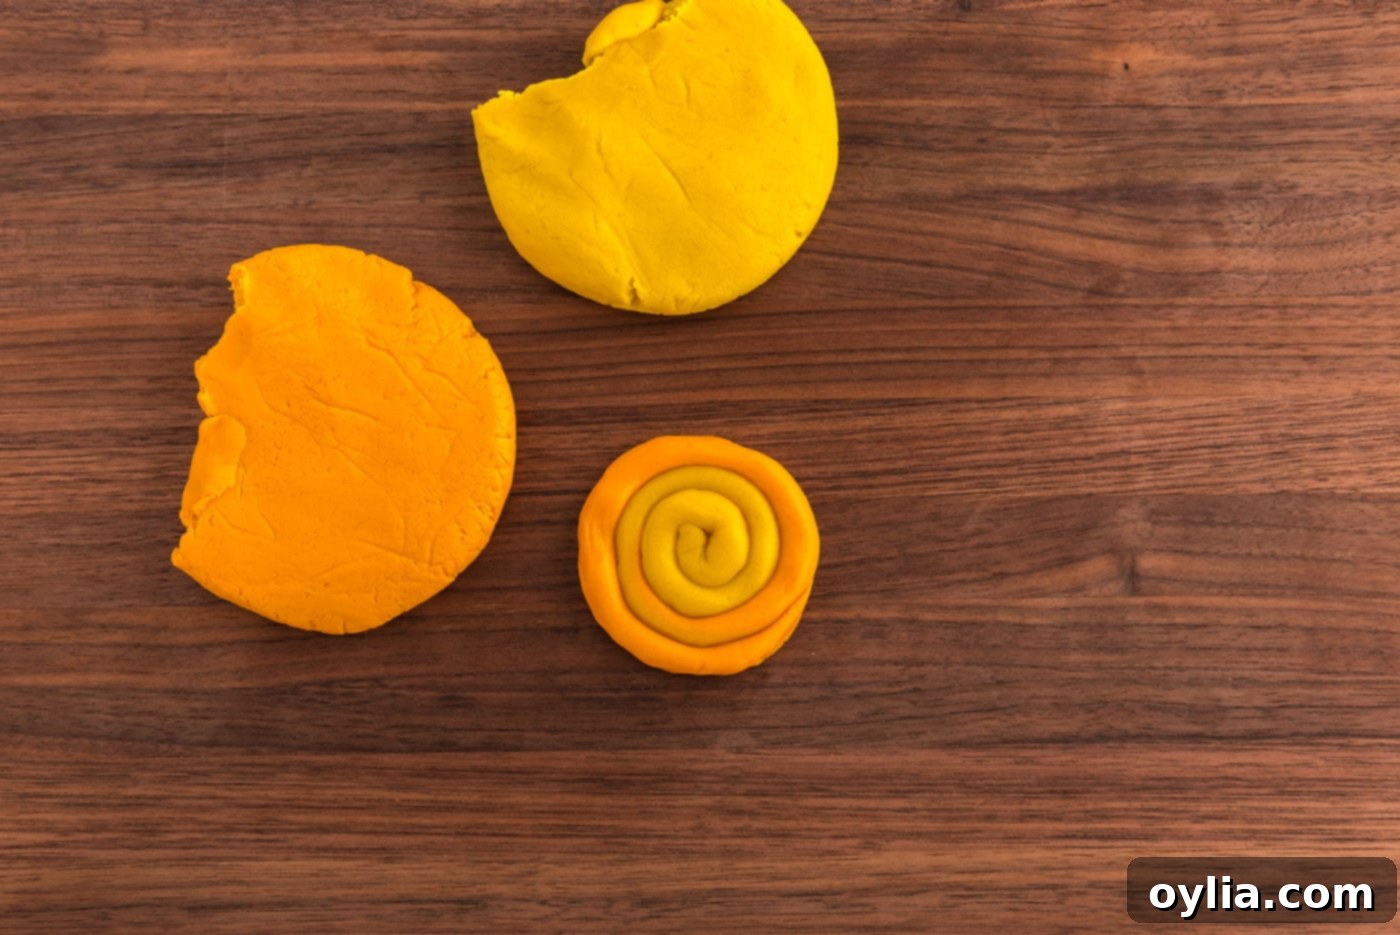
- Take your two distinct shades of yellow dough. Roll a ¾-inch ball from each shade. Gently press and roll these two balls together in your palms, just enough to combine them into a single, marbled ball. Avoid overmixing; the goal is a lovely swirl, not a solid color.
- Next, using the palms of both hands, roll the marbled dough ball into a long ‘snake’ shape, approximately 10-12 inches in length. Aim for a relatively even thickness.
- Starting from one end, carefully coil the dough snake tightly into a spiral, resembling a coin. Place it on your prepared baking sheet. Repeat with the remaining yellow dough.
Designing Your Lucky Shamrock Cookies
To create charming shamrock cookies, you’ll be forming individual heart shapes from green dough and assembling them. Here’s how:
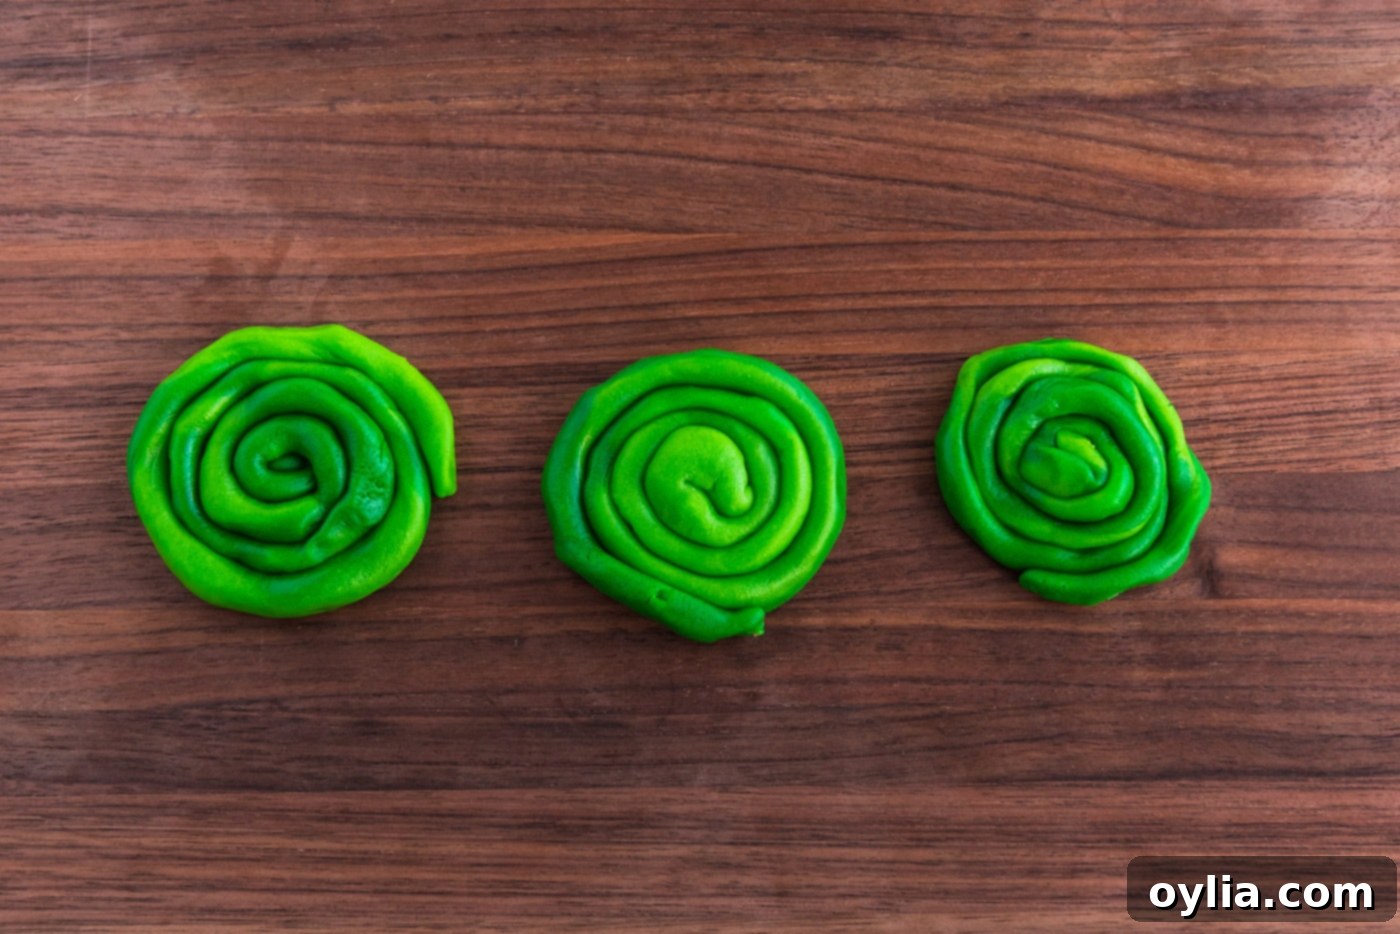
- Each shamrock will consist of three heart-shaped green discs. Take your two different shades of green dough. Roll a ¾-inch ball from each shade, then gently roll the two balls together in your palms to create a subtly marbled effect, similar to the gold coins. Again, don’t overmix; the gentle swirl adds visual interest.
- Using the palms of both hands, roll this marbled green dough into a snake, approximately 10-12 inches long.
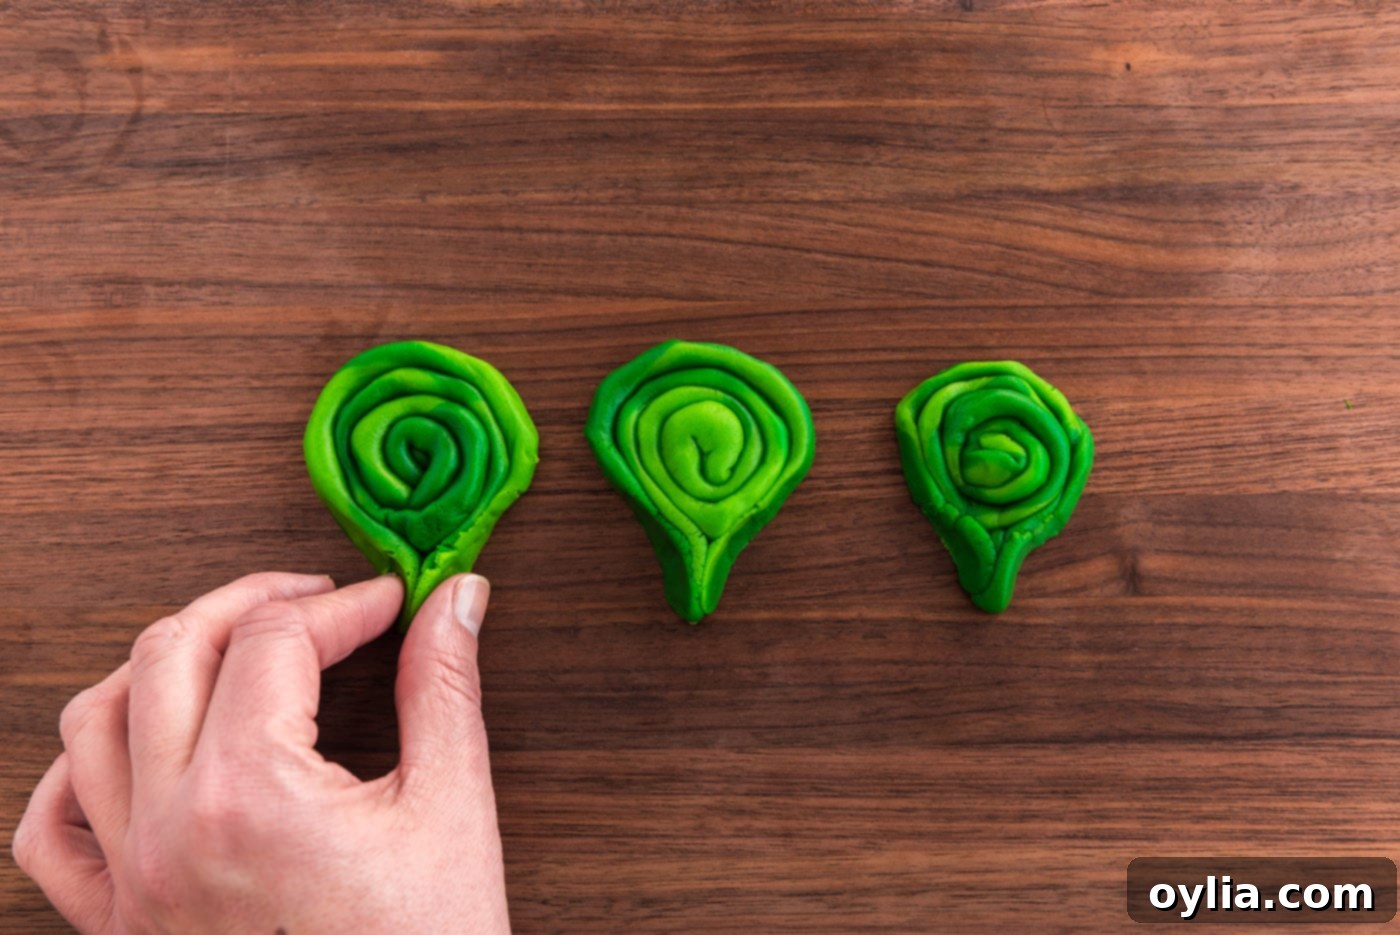
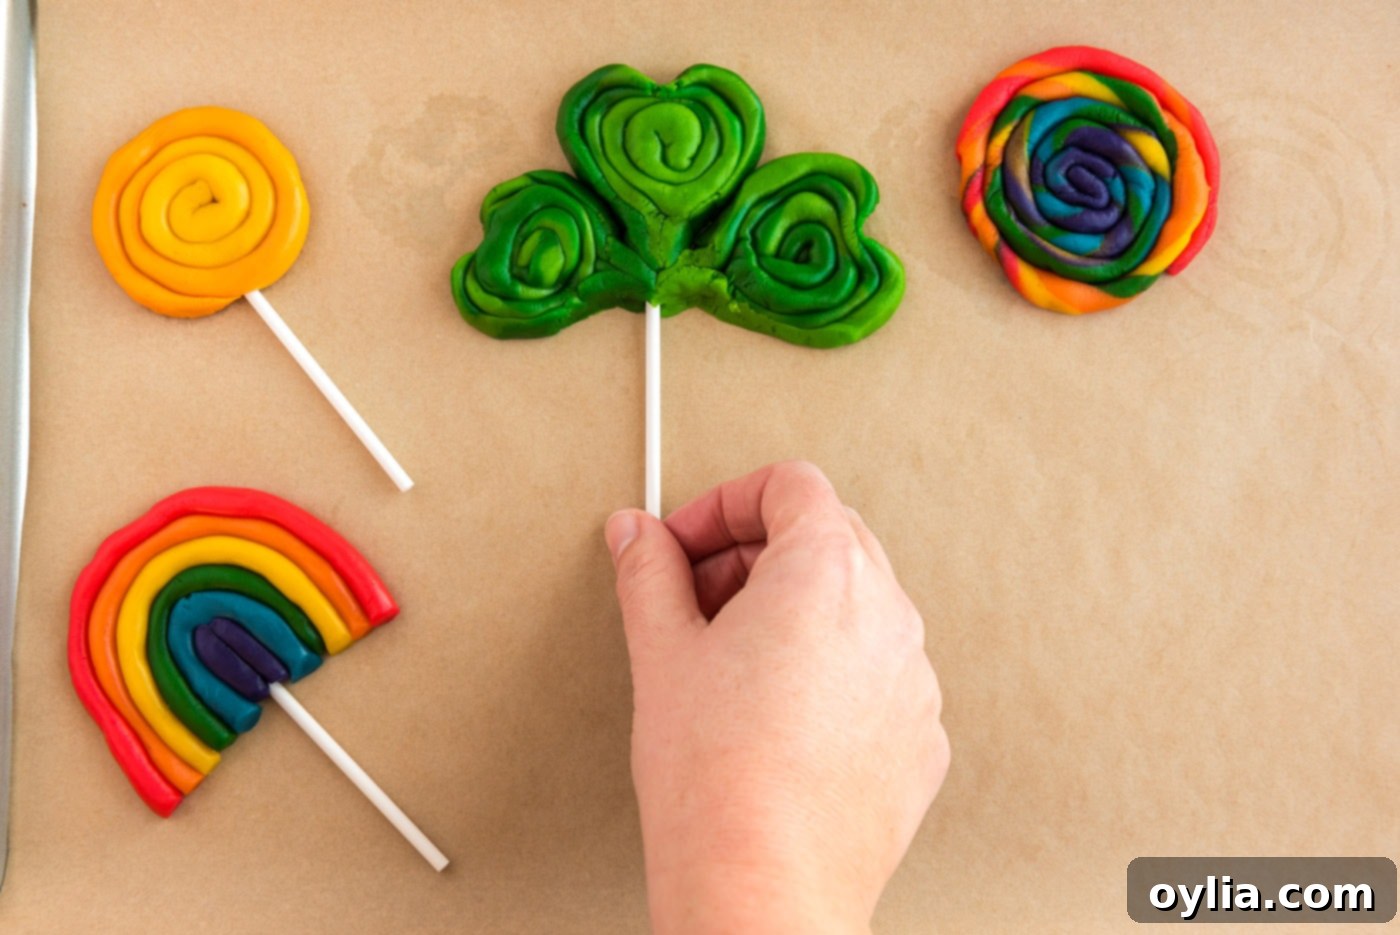
- Now, roll this snake into a tight coil, forming a disc. Where the outer end of the coil finishes, gently pinch the disc into a distinct point. This will form the bottom tip of your heart shape.
- Next, use the back of a butter knife or a lollipop stick to create a small indentation or dent at the opposite (top) end of the disc. This will complete the classic heart shape. Repeat this process to create two more green hearts.
- Once you have three perfectly formed green hearts, arrange them together, pointing inward, to create the iconic three-leaf shamrock. Gently press them together to ensure they adhere. If desired, insert a lollipop stick into the base of the shamrock to make a cookie pop.
Assembling Vibrant Rainbow Cookies
These cheerful rainbow cookies are incredibly simple and visually striking. Here’s how to create them:
- For each rainbow cookie, take small portions of your previously colored red, orange, yellow, green, blue, and indigo (purple) dough.
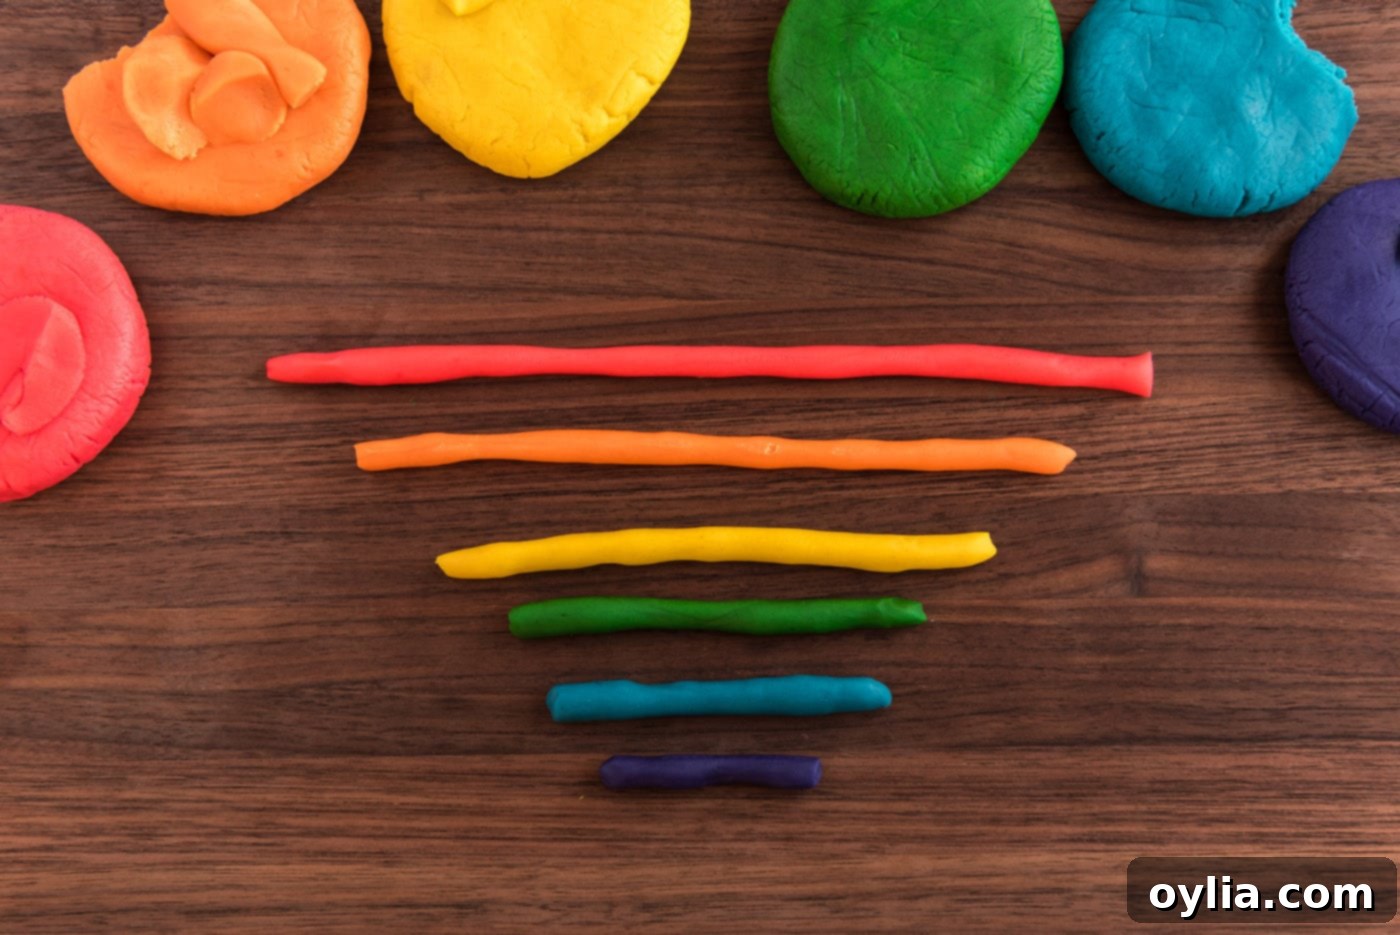
- Roll each colored portion into a separate snake shape. The key here is to make the purple snake the shortest and the red snake the longest, with gradually increasing lengths for the colors in between (indigo < blue < green < yellow < orange < red).
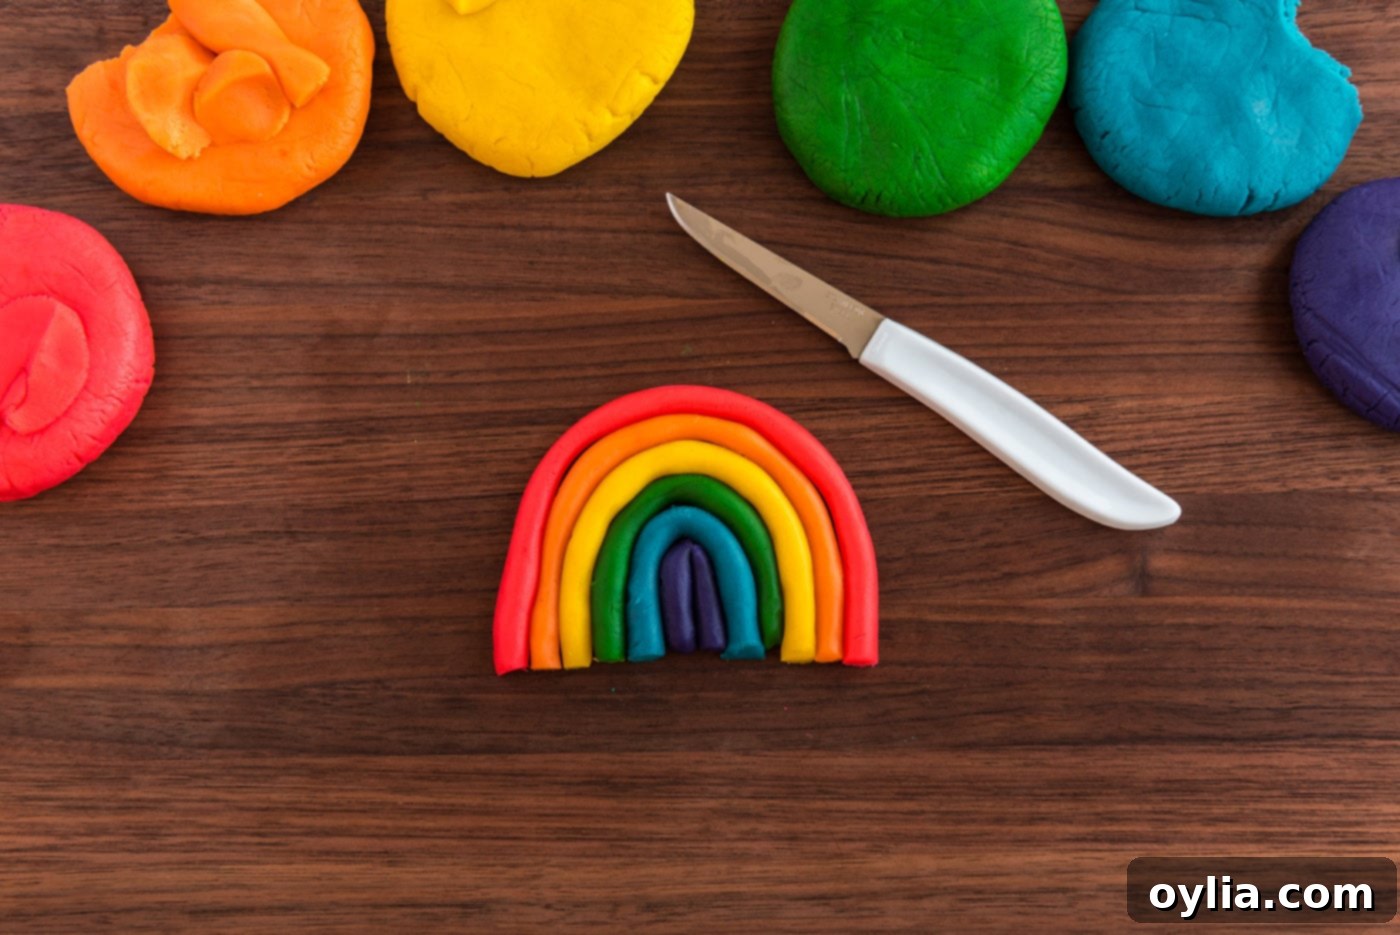
- Carefully arrange the dough snakes next to each other, starting with purple on the inside and red on the outside. Gently curve them around each other to form a rainbow arch. Press lightly to ensure they stick together.
- If desired, insert a lollipop stick into the base of the rainbow to create a fun cookie pop.
Creating Dazzling Rainbow Twisted Coil Cookies
These cookies offer a mesmerizing swirl of colors, combining all the shades of the rainbow into one enchanting treat. Here’s how to make them:
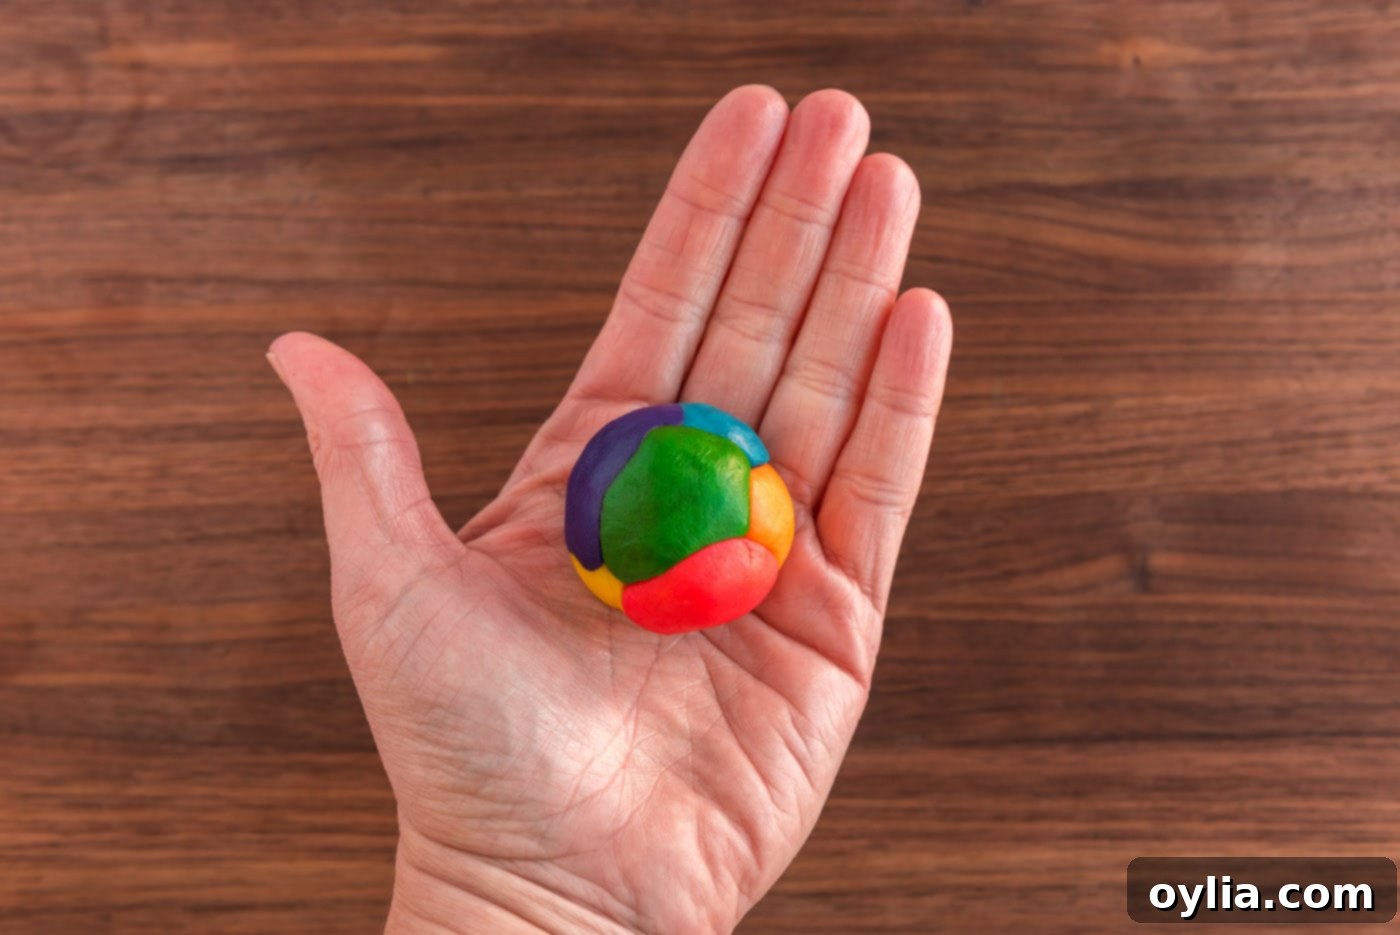
- To begin, you will need a ½-inch ball of each of your rainbow-colored doughs (red, orange, yellow, green, blue, and indigo/purple).
- Gently bring all six colored balls together and lightly combine them into a single, multi-colored ball. The goal is to keep the colors somewhat distinct but merged enough to create a beautiful swirl.
- From this combined ball, roll the dough between your palms into a long snake shape, approximately 8-10 inches. Then, starting from one end, coil the snake tightly into a spiral, forming a round cookie.
- Bake your beautifully shaped cookies for approximately 8 minutes, or until the edges are lightly golden brown. Baking times can vary depending on your oven and cookie thickness, so keep a close eye on them. Once baked, transfer the cookies to a wire rack to cool completely. Store them in an airtight container at room temperature to maintain their freshness and delightful texture.
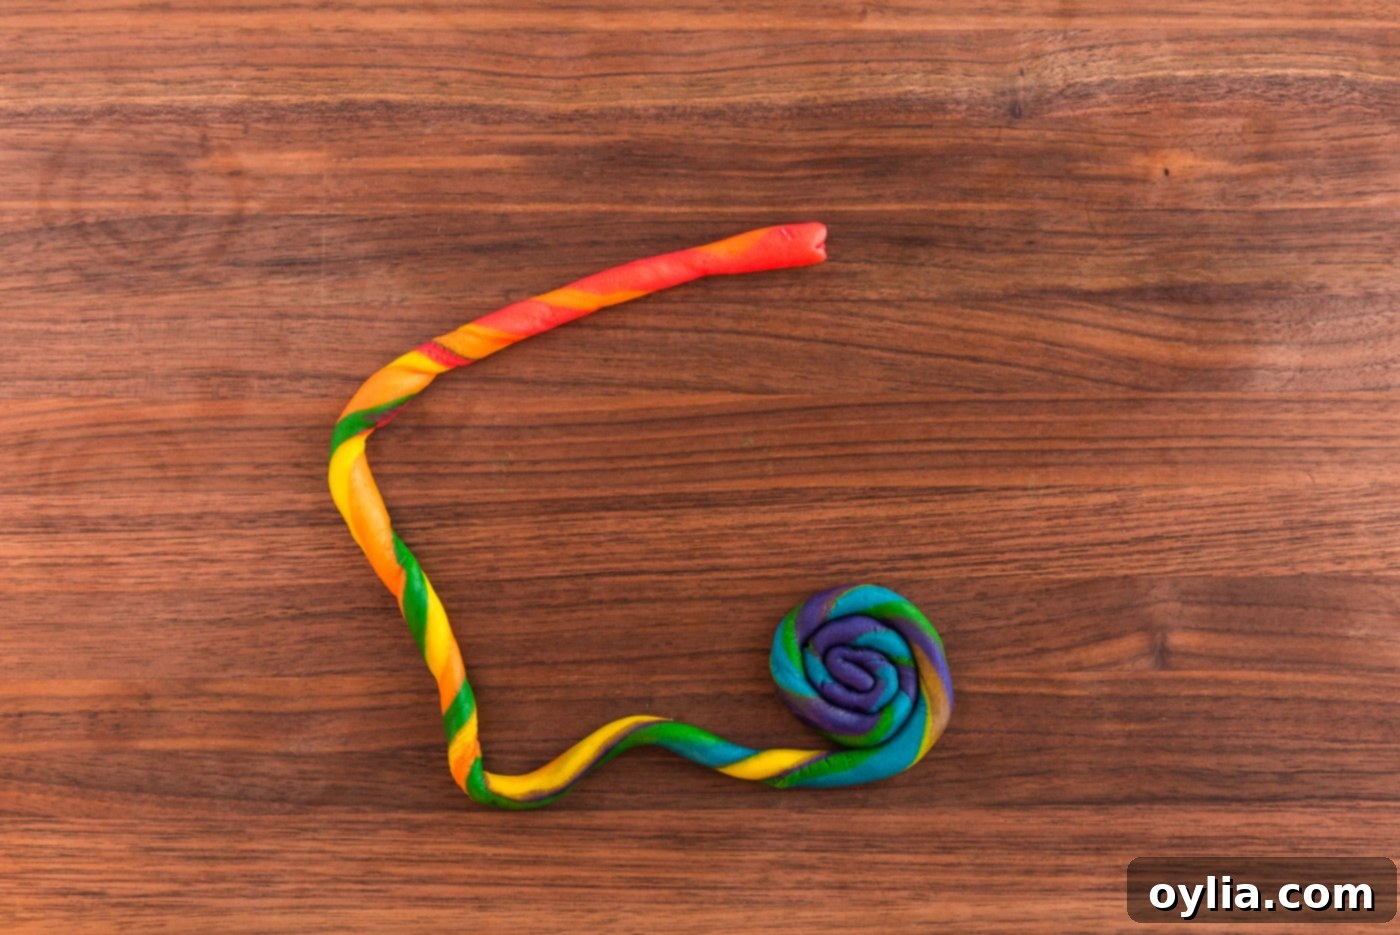
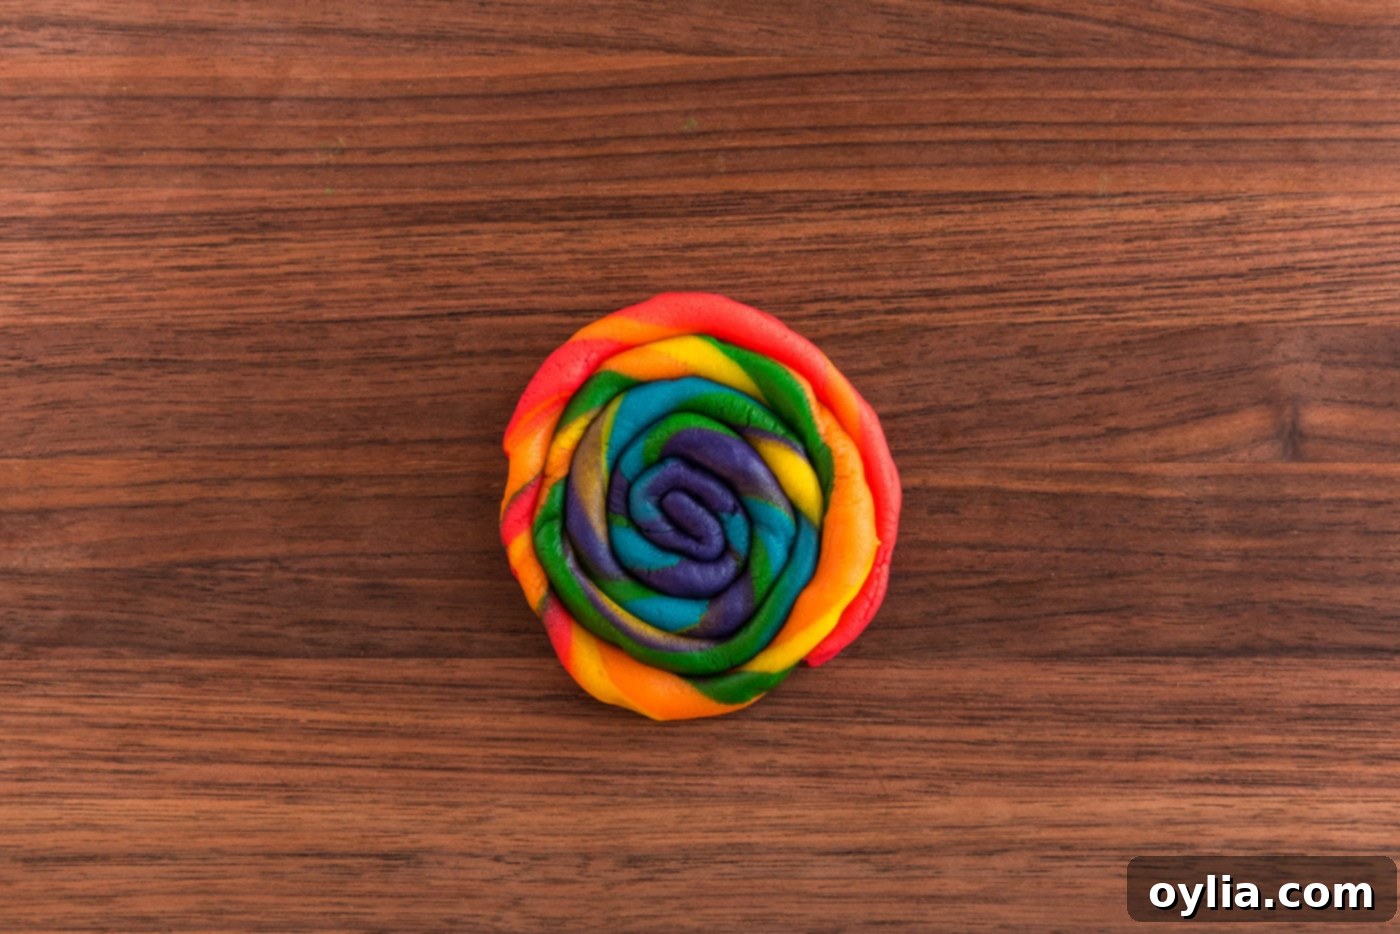
TIP: Don’t worry if your dough snake breaks a couple of times while you’re rolling it. This is normal, especially with multiple colors. Simply pinch it back together gently. The cookies will bake up perfectly fine, and the break will be virtually unnoticeable in the final baked product.
Frequently Asked Questions & Expert Tips for Perfect Cookies
To maintain their delicious taste and tender texture, store your baked St. Patrick’s Day cookies in an airtight container at room temperature. They will stay fresh and enjoyable for 4-5 days. For longer storage, consider freezing them.
Absolutely! This versatile cookie dough freezes exceptionally well. After you’ve chilled the dough in the refrigerator as per the recipe, wrap each individual colored dough ball tightly in plastic wrap. Then, place these wrapped balls into a large freezer-safe bag or container. The dough can be frozen for up to 3 months. When you’re ready to bake, simply thaw the dough in the refrigerator overnight before shaping and baking as directed.
Yes, you certainly can! Adding lollipop sticks transforms these cookies into fun, handheld treats, perfect for parties or as edible gifts. Just ensure that the sticks you use are oven-proof. Before baking, carefully insert a stick into the backside of each shaped cookie, pressing gently to make sure it adheres well to the dough. This ensures they won’t fall out when picked up after baking.
Delightful Serving Suggestions
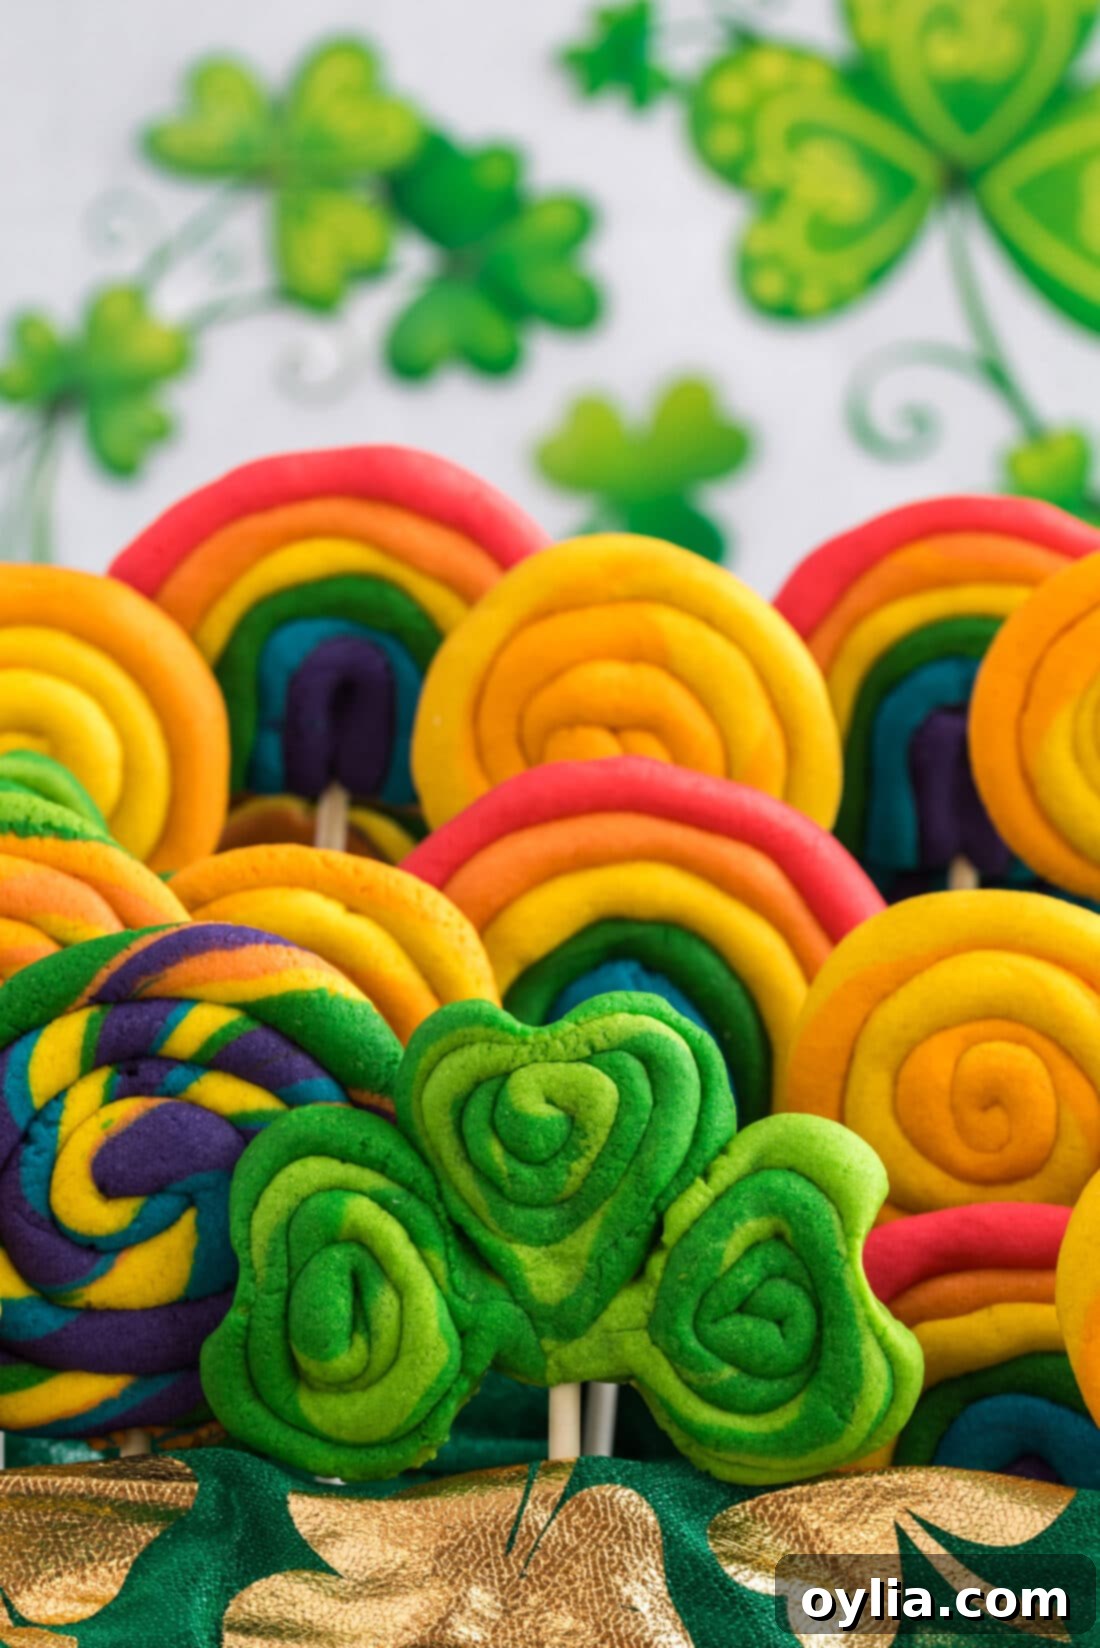
These vibrant St. Patrick’s Day cookies are perfect in so many ways! Serve them alongside a tall, frosty glass of milk for a classic treat that everyone, young and old, will enjoy. For those looking to share a little luck, wrap a few cookies in clear cellophane baggies and tie them with a festive green or rainbow ribbon – they make charming homemade gifts for friends, teachers, or party favors. This recipe is also an absolutely wonderful opportunity to invite your kids into the kitchen. They’ll have a blast helping to mix colors, roll the dough, and create all the fun shapes, watching their efforts transform into brilliant, delicious cookies in the oven. It’s a memorable way to celebrate the holiday and create lasting family memories.
Explore More St. Patrick’s Day Recipes
Looking for more ways to celebrate St. Patrick’s Day with delicious food? Check out these other festive recipes that are sure to bring some Irish cheer to your table:
- Fluffy & Colorful Rainbow Pancakes: Start your St. Patrick’s Day with a breakfast burst of color!
- Lucky Shamrock Shaped Brownies: Rich, fudgy brownies cut into festive shamrock shapes.
- Naturally Green Shamrock Shakes: A healthy and refreshing twist on a classic, vibrant green shake.
- Decadent Bailey’s Irish Cream Chocolate Fudge: An adults-only treat infused with the rich flavor of Irish cream.
I absolutely love baking and cooking, and it brings me so much joy to share my kitchen experiences and tested recipes with all of you! Remembering to come back each day for new ideas can be tough amidst a busy schedule, which is precisely why I offer a convenient newsletter. Every time a new recipe is posted, it lands right in your inbox. Simply subscribe here and start receiving your free daily recipes, making it easier than ever to discover your next favorite dish or dessert!

St. Patrick’s Day Cookies
IMPORTANT – There are often Frequently Asked Questions within the blog post that you may find helpful. Simply scroll back up to read them!
Print It
Pin It
Rate It
Save ItSaved!
Ingredients
- ¾ cup unsalted butter softened to room temperature
- 3 ounces cream cheese softened
- 1 cup granulated sugar
- 1 large egg
- 1 teaspoon vanilla extract
- 2 ¾ cup all purpose flour
- 1 teaspoon baking powder
- ¼ teaspoon salt
- gel food coloring in red, orange, yellow, green, blue, and indigo (purple).
Tools You’ll Need
-
Electric mixer (stand mixer or hand mixer)
-
Lollipop sticks optional; ensure they are oven-proof for baking.
-
Baking sheet (lined with parchment paper for easy cleanup)
Before You Begin: Important Notes for Success
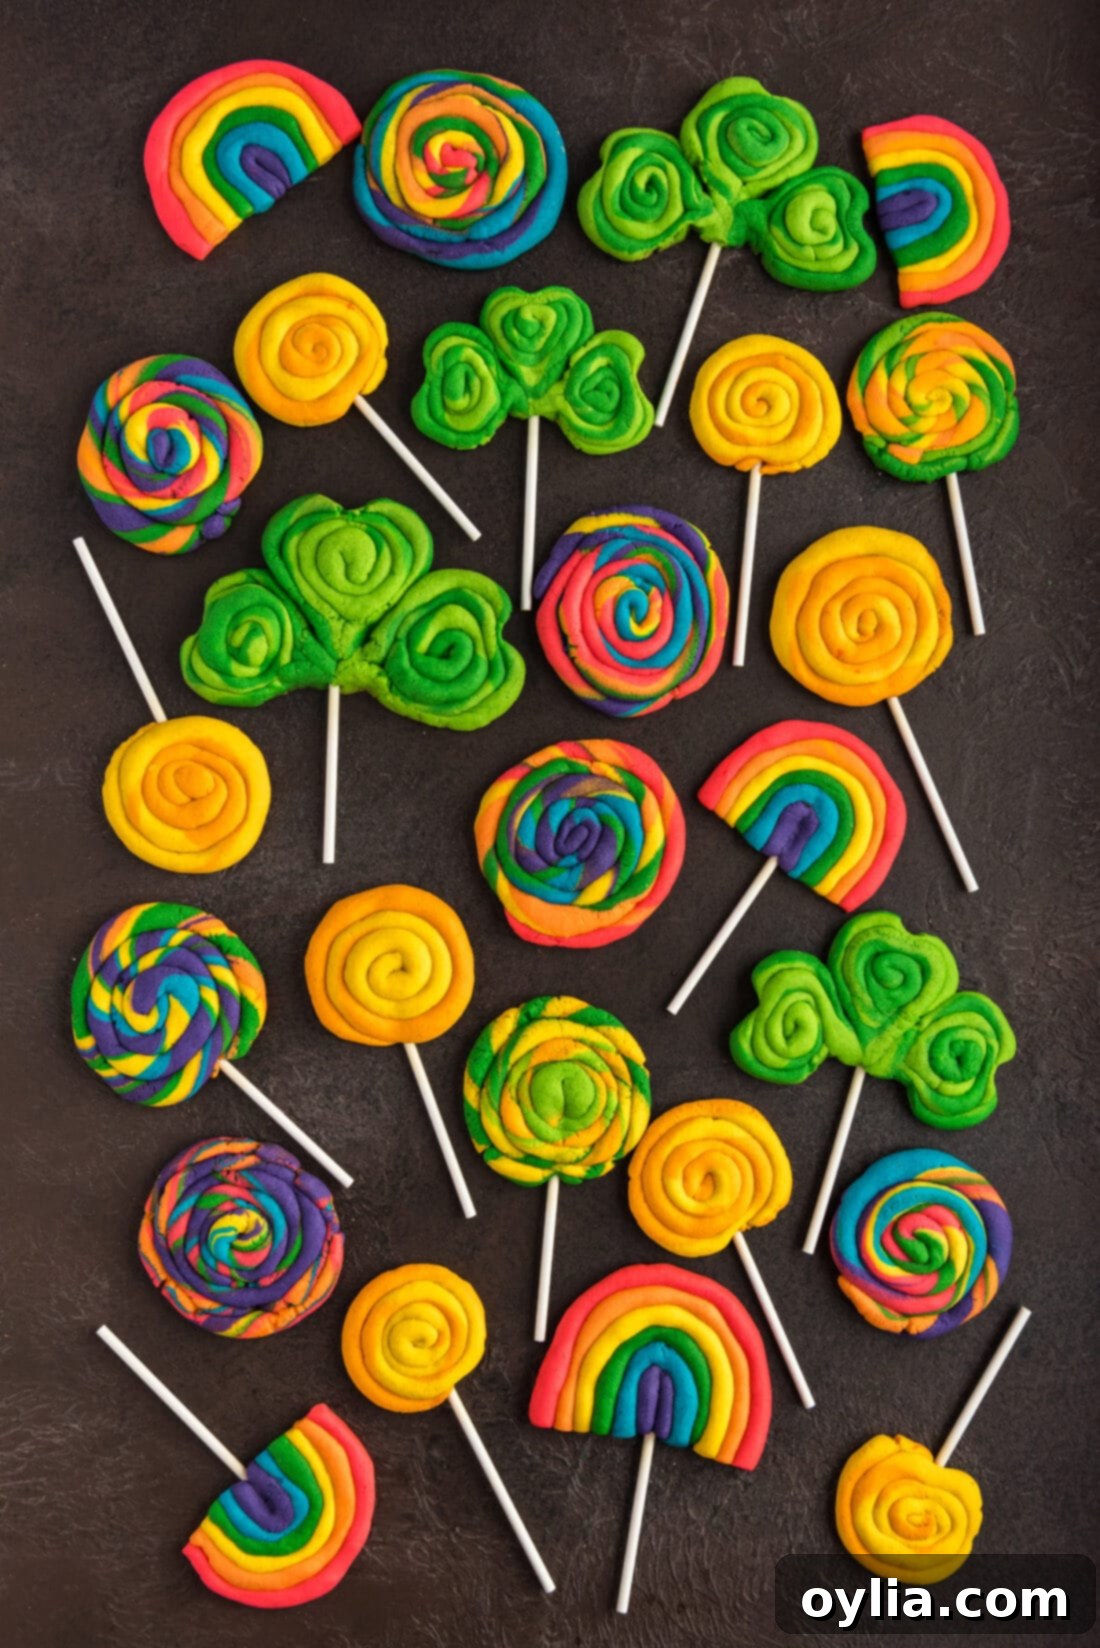
- This recipe is quite flexible and can yield anywhere from 20 to 30 cookies, depending on the size and complexity of the shapes you decide to make. Consequently, the nutritional facts listed are estimates, as each cookie will naturally vary in size and ingredient distribution.
- For the most vivid and striking colors in your cookies, we highly recommend using paste gel food coloring. This type of coloring is much more concentrated than liquid food coloring, meaning you’ll achieve brighter, richer hues with a smaller amount of product. This prevents over-saturating your dough with liquid, which could affect its texture. Start with a tiny dab on a toothpick and gradually add more until you reach your desired vibrancy.
- Embrace creativity! You can choose to divide the dough into several sections, as outlined in the main instructions, to create a delightful assortment of shamrocks, rainbows, gold coins, and twisted coil cookies. Alternatively, if you have a favorite design in mind, feel free to use all the dough for one specific shape – the possibilities are endless!
Instructions
Preparing the Dough
-
In a large mixing bowl, cream together the softened butter, cream cheese, and granulated sugar until the mixture is light, fluffy, and well combined. This usually takes about 2-3 minutes with an electric mixer. Then, beat in the large egg and vanilla extract until the mixture is smooth.
-
In a separate medium bowl, whisk together the all-purpose flour, baking powder, and salt. Gradually add these dry ingredients to the creamed wet mixture, stirring until a soft, cohesive dough forms. Be careful not to overmix, which can result in tough cookies.
-
Divide the dough into two main batches. For the rainbow cookies, separate one batch into 6 equal pieces. Using paste gel food coloring, tint each section a distinct color of the rainbow: red, orange, yellow, green, blue, and indigo (purple). Mix until the color is evenly distributed.
-
For the shamrocks and gold coins, divide the second main batch into 4 pieces. Tint two of these pieces green (one darker, one lighter for contrast) and the other two yellow (one slightly darker, perhaps with a tiny touch of orange, for contrast if desired).
-
Wrap each individual colored dough ball securely in plastic wrap and chill them in the refrigerator for at least two hours. This step is crucial for making the dough firm and easy to handle for shaping.
-
Once you are ready to begin shaping your cookies, preheat your oven to 350 degrees F (175 degrees C). Line a baking sheet with parchment paper.
Gold Coin Cookies
-
Take a ¾-inch ball from each of your two yellow dough shades. Gently roll these two balls together in your palms to combine them into a single, marbled yellow ball. Roll this marbled dough into a snake, about 10-12 inches long. Starting from one end, coil the snake tightly into a spiral shape resembling a coin. Place on the prepared baking sheet.
Shamrock Cookies
-
You will need three green heart shapes for each shamrock. Take a ¾-inch ball from each of your two green dough shades and gently roll them together to create a subtly marbled green ball. Roll this into a snake, about 10-12 inches long.
-
Coil the green dough snake into a disc. Where the coil ends, gently pinch the disc into a distinct point to form the bottom of a heart shape.
-
Use a butter knife or a lollipop stick to create a small indentation at the opposite (top) end of the disc, completing the heart shape. Repeat to make two more green hearts.
-
Arrange the three green hearts together to form a shamrock. Gently press them to adhere. If making cookie pops, insert an oven-safe lollipop stick into the base of the shamrock. Place on the prepared baking sheet.
Rainbow Arch Cookies
-
Roll small portions of each rainbow-colored dough (red, orange, yellow, green, blue, indigo/purple) into separate snake shapes, with purple being the shortest and red the longest. Arrange the snakes next to each other, curving them into a rainbow arch. Gently press to secure and insert an oven-safe lollipop stick if desired. Place on the prepared baking sheet.
Rainbow Coil Cookies
-
Take a ½-inch ball of each rainbow-colored dough. Gently combine them into one multi-colored ball, without fully blending the colors.
-
Roll this combined dough ball into a snake, approximately 8-10 inches long. Coil the snake tightly into a spiral cookie. If the dough breaks, simply pinch it back together. Place on the prepared baking sheet.
-
Bake all shaped cookies for 8 minutes, or until they are lightly browned around the edges. Keep a close watch as baking times can vary. Let the cookies cool on the baking sheet for a few minutes before transferring them to a wire rack to cool completely. Store in an airtight container at room temperature.
Expert Tips & FAQs Summary
- Storage: Store baked St. Patrick’s Day cookies in an airtight container at room temperature for up to 4-5 days to keep them fresh and soft.
- Freezing Dough: This cookie dough freezes beautifully! After chilling the colored dough in the refrigerator, wrap each individual color portion tightly in plastic wrap, then place them into a large freezer bag. Freeze for up to 3 months. Thaw overnight in the refrigerator before shaping and baking.
- Lollipop Sticks: To make cookie pops, insert oven-safe lollipop sticks into the back of your shaped cookie dough before baking. Ensure they are pressed firmly into the dough so they adhere well.
- Color Contrast: For better definition in multi-colored cookies (like the gold coins or shamrocks), aim for slightly different shades of the same color. For yellow gold coins, adding a tiny drop of orange to one batch can create a more noticeable swirl.
- Chill Time is Key: Do not skip or shorten the dough chilling time! This step is essential for firming the dough, preventing spread, and making it much easier to handle and shape without sticking.
Nutrition Information (Estimated)
The recipes on this blog are tested with a conventional gas oven and gas stovetop. It’s important to note that some ovens, especially as they age, can cook and bake inconsistently. Using an inexpensive oven thermometer can assure you that your oven is truly heating to the proper temperature. If you use a toaster oven or countertop oven, please keep in mind that they may not distribute heat the same as a conventional full sized oven and you may need to adjust your cooking/baking times. In the case of recipes made with a pressure cooker, air fryer, slow cooker, or other appliance, a link to the appliances we use is listed within each respective recipe. For baking recipes where measurements are given by weight, please note that results may not be the same if cups are used instead, and we can’t guarantee success with that method.
This post originally appeared here on February 21, 2014, and has since been updated with new photos, expanded instructions, and expert tips to enhance your baking experience.
