Score a Touchdown with This Ultimate Savory Football Cheese Ball Recipe
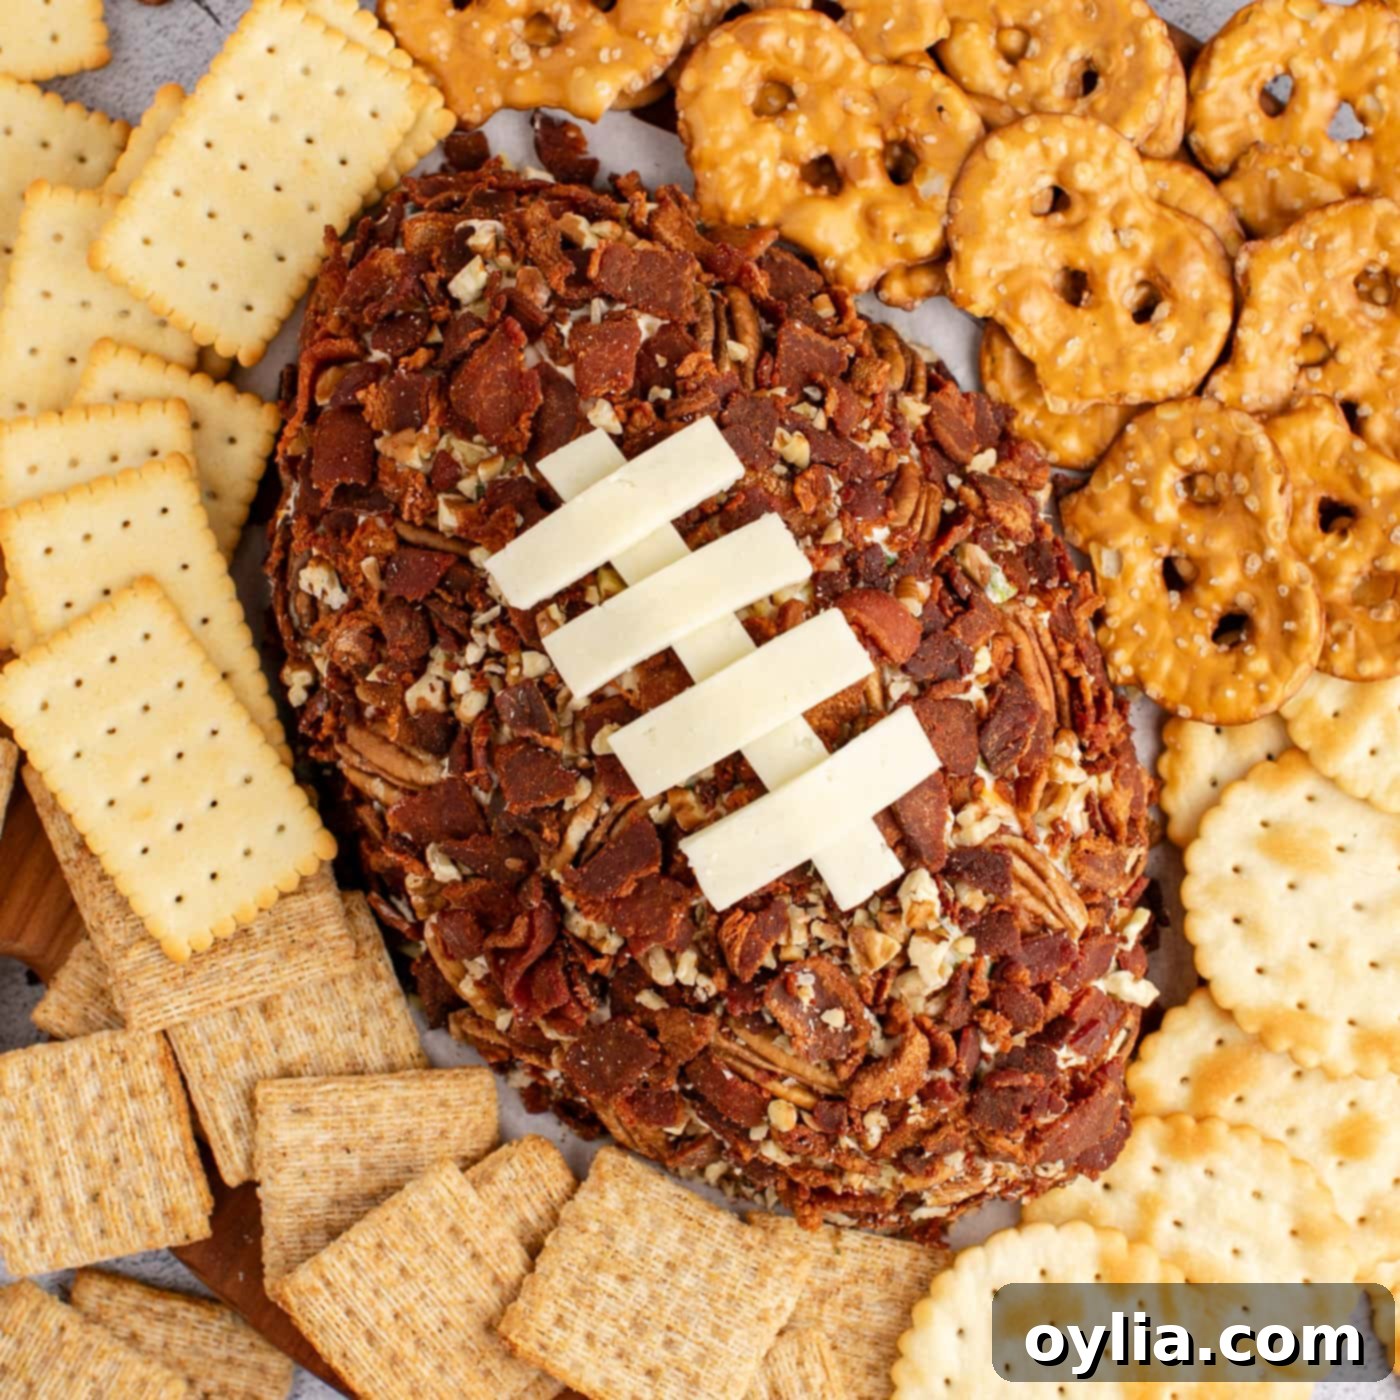
Get ready to elevate your game day experience with the most incredible savory football cheese ball! This show-stopping appetizer is a true crowd-pleaser, packed with layers of flavor from crispy bacon, rich cream cheese, sharp cheddar, zesty ranch seasoning, and the satisfying crunch of pecans. Shaped like a football and adorned with mozzarella laces, it’s not just delicious but also a fun, festive centerpiece for any gathering.
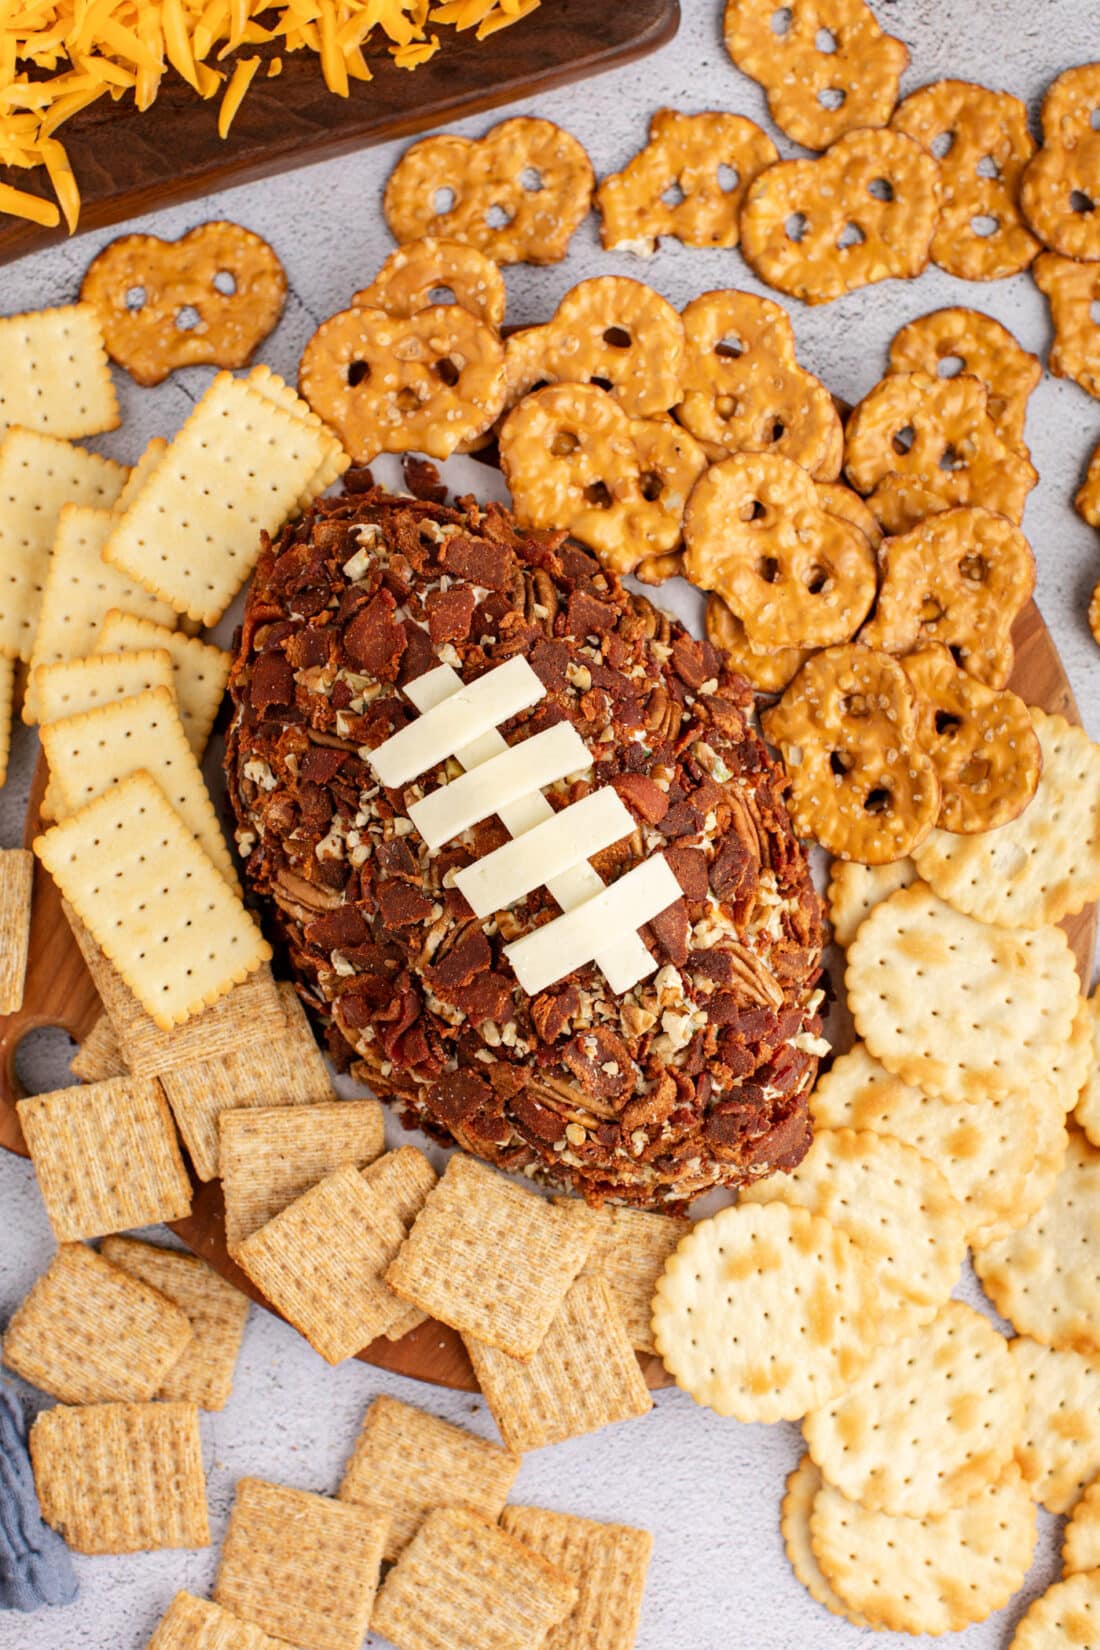
Why This Football Cheese Ball Recipe Is a Game Day Champion
This isn’t just any cheese ball; it’s a game-changer for your football festivities! What makes this recipe an absolute winner? For starters, its undeniable appeal lies in its creative presentation. Shaped meticulously into a football and adorned with distinctive mozzarella laces, it immediately captures attention and sets the perfect game day mood. Beyond its visual charm, this savory appetizer is incredibly easy to prepare, making it ideal for busy hosts. You can even make it a day in advance, allowing the flavors to meld beautifully and intensify, resulting in an even more delicious spread.
Imagine your guests gathered around the snack table, eager to dig into this creamy, flavorful delight. With its rich combination of cheeses, salty bacon, and earthy pecans, this cheese ball is guaranteed to be a touchdown at any party. It’s truly a dish that no one can resist, so make sure you grab a scoop before it vanishes! For an even more expansive spread, consider pairing it with a football party tray, offering an array of additional munchable options that will satisfy every palate. This recipe offers both convenience and exceptional taste, making it a staple for your annual football celebrations.
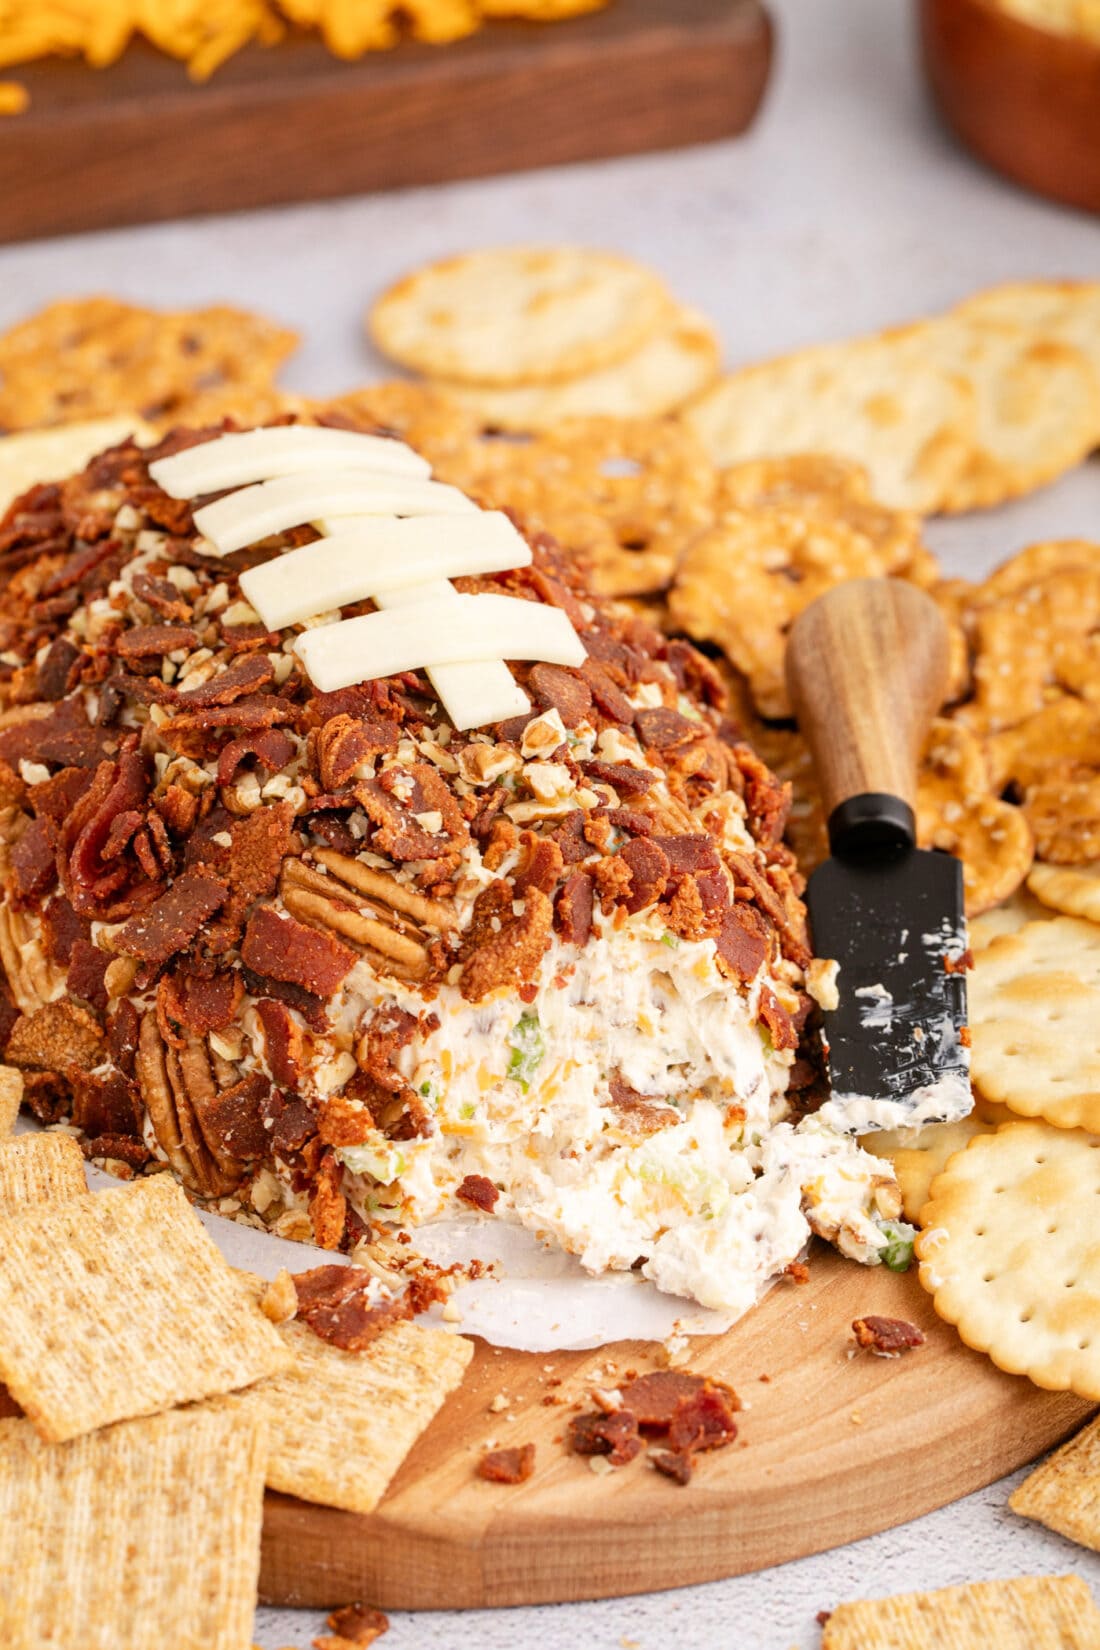
Essential Ingredients for Your Football Cheese Ball
Crafting this irresistible football cheese ball requires a selection of fresh, high-quality ingredients that blend seamlessly to create a symphony of flavors and textures. Each component plays a vital role in making this appetizer truly special. For precise measurements, detailed instructions, and a printable version of this recipe, please refer to the recipe card at the end of this post.
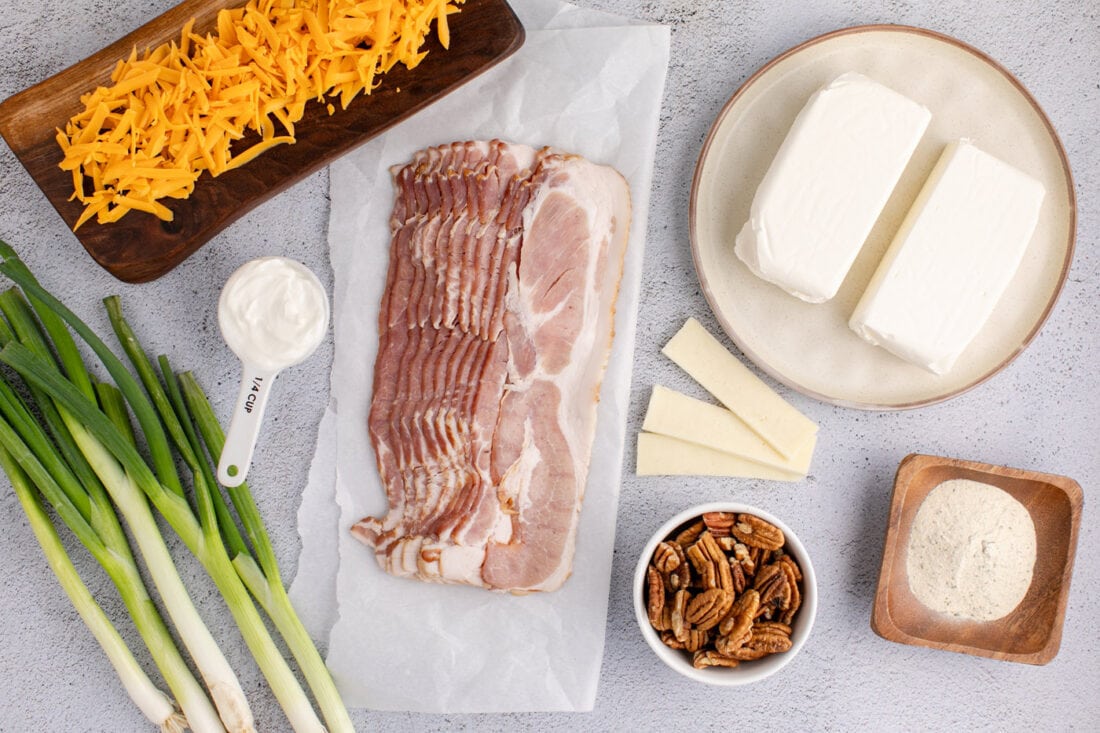
Ingredient Information and Smart Substitutions
Understanding each ingredient’s role allows for informed choices and potential customizations to suit your taste or dietary needs.
CHEESE BALL BASE – The heart of this savory creation is a luscious blend of softened cream cheese, tangy sour cream, sharp shredded cheddar cheese, crispy bacon bits, fresh green onions, and crunchy pecans, all brought together with a packet of ranch seasoning. The **cream cheese** is absolutely vital for providing the smooth, spreadable structure that holds the ball together; therefore, I highly recommend against substituting it. For the **shredded cheese**, while cheddar offers a classic robust flavor, feel free to experiment with other varieties like Monterey Jack, Colby Jack, or even a smoked gouda for a deeper profile. For the best texture and flavor, I always advocate for freshly shredding your cheese, as pre-shredded varieties often contain anti-caking agents that can slightly alter the melt and texture. However, if convenience is key, pre-shredded cheese will still yield a delicious result.
SEASONING – A packet of **Ranch seasoning mix** infuses this cheese ball with an unmistakable, zesty flavor that is universally loved. If you’re looking to switch things up, **taco seasoning** can offer a fantastic Southwestern twist, or you could opt for your own bespoke blend of favorite spices such as garlic powder, onion powder, paprika, and a pinch of cayenne pepper for a subtle kick. Remember, good seasoning is key to a memorable appetizer!
CRISPY BACON – The bacon adds a critical salty, smoky, and crispy element that perfectly complements the creamy cheese. Ensure your bacon bits are cooked to a perfect crispness and drained well to avoid a greasy cheese ball. You’ll use half of the cooked bacon within the cheese ball mixture and the other half for the exterior topping, adding a delightful crunch with every bite.
CRUNCHY TOPPING – The topping is where we truly get creative with the **pecans** to give this appetizer its distinctive football texture. We’ve utilized a variety of pecan forms for optimal visual and textural appeal: 12 whole pecans for definition, 6 pecan halves for a slightly smoother surface, and approximately 3 Tablespoons of finely chopped pecans to create a granular, leathery look reminiscent of a football. This blend provides fantastic texture, but don’t feel limited – you can easily adjust the proportions or use only chopped, halved, or whole pecans as you see fit. You can even lightly toast your pecans beforehand for an even richer, nuttier flavor. The combined texture of mixed pecans and bacon bits on the exterior provides a delightful contrast to the smooth interior.
DECORATIVE LACES – For the iconic football laces, we use **sliced mozzarella cheese**. Its bright white color and mild flavor make it perfect for this decorative touch. Provolone or even white cheddar slices could also work, but mozzarella offers the cleanest, most authentic appearance.
How to Craft Your Game Day Football Cheese Ball: Step-by-Step Instructions
These step-by-step photos and detailed instructions are here to guide you through making this incredible recipe. For the complete printable version, including all measurements and comprehensive instructions, you can Jump to Recipe at the bottom of this post.
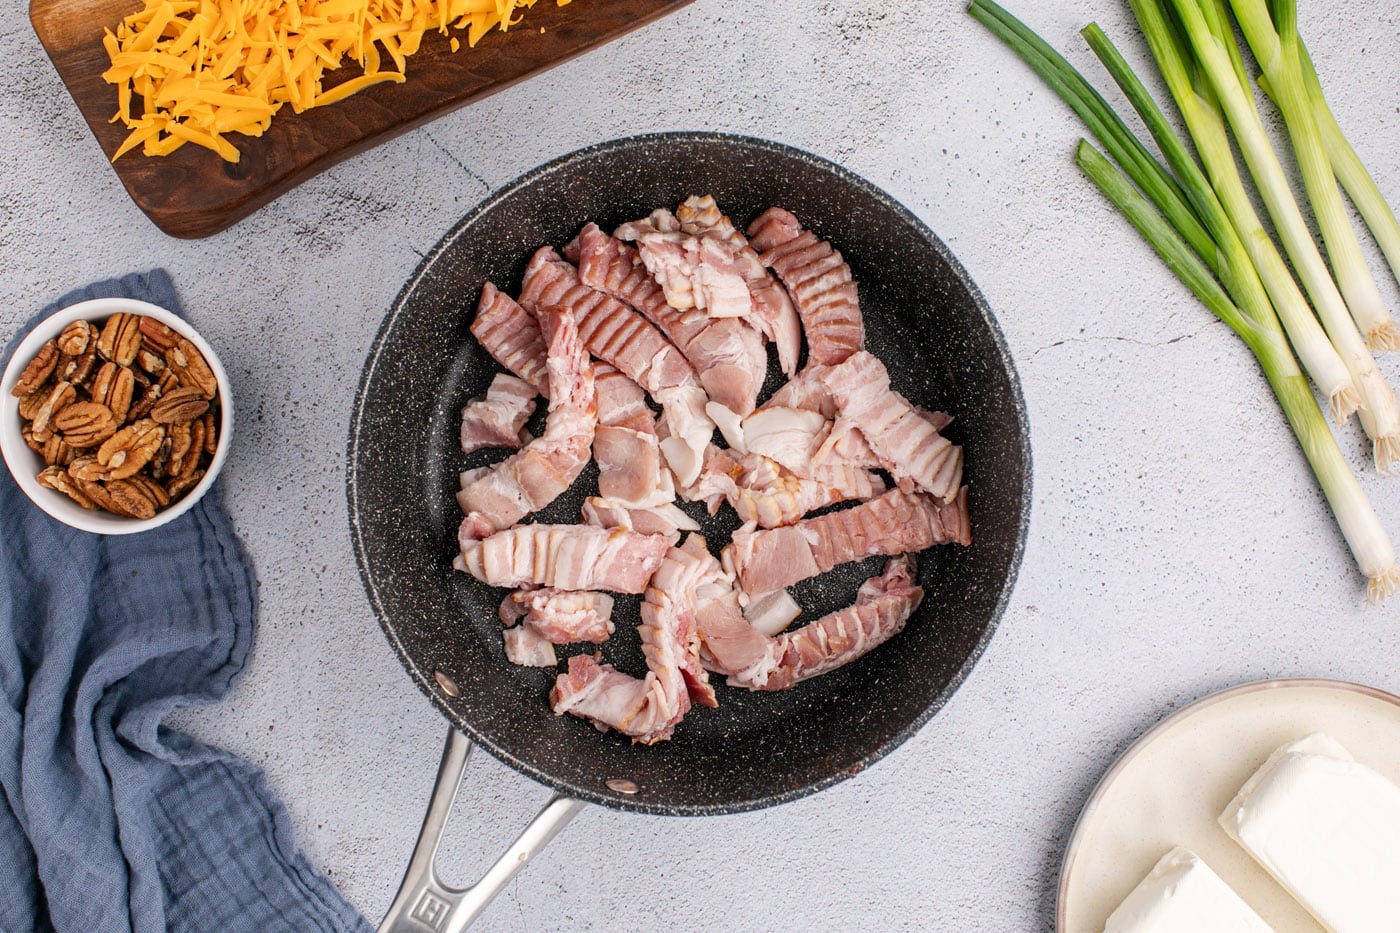
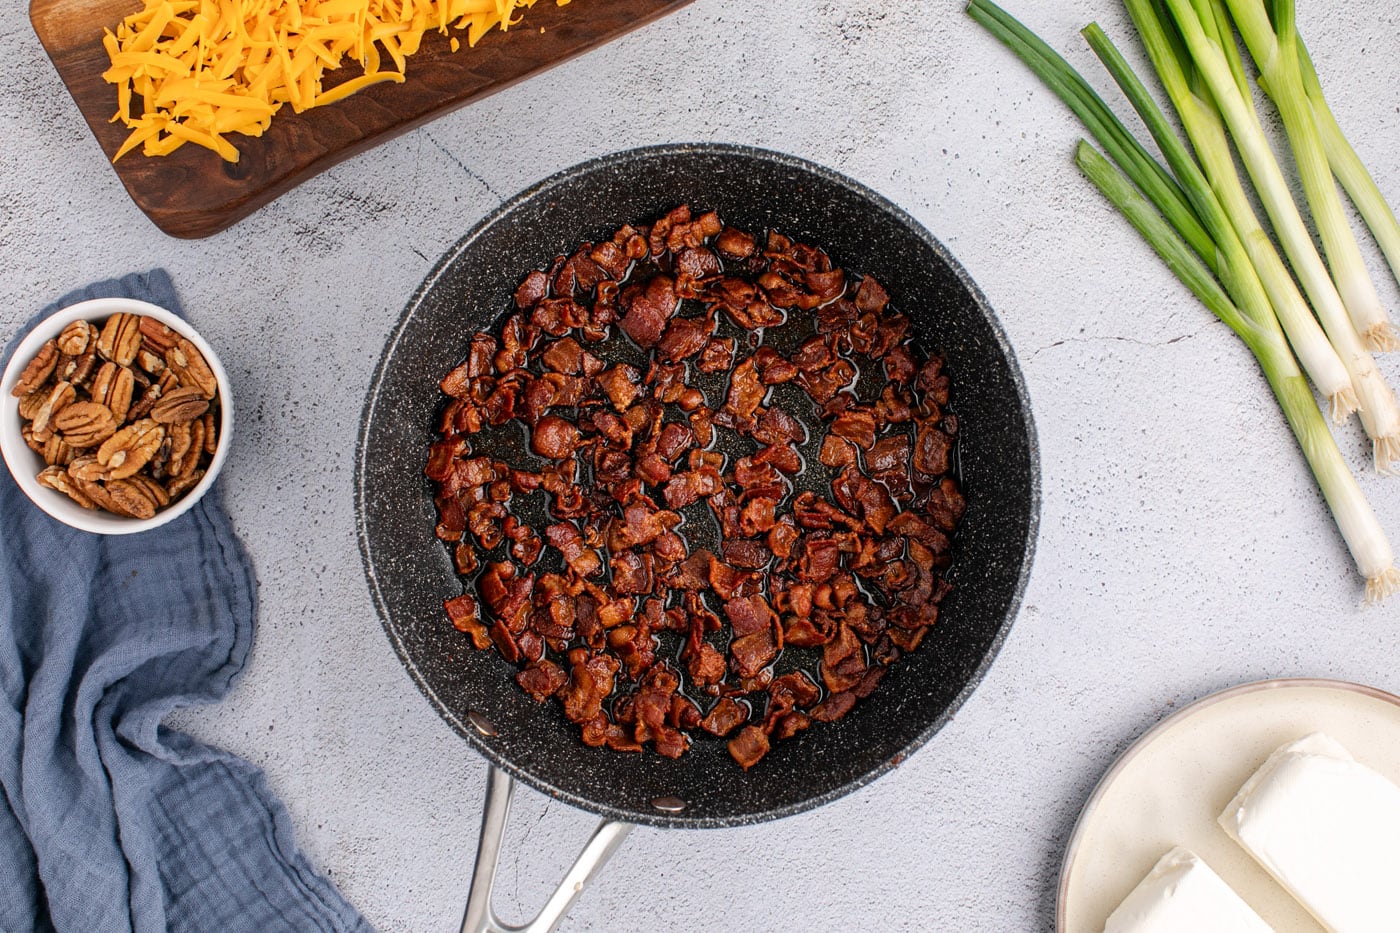
- Begin by preparing your bacon. Cut or chop the raw bacon into small, uniform pieces or strips. Sauté these pieces in a skillet over medium-high heat until they become wonderfully crispy. Once cooked, transfer the bacon bits to a plate lined with paper towels to drain excess grease and cool. Remember, you’ll need bacon for both the cheese ball mixture and the topping, so if you’re cooking enough for both (1 pound total), divide the crispy bacon in half and set one portion aside for later. This ensures you have perfectly crunchy bacon for the exterior.


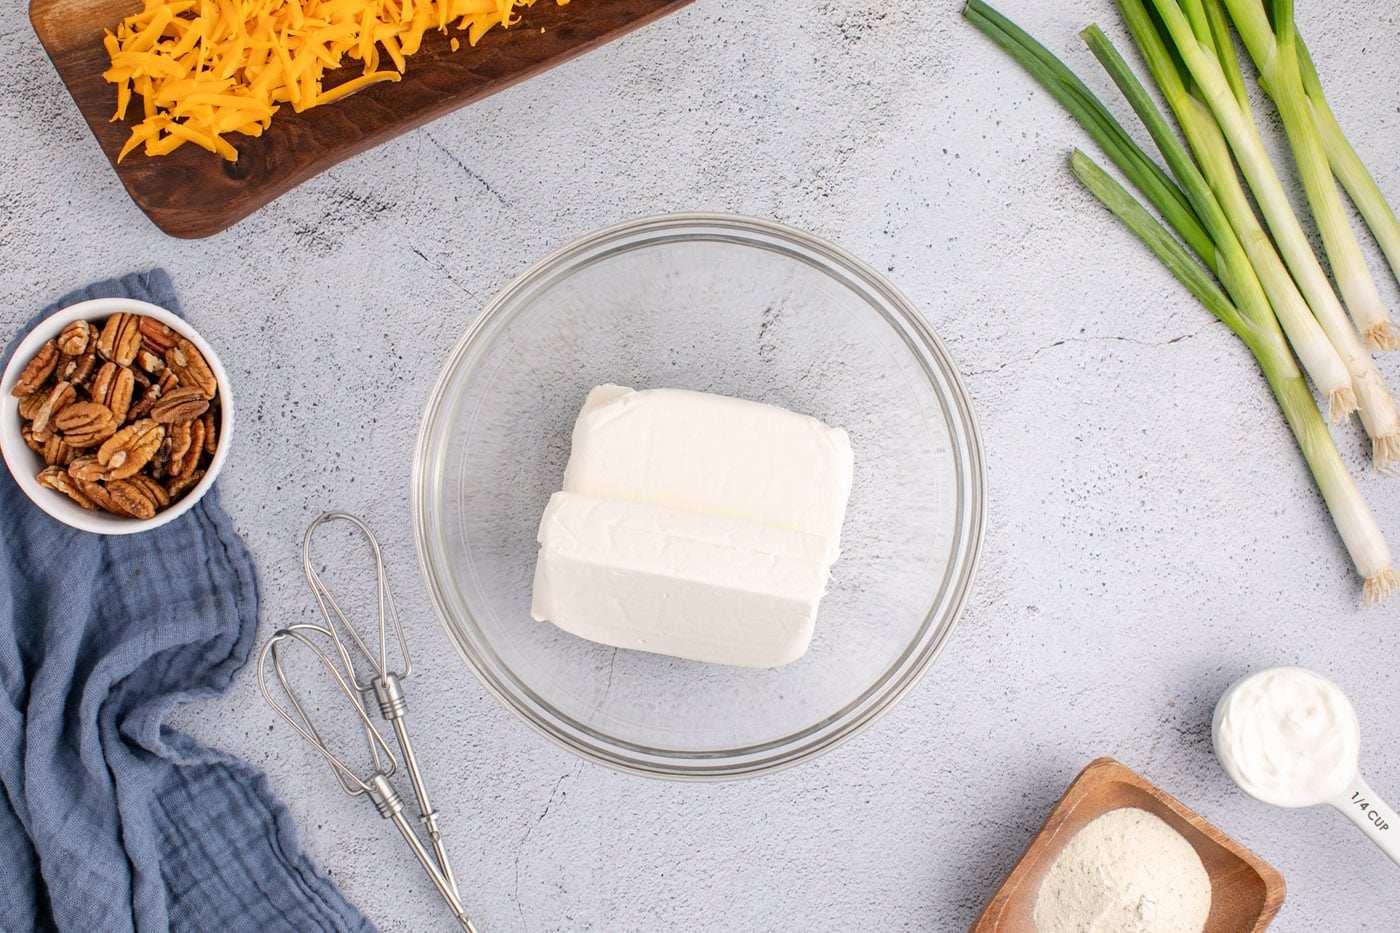
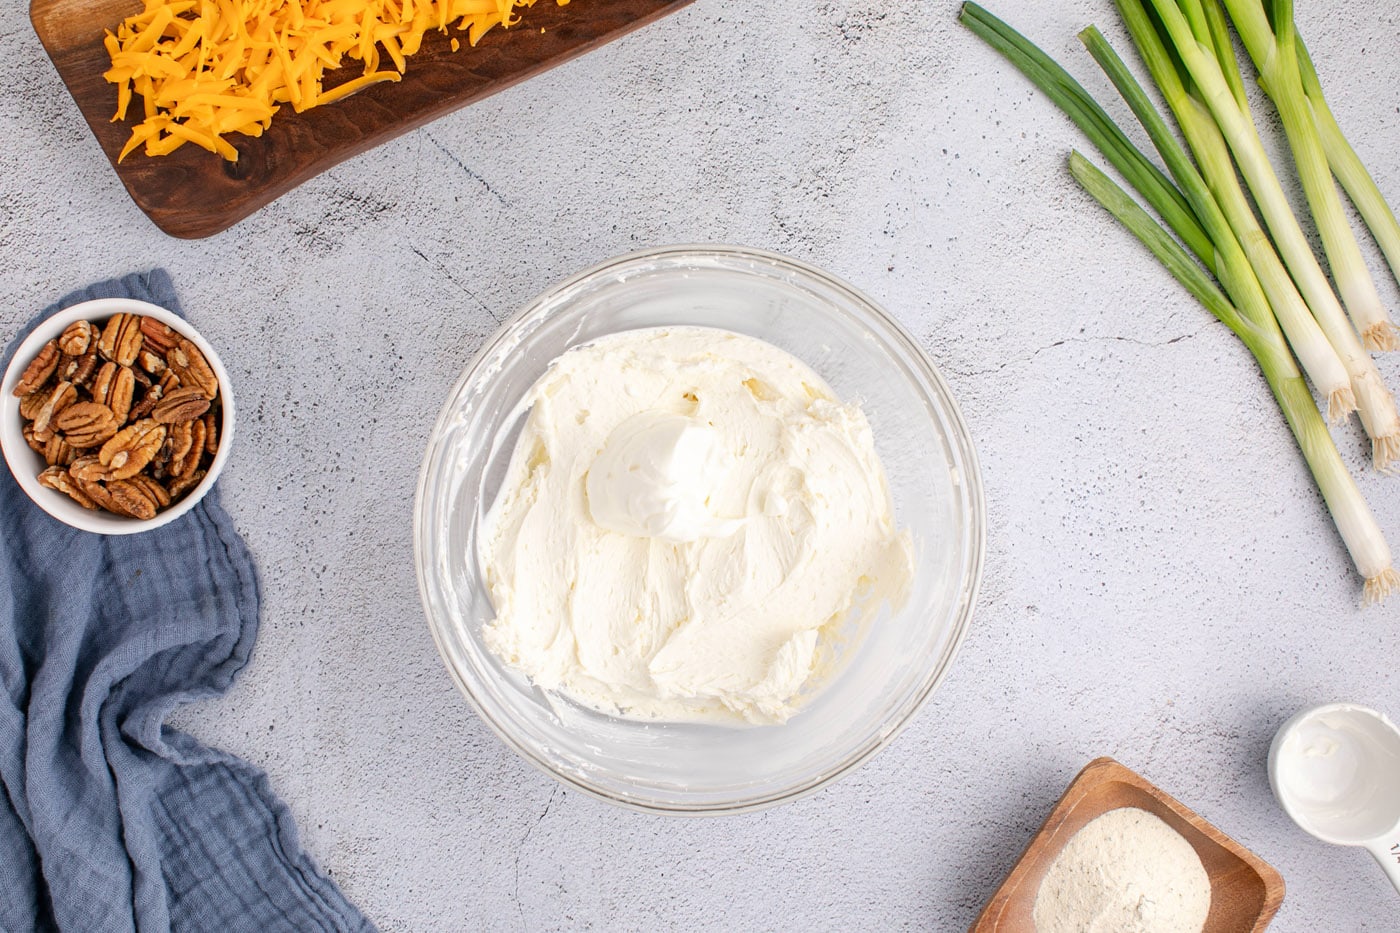
- In a large mixing bowl, take your softened cream cheese (softened cream cheese is crucial for a smooth mixture, so ensure it’s at room temperature). Using a hand mixer, beat the cream cheese until it’s light, fluffy, and completely smooth. This step is essential as it makes it significantly easier to incorporate all the other flavorful ingredients without lumps. To save time, you can even begin this step while your bacon is still cooking.

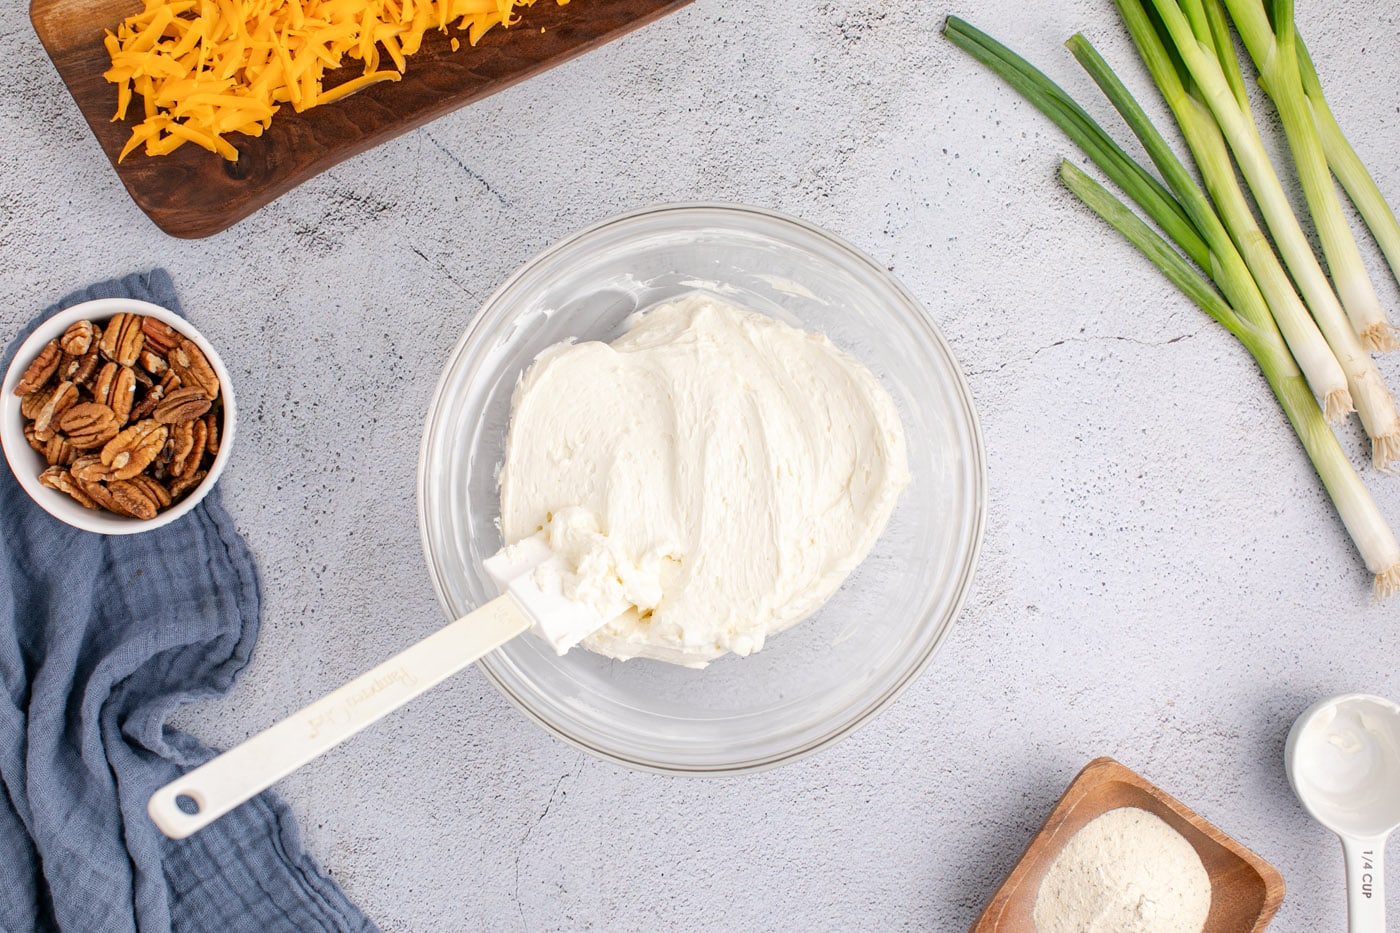
- Once the cream cheese is perfectly smooth, add in the sour cream. Beat the mixture with the hand mixer for another minute until both ingredients are thoroughly combined and the mixture is uniformly creamy.


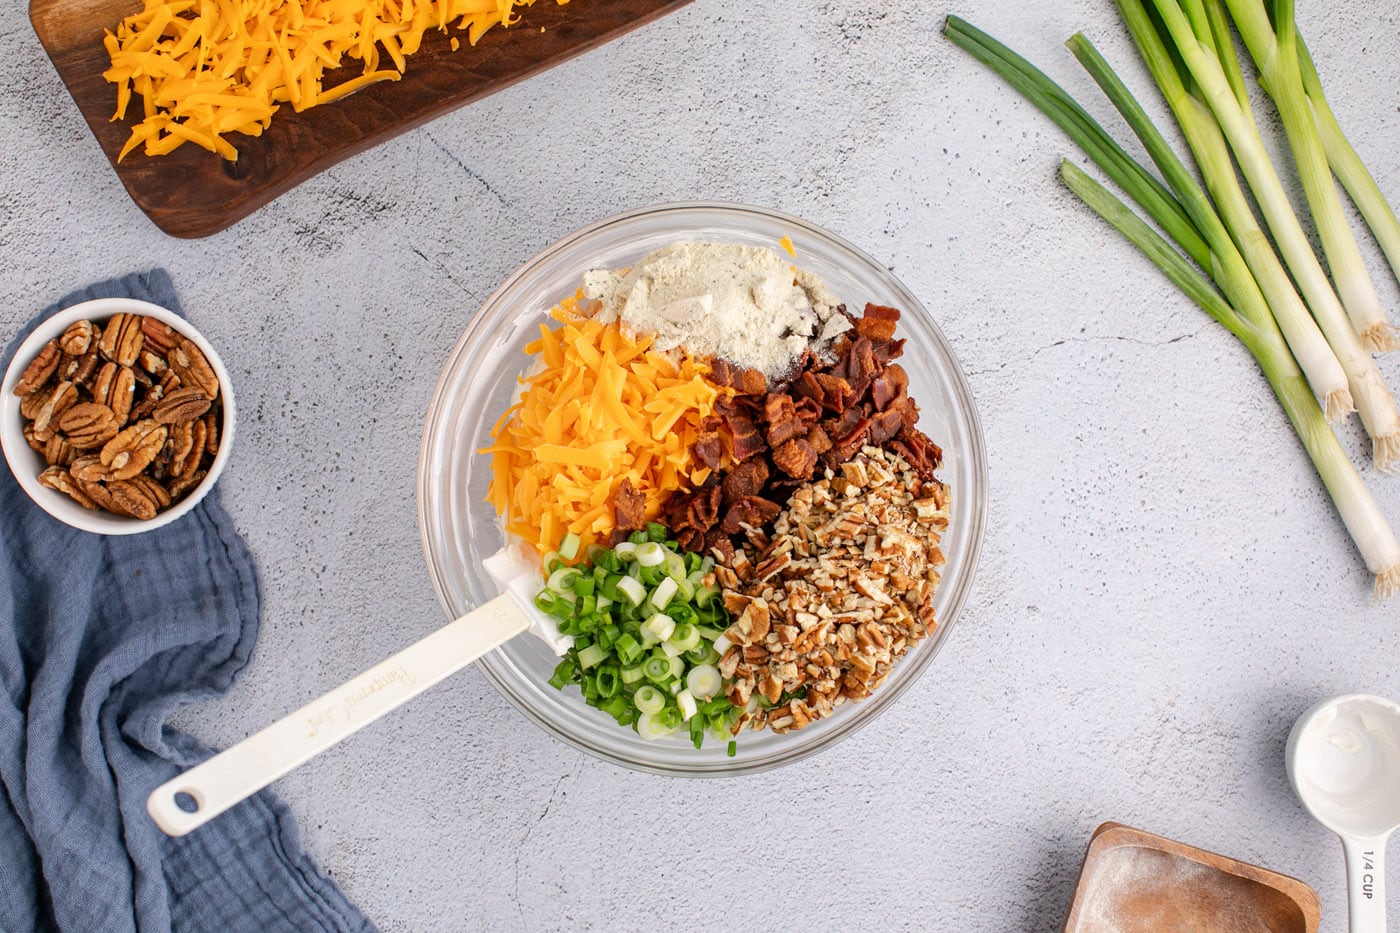
- Now it’s time to incorporate all the savory additions. Gently fold in 2 cups of shredded cheddar cheese, the reserved half of the crispy bacon bits, sliced green onions, the chopped pecans intended for the internal mixture, and the entire packet of ranch seasoning. Use a spatula to fold until all ingredients are evenly distributed throughout the creamy base. Be careful not to overmix, as this can affect the texture.

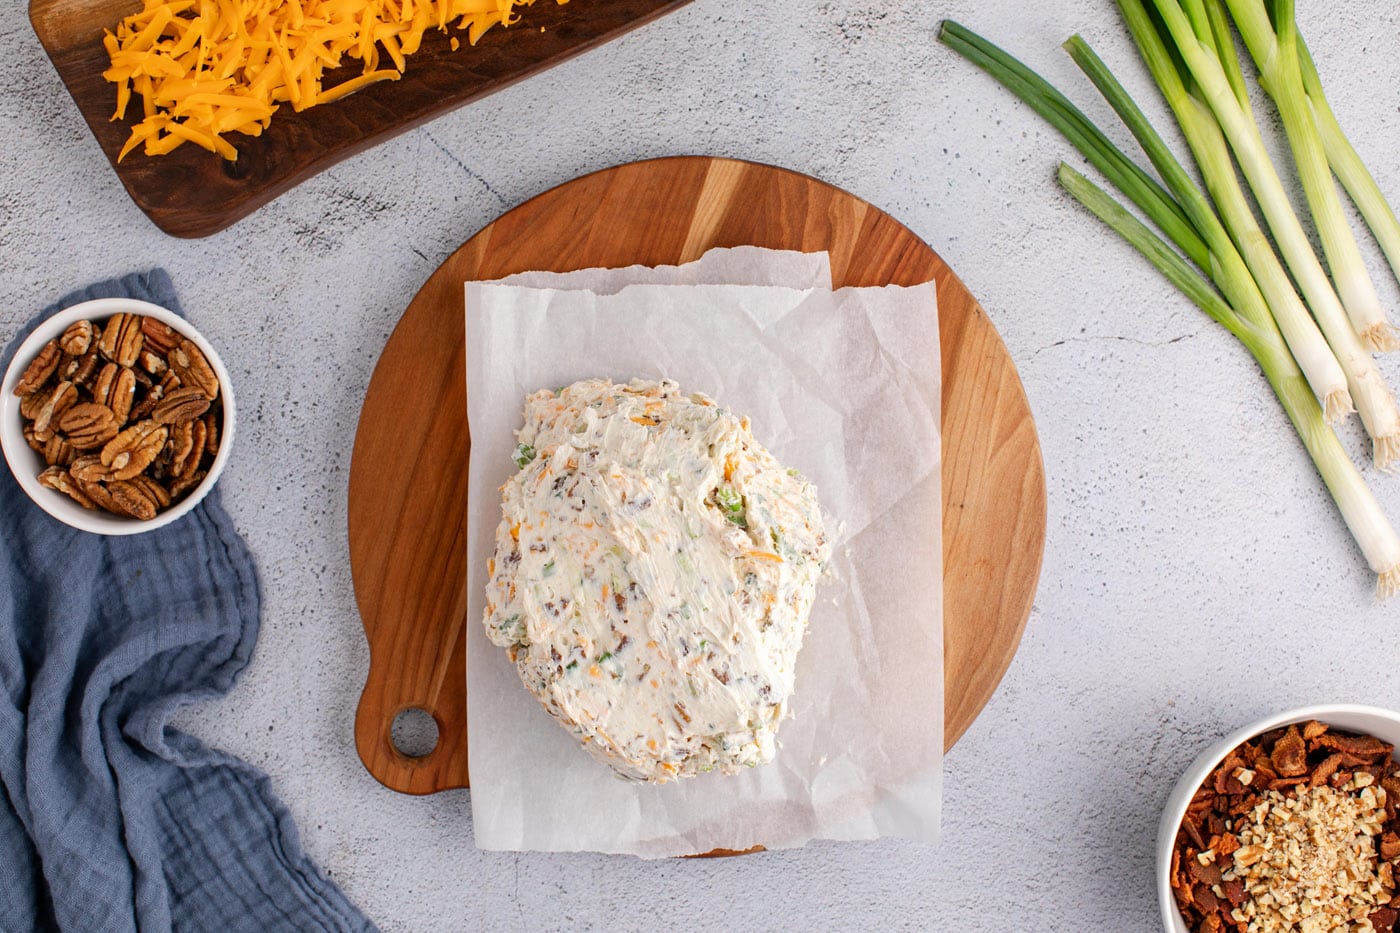
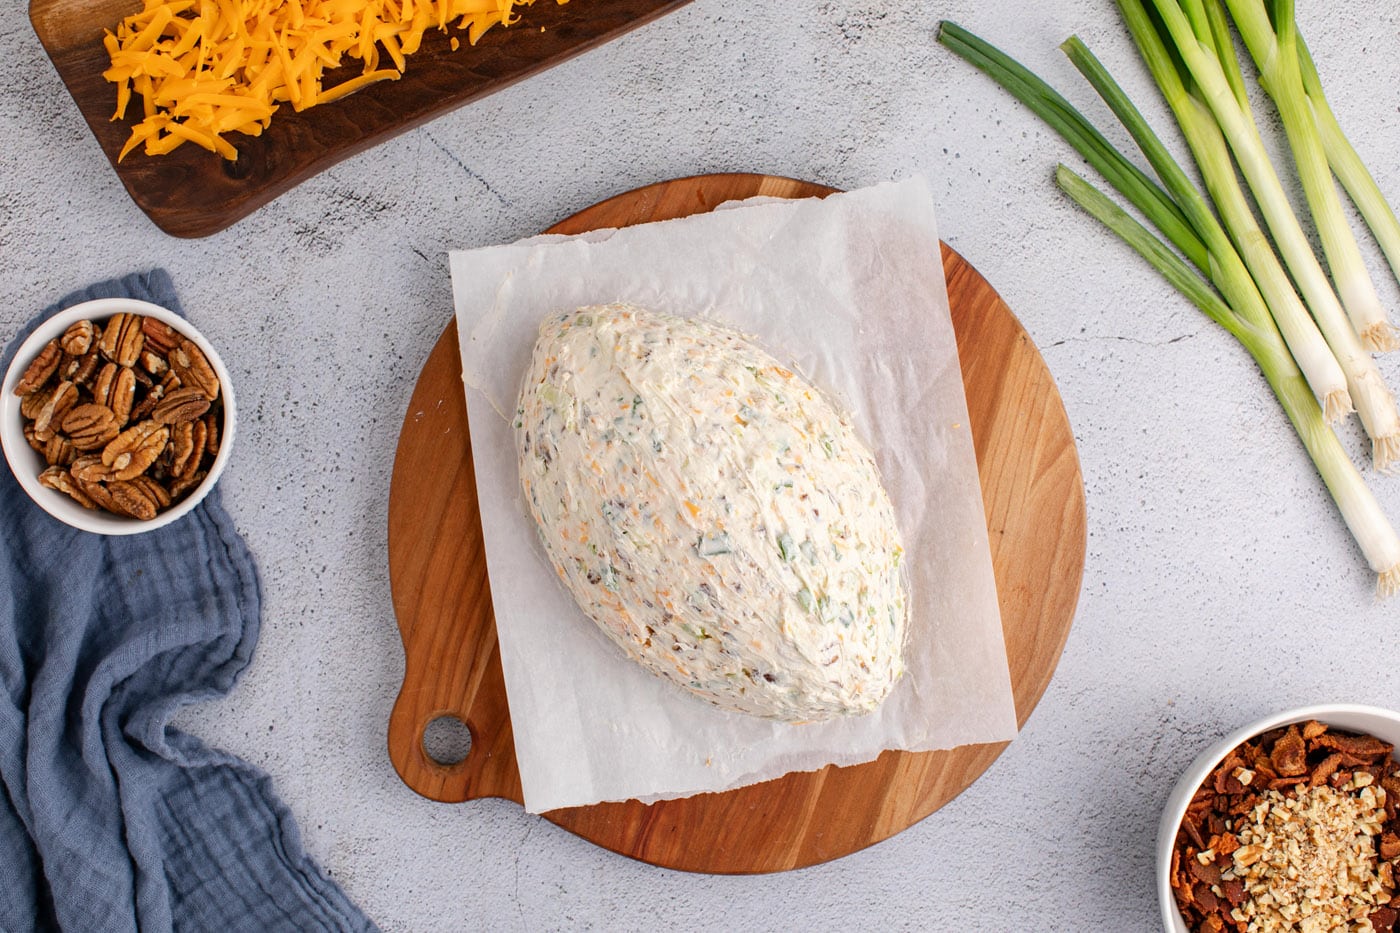
- To shape your cheese ball, you can either work directly on a clean cutting board or, for easier handling and cleanup, lay down a piece of parchment paper. Drop the entire cheese mixture into the center of your chosen surface. Using a spatula or your hands (lightly greased if it’s too sticky), begin to meticulously mold the mixture into the classic oval shape of a football. Aim for smooth, rounded ends and a slightly flatter top and bottom. Once shaped, if using parchment paper, you can cut tightly around it and cover it with your chosen dippers for later.


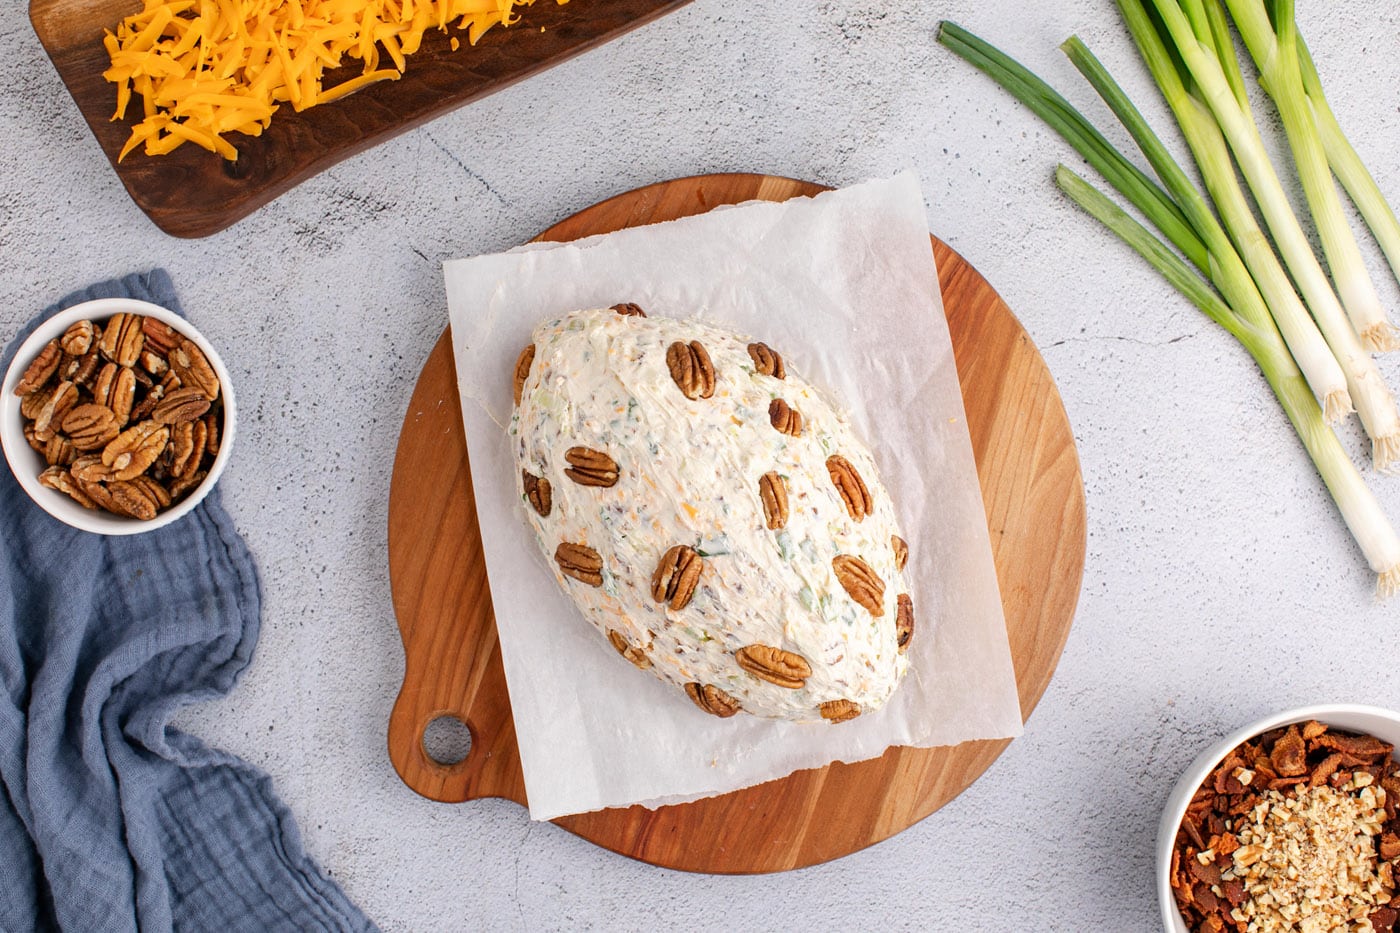
- Now for the decorative topping! Begin by randomly placing the whole pecans onto the shaped cheese ball, gently pressing them in slightly to adhere. Follow with the pecan halves, distributing them evenly to create a varied, textured surface that resembles the pigskin.

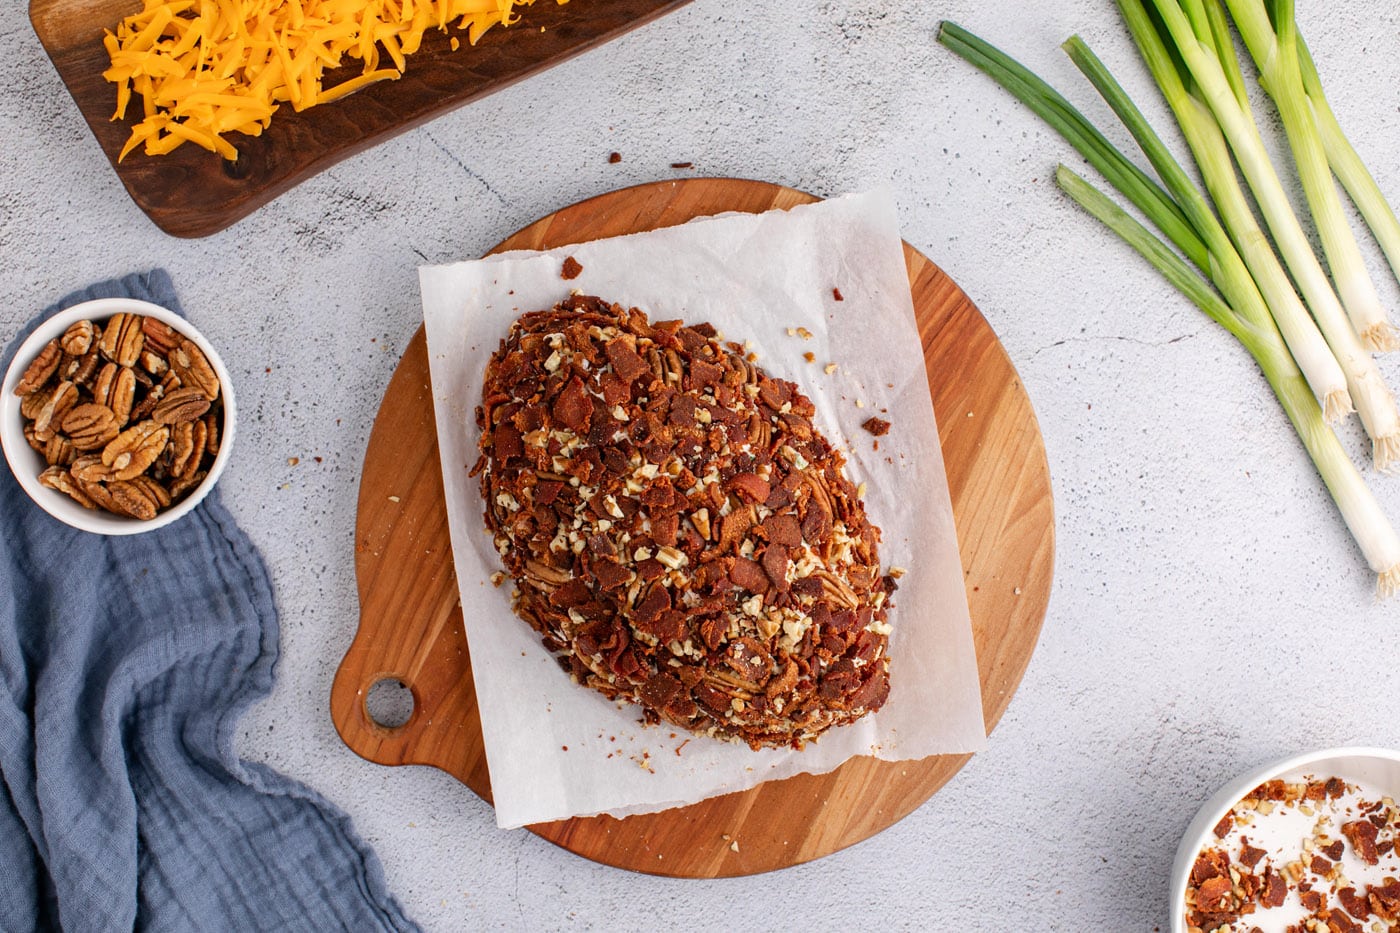
- Next, combine the finely chopped pecans with the remaining crispy bacon bits. Scoop this mixture onto the cheese ball, pressing lightly to ensure everything adheres. Continue this process until the entire surface of the football cheese ball is mostly covered, creating a rich, savory crust. If there are any loose pieces, you can gently lift and shake the ball, then add extra topping where needed to fill in any gaps.

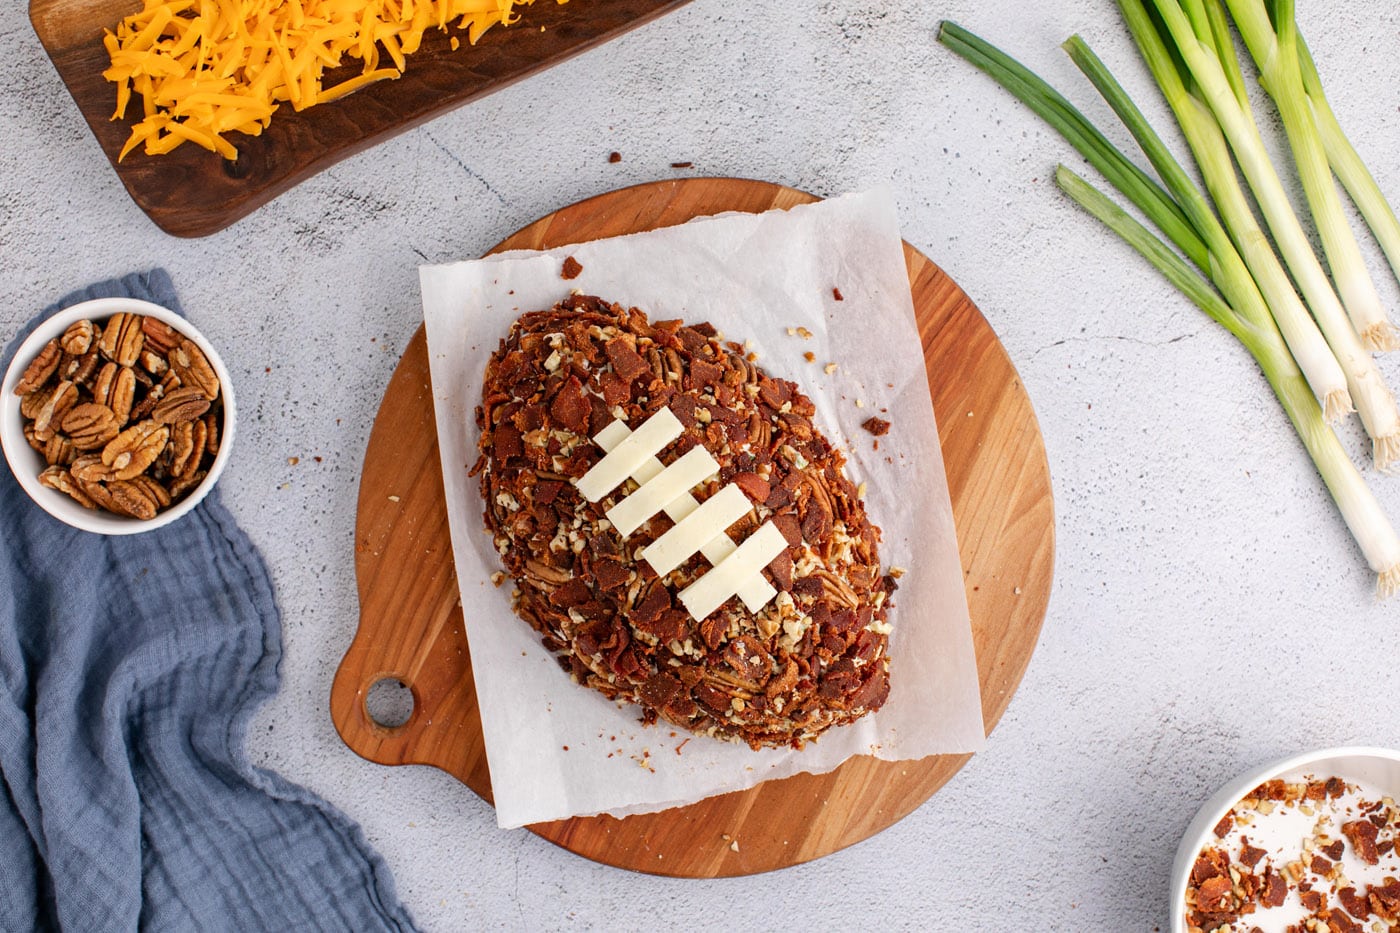
- Finally, create the signature football laces. Take a slice of mozzarella cheese and cut it into four small, short strips and one longer strip. Carefully arrange these strips on top of the cheese ball to mimic the appearance of football laces. The longer strip typically runs down the middle, with the shorter strips crossing over it.

- Your Football Cheese Ball is now complete! You can enjoy it immediately, or for best results and to allow the flavors to deepen, place it in the fridge for at least 30 minutes. If chilling, remember to let it sit out at room temperature for about 30 minutes prior to serving. This slight softening ensures the best, most spreadable texture.
Frequently Asked Questions & Expert Tips for Success
Absolutely! This is one of the best features of a cheese ball, as it actually tastes even better when made a day in advance. The flavors have ample time to meld and deepen. You can fully shape, decorate, and then wrap the cheese ball tightly in plastic wrap, or store it in an airtight container in the refrigerator for up to 2 days ahead of your event. However, keep in mind that the pecans (and bacon) on the exterior may soften slightly as it sits. For maximum crunch and freshness of the coating, you might prefer to wait until just before serving to add the outer layer of pecans and bacon, as well as the mozzarella laces.
Proper storage is key to maintaining freshness and flavor. Store your football cheese ball in an airtight container, or tightly wrapped in plastic wrap, in the refrigerator for up to 4 days. This keeps it fresh and prevents it from absorbing odors from other foods in your fridge.
While cheese balls can be frozen, they sometimes have a tendency to dry out or change texture slightly after being frozen and thawed. For the best results, it’s generally recommended to freeze the undecorated cheese ball base only, without the exterior pecan/bacon coating or mozzarella laces. Wrap the cheese ball exceptionally well in multiple layers of plastic wrap, ensuring no portion of the cheese is left exposed to prevent freezer burn. Then, place it inside a large freezer-safe zip-top bag. It can be frozen for up to 1 month. To thaw, transfer it to the refrigerator 1-2 days before you plan to serve it. Once thawed, you can then add the fresh toppings and laces as directed in the recipe.
The best companions for this savory cheese ball are sturdy dippers that can handle its creamy texture. Think an assortment of crackers (wheat thins, Ritz, multigrain), pretzel crisps, bagel chips, or even toasted baguette slices (crostini). For a healthier option, fresh vegetables like carrot sticks, celery sticks, bell pepper strips, or cucumber slices are excellent choices. Mini pita bread or even robust potato chips can also work wonderfully.
Absolutely! If you love a little heat, you can easily add a spicy kick. Incorporate a pinch of cayenne pepper or red pepper flakes into the cheese ball mixture. For a more intense flavor, finely chopped jalapeños (deseeded for less heat) or a dash of hot sauce can be mixed in. Remember to taste as you go to achieve your desired level of spice.
Achieving the ideal football shape is easier than you think. Start by forming a rough oval, then gently taper the ends to create the classic pointed shape. Use the flat side of a spatula or your hands to smooth out the surface and define the edges. If the mixture is too soft, chill it for 15-30 minutes before shaping. If it’s too firm, let it sit at room temperature for a few minutes to soften slightly. Precision with the shape makes the mozzarella laces stand out beautifully!
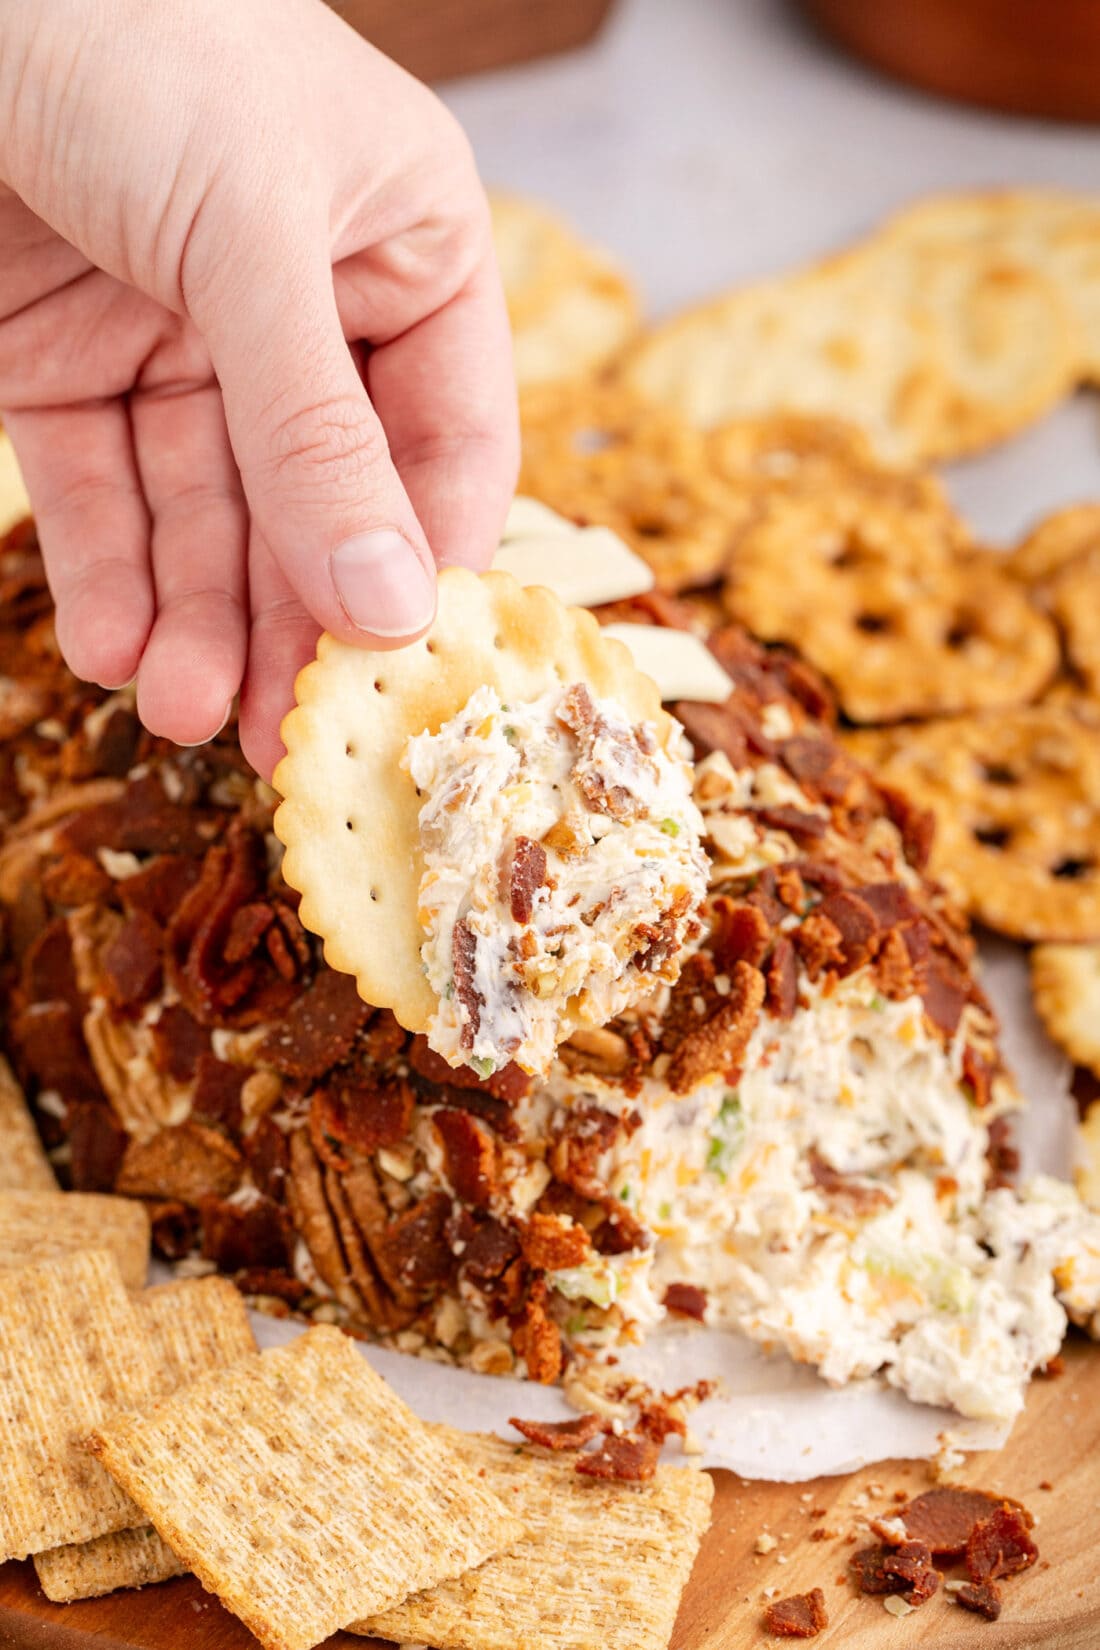
Elevate Your Spread: Creative Serving Suggestions
Presentation and pairing are key to making your football cheese ball a truly memorable game day hit! Serve your masterpiece on a large platter surrounded by an exciting variety of dippers. Think hearty, sturdy crackers that won’t break under the weight of the creamy cheese, such as multigrain, wheat thins, or even gourmet water crackers. Pretzel crisps offer a fantastic salty crunch, while crostini or toasted baguette slices provide an elegant touch. Don’t forget fresh vegetables like crisp celery sticks, vibrant carrot sticks, and colorful bell pepper strips for a lighter, refreshing option that contrasts beautifully with the rich cheese.
For optimal flavor and texture, you can enjoy this cheese ball either chilled or slightly softened at room temperature. My personal preference is to let the cheese ball sit out for about 30 minutes to an hour before serving. This allows the cream cheese to soften just enough, creating a more lusciously spreadable texture that’s easier for your guests to scoop. Pair this savory delight with your favorite game day beverages, from craft beers to refreshing iced teas, to complete the ultimate party experience.
Looking to expand your cheese ball repertoire? Consider making a variety! You can easily adapt our other delicious recipes, such as the gouda and sun-dried tomato cheese ball or the festive cranberry cheese ball. Simply double their ingredients and shape them into additional footballs for a diverse and impressive cheese ball lineup!
More Game Day Recipes to Complete Your Feast
No game day party is complete with just one amazing dish! If you’re looking to round out your spread with more crowd-pleasing appetizers and snacks, check out these fantastic recipes that pair perfectly with our Football Cheese Ball:
- Cheeseburger Sliders: Miniature burgers packed with flavor, perfect for hearty appetites.
- Smoked Queso Dip: A smoky, cheesy dip that’s impossible to resist.
- Bacon Wrapped Little Smokies: Sweet and savory bites that disappear in a flash.
- Honey Garlic Chicken Wings: Sticky, flavorful wings that are always a hit.
I absolutely adore spending time in the kitchen, creating and experimenting with new recipes, and then sharing those culinary adventures with all of you! Remembering to come back and check for new daily recipes can sometimes be a challenge, which is why I offer a convenient newsletter. Every time a new recipe is posted, it lands directly in your inbox. Simply subscribe to start receiving your free daily recipes and never miss out on delicious inspiration!
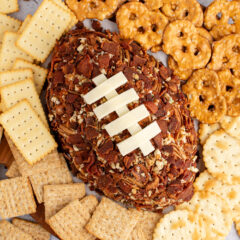
Football Cheese Ball
IMPORTANT – There are often Frequently Asked Questions within the blog post that you may find helpful. Simply scroll back up to read them!
Print It
Pin It
Rate It
Save ItSaved!
Ingredients
Cheeseball
- 1 pound bacon chopped into bits (divided for cheese ball and topping)
- 16 ounces cream cheese softened
- ¼ cup sour cream
- 2 cups shredded cheddar cheese
- 5 green onions sliced
- ¾ cup pecans roughly chopped
- 1 ounce ranch seasoning packet
Topping
- ½ of the cooked bacon from above, chopped into bits
- 12 whole pecans for decoration
- 6 pecan halves for texture
- 2-3 Tablespoons chopped pecans finely chopped for coating
- mozzarella cheese slice cut into strips for the laces
Things You’ll Need
-
Skillet for cooking bacon until crispy
-
Hand mixer for blending cream cheese and sour cream
Before You Begin – Pro Tips for a Perfect Cheese Ball
- **Pecan Variety for Texture:** We recommend using a mix of pecan cuts to give your football cheese ball an authentic, varied texture. From a single bag of whole pecans, you can easily create 12 whole pecans for definition, 6 pecan halves for mid-range texture, and around 3 Tablespoons of finely chopped pecans to fill in and create a smooth coating. This diverse mixture significantly enhances both the visual appeal and the textural experience, but feel free to adjust to your preference – using only chopped, halved, or whole pecans will still result in a delicious outcome.
- **Fresh vs. Pre-Shredded Cheese:** For the absolute best flavor and a superior melting texture, I always prefer to use freshly shredded cheese. Pre-shredded cheese often contains anti-caking agents that can sometimes give a slightly different consistency. However, for convenience, pre-shredded cheese will certainly work just fine and still deliver a wonderfully tasty cheese ball.
- **Seasoning Customization:** The ranch seasoning mix provides a fantastic, beloved flavor profile to this cheese ball. If you’re looking to explore other flavor avenues, consider substituting it with taco seasoning for a zesty, Tex-Mex inspired twist. Alternatively, you can craft your own signature blend using your favorite spices like garlic powder, onion powder, a touch of smoked paprika, or a pinch of chili powder for a unique and personalized appetizer.
- **Softened Cream Cheese is Key:** Ensure your cream cheese is completely softened to room temperature before you begin mixing. This crucial step guarantees a smooth, lump-free base, making it much easier to incorporate all the other ingredients evenly and achieve the perfect creamy consistency for your cheese ball.
Instructions
-
Carefully cut or chop the bacon into small, even pieces or strips. Sauté these bacon bits in a skillet over medium-high heat until they are perfectly crispy and golden brown. Once cooked, transfer the bacon bits to a plate lined with paper towels to drain off any excess grease. Make sure to divide your cooked bacon: reserve half for mixing into the cheese ball itself, and set the other half aside for the exterior topping. This division ensures both internal flavor and external crunch.
-
In a large mixing bowl, place your softened cream cheese. Using a reliable hand mixer, beat the cream cheese thoroughly until it is light, airy, and completely smooth. This step is vital for ensuring all subsequent ingredients blend in effortlessly and that your cheese ball has a uniform, creamy texture. You can efficiently begin this step while the bacon is still cooking to save time.
-
Once the cream cheese is smooth, add the sour cream to the bowl. Beat the mixture again with the hand mixer until the sour cream is fully incorporated and the base is uniformly creamy and well-combined. Scrape down the sides of the bowl as needed to ensure everything is mixed.
-
Now, gently fold in the remaining core ingredients for your cheese ball: the 2 cups of shredded cheddar cheese, the reserved half of the cooked bacon bits, the sliced green onions, the roughly chopped pecans designated for the internal mixture, and the entire packet of ranch seasoning. Use a spatula to fold everything together until all components are evenly distributed throughout the creamy cheese base. Avoid overmixing to maintain the best texture.
-
Prepare your surface for shaping: you can either work directly on a clean cutting board or, for easier handling and presentation, lay down a sheet of parchment paper. Drop the entire cheese mixture into the center. Using a spatula or your lightly-greased hands, carefully shape the mixture into an oblong, football-like oval, tapering the ends gently. Aim for a smooth surface and well-defined shape. If you used parchment paper, you can trim it neatly around the shaped cheese ball.
-
For the decorative topping, begin by randomly placing the whole pecans onto the surface of the football-shaped cheese ball. Gently press each pecan in slightly to ensure it adheres to the creamy base. Follow this by distributing the pecan halves, aiming for an even coverage that starts to build the textured “pigskin” appearance.
-
In a small bowl, mix the finely chopped pecans with the remaining crispy bacon bits. Scoop this flavorful mixture generously onto the cheese ball, gently pressing it in to secure it to the surface. Continue adding and pressing until the football is mostly covered with this delicious coating, creating a rich, crunchy exterior. If any pieces come loose, you can gently lift and shake the cheese ball, then press any displaced topping back into place or add more where needed.
-
To create the iconic football laces, take a slice of mozzarella cheese and carefully cut it into four small, short strips and one slightly longer strip. Arrange these white mozzarella strips on top of your pecan-and-bacon-covered cheese ball to mimic the classic design of football laces. The longer strip usually forms the central line, with the shorter strips crossing it.
-
Your fantastic Football Cheese Ball is now ready to impress! You can serve it immediately for instant enjoyment, or for an even richer flavor and firmer texture, place it in the fridge to chill for at least 30 minutes (or up to 2 days if making ahead). If chilled, allow it to sit out at room temperature for approximately 30 minutes prior to serving; this slight softening will provide the best, most invitingly spreadable texture.
Expert Tips & FAQs for Optimal Results
- **Storage Perfection:** To keep your delicious football cheese ball fresh and flavorful, always store it in an airtight container or ensure it’s tightly wrapped in plastic wrap. Kept in the refrigerator, it will remain delightful for up to 4 days. This prevents it from drying out and absorbing other odors.
- **Freezing for Future Feasts:** While cheese balls can sometimes lose a little of their original texture (tending to dry out) after freezing and thawing, you can still successfully freeze the *undecorated* cheese ball base. Wrap it exceptionally well in multiple layers of plastic wrap, making sure every part of the cheese is covered to prevent freezer burn. Then, place it inside a large zip-top freezer bag. It can be stored in the freezer for up to 1 month. When you’re ready to serve, thaw the cheese ball in the refrigerator for 1-2 days before your event. Once thawed, proceed with adding the crispy bacon, pecans, and mozzarella laces as per the recipe instructions for a fresh finish.
- **Make-Ahead Mastery:** One of the greatest advantages of this recipe is its make-ahead convenience! You can completely prepare, shape, and even decorate your football cheese ball up to 2 days in advance. Simply wrap it tightly in plastic wrap or place it in an airtight container and store it in the refrigerator. A key consideration, however, is that the pecans and bacon on the exterior may lose some of their crispness and begin to soften as they sit. For the absolute crispiest topping, you might prefer to wait until the day of your event, or just a few hours before serving, to apply the pecan and bacon coating and the mozzarella laces.
- **Serving Temperature is Key:** For the most enjoyable and spreadable texture, allow your chilled cheese ball to sit at room temperature for approximately 30 minutes to an hour before serving. This slight warming will make it easier for guests to scoop and enhance the overall creamy, rich experience.
- **Presentation Power:** Don’t just serve it; style it! Arrange your football cheese ball on a large, game-day themed platter. Surround it with a generous variety of dippers and perhaps some fresh herb garnishes (like parsley or chives) for an extra pop of color. This makes it an even more inviting and festive centerpiece for your party spread.
Nutrition
The recipes on this blog are tested with a conventional gas oven and gas stovetop. It’s important to note that some ovens, especially as they age, can cook and bake inconsistently. Using an inexpensive oven thermometer can assure you that your oven is truly heating to the proper temperature. If you use a toaster oven or countertop oven, please keep in mind that they may not distribute heat the same as a conventional full sized oven and you may need to adjust your cooking/baking times. In the case of recipes made with a pressure cooker, air fryer, slow cooker, or other appliance, a link to the appliances we use is listed within each respective recipe. For baking recipes where measurements are given by weight, please note that results may not be the same if cups are used instead, and we can’t guarantee success with that method.
