Mastering Soft & Chewy Homemade Microwave Caramels: Your Quick & Easy Recipe for Perfect Indulgence
Imagine biting into a perfectly soft, deliciously chewy caramel, rich with buttery sweetness that melts in your mouth. Now, envision making that delightful treat right in your own kitchen, using just a handful of common ingredients and the sheer convenience of your microwave! This recipe for homemade microwave caramels is not only incredibly easy but also promises consistent, crave-worthy results every single time. Say goodbye to the fuss, constant stirring, and potential pitfalls of traditional stovetop candy making, and embrace a simple, efficient method that delivers irresistible, luscious caramels perfect for any occasion.
Why This Easy Microwave Caramel Recipe Is a Culinary Revelation
Making homemade candy often carries a daunting reputation. Many imagine it as a complicated process demanding constant stirring over a hot stove, meticulous temperature monitoring, and endless patience. However, this innovative microwave caramel recipe completely redefines that narrative. It’s truly a culinary revelation, especially for anyone who loves the idea of crafting their own sweet confections but is intimidated by traditional methods.
The **unparalleled convenience** is undoubtedly the primary reason this recipe shines. Instead of being tethered to a stovetop, you’re harnessing the power of your microwave, which dramatically slashes hands-on time and significantly reduces the risk of burning – a common pitfall in caramel making. This makes it an ideal choice for busy individuals, novice candy makers, or anyone seeking a quick, fuss-free dessert solution. The process is elegantly simple: combine your ingredients, microwave in carefully timed stages, and whisk. It’s truly that straightforward!
Beyond convenience, this recipe consistently delivers **perfectly soft and deliciously chewy caramels** – the kind that stretch enticingly without clinging stubbornly to your teeth. The precise blend of ingredients, particularly the light corn syrup, is a secret weapon against sugar crystallization, which can often result in grainy or brittle caramels. This critical component ensures a smooth, velvety texture that is both deeply satisfying and utterly addictive. Every bite offers that classic, rich caramel experience without the hard work.
Furthermore, these homemade microwave caramels are incredibly versatile. They are delightful as standalone treats, making them a superb addition to holiday gift baskets, party favors, or simply as an everyday indulgence. Consider them a perfect base for other caramel-infused desserts, such as decadent caramel apples, rich caramel sauces drizzled over ice cream, or even incorporated into coffee drinks. ‘Tis the season for homemade candy, and while beloved classics like peanut brittle, festive chocolate barks, and creamy fudge hold a special place, these easy microwave caramels undoubtedly deserve a permanent, year-round spot in your cherished recipe collection. Prepare to bookmark and save this recipe, as you’ll find yourself reaching for it again and again for its reliability and delicious results.
Essential Ingredients for Your Delectable Microwave Caramels
Crafting these delectable homemade microwave caramels requires a straightforward lineup of pantry staples. Each ingredient plays a crucial and distinct role in achieving that perfect, classic caramel texture and flavor profile. Understanding their functions will help ensure your success. Below, you’ll find a detailed explanation of what you’ll need and why it’s so important. For the precise measurements and a convenient printable version of this recipe, please refer to the comprehensive recipe card located at the very end of this post.
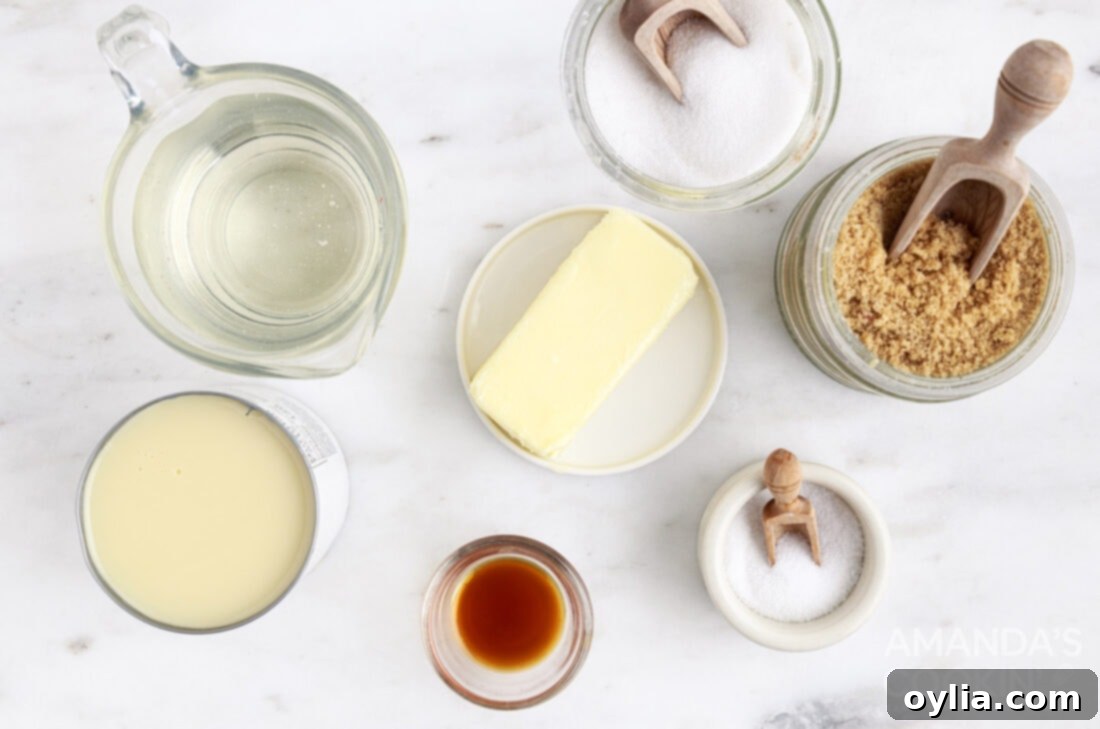
Ingredient Breakdown & Expert Tips for Perfect Caramels
To craft these wonderful homemade caramel candies, you’ll need a specific combination of ingredients, each meticulously chosen to contribute to the caramel’s ultimate taste, smooth consistency, and iconic chewy texture:
- Unsalted Butter: This is the fundamental building block of our rich, creamy caramel flavor. It is absolutely crucial to use *unsalted butter* to ensure you have precise control over the final saltiness of your caramels. If salted butter is your only option, you would need to significantly reduce or completely omit the optional added salt, but for optimal results and flavor balance in candy making and baking, unsalted butter is always the preferred choice. Make sure the butter is fully melted to create a perfectly emulsified and smooth base for the sugars.
- Light Corn Syrup: Do not be tempted to omit or substitute this ingredient! Light corn syrup is truly vital for preventing sugar crystallization, which can unfortunately lead to a grainy, less desirable caramel texture instead of the luxurious smooth and chewy consistency we’re aiming for. It acts as an invert sugar, effectively interfering with the formation of large sugar crystals, thus guaranteeing that classic soft and pliable caramel structure.
- Light Brown Sugar: The addition of light brown sugar imparts a wonderful, nuanced depth of flavor to the caramels. It contributes a subtle hint of molasses, which is a hallmark characteristic of traditional, deeply flavored caramels. When measuring, always ensure the brown sugar is firmly packed into your measuring cup to achieve the correct quantity and consistency.
- Granulated Sugar: This readily available sugar provides the primary sweetness and contributes significantly to the overall structure and body of the caramel. The synergistic combination of both light brown and granulated sugars creates a beautifully balanced and complex flavor profile that is more than the sum of its parts.
- Sweetened Condensed Milk: This is the creamy, indulgent heart of the caramel, providing much of its signature richness and luscious mouthfeel. Sweetened condensed milk is essentially cow’s milk from which about 60% of the water has been removed, and a substantial amount of sugar has been added, resulting in a thick, intensely sweet, and milky concentrate. It is critically important to *not* confuse this with evaporated milk, which is unsweetened and will not yield the same creamy, delightful results for this recipe.
- Vanilla Extract: A generous splash of good quality vanilla extract is paramount. It doesn’t just add its own delightful flavor; it exquisitely enhances and harmonizes all the other flavors present in the caramel, contributing a warm, inviting aroma. For the best flavor impact, vanilla extract is always best added at the very end of the cooking process, after the heat source has been removed, to prevent its delicate aromatic compounds from evaporating.
- Salt (Optional): For those who adore a delightful contrast of flavors, incorporating about 1/2 teaspoon of fine salt can magically elevate your caramels into a sophisticated salted caramel treat. This addition expertly balances the intense sweetness, accentuating the richer, butterscotch-like notes of the caramel. Feel entirely free to adjust the amount of salt to perfectly suit your personal preference, or simply omit it if you prefer a purely sweet, unadulterated caramel experience.
Step-by-Step Guide: How to Make Perfect Homemade Microwave Caramels
These step-by-step photos and detailed instructions are thoughtfully provided to help you visualize each stage and successfully make this recipe. While these visual aids are incredibly helpful for clarity, you can also Jump to the Recipe Card at the very bottom of this post to access the complete printable version of this recipe, which includes all precise ingredient measurements and concise instructions for your convenience.
- Melt the Butter: Begin by placing the half cup of unsalted butter into a large, microwave-safe, deep bowl. The depth of the bowl is a critical safety measure here, as it helps prevent the mixture from boiling over during the cooking process. Microwave the butter on full power until it is completely melted and liquefied.
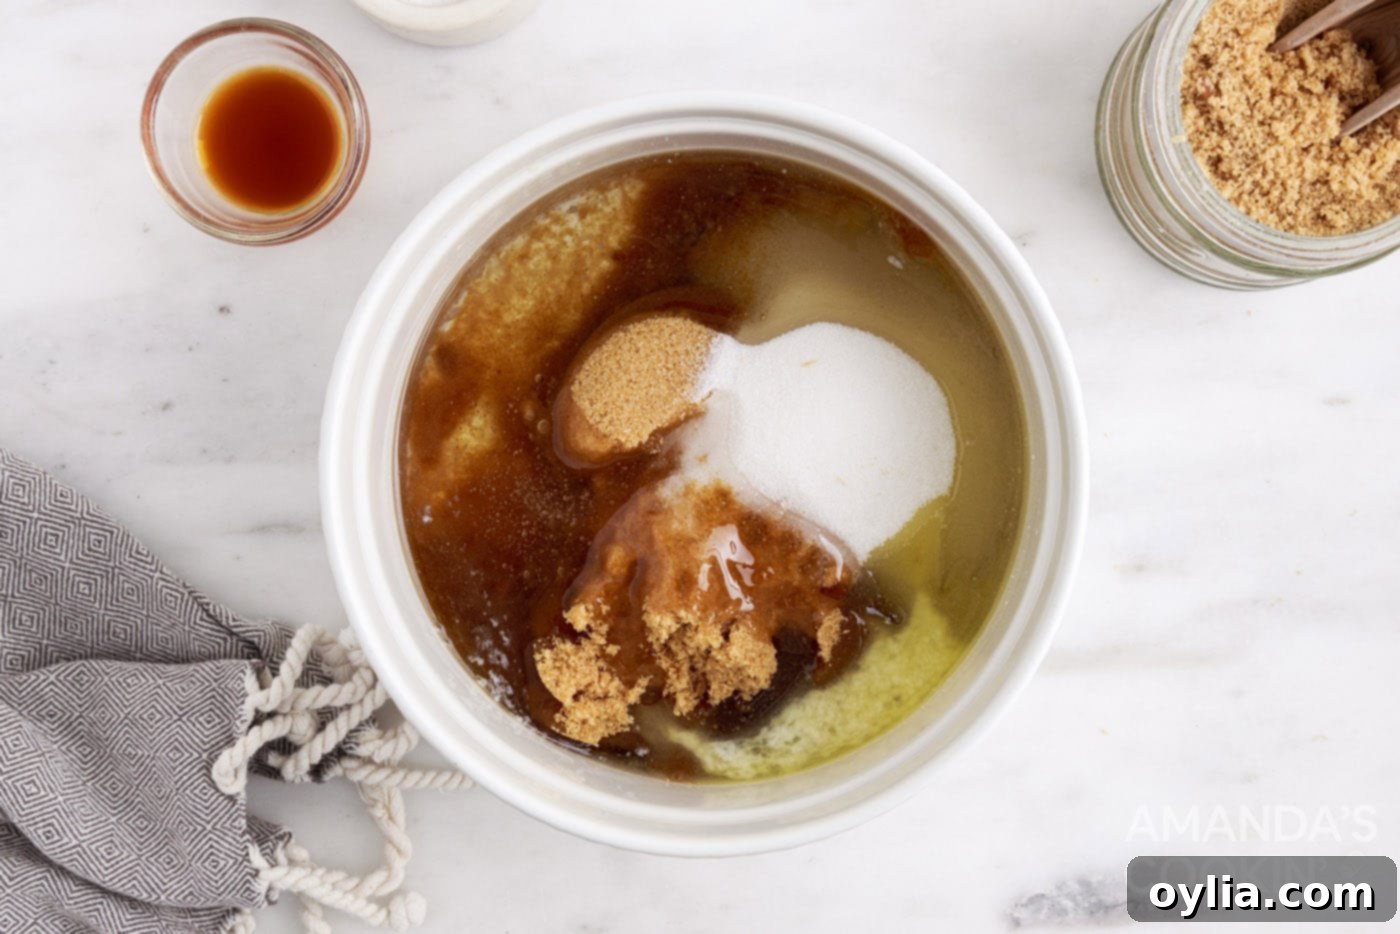
- Combine Sugars and Syrup: To the perfectly melted butter, add the light corn syrup, the packed light brown sugar, and the granulated sugar. Stir these ingredients together thoroughly with a sturdy whisk or spatula until they are fully combined and the sugars are thoroughly moistened. Return the bowl to the microwave and cook on full power for an initial 1-2 minutes, or until the entire mixture comes to a vigorous, rolling boil. It’s important to keep a very close eye on it during this stage to ensure it doesn’t boil over.

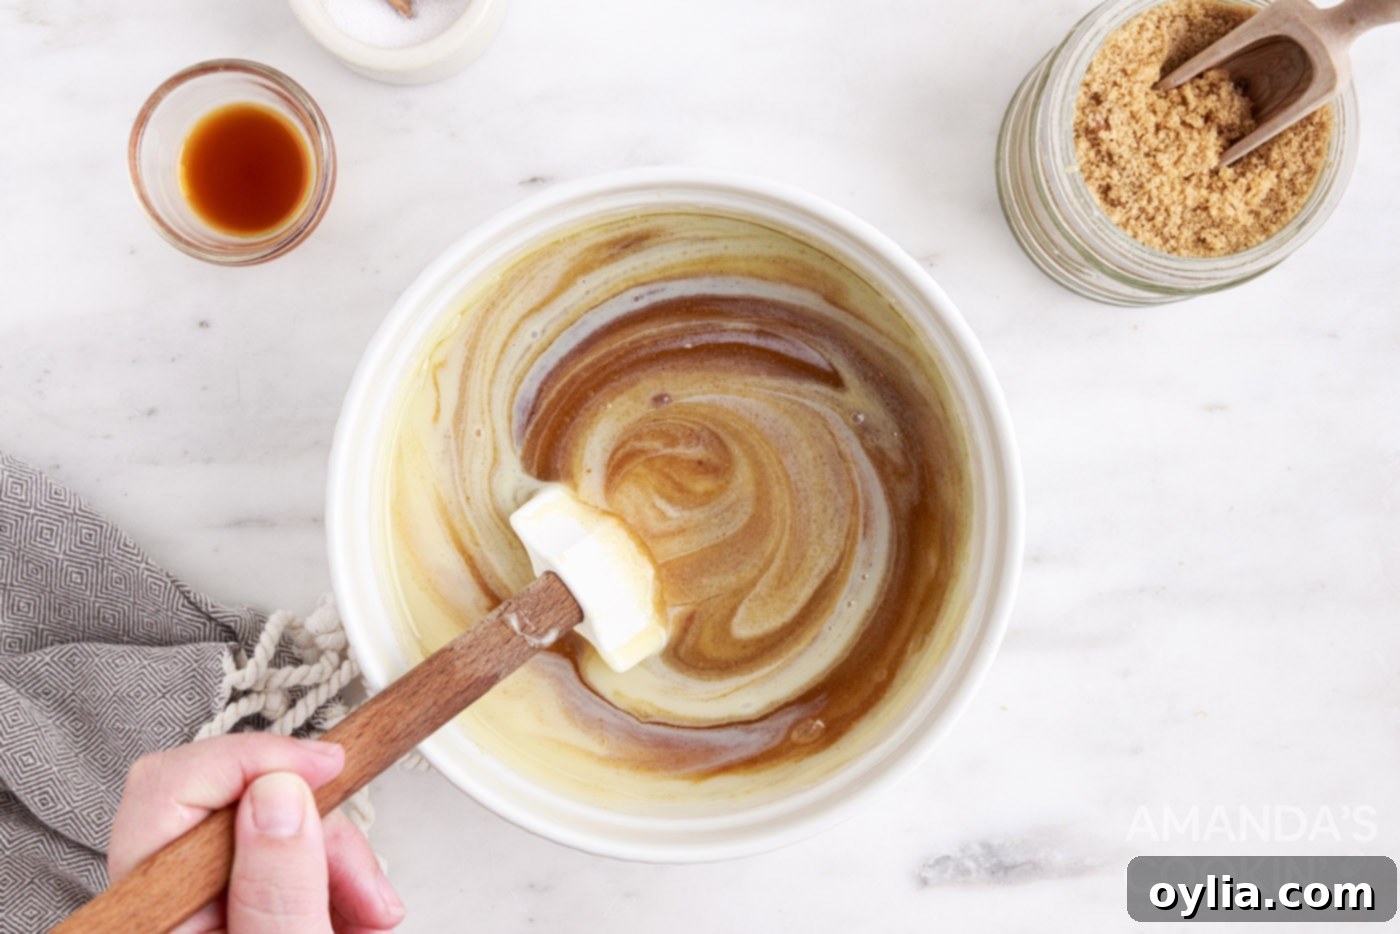
- Whisk in Sweetened Condensed Milk: Carefully remove the hot bowl from the microwave, using oven mitts or a towel. Pour in the entire 14-ounce can of sweetened condensed milk. Vigorously whisk it into the hot, boiling sugar mixture until it is completely smooth, lump-free, and thoroughly incorporated. This step is absolutely crucial for achieving a uniform, creamy caramel without any separations.

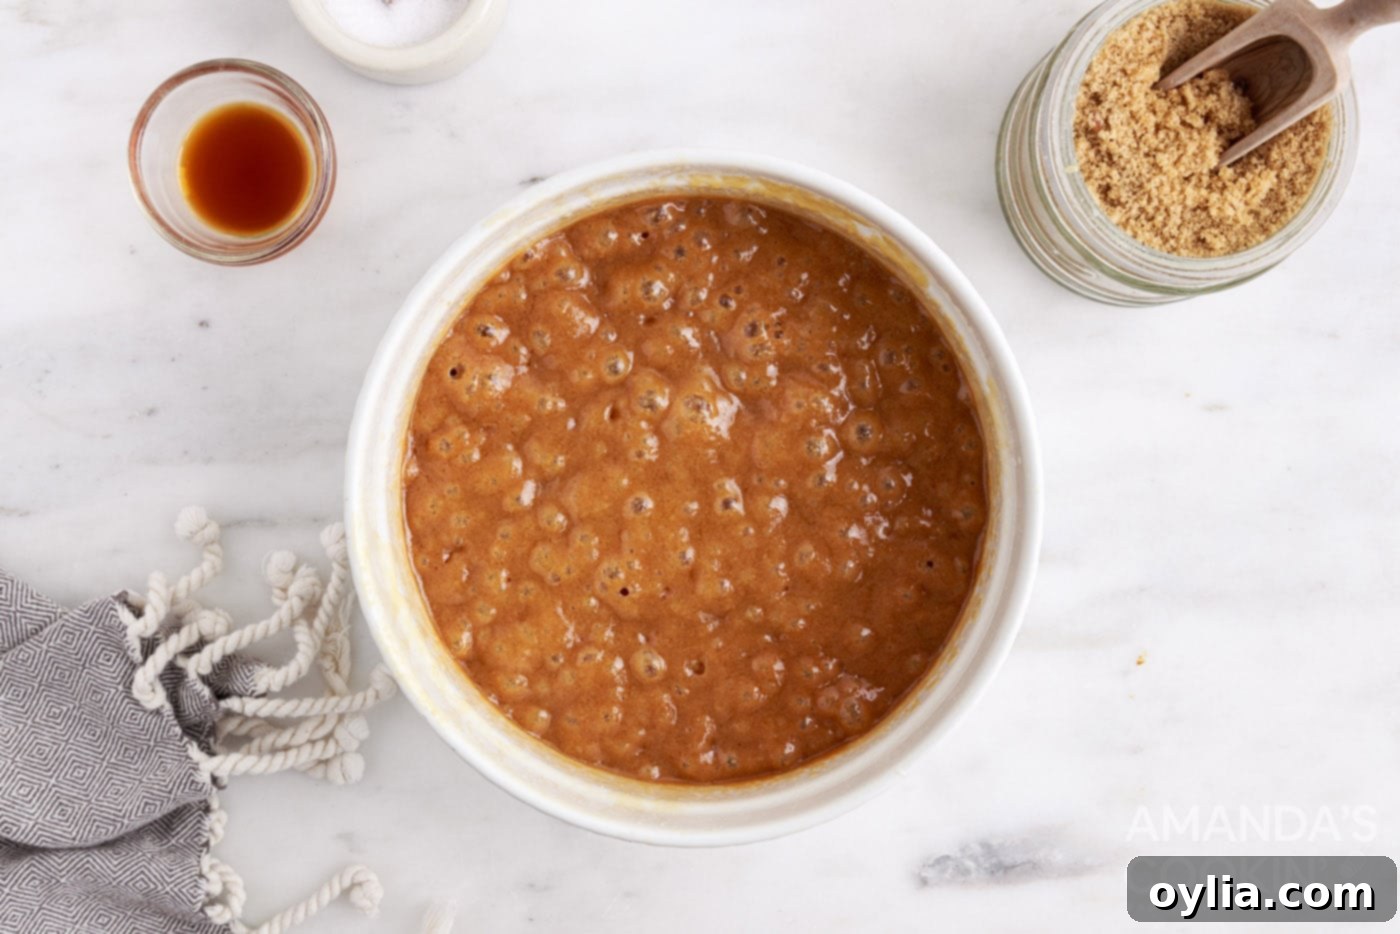
- Cook to Desired Temperature: Return the bowl with the caramel mixture to the microwave. Cook for another 3 1/2 minutes on full power. After this initial cooking time, remove the bowl, give it another thorough whisk, ensuring you scrape down the sides and bottom of the bowl to promote even cooking and prevent scorching. Then, continue to cook for an additional 3-4 minutes, or until the caramel reaches a precise temperature between 240-248°F (115-120°C) when measured with a reliable candy thermometer. This specific temperature range is absolutely crucial for achieving a thick, perfectly chewy caramel. Temperatures below this range will result in a softer caramel that struggles to hold its shape and stick to wrappers, while higher temperatures will yield a harder, more brittle candy. Remember that microwave wattages can vary significantly, so relying on the thermometer for accuracy is paramount over strict adherence to cooking times.

- Add Flavorings: Once the caramel reaches its ideal temperature, remove it from the microwave. Stir in the vanilla extract thoroughly. If you are opting for a delicious salted caramel, now is also the perfect time to incorporate the optional 1/2 teaspoon of salt. Mix well to ensure these vital flavorings are evenly distributed throughout the hot, luscious caramel.
- Prepare Your Pan: While the caramel is still hot and pliable, swiftly prepare your pan for cooling. You can choose to generously butter a jelly roll pan, a half sheet pan, or even a 9×13-inch casserole dish. For the absolute easiest removal and minimal cleanup, we highly recommend lining your chosen pan completely with parchment paper, ensuring there is a generous overhang on the sides. This overhang will serve as convenient “handles” to easily lift the cooled caramel later.
EXPERT TIP: The dimensions of the pan you select will directly influence the final thickness of your finished caramel pieces. A smaller pan will naturally yield thicker, more substantial caramels, which might require a slightly longer cooling and setting time. Conversely, a larger pan will produce thinner caramels that typically set more quickly. Consider your personal preference for caramel thickness when making your pan selection.
- Pour and Cool: Very carefully pour the hot, cooked caramel mixture evenly into your prepared pan. If necessary, use a heat-resistant spatula to gently spread it into an even layer. Now comes the most challenging part of the entire process: patience! Allow the caramel to cool completely and set undisturbed at room temperature for a full 1-2 hours. It is crucial not to rush this crucial setting step by placing it in the refrigerator too soon, as rapid or uneven cooling can sometimes lead to an undesirable texture or even separation.
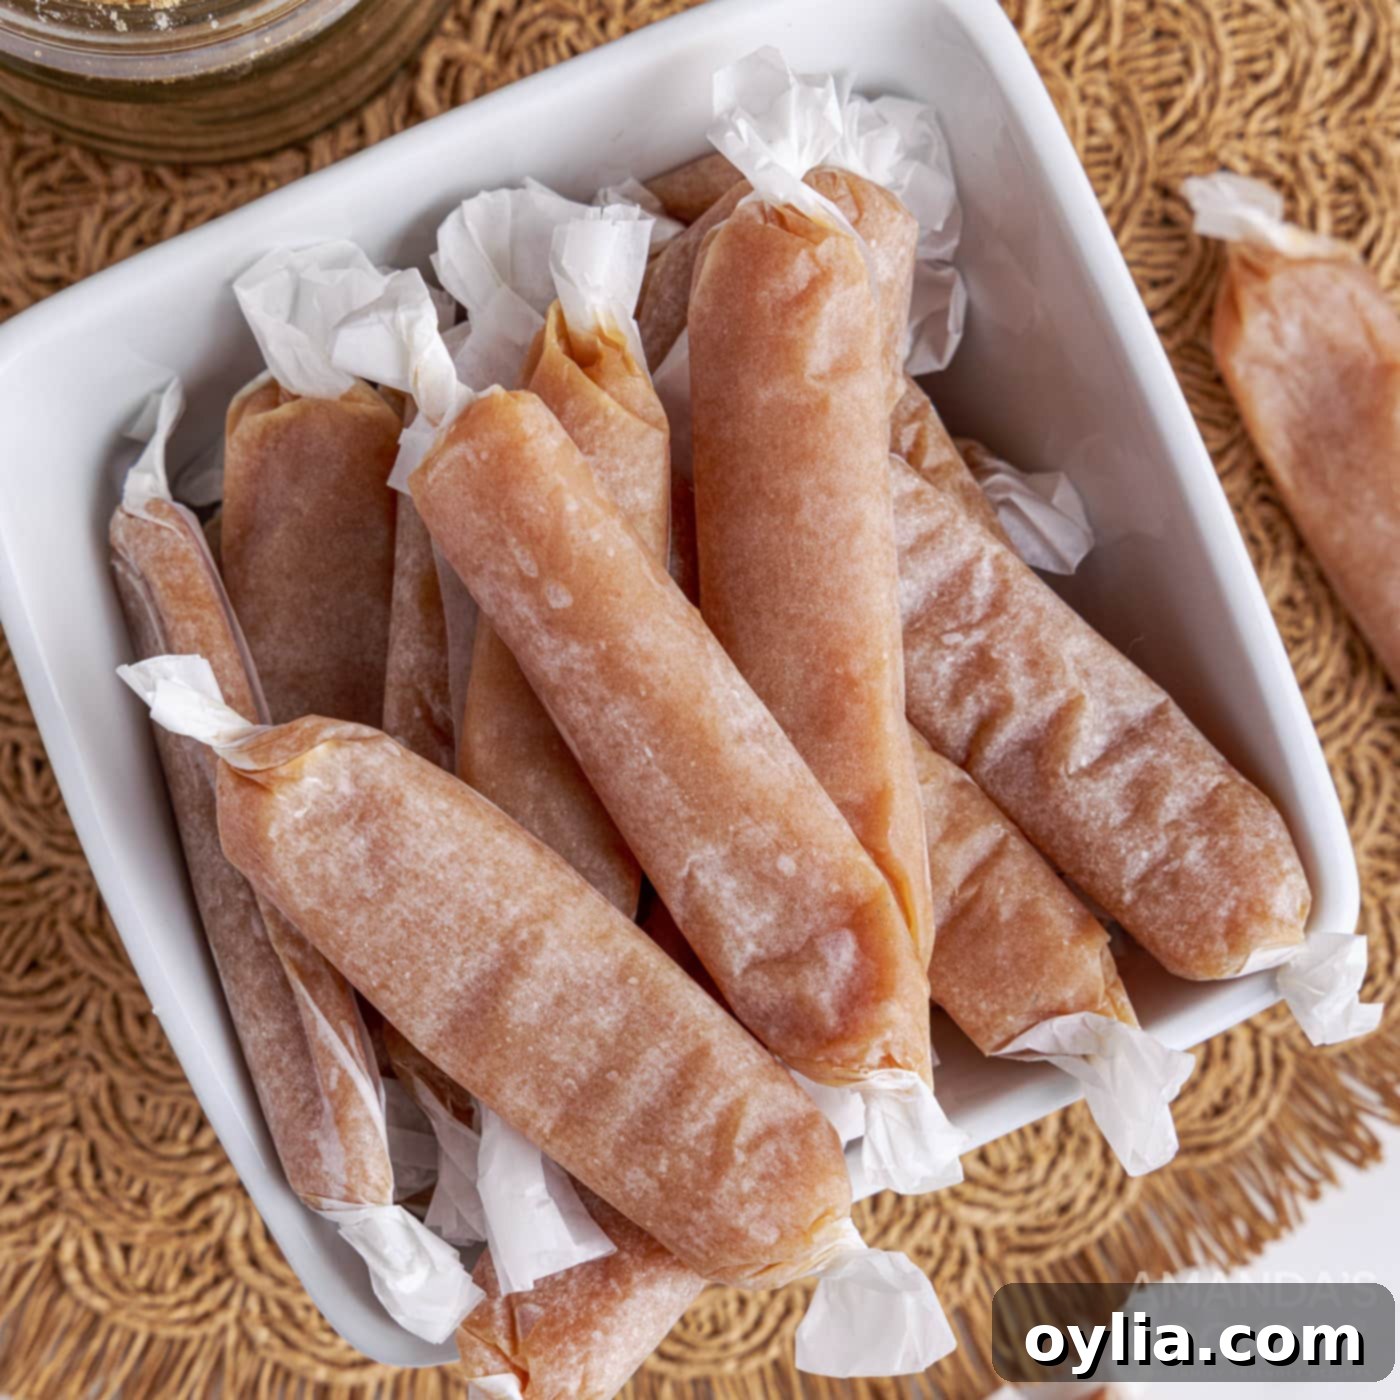
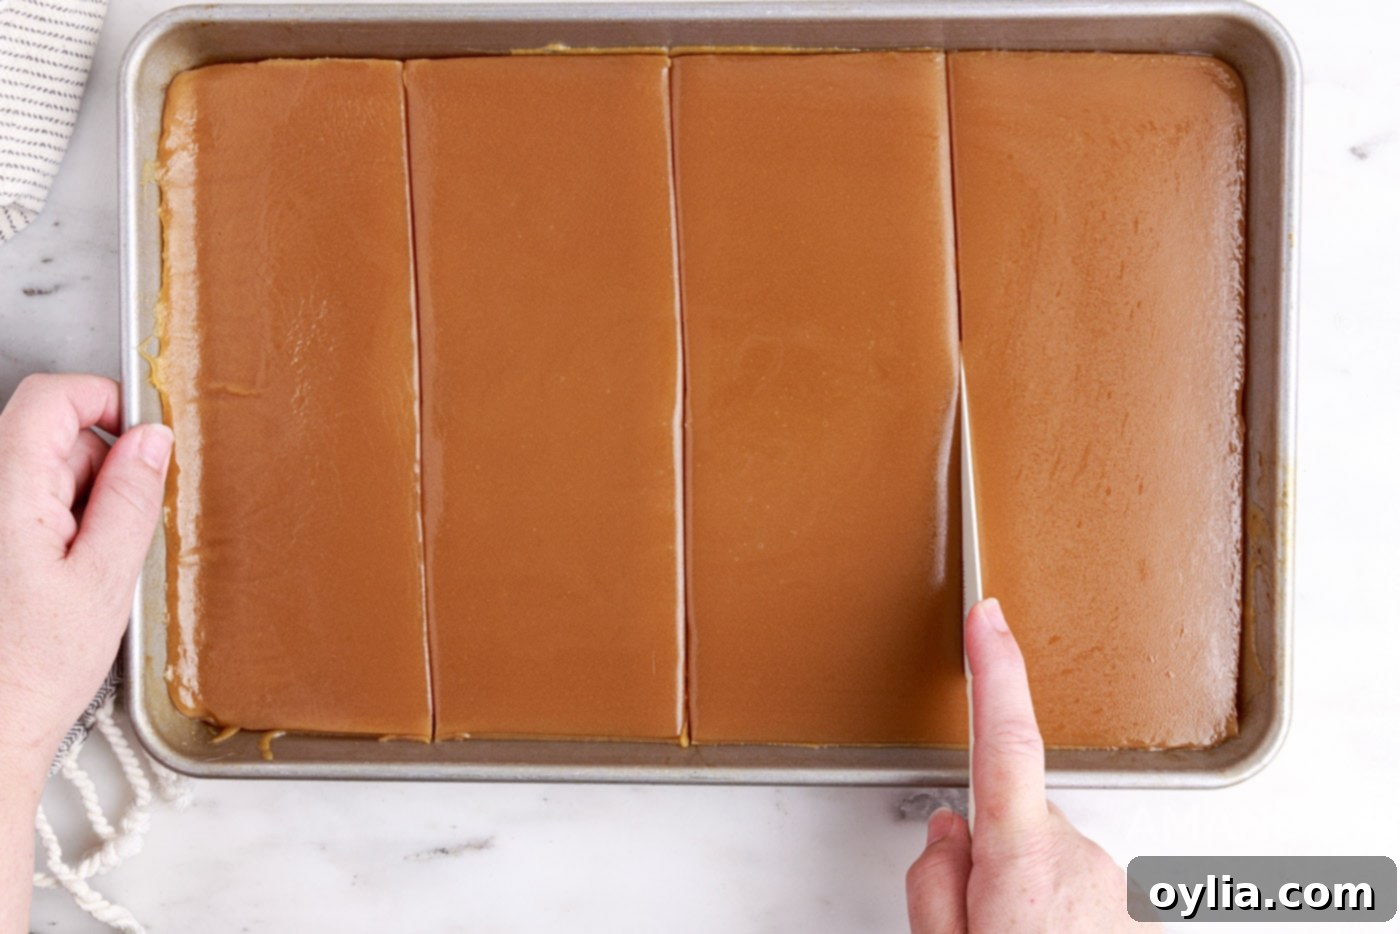
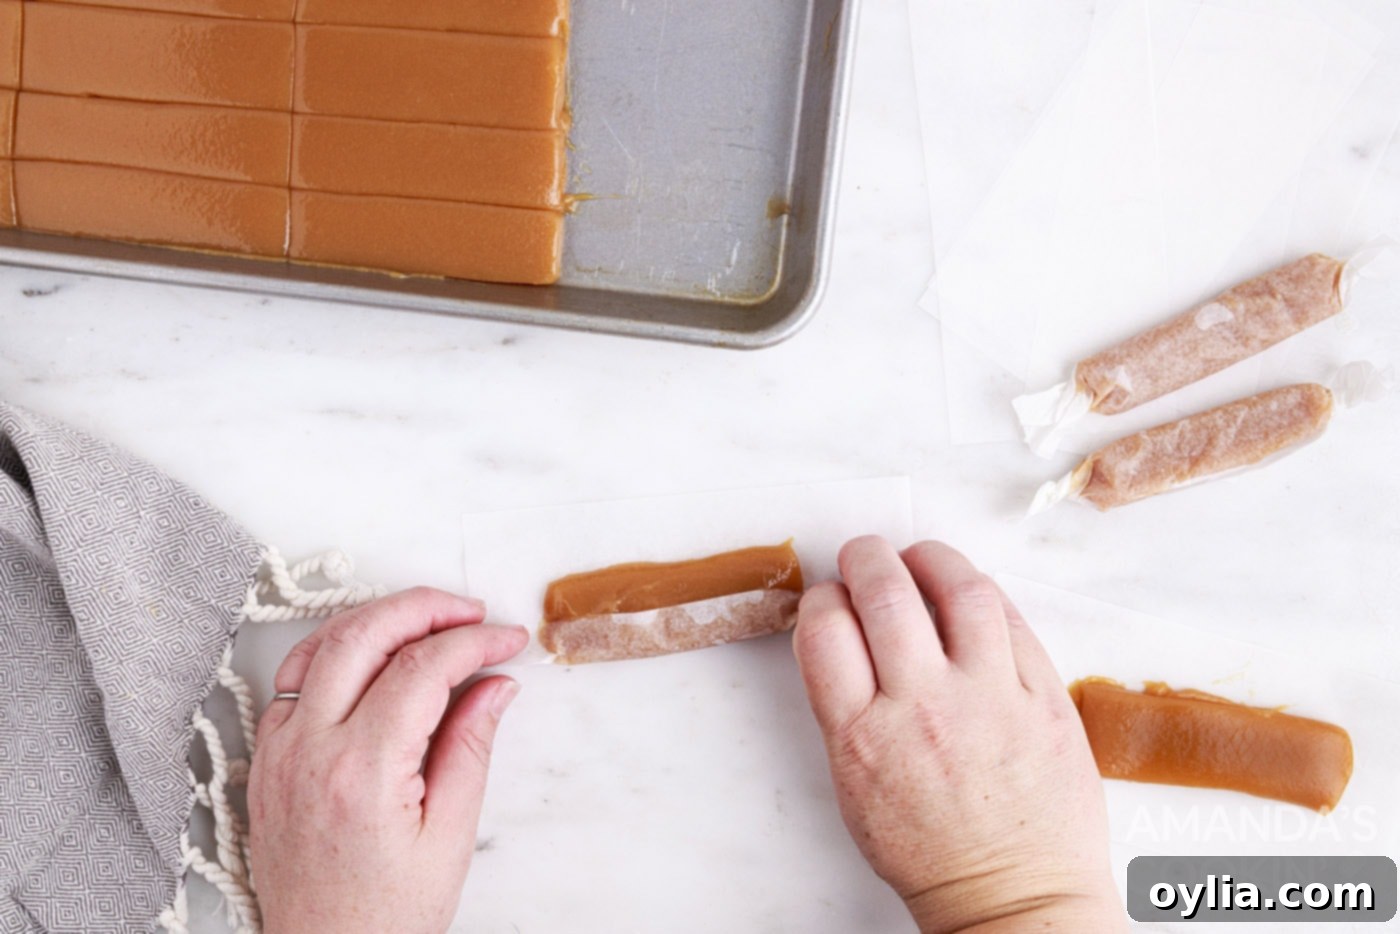
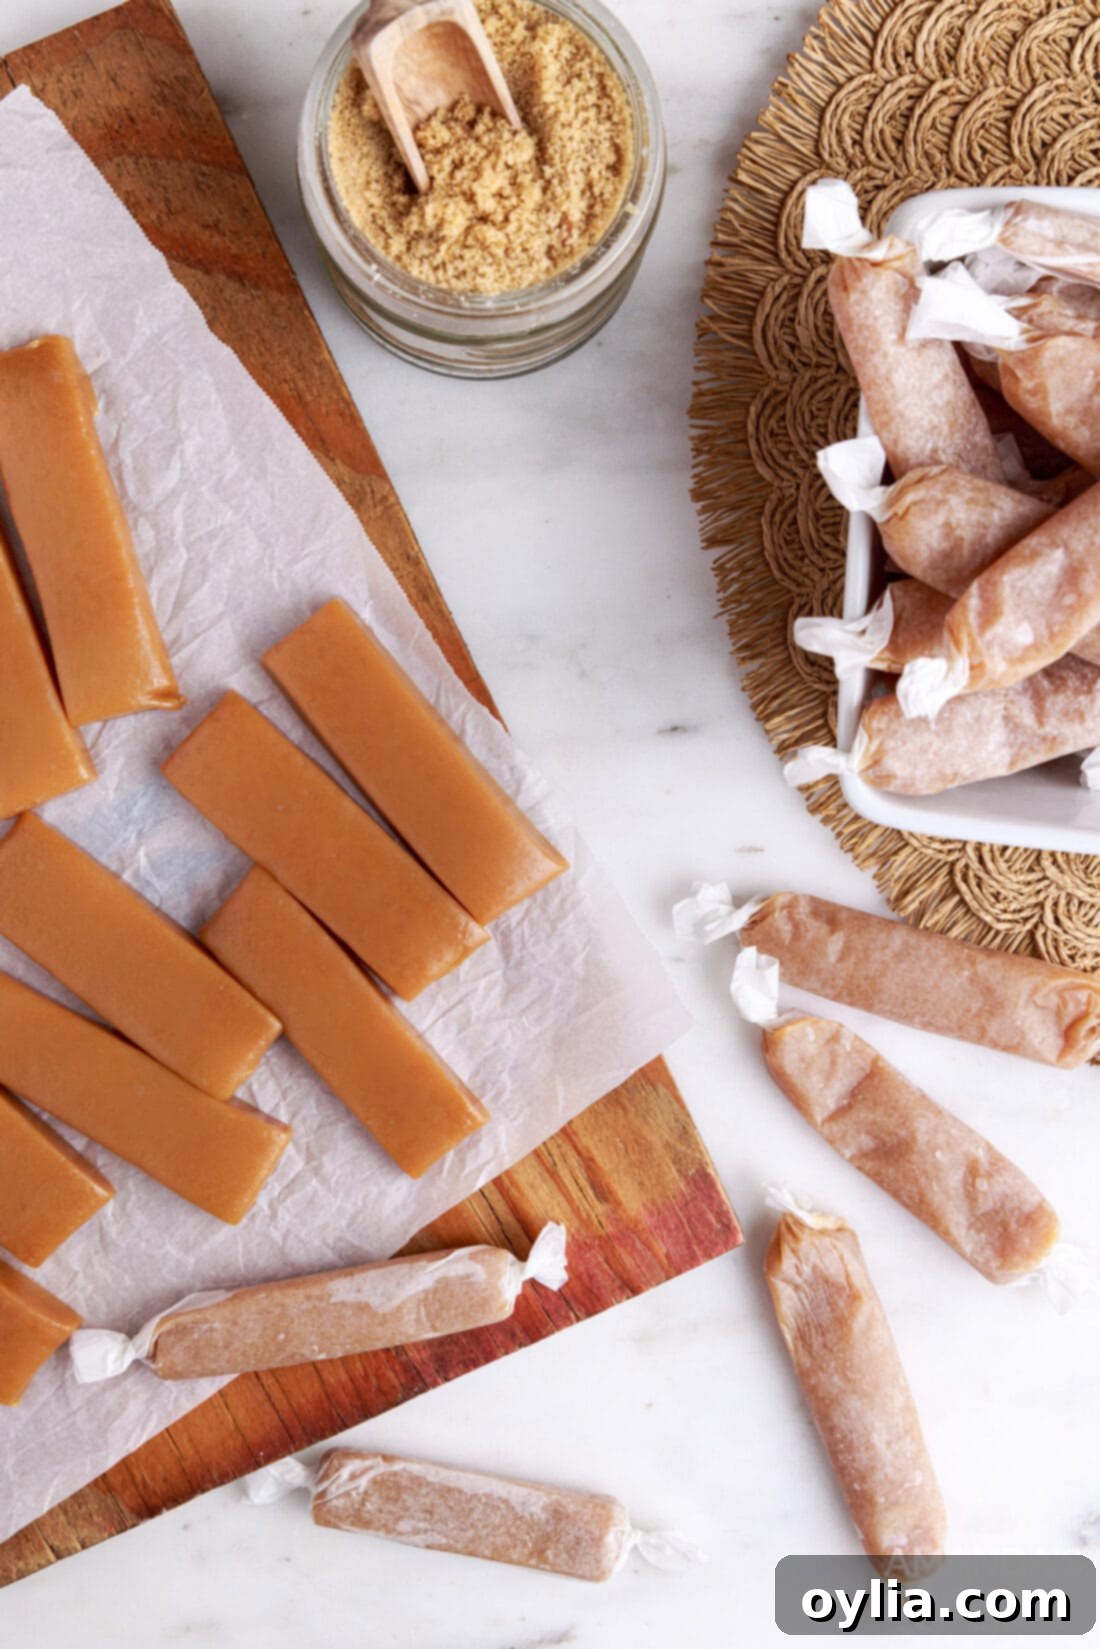
- Slice and Wrap: Once the caramel is completely cool and firm to the touch, use the parchment paper overhang to gently lift the entire slab of caramel out of the pan and transfer it onto a clean cutting board. For clean, neat cuts and to prevent sticking, lightly butter a sharp knife or even a sturdy butter knife. Proceed to slice the caramel into your desired rectangular or square pieces. For optimal freshness, best presentation, and to prevent any sticking, individually wrap each caramel in small squares of fresh parchment paper. This not only preserves their quality but also bestows upon them that classic, professional candy shop aesthetic.


Frequently Asked Questions & Expert Tips for Perfect Microwave Caramels
Don’t panic or fret just yet! It’s actually not uncommon for the caramel mixture to appear a little separated or even slightly “curdled” towards the end of the cooking process, particularly after periods in the microwave. This visual effect can sometimes occur due to minor sugar crystallization or a slight separation of fats. During one of our recipe trials, the caramel indeed looked almost curdled. However, with just a quick, vigorous whisking, it miraculously transformed into a perfectly smooth, homogenous mixture that poured out into beautiful caramels. So, before you consider discarding the batch, try giving it a really good, energetic stir with a sturdy whisk or spatula. More often than not, it will come together beautifully and achieve that desired silky texture.
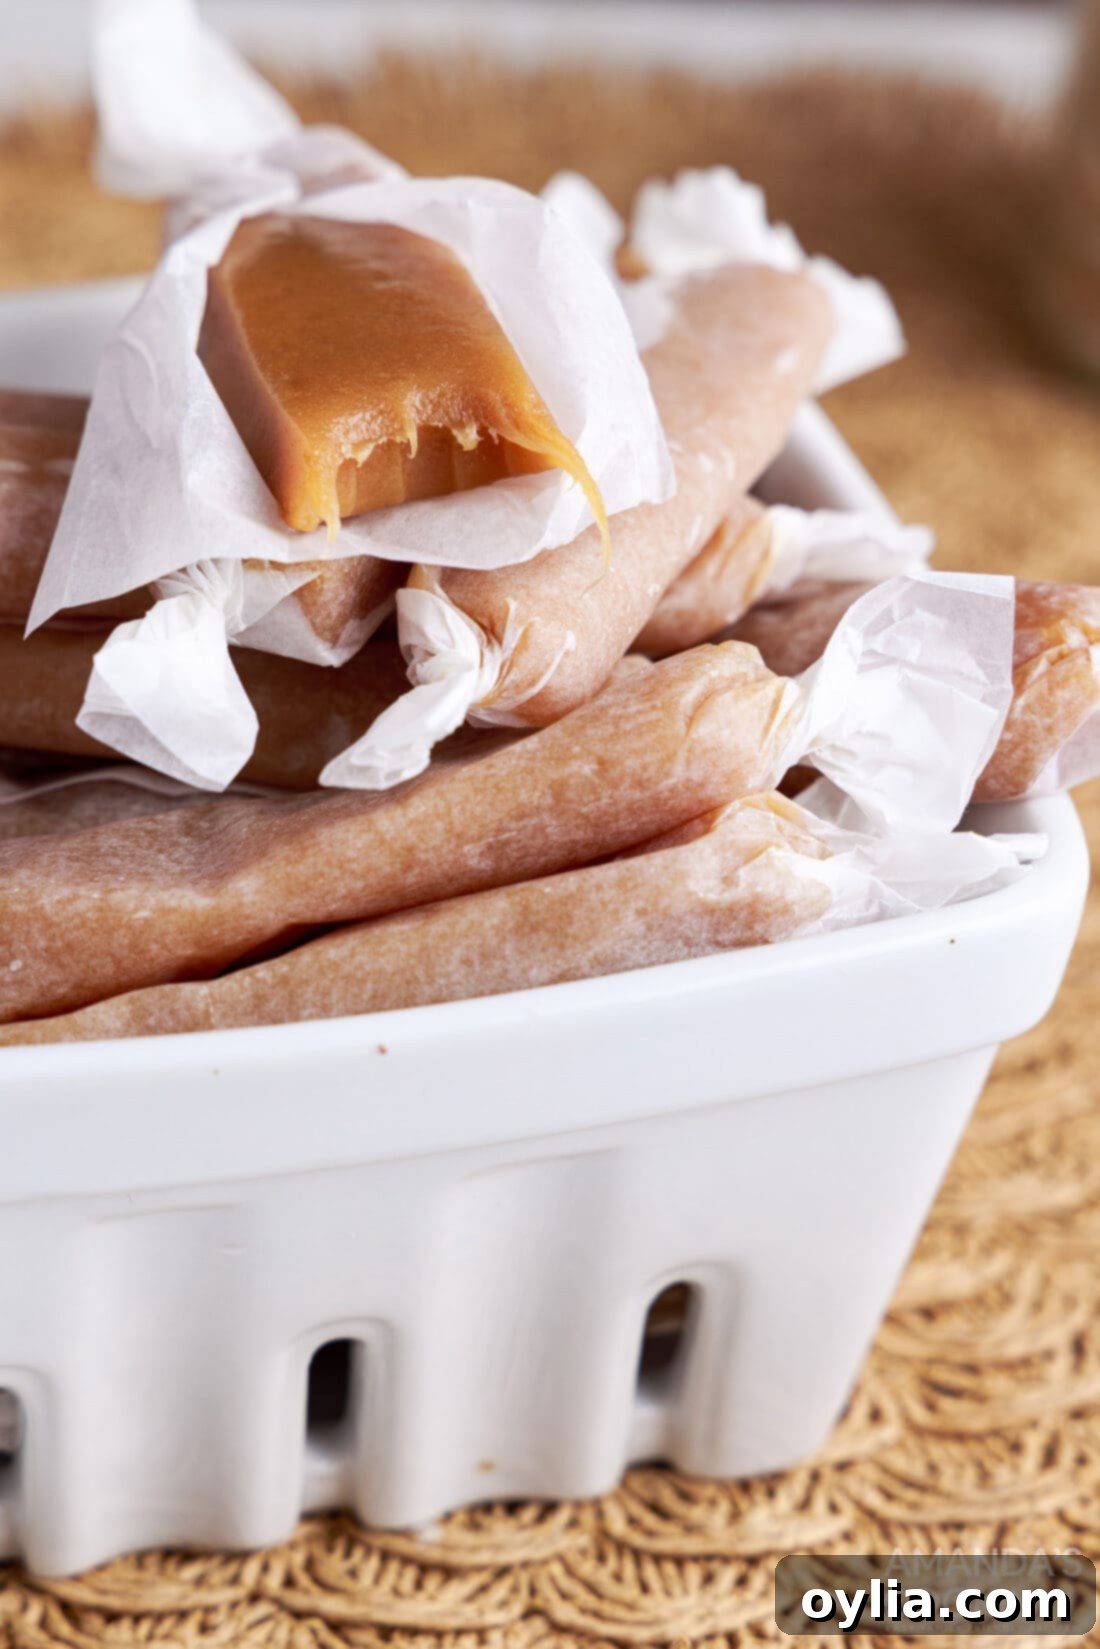
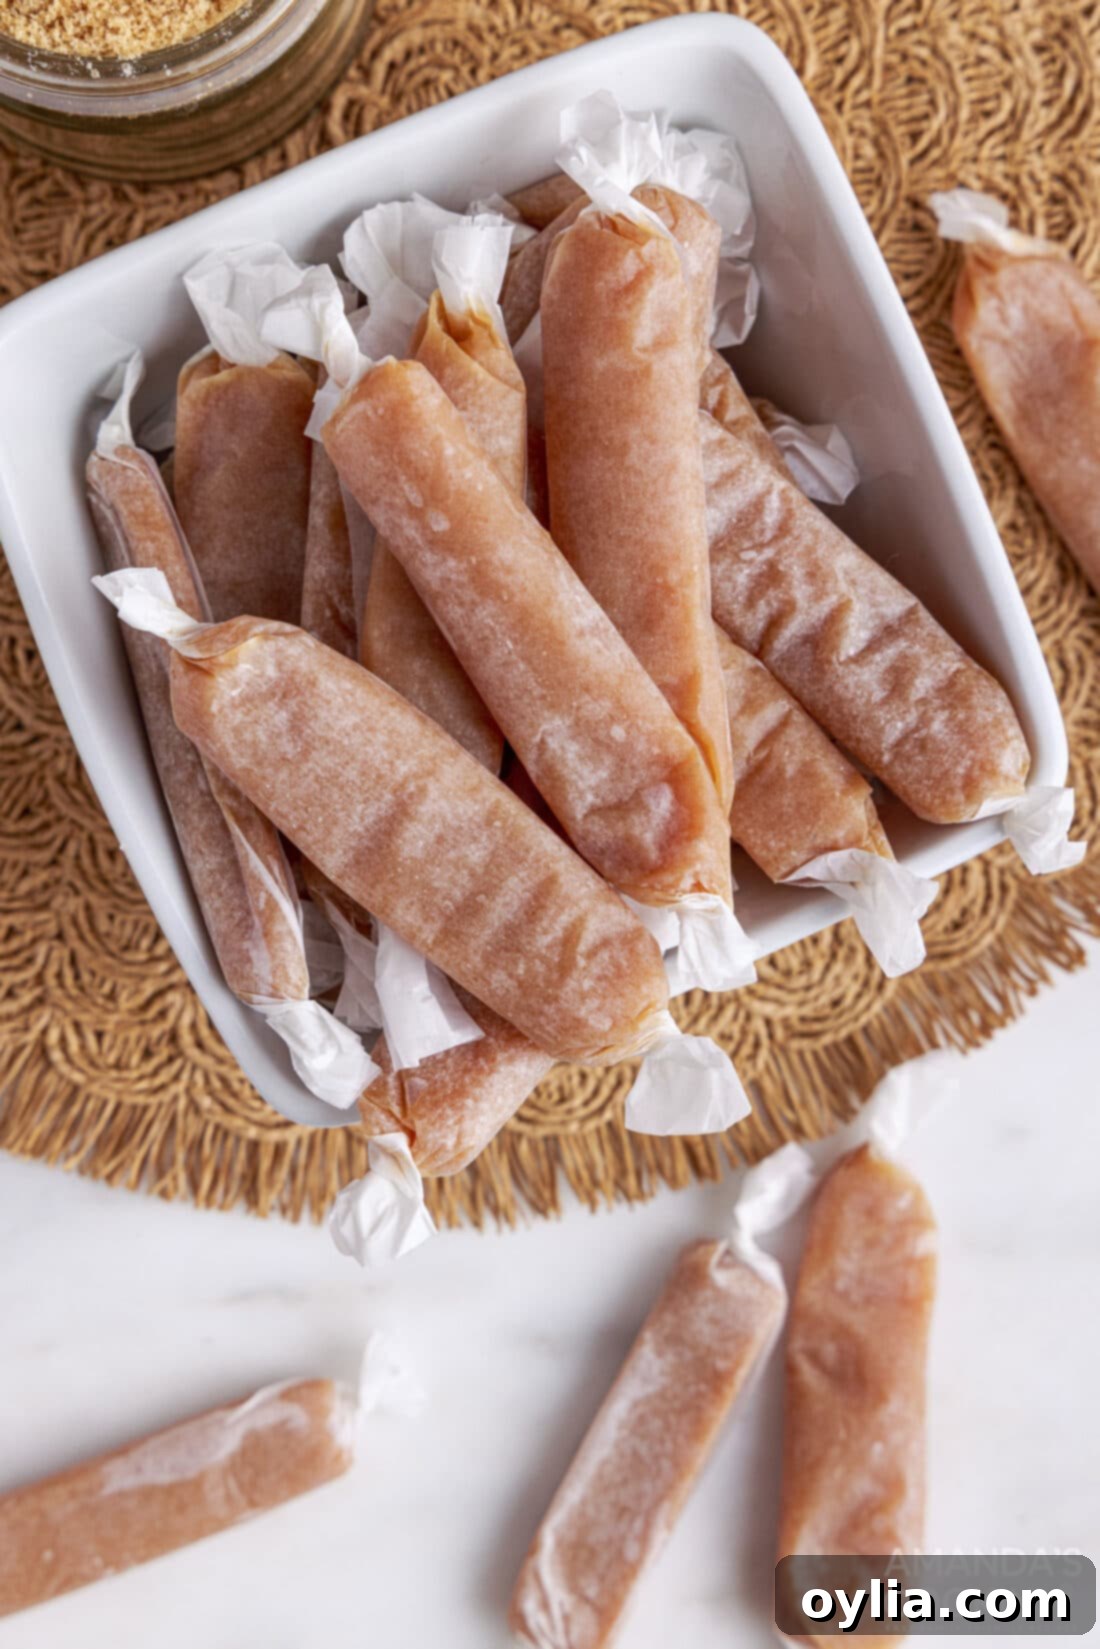
For the best results, a classic presentation, and to ensure your caramels don’t stick together, parchment paper truly works best for wrapping homemade caramels. Simply cut it into small squares (approximately 3×3 or 4×4 inches, depending on the size of your caramel pieces), place an individual caramel in the center, and then twist the ends tightly. This method not only prevents sticking but also gives them a charming, professional, old-fashioned candy shop look. Alternatively, these clear cellophane candy wrappers also work wonderfully and offer the added benefit of showcasing the delicious treat inside. We recommend avoiding standard plastic wrap or aluminum foil directly, as they can sometimes stick to the caramel or tear easily upon unwrapping.
When stored correctly, your delicious homemade microwave caramels boast a good shelf life, typically remaining fresh and enjoyable for between 2 and 3 weeks. The key to preserving their quality and delectable texture for this duration lies entirely in proper storage techniques.
To ensure your caramels remain at their absolute best, store them in an airtight container. You have a couple of excellent options for storage: A cool, dry place, ideally away from direct sunlight, any heat sources, or excessive humidity, is perfect for maintaining their signature soft, chewy texture. For an even firmer caramel texture and potentially an extended shelf life, you can opt to store them in the refrigerator. If you choose refrigeration, we recommend allowing them to come to room temperature for a few minutes before indulging, as this will bring them back to their optimal, most delightful texture.
The final consistency of your caramel is almost entirely dependent on the precise temperature it reaches during the cooking process. If your homemade caramel turns out too soft and doesn’t hold its shape well, becoming gooey or sticky, it most likely means it didn’t reach a high enough temperature (i.e., it stayed below 240°F / 115°C). While still perfectly edible and delicious, it won’t be firm enough to properly slice and wrap. Conversely, if your caramel is too hard, brittle, or difficult to chew, it indicates that it cooked to too high a temperature (above 248°F / 120°C). For consistently perfect, chewy results, an accurate candy thermometer is your absolute best friend and a non-negotiable tool for this recipe. Remember that microwave wattages can vary significantly between appliances, so always trust the thermometer’s reading over strict adherence to suggested cooking times.
While many recipes can be easily doubled, candy making, particularly recipes involving sugar syrup, can be quite sensitive to batch size. If you choose to double this microwave caramel recipe, be keenly aware that the cooking times will need to be significantly adjusted and increased. You will also require a much larger, very deep, microwave-safe bowl to safely accommodate the increased volume of the mixture and prevent any messy boil-overs. It is absolutely crucial to continuously monitor the caramel with a candy thermometer throughout the entire cooking process, as reaching the precise temperature (240-248°F / 115-120°C) becomes even more critical with larger batches to ensure proper setting and texture. For consistently optimal results, especially if you are new to candy making or this particular method, we highly recommend making individual batches rather than attempting to double the recipe.
Absolutely! This basic microwave caramel recipe provides an excellent and highly versatile foundation for creative customization and flavor experimentation. Beyond the popular optional sprinkle of sea salt, consider adding a warm pinch of ground cinnamon, a dash of fragrant pumpkin pie spice, or a hint of rich espresso powder for a more complex and sophisticated flavor profile. You could also experiment with various extracts, such as a delicate almond extract, a robust maple extract, or even a sophisticated hint of bourbon or rum extract (always add these at the same time as the vanilla extract). Just remember to incorporate extracts and spices at the very end of the cooking process, similar to the vanilla, to preserve their delicate aromatic qualities from evaporating with the heat.
Creative Serving Suggestions & Thoughtful Gift Ideas for Your Homemade Caramels
These homemade microwave caramels are far more than just a simple sweet treat; they are incredibly versatile and perfectly suited for a wide array of occasions and culinary applications. While the simple joy of unwrapping and savoring them straight from the parchment is always a delight, here are some creative and inspiring serving suggestions and thoughtful gift ideas to elevate your caramel experience:
- Elegant and Heartfelt Edible Gifts: Homemade microwave caramels make for truly perfect, personalized edible gifts for friends, family, neighbors, teachers, and colleagues, especially during the festive holiday season or any time you wish to share a sweet gesture.
- For a charming, rustic touch, gather a small stack of wrapped caramels and tie them together with natural twine or colorful ribbon.
- Present them in clear cellophane baggies, sealed with a twist tie and adorned with a festive bow or a personalized tag.
- Consider attaching a few beautifully wrapped caramels to larger gift packages as a delightful, unexpected bonus.
- Curate an impressive homemade gift basket by arranging your caramels alongside other delightful homemade candies, such as rich chocolate truffles, addictive saltine toffee, or even some candied pecans, for a truly memorable and appreciated present.
- A Touch of Gourmet with Sea Salt: To create an irresistible salted caramel experience that exquisitely balances the sweetness, consider sprinkling a small amount of coarse sea salt over the caramel mixture immediately after pouring it into the prepared pan, before it has a chance to set. This simple addition elevates the flavor profile significantly.
- Caramel-Dipped Delights: Utilize your freshly made caramels to effortlessly elevate other desserts and snacks!
- Gently melt some caramels (you might need to add a touch of heavy cream to achieve a smooth dipping consistency) to create a luscious, warm dipping sauce for crisp apple slices, pretzels, or even shortbread cookies.
- Dip your favorite pretzels or crispy shortbread cookies directly into the melted caramel for a quick, impressive, and utterly delicious snack or party treat.
- Decadent Dessert Toppings: Once cooled, chop your caramels into small, bite-sized pieces. These delightful morsels can then be used as a fantastic topping for a variety of desserts, including luxurious ice cream sundaes, fudgy brownies, creamy cheesecakes, or even stirred into your morning oatmeal for an unexpectedly decadent breakfast.
- Coffee & Hot Cocoa Enhancer: Drop a wrapped or unwrapped caramel into your hot coffee, tea, or hot cocoa. It will slowly melt, adding a wonderful, sweet, and creamy dimension to your beverage. They are also a key ingredient in creating delightful homemade Caramel Hot Cocoa Bombs!
Explore More Delicious & Easy Homemade Candy Recipes
If you’ve thoroughly enjoyed the delightful process of making these easy microwave caramels, then you’re truly in for a treat! The expansive world of homemade candy is incredibly rewarding and offers endless possibilities for sweet creations. Here are some more of our absolute favorite candy recipes to inspire your very next kitchen adventure and expand your confectionery repertoire:
- Rock Candy – A fascinating, crystalized sugar treat that’s as fun to make as it is to eat.
- Saltine Toffee – An incredibly simple, highly addictive, and surprisingly easy dessert often called “Christmas Crack.”
- Chocolate Turtles – The classic combination of toasted pecans and soft caramel generously covered in rich chocolate.
- Caramel Hot Cocoa Bombs – Craft these cozy, exploding spheres for a warm drink with a delightful caramel surprise inside.
- Peppermint Candy Cane Bark – A festive, vibrant, and minty chocolate delight, perfect for holiday gifting.
- Chocolate Peanut Butter Fudge – A rich, creamy, and utterly irresistible classic flavor pairing.
- White Chocolate Candy Cane Pretzels – A wonderfully sweet, salty, and crunchy snack that’s easy to make.
- Candied Pecans – Perfectly sweet and crunchy, ideal for snacking, topping salads, or garnishing desserts.
- Chocolate Truffles – Elegant, decadent, and surprisingly simple to make, these are a true indulgence.
- Homemade Lollipops – A customizable classic that’s fun for all ages to create and enjoy.
I absolutely adore baking and cooking, and I find immense joy in sharing my kitchen experiences and tested recipes with all of you! Remembering to come back and check for new recipes each day can sometimes be tough, which is precisely why I offer a convenient newsletter that delivers a brand new recipe straight to your inbox every time I post. Simply subscribe here and start receiving your free daily recipes to inspire your culinary adventures!
Microwave Caramels
IMPORTANT – There are often Frequently Asked Questions and Expert Tips within the blog post that you may find incredibly helpful. We encourage you to scroll back up and read them for valuable insights and troubleshooting advice!
Print It
Pin It
Rate It
Save ItSaved!
Ingredients
- ½ cup unsalted butter
- ¾ cup light corn syrup
- 1 ½ cup light brown sugar packed
- ½ cup granulated sugar
- 14 oz sweetened condensed milk
- 1 tsp vanilla extract
- ½ tsp salt optional
Essential Equipment You’ll Need
-
Microwave safe bowl (large and deep to prevent boil-overs)
-
Measuring cups and spoons
-
Jellyroll pan (or similar sized baking dish, like a half sheet pan or 9×13 casserole dish)
-
Candy Thermometer (highly recommended for accuracy)
Important Notes for Guaranteed Success
- Temperature is Your Ultimate Guide: For the ultimate chewy texture, the caramel mixture absolutely must reach and hold a temperature between 240°F and 248°F (115-120°C). If the temperature is too low (below 240°F), your caramels will be excessively soft and struggle to hold their shape, often sticking stubbornly to the wrappers. Conversely, if the temperature climbs too high (above 248°F), your caramels will become hard, brittle, and difficult to chew. Therefore, investing in and using a reliable candy thermometer is not just recommended, it’s virtually essential for consistent, perfect results.
- Thorough Stirring During Cooking: It’s crucial to actively monitor the caramel while it is cooking in the microwave. When you are instructed to whisk midway through the cooking cycles, use a robust, heat-resistant spatula or whisk and make a concerted effort to thoroughly scrape down the sides and across the bottom of the bowl. This diligent stirring ensures that the entire mixture is heated and combined evenly, which is key to preventing localized scorching, uneven cooking, or premature sugar crystallization.
- Optimal Storage Practices: To maintain the peak freshness, delightful flavor, and perfect texture of your homemade caramels, always store them in an airtight container. They can be comfortably kept in a cool, dry room, away from any direct sunlight, heat sources, or humidity, for approximately 2 to 3 weeks. For an even firmer caramel and potentially extended shelf life beyond this, you may store them in the refrigerator. If refrigerated, allow them to come to room temperature for a few minutes before indulging, as this will restore their optimal, chewy texture.
- The Importance of a Deep Bowl: Always, without exception, use a generously sized, deep, microwave-safe bowl. This is a critical safety and success measure to prevent the caramel mixture from boiling over during the various cooking cycles. The mixture tends to expand and rise quite significantly when heated, and a deep bowl provides the necessary margin for error and containment.
Simple Instructions for Delicious Microwave Caramels
-
In a large, microwave-safe, deep bowl, melt the unsalted butter until it is fully liquefied and clear.
-
Add the light corn syrup, packed light brown sugar, and granulated sugar to the melted butter. Stir these ingredients thoroughly with a whisk until they are completely combined. Microwave on full power for 1-2 minutes, or until the mixture reaches a vigorous, rolling boil.
-
Carefully remove the bowl from the microwave. Pour in the sweetened condensed milk and whisk it into the boiling sugar mixture until it is entirely smooth and thoroughly incorporated.
-
Return the bowl to the microwave. Cook on full power for another 3 1⁄2 minutes. Remove, whisk vigorously again, ensuring you scrape down the sides and bottom of the bowl. Then, continue to cook for an additional 3-4 minutes, or until the caramel’s temperature reaches 240-248°F (115-120°C) on a reliable candy thermometer. This temperature range is crucial for achieving a thick, perfectly chewy caramel consistency.
-
Once the desired temperature is reached, remove the caramel from the microwave. Stir in the vanilla extract and the optional 1/2 teaspoon of salt, mixing thoroughly to ensure even distribution of flavors.
-
Prepare your cooling pan. Butter a jelly roll pan, a half sheet pan, or a 9×13-inch casserole dish, or (recommended for ease) line it completely with parchment paper, leaving a generous overhang on the sides for easy lifting.
-
Carefully pour the hot, cooked caramel mixture evenly into the prepared pan. Allow the caramel to cool completely and set at room temperature for 1-2 hours until it is firm to the touch. Do not refrigerate immediately.
-
Once the caramel is fully cooled and firm, use the parchment paper overhang to gently lift the caramel slab out of the pan onto a cutting board. Using a lightly buttered sharp knife, slice the caramel into your preferred rectangular or square pieces. For best storage and presentation, wrap each individual caramel in small squares of parchment paper to prevent sticking.
Nutrition Information (Estimated per Caramel)
The recipes on this blog are meticulously tested with a conventional gas oven and gas stovetop to ensure accuracy and reliability. It’s important to note that oven performance can vary significantly, especially with older appliances, leading to inconsistent cooking and baking. We highly recommend using an inexpensive oven thermometer to verify that your oven is truly heating to the proper temperature. If you opt to use a toaster oven or a countertop oven, please be mindful that these appliances may not distribute heat as uniformly as a conventional full-sized oven, and consequently, you might need to adjust your cooking or baking times. For recipes that utilize specialized appliances such as pressure cookers, air fryers, slow cookers, or others, a direct link to the specific appliances we use is typically provided within each respective recipe for guidance. Furthermore, for baking recipes where measurements are given by weight, please understand that substituting volumetric cup measurements may yield different results, and we cannot guarantee success with that method due to variations in ingredient density.
We genuinely hope you’ve thoroughly enjoyed this comprehensive guide to crafting incredibly soft and chewy homemade microwave caramels! This simple yet immensely rewarding recipe is perfectly suited for satisfying your deepest sweet cravings, creating delightful and thoughtful gifts for loved ones, or simply experiencing the pure joy of homemade candy right in your kitchen. Please don’t allow the notion of candy making to intimidate you; with your trusty microwave and just a few common ingredients, you are truly just minutes away from whipping up a glorious batch of perfectly luscious, golden caramels. Happy cooking, and indulge sweetly!
