Irresistible No-Bake S’mores Lasagna: Your Ultimate Layered Dessert Recipe
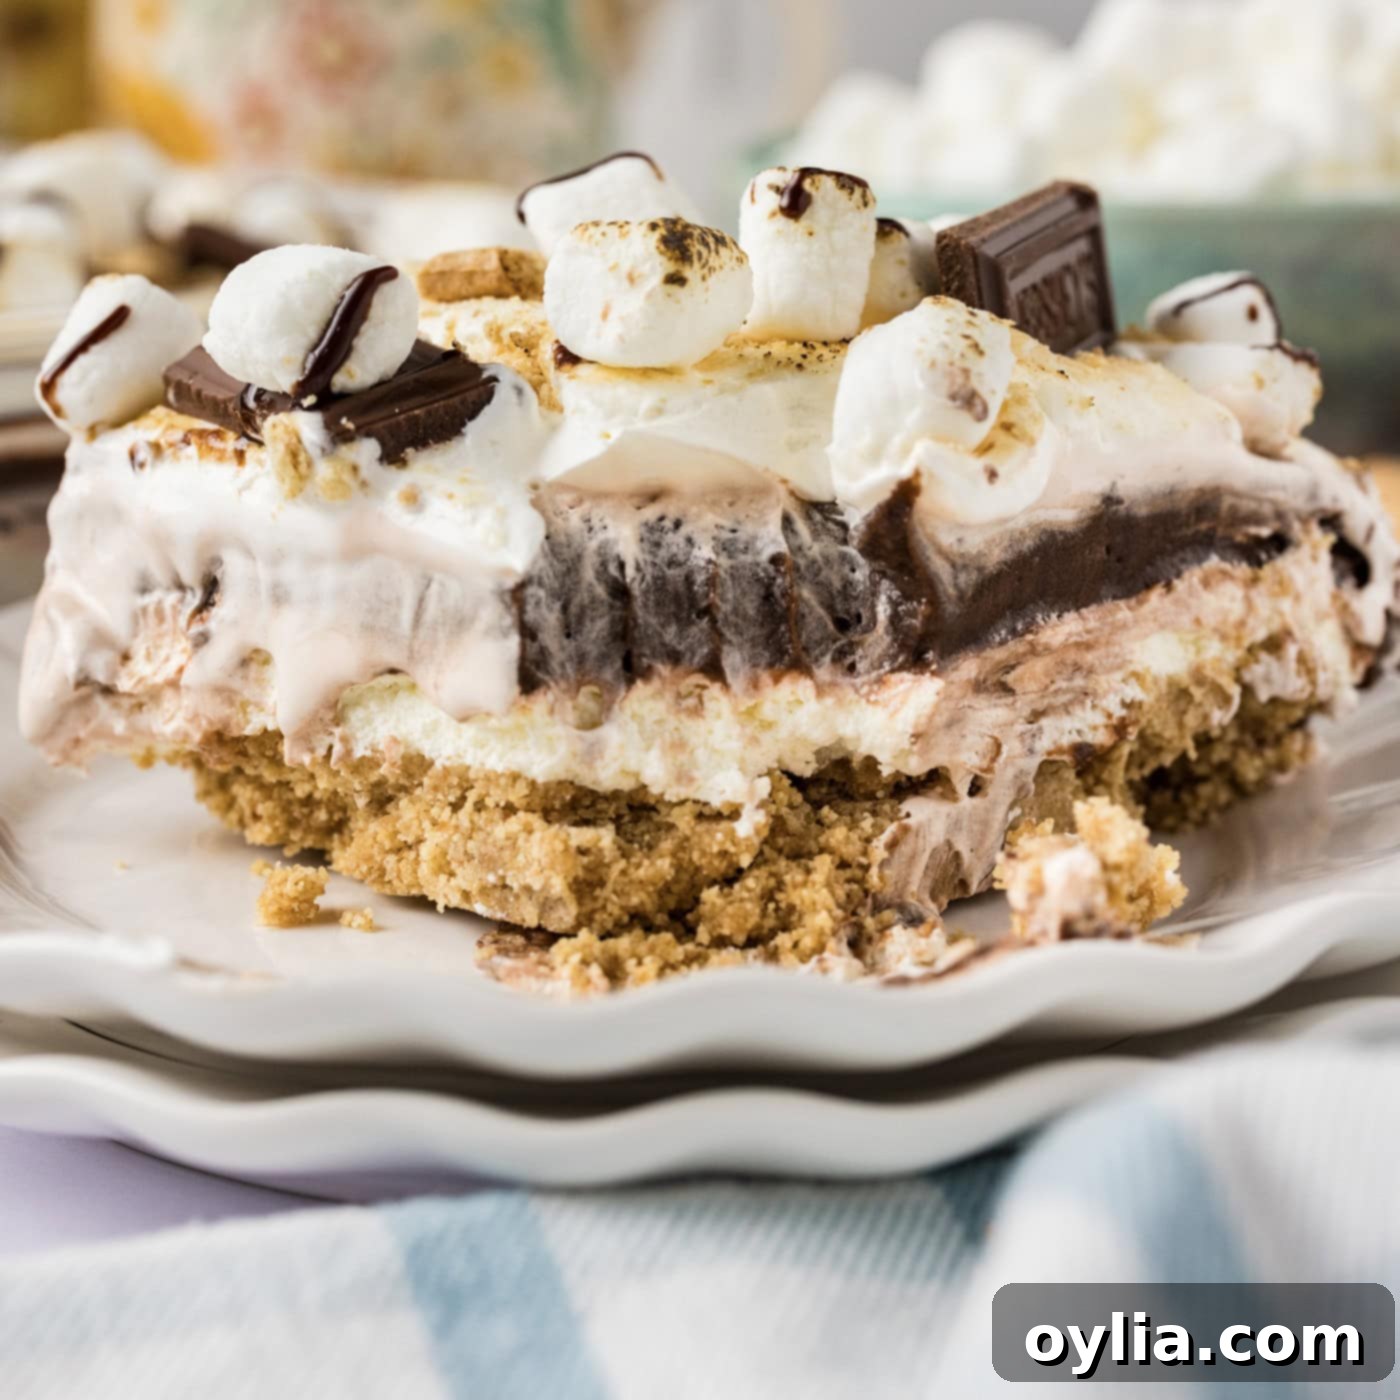
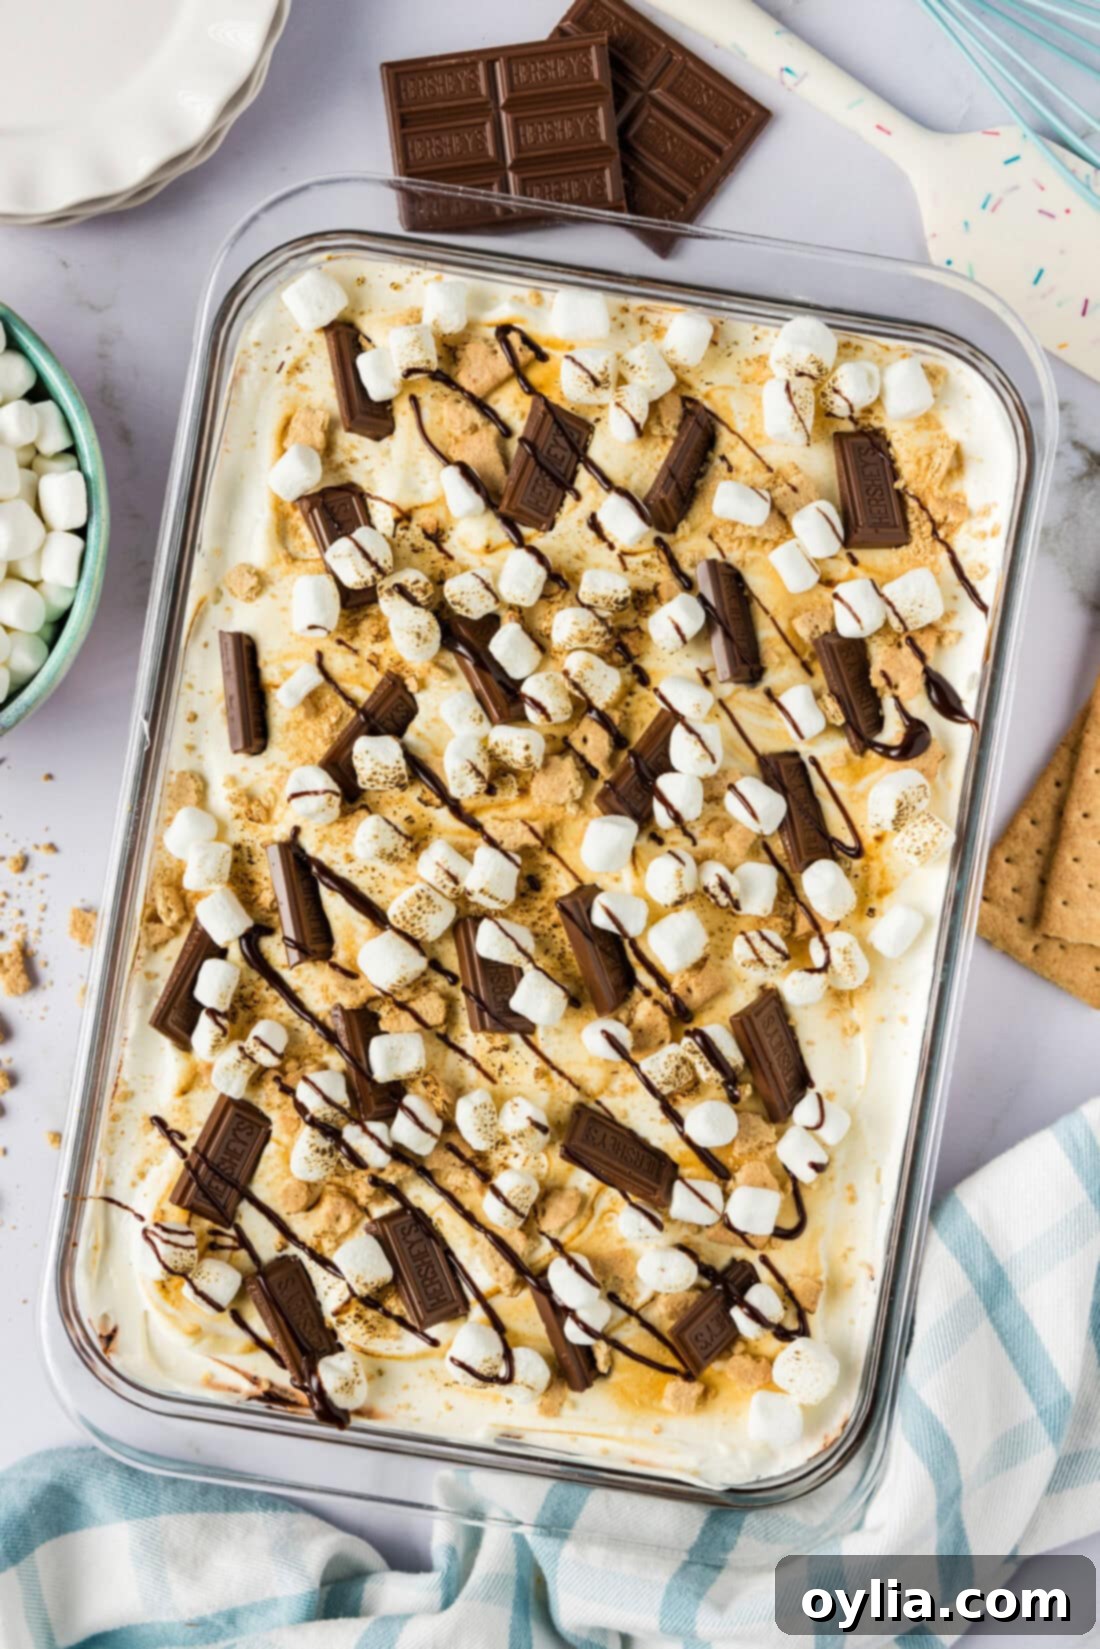
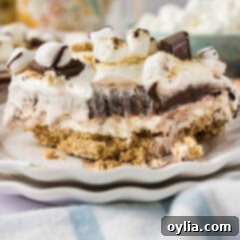
Prepare to amaze your taste buds with this phenomenal No-Bake S’mores Lasagna. This dessert marvel boasts four magnificent layers: a rich graham cracker crust, a velvety cheesecake filling, a decadent chocolate pudding, and a crowning cloud of dreamy marshmallow fluff. It’s the quintessential dessert for summer gatherings, potlucks, or simply when you crave the nostalgic flavors of s’mores without the campfire fuss.
Why This S’mores Lasagna Recipe is a Must-Try
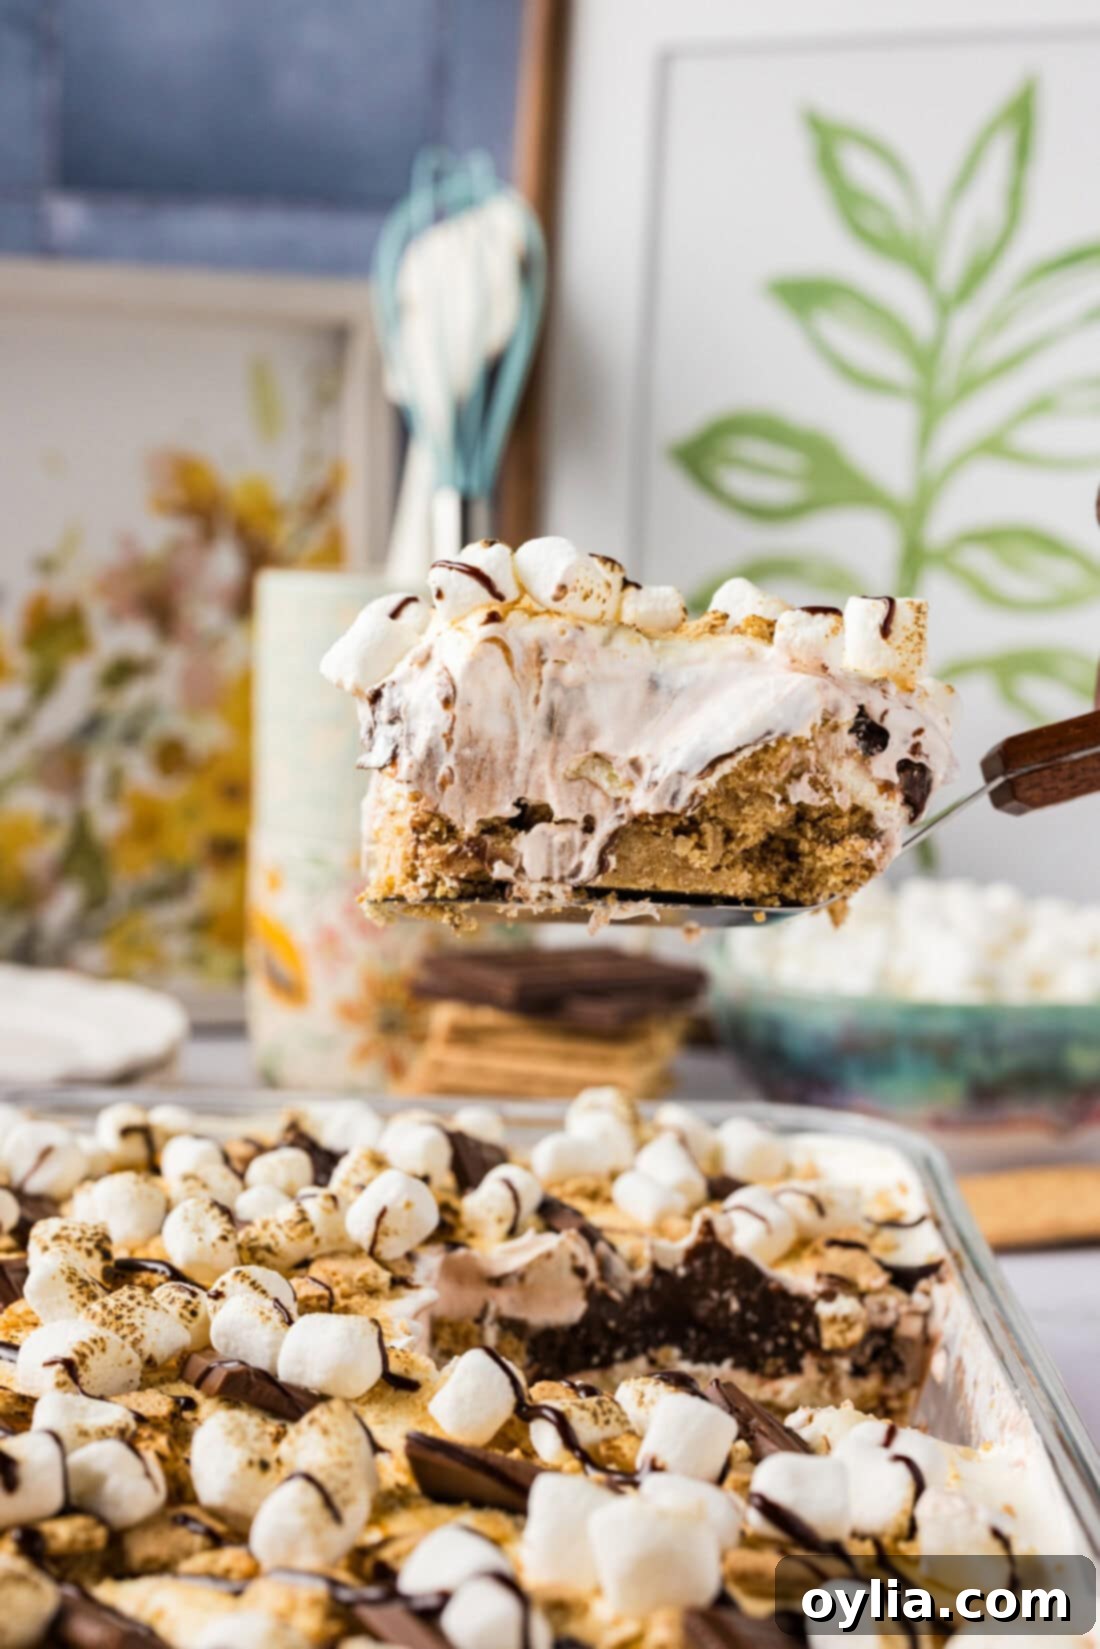
This S’mores Lasagna isn’t just a dessert; it’s an experience. Its effortless preparation combined with an explosion of classic s’mores flavors makes it an undeniable crowd-pleaser. Imagine layers so smooth and creamy, contrasted with a crunchy, buttery graham cracker base, all crowned with a fluffy, toasted marshmallow topping. It’s a symphony of textures and tastes that truly elevates the simple s’mores concept.
Even those who aren’t typically big fans of sweets often find themselves reaching for a second slice of this masterpiece. Its light, airy, yet incredibly rich profile hits all the right notes, making it a universally loved dessert. This no-bake wonder is perfect for beating the heat during summer parties, family barbecues, or any festive gathering where you want a show-stopping dessert without the oven. It’s so good, it might just wrestle for the top spot with other beloved s’mores desserts, like a s’mores icebox cake!
The beauty of a no-bake lasagna lies in its simplicity and make-ahead potential. You don’t need to be an expert baker to achieve these stunning layers. Each component is designed for ease, allowing you to create a professional-looking dessert with minimal effort. Plus, the chilling time ensures that all the flavors meld beautifully, creating a cohesive and utterly delightful treat that tastes even better after a few hours in the refrigerator.
Essential Ingredients for Your S’mores Lasagna
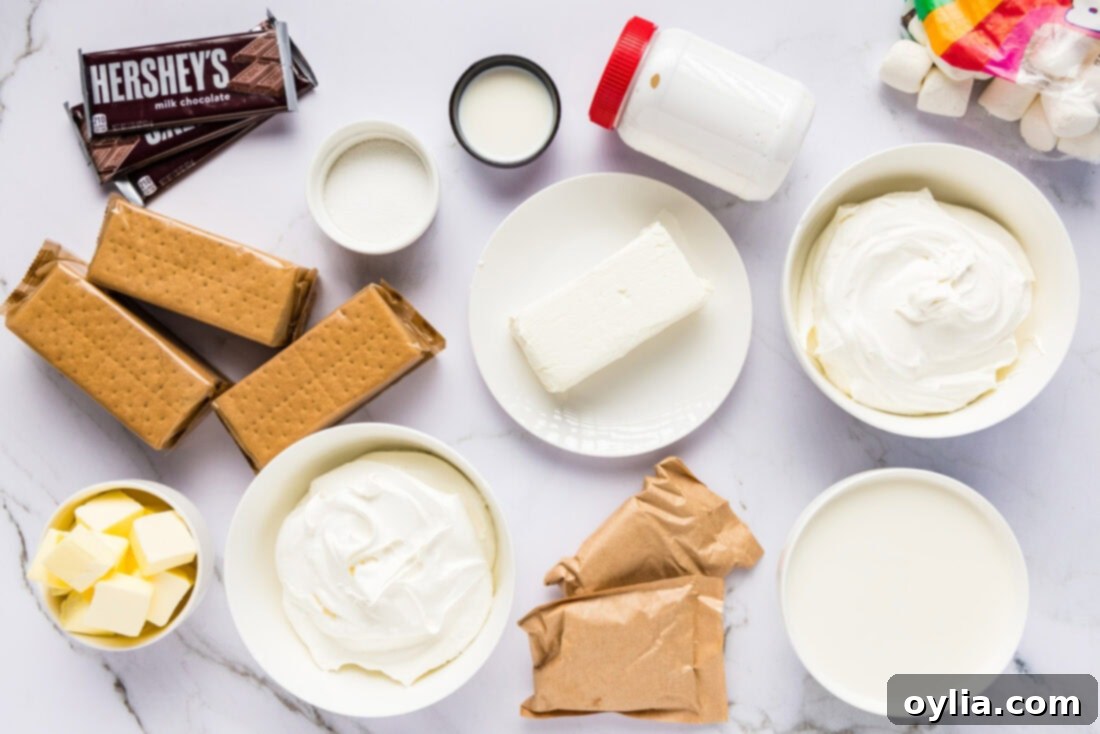
Gathering your ingredients is the first step to creating this magical dessert. You’ll find a detailed list with all measurements and instructions in the printable recipe card at the end of this post. For now, here’s an overview of what you’ll need to construct each delightful layer:
- For the Crust: Graham crackers (the classic s’mores base!) and melted unsalted butter.
- For the Cheesecake Layer: Softened cream cheese, granulated sugar, milk, and Cool Whip for that light, airy texture.
- For the Pudding Layer: Instant chocolate pudding mix (for quick setting) and milk.
- For the Marshmallow Topping: Marshmallow fluff and additional Cool Whip for an irresistibly fluffy and stable topping.
- For the Garnish: Hershey’s chocolate bars, more graham crackers, mini marshmallows, and chocolate syrup for that authentic s’mores look and taste.
Having all your ingredients prepped and ready before you start assembling will make the process even smoother. Remember, quality ingredients make a difference, so choose your favorites!
Ingredient Insight & Clever Substitutions
Understanding your ingredients can make all the difference in perfecting your S’mores Lasagna. Here are some insights and alternative suggestions:
CRUST – While a buttery graham cracker crust is absolutely quintessential for that authentic s’mores flavor, don’t hesitate to experiment! For a different twist, you could opt for an Oreo crust, similar to what we use in our chocolate lasagna. This would introduce a deeper chocolate note, but graham crackers truly enhance the classic s’mores experience. Whichever you choose, ensure your crumbs are fine and evenly mixed with melted butter for a firm, delicious base.
LAYERS – This recipe features two primary creamy layers: a rich cheesecake and a smooth chocolate pudding. For maximum ease and best results, always use instant chocolate pudding mix. “Cook ‘n Serve” varieties require a different preparation and cooling process that isn’t ideal for this no-bake layered dessert. A crucial tip for seamless assembly is to place the dessert into the freezer in between spreading each layer. This brief chill time allows each layer to set slightly, making it much easier to spread the next one without mixing or disturbing the previous one. I typically pop it into the freezer while I’m mixing the ingredients for the subsequent layer, which is usually just enough time for it to firm up perfectly.
TOPPING – The marshmallow fluff topping creates a wonderfully light and stretchy texture reminiscent of toasted marshmallows. However, if marshmallow fluff isn’t readily available or you prefer a different consistency, a simple alternative is to use Cool Whip or homemade stabilized whipped cream. You can spread this over the top and then generously sprinkle with miniature marshmallows for a similar visual and textural effect. If you opt for Cool Whip as the topping, you can still gently toast the mini marshmallows on top with a kitchen torch for that delightful caramelized flavor, ensuring the layers beneath are well-chilled to prevent excessive melting.
Crafting Your S’mores Lasagna: Step-by-Step Guide
These step-by-step photos and instructions are here to help you visualize how to make this recipe. For a concise, printable version of this recipe, complete with precise measurements and instructions, you can Jump to Recipe at the bottom of this post.
Preparing the Perfect Graham Cracker Crust
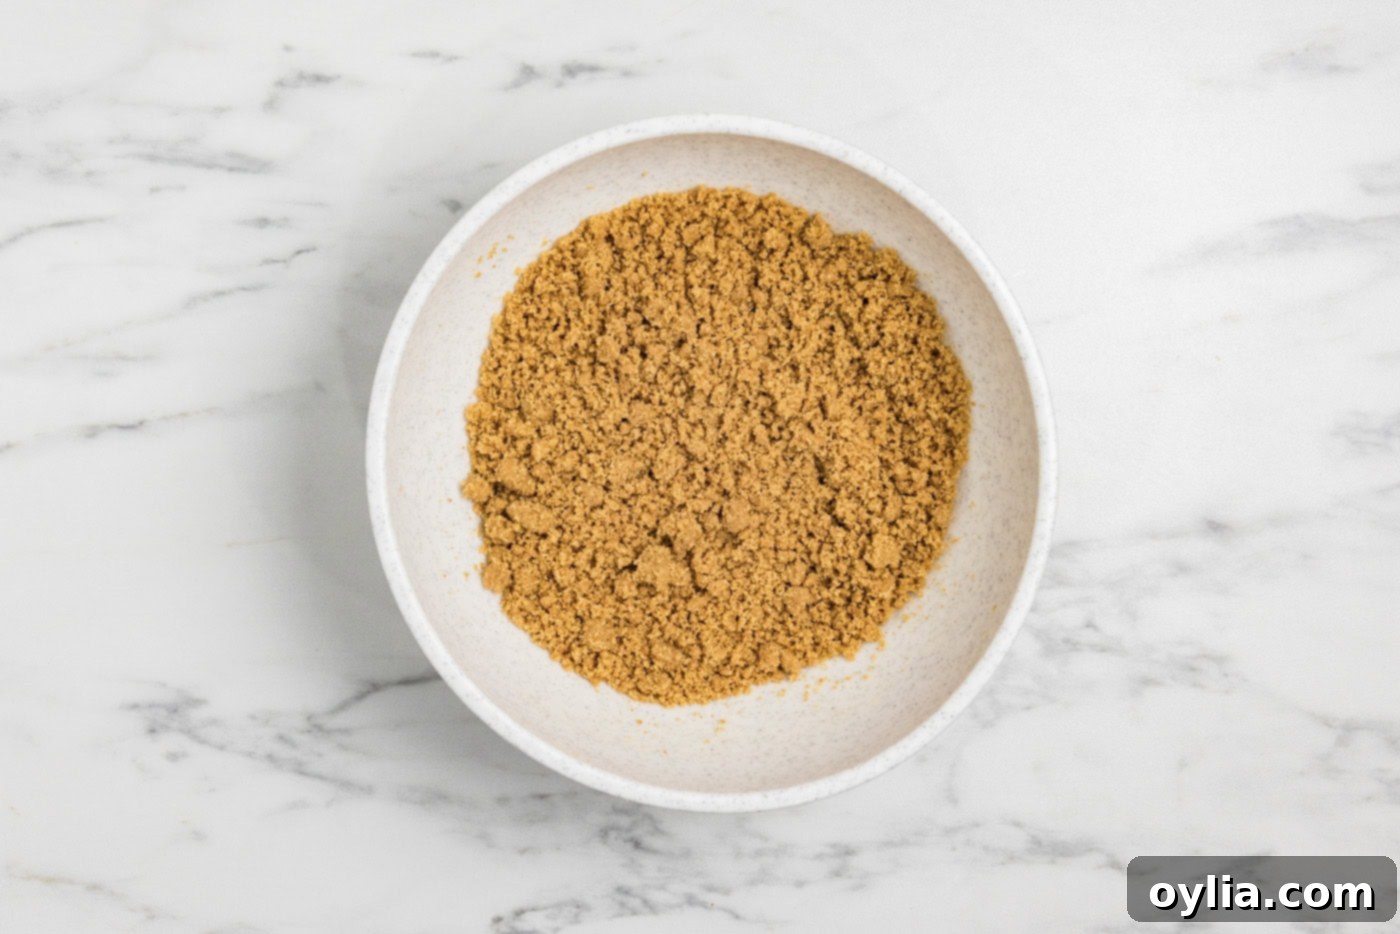
- To begin, take your graham crackers and process them in a food processor until they form fine, even crumbs. Consistency is key here for a uniform crust.
- In a bowl, combine these graham cracker crumbs with melted butter. Stir thoroughly using a rubber spatula until all the crumbs are completely moistened and coated. This ensures a cohesive crust.

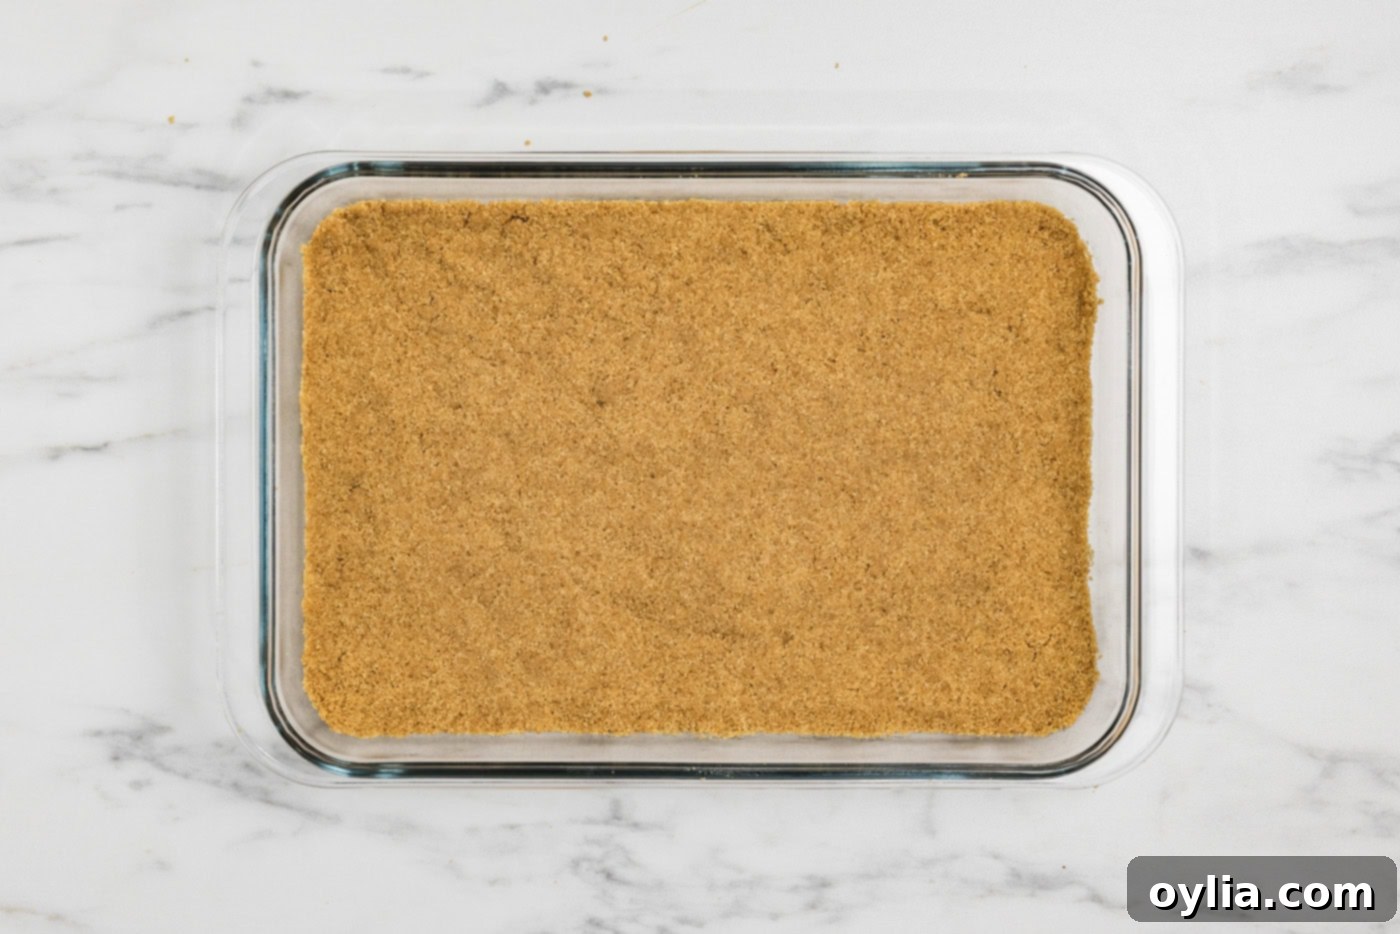
- Transfer the buttered crumbs into a 13×9 inch baking dish. Press the mixture firmly and evenly into the bottom of the dish to form your crust. For best results, use the flat bottom of a glass or measuring cup to achieve a compact layer. Place the dish into the freezer while you prepare the next layer; this helps the crust set.

Assembling the Creamy Cheesecake and Pudding Layers
- For the luscious cheesecake layer, beat softened cream cheese in a large bowl with a mixer on medium speed until it’s light and creamy. Gradually add the granulated sugar and milk, continuing to mix until the mixture is perfectly smooth and combined.
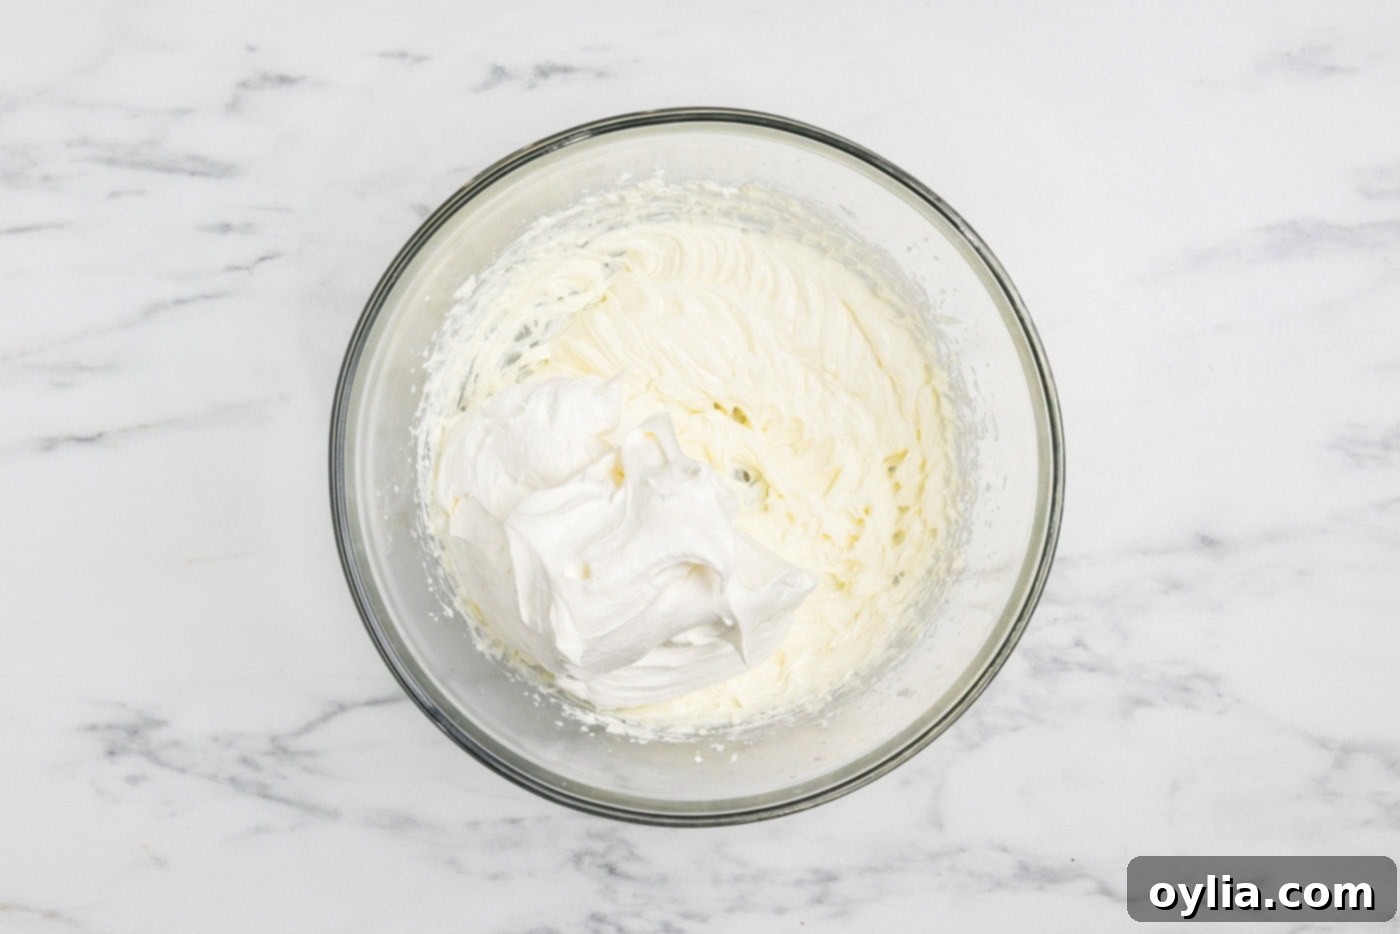
- Gently fold in the Cool Whip using a rubber spatula. This step is crucial for achieving that airy, cheesecake-like texture. Be careful not to overmix, as you want to retain the fluffiness.

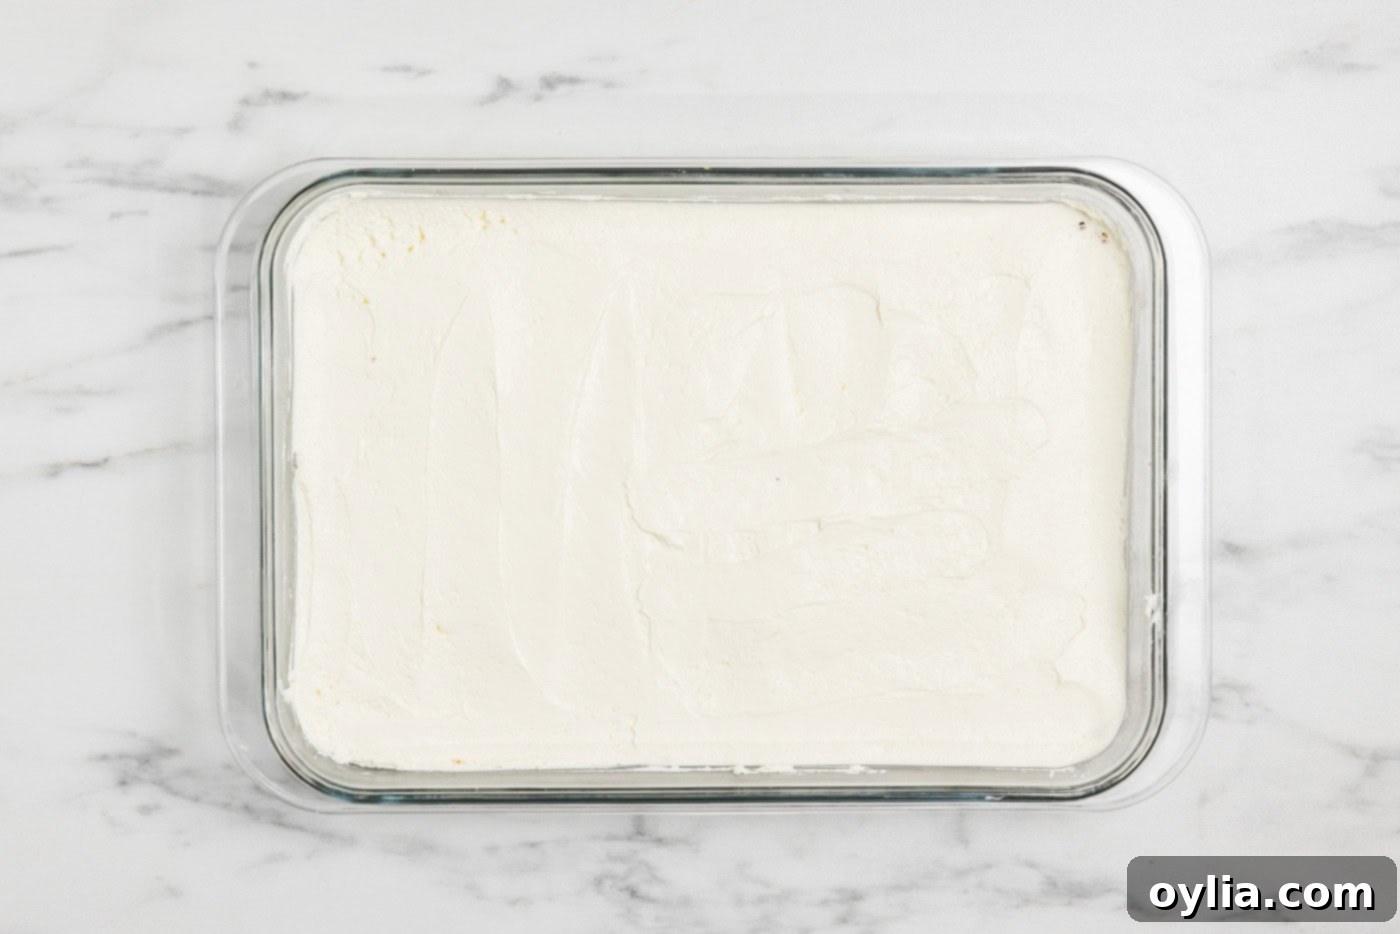
- Retrieve your chilled pan from the freezer. Using an icing spatula, carefully spread the cream cheese mixture evenly over the graham cracker crust. Return the pan to the freezer immediately to allow this layer to set.

- Now for the chocolate pudding layer. In a large bowl, whisk together the instant pudding mixes and milk. Beat on medium speed until the mixture thickens to a smooth, spreadable consistency. Ensure there are no lumps.
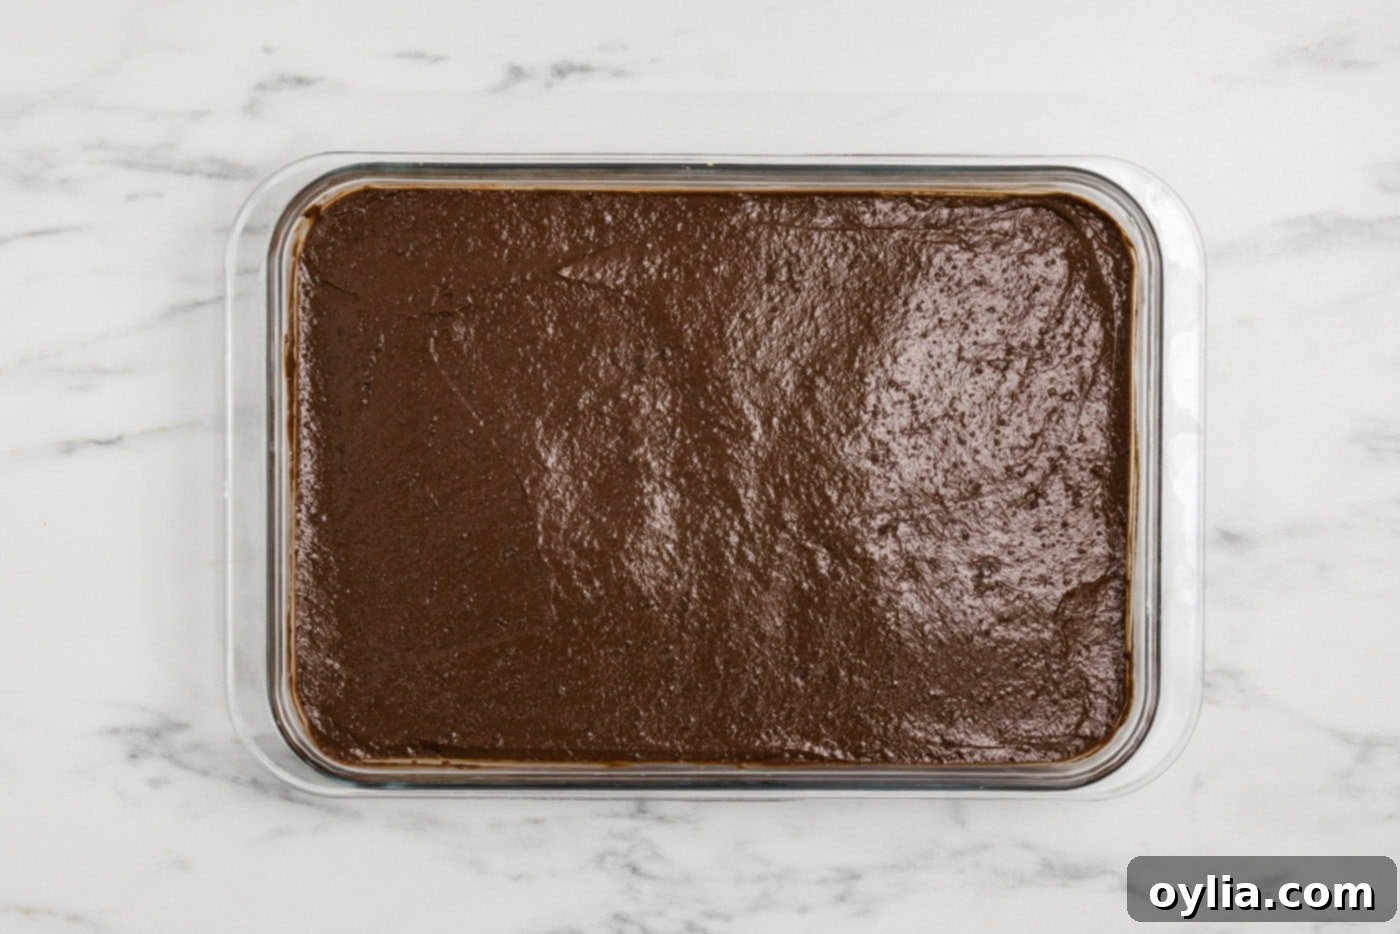
- Once again, retrieve the pan from the freezer. Carefully spread the chocolate pudding mixture over the set cheesecake layer using your icing spatula. Evenly distribute it, then return the pan to the freezer for another chill. This layering and freezing technique is key to achieving clean, distinct layers in your lasagna.

Creating the Cloud-Like Marshmallow Topping
- In a large bowl, use a mixer on medium speed to beat together the marshmallow fluff and Cool Whip until they are thoroughly combined and form a light, airy mixture. This creates the signature fluffy topping.
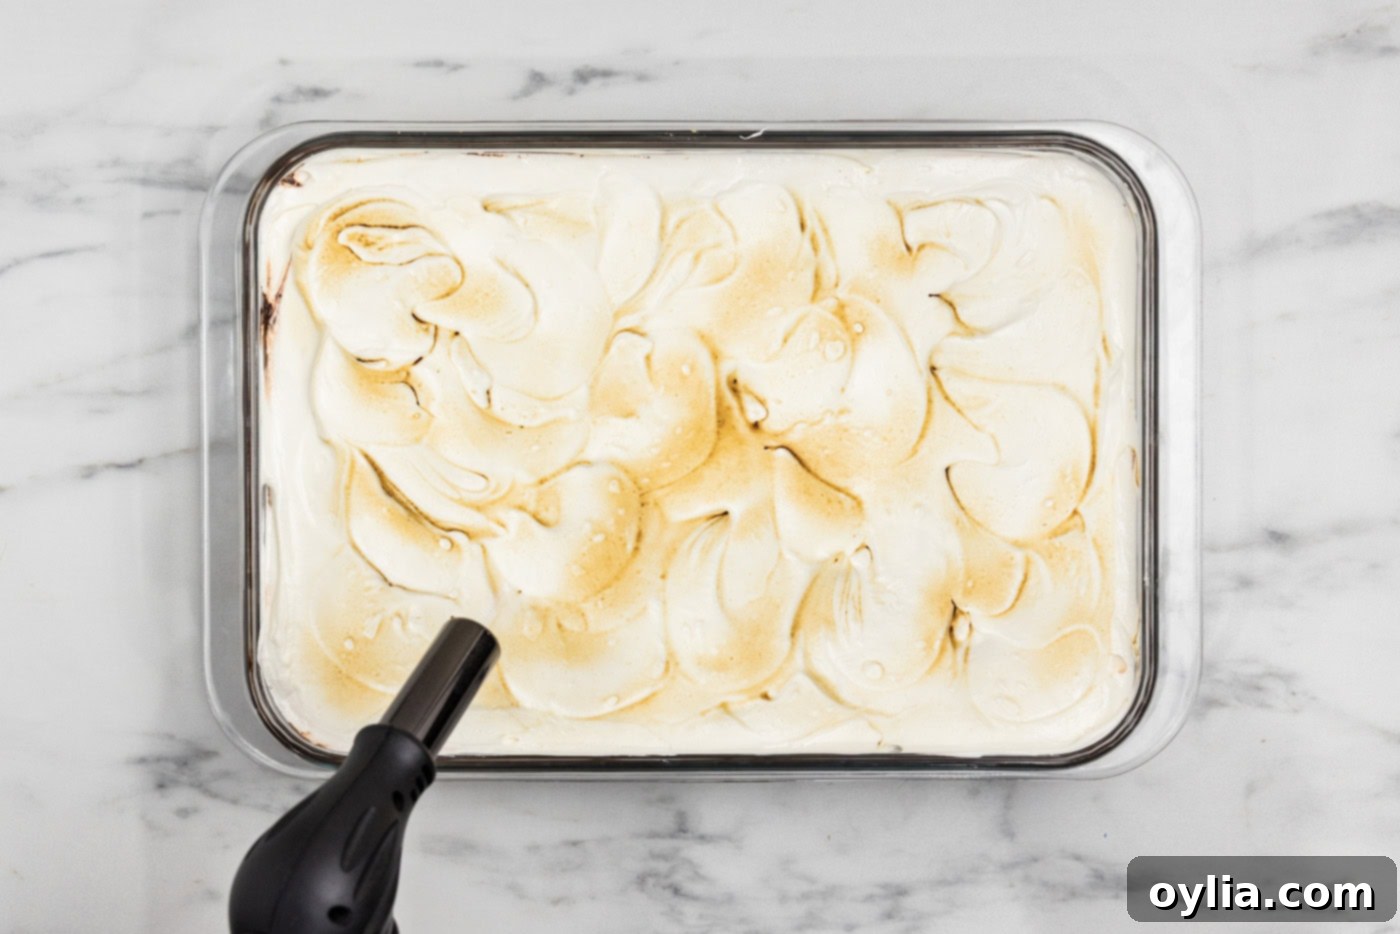
- Take the pan out of the freezer. Gently spread the marshmallow topping over the chilled pudding layer using an icing spatula. Create decorative swirls and peaks with your spatula for an attractive finish. Return the pan to the freezer for a final chill to ensure everything is well-set before serving.
- PRO TIP for Toasted Marshmallow Perfection – If you desire a beautifully browned, toasted marshmallow topping, this is where a kitchen torch comes in handy! It’s crucial that the dessert is well-chilled, ideally having spent a couple of hours in the freezer, as marshmallow fluff melts quickly. Remove the pan from the freezer, and holding the torch a few inches above the topping, move it back and forth over the peaks until they are lightly golden brown. Be swift and even to avoid burning.

The Finishing Touches: Adding S’mores Garnish
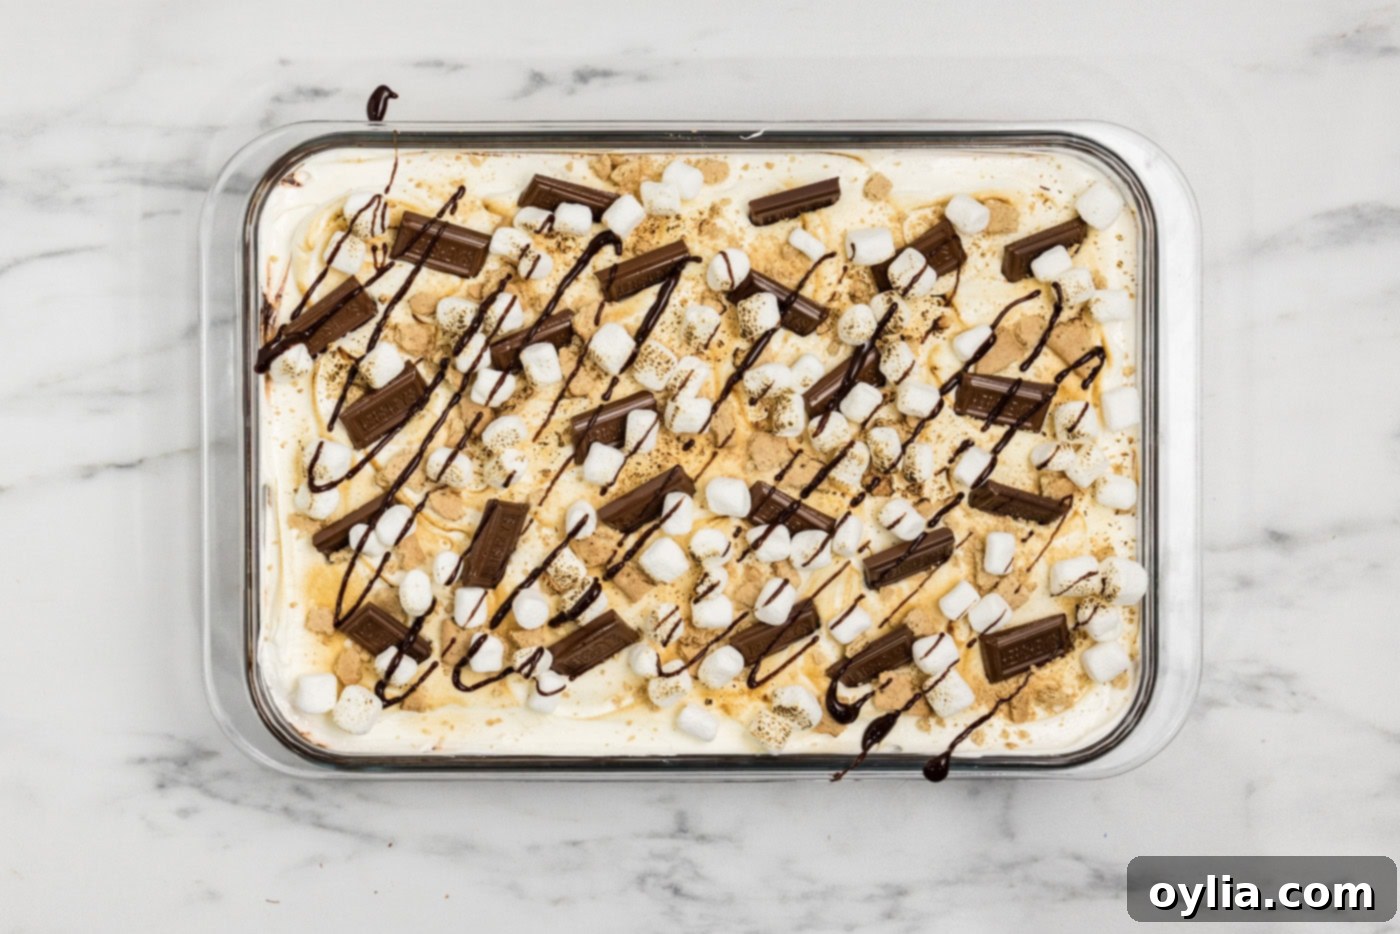
- To complete the s’mores experience, crumble 2-3 graham cracker sheets and sprinkle them generously over the browned marshmallow topping. Break Hershey’s chocolate bars into small sections and gently press them into the topping. Finish with a handful or two of mini marshmallows for extra visual appeal and texture.
- If you skipped toasting the main marshmallow fluff layer, or want extra toasted goodness, you can use your kitchen torch to lightly toast the scattered mini marshmallows. Be mindful of the chocolate bars; while you don’t want to melt them completely, a slight softening will actually make them easier and more pleasant to eat.
- Finally, for an added touch of decadence and visual flair, drizzle your s’mores lasagna with rich chocolate syrup just before serving.

Frequently Asked Questions & Expert Tips for S’mores Lasagna Success
To maintain its freshness and deliciousness, store any leftover S’mores Lasagna covered with an airtight lid or tightly wrapped in plastic wrap. Keep it in the refrigerator for up to 4 days. This prevents it from drying out and absorbing other fridge odors, ensuring each slice is as good as the first.
Absolutely! This is one of the best features of a no-bake dessert. You can assemble the entire S’mores Lasagna a day or even two days in advance. Simply ensure it’s well-covered and stored in the refrigerator until you’re ready to serve. This makes it a fantastic option for parties and events, allowing you to focus on other preparations. If you plan to torch the topping, it’s best to do that just before serving for the freshest look and taste.
Yes, you can! This S’mores Lasagna freezes beautifully for up to 4 months. For best results when freezing, first cut the lasagna into individual serving-size pieces. Line a plate or small baking sheet with waxed paper and arrange the pieces on it, ensuring they don’t touch each other. Freeze for 3-4 hours, or until solid. Once frozen, wrap each individual piece tightly with plastic wrap. Store the wrapped pieces in a freezer bag or an airtight container. To thaw, simply remove a frozen piece from the freezer, unwrap it while still frozen (this prevents the wrap from sticking), and let it thaw in the refrigerator for a few hours or at room temperature for about 30-60 minutes. The texture and flavor will remain wonderfully intact.
Freezing the dessert between adding each layer is a game-changer! This quick chill allows each layer to firm up sufficiently, preventing them from blending together when you spread the next one. This technique results in distinct, clean, and beautifully defined layers, which is visually appealing and enhances the textural experience of the lasagna.
No food processor? No problem! You can easily crush graham crackers by placing them in a gallon-sized resealable plastic bag and using a rolling pin or the bottom of a heavy pan to smash them into fine crumbs. Alternatively, many grocery stores offer pre-crushed graham cracker crumbs, which can save you a step!
Dazzling Serving Suggestions for Your S’mores Lasagna
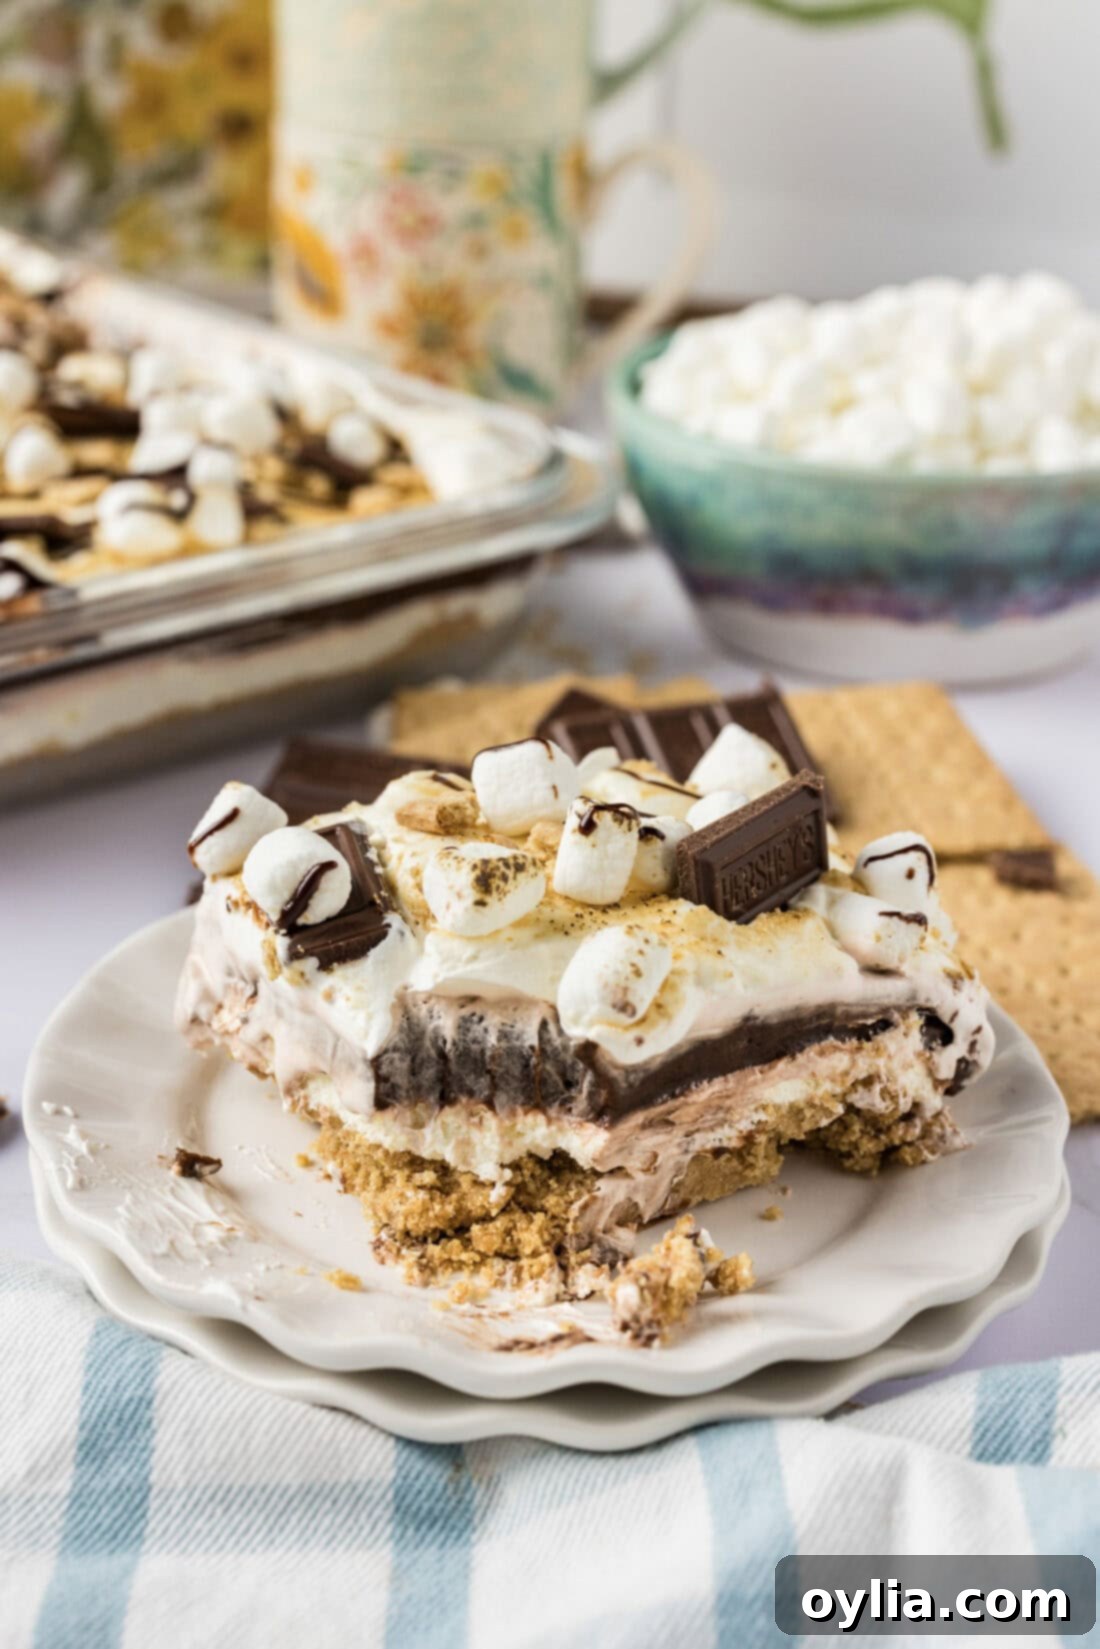
Once your S’mores Lasagna is perfectly chilled and garnished, it’s ready to impress! While the toppings mentioned in the recipe (mini marshmallows, chopped Hershey bars, crumbled graham crackers, and chocolate drizzle) are fantastic for that classic s’mores appeal, feel free to get creative. You could add a sprinkle of chocolate chips, a dusting of cocoa powder, or even a few chocolate shavings for an extra touch of elegance.
Remember to serve this beautiful dessert chilled. The cold temperature ensures the layers remain firm and distinct, offering a refreshing contrast to the rich flavors. A quick tip for cleaner slices: pop the entire dish into the freezer for about 30 minutes before cutting. This firms up all the layers, making it much easier to achieve neat, perfect squares. While this dessert can be a little messy to eat due to its soft, layered nature, the incredible flavor absolutely makes up for it!
Consider serving individual slices with a cold glass of milk, a scoop of vanilla bean ice cream, or a warm cup of coffee for a truly indulgent experience. This S’mores Lasagna is designed to be a show-stopper and a conversation starter at any event. Its irresistible blend of crunchy, creamy, and fluffy textures with iconic s’mores flavors guarantees smiles all around.
Discover More Delectable Dessert Lasagna Recipes
If you fell in love with this S’mores Lasagna, you’re in for a treat! The world of no-bake dessert lasagnas is vast and delicious. Here are some other fantastic variations to try:
- Chocolate Lasagna: A classic, rich, and intensely chocolatey version perfect for chocoholics.
- Strawberry Lasagna: A vibrant, fruity, and refreshing option ideal for berry lovers.
- Mint Chocolate Lasagna: A cool and invigorating dessert with a delightful minty kick.
- Chocolate Peanut Butter Lasagna: The ultimate combination of sweet and savory, a dream come true for peanut butter enthusiasts.
Each of these recipes offers a unique flavor profile and the same easy, no-bake convenience. They are all perfect for sharing and guaranteed to be a hit at any gathering.
I love sharing my passion for baking and cooking with all of you! To make sure you never miss a new, delicious recipe, I offer a convenient newsletter. Simply subscribe and start receiving your free daily recipes straight to your inbox!
S’mores Lasagna
IMPORTANT – There are often Frequently Asked Questions within the blog post that you may find helpful. Simply scroll back up to read them!
Print It
Pin It
Rate It
Save ItSaved!
Course: Dessert
Cuisine: American
Ingredients
Crust
- 3 sleeves graham crackers (14.4 ounce box, yields about 2.5 cups crumbs, 404g)
- ¾ cup unsalted butter (melted; 12 tablespoons or 6 ounces)
Cheesecake Layer
- 8 ounces cream cheese (softened at room temperature)
- ¼ cup granulated sugar
- 2 Tablespoons milk
- 8 ounces Cool Whip (thawed)
Pudding Layer
- 7.8 ounces instant chocolate pudding mix (two 3.4 ounce boxes)
- 2 ¾ cup milk (22 ounces)
Marshmallow Topping
- 7 ounces marshmallow fluff
- 8 ounces Cool Whip (thawed)
Garnish
- 2 Hershey’s chocolate bars (standard size)
- 3 sheets graham crackers (approx. 1.5 oz, 42g)
- 1 cup mini marshmallows (approx. 1.75 oz, 50g)
- chocolate sauce (for drizzling)
Tools You’ll Need
-
Food processor
-
13×9 baking dish
-
Rubber spatula
-
Hand mixer
-
Kitchen torch (optional, for browning the topping)
Before You Begin
- We highly recommend placing the dessert into the freezer in between layers. I place mine in after each layer, and it’s in there long enough for me to mix up the next layer’s ingredients. This makes it easier to spread!
- Instead of the marshmallow fluff topping, you can spread with Cool Whip and add a layer of miniature marshmallows.
- If you don’t have a food processor, you can put the graham crackers into a gallon zipper bag and smash them with a rolling pin. You can also buy graham cracker crumbs.
Instructions
Make the Crust
-
Run graham crackers through a food processor until they are fine crumbs.3 sleeves graham crackers
-
Stir in the melted butter with a rubber spatula until completely combined and moistened.3/4 cup unsalted butter
-
Dump crumbs into a 13×9 baking dish and press evenly into the bottom. Place dessert in freezer.
Make the Cheesecake
-
In a large bowl with mixer on medium speed, beat the cream cheese until creamy. Add in sugar and milk and mix until completely combined.8 ounces cream cheese, 1/4 cup granulated sugar, 2 Tablespoons milk
-
Using a rubber spatula, fold Cool whip into the cream cheese mixture.8 ounces Cool Whip
-
Remove pan from freezer and use an icing spatula to spread cream cheese mixture over the crust. Place pan back into the freezer.
Make the Pudding
-
To a large bowl, add the pudding mixes and milk. Beat on medium speed until it starts to thicken.7.8 ounces instant chocolate pudding mix, 2 3/4 cup milk
-
Remove pan from freezer and use an icing spatula to spread pudding over the crust. Place pan back into the freezer.
Make the Topping
-
In a large bowl with mixer at medium speed beat together Marshmallow Fluff and Cool Whip until well combined.7 ounces marshmallow fluff, 8 ounces Cool Whip
-
Remove pan from freezer and use an icing spatula to spread topping over the crust. Use icing spatula to lift little swirls of topping. Place pan back into the freezer.
TIP: If you want to roast the topping with a torch, leave the dessert in the freezer for a couple hours. Because marshmallow fluff can melt quickly, it’s best for the topping to be frozen. Remove from freezer and holding torch fairly close the the topping, move back and forth over the peaks to brown it.
-
For garnish, crumble 2-3 graham cracker sheets and sprinkle over browned topping. Break Hershey bar into sections and gently press into topping. Sprinkle with a couple handfuls of mini marshmallows.2 Hershey’s chocolate bars, 3 sheets graham crackers, 1 cup mini marshmallows
-
To toast the marshmallows, use a kitchen torch. Be aware that you don’t want to melt the chocolate bars, bar they will soften a little as you toast the marshmallows. This is good! It makes them easier to eat.
-
Drizzle with chocolate syrup.
Expert Tips & FAQs
- Please note that the garnish measurements are estimated and garnishing is completely optional. You can use as little or as much as you want.
- If you find the crust hard to cut, you can loosen it by putting some hot tap water into a baking sheet then placing the dessert dish into that for a minute or so.
- Store the dessert lasagna covered with an air-tight lid or tightly wrapped with plastic wrap in the refrigerator for up to 4 days.
- You can freeze this dessert for up to 4 months. Line a plate or small baking sheet with waxed paper. Cut into serving-size pieces. Place pieces onto waxed paper, making sure they are not touching each other. Freeze for 3-4 hours, or until solid. Wrap each individual frozen piece with plastic wrap. Store wrapped pieces in a freezer bag or container. To thaw, remove the frozen piece from the freezer and remove the plastic wrap while still frozen. This will keep the wrap from sticking to the thawed dessert. Thaw in the refrigerator or at room temperature.
Nutrition
The recipes on this blog are tested with a conventional gas oven and gas stovetop. It’s important to note that some ovens, especially as they age, can cook and bake inconsistently. Using an inexpensive oven thermometer can assure you that your oven is truly heating to the proper temperature. If you use a toaster oven or countertop oven, please keep in mind that they may not distribute heat the same as a conventional full sized oven and you may need to adjust your cooking/baking times. In the case of recipes made with a pressure cooker, air fryer, slow cooker, or other appliance, a link to the appliances we use is listed within each respective recipe. For baking recipes where measurements are given by weight, please note that results may not be the same if cups are used instead, and we can’t guarantee success with that method.
