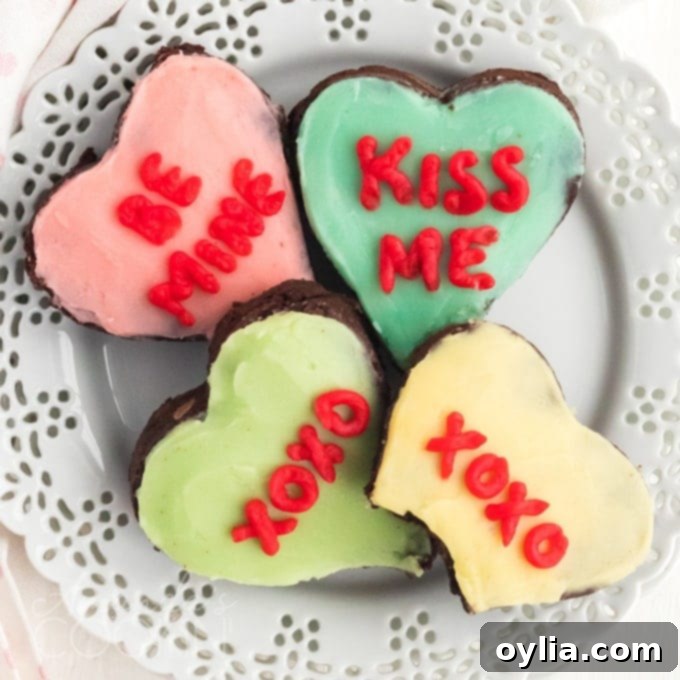
Decadent Conversation Heart Brownies: Your Ultimate Valentine’s Day Dessert Guide
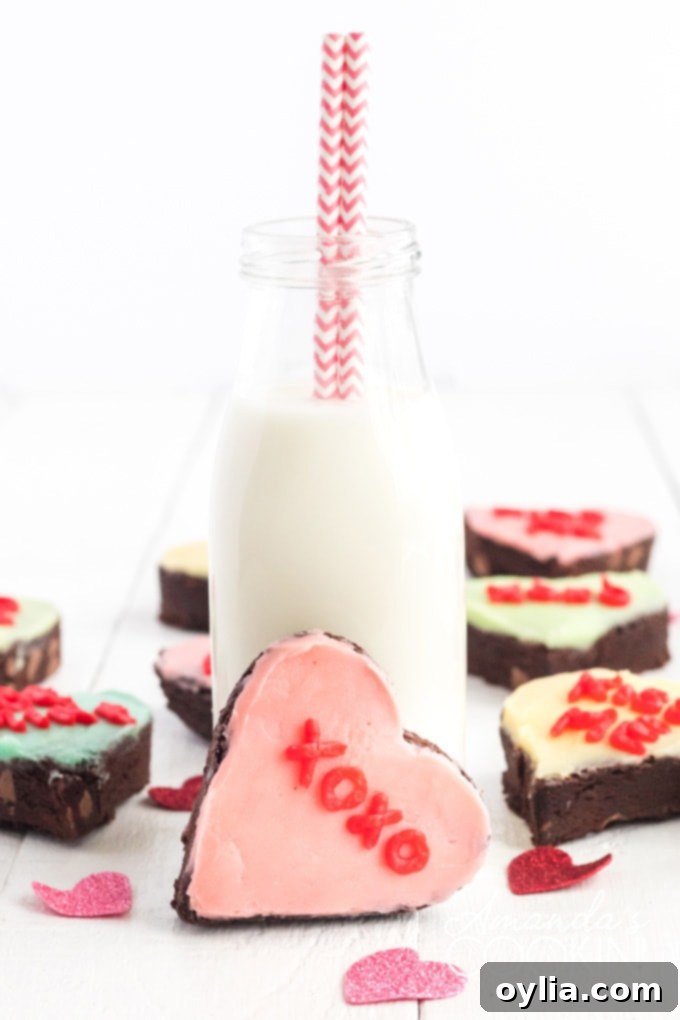
Forget the chalky, flavorless classic candies this Valentine’s Day! Dive into a world of rich, chocolatey goodness with these adorable and utterly delicious Conversation Heart Brownies. Combining the nostalgic charm of those iconic Valentine’s messages with the irresistible allure of homemade brownies, this recipe creates the perfect easy Valentine’s dessert that genuinely tastes as good as it looks. We wanted to capture the cuteness of Conversation Hearts without compromising on flavor, and these brownies do just that, delivering a truly special treat for your loved ones.

Crafting the Perfect Conversation Heart Brownie: A Detailed Recipe
Our journey to the ultimate Conversation Heart Brownie begins with a foundation of pure chocolate bliss: our classic brown butter brownie recipe. This isn’t just any brownie; the brown butter adds a depth of nutty, caramel-like flavor that elevates the chocolate to new heights. While our 3-ingredient brownies offer a fantastic shortcut for those pressed for time, we highly recommend trying this brown butter version for an unparalleled richness that truly shines. The result is a fudgy, intensely chocolatey brownie that serves as the ideal canvas for our festive decorations.
Of course, you’re always welcome to use your personal favorite brownie recipe, but we promise this one is pretty fantastic. The real magic of these treats lies in transforming them into charming little conversation hearts. This decorative touch is incredibly fun, especially when you involve children in the process, though it can require a bit more patience with little hands. The beauty is the complete creative freedom you gain: choose your own vibrant colors and craft personalized messages that speak volumes, making each brownie an even more thoughtful and cherished gift.
Essential Ingredients for Your Conversation Heart Brownies
Gathering high-quality ingredients is the first step towards creating truly irresistible brownies. While we aim for simplicity, the freshness and quality of each component will significantly impact the final taste and texture of your delightful Valentine’s Day treats. Here’s what you’ll need for our signature brown butter brownie recipe:
- 1 1/3 cup butter
- 2 1/2 cups white sugar
- 1 1/2 cup cocoa powder
- 1 teaspoon salt
- 1/2 teaspoon baking powder
- 4 large eggs
- 2 teaspoons vanilla extract
- 1 1/3 cup flour
- 1 cup milk chocolate chips
- 2 1/2 cups vanilla or white frosting
- food coloring
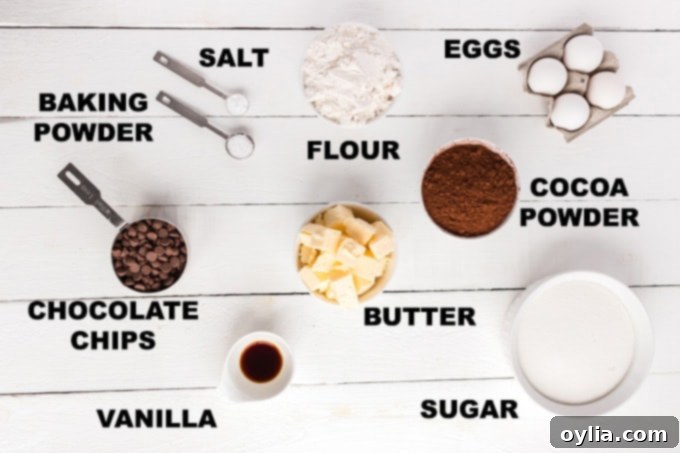
A Note on Ingredients: For the best chocolate flavor, opt for a good quality unsweetened cocoa powder. Dutch-processed cocoa will give a darker, milder chocolate taste, while natural cocoa offers a fruitier, more intense chocolate punch. For the frosting, a good quality canned vanilla or white frosting works wonders for convenience, but homemade buttercream can elevate the taste even further. Don’t skimp on the vanilla extract – it truly enhances the overall chocolate profile. And remember, fresh, large eggs are always best for baking!
Kitchen Tools You May Find Helpful
Having the right tools on hand will make the baking process smoother and more enjoyable. These items are commonly found in most kitchens and will assist you in creating perfectly shaped and decorated conversation heart brownies:
- 10×10 baking pan
- Medium saucepan
- 3-4 microwave-safe bowls (for coloring frosting)
- Whisk or wooden spoon
- Measuring cups and spoons
- Piping bag (or a zip-top plastic bag)
- Spoons
- Heart-shaped cookie cutter (essential for the signature look!)
- Offset spatula (for smoothing frosting)
Expert Baking Tips for Perfect Conversation Heart Brownies
Achieving bakery-quality brownies and perfectly decorated conversation hearts involves a few key techniques. Pay attention to these tips for the best results:
- Pan Size Matters: We recommend baking these brownies in a 10″x10″ square pan. This size allows for a good thickness, making them easy to cut out with a heart-shaped cookie cutter after they’ve completely cooled. If you don’t have a 10×10 pan, a 9″x9″ pan can be used, but be aware that the brownies will be thicker. This means you’ll likely need to increase the bake time by a few minutes (start checking at 25-30 minutes) to ensure they are cooked through without being dry.
- Cooling is Crucial: The most important rule for fudgy brownies and clean cuts is patience! Allow your brownies to cool completely in the pan before attempting to cut them. Warm brownies are delicate and prone to crumbling or breaking, especially when using a cookie cutter. For best results, let them cool at room temperature for several hours, or even overnight. You can also refrigerate them for 30-60 minutes once they’ve reached room temperature to firm them up further for easier cutting.
- Greasing Your Pan: To prevent sticking and ensure easy removal, properly grease and flour your baking pan, or line it with parchment paper, leaving an overhang on the sides. The parchment paper method is particularly helpful as you can simply lift the cooled brownie slab out of the pan before cutting.
- Sifting Dry Ingredients: Don’t skip sifting the cocoa powder, salt, and baking powder. This step helps to remove any lumps, ensuring these ingredients are evenly distributed throughout the batter, leading to a smoother texture and consistent rise.
How to Make Your Own Conversation Heart Brownies: Step-by-Step Instructions
Ready to bake? Follow these detailed steps to create your delightful and personalized Conversation Heart Brownies:
- Prepare Your Oven and Pan: Preheat your oven to 325 degrees F (160 degrees C). Grease or spray a 10×10 baking pan thoroughly. If using parchment paper, line the pan so that the paper extends over the edges, creating “handles” for easy removal later.
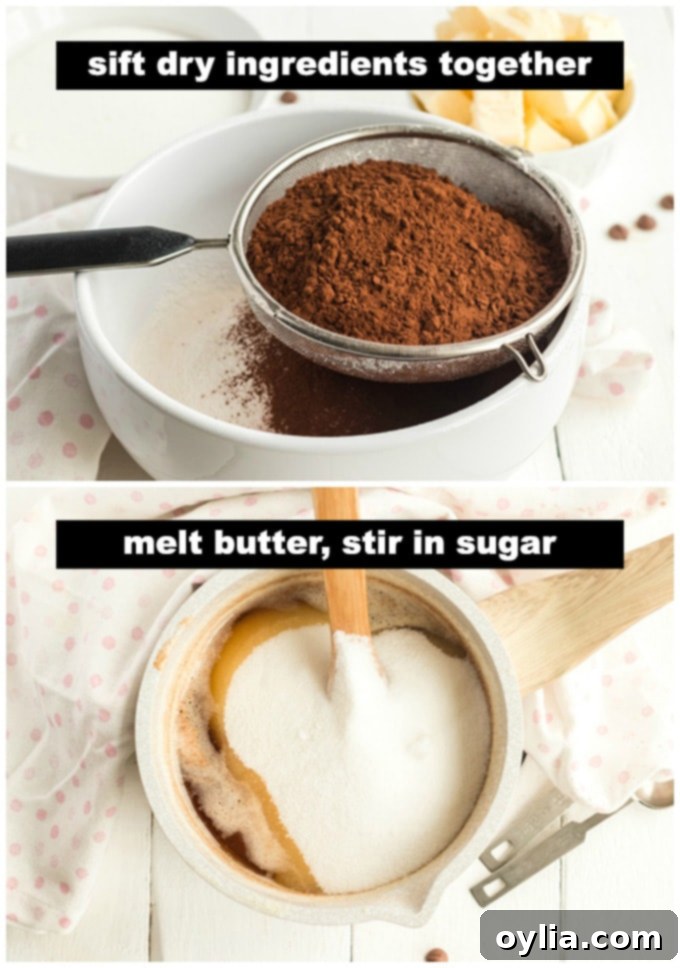
- Combine Dry Ingredients: In a small bowl, sift together the cocoa powder, salt, and baking powder. Sifting ensures that these dry ingredients are evenly distributed and free of lumps, which contributes to a smoother brownie texture. Set this mixture aside.
- Brown the Butter: Place the butter in a small saucepan over medium heat. Cook for 8-10 minutes, stirring occasionally, until it turns a light golden brown. As the butter browns, small pieces of milk fat will settle at the bottom and turn a deep chocolate brown – this is perfectly normal and desired for the nutty flavor. Once browned, immediately remove the pan from the stove to prevent burning. Stir in the white sugar with a wooden spoon until combined.
- Cool and Add Cocoa: Add the sifted cocoa mixture to the brown butter and sugar. Stir well. Allow this mixture to cool to room temperature, which typically takes about 5-8 minutes. Cooling is important to prevent the eggs from cooking when added in the next step.
- Incorporate Wet and Dry Ingredients: Add the eggs one at a time to the cooled mixture, beating thoroughly after each addition to ensure full incorporation. Next, stir in the vanilla extract and then the flour. Be careful not to overmix the flour; mix just until no dry streaks remain. Overmixing can lead to tough brownies. Finally, beat the mixture for an additional 2 minutes before gently folding in the milk chocolate chips.
- Bake the Brownies: Pour and spread the brownie batter evenly into your prepared baking pan. Bake for 22-25 minutes, or until an inserted toothpick into the center comes out with moist crumbs but no wet batter, and the tops appear slightly cracked. Avoid overbaking, as this will result in dry brownies.
- Cool and Cut: Allow the brownies to cool completely in the pan. This is crucial for them to set properly and prevent breaking when cut. Once cooled, use a heart-shaped cookie cutter to cut as many brownies from the pan as you can, gently pressing down and twisting for clean edges.
- Prepare the Colored Frosting: Divide 2 cups of the vanilla or white frosting into 4-5 separate microwave-safe bowls, about 1/2 cup per bowl. Add a single drop of food coloring to each bowl to achieve your desired pastel or vibrant colors (think pink, yellow, blue, green, purple). For the red piping frosting, take the remaining 1/2 cup of frosting and add about 6 drops of red food coloring, or until you achieve a deep red. If you prefer, you can certainly keep the piping frosting white for a classic look.
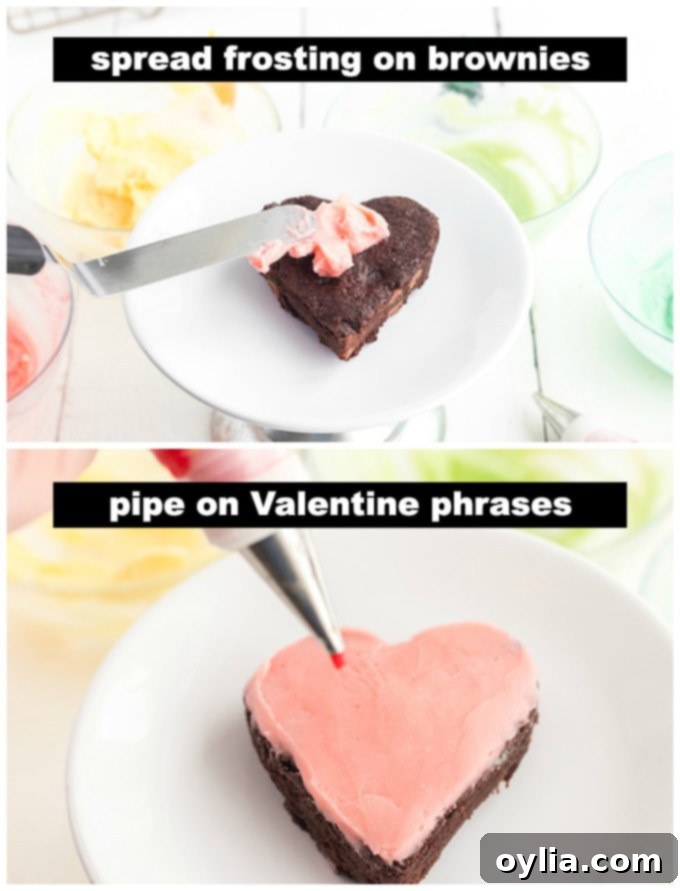
- Frost and Chill: Roughly spread a layer of your desired colored frosting over each heart-shaped brownie. Don’t worry about perfection at this stage. Once frosted, place the brownies in the refrigerator for about 10-15 minutes. This chilling period allows the frosting to firm up slightly.
- Smooth the Frosting: After the frosting has set, dip an offset spatula into warm water, wipe it clean with a paper towel, and then use it to gently smooth the tops of the frosted brownies. The warm, clean spatula will help create a polished, even surface, perfect for piping.
- Pipe Your Messages: Fill a piping bag fitted with a small round tip (we used a Wilton #1 tip for fine words) or a sturdy zipper plastic bag with your red (or white) piping frosting. If using a plastic bag, snip a very small corner off the bag to create a fine opening for writing. Carefully pipe your favorite conversation heart messages, names, or simple designs onto each brownie. Let your creativity flow!



Why Choose Homemade Conversation Heart Brownies?
In a world of store-bought sweets, there’s something incredibly special about homemade treats, especially for occasions like Valentine’s Day. These Conversation Heart Brownies offer more than just a delicious dessert; they represent a labor of love. The act of baking, decorating, and personalizing each brownie allows you to infuse your affection into every bite. They are a delightful way to show appreciation to teachers, a thoughtful gesture for friends, or a charming surprise for family members. Plus, the ability to customize colors and messages makes them truly unique and memorable.
Serving Suggestions and Creative Variations
These brownies are adorable and versatile! Here are a few ideas to make them even more special:
- Classroom Treats: Pack them individually in clear bags with a ribbon for a charming school handout.
- Office Gifts: Arrange a platter for your colleagues – they’re sure to bring smiles!
- Romantic Gesture: Serve them with a scoop of vanilla bean ice cream and a drizzle of chocolate sauce for a decadent dessert for two.
- Flavor Twists: Experiment with different brownie bases. Add a pinch of cinnamon for warmth, a swirl of raspberry jam for fruitiness, or a sprinkle of espresso powder to deepen the chocolate flavor.
- Frosting Fun: While vanilla is classic, consider a cream cheese frosting for a tangy counterpoint or a light mint-flavored frosting for a unique twist.
- Beyond Valentine’s: These aren’t just for February 14th! Change the cookie cutter shape and messages for birthdays, anniversaries, or “just because” treats. Imagine star-shaped brownies with uplifting messages, or mini cakes for a baby shower.
These Conversation Heart Brownies are more than just a dessert; they’re a fun baking project, a personalized gift, and a delightful way to celebrate love and friendship. We’re confident they’ll be a hit wherever they go!
More Valentine’s Day Treat Ideas to Sweeten Your Celebration
If you’re looking for even more ways to spread love through delicious baked goods this Valentine’s Day, check out these other fantastic recipes:
- Valentine’s Day Heart Cupcakes
- Valentine Play Dough Cookie Pops
- Heart Oreo Truffles
- Chocolate Covered Strawberries
- Red Velvet Lasagna
- Red Velvet Fudge
- Chocolate Chip Cookies for Two
- Conversation Heart Cookies

Conversation Heart Brownies
IMPORTANT – There are often Frequently Asked Questions within the blog post that you may find helpful. Simply scroll back up to read them!
Print It
Rate It
Save ItSaved!
Ingredients
- 1 ⅓ cup butter
- 2 ½ cups white sugar
- 1 ½ cup cocoa powder
- 1 teaspoon salt
- ½ teaspoon baking powder
- 4 large eggs
- 2 teaspoons vanilla extract
- 1 ⅓ cup flour
- 2 ½ cups vanilla or white frosting
- food coloring
Things You’ll Need
-
10×10 baking pan
-
Saucepan
-
Microwave safe bowl
-
Whisk
-
Measuring cups and spoons
-
Spoon
Before You Begin
- I baked the brownies in a 10″x10″ square pan and cut them out with a heart-shaped cookie cutter after cooling.
- If you don’t have a 10×10, you can use a 9″x9″ pan, but you may need to increase the bake time a little as the brownies will be thicker.
Instructions
-
Preheat oven to 325 degrees F.
-
Grease or spray a 10×10 baking pan.
-
In a small bowl, sift together the cocoa powder, salt and baking powder. Set aside.
-
Place the butter in a small saucepan over medium heat and cook for 8-10 minutes until slightly golden brown. Small pieces of milk fat will turn a chocolate brown and that’s okay. Remove the pan from the stove and immediately stir in the white sugar with a wooden spoon.
-
Add in the cocoa mixture and then allow to cool to room temperature, about 5-8 minutes.
-
Add in the eggs one at a time, then the vanilla and flour, beating thoroughly after each addition. Beat for 2 minutes before adding in the chocolate chips.
-
Pour/spread the brownie batter into the baking pan and bake for 22-25 minutes, until an inserted toothpick comes out clean and tops are cracked. Allow brownies to cool in the pan to avoid breaking. Ue a heart shaped cookie cutter to get as many brownies from the pan as you can.
-
Place 1/2 cup of frosting into 5 separate bowls. Add one drop of food coloring to each bowl, depending on the color you want. For the red piping color, you will need about 6 drops of food coloring. If you prefer, you can leave the piping frosting white.
-
Roughly frost each brownie with desired color and refrigerate for about 10-15 minutes.
-
After they have set, use an offset spatula dipped in warm water, wiped with a paper towel to smooth tops.
-
Fill piping bag or zipper plastic bag with red piping frosting. We used a Wilton #1 tip for piping the words. If using plastic bag, snip a small corner off the bag to pipe.
Nutrition
The recipes on this blog are tested with a conventional gas oven and gas stovetop. It’s important to note that some ovens, especially as they age, can cook and bake inconsistently. Using an inexpensive oven thermometer can assure you that your oven is truly heating to the proper temperature. If you use a toaster oven or countertop oven, please keep in mind that they may not distribute heat the same as a conventional full sized oven and you may need to adjust your cooking/baking times. In the case of recipes made with a pressure cooker, air fryer, slow cooker, or other appliance, a link to the appliances we use is listed within each respective recipe. For baking recipes where measurements are given by weight, please note that results may not be the same if cups are used instead, and we can’t guarantee success with that method.
This post originally appeared here on Jan 27, 2017.
