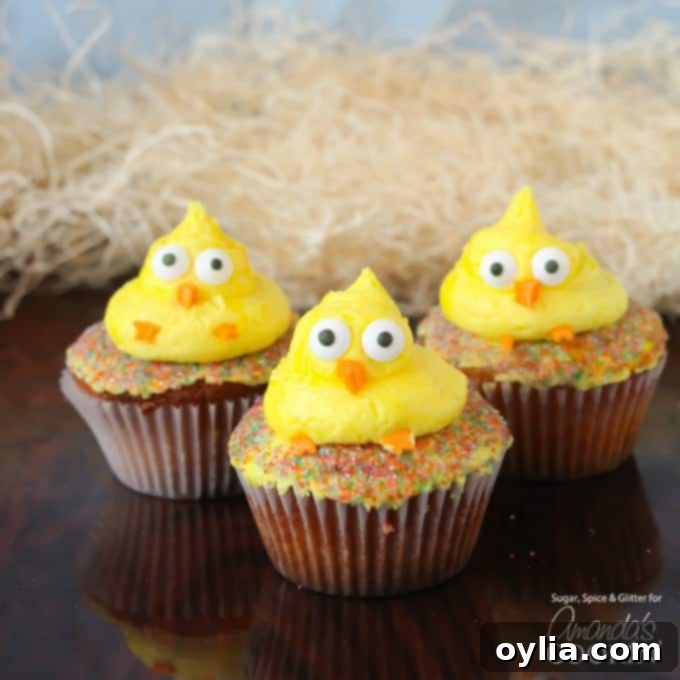
Adorable & Easy Easter Chick Cupcakes: A Fun, Kid-Friendly Dessert for Any Crowd
As Easter approaches, many of us are searching for that perfect dessert – something festive, delicious, and, ideally, easy to make. Look no further! These charming Easter Chick Cupcakes are not just incredibly cute; they’re also wonderfully simple to create, making them an ideal treat to share with a crowd. Whether you’re hosting a big family gathering, preparing snacks for a school event, or just want a fun activity with the kids, these delightful cupcakes will bring smiles and add a touch of whimsy to your holiday table. They’re as much a joy to decorate as they are to eat, offering a fantastic opportunity for bakers of all ages to get involved, much like our popular Rice Krispie Nests!
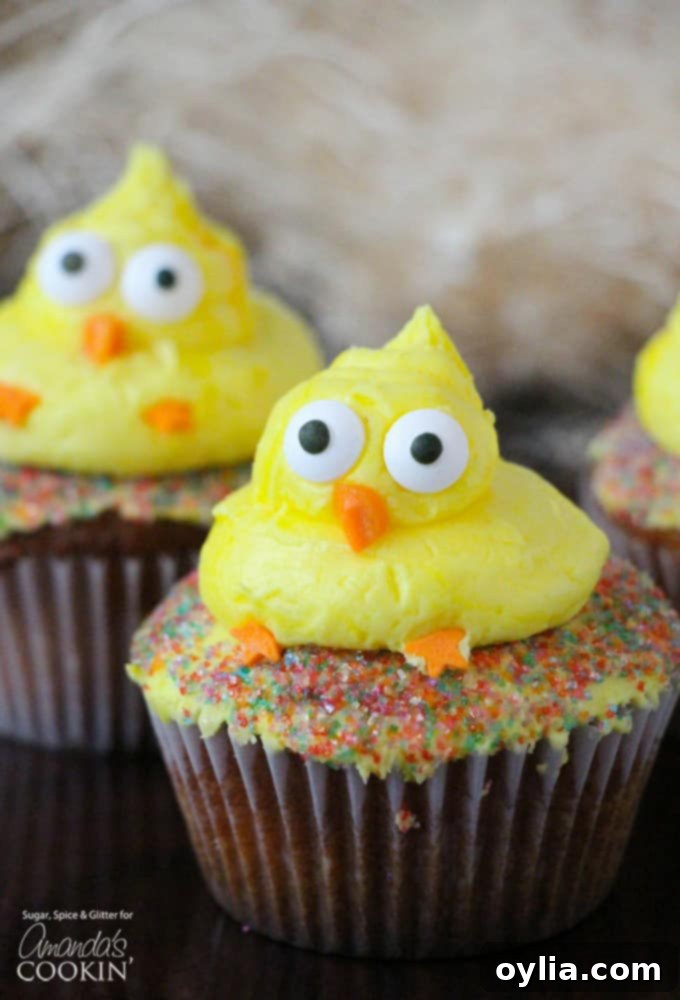
Why Easter Chick Cupcakes Are a Must-Make This Spring
While I adore the artistry of elaborate cake designs, real life often calls for a more practical approach. Think about it: a busy kitchen, a whirlwind of daily activities, and eager kids ready to “help” usually don’t mix well with intricate baking projects. That’s precisely why these Easter chick cupcakes have become a go-to favorite. They strike the perfect balance between impressive and effortless.
My philosophy for holiday baking is simple: it needs to be enjoyable for everyone involved, especially my daughter. There’s nothing more rewarding than seeing her proudly decorate her own treats without me having to constantly supervise or take over. These cupcakes are designed to be hands-on and forgiving, making them a true win in our kitchen. You get a delightful outcome with minimal stress, perfect for maintaining a festive spirit without sacrificing your sanity.
Beyond their ease, these cupcakes are:
- **Crowd-Pleasers:** The cute chick design instantly grabs attention and is loved by both children and adults.
- **Highly Customizable:** Easily adapt the decorations to whatever candies or sprinkles you have on hand.
- **Perfect for Parties:** They’re individually portioned, making serving a breeze at any gathering, from school parties to family brunches.
- **Memory Makers:** Involving kids in the decorating process creates lasting holiday memories and fosters their love for baking.
RELATED – Planning an Easter brunch? Don’t miss our carrot cake pancakes for a festive morning treat!
Crafting Your Perfect Chick Cupcakes: Base & Buttercream
For this delightful Easter dessert, I rely on a robust and flavorful base. My preference is always my favorite buttermilk cupcake recipe. The buttermilk adds an incredible tenderness and subtle tang that perfectly complements the sweet vanilla buttercream. However, if you’re truly pressed for time or prefer a shortcut, a good quality yellow or white box cake mix can be an excellent substitute. Just follow the package directions for baking, and you’ll still end up with delicious cupcakes ready for decorating.
The vanilla buttercream is equally important, providing a smooth, creamy canvas for our chick designs. We’ll dye it a cheerful yellow, but feel free to experiment with other pastel colors if you’re aiming for a different look, perhaps for baby ducklings or even colorful monster cupcakes for a different occasion! The key is a consistency that’s easy to pipe but firm enough to hold its shape.
Creative Decoration Ideas to Personalize Your Chicks
One of the best parts about these Easter chick cupcakes is how much fun you can have with the decorations. Over the years, we’ve explored many variations, proving that creativity in the kitchen can be incredibly simple and resource-friendly. Here are some ideas:
- **Feathery Textures:** To give your chicks a wonderfully “feathery” look, try rolling the frosted cupcakes in dyed shredded coconut before adding the final details. Green coconut can also make a lovely “nest” base!
- **Eye Options:** While candy eyes are incredibly convenient and adorable, you can also use mini chocolate chips for smaller, more subtle eyes, or even small dots of melted dark chocolate applied with a toothpick.
- **Beak Alternatives:** My go-to for beaks is thinly sliced carrot, cut into small triangles. It’s a healthy, natural, and readily available option that adds a nice crunch. However, orange candy-coated chocolate chips (like M&M’s) are another popular choice. You could also use small pieces of orange fruit leather or even tiny triangular pieces of orange gummy candy.
- **Feet/Claws:** Orange star sprinkles are perfect for chick claws, as they can be easily broken or trimmed to create the desired shape. Alternatively, small pretzel stick pieces or even tiny piped lines of orange frosting can work.
- **Adding Bling:** Edible glitter or extra sprinkles can give your chicks an extra sparkle, especially if you apply them to the frosting base before piping the main chick body.
- **Beyond Chicks:** Get inspired! These simple frosted shapes can be adapted to many other Easter or spring themes. Think bunnies (with marshmallow ears), lambs (with mini marshmallows for wool), or even flowers.
Don’t be afraid to look at what you already have in your pantry. Repurposing ingredients not only makes baking more economical but also sparks unique ideas!
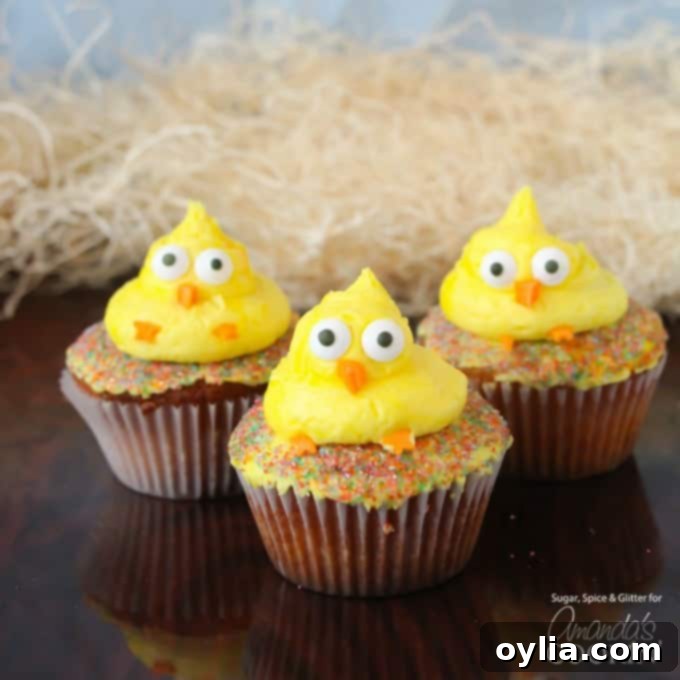
Ingredients to Make Easter Chick Cupcakes
Here’s what you’ll need to create these adorable treats. This recipe makes 24 cupcakes, perfect for sharing!
For the Buttermilk Cupcakes:
- 1 1/4 cups cake flour
- 1 1/4 tsp baking powder
- 1/2 tsp baking soda
- 1/2 tsp salt
- 2 large eggs
- 3/4 cup sugar
- 1 1/2 tsp pure vanilla extract
- 1/2 cup olive oil
- 1/2 cup buttermilk
For the Vanilla Buttercream and Decorations:
- 2 cups unsalted butter, softened
- 8-10 cups icing sugar (confectioners’ sugar)
- 2-4 Tablespoons cream or milk
- 2 teaspoons pure vanilla extract
- Yellow gel food coloring
- 48 orange star sprinkles (for claws)
- 48 Candy Eyes
- 1 carrot, or 24 orange candy-coated chocolate chips (for beaks)
- Edible glitter or sprinkles, optional (for base coating)
Helpful Kitchen Tools
Having the right tools can make the baking and decorating process even smoother:
- Muffin pan
- Electric Mixer (stand mixer or hand mixer) and large mixing bowls
- Measuring cups and spoons
- Piping bag with a wide tip (or a Ziploc bag with the corner snipped off)
- Offset spatula (for spreading frosting)
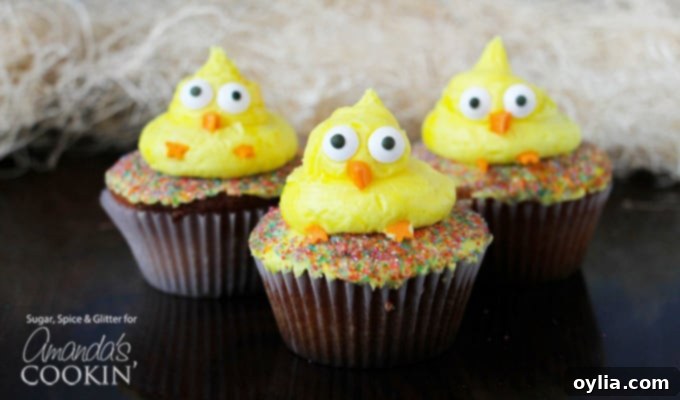
Perfect for Any Occasion: Serving Your Chick Cupcakes
These Easter chick cupcakes are incredibly versatile for serving. They were a huge hit as a classroom treat for my daughter’s school event, eliciting excited squeals from all the children. They’re equally perfect as a fun dessert for a family get-together, especially when the adults might be enjoying more sophisticated fare, but you want something special for the younger ones. (Though, honestly, I’d be thrilled to receive one of these as my dessert at any Easter gathering – they’re simply too cute to resist!)
Beyond formal events, these cupcakes also make a thoughtful and charming gift for neighbors, a delightful surprise for a hostess, or a cheerful accompaniment to coffee with friends. Their portability and individual portions make them ideal for sharing, spreading a little bit of Easter joy wherever they go.
Pro Tips for Perfect Chick Cupcakes
- **Don’t Overmix:** When making your cupcake batter, mix until just combined. Overmixing can lead to tough cupcakes.
- **Cool Completely:** Ensure your cupcakes are entirely cool before frosting. Warm cupcakes will melt the buttercream, creating a messy situation.
- **Butter Consistency:** For the best buttercream, make sure your butter is softened to room temperature, but not melted. This helps achieve a smooth, pipeable consistency.
- **Piping Bag Alternative:** If you don’t have a piping bag, a sturdy Ziploc bag with a corner snipped off (about 1-inch wide opening) works perfectly for piping the chick shapes.
- **Kid Safety:** If baking with kids, supervise them with sharp tools like knives for cutting carrots. Let them handle the fun parts like placing candy eyes and sprinkles!
- **Storage:** Store decorated cupcakes in an airtight container at room temperature for up to 2-3 days, or in the refrigerator for up to a week. Let refrigerated cupcakes come to room temperature for the best flavor and texture.
Frequently Asked Questions About Easter Chick Cupcakes
Can I use a box cake mix instead of making cupcakes from scratch?
Absolutely! Using a good quality box cake mix is a fantastic shortcut, especially when you’re short on time. Just follow the package instructions for baking the cupcakes, then use our vanilla buttercream recipe and decoration guide.
How far in advance can I make these cupcakes?
You can bake the cupcakes up to 2 days in advance and store them in an airtight container at room temperature. The buttercream can be made up to 3 days in advance and stored in the refrigerator. Just bring it to room temperature and re-whip it for a minute or two before frosting. For best results and the freshest look, decorate the cupcakes the day before or on the day you plan to serve them.
What if I don’t have buttermilk?
No problem! You can easily make a substitute for buttermilk. For 1/2 cup of buttermilk, simply pour 1/2 cup of regular milk (dairy or non-dairy) into a measuring cup, then add 1/2 tablespoon of white vinegar or lemon juice. Stir gently and let it sit for 5-10 minutes until it slightly curdles. Then use it as directed in the recipe.
Can I freeze these cupcakes?
Yes, you can! Unfrosted cupcakes freeze beautifully. Wrap them tightly in plastic wrap, then place them in a freezer-safe bag or container for up to 3 months. Thaw them at room temperature before frosting. You can also freeze decorated cupcakes, but they might be more delicate to handle and the decorations could shift slightly upon thawing. Freeze them on a tray until solid, then wrap them individually.
More Delicious Easter Recipes
If you’re looking for more inspiration for your Easter dessert table, we have a wonderful collection of festive treats that are sure to impress. Hop over and check out some of these other favorites:
- For a show-stopping dessert, try our Checkerboard Cake for Easter. It’s surprisingly easier than it looks!
- Indulge in the rich, classic flavors of this ever-delicious Homemade French Silk Pie.
- If you loved these chicks, you’ll adore our equally charming Easter Bunny Cupcakes.
- For an elegant and flavorful option, our beautiful Carrot Cake Trifle layers traditional Easter flavors.
- And don’t forget these colorful and fun Frosted Sugar Cookie Bars, perfect for any spring celebration.
- Just added, and another adorable option, are our sweet Bird Nest Cookies!
Happy baking, and enjoy your Easter celebrations!
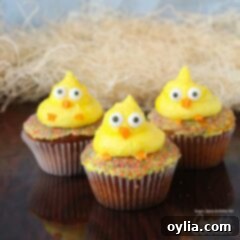
Easter Chick Cupcakes
These cute Easter Chick Cupcakes are a quick & easy Easter dessert, fit to feed a crowd! Great for a holiday gathering or as a fun recipe to do with kids.
IMPORTANT – There are often Frequently Asked Questions within the blog post that you may find helpful. Simply scroll back up to read them!
Recipe Metadata:
- Course: Desserts
- Cuisine: American
- Servings: 24 cupcakes
- Total Time: Approximately 25 minutes (prep + bake)
- Calories: 390 per cupcake
- Author: Amanda Davis
Ingredients
For the cupcakes:
- 1 ¼ cups cake flour
- 1 ¼ tsp baking powder
- ½ tsp baking soda
- ½ tsp salt
- 2 large eggs
- ¾ cup sugar
- 1 ½ tsp pure vanilla extract
- ½ cup olive oil
- ½ cup buttermilk
For the vanilla buttercream and decorations:
- 2 cups butter, softened
- 8-10 cups icing sugar (confectioners’ sugar)
- 2-4 Tablespoons cream or milk
- 2 teaspoons vanilla extract
- Yellow gel food coloring
- 48 orange star sprinkles
- 48 Candy Eyes
- 1 carrot or 24 orange candy-coated chocolate chips (for beaks)
- Edible glitter or sprinkles (optional)
Before You Begin
Calorie count does not include candy decorations. For the most accurate calorie count with your chosen decorations, please calculate separately.
Instructions
For the cupcakes:
- Preheat oven to 350°F (175°C) and line a cupcake tray with your chosen liners.
- In a medium bowl, whisk together the cake flour, baking powder, baking soda, and salt. Set aside.
- Place the two eggs in a separate large bowl and beat for 30 seconds before slowly adding in the white sugar. Continue beating until light and fluffy.
- Once the egg and white sugar mixture is light and fully beaten, beat in the vanilla extract and olive oil.
- Add half of the dry ingredients to the wet mixture, mix completely until just combined, then add half of the buttermilk. Mix again. Repeat this process with the remaining dry ingredients and buttermilk, mixing until just smooth.
- Fill the muffin liners halfway full with batter and bake for 12-15 minutes, or until a toothpick inserted into the center comes out clean. Cool in the pan for a few minutes before removing to a cooling rack to cool completely.
For the frosting and decoration:
- Combine the softened butter, 8 cups of icing sugar, 2 Tablespoons of cream or milk, and the vanilla extract in a large mixing bowl.
- Mix with an electric mixer for 2 minutes on medium speed until creamy. Adjust the consistency by adding more icing sugar for a thicker frosting or more cream/milk for a thinner, smoother frosting.
- Dye the buttercream a cheerful yellow with a small amount of yellow gel food coloring, mixing until evenly colored.
- Spoon the buttercream into a piping bag fitted with a large round tip (or a Ziploc bag with a 1-inch tip cut off).
- For an optional textured base, spread a thin layer of yellow buttercream on the top of each cooled cupcake with an offset spatula and gently roll the edges of the cupcake in edible glitter or sprinkles.
- Pipe a large dollop of frosting in the middle of each cupcake to form the chick’s body, then pipe a slightly smaller dollop on top of the first to create the head.
- Prepare the decorations: Cut the carrots into thin slices and then trim them into small triangles for beaks. Break one point off of each orange star sprinkle to create the chick’s claws.
- Carefully add two candy eyes, one carrot beak, and two star sprinkle claws to each chick cupcake, gently pressing them into the frosting.
- Repeat for all remaining cupcakes.
Nutrition Information
Serving: 1 cupcake | Calories: 390 cal | Carbohydrates: 51g | Protein: 1g | Fat: 20g | Saturated Fat: 10g | Cholesterol: 56mg | Sodium: 222mg | Potassium: 51mg | Sugar: 45g | Vitamin A: 505IU | Calcium: 26mg | Iron: 0.2mg
Tried this Recipe? Pin it for Later!
Follow on Pinterest @AmandasCookin or tag #AmandasCookin!
The recipes on this blog are tested with a conventional gas oven and gas stovetop. It’s important to note that some ovens, especially as they age, can cook and bake inconsistently. Using an inexpensive oven thermometer can assure you that your oven is truly heating to the proper temperature. If you use a toaster oven or countertop oven, please keep in mind that they may not distribute heat the same as a conventional full sized oven and you may need to adjust your cooking/baking times. In the case of recipes made with a pressure cooker, air fryer, slow cooker, or other appliance, a link to the appliances we use is listed within each respective recipe. For baking recipes where measurements are given by weight, please note that results may not be the same if cups are used instead, and we can’t guarantee success with that method.
This post originally appeared on this blog on Mar 31, 2017. It has been updated with additional tips, information, and improved SEO for a better reader experience.
