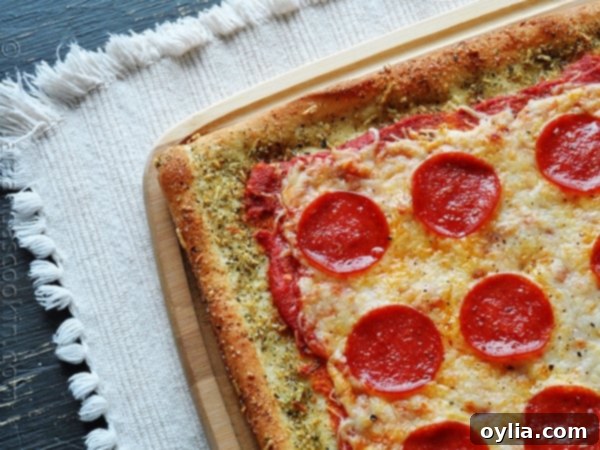
Irresistible Garlic Bread Crusted Pizza: Your New Favorite Weeknight Meal
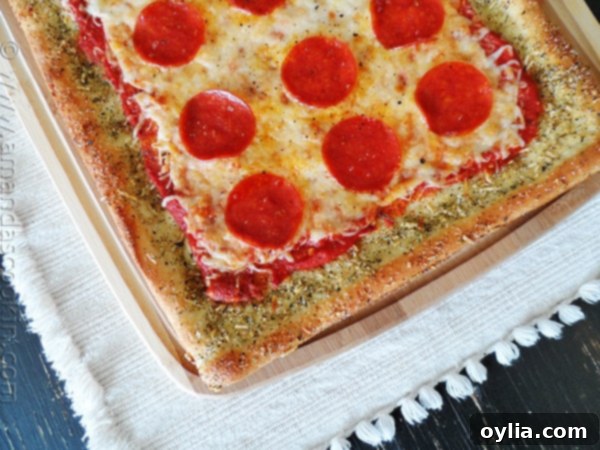
Who doesn’t love the savory, aromatic delight of garlic bread? And who can resist a classic, cheesy pizza? What if you could combine these two universally adored foods into one incredibly satisfying dish? Say hello to Garlic Bread Crusted Pizza – a sensational twist on your favorite comfort food that’s surprisingly simple to make at home. Forget the elaborate preparations; this recipe brings those iconic garlic bread flavors directly to your pizza crust, transforming an ordinary pizza night into an extraordinary culinary experience.
Garlic bread pizza isn’t just a fleeting trend; it’s a brilliant innovation many restaurants and pizzerias have embraced. Now, you can recreate that same gourmet experience right in your kitchen, achieving those rich, garlicky notes without needing a separate loaf of garlic bread. This recipe is a fantastic alternative to our popular French Bread Pizza, offering a full-sized pie rather than individual portions, but with the same heavenly garlic infusion that makes every bite a treat.
It’s the perfect solution for busy weeknights, family gatherings, or even just a fun cooking project with your loved ones. Get ready to elevate your pizza game with a crust that’s bursting with flavor and a texture that’s perfectly golden and crisp.
Why Garlic Bread Crusted Pizza is a Game Changer
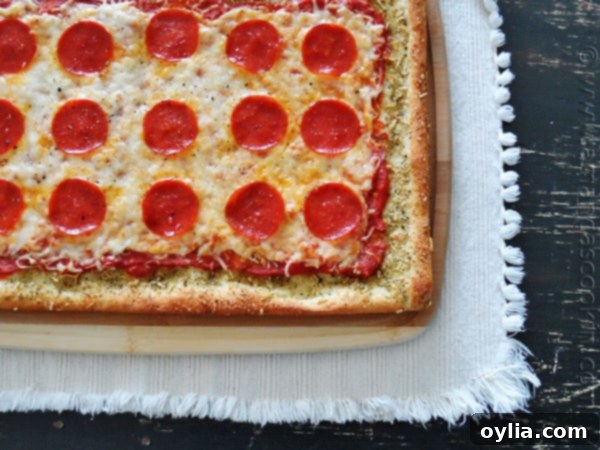
Pizza holds a special place in everyone’s heart, and for good reason. It’s versatile, delicious, and incredibly satisfying. But let’s be honest, sometimes the crust can feel a little… plain. That’s where the magic of a garlic bread crust comes in. Instead of just being a vehicle for toppings, the crust becomes a star in its own right, infused with a savory blend of garlic, herbs, and Parmesan cheese.
This recipe is particularly ideal for households with teenagers or young adults, like mine. My kids are now old enough to navigate the kitchen, and what’s more appealing and simple to make than pizza? It’s a fantastic way to encourage independence and culinary exploration without requiring extensive supervision. The beauty of this recipe lies in its simplicity and the use of readily available ingredients, making it accessible for cooks of all skill levels.
The Convenience Factor: Using Refrigerated Pizza Crust
When the wonderful people at Pillsbury and General Mills challenged me to create a unique dish using their convenient refrigerated pizza crust, I immediately envisioned a recipe that would be both easy and exciting, especially one that could get my boys involved in the kitchen. Using pre-made dough is a lifesaver for busy families. While I cherish making homemade pizza dough, the process can be lengthy, involving mixing, kneading, and rising times. Refrigerated dough eliminates these steps, offering a shortcut to deliciousness without compromising on quality.
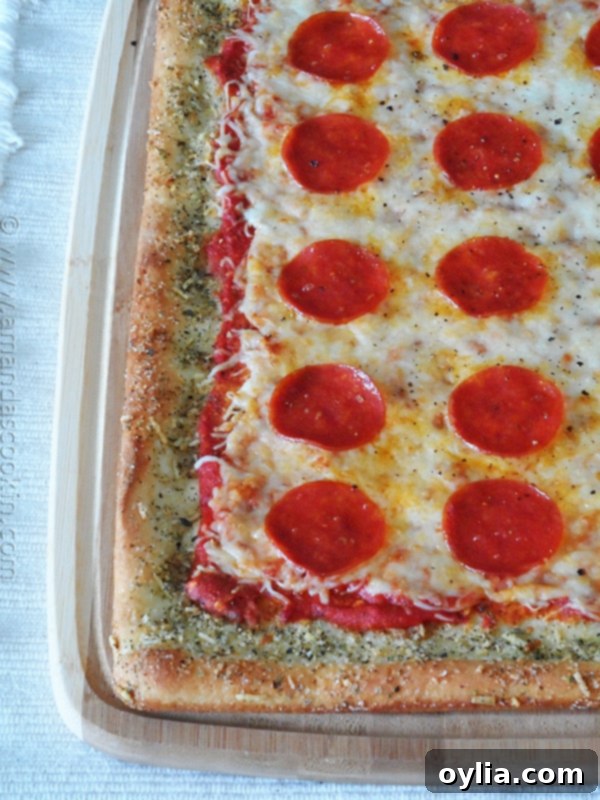
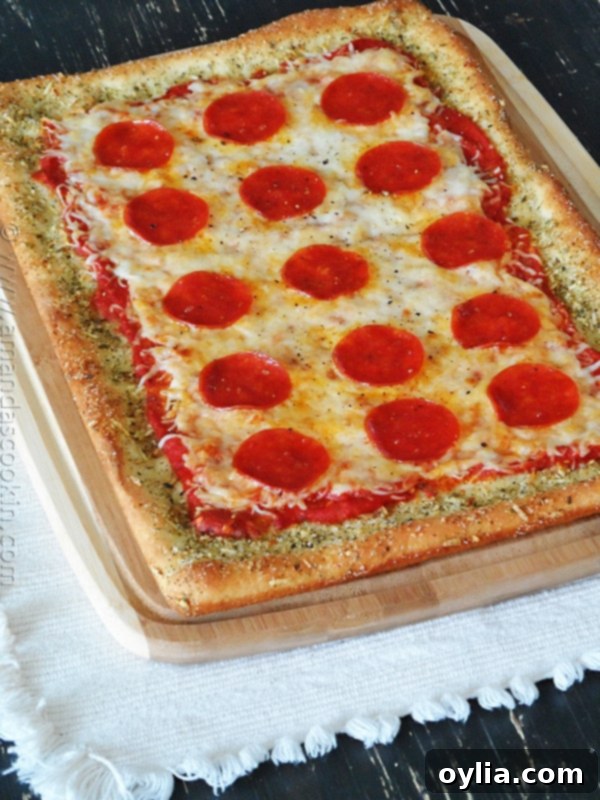
The decision to focus on dressing up the crust, rather than just the toppings, was a lightbulb moment. Why limit the flavor to the center when you can make the entire pizza a taste sensation? Adding the robust flavors of garlic bread to the crust felt like a natural and perfect fit. Not only does it taste incredible, but it also creates a visually appealing pizza that looks far more sophisticated than one with a plain, unadorned crust.
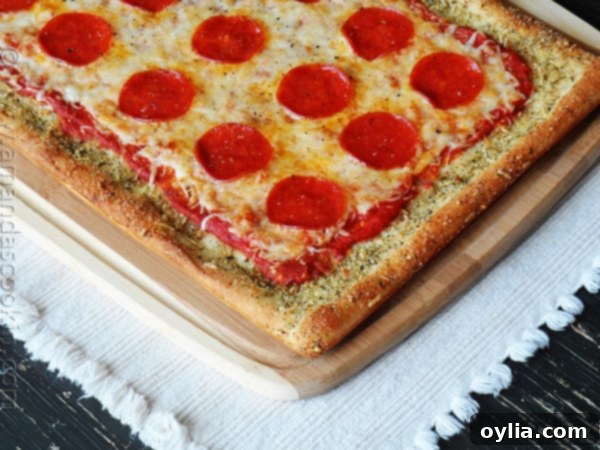
Crafting Your Garlic Bread Crusted Pizza: A Simple Guide
Let’s dive into the straightforward steps to create this delectable pizza. You’ll be amazed at how quickly you can achieve such impressive results.
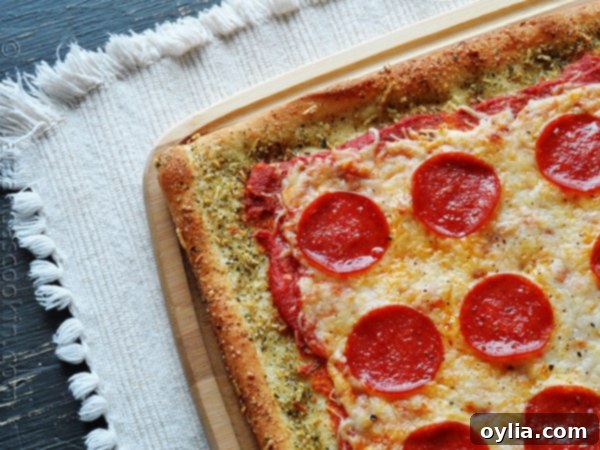
Step-by-Step Preparation:
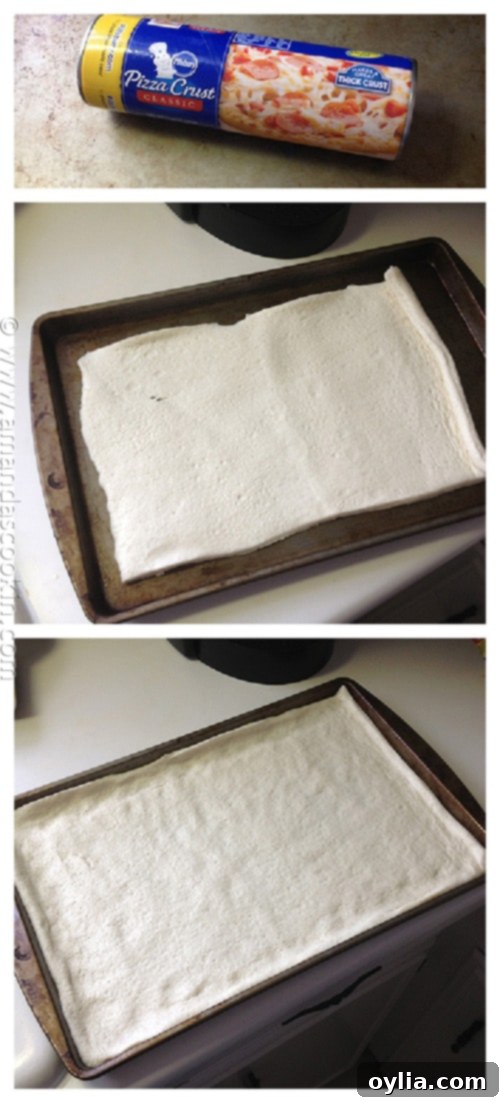
- **Prepare the Crust:** First, preheat your oven to 400°F (200°C) to ensure it’s ready for baking. Take a rimmed cookie sheet and give it a light spray with cooking oil or line it with parchment paper for easy cleanup. Unroll the refrigerated pizza crust onto the prepared sheet. Gently press the dough outwards to spread it evenly towards the edges of the pan. Using your fingers, carefully create a slightly raised rim around the entire perimeter of the dough. This forms a beautiful edge and helps contain your delicious toppings. This step is incredibly easy and perfect for getting younger family members involved in the cooking process.
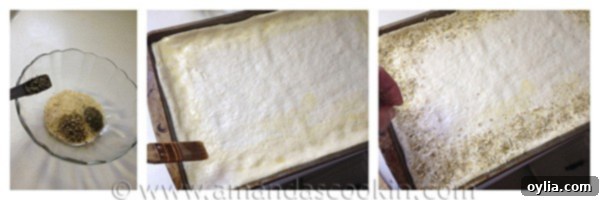
- **Create the Garlic Bread Topping:** In a small bowl, mix together your garlic salt ingredients. While the recipe calls for specific herbs, you can easily adapt this! To save a step, consider using a pre-mixed herbed garlic salt and simply add the Parmesan cheese. Alternatively, a good quality dried Italian seasoning blend can substitute the individual herbs, making it even quicker. Once your mixture is ready, lightly brush the outer edges of your pizza dough with olive oil. This not only helps the garlic topping adhere but also contributes to a wonderfully crispy, golden crust. Generously sprinkle the garlic salt mixture all around the olive-oiled edges of the crust.
- **First Bake & Topping:** Partially bake the prepared crust for 8 minutes. This crucial step helps the crust get a head start, ensuring it’s cooked through and slightly crispy before you load it with toppings. Remove the crust from the oven. Now, it’s time for the classic pizza elements: spread your favorite pizza sauce (whether store-bought or homemade) over the main body of the pizza, being careful to leave the garlic-crusted edges visible and untouched. Finally, generously top with shredded mozzarella cheese and any other favorite toppings you desire – pepperoni, sausage, veggies, or a combination!
- **Final Bake:** Return the pizza to the oven and bake for an additional 6-10 minutes. Keep a close eye on it; you’re looking for the cheese to be beautifully melted and bubbly, and the garlic-infused crust to achieve a rich golden brown hue. Once done, carefully remove the pizza, let it cool for a few minutes, slice, and serve!

Tips for Success & Variations
- **Crust Perfection:** For an extra crispy bottom, consider preheating your baking sheet in the oven before placing the unrolled dough on it (use caution!). Alternatively, bake on a pizza stone.
- **Garlic Level:** Adjust the amount of garlic salt to your preference. If you’re a true garlic lover, you can even add a touch of garlic powder to the topping mix or a very thin layer of minced garlic before brushing with olive oil.
- **Herb Power:** Don’t be afraid to experiment with other herbs! A pinch of dried thyme or fennel seeds can add another layer of flavor to your garlic crust.
- **Cheese, Please:** While mozzarella is classic, consider blending in a little provolone for extra stretch and flavor, or a sprinkle of sharp cheddar for a bolder taste. For the crust itself, a finely grated Parmesan works best for even distribution and a lovely nutty flavor.
- **Topping Creativity:** This garlic bread crust pairs wonderfully with almost any pizza topping. Classic pepperoni and sausage are always winners, but try adding sautéed mushrooms, bell peppers, onions, olives, or even cooked chicken for different variations.
- **Make it Spicy:** A pinch of red pepper flakes in the garlic salt mixture or sprinkled over the pizza sauce will add a nice kick.
Frequently Asked Questions (FAQs)
Q: Can I use homemade pizza dough for this recipe?
A: Absolutely! While this recipe emphasizes the convenience of refrigerated dough, you can certainly use your favorite homemade pizza dough. Just make sure it’s rolled out to the desired thickness and size, and follow the same steps for preparing the garlic bread crust and baking.
Q: What if I don’t have all the individual herbs for the garlic salt topping?
A: No problem! You can easily substitute the individual oregano, basil, marjoram, and rosemary with 1 to 1.5 teaspoons of a good quality Italian seasoning blend. Or, as mentioned, a pre-mixed herbed garlic salt works perfectly; just add the Parmesan cheese.
Q: Can I prepare the garlic mixture ahead of time?
A: Yes, you can mix the garlic salt topping ingredients a few days in advance and store them in an airtight container at room temperature. This makes assembly even quicker when pizza night rolls around.
Q: How do I store leftover garlic bread crusted pizza?
A: Store any leftover pizza in an airtight container or wrapped tightly in foil in the refrigerator for up to 3-4 days. For best results when reheating, use a toaster oven or a hot skillet to crisp up the crust, or microwave briefly if you’re in a hurry.
Q: Can I freeze this pizza?
A: Yes, you can freeze it! If freezing unbaked, assemble the pizza up to the point of adding toppings, then freeze on the baking sheet until solid. Once frozen, wrap tightly in plastic wrap and then foil. To bake, unwrap and bake from frozen, adding extra baking time. If freezing baked pizza, let it cool completely, then wrap individual slices or the whole pizza well before freezing. Reheat as desired.
This garlic bread crusted pizza is more than just a meal; it’s an experience. It brings together the best of both worlds – the satisfying crunch and aroma of garlic bread with the comforting familiarity of a classic pizza. It’s a guaranteed crowd-pleaser that will have everyone asking for seconds. Give it a try tonight and watch it become a staple in your dinner rotation!
Using ready-made dough is so much more convenient and a great option when you don’t have a lot of time for mixing and rising. This refrigerated dough is also surprisingly versatile; it’s fantastic for making homemade breadsticks or other savory treats too!
More Garlic Bread Pizza Recipes
If you’re looking for different takes on the garlic bread pizza concept, here are a few more ideas, including some that use actual garlic bread as a base:
- Made on actual garlic bread – Mommy Hates Cooking
- Another made on garlic bread – Culicurious
More Pillsbury Pizza Crust Ideas
Pillsbury’s convenient pizza crust opens up a world of possibilities beyond just traditional pizza. Here are a few more inspiring ideas to get your creative juices flowing:
- Parmesan Crusted Pepperoni Pizza
- Garlic Butter Crusted Margherita Pizza
- Parmesan Crusted Chicken Alfredo Pizza
Prefer to go fully homemade? You can’t beat the taste of a pizza made from scratch. Try my recipe for the best homemade pizza dough!
Garlic Bread Crusted Classic Pizza
IMPORTANT – There are often Frequently Asked Questions within the blog post that you may find helpful. Simply scroll back up to read them!
Print It
Pin It
Rate It
Save ItSaved!
Ingredients
- 1 tube Pillsbury Classic Pizza Crust
- ½ cup pizza sauce or my homemade pizza sauce
- 1 ½ cups shredded mozzarella cheese
- ½ tablespoon olive oil
- Pepperoni or sausage optional
Garlic Salt Topping
- 1 teaspoon garlic salt
- ¼ teaspoon oregano
- ¼ teaspoon basil
- ¼ teaspoon marjoram
- ⅛ teaspoon rosemary
- 2 teaspoon fresh grated parmesan
Before You Begin
Instructions
-
Preheat oven to 400 F.
-
Spray a rimmed baking sheet and roll out pizza dough, pressing dough to spread to sides. Use your fingers to make the edges of the crust raised a bit.
-
Mix together the garlic salt topping ingredients. Brush the outside edges of the dough with olive oil. Sprinkle garlic salt topping all around the edges of the crust.
-
Partially bake dough for 8 minutes. Remove from oven and spread pizza sauce, leaving the crust visible. Top with mozzarella cheese and any other toppings you like.
-
Bake for another 6-10 minutes, or until cheese is bubbly and crust is golden brown.
The recipes on this blog are tested with a conventional gas oven and gas stovetop. It’s important to note that some ovens, especially as they age, can cook and bake inconsistently. Using an inexpensive oven thermometer can assure you that your oven is truly heating to the proper temperature. If you use a toaster oven or countertop oven, please keep in mind that they may not distribute heat the same as a conventional full sized oven and you may need to adjust your cooking/baking times. In the case of recipes made with a pressure cooker, air fryer, slow cooker, or other appliance, a link to the appliances we use is listed within each respective recipe. For baking recipes where measurements are given by weight, please note that results may not be the same if cups are used instead, and we can’t guarantee success with that method.
I was compensated for the time I spent in the kitchen and writing this post for you, but all opinions expressed are 100% mine.
