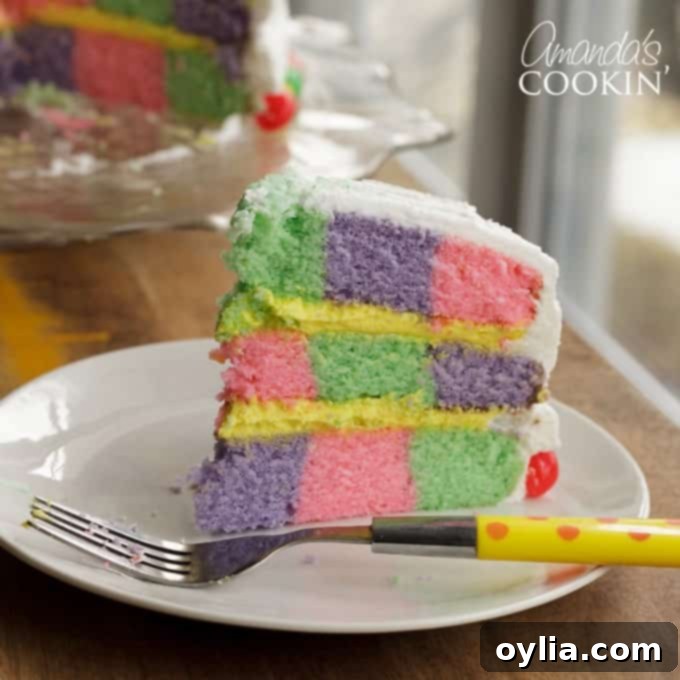
Pastel Perfection: Bake a Stunning Checkerboard Cake for Your Easter Celebration
A checkerboard cake is a showstopper, renowned for its striking visual contrast, typically achieved with classic yellow and chocolate cake layers. While this traditional version is always a crowd-pleaser, I envisioned something more vibrant and celebratory for the arrival of spring. With Easter just around the corner, what better way to embrace the festive spirit than by crafting a beautiful pastel checkerboard cake? This unique creation promises to be the centerpiece of your holiday dessert table, delighting both eyes and taste buds with its charming colors and delicious flavor. Plus, any leftover batter from this generous recipe can be transformed into adorable treats like these Easter Bunny Cupcakes, ensuring no deliciousness goes to waste!
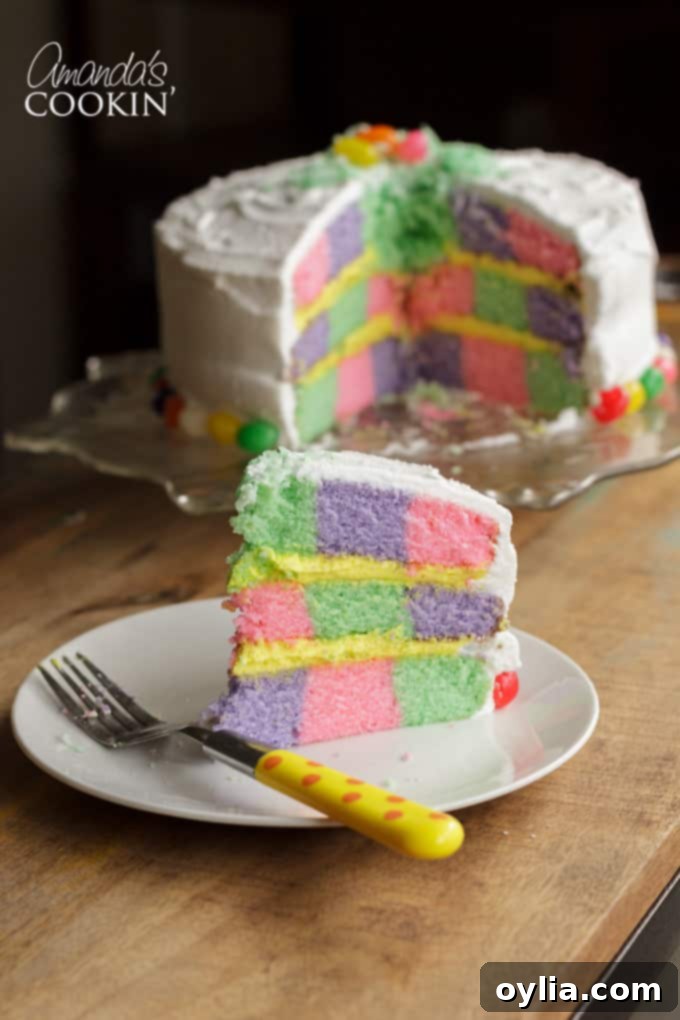
Why a Pastel Checkerboard Cake is Your Go-To Easter Dessert
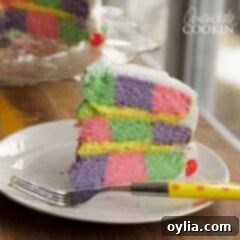
Easter is a celebration of renewal, joy, and vibrant colors, making a pastel checkerboard cake an ideal choice. The soft hues of pink, green, and purple nestled within each slice perfectly capture the essence of spring. Unlike traditional cakes, the hidden checkerboard pattern creates a delightful surprise when sliced, sparking conversation and bringing smiles to everyone’s faces. It’s not just a cake; it’s an edible work of art that reflects the playful and festive nature of the holiday. Imagine the delight as your friends and family discover the beautiful design concealed beneath the elegant frosting!
To achieve this colorful treat, I took inspiration from Dorie Greenspan’s highly acclaimed recipe for her Perfect Party Cake, adapting it to suit our vibrant pastel vision. One notable change I made was opting for a white frosting that uses shortening instead of butter. While some might be hesitant, I can assure you that this particular frosting is not only delicious but also incredibly smooth and stable, making it perfect for achieving crisp lines and bright colors. If you prefer, however, feel free to substitute with your favorite white icing or buttercream frosting. The important thing is to have a frosting that complements the cake and can hold the beautiful pastel tints.
Essential Baking Tips for a Flawless Pastel Checkerboard Cake
Creating a visually stunning checkerboard cake requires a few clever tricks and careful execution. These baking tips are designed to guide you through the process, ensuring your cake turns out perfectly moist, flavorful, and beautifully patterned.
1. Managing Your Batter: Quantity and Creativity
This recipe is designed to produce a substantial three-layer cake, and it uses a double batch of batter to ensure you have plenty for all your colorful layers. You will likely have leftover batter, which is a fantastic opportunity for more baking! Don’t let it go to waste. You can pour the remaining batter into a 9-inch square pan to make a delightful square cake, perhaps even swirling the different colors together for a fun marble effect. Alternatively, the excess batter is perfect for making cupcakes. Adjust baking times accordingly – cupcakes usually bake faster than a full cake.
2. Choosing Your White Cake Base
While I’ve adapted a specific recipe, the beauty of a checkerboard cake lies in its flexibility. You can absolutely use any trusted white cake recipe you adore. If you have a family-favorite white cake recipe that consistently turns out moist and delicious, feel free to use that as your foundation. The key is a sturdy yet tender crumb that can hold its shape when sliced, revealing the intricate pattern.
3. Mixer Capacity: Handle with Care
Given that this is a double batch cake recipe, it yields a significant amount of batter. If you’re using a standard home mixer, especially a smaller one, it can get quite full. While my KitchenAid stand mixer handled it, the bowl was definitely packed. To avoid overworking your mixer or having batter overflow, I highly recommend splitting the cake recipe in half and preparing it in two separate batches. This ensures your mixer operates efficiently and the batter is properly aerated for a light, fluffy cake.
4. Distributing Colored Batter with Ease
When it comes to coloring and distributing your batter into the checkerboard pan, precision is key. I found liquid measuring cups incredibly helpful for this step, as their pour spouts allowed for easier and neater placement of the different colored batters into the specific rings. Another excellent method, preferred by many bakers, is to use decorator bags (without tips, just snip the end) to pipe the batter into the designated sections. This offers even greater control and can minimize mess, ensuring clean lines in your final design.
5. Smart Egg Yolk Usage
This recipe primarily uses egg whites for a lighter, whiter cake base, which is ideal for vibrant pastel colors. Don’t discard those leftover egg yolks! They are precious ingredients that can be put to good use in other delicious recipes. Consider saving them to make homemade custards, crème brûlée, or even decadent ice cream. It’s a great way to reduce waste and enjoy another culinary creation.
Gather Your Ingredients for a Delightful Easter Cake
Crafting this stunning cake begins with a selection of fresh, quality ingredients. Here’s what you’ll need for both the cake layers and the smooth, adaptable white frosting. Remember, room temperature ingredients for butter and eggs are crucial for a smooth, emulsified batter.
Ingredients for the Pastel Checkerboard Cake
- 4 1/2 cups cake flour
- 2 tablespoon baking powder
- 1 teaspoon salt
- 2 1/2 cups buttermilk
- 8 large egg whites
- 3 cups sugar
- 4 teaspoons grated lemon zest (freshly grated for best flavor!)
- 2 sticks (16 tablespoons) unsalted butter, at room temperature
- 1 teaspoon pure lemon extract
Ingredients for the Silky White Frosting
This shortening-based frosting offers a beautifully smooth texture and a brilliant white base, perfect for tinting pastel colors without any yellow undertones from butter. It’s also remarkably stable for decorating.
- 1 cup vegetable shortening (ensure it’s not butter-flavored for the purest white)
- 4 1/2 cups sifted powdered sugar
- 4 tablespoons milk
- 1 1/2 teaspoons clear vanilla extract (clear for white frosting)
- 1/2 teaspoon lemon extract
Helpful Kitchen Tools to Simplify Your Baking Process
Having the right equipment can make all the difference, especially when creating a cake with intricate details like a checkerboard pattern. These tools will help ensure a smoother and more enjoyable baking experience:
- Checkerboard Pan Set: This specialized pan set is highly recommended as it simplifies the creation of the checkerboard pattern dramatically. It typically includes three round pans and a removable insert that guides your batter placement.
- Stand mixer or hand mixer: Essential for creaming butter and sugar, and mixing the batter until light and fluffy. A stand mixer is particularly useful for this double-batch recipe.
- Mixing bowls: Several bowls are needed for separating dry and wet ingredients, and especially for dividing and coloring your batter.
- Measuring cups and spoons: Accurate measurements are crucial in baking, so ensure you have a reliable set.
- Liquid measuring cups or decorator bags: As mentioned in the tips, these are invaluable for precise batter distribution into the checkerboard pan.
- Parchment paper: For lining the cake pans, ensuring easy release of your delicate cake layers.
- Cooling racks: Essential for allowing your cake layers to cool evenly and prevent sogginess.
FOR YOUR CONVENIENCE, A PRINTABLE VERSION OF THIS RECIPE IS AVAILABLE IN THE RECIPE CARD BELOW!
Step-by-Step Guide: Baking Your Pastel Checkerboard Cake
Follow these detailed instructions to create your beautiful pastel checkerboard cake. Precision and patience are your best friends in this process!
Getting Ready for Baking
- Preheat Your Oven: Center a rack in your oven and preheat it to 350 degrees F (175 degrees C).
- Prepare Your Pans: Thoroughly butter three 9-inch round cake pans. If you’re using a Checkerboard Pan Set, these pans will likely be part of it. Line the bottom of each pan with a round of parchment paper or wax paper. This crucial step prevents sticking and ensures your cake layers release cleanly.
- Set Up the Insert: Place the checkerboard cake insert into one of the prepared pans. This insert will help you create the distinct sections for your colored batter. Set this pan aside.
Directions for Making the Cake Layers
- In a large mixing bowl, combine the dry ingredients: whisk together the cake flour, baking powder, and salt until they are well combined. Set aside.
- In a separate medium-sized bowl, whisk together the wet ingredients: the buttermilk and egg whites until just combined.
- Prepare the Sugar and Butter Mixture: In the bowl of your stand mixer (or a large bowl if using a hand mixer), add the sugar and grated lemon zest. Use your fingers to rub the sugar and zest together vigorously. This action releases the fragrant oils from the lemon zest into the sugar, infusing your cake with bright citrus notes. Continue until the sugar is moist and highly fragrant.
- Add the softened unsalted butter to the sugar-lemon mixture. Using the paddle attachment (or beater with a hand mixer), beat at medium speed for a full 3 minutes. This step is vital for incorporating air into the mixture, resulting in a very light, fluffy, and pale butter and sugar cream.
- Beat in the pure lemon extract until just combined. Then, begin incorporating the dry and wet mixtures alternately. Add one-third of the flour mixture to the butter-sugar mix, beating on medium speed until just incorporated. Next, beat in half of the buttermilk-egg mixture. Follow with another half of the remaining dry ingredients. Add the rest of the milk and eggs, beating until the batter appears homogeneous and smooth. Finally, add the very last of the dry ingredients.
- Once all ingredients are added, give the entire batter a final, thorough beating for about 2 minutes. This ensures everything is completely mixed and that the batter is well-aerated, which contributes to a tender cake crumb.
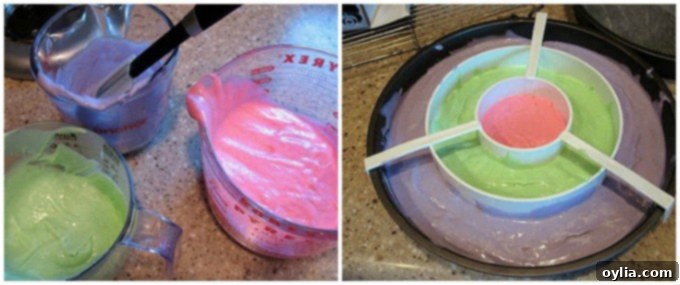
- Coloring the Batter: Evenly separate the prepared white batter into three separate bowls. To create your pastel colors, add a very small amount of paste food coloring (think smaller than a pea, as a little goes a long way for pastels) to each bowl. Whisk thoroughly until the color is uniform and achieves your desired pastel shade. For this recipe, I used lovely pink, purple, and green.
- Filling the First Pan: Take the cake pan that already has the checkerboard insert in place. Start by filling the very center hole halfway with your pink batter. Then, fill the middle ring halfway with green batter, and finally, the outer ring halfway with purple batter. Be gentle to avoid mixing the colors. Once filled, carefully loosen the insert’s “legs” from the side of the pan and lift the insert straight up and out. Rinse and thoroughly dry the insert before placing it into the next prepared pan.
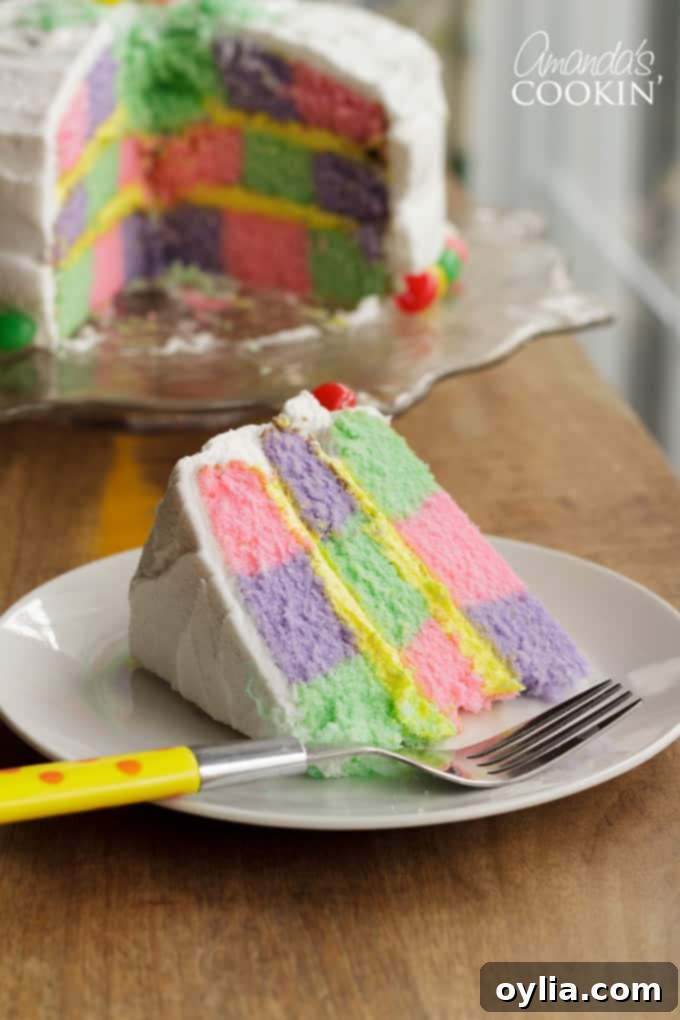
- Filling Subsequent Pans: Continue the pattern flow for the remaining two pans. For the second pan, fill the center hole halfway with green batter, the second ring with purple, and the outer ring with pink. For the third and final pan, keep the pattern going: purple in the center, then pink, then green. This alternating pattern is what creates the beautiful checkerboard effect.
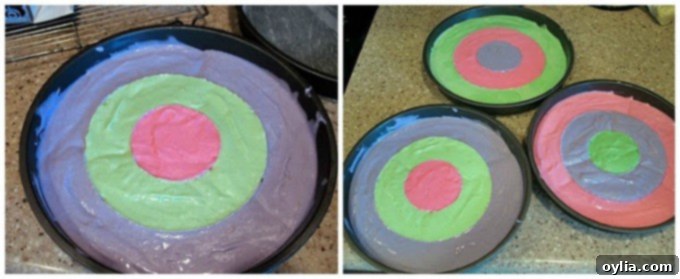
- Baking and Cooling: Bake the cake layers for 25-35 minutes. Begin checking for doneness around the 25-minute mark. The cakes are ready when they feel springy to the touch and a thin knife or toothpick inserted into the centers comes out clean. Transfer the baked cakes to cooling racks and let them cool in the pans for about 5 minutes. Then, run a thin knife around the sides of each cake to loosen them, carefully unmold, and peel off the parchment paper liners. Invert the layers and cool them completely to room temperature right side up on the racks. (Pro Tip: Cooled cake layers can be wrapped airtight and stored at room temperature overnight, or even frozen for up to 2 months for future use. This is great for making ahead!)
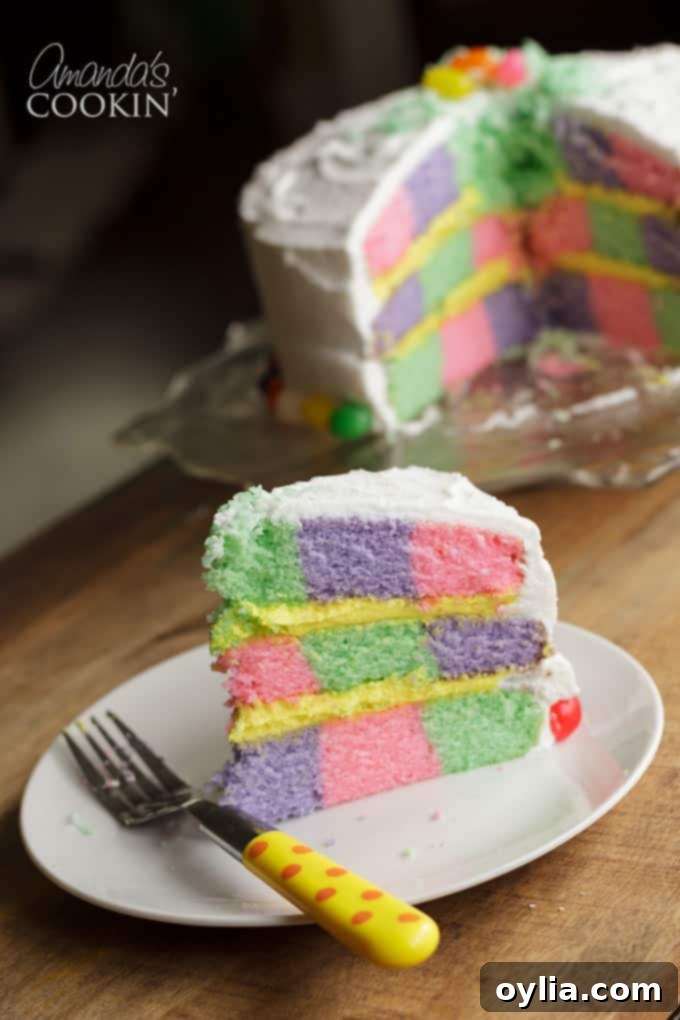
I utilized vibrant paste food coloring to tint both the cake batters and a portion of the frosting, and the checkerboard baking set made creating the intricate pattern surprisingly simple. However, if you don’t wish to purchase a specialized pan, don’t fret! This helpful tutorial will show you how to achieve a checkerboard cake effect using standard round cake pans and a few simple tools you likely already have in your kitchen.
Crafting the Perfect Pastel Frosting and Decorating Your Masterpiece
The frosting is the final touch that brings your checkerboard cake together. This recipe features a wonderfully smooth shortening-based frosting that provides a pristine white canvas for coloring and offers excellent stability for decorating. The full, detailed instructions for preparing this delicious frosting are included in the printable recipe card below.
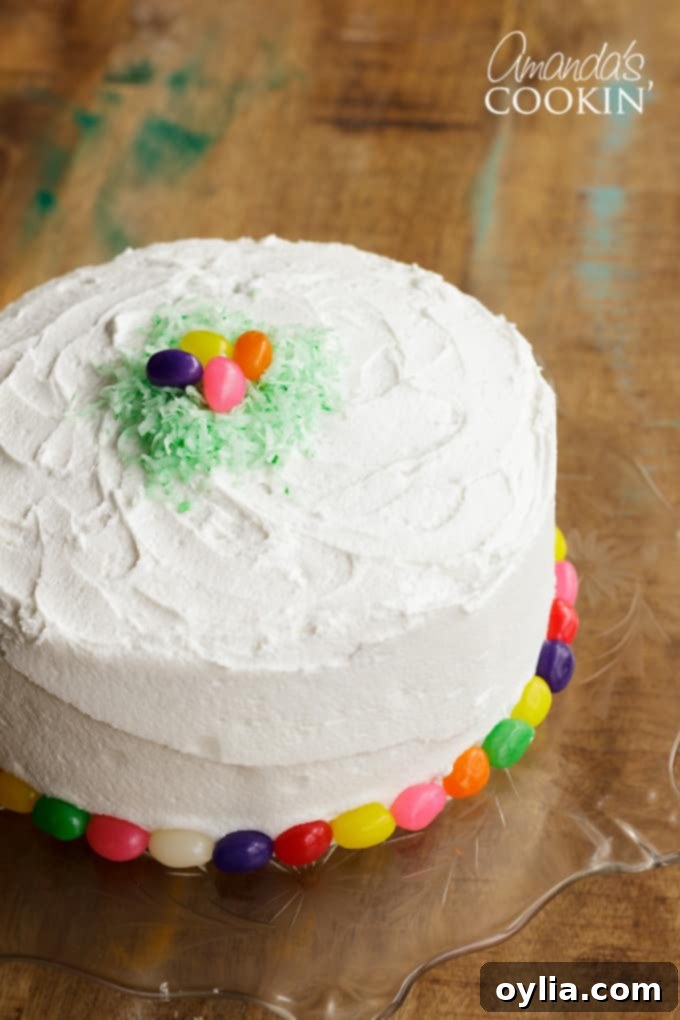
Once your frosting is prepared, you’ll divide a portion of it to tint a soft pastel yellow. This yellow frosting will be used between the cake layers, creating a subtle internal warmth that beautifully complements the pastel cake layers. The remaining white frosting will elegantly cover the sides and top of the cake, providing a clean, fresh backdrop for your Easter decorations. For garnishing, mix shredded coconut with a single drop of green food coloring to create “grass” atop your cake, then artfully arrange a few colorful jelly beans to resemble Easter eggs. You can also adorn the outside bottom edge of the cake with more jelly beans for a fun border.
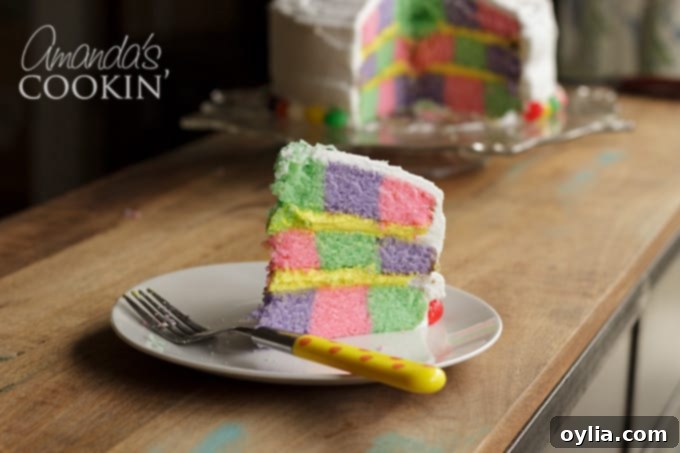
Didn’t it turn out absolutely beautifully? The visual appeal of this cake is truly remarkable, and the delicious taste makes every second you spend creating it worthwhile! This pastel checkerboard cake is definitely a recipe that will impress your friends and family and become a memorable part of your Easter traditions. I hope you have a blast making this unique and festive dessert!
Looking for More Delightful Easter Treats?
Easter is the perfect occasion to indulge in a variety of sweet delights. If you’re searching for more festive recipes to complete your holiday spread, explore some of our other popular creations:
- For a taste of nostalgia, try our vibrant Frosted Sugar Cookie Bars, which taste just like those beloved Lofthouse cookies!
- These charming Rice Krispie Nests are incredibly easy to make and add a whimsical touch to your dessert table.
- A sophisticated yet simple dessert, our Carrot Cake Trifle offers layers of classic Easter flavors, perfect for a crowd.
- We have far too many delightful options to list them all here, so be sure to explore our extensive collection of Easter dessert recipes and Easter recipe ideas for even more inspiration!
Pastel Checkerboard Cake for Easter
IMPORTANT – There are often Frequently Asked Questions and detailed tips within the blog post that you may find helpful. Simply scroll back up to read them!
Print It
Pin It
Rate It
Save ItSaved!
Ingredients
For the Pastel Cake:
- 4 ½ cups cake flour
- 2 tablespoons baking powder
- 1 teaspoon salt
- 2 ½ cups buttermilk
- 8 large egg whites
- 3 cups sugar
- 4 teaspoons grated lemon zest
- 16 tbsp unsalted butter 2 sticks, at room temperature
- 1 teaspoon pure lemon extract
- Paste food coloring (pink, purple, green)
For the Silky White Frosting:
- 1 cup vegetable shortening not butter flavored
- 4 ½ cups powdered sugar sifted
- 4 tablespoons milk
- 1 ½ teaspoons clear vanilla
- ½ teaspoon lemon extract
For Garnish:
- 1 cup Jelly beans
- ½ cup shredded coconut
- 1 drop green food coloring
Before You Begin
Instructions
Getting Started (Prep):
-
Preheat oven to 350 F (175 C).
-
Butter three 9-inch round cake pans (from a Checkerboard Pan Set recommended) and line the bottom of each with a round of parchment paper. Insert the checkerboard divider into one pan and set aside.
Making the Cake Layers:
-
In a large bowl, whisk together the cake flour, baking powder, and salt.
-
In a separate bowl, whisk together the buttermilk and egg whites.
-
In your mixer’s bowl, combine sugar and lemon zest, rubbing with fingers until fragrant. Add room-temperature butter and beat at medium speed for 3 minutes until very light and fluffy.
-
Beat in lemon extract. Gradually add flour mixture (in thirds) alternating with the milk-egg mixture (in halves), beating on medium speed until just incorporated after each addition. Give a final 2-minute beat to ensure aeration.
-
Divide batter evenly into three bowls. Tint each bowl with a small amount of paste food coloring (e.g., pink, purple, green) and whisk until the desired pastel shade is achieved.
-
For the first pan with the insert: fill the center hole halfway with pink batter, the middle ring halfway with green, and the outer ring halfway with purple. Carefully remove the insert, rinse, and dry it, then place it into the next pan.
-
Continue the pattern for the second pan: green in the center, purple in the second ring, pink in the outer ring. Repeat for the third pan: purple in the center, pink in the second ring, green in the outer ring.
-
Bake for 25-35 minutes, or until springy to the touch and a thin knife inserted comes out clean. Cool cakes on racks for 5 minutes, then unmold, remove paper liners, and cool completely right side up.
To Make the Frosting:
-
Beat vegetable shortening, clear vanilla, and lemon extract until creamy (1-2 minutes on medium speed). Gradually add 2 cups of sifted powdered sugar, then 2 tablespoons of milk. Add 2 more cups of powdered sugar, then the remaining milk, and any additional powdered sugar needed to reach desired consistency.
-
Separate 1/3 of the frosting into a different bowl and tint it with a small amount of yellow paste food coloring. Use this yellow frosting between the cake layers. Frost the sides and top of the cake with the remaining white frosting.
-
To garnish, mix shredded coconut with one drop of green food coloring to create “grass.” Place the tinted coconut on top of the cake and add a few colorful jelly beans. Decorate the outside bottom edge of the cake with more jelly beans.
Nutrition
The recipes on this blog are tested with a conventional gas oven and gas stovetop. It’s important to note that some ovens, especially as they age, can cook and bake inconsistently. Using an inexpensive oven thermometer can assure you that your oven is truly heating to the proper temperature. If you use a toaster oven or countertop oven, please keep in mind that they may not distribute heat the same as a conventional full sized oven and you may need to adjust your cooking/baking times. In the case of recipes made with a pressure cooker, air fryer, slow cooker, or other appliance, a link to the appliances we use is listed within each respective recipe. For baking recipes where measurements are given by weight, please note that results may not be the same if cups are used instead, and we can’t guarantee success with that method.
This post was originally published on March 23, 2010, and has been updated with enhanced content and photography.
