Mastering the Reverse Sear Ribeye: Achieve Steakhouse Perfection at Home
Prepare to transform your home cooking with the ultimate guide to reverse sear ribeye. This method consistently delivers an ultra-juicy, tender steak with an irresistibly perfect, deep golden crust that melts in your mouth. Say goodbye to unevenly cooked or dry steaks, as the reverse sear technique is a virtually foolproof way to achieve steakhouse-quality results every single time. It’s an easy yet sophisticated approach that guarantees deliciousness without fail, making you a confident steak chef in your own kitchen.
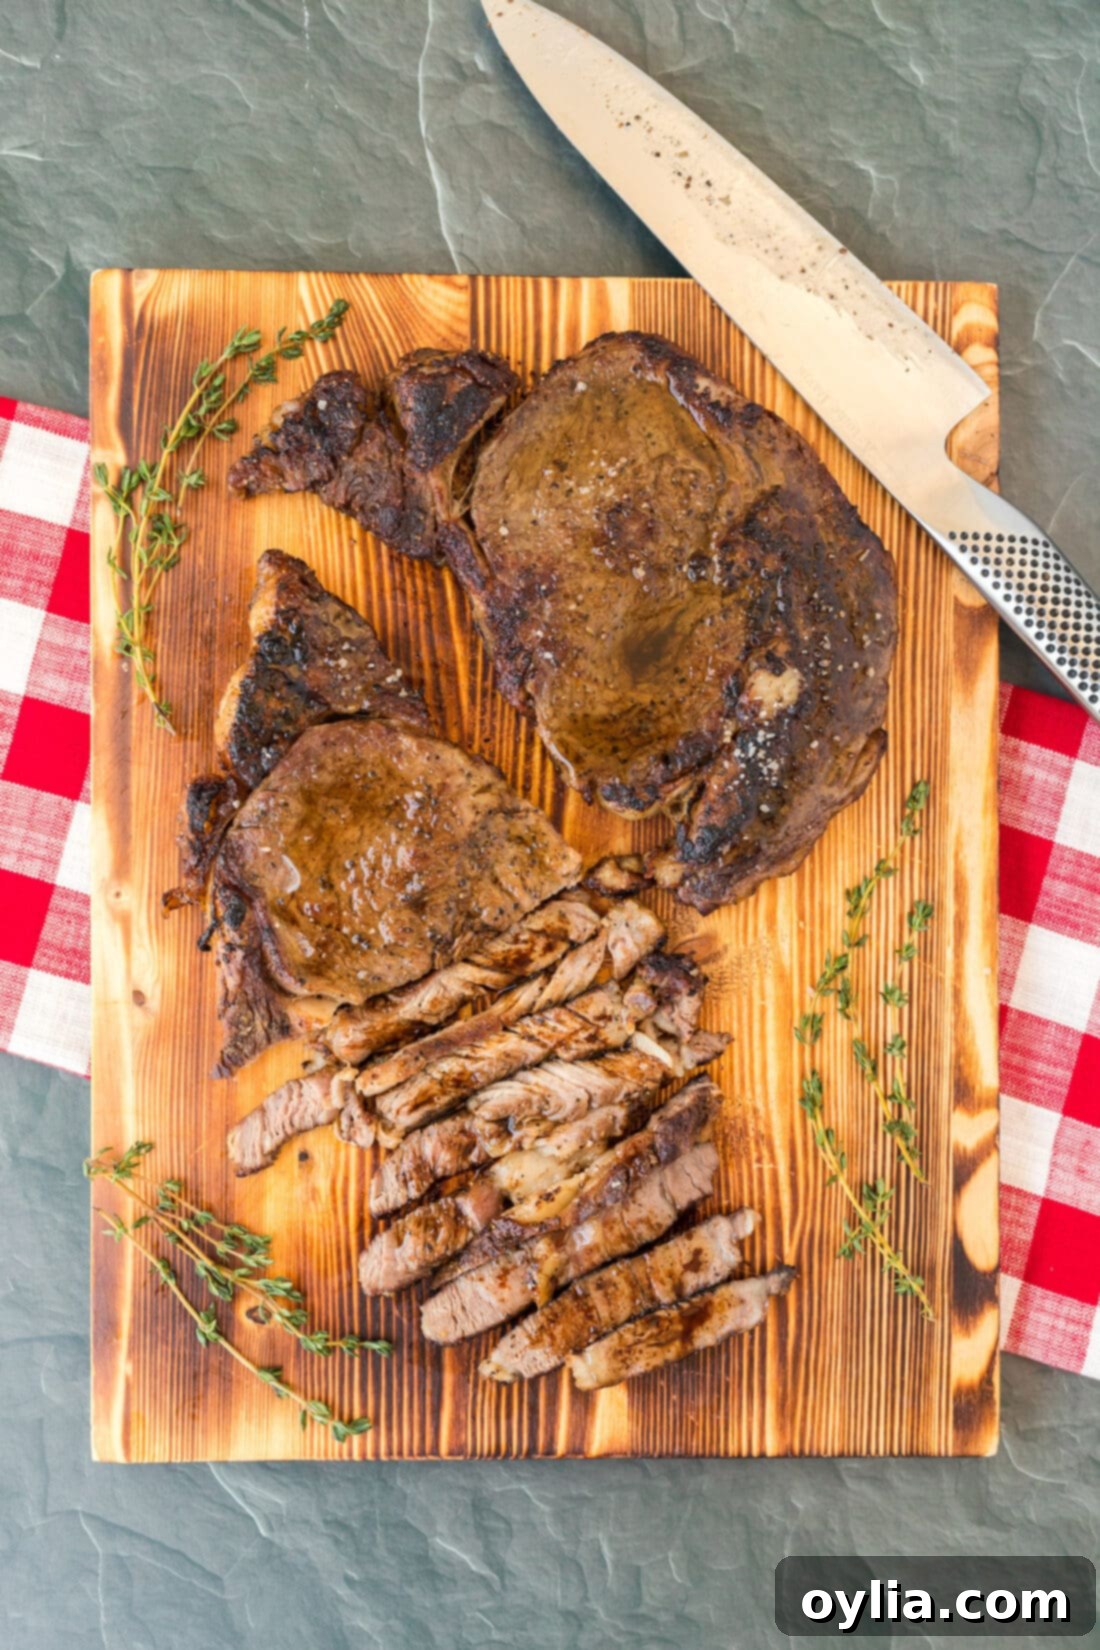
Why the Reverse Sear Method is a Game Changer for Ribeye Steak
You might be familiar with traditional steak cooking methods, perhaps even our smoked ribeye steak recipe where we sear last. However, the reverse sear ribeye method takes your steak game to an entirely new level of culinary excellence. It’s time to properly introduce this fool-proof, step-by-step tutorial designed to help you conquer the art of cooking perfectly tender and incredibly flavorful steak with ease.
If you’ve never experienced the magic of reverse searing a ribeye, you are truly in for a revelation. This technique ensures a uniformly cooked interior from edge to edge, something often difficult to achieve with conventional high-heat searing. The method itself is quite descriptive: instead of searing first, then cooking, you reverse the order. You begin by slow-baking the steak at a lower temperature in the oven, bringing it gradually up to your desired internal temperature. This gentle cooking process ensures even doneness and tenderness throughout the meat, allowing the muscle fibers to relax and retain moisture. Then, once the steak is almost cooked, you transfer it to a screaming hot cast iron skillet to develop that spectacular, crunchy, and flavorful crust that every steak lover craves. It’s a fundamental shift in approach that guarantees superior results, preventing the grey band of overcooked meat often seen in traditionally seared steaks.
The Science Behind the Perfect Steak
The beauty of the reverse sear lies in its scientific precision and careful temperature management. By slowly bringing the ribeye up to temperature in the oven, you allow the enzymes within the meat to tenderize it further, and the low heat prevents the muscle fibers from seizing up, which often leads to tough steak. This initial low-temperature cook also works to slowly dry the surface of the steak, which is absolutely crucial for achieving a superior, evenly browned crust when it finally hits the hot skillet. A dry surface means better contact with the heat and more efficient browning through the Maillard reaction – that chemical process responsible for the rich, complex flavors and beautiful color on seared foods. When you finally sear the steak at high heat, the interior is already at or very near its target temperature, so you only need a short burst of intense heat to create that coveted crust without overcooking the inside. This two-stage cooking ensures maximum juiciness and an unbeatable texture.
Selecting the Perfect Ribeye Steak for Reverse Searing
The foundation of any great steak meal starts with choosing the right cut. For the reverse sear method, a high-quality ribeye is paramount to achieving the best results. Look for steaks that possess the following characteristics:
- Thickness: Ideally, your ribeye steaks should be 1.5 to 2 inches thick. Thinner steaks cook too quickly in the oven, making it harder to develop that even internal temperature before searing. Thicker steaks benefit most from the gentle, even cooking of the reverse sear, allowing for a beautiful gradient of doneness from edge to center.
- Marbling: Ribeye is renowned for its beautiful marbling – the intramuscular fat that appears as white flecks and streaks throughout the meat. This marbling is key to the steak’s flavor, moisture, and juiciness as it renders during cooking. Choose steaks with abundant, evenly distributed marbling for maximum tenderness and taste.
- Weight: For optimal thickness and cooking consistency, aim for individual steaks weighing approximately 1 pound each. This weight typically correlates with the ideal thickness for reverse searing.
- Grade: If possible, opt for USDA Prime or Choice grade beef. These grades indicate higher levels of marbling and overall quality, translating to a more tender and flavorful finished product. Select the best quality you can find within your budget.
- Appearance: Look for a vibrant red color, which indicates freshness. Avoid steaks with any grey or brown discoloration.
Bringing your steaks to room temperature before cooking is another critical step. Remove them from the refrigerator about 30-60 minutes before you plan to season and cook. This helps the steak cook more evenly from edge to center, preventing a cold core.
Essential Ingredients for Your Flavorful Ribeye
While the full recipe with precise measurements is available in the printable version at the end of this post, let’s dive into the essential components for a truly mouth-watering reverse sear ribeye. The beauty of this recipe is its simplicity, allowing the natural flavors of the beef to shine through, enhanced by a perfectly balanced rub. You’ll find these common ingredients readily available at any grocery store, ensuring this gourmet experience is accessible to everyone.
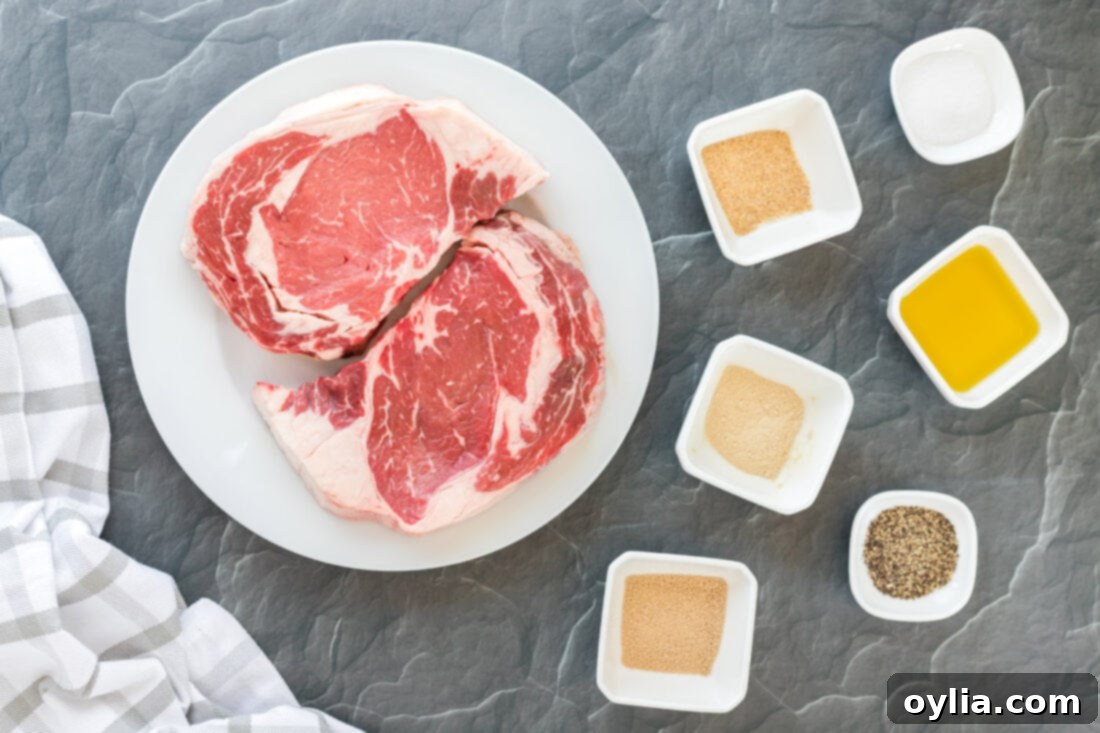
Ingredient Information and Seasoning Suggestions for the Best Crust
The right blend of seasonings is key to enhancing the ribeye’s natural richness without overpowering it. Here’s what you’ll need for our signature rub and some expert tips for an even better steak:
- Ribeye Steak: As previously discussed, aim for two steaks, totaling around 2 pounds, each 1 1/2 to 2 inches thick. This thickness is ideal for achieving a glorious medium doneness with our suggested cooking times. For different preferences, adjustments can be made:
- For rare, aim for a final internal temperature of 125-130°F. Remove from the oven at 120-125°F.
- For medium-rare, aim for a final internal temperature of 130-135°F. Remove from the oven at 125-130°F.
- For well-done, aim for a final internal temperature of 150-155°F. You might increase oven time by about 10 minutes and sear slightly longer, but always use a meat thermometer as your guide to prevent overcooking.
Remember to allow your steaks to come to room temperature for at least 30-60 minutes before applying the rub and cooking. This crucial step ensures a more even cook from edge to center.
- Olive Oil: A small amount of olive oil acts as a binder for the spices, helping them adhere uniformly to the steak. It also contributes to the initial browning in the oven and assists in developing a beautiful crust during the sear.
- Brown Sugar: This might seem like an unusual addition for steak, but a touch of brown sugar in the rub is a secret weapon. It aids significantly in the caramelization process during searing, contributing to that desirable, dark, and deeply flavorful crust (the Maillard reaction). It also adds a subtle sweetness that perfectly balances the savory notes of the rich beef, creating a more complex flavor profile.
- Onion Powder & Granulated Garlic: These aromatic powders provide a foundational savory flavor that complements the beef perfectly. They offer a concentrated taste without the moisture of fresh aromatics, and they distribute more evenly than fresh garlic or onion, preventing any burning during the high-heat sear.
- Salt & Black Pepper: These are the cornerstones of any good steak seasoning. Use good quality coarse salt, such as kosher salt or sea salt, for better flavor penetration and texture. Freshly ground black pepper adds a pungent kick and a fresh aroma. For an even more intense flavor and juicier result, consider a technique called “dry brining” by salting the steak generously (about 1 teaspoon per pound) and letting it sit uncovered on a wire rack in the refrigerator for 12-24 hours prior to cooking. This draws moisture out, then reabsorbs it, leading to a much juicier steak and an even better, crispier crust.
Feel free to experiment with other seasonings if you wish! A pinch of smoked paprika can add depth, a touch of cayenne for a subtle heat, or even a classic steak seasoning blend if you have a cherished favorite. However, the provided blend is expertly designed to highlight the ribeye’s inherent qualities and create a universally appealing flavor.
How to Make the Perfect Reverse Sear Ribeye: A Step-by-Step Guide
These detailed step-by-step photos and instructions are designed to help you visualize each stage of this recipe, ensuring your success in achieving a restaurant-quality steak at home. For a convenient printable version of this recipe, complete with precise measurements and comprehensive instructions, simply Jump to Recipe at the bottom of this post.
- Prepare Your Oven and Equipment: Begin by preheating your oven to 400°F (200°C). While some reverse sear methods use lower temperatures, this slightly higher heat helps to gently bring the internal temperature of the steak up efficiently before the sear. Place a wire rack over a sturdy baking sheet. This setup is crucial as it allows air to circulate evenly around the entire steak, promoting consistent cooking and helping to dry the surface, which is vital for developing that perfect, crispy crust later.
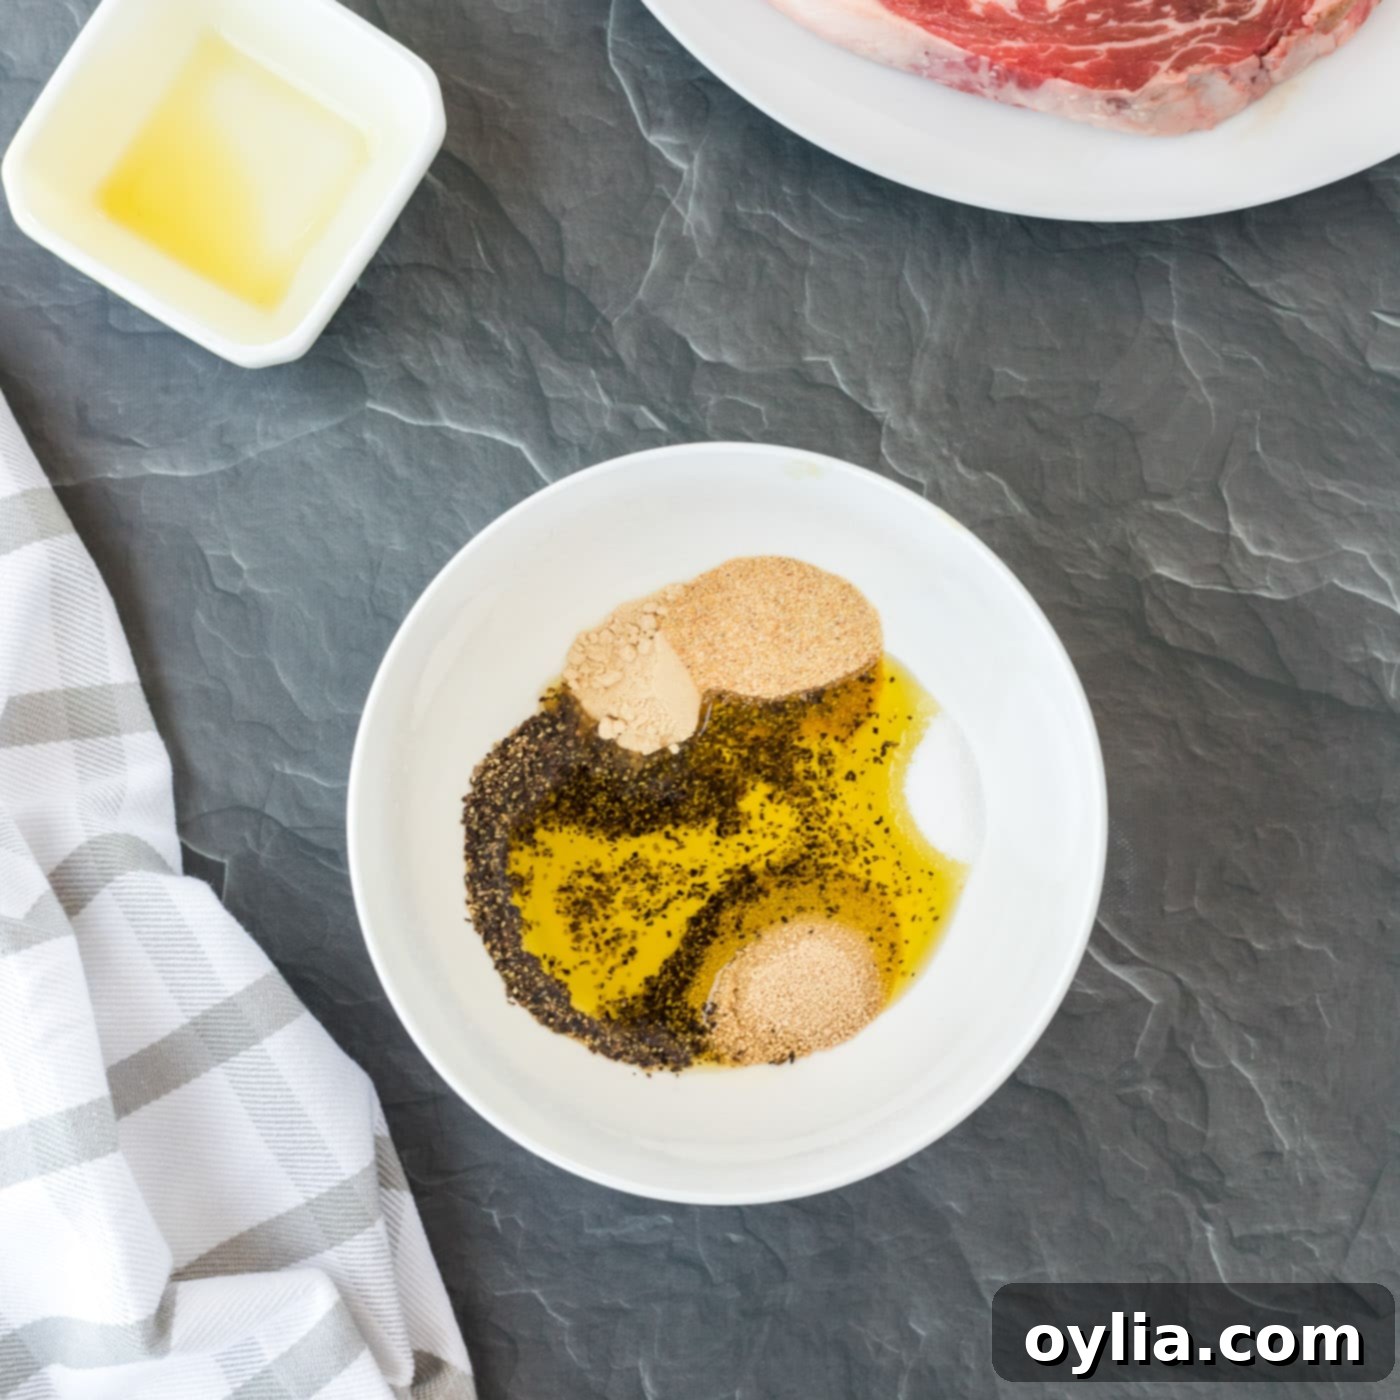
- Craft Your Flavorful Rub: In a small, clean bowl, combine the olive oil, granulated brown sugar, onion powder, granulated garlic, salt, and black pepper. Stir these ingredients thoroughly until they are well combined, forming a thick, fragrant paste. This ensures that every bite of your ribeye will be packed with a balanced burst of flavor.
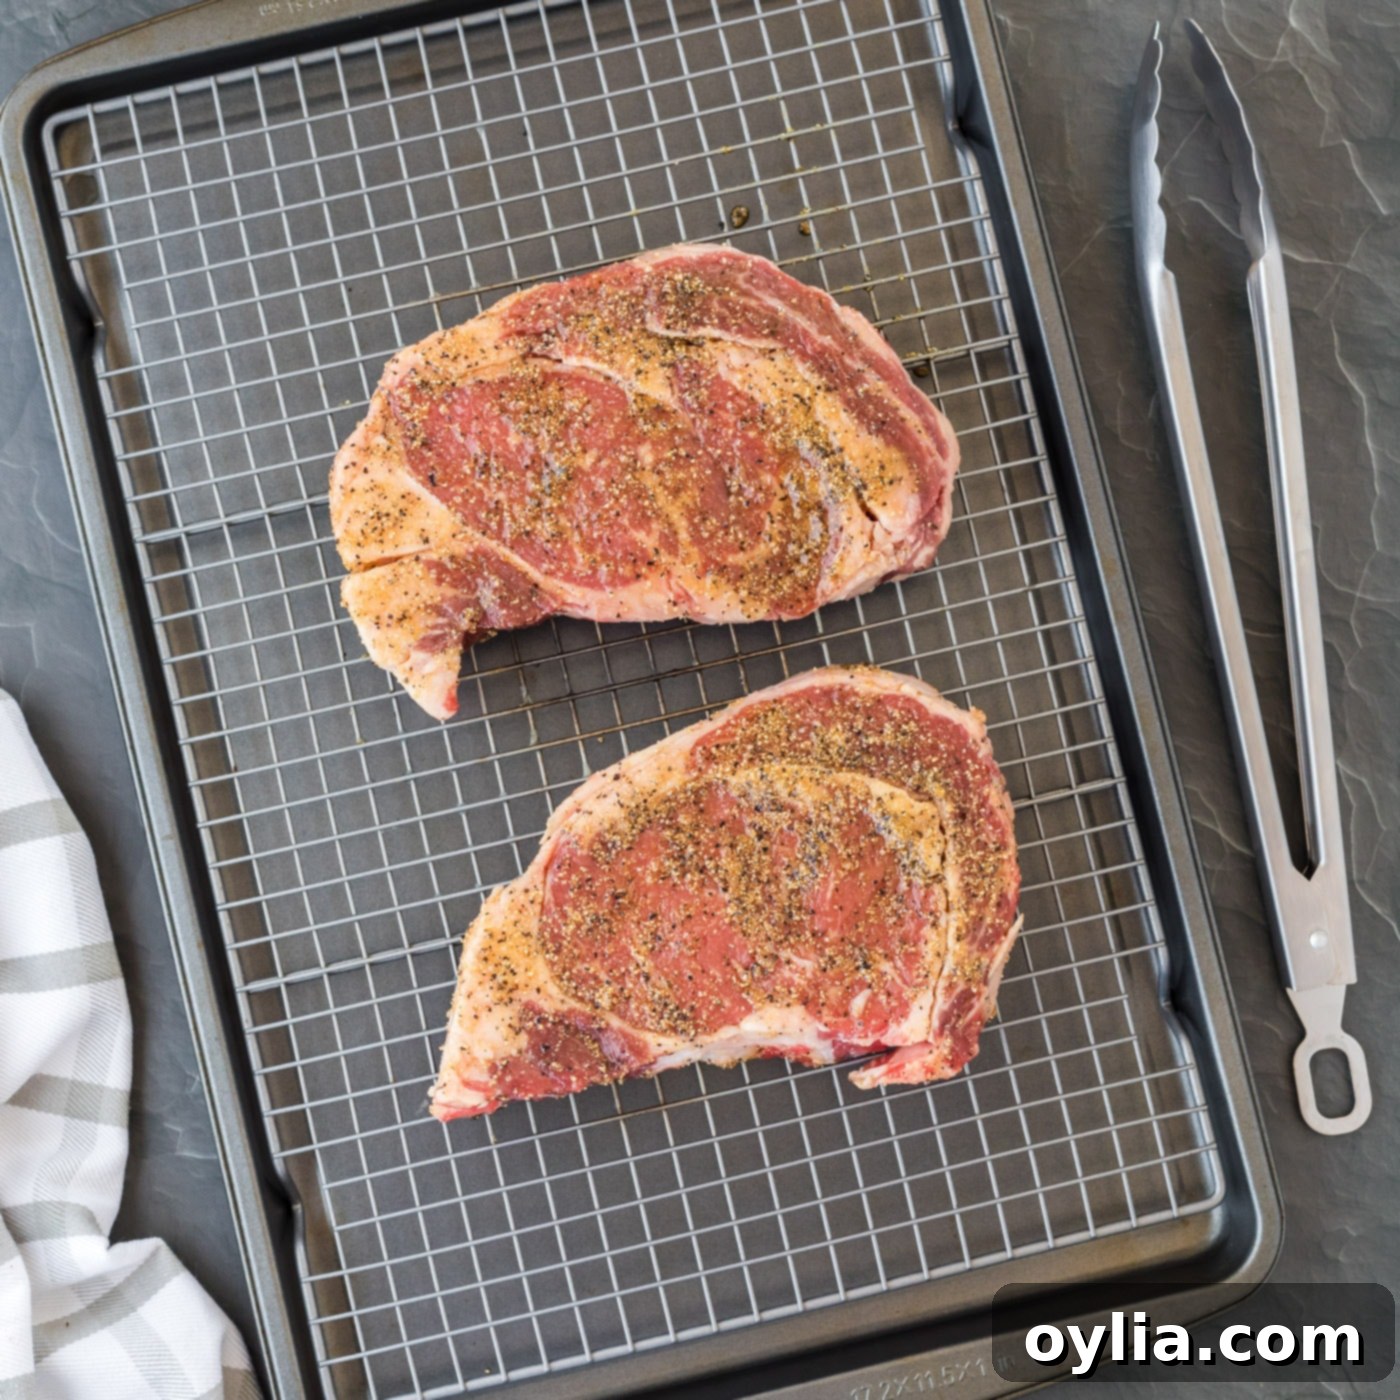
- Season the Steak Generously: Don your kitchen gloves (or ensure your hands are thoroughly clean) and pick up the prepared rub. Generously apply the entire oil and spice mixture all over both sides and the edges of each ribeye steak. Ensure an even coating, pressing the rub firmly onto the meat so it adheres well. This is where all the wonderful flavor infusion begins, laying the foundation for an incredibly tasty steak.

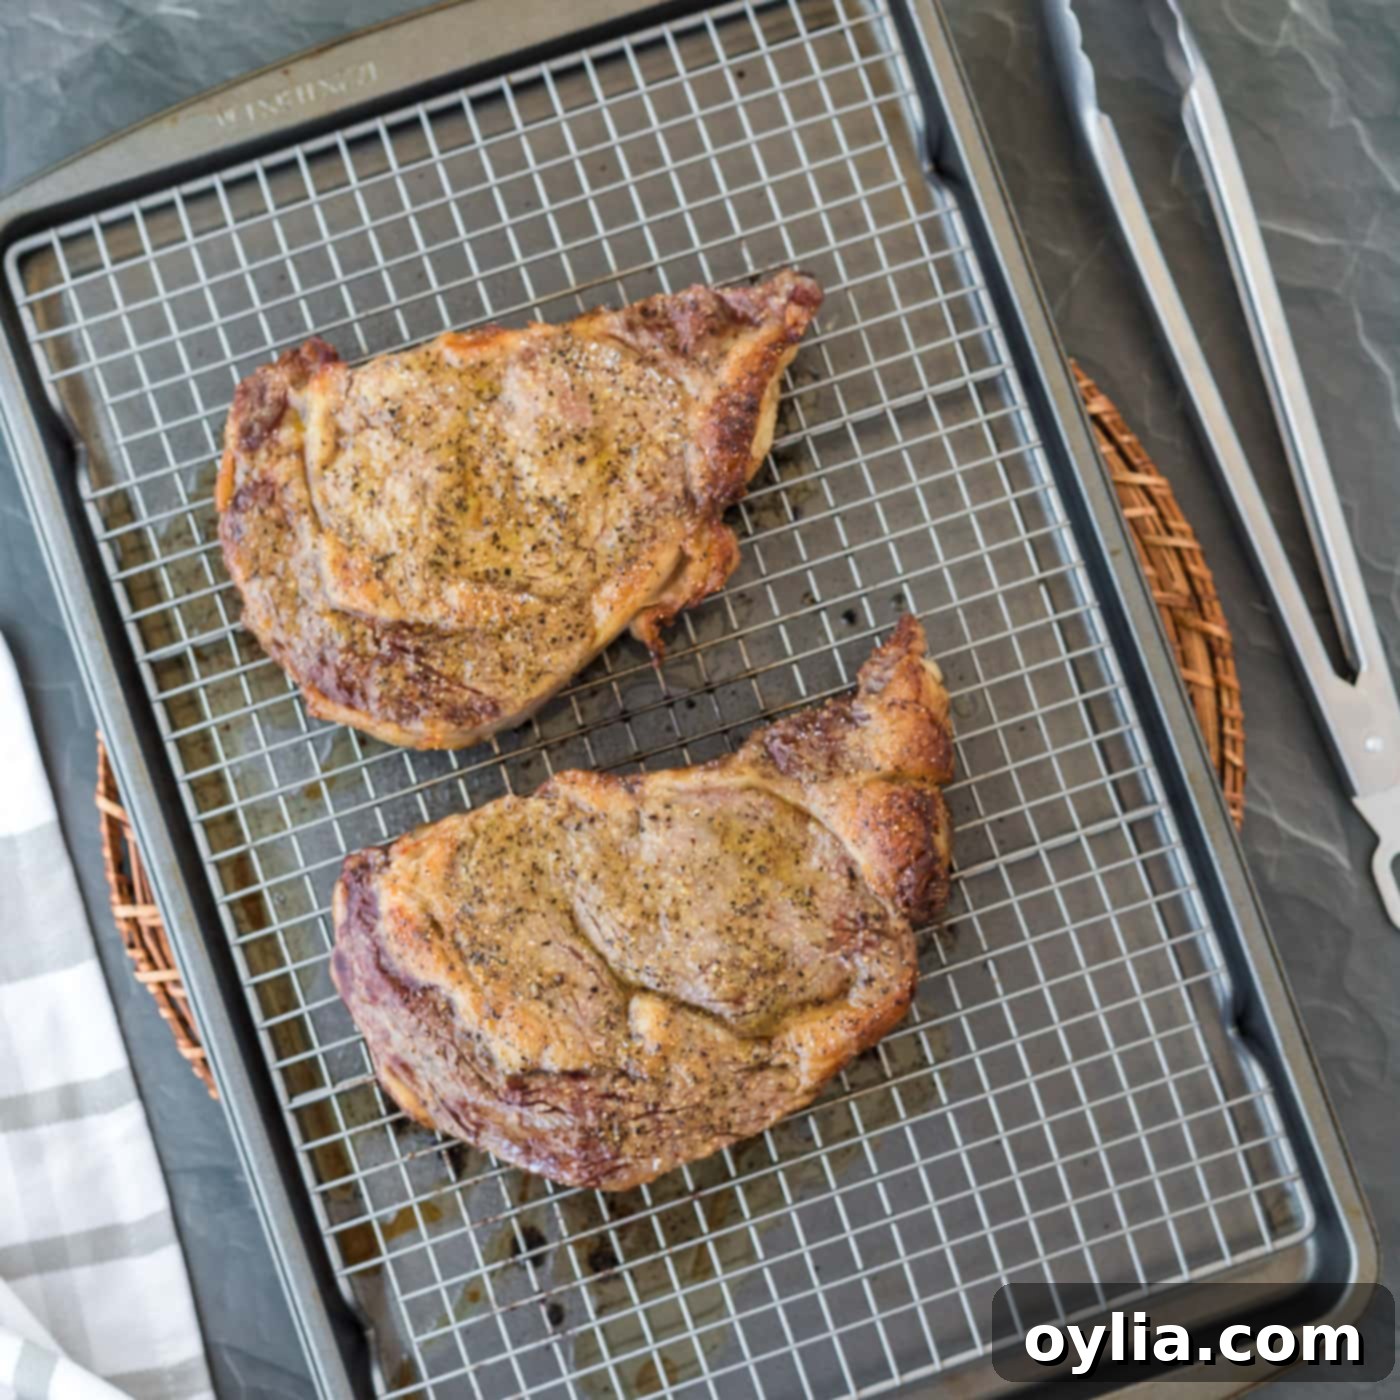
- Initial Oven Bake: Carefully place the generously seasoned ribeye steaks on the prepared wire rack over the baking sheet. Transfer the entire baking sheet to the preheated oven. Bake for approximately 15-20 minutes. The exact time will vary based on the thickness of your steaks and your desired final doneness. For an accurate reading, which is paramount for reverse searing, use an instant-read meat thermometer. You’ll want to remove the steaks from the oven when their internal temperature reaches about 10-15°F below your final target (e.g., for medium-rare at 130-135°F, remove from the oven when it reaches 120-125°F). This pre-sear baking ensures uniform internal cooking.


- Prepare for the Sear: Approximately 3-4 minutes before the oven time is complete, begin preheating your cast iron skillet. Place it over high heat on your stovetop. Importantly, do not add any oil or butter at this stage; a dry, screaming hot pan is essential for the initial sear, ensuring the Maillard reaction can occur quickly and effectively without steaming the steak.
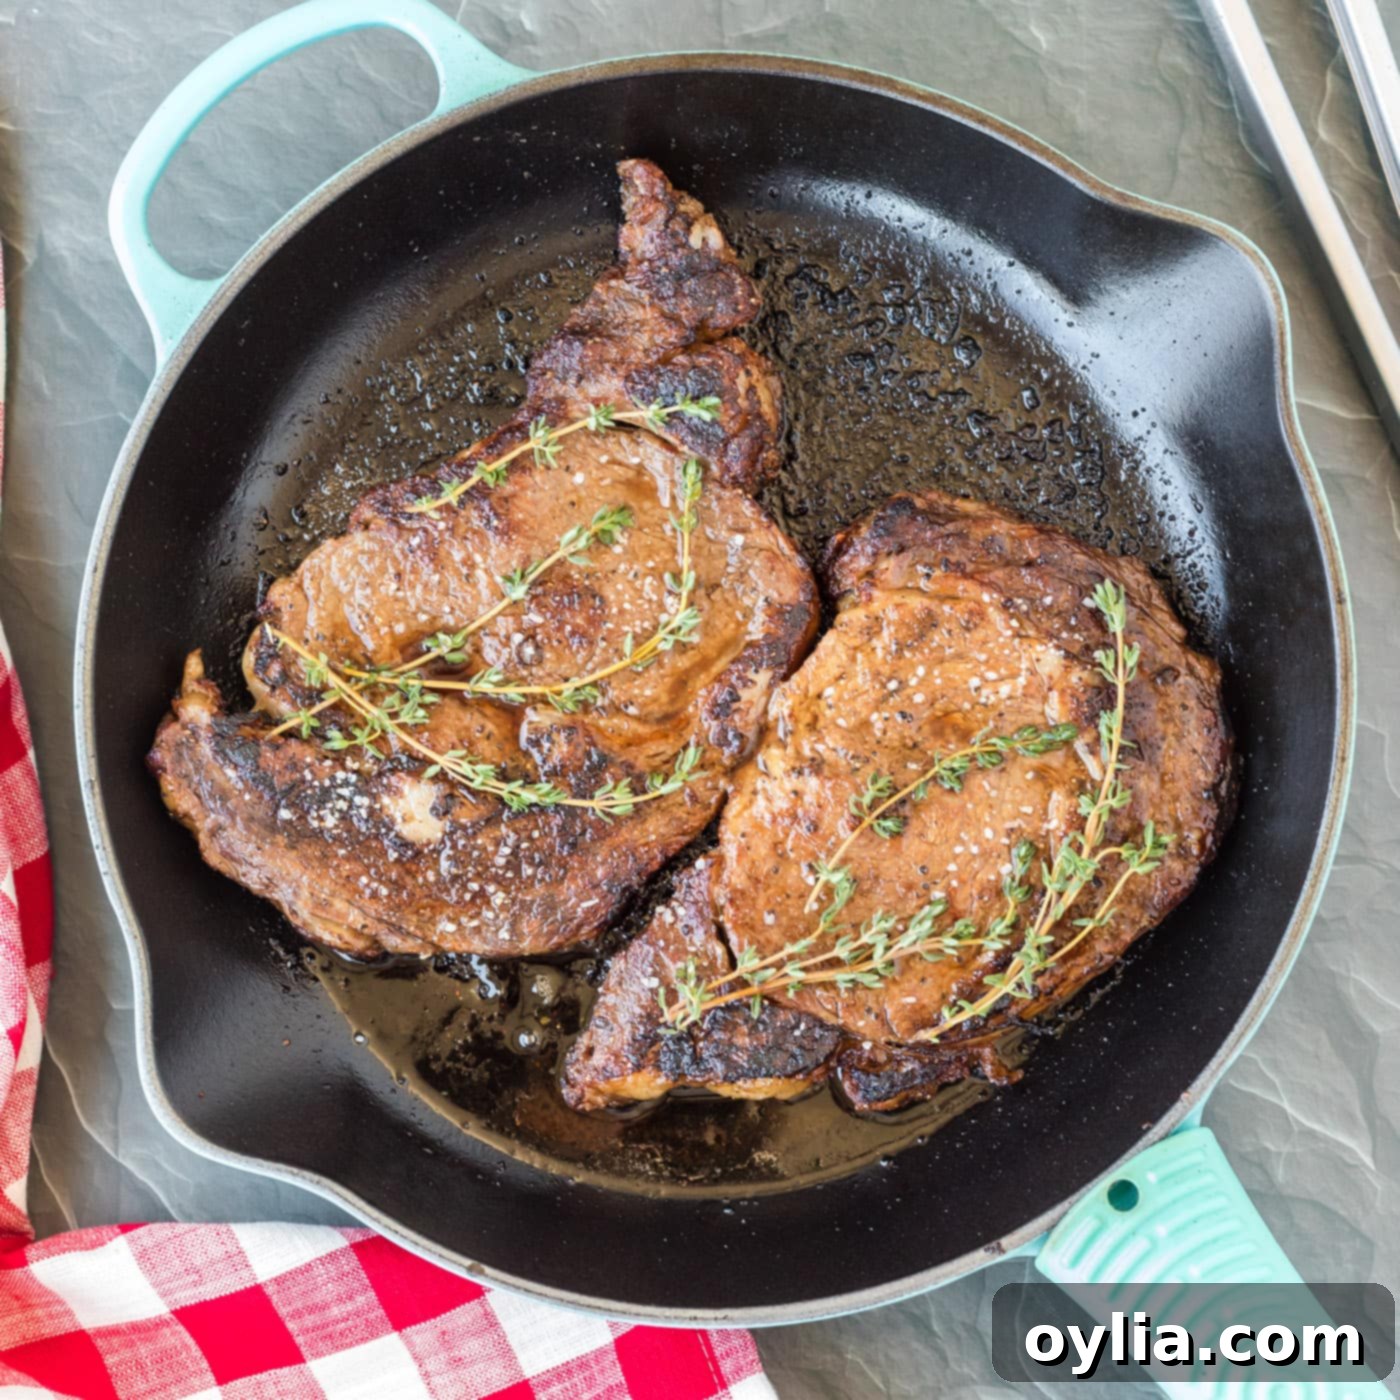
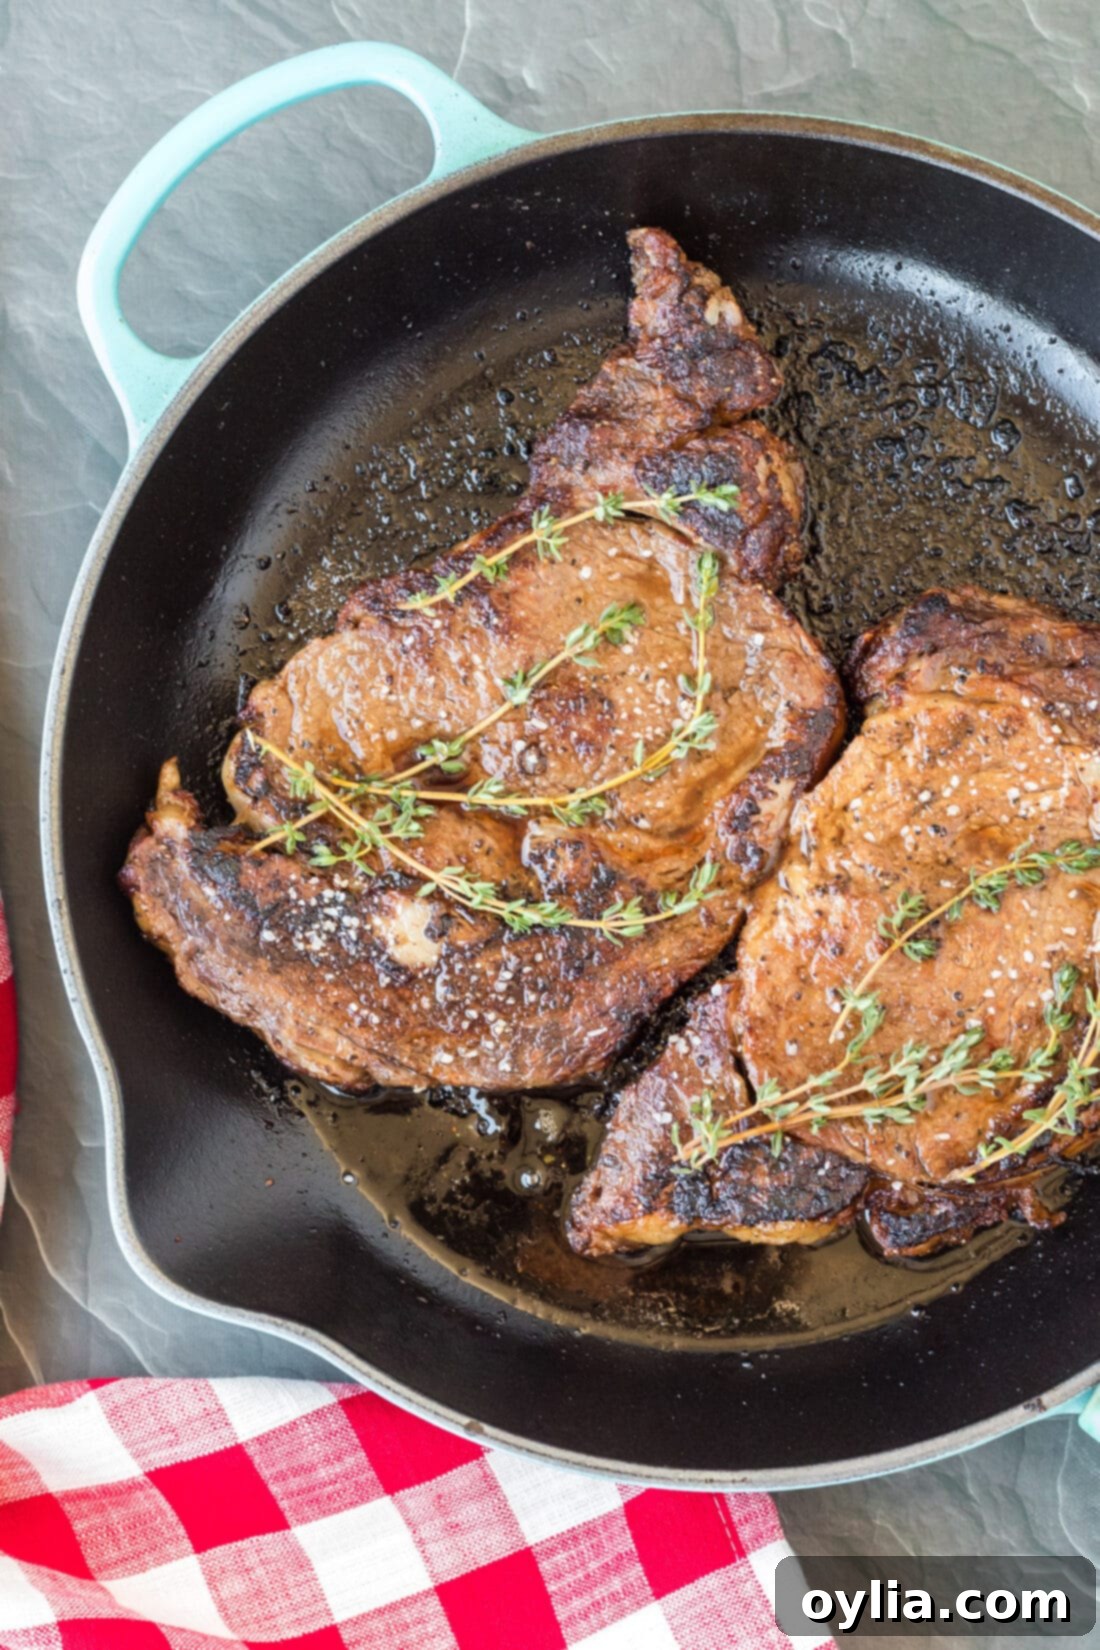
- The High-Heat Sear: Once the steaks are out of the oven and your skillet is smoking hot (you should see wisps of smoke and feel intense heat rising from the pan), immediately transfer the steaks to the hot skillet using tongs. Sear for 2-4 minutes on each side. The goal here is to develop a deep, dark, and crunchy crust that locks in juices and adds incredible flavor. For added richness and aromatic depth, during the last minute of searing, you can add a tablespoon of butter, a sprig of fresh rosemary or thyme, and a smashed garlic clove to the pan. Tilt the pan slightly and baste the steak repeatedly with the melted, fragrant butter for an extraordinary finish.
- Rest for Juiciness: Remove the perfectly seared steaks from the skillet and place them on a clean cutting board. This next step is perhaps the most crucial for a truly juicy steak: allow them to rest undisturbed for a minimum of 5-10 minutes. This resting period allows the muscle fibers, which have contracted and pushed juices to the center during cooking, to relax. This relaxation enables the juices to redistribute evenly throughout the entire cut. If you slice too early, all that precious, flavorful juice will simply run out onto your board, leaving you with a drier, less satisfying steak. Do NOT cover the steak with foil during this rest, as this will trap heat and continue to cook the steak, potentially overshooting your desired doneness and softening that beautiful crust you just worked so hard to achieve.
Frequently Asked Questions & Expert Tips for Reverse Sear Ribeye
The primary benefits include a perfectly even doneness from edge to edge (eliminating the dreaded grey band!), a superior, crispy, and deeply flavored crust due to the dried surface and precise high-heat sear, and a more tender steak as the low-temperature oven cooking allows enzymes to work effectively and muscle fibers to relax. It also offers much more control over the internal temperature, making it harder to overcook the interior, especially for thicker cuts like ribeye.
Using an instant-read thermometer inserted into the thickest part of the beef (avoiding bone or large fat pockets) is absolutely essential for accurate temperatures. Remember that the steak’s temperature will rise by 5-10°F during resting (known as carryover cooking), so you should always pull it from the heat slightly before your target doneness.
- Rare: Remove from heat at 120-125°F (final temperature after rest: 125-130°F)
- Medium-Rare: Remove from heat at 125-130°F (final temperature after rest: 130-135°F)
- Medium: Remove from heat at 135-140°F (final temperature after rest: 140-145°F)
- Medium-Well: Remove from heat at 140-145°F (final temperature after rest: 145-150°F)
- Well-Done: Remove from heat at 145-150°F (final temperature after rest: 150-155°F – note: achieving a truly tender well-done steak with this method can be challenging, as higher internal temperatures tend to dry out the meat.)
Resting the steak is a non-negotiable step for a juicy outcome. During the high-heat searing, the muscle fibers contract and push the juices towards the center of the steak. If you cut into the steak immediately after cooking, these concentrated juices will simply spill out onto the cutting board, resulting in a drier, less flavorful piece of meat. The resting period, typically 5-10 minutes for a ribeye, allows these muscle fibers to relax. This relaxation enables the juices to redistribute evenly throughout the entire cut of meat, ensuring every bite is succulent and tender. Do not cover the steak with foil during this rest, as it will trap heat and continue to cook the steak (overcooking it), and it can also soften the crisp crust.
Absolutely! The reverse sear method works wonderfully for other thicker cuts of steak, such as a New York strip, porterhouse, T-bone, or even a thick-cut sirloin. The key is to use a steak at least 1.5 inches thick to allow for sufficient low-temperature cooking before the high-heat sear. This method is less ideal for very thin steaks (under 1 inch), as they cook too quickly in the oven, making it difficult to control the internal temperature accurately. For thinner cuts, traditional searing might be more appropriate.
For the initial searing of the steak after it comes out of the oven, it’s best to use a high smoke point oil like olive oil (which is already incorporated into our rub) or avocado oil. Because butter burns quickly at high temperatures, using it too early can impart a bitter, burnt flavor to your crust. However, adding butter, fresh garlic cloves, and herbs (like rosemary or thyme) during the last minute of searing for basting is an excellent technique. This allows the butter to infuse flavor and create a beautiful sheen without burning, as it’s only exposed to the high heat for a short duration.
Beyond your oven and stovetop, the most critical tools are a cast iron skillet (or other heavy-bottomed, oven-safe pan that retains heat well for searing), a wire rack placed over a baking sheet for even air circulation in the oven, and most importantly, an instant-read meat thermometer. The thermometer is your guide to precision cooking and is crucial for hitting your desired doneness perfectly.
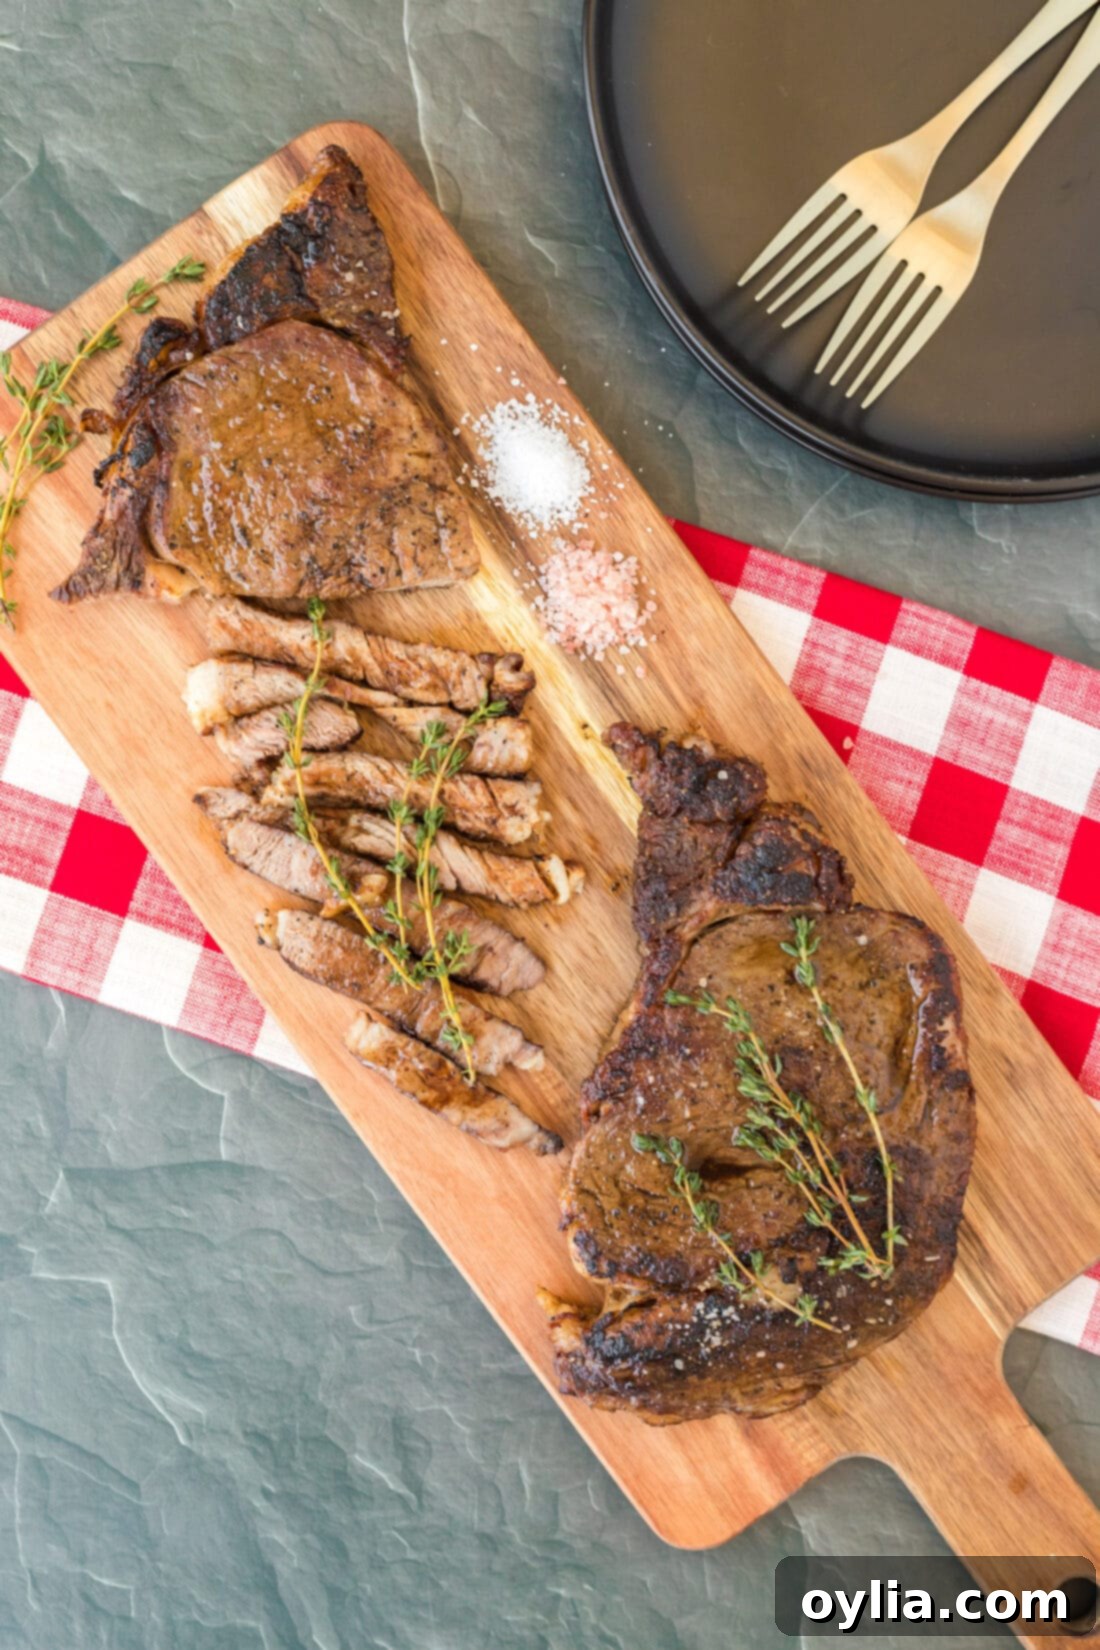
Serving Suggestions for Your Gourmet Ribeye
A perfectly cooked reverse sear ribeye deserves equally delicious and thoughtful accompaniments. Here are some ideas to complete your gourmet meal, turning it into a truly memorable dining experience:
- Potatoes: Potatoes are a classic pairing for steak and offer endless possibilities. Consider creamy crockpot mashed potatoes infused with garlic and herbs, crispy roasted potatoes seasoned with rosemary, or a decadent potato gratin layered with cheese and cream. For something a little lighter yet equally satisfying, a perfectly baked sweet potato can provide a lovely contrast.
- Vegetables: Complement the richness of the ribeye with vibrant, fresh, and often slightly acidic or bitter vegetables. Roasted asparagus with a squeeze of fresh lemon, tender garlicky green beans, classic creamed spinach, or sweet corn on the cob are all excellent choices. A medley of seasonal roasted root vegetables like carrots, parsnips, and Brussels sprouts can also add wonderful earthy flavors and textures.
- Salad: A crisp side salad with a tangy vinaigrette can provide a refreshing contrast to the hearty steak. Think a simple green salad with fresh spring mix, cherry tomatoes, crisp cucumber, and a light lemon-herb dressing. This helps cut through the richness of the meat.
- Sauces: While a perfectly cooked ribeye often needs no embellishment, a complementary topping can elevate the experience to new heights. Consider a classic Béarnaise sauce, a rich red wine reduction (which you can make using the fond from your searing pan!), a vibrant and herbaceous chimichurri, or a simple compound butter (like garlic-herb butter or truffle butter) melting luxuriously over the hot, sliced steak.
- Wine Pairing: Ribeye, with its rich marbling and robust, savory flavor, pairs beautifully with full-bodied red wines. Cabernet Sauvignon, Merlot, Syrah/Shiraz, or a Zinfandel would all make excellent choices, as their tannins and fruit notes complement the beef without being overpowered.
With these thoughtful pairings, your reverse sear ribeye meal will be an unforgettable dining experience, perfect for a special occasion or simply a treat for yourself and your loved ones. Enjoy every tender, flavorful bite!
Explore More Delicious Beef Recipes
If you’ve enjoyed mastering this reverse sear ribeye recipe and are looking to expand your repertoire of delectable beef dishes, you’ve come to the right place. Our collection features a variety of comforting and impressive beef recipes that are sure to become family favorites. Dive into these mouth-watering options and discover your next culinary adventure:
- Hearty Salisbury Steaks
- Fall-Off-The-Bone Oven Beef Ribs
- Classic Oven Swiss Steak
- Comforting Crockpot Beef Burgundy
- Quick & Easy Ground Beef Stroganoff
- Elegant Veal Chops
I love to bake and cook and share my kitchen experience with all of you! Remembering to come back each day can be tough, that’s why I offer a convenient newsletter every time a new recipe posts. Simply subscribe and start receiving your free daily recipes!

Reverse Sear Ribeye: Steakhouse Quality at Home
IMPORTANT – There are often Frequently Asked Questions within the blog post that you may find helpful. Simply scroll back up to read them!
Print It
Pin It
Rate It
Save ItSaved!
Ingredients
- 2 ribeye steaks 2 pounds, around 1 1/2 – 2 inches thick
- 1 ½ Tablespoons olive oil
- 1 Tablespoon granulated brown sugar
- 1 Tablespoons onion powder
- 1 Tablespoon granulated garlic
- 2 teaspoons salt
- 2 teaspoons black pepper
Things You’ll Need
-
Cast iron skillet
-
Wire cooling racks
-
Baking sheets
-
Tongs
-
Instant-read thermometer
Before You Begin
- Look for 2 pounds of ribeye steak, about 1 pound each steak. They should be 1 1/2 – 2 inches thick for the best results. Depending on the thickness of your steak and the doneness you prefer, you can adjust the oven time. Our instructions will result in medium doneness, but use an instant-read thermometer for precision.
- For optimal flavor and tenderness, allow the steaks to come to room temperature for 30-60 minutes before applying the rub.
- Consider dry brining: generously salt the steaks (about 1 tsp per pound) and leave uncovered in the fridge for 12-24 hours. Pat dry thoroughly before applying the rub for an even better crust.
Instructions
-
Preheat oven to 400°F (200°C). Place a wire rack over a sturdy baking sheet to allow for even air circulation around the steaks.
-
In a small bowl, mix together the olive oil, granulated brown sugar, onion powder, granulated garlic, salt, and black pepper until well combined into a paste.
-
Using gloved hands, generously rub the oil and spice mixture all over both sides and the edges of each ribeye steak, ensuring an even coating.
-
Place the prepared steaks on the wire rack over the baking sheet.
-
Bake in the preheated oven for 15-20 minutes, or until the internal temperature reaches about 10-15°F below your desired final doneness (e.g., 125°F for a final medium-rare of 135°F). Use an instant-read thermometer for accuracy.
-
Approximately 3-4 minutes before the oven timer is complete, place your cast iron skillet (dry, without oil or butter) over high heat on the stovetop and preheat until it’s smoking hot.
-
Carefully remove the steaks from the oven and immediately transfer them to the screaming hot skillet. Sear for 2-4 minutes on each side to develop a deep, crispy crust. For extra richness, add a tablespoon of butter, fresh rosemary/thyme, and a smashed garlic clove during the last minute of searing, basting the steak continuously.
-
Remove the seared steaks to a clean cutting board and allow them to rest for a minimum of 5-10 minutes. Do NOT cover with foil, as this will continue to cook the steak and prevent the redistribution of juices, leading to a less tender result.
Nutrition
The recipes on this blog are tested with a conventional gas oven and gas stovetop. It’s important to note that some ovens, especially as they age, can cook and bake inconsistently. Using an inexpensive oven thermometer can assure you that your oven is truly heating to the proper temperature. If you use a toaster oven or countertop oven, please keep in mind that they may not distribute heat the same as a conventional full sized oven and you may need to adjust your cooking/baking times. In the case of recipes made with a pressure cooker, air fryer, slow cooker, or other appliance, a link to the appliances we use is listed within each respective recipe. For baking recipes where measurements are given by weight, please note that results may not be the same if cups are used instead, and we can’t guarantee success with that method.
