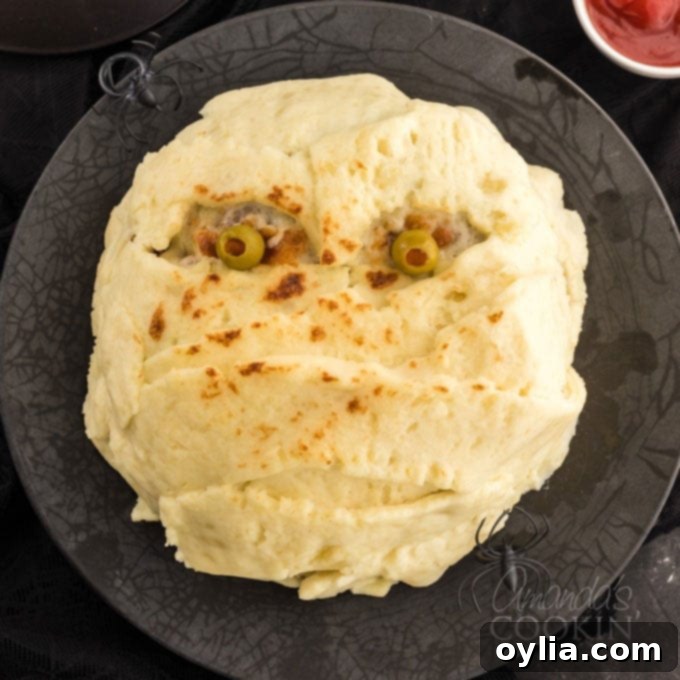
Spooky & Delicious: The Ultimate Mummy Meatloaf Recipe for Halloween Dinner
Halloween is a time for costumes, candy, and all things spooky, but it’s also the perfect opportunity to get creative in the kitchen! This Mummy Meatloaf isn’t just a meal; it’s a centerpiece of festive fun, designed to bring smiles to faces and make dinnertime an unforgettable part of your Halloween celebration. Say goodbye to plain, boring weeknight meals and hello to a ghoulishly good dish that kids will devour and adults will adore. It’s a wonderfully inventive way to serve up a comforting classic with a thrilling, seasonal twist.
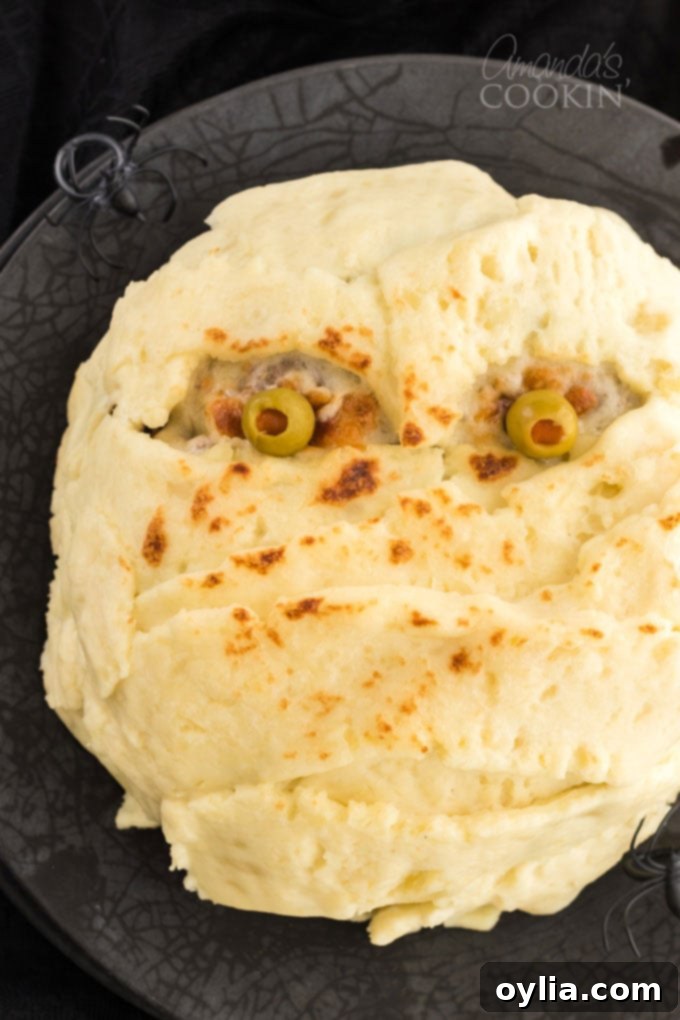
Why You’ll Love This Spooky Meatloaf
Traditionally, Halloween often revolves around trick-or-treating and sweet treats, with dinner sometimes taking a back seat. But why should the spooky fun stop at dessert? This Mummy Meatloaf transforms a classic comfort food into a thrilling experience for your taste buds and your eyes. It’s more than just a meal; it’s a conversation starter, a giggle-inducer, and a potential new family tradition waiting to happen!
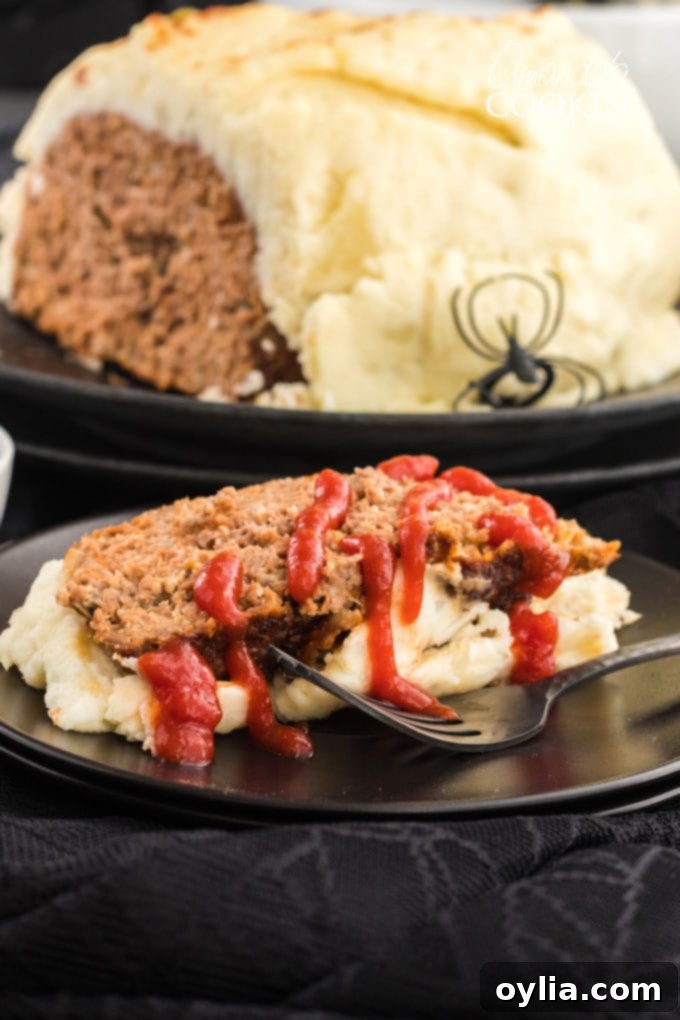
Imagine the delight on your children’s faces as they sit down to a dinner that looks like it stepped right out of a haunted tomb. This recipe effortlessly combines the hearty goodness of a classic meatloaf with the festive charm of Halloween. Its unique presentation, with savory meatloaf peeking through creamy mashed potato “bandages” and eerie olive eyes, ensures it will be the talk of your holiday table. Whether you’re planning a quiet family dinner before heading out for candy or hosting a lively Halloween party for adult friends, this dish is versatile enough to impress everyone.
For years, I’ve enjoyed crafting fun and sometimes delightfully gross Halloween party food. I still fondly recall making Kitty Litter Cake for my daughter’s 5th-grade party over a decade ago! That same spirit of playful culinary creation inspired this mummy meatloaf. It’s a fantastic way to infuse more holiday cheer into your dinnertime routine, proving that Halloween festivities can extend beyond sugary snacks. This dish isn’t just about eating; it’s about making memories and celebrating the season in a truly special way. It brings a touch of magic and mischief to your dinner table, making it an ideal choice for a memorable October evening.
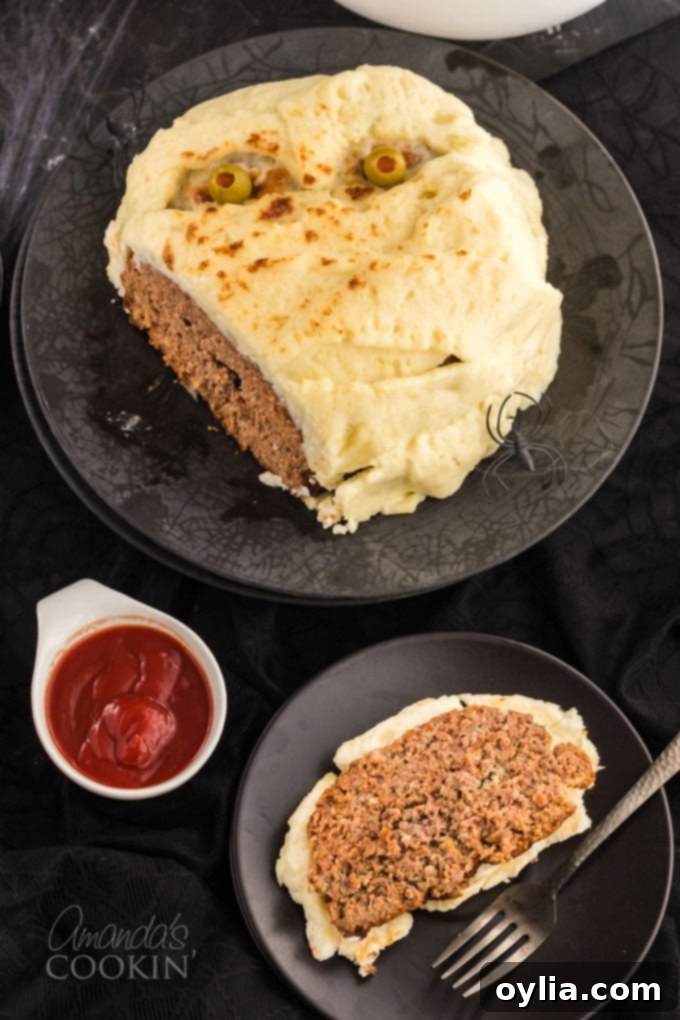
How to Create Your Mummy Meatloaf: A Step-by-Step Guide
Creating this eye-catching Mummy Meatloaf is simpler than you might think! This recipe combines a flavorful, moist meatloaf with creamy, dreamy mashed potatoes to form the signature “bandages.” Follow these straightforward steps to bring your spooky culinary masterpiece to life. You’ll find a complete, printable recipe card with exact measurements and detailed instructions at the end of this post, but these sections break down the process into easy-to-manage stages, ensuring you have all the tips and tricks for success.
Preparing the Meatloaf Base
- Begin by preheating your oven to 350 degrees F (175 C). This is a crucial first step, as a properly preheated oven ensures even cooking and helps your meatloaf set correctly from the start.
- For a better binder and texture, process the dry old-fashioned oats in a food processor until they resemble a coarse flour or fine crumbs. This helps the oats integrate seamlessly into the meatloaf mixture without being too chunky, ensuring a smooth texture that still binds everything beautifully.
- In a large mixing bowl, combine the processed oats, lean ground beef, tomato juice, eggs, finely diced onion, salt, and pepper. Use a fork or your hands to mix these ingredients thoroughly but gently. Avoid overmixing, as this can lead to a tough, dense meatloaf. The goal is just to ensure everything is evenly distributed and well incorporated for optimal flavor and texture.
- Firmly press the meatloaf mixture into a 2.5-quart ungreased oven-safe glass bowl. The bowl’s rounded shape will naturally help you achieve the classic dome-like top, which is perfect for sculpting your mummy.
- Place the bowl on a baking sheet to catch any potential drips and for easier handling when transferring in and out of the oven. Bake for approximately 1 hour and 15 minutes, or until the internal temperature reaches 160 F (71 C) when measured with a reliable meat thermometer inserted into the thickest part of the meatloaf.
- While your meatloaf is baking, it’s the perfect time to start preparing the creamy mashed potatoes that will become your mummy’s signature bandages!
Crafting the Creamy Mashed Potato Bandages
The secret to perfect mummy bandages lies in rich, smooth mashed potatoes that are easy to pipe. Here’s how to make them:
- Peel the Yukon Gold potatoes and cut them into quarters. Yukon Gold potatoes are ideal for mashing due to their naturally buttery flavor and creamy texture when cooked, ensuring your bandages are both delicious and easy to pipe.
- Fill a Dutch oven or a large soup pot with enough water to generously cover the potatoes. Add about ½ tablespoon of Kosher salt to the water; salting the water as the potatoes boil helps to season them from the inside out, building flavor from the very beginning. Place the pot on the stovetop over high heat, bring to a rolling boil, then reduce the heat to a steady simmer. Cook for about 30 minutes, or until the potatoes are completely fork-tender.
- Once tender, carefully drain the potatoes thoroughly in a colander. Allow them to sit for a few moments, letting the steam escape. This crucial step helps dry out the potatoes, preventing watery mashed potatoes and ensuring a fluffy, ideal texture for piping. Return the steamed potatoes to the pot.
- Add the softened unsalted butter and cream cheese to the hot potatoes. Use a handheld potato masher to start breaking down the potatoes and incorporate the butter and cream cheese. The cream cheese adds a wonderful tang and extra richness, making the “bandages” truly irresistible.
- For an ultra-smooth consistency, switch to a handheld electric mixer. Beat the potatoes, butter, and cream cheese until light, airy, and fluffy, with no lumps remaining.
- Finally, pour in the half and half (or heavy cream for an even richer result) and fresh ground black pepper. Continue to mix until fully combined and smooth. Taste and adjust seasonings as needed, adding more salt or pepper to your preference. Remember, these potatoes are the main decoration, so you want them to taste fantastic!
Decorating Your Spooky Mummy
Now for the truly fun part – transforming your meatloaf into a ghoulish mummy! This is where your creativity comes into play, bringing the Halloween spirit to your dinner table.
- Once the meatloaf is baked, carefully remove it from the oven and let it stand for a few minutes to cool slightly. If you used ground beef with higher fat content and notice excess grease, gently hold the bowl and drain as much grease as possible from the side. This step might not be necessary if you opted for lean ground beef. Increase your oven temperature to broil in preparation for the final step.
- Place a baking sheet upside down over the top of the meatloaf bowl, ensuring it completely covers the opening. With oven mitts, carefully invert the bowl, turning the meatloaf out onto the baking sheet. It should pop out in a perfect dome shape, ready for its mummy makeover!
- Scoop your prepared mashed potatoes into a piping bag fitted with a Wilton 789 piping tip. This tip is excellent for creating wide, flat ribbons, which are absolutely perfect for resembling mummy bandages. If you don’t have this specific tip, a large star tip or even just snipping a corner off a sturdy Ziploc bag will work in a pinch for a similar effect.
- Arrange two slices of white cheese (Havarti, mozzarella, or provolone work well for their excellent melting quality and pale color) onto the upper half of the meatloaf. These will form the whites of your mummy’s eyes, providing a base for the olive “pupils.”
- Begin piping the mashed potatoes onto the meatloaf, starting from the bottom and working your way up. Create overlapping strips to resemble ancient mummy bandages. Leave a small, irregular gap in the cheese area for the eyes. You can get creative with your piping, making some strips tighter and others looser for a more authentic, aged wrapped look.
- Carefully slide the baking sheet with your decorated mummy meatloaf back into the oven under the preheated broiler. Broil for just 3 minutes, keeping a very close eye on it! The goal is to lightly brown the edges of the potato bandages and melt the cheese, giving the mummy a slightly “toasted” and eerily aged appearance without burning.
- Remove the meatloaf from the oven immediately. While the cheese is still warm and soft, press the two pimento-stuffed green olives (with one side cut flat for better adhesion) into the melted cheese to create the mummy’s eyes. For an extra touch of Halloween gore, serve your Mummy Meatloaf with a generous drizzle of “blood” (ketchup) around the plate, making for a truly memorable presentation!
Amanda’s Tips, Tricks, and Variations
The idea for this Mummy Meatloaf has evolved over the years, starting back when I first began blogging in 2008. I remember seeing a similar concept where cooked lasagna noodles were draped over the meatloaf to create the bandage effect. While visually effective, I always felt it was a waste, as the noodles were rarely eaten and often tossed. It didn’t quite achieve that fully edible, cohesive dish I envisioned.
Later, I discovered mini meatloaf mummies baked in muffin tins, cleverly adorned with mashed potato bandages piped on with a cake decorator tip. This was the ‘aha!’ moment. By combining the substantiality of a large meatloaf with the delicious and edible mashed potato decoration, I finally arrived at this completely edible and delightful Mummy Meatloaf dinner. I’ve gathered a few extra tips and ideas to ensure your creation is a howling success:
- Perfect Mashed Potatoes: Don’t skimp on the cream cheese and butter! They’re absolutely key to producing rich, pipeable mashed potatoes that not only taste fantastic but also hold their shape beautifully as bandages. If your potatoes seem too stiff for piping after mixing, add a tablespoon or two more of half and half (or milk) until you achieve a smooth, workable consistency.
- Meatloaf Moisture: The combination of tomato juice and oats in this recipe works wonders to ensure your meatloaf stays incredibly moist and flavorful. Additionally, opting for lean ground beef helps to prevent excessive grease from accumulating during baking, leading to a lighter, less oily final product.
- Piping Bag Alternative: No specialized piping bag or fancy tip? No problem at all! A sturdy Ziploc bag with one corner snipped off will work just fine. You might not get the exact same perfectly flat “ribbon” effect, but you can still create effective and charming “bandages” by simply squeezing and layering the potatoes.
- Eye Variations: While pimento-stuffed green olives offer a classic eerie look, feel free to get creative with the eyes! Consider using small pieces of roasted red bell pepper, black olive slices, or even tiny dots of mustard or hot sauce dabbed onto the cheese for a different, equally spooky eye effect.
- Make-Ahead Magic: To save valuable time on a busy Halloween night, you can prepare the meatloaf mixture and the mashed potatoes a day in advance. Store them separately in airtight containers in the refrigerator. On Halloween, simply bake the meatloaf, gently reheat the potatoes, and then proceed with the assembly and decorating steps.
- Serving Suggestions: This mummy meatloaf pairs wonderfully with a variety of side dishes. A side of Roasted Halloween Vegetables, a simple green salad, some spooky “worm” pasta, or even corn on the cob can complete your festive meal. Don’t forget the indispensable “blood” (ketchup) for dipping slices of your mummy!
- Storage and Reheating: Any leftover Mummy Meatloaf can be stored in an airtight container in the refrigerator for up to 3-4 days. For reheating, gently warm slices in the microwave or oven until heated through.
I hope you and your family (or party guests) enjoy creating and devouring this fun and festive meal as much as we do. It’s a wonderful way to add a bit of culinary magic and playful fright to your Halloween festivities. And remember, for that extra eerie touch, be sure to dribble some ketchup on top for a truly “bloody” effect that will get everyone talking!
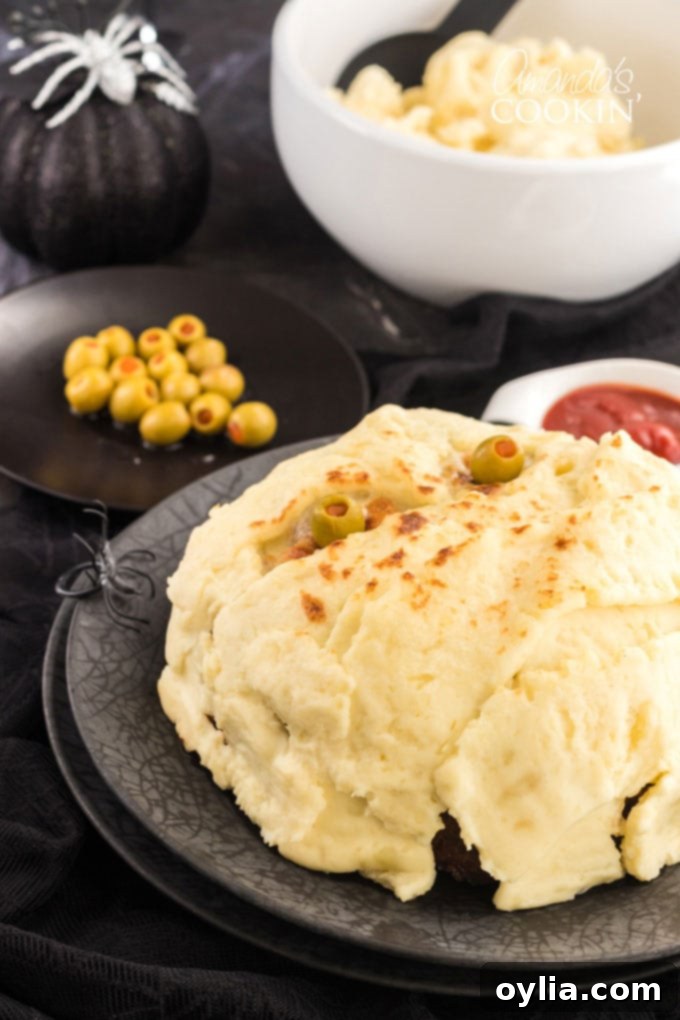
More Fun Halloween Recipes to Try
Looking to complete your Halloween spread with more spooky delights? Here are some other fantastic recipes that will keep the festive spirit alive in your kitchen:
- Roasted Halloween Vegetables
- Spiderweb Cocktail
- Raven Coffee Cocktail
- Monster Eyeball Cookies
- Jalapeno Popper Mummies
- Halloween Candy Apples
- Frankenstein Rice Krispie Treats
- Spider Web Taco Dip
- Halloween Dirt Cups
I love to bake and cook and share my recipes with you! I know it’s hard to remember to come back and search, so I’ve made it easy for you with my weekly newsletter! You can subscribe for free and I’ll send you delicious recipes every week right to your email.
This post originally appeared here on Oct 3, 2019, and has been updated with additional tips and expanded details for an even better cooking experience!

Mummy Meatloaf: The Perfect Spooky Dinner
IMPORTANT – There are often Frequently Asked Questions within the blog post that you may find helpful. Simply scroll back up to read them!
Print It
Rate It
Save ItSaved!
Ingredients
For the Meatloaf
- 2 pounds lean ground beef
- ¾ cup tomato juice 5.5 oz can
- 1 cup old-fashioned oats uncooked (3 oz)
- 2 large eggs
- ⅓ cup finely diced onion 1.8 oz
- 1 teaspoon salt
- ½ teaspoon pepper
For the Mashed Potato Bandages
- 2.5 pounds Yukon Gold potatoes peeled, quartered
- ¼ cup unsalted butter softened
- ⅓ cup half and half or heavy cream
- 4 ounces regular cream cheese softened
- ½ tablespoon Kosher salt for salting the water
- ¼ teaspoon fresh ground black pepper
For Decoration
- 2 slices of white cheese havarti, mozzarella, etc
- 2 pimento stuffed green olives one side cut flat
- Ketchup optional
Things You’ll Need
-
Hand mixer
-
Potato Masher
-
Food processor
-
Baking sheets
Before You Begin
Instructions
Start the Meatloaf
-
Preheat oven to 350 degrees F (175 C).
-
Run the dry old-fashioned oats through a food processor to break them up into a finer consistency.
-
In a large bowl, combine the processed oats, lean ground beef, tomato juice, eggs, finely diced onion, salt, and pepper. Mix thoroughly with a fork or your hands until well combined, being careful not to overmix. Press the mixture firmly into a 2.5-quart ungreased oven-safe glass bowl.
-
Place the bowl on a baking sheet. Bake for 1 hour and 15 minutes, or until the internal temperature of the meatloaf reaches 160 F (71 C).
-
While the meatloaf is baking, prepare the mashed potatoes for the mummy bandages.
Make the Potatoes
-
Peel the Yukon Gold potatoes and cut them into quarters for even cooking.
-
Fill a Dutch oven or large soup pot with water, add ½ tablespoon of Kosher salt, and the quartered potatoes. Place on the stovetop over high heat, bring to a boil, then reduce to a simmer. Cook for a total of 30 minutes, or until the potatoes are completely fork-tender.
-
Drain the potatoes thoroughly in a colander, allowing them to steam for a few moments to remove excess moisture. Return them to the pot.
-
Add the softened unsalted butter and cream cheese to the hot potatoes and smash with a handheld potato masher until partially broken down.
-
Using a handheld electric mixer, combine the butter, cream cheese, and potatoes until smooth and fluffy.
-
Pour in the half and half (or heavy cream) and fresh ground black pepper. Mix again until fully incorporated. Taste and adjust seasonings as desired.
Decorating your Mummy
-
Remove the baked meatloaf from the oven and let it stand for a few minutes to cool slightly. If there is any accumulated grease, carefully hold the bowl and drain as much as possible from the side. This step is less likely to be needed if using lean beef. Increase the oven temperature to broil.
-
Place a baking sheet upside down over the top of the meatloaf bowl, ensuring it completely covers the bowl. Invert the bowl, carefully turning the meatloaf out onto the baking sheet. It should be a perfect dome shape.
-
Scoop the mashed potatoes into a piping bag fitted with a Wilton 789 piping tip (or a similar wide, flat tip).
-
Place two slices of white cheese (like Havarti or Mozzarella) onto the upper half of the meatloaf, where the mummy’s eyes will be positioned.
-
Pipe the mashed potatoes onto the meatloaf in overlapping strips, starting from the bottom and working your way up, to create the appearance of mummy bandages. Leave the cheese slices partially exposed for the eyes.
-
Place the baking sheet with the decorated meatloaf into the oven under the preheated broiler for approximately 3 minutes. Watch carefully! You want just enough time to lightly brown the edges of the potato bandages and melt the cheese.
-
Remove from the oven. Immediately press the two pimento-stuffed green olives (flat side down) into the melted cheese for the mummy’s eyes. Serve hot, optionally with a drizzle of ketchup to simulate “blood” for an extra spooky effect!
Nutrition
The recipes on this blog are tested with a conventional gas oven and gas stovetop. It’s important to note that some ovens, especially as they age, can cook and bake inconsistently. Using an inexpensive oven thermometer can assure you that your oven is truly heating to the proper temperature. If you use a toaster oven or countertop oven, please keep in mind that they may not distribute heat the same as a conventional full sized oven and you may need to adjust your cooking/baking times. In the case of recipes made with a pressure cooker, air fryer, slow cooker, or other appliance, a link to the appliances we use is listed within each respective recipe. For baking recipes where measurements are given by weight, please note that results may not be the same if cups are used instead, and we can’t guarantee success with that method.
