Festive & Easy Pumpkin Deviled Eggs: Your Perfect Fall & Halloween Appetizer
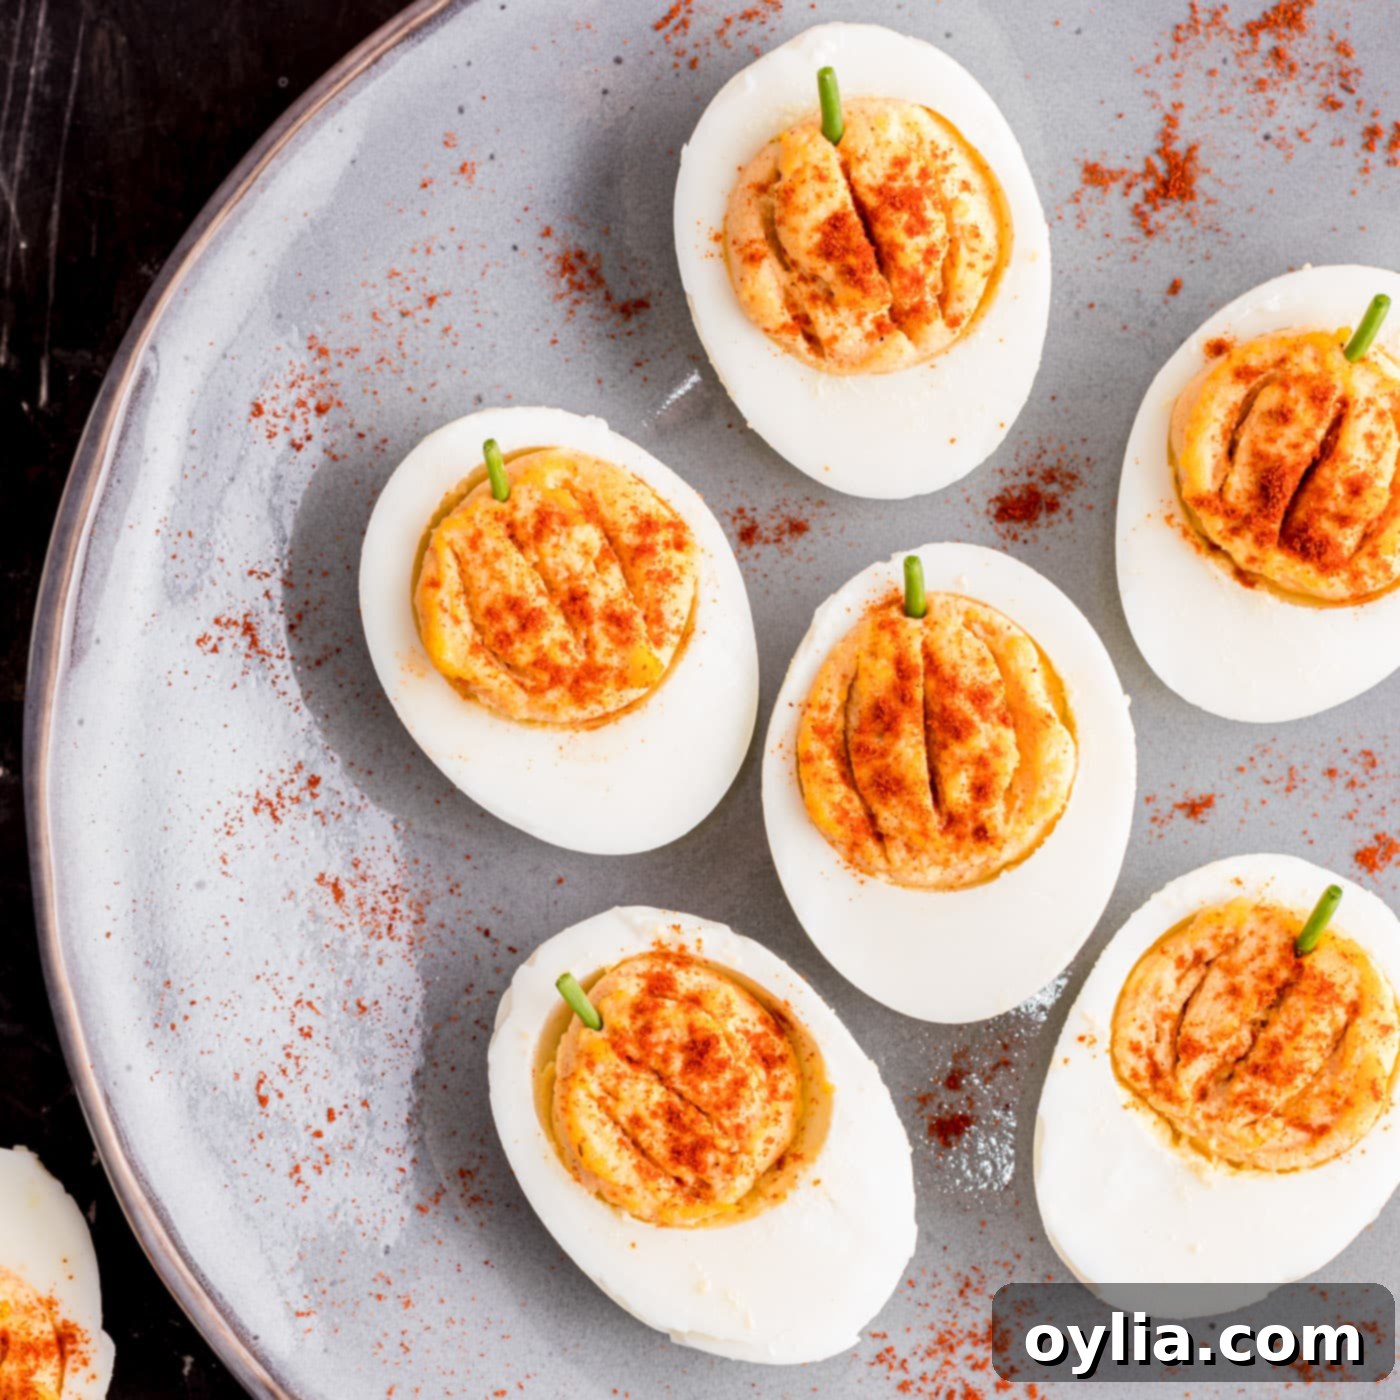
Step into the autumn spirit with these utterly charming Pumpkin Deviled Eggs! This recipe takes a beloved classic and infuses it with a delightful seasonal twist, making it the ultimate conversation starter for any fall celebration. Imagine a platter of creamy, savory deviled eggs, transformed into adorable miniature pumpkins with just a few simple additions. Using the familiar ingredients you love, plus a touch of vibrant paprika for color and fresh chives for that perfect “stem” detail, you’ll create an effortless yet impressive appetizer. Whether you’re hosting a cozy fall get-together, a spooky Halloween bash, or a hearty Thanksgiving dinner, these pumpkin-shaped deviled eggs are guaranteed to be a hit, adding a touch of whimsical festivity to your spread.
Why These Pumpkin Deviled Eggs Are a Must-Try Fall Appetizer
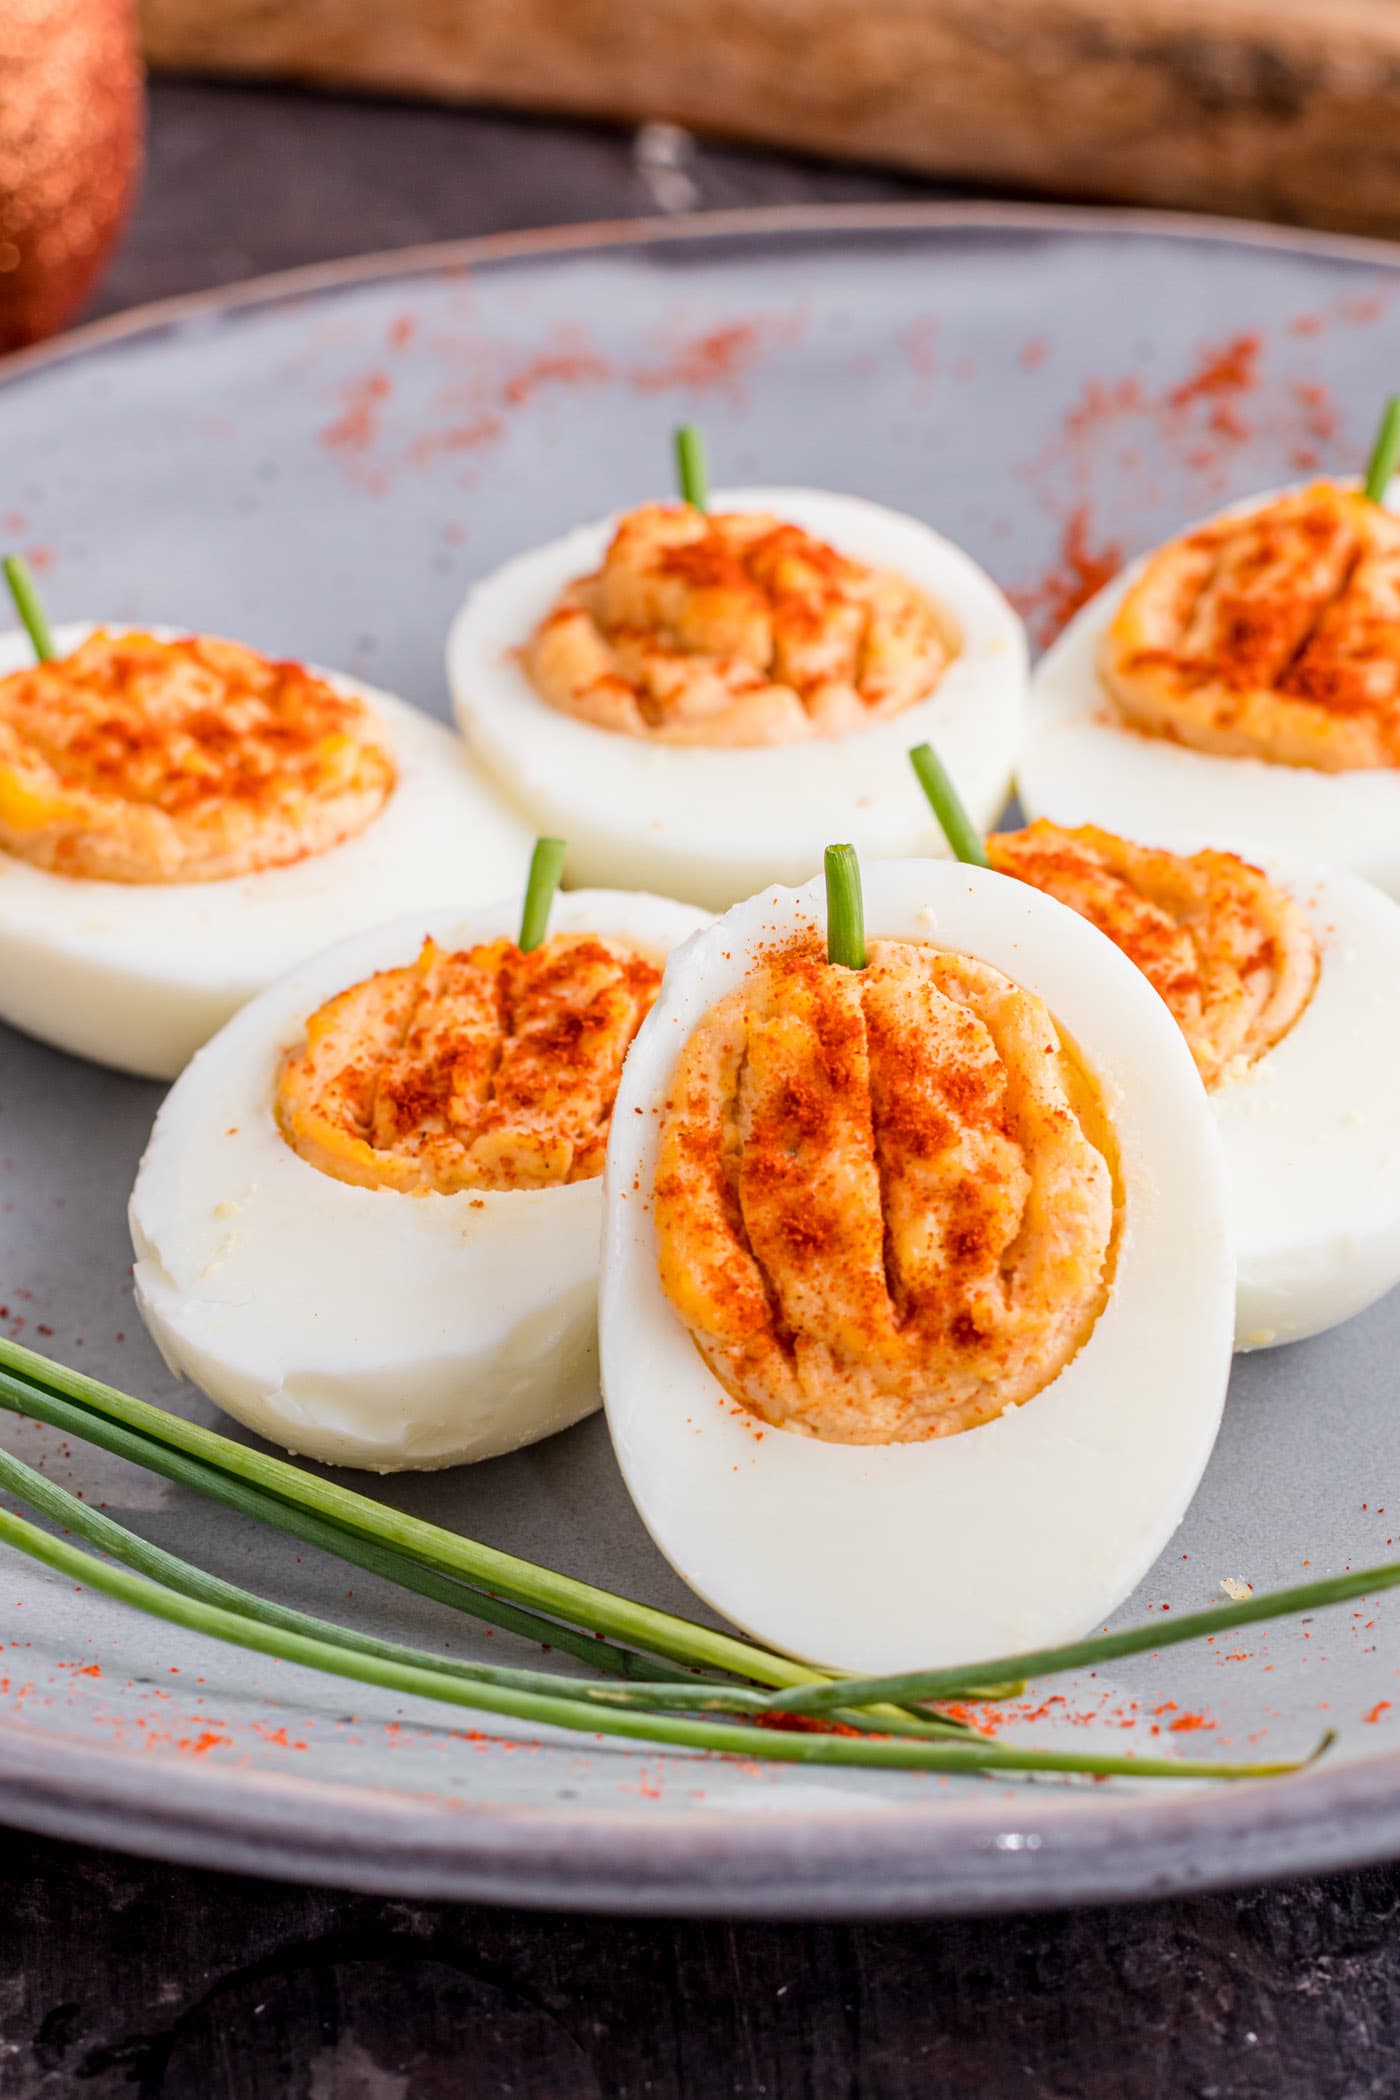
Let’s clear up any initial confusion: these delightful Pumpkin Deviled Eggs contain no actual pumpkin in their ingredients! The “pumpkin” in their name refers purely to their charming, seasonal shape and vibrant color. This clever visual trick is what makes them so special and perfect for autumn celebrations. We take our time-tested classic deviled eggs recipe and elevate it with a simple yet brilliant modification: a teaspoon of good quality paprika infused into the creamy yolk mixture. This not only adds a subtle, earthy flavor but, more importantly, provides that rich, inviting orange hue synonymous with pumpkins. To complete the illusion, each “pumpkin” is crowned with a neatly snipped piece of fresh chive, acting as a realistic little green stem. The result? An irresistibly cute and perfectly themed appetizer that brings a smile to every face.
Deviled eggs hold a special place in the hearts of many, a beloved staple at everything from casual potlucks to elegant holiday gatherings. There’s an undeniable allure to a tray of these creamy, savory stuffed eggs, and for good reason—they’re consistently delicious and satisfying. But why settle for ordinary when you can add a festive touch with such ease? These Pumpkin Deviled Eggs are incredibly versatile, making them ideal for a wide array of fall events. They’ll be the star attraction at your next fall harvest gathering, add a playful element to your Halloween party spread, or bring a touch of unexpected charm to your Thanksgiving feast. The best part is that this seasonal transformation requires minimal extra effort, proving that sometimes the simplest changes create the biggest impact. Get ready to impress your guests with this easy, adorable, and utterly delicious fall treat!
Essential Ingredients for Your Pumpkin Deviled Eggs
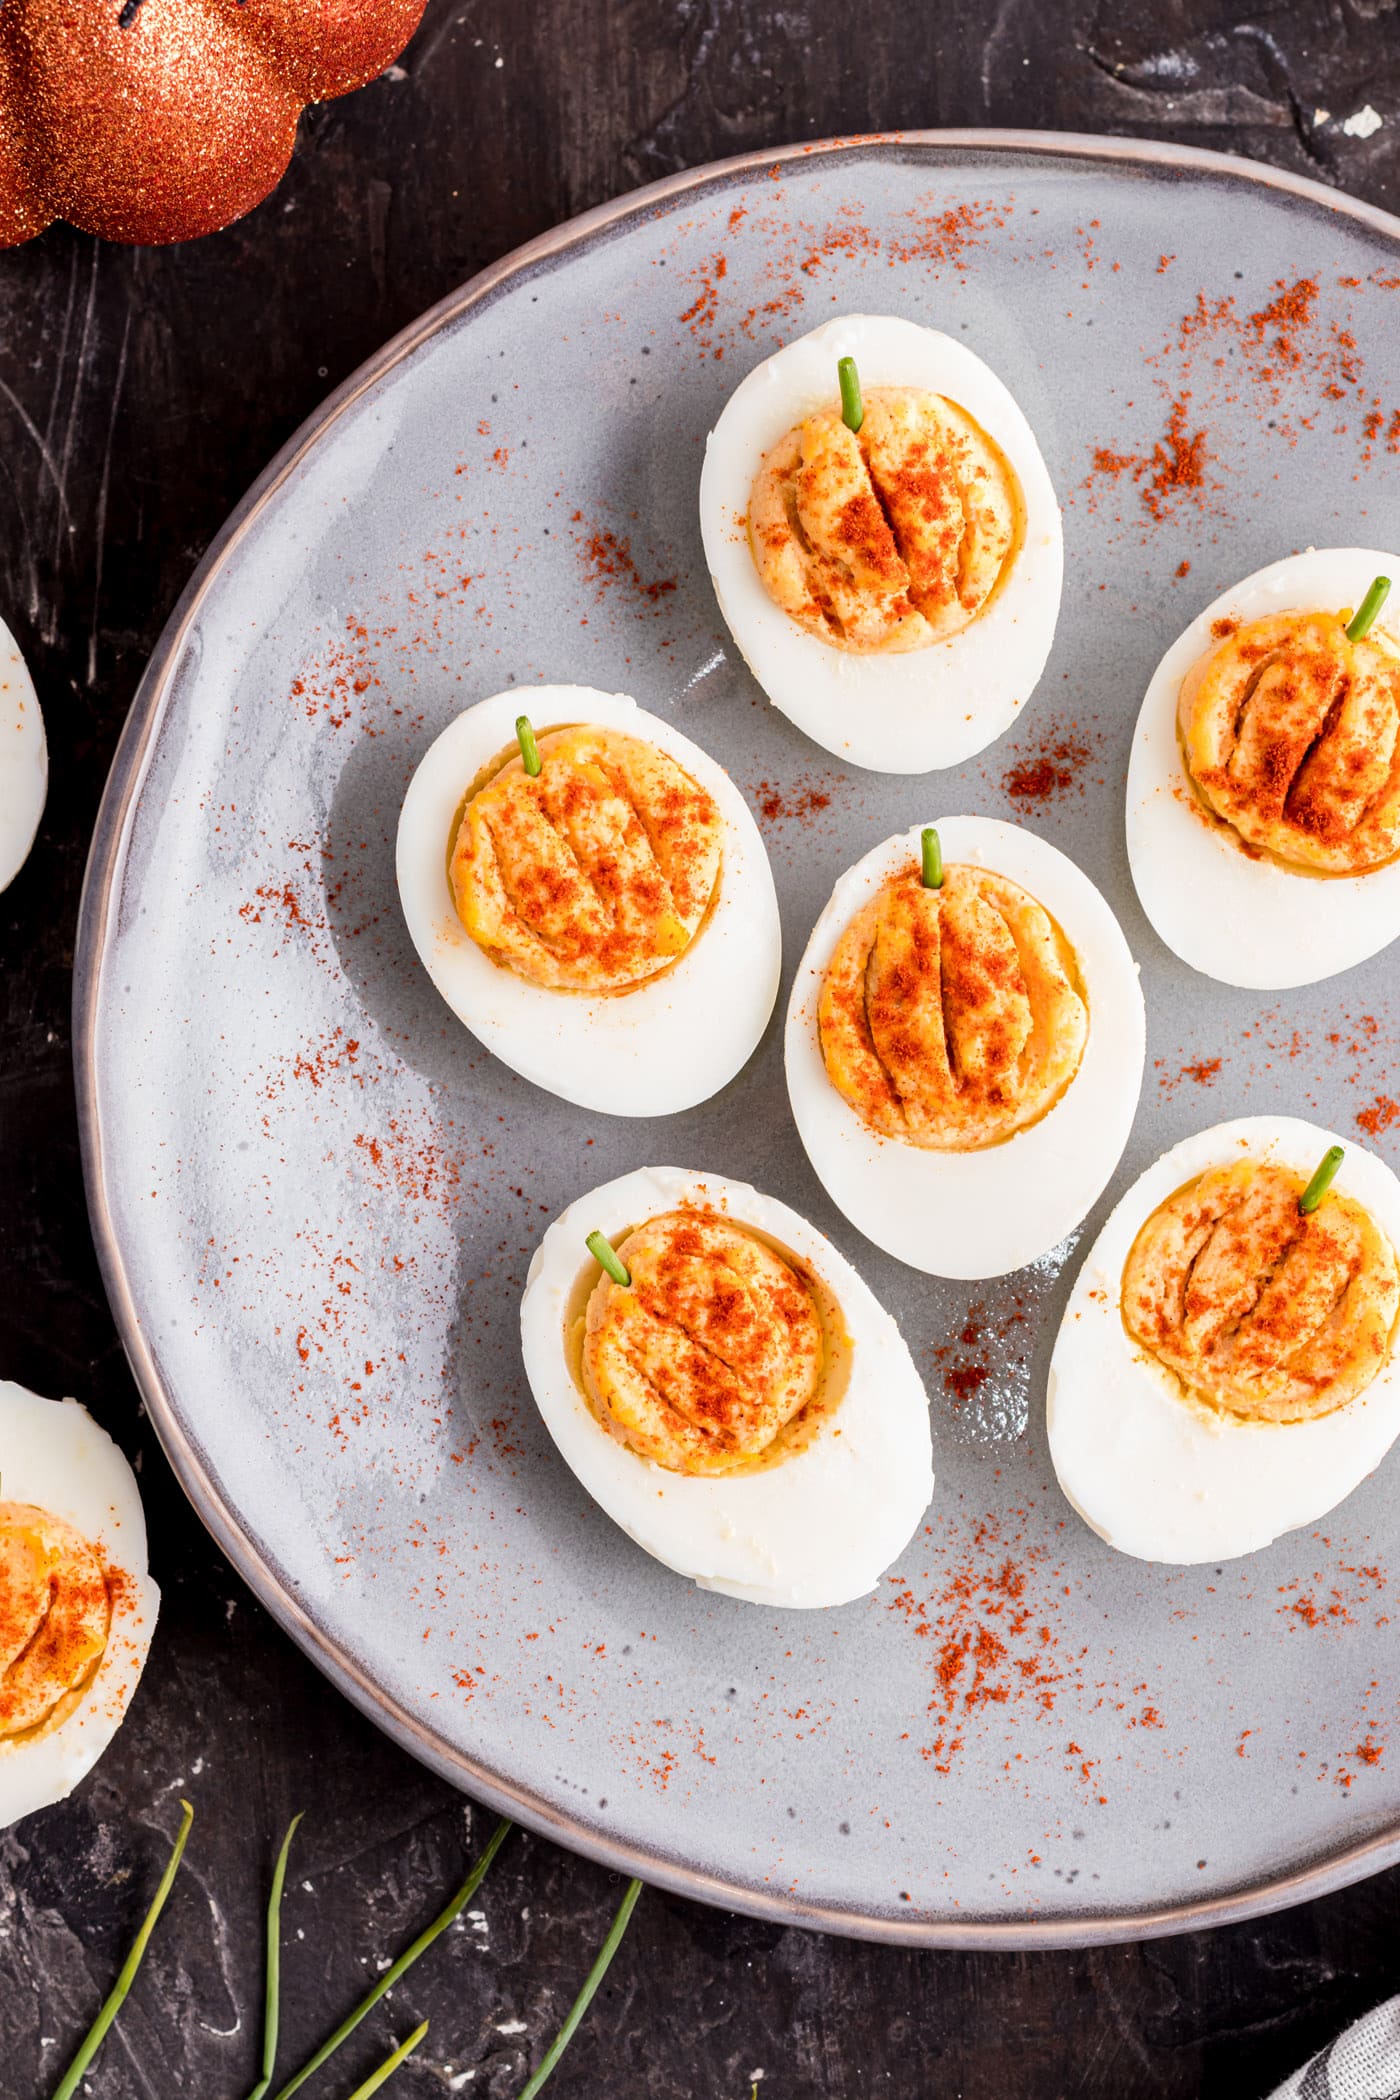
Crafting these festive pumpkin-shaped deviled eggs is remarkably straightforward, requiring a handful of common pantry staples alongside a couple of special additions for that signature fall flair. Below, you’ll find a detailed breakdown of all the ingredients, measurements, and instructions. For a convenient printable version of the full recipe, simply refer to the recipe card located at the end of this post.
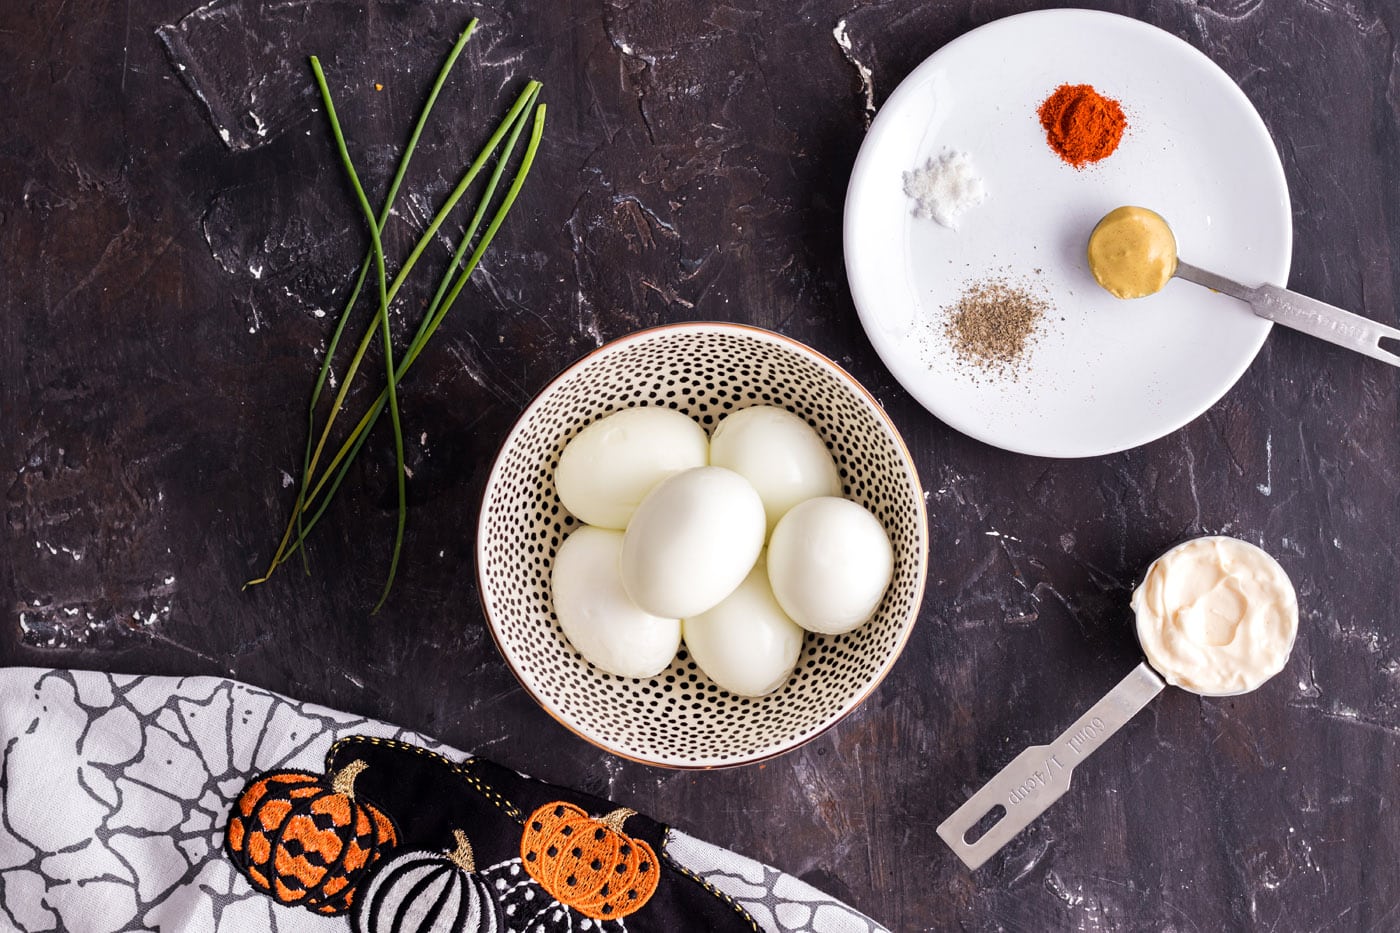
Ingredient Spotlight & Smart Substitutions
EGGS – For this recipe, 6 hard-boiled eggs will yield 12 perfectly sized deviled egg halves. This recipe is easily scalable, so feel free to double or even triple the quantities to accommodate larger gatherings. For consistently perfect, easy-to-peel hard-boiled eggs, I highly recommend using an egg cooker. It’s a game-changer! If you’re boiling eggs on the stovetop, older eggs (about a week old) tend to peel more easily than very fresh ones. Whichever method you choose, ensuring your eggs are properly cooked and cooled is the first step to deviled egg perfection.
FILLING – The heart of these Pumpkin Deviled Eggs is their creamy, flavorful yolk filling. It’s built on the foundation of our classic recipe, with the key addition of paprika. This spice not only imparts a beautiful orange hue that makes them look like mini pumpkins but also adds a warm, subtly smoky, or sweet depth of flavor, depending on the type you choose. I prefer regular, full-fat mayonnaise for its rich texture and taste, but a low-fat or light mayonnaise will also work well if you’re looking for a lighter option. When it comes to mustard, Dijon is my go-to for its sophisticated, tangy kick that beautifully complements the egg yolks. However, if you prefer the sharper, more traditional flavor of yellow mustard, that’s a perfectly acceptable substitution. Remember to taste and adjust the seasoning as you go, especially with salt.
CHIVES & GARNISH – The final touch that transforms these deviled eggs into charming pumpkins is the snipped chive stem. Fresh chives offer a mild oniony flavor and a vibrant green color that contrasts beautifully with the orange yolk. If chives aren’t available, finely chopped fresh parsley or cilantro can offer a similar green accent, though the flavor profile will shift slightly. For an even more rustic look, a tiny piece of pretzel stick can mimic a pumpkin stem. A final sprinkle of paprika, either sweet or smoked, enhances both the visual appeal and the flavor.
Step-by-Step: Crafting Your Pumpkin Deviled Eggs
These step-by-step photos and detailed instructions are provided to guide you visually through the process of making this recipe. For a convenient printable version, complete with all measurements and instructions, simply Jump to Recipe at the bottom of this post.
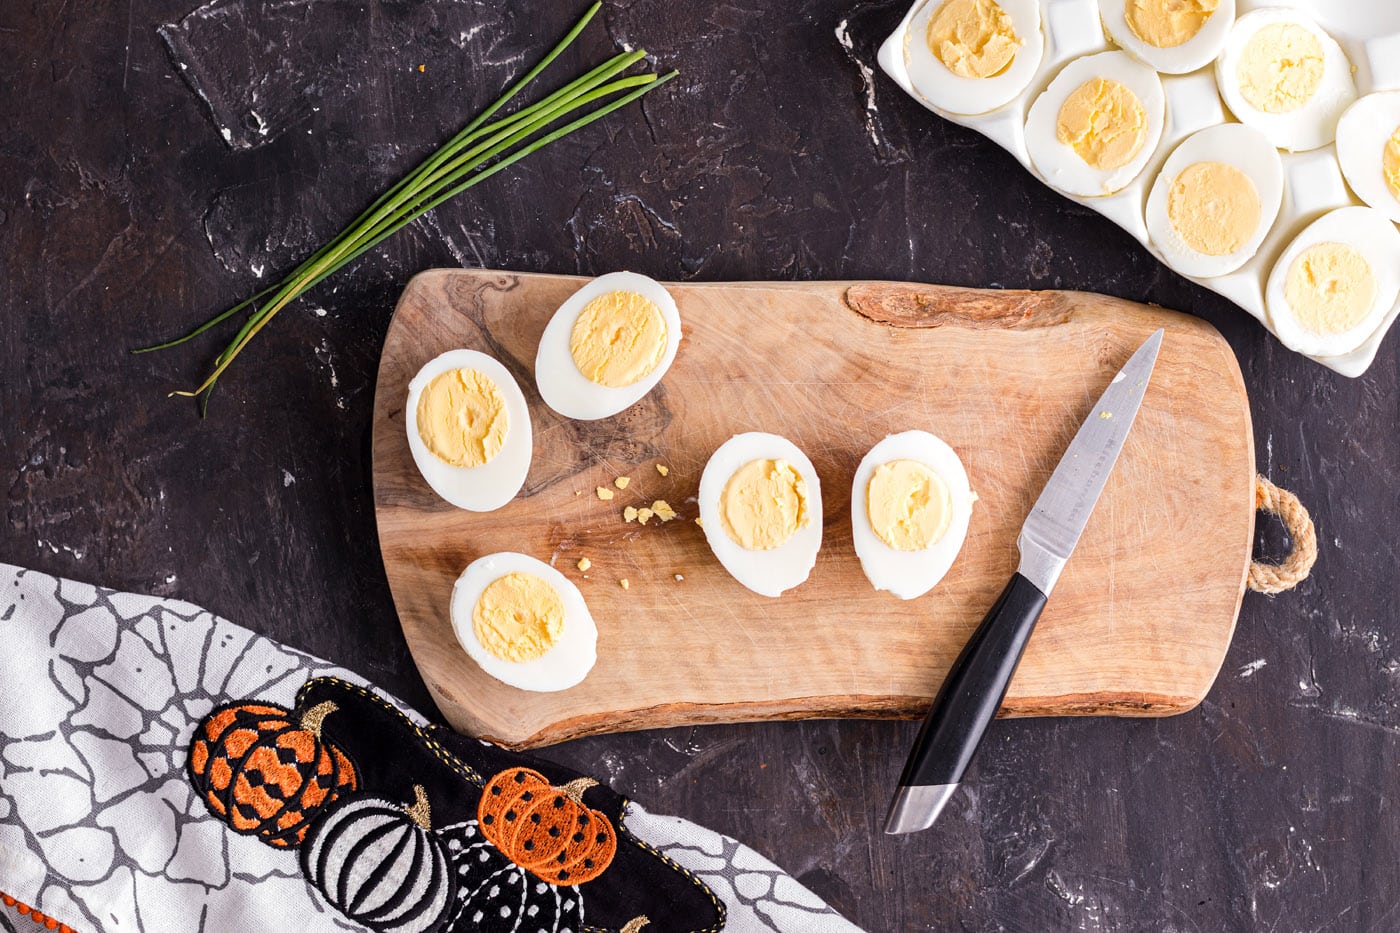
- Prepare the Eggs: Begin by carefully removing the shells from your hard-boiled eggs. This is a critical step for perfect deviled eggs, as any gouges or scrapes in the cooked white will be quite visible. Take your time to ensure a smooth, clean surface. Once peeled, gently rinse the egg whites under cool water and pat them thoroughly dry with paper towels. Next, carefully slice each egg in half lengthwise, creating two perfect boat-shaped halves.
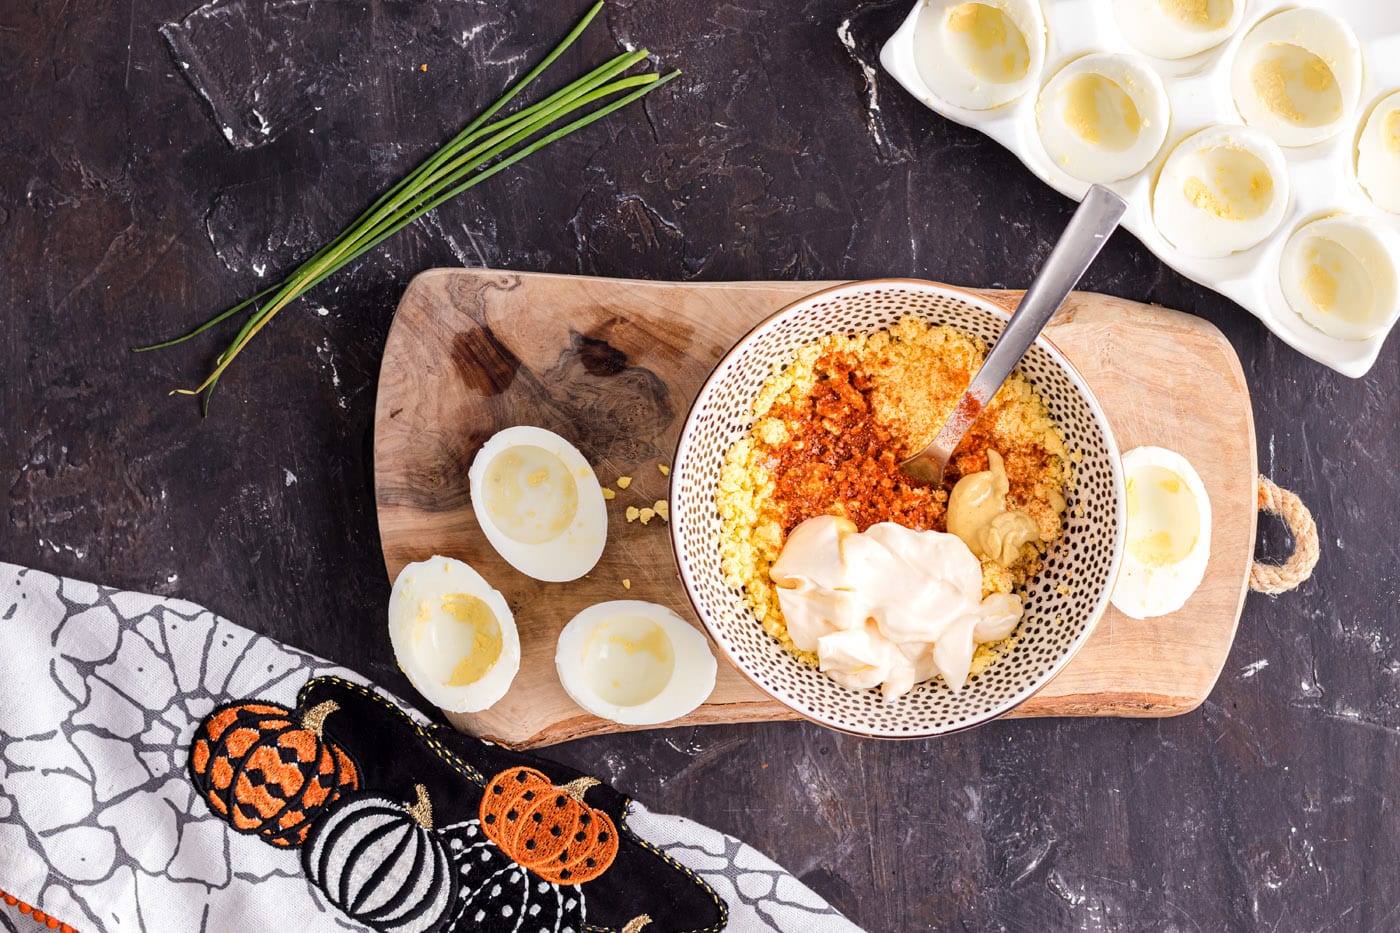
- Mash the Yolks: Gently scoop out the bright yellow yolks from each egg white half and place them into a small mixing bowl. Using a fork, begin to mash the yolks. Continue mashing until they are completely smooth and free of any large chunks. A fine, consistent texture is key to a creamy deviled egg filling.

- Create the Filling: To the mashed yolks, add the mayonnaise, mustard (Dijon or yellow), black pepper, and the star ingredient – paprika. Mix all these components together thoroughly with the fork or a small whisk until the mixture is perfectly combined and beautifully smooth and creamy. The paprika should distribute evenly, giving the filling its signature orange hue. Now, taste the mixture. Add salt very sparingly, stirring well after each tiny addition, until you achieve your desired savory balance. It’s much easier to add more salt than to fix an overly salty filling!

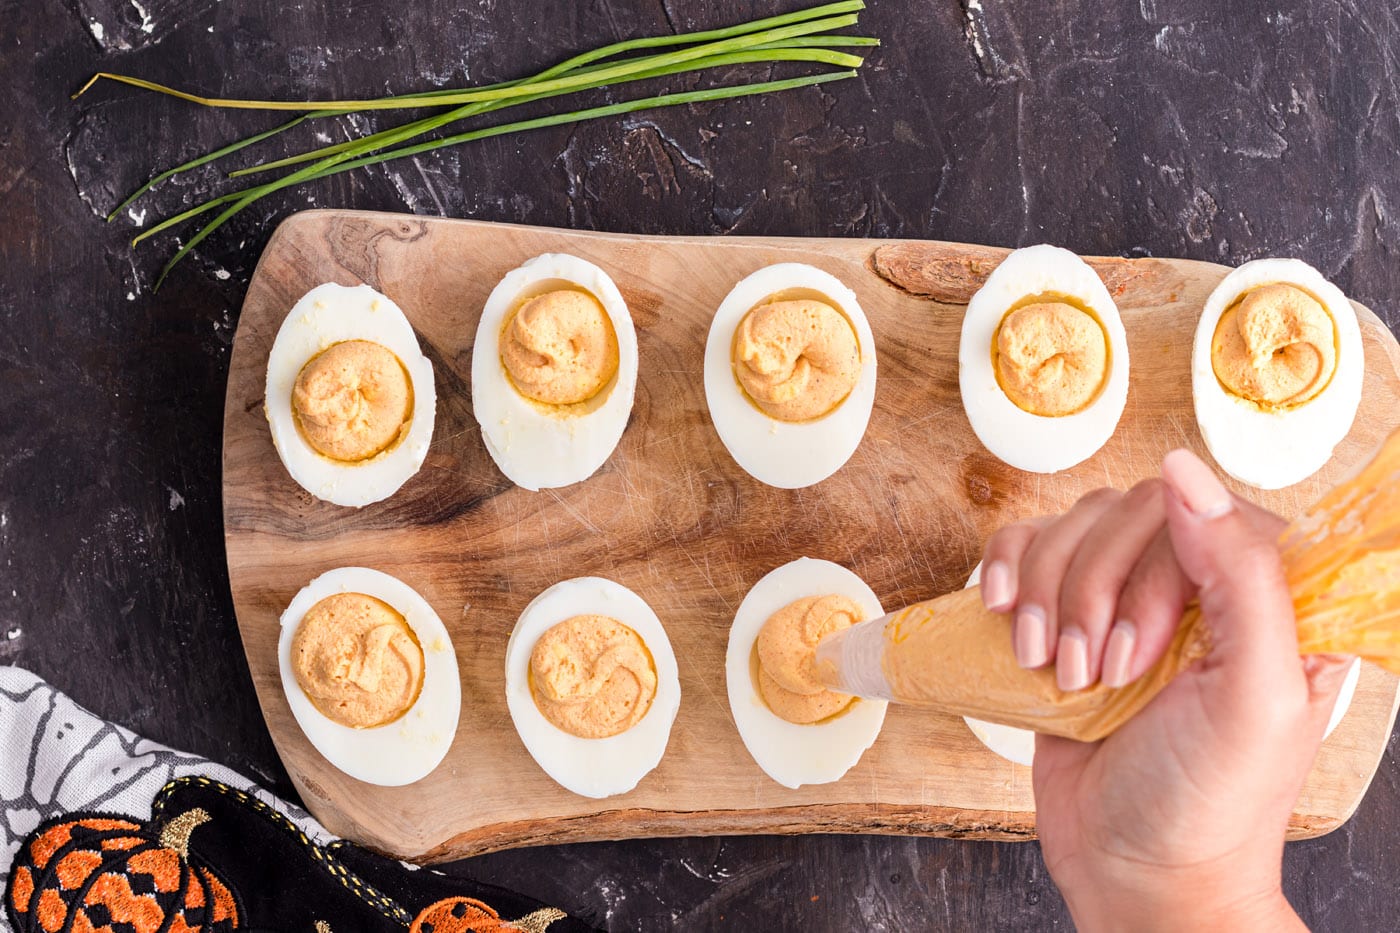
- Pipe the Filling: Transfer the creamy yolk mixture into a piping bag fitted with a round tip. Carefully pipe the mixture into the hollow centers of the egg whites, creating a neat, rounded mound that will form the body of your pumpkin. Don’t worry if you don’t have a piping bag; you can just as easily use two spoons to neatly scoop and shape the mixture into the egg white halves.

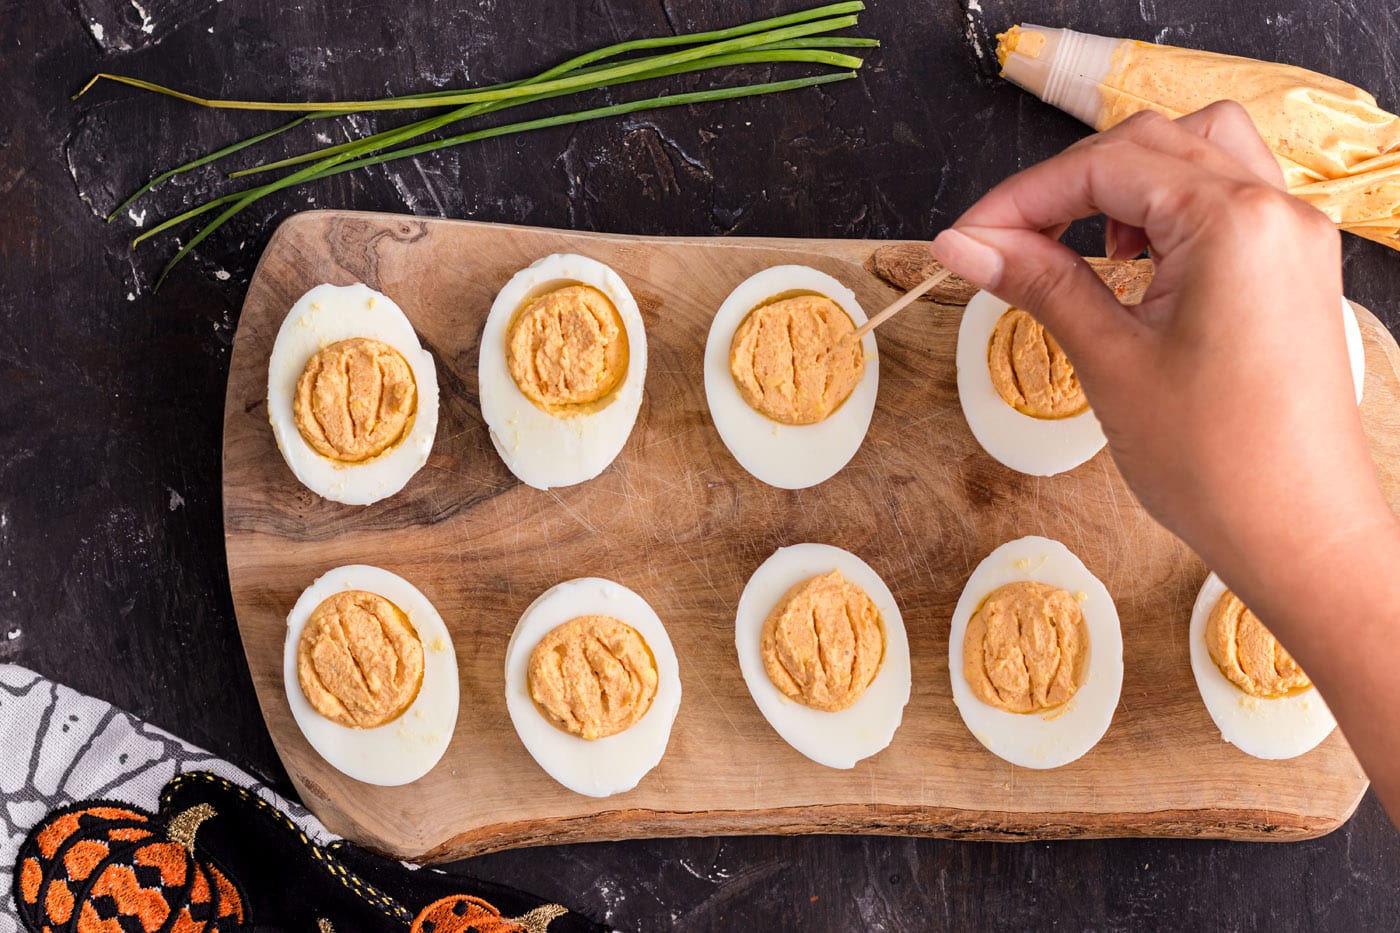
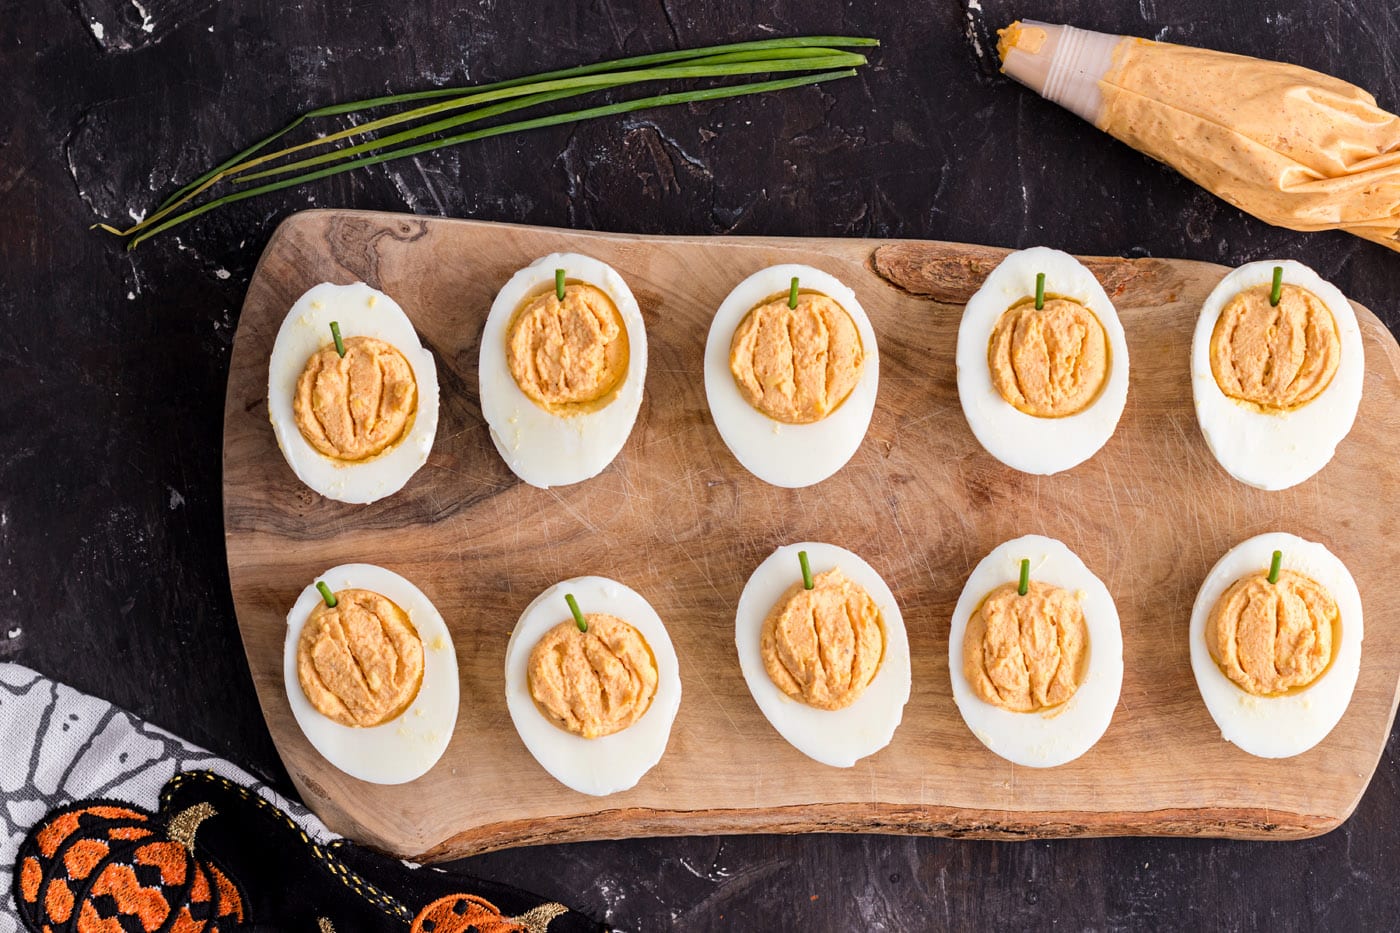
- Shape and Garnish: Now for the fun part! Take a simple toothpick and gently press it into the piped yolk mixture, drawing lines from the center outwards to create the distinct ridges of a pumpkin. Repeat this around the entire circumference of the yolk to form that recognizable pumpkin shape. Finally, take a small snipped piece of fresh chive and carefully place it upright in the center of each “pumpkin” to serve as its adorable stem.


- Final Paprika Dusting: For an extra pop of color and a hint more flavor, lightly sprinkle a small amount of paprika over the tops of your finished deviled eggs. This adds visual depth and a final touch of autumnal warmth.
- Transporting Your Delights: If you’re bringing your delicious Pumpkin Deviled Eggs to a potluck or party, ensure they arrive safely and beautifully. Pop them into a dedicated deviled egg tray with a secure lid. This prevents them from shifting and keeps them chilled until serving time.
Frequently Asked Questions & Expert Tips for Perfect Deviled Eggs
Achieving perfectly boiled and easily peelable eggs is crucial for stunning deviled eggs. I swear by my egg cooker, as it consistently delivers flawless results without fail. The steam method it uses makes peeling a breeze. If you don’t have an egg cooker, a reliable stovetop method involves placing eggs in a saucepan, covering them with water, bringing to a rolling boil for just 3 minutes, then immediately turning off the heat, covering the pan, and letting them sit for 12 minutes. For a truly easy peel, ensure you always finish the cooking process by plunging the hot eggs directly into a bowl of ice water. This rapid cooling stops the cooking, prevents a green ring around the yolk, and helps the shell separate from the egg white more readily.
Absolutely! Deviled eggs are a fantastic make-ahead appetizer, which is perfect for busy holiday preparations. You can prepare both the egg white halves and the yolk filling a day or two in advance. For the filling, store it in an airtight container in the refrigerator to keep it fresh and prevent it from drying out. For the sliced egg whites, gently wrap them in plastic wrap or place them in a large ziplock bag or airtight container, also in the refrigerator. The key is to assemble and decorate your Pumpkin Deviled Eggs just before serving. This ensures the best texture, appearance, and overall freshness for your guests.
To maintain their freshness and flavor, store any leftover deviled eggs in an airtight container in the refrigerator. They will typically remain delicious for 3-4 days. While they are safe to eat for a few days, deviled eggs are generally at their best when enjoyed within a day or two of preparation. The texture of the filling and the crispness of the egg whites are optimal during this time. For the best experience, try to consume them promptly after your gathering.
If your filling is too runny, it’s often due to too much mayonnaise. You can try mashing in an extra egg yolk (if you have one) or adding a small amount of cream cheese (about 1 teaspoon per 6 eggs) to thicken it. If it’s too thick, simply add a tiny bit more mayonnaise or a splash of pickle juice or milk, mixing well until you reach your desired creamy consistency. Adjust gradually to avoid over-correcting.
While paprika is essential for the “pumpkin” color, you can certainly experiment with other spices to alter the flavor profile. A pinch of curry powder can add an exotic twist, or a dash of cayenne pepper can introduce a subtle heat. For a smoky depth without the color, a tiny amount of liquid smoke (used very sparingly) could be interesting. Just be mindful that changing the spices might alter the classic deviled egg taste, but it’s a great way to personalize the recipe!
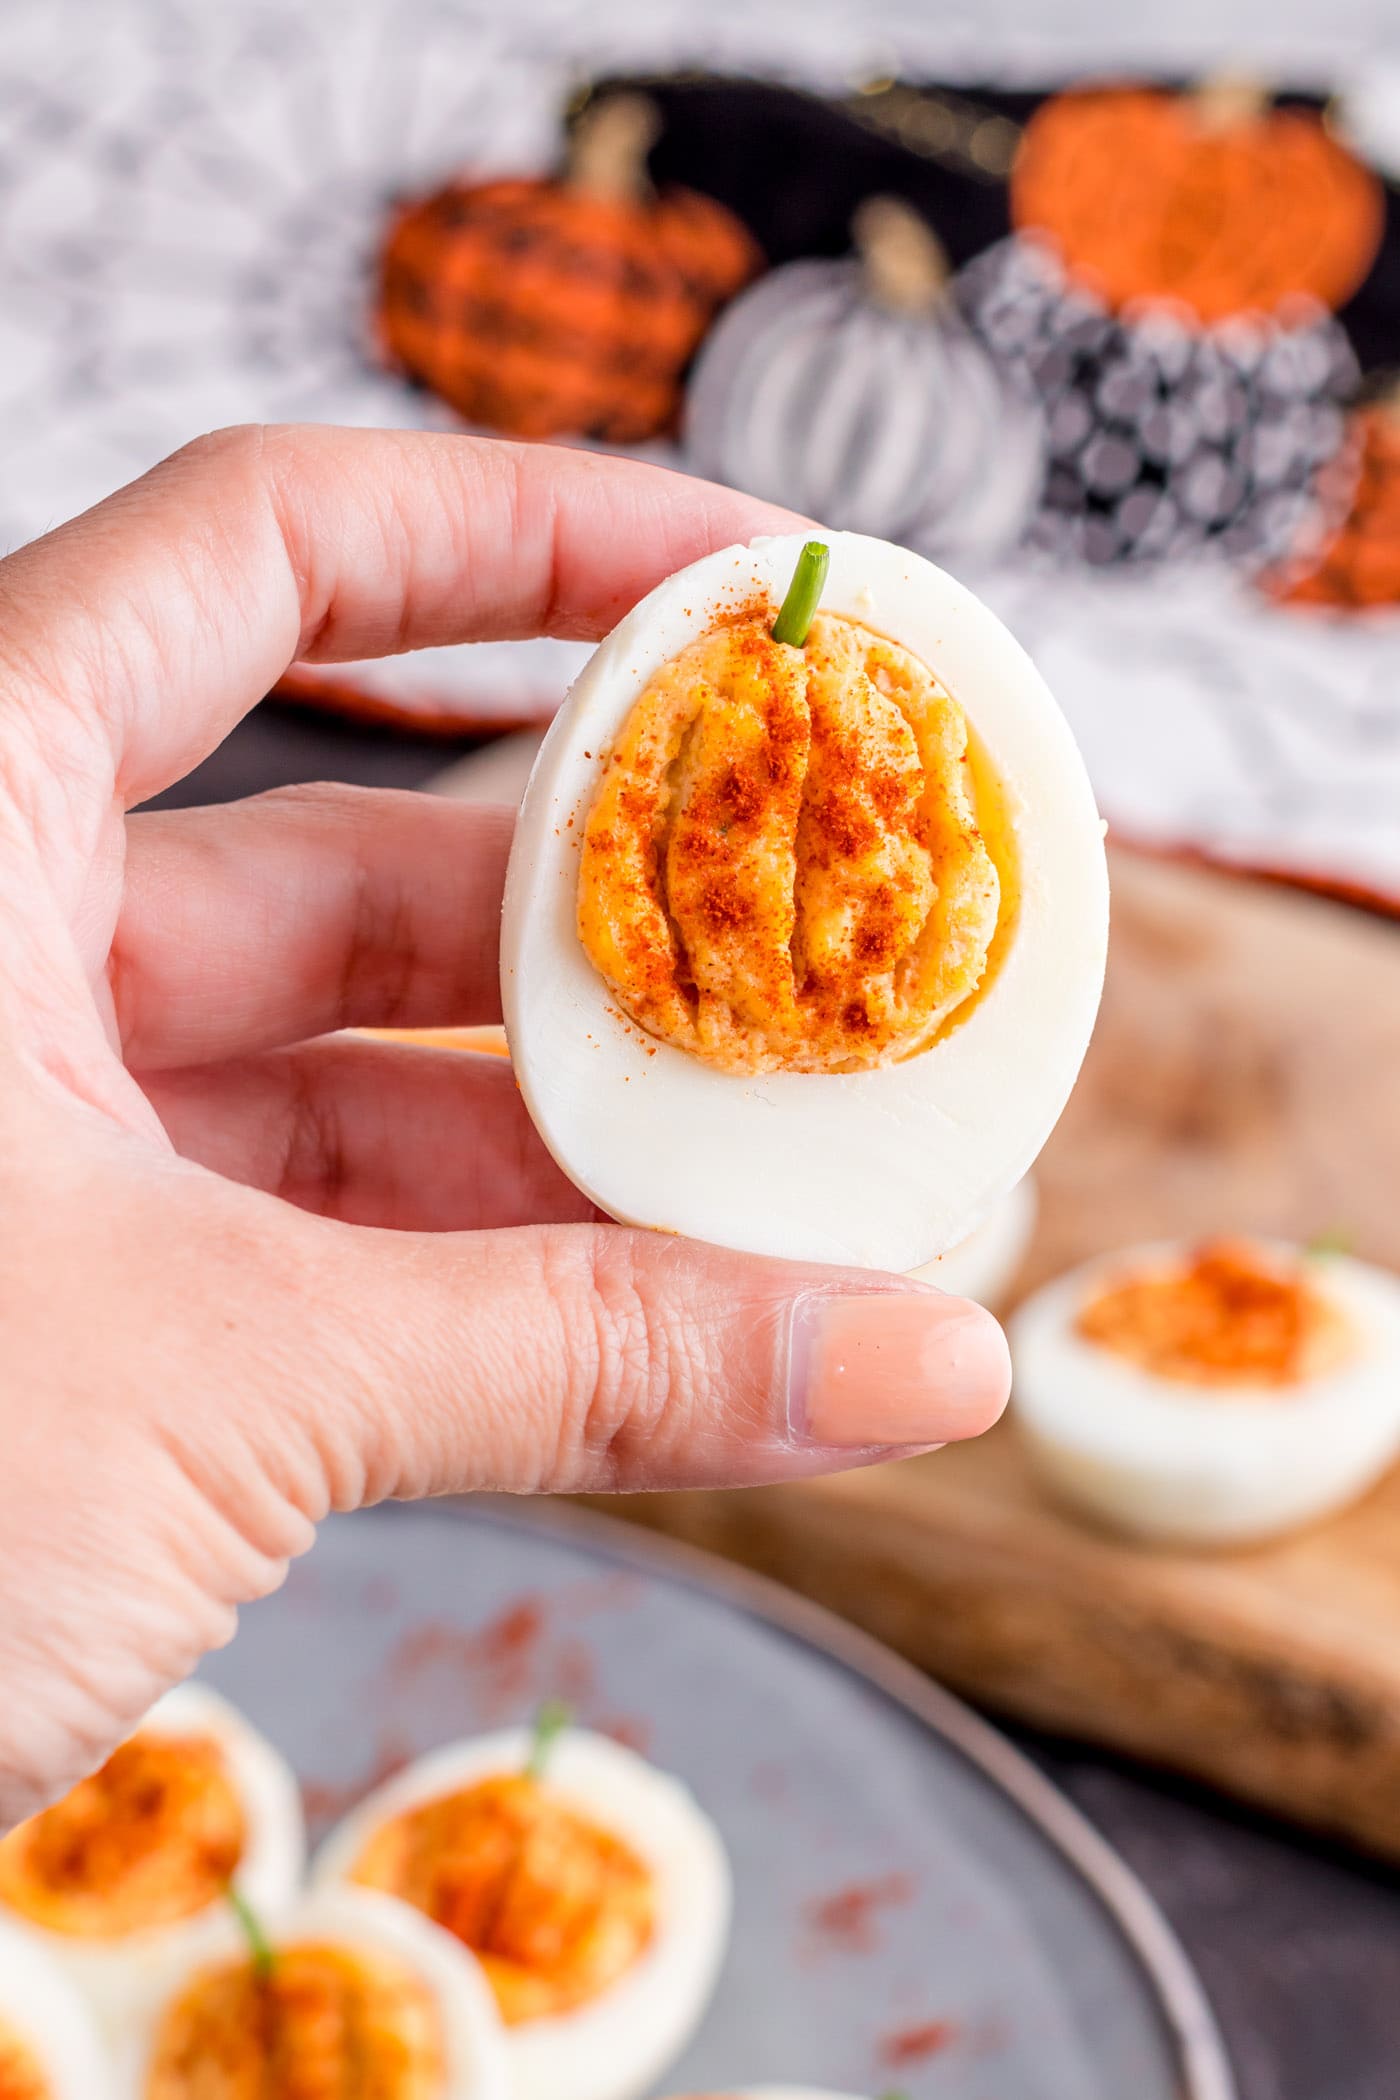
Creative Ways to Serve Your Pumpkin Deviled Eggs
These adorable Pumpkin Deviled Eggs are incredibly versatile and can be served in many creative ways to enhance your fall and holiday spreads. While a light sprinkle of paprika on top is generally enough to deepen the color and add flavor, remember not to go overboard when mixing it into the filling, as too much can make the flavor too prominent. For a slightly different aesthetic, you could even skip the paprika in the filling entirely and rely solely on the ridges and a fresh chive stem for the pumpkin look, offering a more classic deviled egg taste with a visual surprise. Serve them on a beautiful autumn-themed platter alongside other festive snacks like roasted nuts, cheese and crackers, or a vibrant fall salad. They pair wonderfully with heartier dishes too, making them an excellent side for a Thanksgiving buffet. If you’re hosting a Halloween party, consider arranging them among other spooky treats or colorful veggie sticks for a balanced and fun offering. No matter how you present them, these charming deviled eggs are sure to be a delightful addition to any meal or gathering!
If you’re making these for a spectacular Halloween party, you’re in for a treat! Be sure to explore our extensive Halloween recipe section on the blog. You’ll find a treasure trove of additional snack, appetizer, and festive drink ideas that will perfectly complement your pumpkin deviled eggs and create an unforgettable celebration!
More Must-Try Fall Recipes
The autumn season brings with it a bounty of comforting flavors and ingredients. If you’re looking to continue your culinary journey through fall, here are some other fantastic recipes that capture the essence of the season:
- Hot Apple Cider: A warm and comforting classic, perfect for chilly evenings.
- Pumpkin Pie Dip: All the flavors of pumpkin pie in a dippable, shareable format.
- Pumpkin Spice Donuts: Indulge in these spiced treats for a breakfast or dessert delight.
- Mini Pumpkin Cheesecakes: Individual portions of creamy, spiced pumpkin cheesecake.
- Crockpot Cinnamon Apples: Sweet, tender apples slow-cooked to perfection with warm spices.
I absolutely adore spending time in the kitchen, experimenting with new flavors, and sharing my culinary discoveries with all of you! It can be challenging to remember to check back for new recipes every day, which is precisely why I offer a convenient newsletter. Each time a new recipe is posted, it lands directly in your inbox. Simply subscribe here and start receiving your free daily recipes!
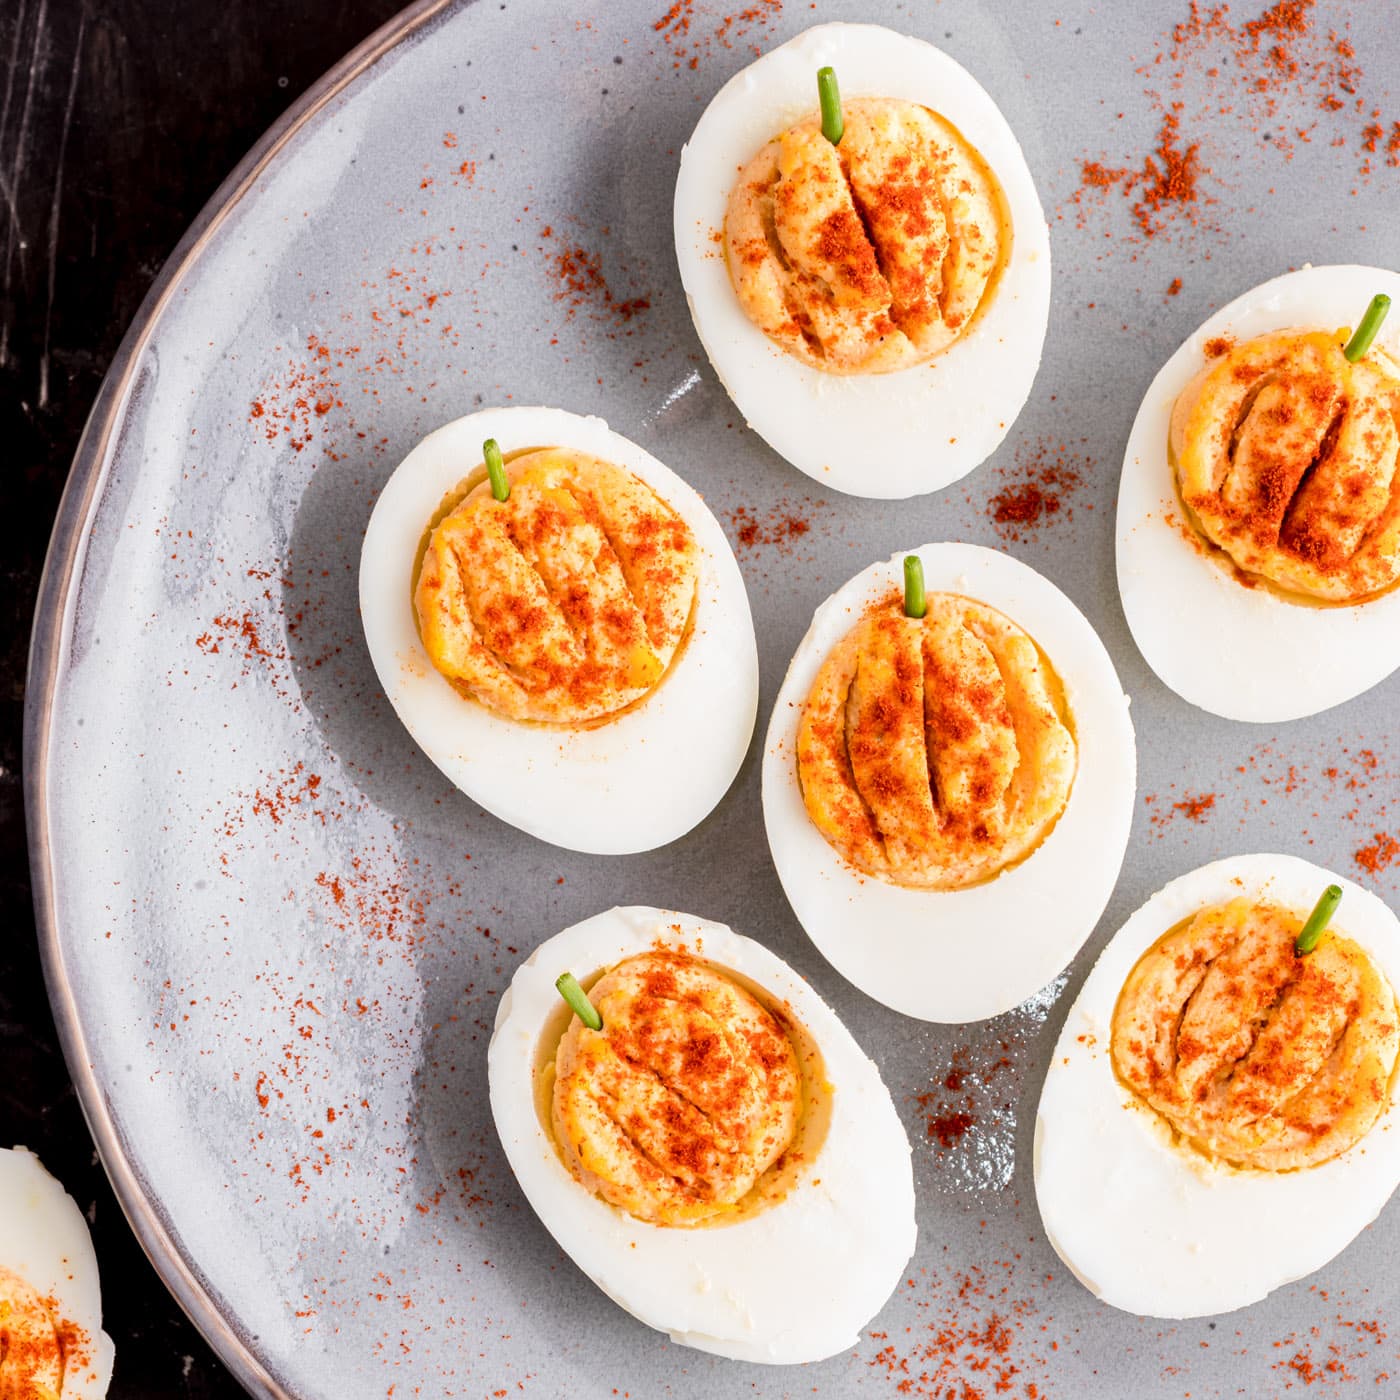
Pumpkin Deviled Eggs
★
★
★
★
IMPORTANT – Don’t forget to check the Frequently Asked Questions (FAQs) and Expert Tips sections within the blog post for helpful advice! Scroll up to read them.
Print It
Pin It
Rate It
Ingredients
- 6 hard boiled eggs
- ¼ cup mayonnaise
- 1 teaspoon Dijon mustard or yellow mustard
- ⅛ teaspoon black pepper
- 1 teaspoon paprika plus more for garnish
- salt to taste
- chives snipped, for the stems
Equipment You’ll Need
-
Egg cooker or saucepan for boiling eggs
-
Piping bag
-
Round piping tip
-
Toothpicks
Before You Begin: Important Notes for Success
- Perfectly Boiled Eggs: For easily peelable boiled eggs, I highly recommend using an egg cooker, which has consistently yielded perfect results for me. Alternatively, for stovetop boiling, place eggs in a saucepan, cover with water, bring to a rolling boil for 3 minutes, then turn off the heat, cover, and let sit for 12 minutes. Regardless of the method, always plunge the cooked eggs into an ice water bath immediately after to stop the cooking process and aid in easy peeling.
- Mayonnaise & Mustard Choices: I typically use regular, full-fat mayonnaise for its rich flavor and creamy texture, but a low-fat or light mayonnaise can also be used successfully. For mustard, Dijon is my preferred choice for its tangy depth, but if you enjoy the classic, slightly sharper taste of yellow mustard, feel free to substitute it.
- Salt with Caution: The yolk filling can quickly become overly salty, and unfortunately, there’s no easy fix once it’s too seasoned. To prevent this, prepare the filling completely (including mayo, mustard, pepper, and paprika) and then add salt very gradually, tasting after each small addition, until you achieve your perfect flavor balance.
Instructions
-
Carefully remove the shells from the hard-boiled eggs. This is an important step because you don’t want any gouges or scrapes in the cooked white, as it will be on display. Once peeled, rinse the egg whites and pat them thoroughly dry with paper towels, then slice each egg in half lengthwise.
-
Gently remove the yolks from the egg whites and place them into a small bowl. Mash the yolks with a fork until they are completely smooth and free of any large chunks.
-
To the mashed yolk mixture, add the mayonnaise, mustard, black pepper, and paprika. Mix thoroughly until all ingredients are well combined and the mixture is nice and smooth. Add salt sparingly, stirring thoroughly after each addition, until you reach the desired flavor.
-
Transfer the egg yolk mixture into a piping bag fitted with a round tip. Pipe the mixture neatly into the hollow centers of the egg white halves. Alternatively, you can use two spoons to scoop and shape the filling into the eggs.
-
Use a toothpick to gently create subtle ridges on top of the piped egg yolk mixture, mimicking the characteristic look of a pumpkin. Then, carefully add a small snipped piece of fresh chive to the very top of each deviled egg to create a pumpkin stem.
-
Lightly sprinkle a final dusting of paprika over all the eggs for an added pop of color and flavor.
-
If you are transporting your delicious deviled eggs to a gathering, place them securely into a dedicated deviled egg tray with a lid to keep them fresh and prevent damage.
Expert Tips & FAQs (Quick Reference)
- Storage: Store leftover deviled eggs in an airtight container in the refrigerator for 3-4 days. They are most delicious within a day or two of preparation.
- Make Ahead: Prepare the filling and egg whites separately a day or two in advance. Store the filling in an airtight container in the fridge, and wrap sliced egg whites in plastic wrap or store in a sealed container. Assemble and decorate right before serving.
- Salt Adjustment: Always add salt to the yolk mixture sparingly and taste as you go, as it’s easier to add more than to fix an overly salty filling.
- Consistency Fixes: If filling is too runny, add a little more mashed yolk or cream cheese. If too thick, thin with a tiny bit more mayo or a splash of pickle juice.
Nutrition Information
Calories: 71 cal |
Carbohydrates: 0.4g |
Protein: 3g |
Fat: 6g |
Saturated Fat: 1g |
Polyunsaturated Fat: 2g |
Monounsaturated Fat: 2g |
Trans Fat: 0.01g |
Cholesterol: 95mg |
Sodium: 114mg |
Potassium: 37mg |
Fiber: 0.1g |
Sugar: 0.3g |
Vitamin A: 216IU |
Vitamin C: 0.003mg |
Calcium: 14mg |
Iron: 0.4mg
The recipes on this blog are tested with a conventional gas oven and gas stovetop. It’s important to note that some ovens, especially as they age, can cook and bake inconsistently. Using an inexpensive oven thermometer can assure you that your oven is truly heating to the proper temperature. If you use a toaster oven or countertop oven, please keep in mind that they may not distribute heat the same as a conventional full-sized oven and you may need to adjust your cooking/baking times. In the case of recipes made with a pressure cooker, air fryer, slow cooker, or other appliance, a link to the appliances we use is listed within each respective recipe. For baking recipes where measurements are given by weight, please note that results may not be the same if cups are used instead, and we can’t guarantee success with that method.
