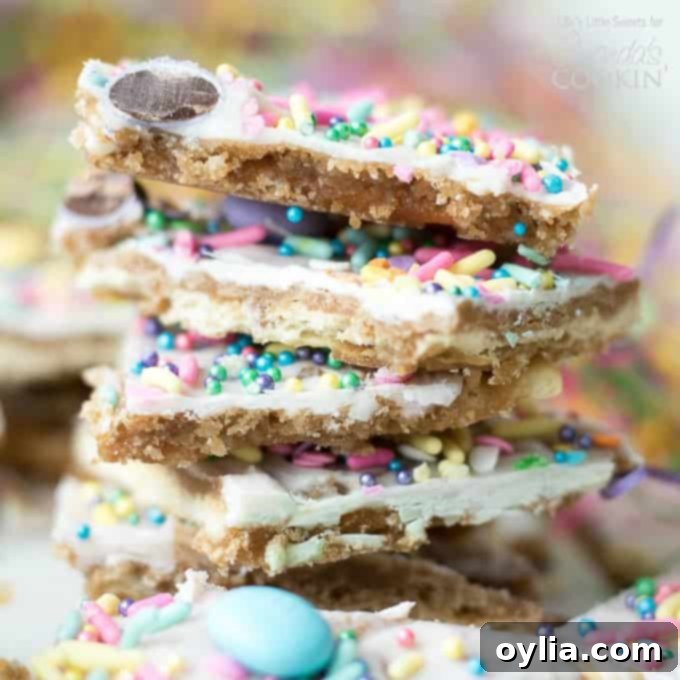
Easy Easter Toffee: The Perfect Sweet & Salty Spring Treat (Saltine Cracker Toffee Recipe)
As spring breathes new life into the world, bringing with it the joyous celebration of Easter, our kitchens become hubs of delightful aromas and colorful creations. This year, add a truly special touch to your holiday dessert table with our incredible Easter Toffee. This recipe is a vibrant, spring-themed adaptation of the beloved classic Saltine Toffee – affectionately known by many as “Saltine Crack” or “Christmas Crack.” Imagine the perfect blend of salty crunch, rich buttery caramel, creamy white chocolate, and a festive burst of pastel sprinkles and your favorite Easter candies. It’s an easy-to-make treat using simple pantry ingredients, transforming everyday staples into an extraordinary holiday indulgence.
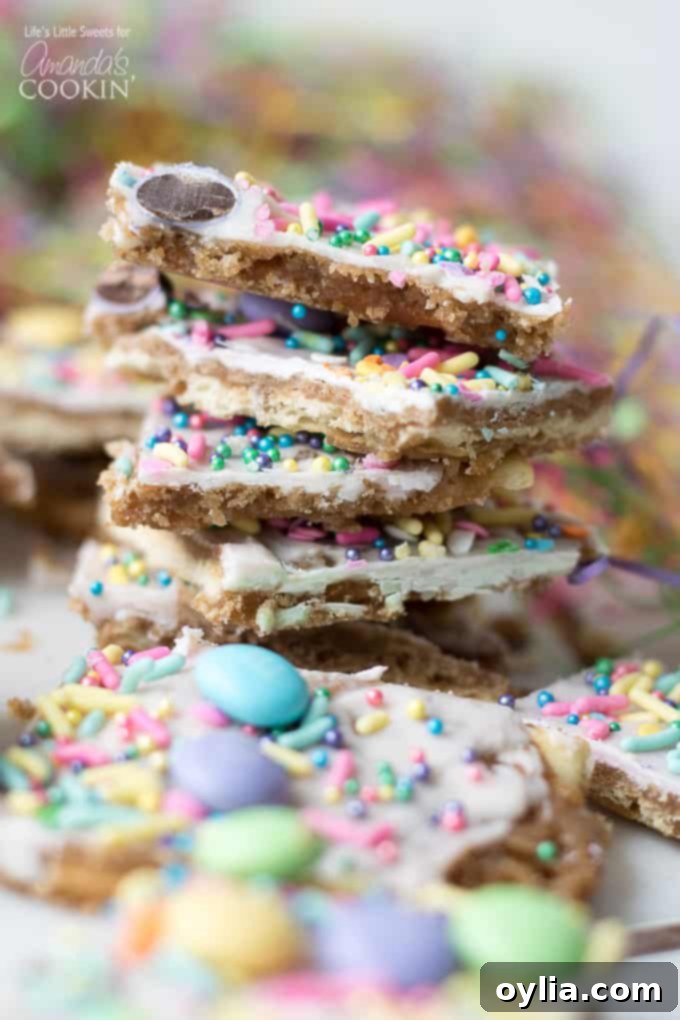
Discover the Irresistible Charm of Saltine Cracker Toffee
Before we dive into the festive Easter twist, let’s appreciate the phenomenon that is Saltine Cracker Toffee. This ingenious dessert has captured hearts worldwide with its simplicity and incredible flavor profile. What makes it so utterly addictive? It’s that harmonious dance between the crisp, slightly salty crackers, the deeply caramelized, buttery toffee layer, and the luxurious blanket of melted chocolate. Each bite offers a satisfying crunch followed by a melty, sweet-and-salty explosion that keeps you coming back for more. It’s the kind of treat that seems too good to be true, given how effortlessly it comes together.
The beauty of Saltine Toffee lies in its accessibility. You don’t need fancy ingredients or specialized equipment. Most of what you need is likely already in your kitchen pantry: a box of saltines, butter, brown sugar, and chocolate. This makes it an ideal choice for spontaneous baking sessions, unexpected guests, or simply satisfying that sudden craving for something truly special. I’m constantly finding excuses to whip up a batch, whether it’s for a holiday or just because! For example, when a craving for butterscotch hit, I quickly made this delightful Chocolate Butterscotch Saltine Toffee. The versatility of this base recipe is truly endless.
That buttery, crunchy texture is so incredibly yummy and comforting. It pairs perfectly with a hot cup of coffee for a morning pick-me-up or a soothing cup of tea in the afternoon. It’s the ultimate combination of satisfying richness and delicate crispness that few other desserts can achieve with such ease. It hits all the right notes: sweet, salty, crunchy, and smooth, all in one delightful bite.
Elevating Classic Toffee for Easter Celebrations
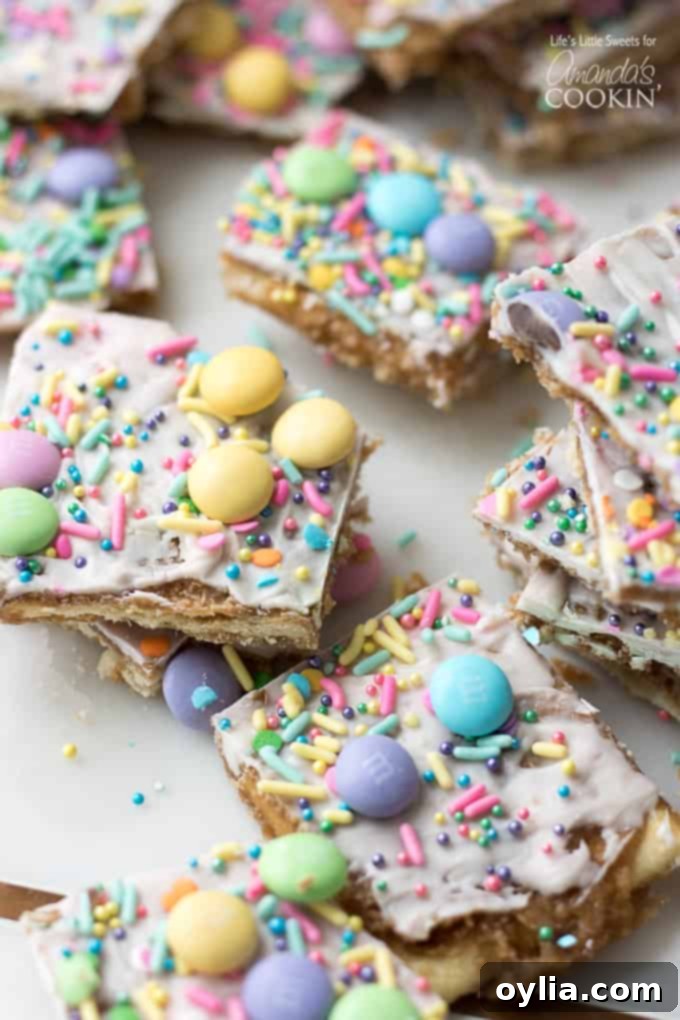
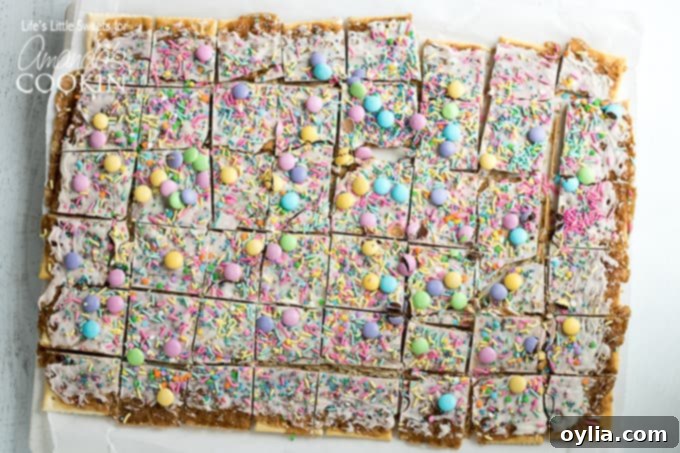
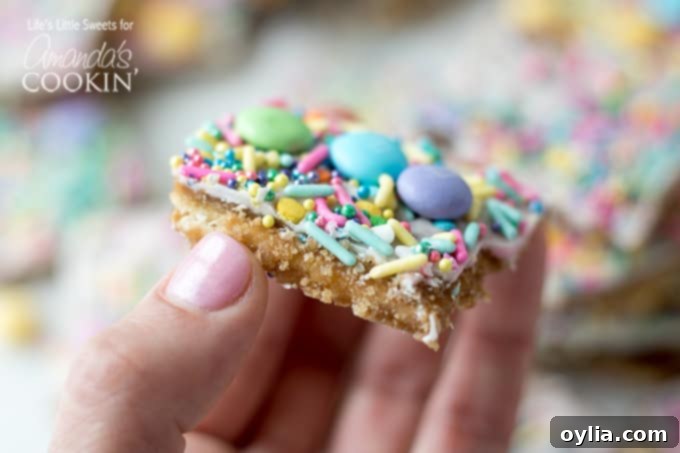
Our Easter Toffee takes the beloved Saltine Toffee concept and infuses it with all the joyful colors and spirit of springtime. This isn’t just a basic toffee; it’s a canvas for festive creativity! By incorporating white chocolate, which serves as a perfect neutral base for coloring, along with an assortment of pastel sprinkles and your favorite Easter-themed candies, we transform a simple treat into a dazzling holiday centerpiece. Doesn’t this Easter Toffee look incredibly festive with all those bright, cheerful colors?
I personally love topping mine with colorful M&M’s, but the true magic of this recipe is its adaptability. You are free to use any of your favorite Easter candies – mini chocolate eggs, jelly beans, robin’s eggs, or even crushed pastel-colored cookies. The amount is entirely up to your taste; pile them high for an extravagant look or keep it more minimalist. The result is always a visually stunning dessert that screams “Spring has arrived!”
A Fun & Easy Easter Family Tradition
One of the best aspects of this Easter Toffee recipe is how wonderfully it lends itself to becoming a new, easy, and fun Easter tradition. It’s an excellent activity for getting the whole family involved, especially little ones who will adore decorating the toffee with sprinkles and candies. Imagine the joy of creating a batch together, leaving some out for the Easter bunny, and then enjoying the fruits of your labor on Easter morning or during a festive brunch. These shared moments in the kitchen are often the most memorable parts of any holiday, and this simple recipe offers a fantastic opportunity to create them.
The Perfect Edible Gift & Party Favor
Beyond being a fantastic treat for your own household, this Easter Toffee also makes an exquisite and thoughtful edible gift for family and friends. Who wouldn’t be delighted to receive a cellophane bag or a cute box filled with these bright, sweet, and crunchy squares? The vibrant colors and irresistible taste make them an instant hit. They are perfect for neighbor gifts, teacher appreciation, or bringing to an Easter potluck, guaranteed to bring smiles to recipients.
Moreover, its simple preparation allows you to easily make a large batch or even double it if you’re hosting an Easter party or need favors for a larger gathering. You can effortlessly whip up enough to share with everyone, ensuring no one misses out on this delectable holiday treat. Its impressive appearance belies its quick and easy preparation, making you look like a seasoned baker with minimal effort and maximum charm.
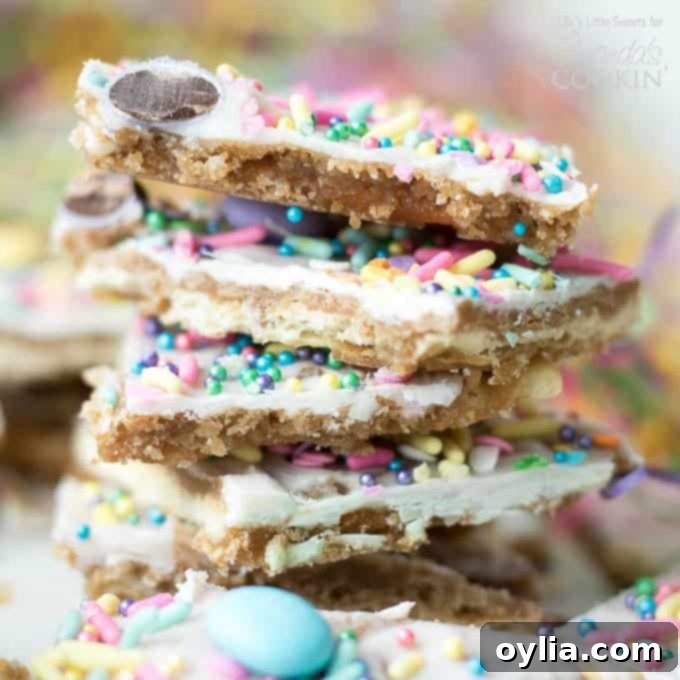
Essential Ingredients for Your Easter Toffee
The beauty of this recipe lies in its simplicity, requiring just a handful of everyday ingredients. However, understanding each component’s role can elevate your toffee from good to spectacular:
- 48 (or more, depending on the size of your baking sheet) Saltine crackers (regular): These humble crackers form the perfectly crisp, slightly salty base that provides an exquisite contrast to the sweet toffee and chocolate layers. Ensure you have enough to cover your baking sheet completely without large gaps for a uniform toffee slab.
- 1 cup unsalted butter (2 sticks): Unsalted butter is crucial here as it allows you to precisely control the overall saltiness of your final product. It melts down to create the rich, creamy, and undeniably delicious foundation of your caramel toffee.
- 1 cup dark brown sugar (packed): The dark brown sugar is key to achieving that deep, molasses-rich flavor and a beautiful, golden caramel color for your toffee base. Always remember to pack your brown sugar firmly into the measuring cup to ensure accurate measurement and the right consistency for the toffee.
- 6 ounces white chocolate chip morsels: White chocolate is the star for decorating this Easter Toffee, as its light color makes it an ideal canvas for vibrant pastel food coloring. Opt for the best quality white chocolate chips you can find, as higher quality tends to melt more smoothly and consistently. Be aware that white chocolate can sometimes be a little trickier to melt without scorching compared to milk or dark chocolate. *Keep reading for an easy substitution if melting white chocolate is a concern.
- 1-2 drops of gel food coloring (I used red to make pink and green): This is your secret weapon for infusing your Easter Toffee with those delightful, soft pastel hues. Gel food coloring is highly concentrated and won’t add excess liquid to your melted chocolate, which can cause it to seize. You can experiment with various colors to create a spectrum of soft pinks, light blues, gentle greens, or sunny yellows. This step is entirely optional; if you prefer a classic aesthetic, you can always leave the white chocolate its natural creamy white color. *As an alternative for adding color, you might consider using colored candy melts in the same quantity as the white chocolate chips. Candy melts are specifically formulated to melt smoothly and are available in a wide array of ready-made vibrant colors, simplifying the coloring process.
- Easter and Springtime-themed sprinkles and candies – the amount is to taste: This is truly where the fun and personalization come into play! Stock up on your favorite pastel sprinkles – look for bunny shapes, tiny eggs, or classic nonpareils. Add an assortment of Easter candies such as mini chocolate eggs, colorful jelly beans, or even crushed robin’s eggs for extra texture and holiday cheer. There’s no right or wrong amount here – feel free to decorate as much or as little as your heart desires, making each piece uniquely festive!
Recommended Kitchen Tools for a Seamless Experience
Having the right tools makes any baking project smoother and more enjoyable. For this Easter Toffee, a few basic kitchen items will ensure your success and make the process incredibly easy:
- Rimmed Baking Sheet: This is an absolutely essential item. A standard half-sheet pan (approximately 18×13 inches) works perfectly for the quantities listed and is crucial for containing the melted toffee mixture, preventing any messy spills in your oven.
- Measuring Spoons and Cups: As with most baking, accuracy is key, especially when dealing with the precise ratios of butter and sugar required for the toffee base. Having clearly marked measuring tools will ensure consistent results.
- Heavy-Duty Aluminum Foil or Parchment Paper: While aluminum foil can technically work, I enthusiastically recommend parchment paper for this recipe. It truly is a game-changer for easy release and quick cleanup, ensuring your delicate toffee doesn’t stick to the bottom of the pan – a common issue with foil. Make sure your parchment paper extends up the sides of the pan; this creates a “sling” that allows for incredibly easy removal of the entire slab of toffee once it has set.
- Baking Spatula and/or Offset Spatula: These tools are invaluable for smoothly and evenly spreading the melted chocolate over the hot toffee layer. An offset spatula, with its slightly angled blade, is particularly adept at achieving a beautifully smooth and consistent chocolate layer.
- Medium Saucepan: A sturdy, medium-sized saucepan is needed for melting the butter and brown sugar to create the luscious toffee base. Choose one with a heavy bottom to ensure even heat distribution and prevent scorching of the caramel.
- Small Bowls for mixing the food coloring and white chocolate (optional): If you’re planning to color your white chocolate into different pastel shades, having a few small, microwave-safe bowls will make the process much cleaner and allow you to work with multiple colors simultaneously without cross-contamination.
Step-by-Step Guide to Crafting Perfect Easter Toffee
Making this Easter Toffee is surprisingly straightforward, and with these detailed steps, you’ll achieve perfect results every time. Follow along to create a batch of irresistibly crunchy, sweet, and festive treats that will impress all your Easter guests.
1. Prepare Your Workspace
Before you begin the cooking process, ensure your oven is ready by preheating it to 350 degrees F (175 degrees C). This ensures the oven is at the correct temperature when the toffee is ready to be baked, ensuring optimal caramelization. Next, prepare your baking sheet: generously cover a standard rimmed baking sheet with parchment paper. This step is absolutely crucial for preventing the toffee from sticking and for easy removal later. Make sure the parchment paper extends up the sides of the pan; this creates a convenient “sling” that will allow you to lift the entire slab of cooled toffee with ease. Arrange about 48 (or more, depending on the exact size of your sheet pan) regular saltine crackers in a single, snug layer across the entire bottom of the prepared pan. These crackers form the sturdy, salty foundation of your delicious toffee.
2. Create the Buttery Toffee Base
In a medium-sized saucepan, combine the 1 cup of unsalted butter and 1 cup of packed dark brown sugar. Place the saucepan over medium heat, stirring occasionally with a whisk or wooden spoon until the butter is completely melted and the brown sugar has fully dissolved into a smooth, cohesive mixture. Once melted, bring the mixture to a vigorous, rolling boil. Continue to boil the mixture for exactly 5 minutes, stirring constantly. This precise boiling time is critical for the sugar to properly caramelize and reach the ideal temperature for a crisp, firm toffee. The mixture should become visibly bubbly and slightly thickened. Exercise caution at this stage, as the mixture will be very hot. Do not under-boil, as this can result in a soft, chewier toffee that doesn’t “crack,” and avoid over-boiling, which can cause it to become overly brittle or even burnt.
3. Bake and Top with White Chocolate
Once the toffee mixture has boiled for 5 minutes, carefully and evenly pour the hot, bubbly caramel over the arranged saltine crackers on your prepared baking sheet. Ensure all crackers are thoroughly coated. Immediately transfer the sheet pan into your preheated oven. Bake for a brief 4-5 minutes. During this short baking time, the toffee mixture will continue to bubble and meld perfectly with the crackers, creating a solid base. When you remove the pan from the oven, the toffee mixture should still be actively bubbling, indicating it’s perfectly hot and ready for the next step.
As soon as the pan comes out of the oven, generously sprinkle the 6 ounces of white chocolate chip morsels over the hot toffee layer. The intense residual heat from the crackers and toffee will quickly begin to melt the chocolate. Allow the chocolate chips to sit for a few minutes (typically 3-5 minutes) to soften sufficiently. Once softened, use an offset spatula or the back of a spoon to gently and evenly spread the melted white chocolate across the entire surface of the toffee. This is also the perfect moment to introduce your festive pastel colors! As an optional step, you can mix 1-2 drops of gel food coloring into separate portions of melted white chocolate and then spread them for a beautiful pastel effect, or simply drizzle various colored candy melts over the base layer for a playful marbled design. Immediately after spreading the chocolate (while it’s still wet), generously sprinkle your chosen Easter and Springtime-themed sprinkles and candies over the top, gently pressing them into the chocolate to ensure they adhere securely.
4. Cool and Enjoy!
Once your Easter Toffee is beautifully decorated, place the entire sheet pan into the refrigerator. Allow it to cool and set completely for at least 2 hours, or for best results, overnight. This crucial refrigeration time ensures the toffee becomes wonderfully firm and achieves that satisfying crisp “snap” when broken. Once fully chilled and set, carefully remove the toffee from the refrigerator. You can then either break it apart into rustic, irregular pieces using your hands (hence the nickname “crack”!), or for neater portions, use a sharp knife to cut it into squares or rectangles. Package your delightful Easter Toffee in decorative cellophane bags or charming gift boxes for thoughtful gift-giving, or simply arrange it on a beautiful platter for your Easter guests. Enjoy this utterly delicious and festive treat!
Troubleshooting and Expert Tips for Best Results
Even though this recipe is simple, a few expert tips can help you achieve bakery-quality results every time:
- Achieving the Perfect Toffee Texture: The 5-minute boil time for the butter-sugar mixture is absolutely critical. Boiling for too short a time can result in a soft, chewy toffee that lacks that satisfying “crack,” while boiling for too long can make it overly brittle or even give it a burnt taste. Set a timer and watch it carefully!
- Spreading the Chocolate Smoothly: Once you sprinkle the white chocolate chips, give them a few minutes to melt from the residual heat. Don’t rush to spread them. If they’re not melting sufficiently, you can carefully pop the pan back into the turned-off oven (with residual heat) for 30-60 seconds, or gently use a hairdryer on a low setting over the chips to help them along.
- Evenly Colored Chocolate: If using gel food coloring, mix it into the white chocolate *before* spreading it. For a marbled effect, drizzle different colored melted white chocolate or candy melts over the base layer and swirl gently with a toothpick for artistic flair.
- Crispness is Key: Do not skimp on the refrigeration time. A minimum of 2 hours, or even better, overnight, will ensure your toffee sets perfectly firm and yields that satisfying “crack” when broken or bitten into. Patience is a virtue for perfect toffee!
- Storage: To maintain its freshness and crisp texture, store your Easter Toffee in an airtight container. It can be kept at room temperature for up to a week, or in the refrigerator for longer freshness (up to 2 weeks). If storing in layers, separate them with parchment paper to prevent them from sticking together.
More Delightful Easter Desserts to Explore
Easter is undeniably a holiday synonymous with decadent desserts, and while this Easter Toffee will certainly be a crowd-pleaser, there are many other delightful recipes that can complete your festive spread. Among the most popular traditional Easter treats are the wonderfully moist Pineapple Upside Down Cake, a true classic; the charming and kid-friendly Rice Krispie Nests, perfect for little helpers to decorate; the elegant and flavorful Carrot Cake Trifle, offering layers of spring delight; and these beautifully pastel-colored Frosted Sugar Cookie Bars. We sincerely hope you’ll add this incredibly easy and festive Easter Toffee recipe to your growing list of favorite holiday dessert traditions!
Easter Toffee
IMPORTANT – There are often Frequently Asked Questions within the blog post that you may find helpful. Simply scroll back up to read them!
Print It
Pin It
Rate It
Save ItSaved!
Ingredients
- 48 each or more, depending on the size of your baking sheet Saltine crackers (regular)
- 1 cup unsalted butter 2 sticks
- 1 cup dark brown sugar packed
- 6 ounces white chocolate chip morsels use the best quality possible because white chocolate is a little harder to melt *see below for substitution
- 1-2 drops of gel food coloring I used red to make pink and green – to make the white chocolate have some pastel color to it. *you could also try using colored candy melts in the same amount as the white chocolate – this is optional and you can always just leave the white chocolate white
- Easter and Springtime-themed sprinkles and candy amount to taste
Instructions
-
Preheat oven to 350 degrees F.
-
Cover a rimmed baking sheet with parchment paper (make sure the parchment is covering up the sides).
-
Cover sheet pan with 48 (or more) saltine crackers.
-
Melt the unsalted butter and packed, dark brown sugar in a medium sauce pan. Boil for 5 minutes or until it is mixed and bubbly. Stir with a whisk or wooden spoon.
-
Pour carefully over the arranged Saltines.
-
Place sheet pan in the preheated oven for 4-5 minutes, the butter-sugar mixture should be bubbly when you take it out.
-
Take the sheet pan out and sprinkle the white chocolate chip morsels, after a few minutes, using an offset spatula spread the chocolate evenly. Add sprinkles and candy.
EXPERT TIP – Optionally, you can mix 1-2 drops of food coloring with the melted white chocolate and spread it to get a pastel effect. As another option for adding color, you can try using the same amount candy melts as well if you prefer.
-
Cool in the refrigerator for 2 hours or overnight to allow it to set. Take out and you can break it apart with your hands or use a sharp knife to cut. Package to give for gift-giving and enjoy!
Nutrition
The recipes on this blog are tested with a conventional gas oven and gas stovetop. It’s important to note that some ovens, especially as they age, can cook and bake inconsistently. Using an inexpensive oven thermometer can assure you that your oven is truly heating to the proper temperature. If you use a toaster oven or countertop oven, please keep in mind that they may not distribute heat the same as a conventional full sized oven and you may need to adjust your cooking/baking times. In the case of recipes made with a pressure cooker, air fryer, slow cooker, or other appliance, a link to the appliances we use is listed within each respective recipe. For baking recipes where measurements are given by weight, please note that results may not be the same if cups are used instead, and we can’t guarantee success with that method.
This post originally appeared on the blog on Mar 17, 2018.
