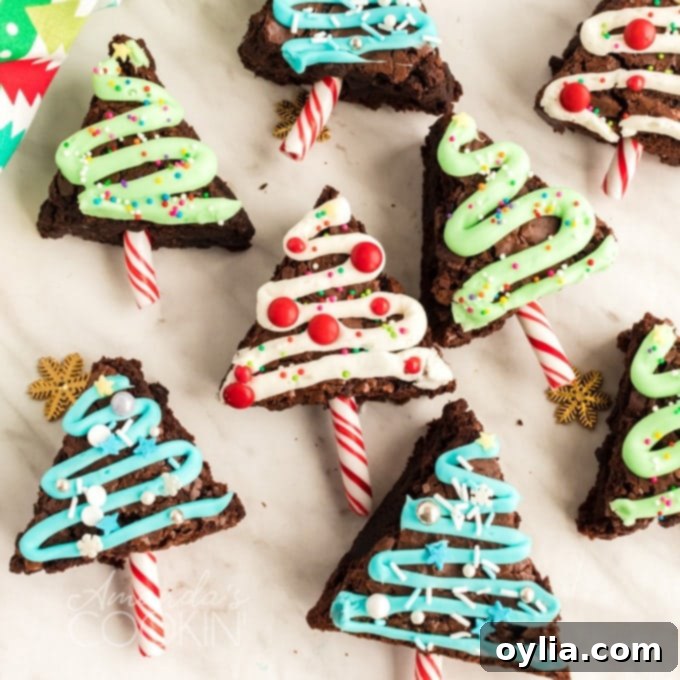
Easy & Festive Christmas Tree Brownies: The Perfect Holiday Treat!
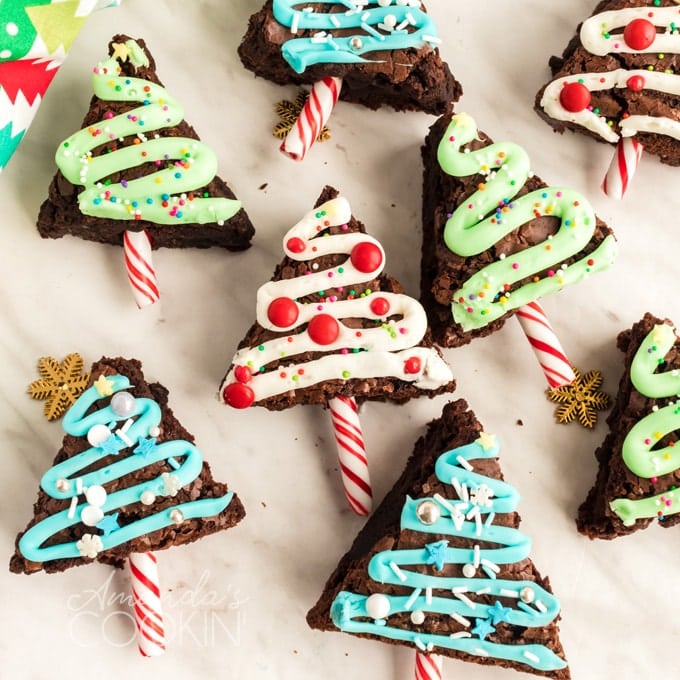
Bring a touch of edible enchantment to your holiday table with these charming Christmas Tree Brownies! Crafted with remarkable simplicity using a trusty box mix and a tub of pre-made frosting, these delightful treats are not just easy to make but are also incredibly fun to decorate. While their festive shape and vibrant sprinkles are designed to capture the hearts of children, don’t be surprised when you find adults secretly reaching for seconds (or even thirds!). They’re the ultimate crowd-pleaser for any festive gathering, school party, or cozy family night.
If you’re a fan of a refreshing minty twist during the holidays, consider elevating your brownies! Instead of a standard box mix, try my peppermint brownies recipe as a base. Imagine that cool minty flavor perfectly complementing the rich chocolate, all shaped and decorated like a miniature Christmas tree – truly a seasonal sensation!
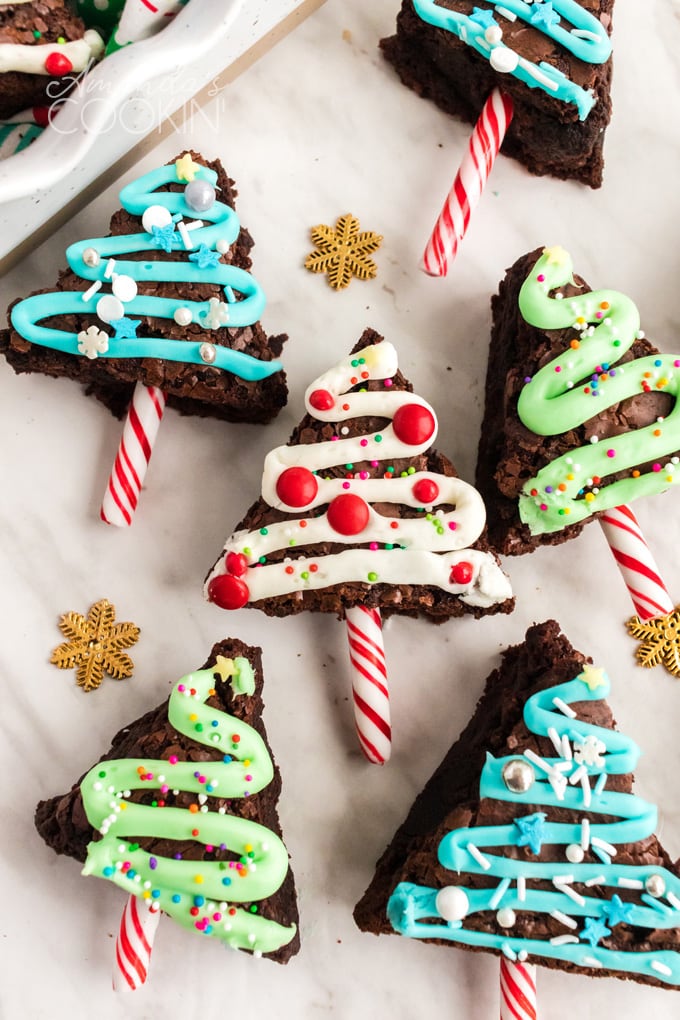
Why These Christmas Tree Brownies Are a Holiday Must-Make
Prepare to receive a flurry of compliments when you proudly display these darling little Christmas tree-shaped brownies. Beyond their undeniable cuteness, they offer a host of reasons to become your new favorite holiday tradition. They’re quick, making them ideal for busy holiday schedules, and the involvement of minimal baking allows even the youngest chefs to participate in the fun. The combination of chewy, rich brownies and sweet, colorful frosting is simply irresistible, embodying the joy and indulgence of the festive season.
Their individual size makes them perfect for portion control (if you can resist having just one!) and easy to serve at parties without the need for plates and forks. Plus, customizing them with different colors of frosting and an array of sprinkles means every brownie can be a unique, mini masterpiece. These Christmas Tree Brownies aren’t just a dessert; they’re an experience, creating cherished memories and spreading holiday cheer with every delicious bite.
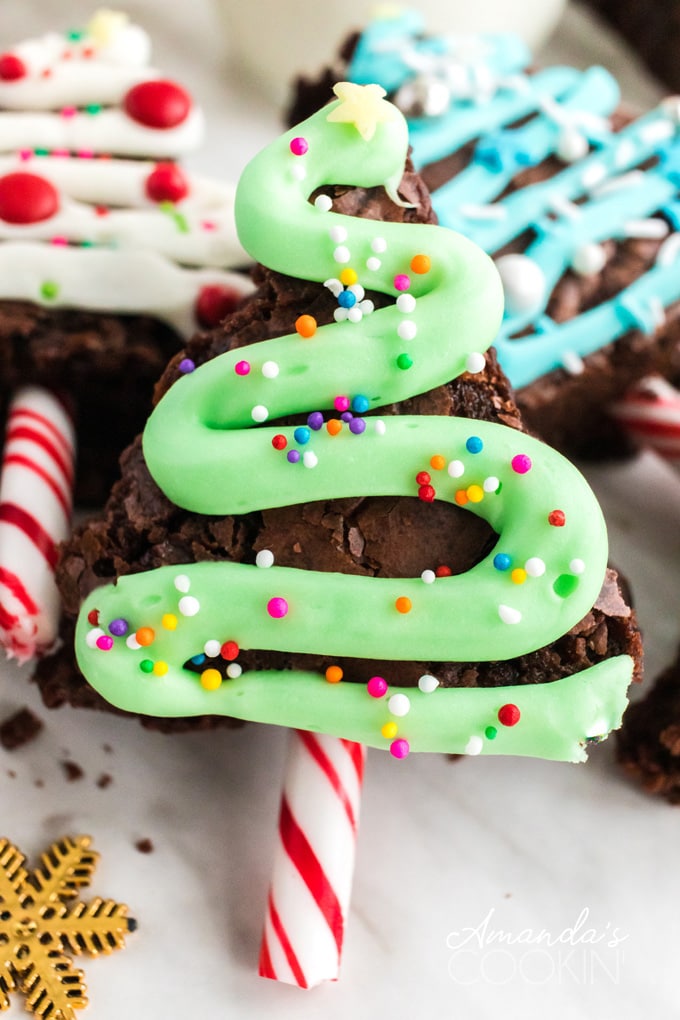
Simple Ingredients for Festive Brownies
The beauty of this recipe lies in its simplicity. We’re leaning on a couple of convenient store-bought items to save you time and effort during the busy holiday season, allowing you to focus on the fun part: decorating! Remember that a box mix requires a few extra pantry staples, so double-check the back of your brownie box to ensure you have everything needed to prepare the brownie base.
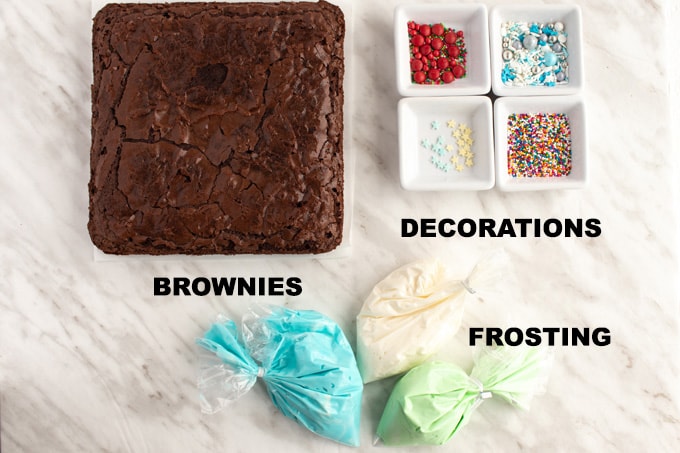
What You’ll Need:
- 18 oz box brownie mix (plus ingredients on box): Any standard fudge or chewy brownie mix will work perfectly. The box will typically require oil, water, and eggs.
- 16 oz can white frosting: Store-bought white frosting provides a smooth, easy-to-tint base for your festive decorations. Vanilla or cream cheese frosting varieties are ideal.
- Blue and green liquid food coloring: Essential for transforming plain white frosting into vibrant, tree-like colors. Feel free to experiment with other holiday colors like red or even purple!
- Decorative sprinkles and nonpareils: These are your “ornaments”! Choose a festive mix of greens, reds, golds, and silvers to make your trees sparkle.
- Small star sprinkles: The crowning glory for each tree! Gold or yellow stars work best to mimic a tree topper.
- Candy canes or pretzel sticks: These form the sturdy “trunk” of your Christmas trees. Candy canes add a pop of mint and color, while pretzel sticks offer a salty-sweet contrast and are great for those avoiding mint.
Helpful Baking Tools for Easy Preparation
Having the right tools can make all the difference, even with a simple recipe like this one. These items will ensure your Christmas Tree Brownies come out perfectly baked, easily cut, and beautifully decorated.
- Square baking pan: An 8×8 or 9×9 inch square pan is crucial for achieving the ideal brownie thickness and making triangle cuts efficient.
- Aluminum foil: Your secret weapon for effortlessly lifting baked brownies from the pan without sticking or breaking.
- Chef’s knife: A sharp knife is key for clean, precise cuts when shaping your brownie triangles.
- Cutting board: Provides a stable and safe surface for cutting your cooled brownies.
- Small mixing bowls: For dividing and coloring your frosting.
- Sandwich-sized zipper bags: An easy and disposable alternative to piping bags for frosting application.
Pro Tips for Perfect Christmas Tree Brownies
Achieving bakery-worthy Christmas Tree Brownies is easier than you think, especially with these insider tips:
- Lining the Pan is Key: Always line your baking pan with aluminum foil, ensuring excess foil hangs over the edges. This creates “handles” that allow you to lift the entire slab of cooled brownies out of the pan with ease, preventing sticking and making cutting a breeze. Don’t forget to spray the foil with cooking spray for extra non-stick insurance!
- Clean Cuts Every Time: Brownies can sometimes be sticky, making clean cuts challenging. For razor-sharp edges, run your knife blade under hot tap water and wipe it clean between each cut. The heat helps melt through the chocolate smoothly. If your brownies are still proving stubborn, pop them in the refrigerator for a few hours (or even overnight) to firm them up. Chilled brownies are much easier to slice into perfect triangles.
- Cool Completely: Patience is a virtue, especially in baking! Ensure your brownies are completely cooled before attempting to cut or frost them. Warm brownies will crumble when cut and cause your frosting to melt and slide off.
- Practice Your Piping: If you’re new to piping, do a quick practice run on a piece of parchment paper before decorating your brownies. This helps you get a feel for the pressure and flow, leading to prettier trees.
- Get Kids Involved: This recipe is perfect for little helpers! Let them stir the brownie mix (under supervision), choose sprinkles, and decorate the cooled brownies. It’s a wonderful way to create holiday memories.
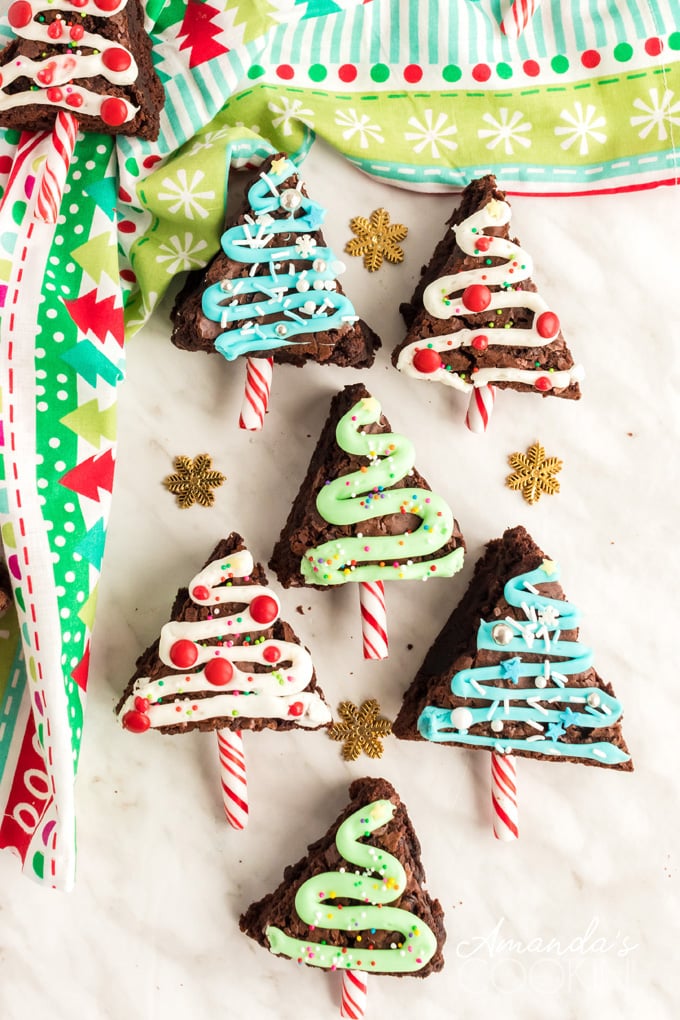
How to Make Christmas Tree Brownies: Step-by-Step
Let’s turn that plain brownie slab into an enchanting forest of festive delights! Follow these simple steps for a fun and rewarding baking project.
- Bake the Brownies: Begin by preparing your favorite box brownie mix according to the package directions. Pour the batter into your prepared square baking pan (lined with foil and sprayed with cooking spray). Bake as directed. Once baked, allow the brownies to cool in the pan for about five minutes. Then, using the foil overhang as handles, carefully lift the entire brownie slab out of the pan and transfer it to a wire rack. It’s crucial to let the brownies cool completely at room temperature before proceeding. This can take an hour or two.
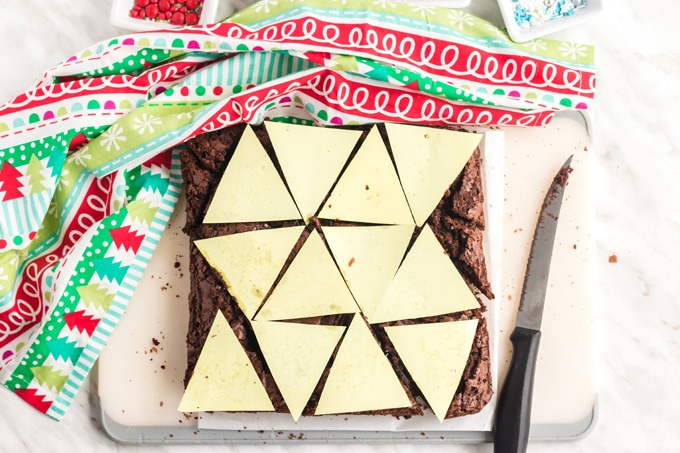
- Cut into Triangles: Once the brownies are completely cool and firm, remove them from the foil. Now for the fun part of shaping them! You can freehand the cuts, but for uniform trees, we recommend cutting out paper triangles measuring approximately 2.5 inches wide at the base and 2.5 inches tall. Place these as a guide on your brownie slab. Slice the brownies into long strips, then cut each strip into triangles. The most efficient way to do this is to cut the entire slab into rows of squares, then cut each square diagonally to create two triangles.
NOTE: These triangle measurements are optimized for an 8×8 baking pan. If you’re using a 9×9 inch pan, you may need to adjust the size of your paper triangle template slightly to maximize your brownie yield.
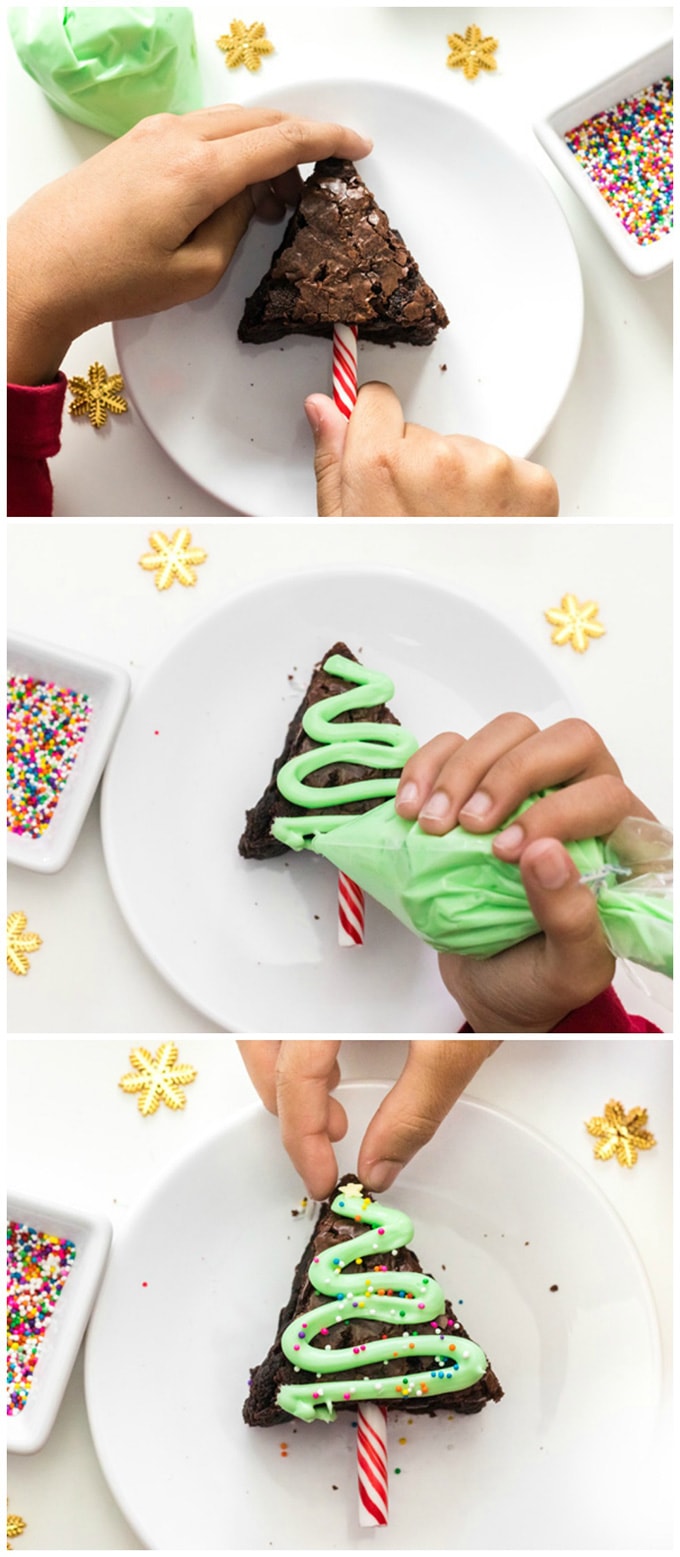
- Add the Tree Trunk: For the tree trunks, snap your candy canes into pieces about 1.5 inches long. If you prefer, use pretzel sticks for a slightly savory crunch; if they are thin, use two side-by-side for better stability. Gently press the broken end of each candy cane piece (or pretzel sticks) into the base of each brownie triangle.
- Prepare the Frosting: Divide your can of white frosting evenly into three separate bowls. Tint two of these bowls with liquid food coloring – one green for classic trees and one blue for a whimsical winter touch (or any other colors you desire!). Leave the third bowl white if you want. Spoon each color of frosting into separate sandwich-sized zipper bags. Seal the bags securely, then snip a very small corner off each bag to create a piping hole. This allows for easy and controlled frosting application.
- Decorate Your Trees: Now for the most creative step! Use the colored frostings to pipe festive designs onto your brownie trees. Swirls, zig-zags, or simple lines all look great. Immediately after frosting, adorn your trees with decorative sprinkles, nonpareils, and those charming small star sprinkles for the tree toppers. The frosting will set quickly, so decorate one or two at a time.
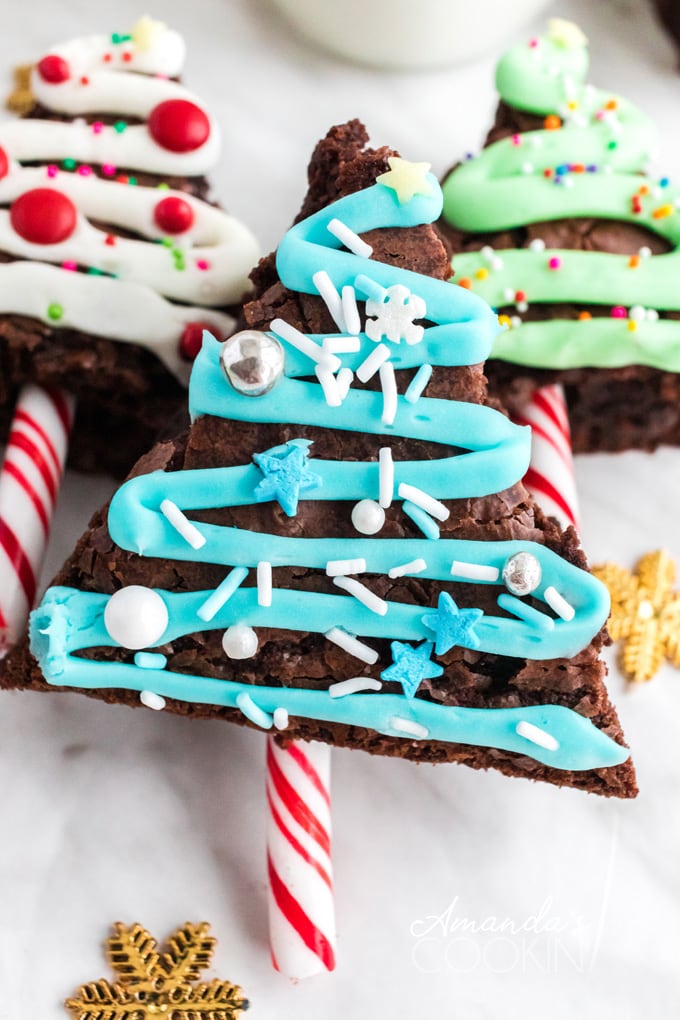
Serving, Storage, and Variations
Once your whimsical holiday treats are complete, both kids and adults will adore them! Be sure to allow the icing to set completely for at least 30 minutes to an hour before handling or serving them to prevent smudging and ensure they hold their festive appeal. You can gently place them in the refrigerator to speed up the setting process.
Storage Tips:
- Store your Christmas Tree Brownies in an airtight container at room temperature for up to 3-4 days.
- For longer freshness, especially if your kitchen is warm, you can refrigerate them for up to a week. Just bring them to room temperature for about 15-20 minutes before serving for the best texture.
- These brownies also freeze well! Place them in a single layer on a baking sheet to freeze until solid, then transfer them to an airtight, freezer-safe container or bag for up to 2-3 months. Thaw at room temperature when ready to enjoy.
Creative Variations:
- Minty Fresh: As mentioned, swap out the standard brownie mix for my peppermint brownie recipe for a cool, refreshing flavor.
- Chocolate Overload: Use chocolate frosting instead of white, or drizzle melted white chocolate over dark chocolate frosting for a striking contrast.
- Homemade Touch: If you have extra time and prefer a completely homemade dessert, use your favorite scratch brownie recipe. Just ensure it bakes up in a square pan to maintain the cutting efficiency.
- Nutty Trees: Add chopped nuts (like walnuts or pecans) to your brownie batter for extra texture and flavor.
- Coconut Snow: Sprinkle shredded coconut over your frosted trees for a snowy effect.
- Different Trunks: Experiment with other “trunk” options like chocolate-dipped pretzel sticks, short pieces of Pirouette cookies, or even mini chocolate bars.
Frequently Asked Questions (FAQ)
Got questions about making these adorable Christmas Tree Brownies? We’ve got answers!
Can I use homemade brownies for this recipe?
Absolutely! While this recipe highlights the convenience of a box mix, you can certainly use your favorite homemade brownie recipe. Just make sure it bakes in an 8×8 or 9×9 inch square pan so you can easily cut it into the desired triangle shapes. Allow them to cool completely before cutting and decorating.
What kind of sprinkles work best for decoration?
Any festive sprinkles will do! Nonpareils, jimmies, sugar pearls, or even edible glitter work wonderfully. Look for holiday-themed mixes with reds, greens, and golds. Small star sprinkles are perfect for the tree toppers.
My frosting is too thick/thin. How can I fix it?
If your canned frosting is too thick to pipe easily, you can microwave it in a microwave-safe bowl for 5-10 seconds at a time, stirring until it reaches a smoother consistency. If it becomes too thin, place it in the refrigerator for 15-30 minutes to firm up.
Can I make these Christmas Tree Brownies ahead of time?
Yes, you can! The brownies can be baked and cut up to 1-2 days in advance and stored in an airtight container at room temperature. You can then frost and decorate them closer to serving time. Decorated brownies also store well for several days, as mentioned in the storage tips above.
What if I don’t have sandwich bags for piping?
No problem! You can use actual piping bags with a small round tip (like Wilton 3 or 4), or simply use a butter knife or small spatula to spread the frosting onto the brownies. The piped look is fun, but a frosted look is equally delicious!
More Christmas Recipes to Brighten Your Holidays
Looking for more festive inspiration? Explore these other wonderful holiday recipes that are perfect for sharing the joy of the season with family and friends. From classic cookies to delightful candies, there’s something for every sweet tooth!
- Saltine Toffee: An addictive crunchy, buttery, and chocolatey treat that’s surprisingly easy to make.
- Chocolate Turtles: Elegant and delicious, these pecan and caramel clusters are drenched in rich chocolate.
- Gingerbread Cookies: The quintessential holiday cookie, perfect for decorating and gifting.
- Homemade Peanut Brittle: A classic crunchy candy, sweet and nutty, great for a holiday crunch.
- Candy Cane Pretzel Sticks: A simple, festive, and irresistible combination of salty pretzels, sweet white chocolate, and refreshing peppermint.
- Candy Cane Jello Shots: A fun, adult-only treat to liven up your holiday party!
Christmas Tree Brownies
IMPORTANT – There are often Frequently Asked Questions within the blog post that you may find helpful. Simply scroll back up to read them!
Print It
Rate It
Save It
Saved!
Prevent your screen from going dark
Course:
Desserts
Cuisine:
American
12
trees
40 minutes
346
Amanda Davis
Ingredients
-
18
oz
box brownie mix
plus ingredients on box -
16
oz
can white frosting -
Blue and green liquid food coloring -
Decorative sprinkles and nonpareils -
Small star sprinkles -
Candy canes or pretzel sticks
Things You’ll Need
-
Square baking pan -
Aluminum foil -
Chef’s knife -
Cutting board
Before You Begin
- It’s best to line your baking pan with aluminum foil then spray it with cooking spray. Allow excess foil to hang over the edges of the pan. This will give you handles to lift the brownies out with.
- If your brownies are sticky, run the knife blade under hot tape water in between each cut. If you are still having trouble, refrigerate the brownies for a few hours to make them easier to cut.
Instructions
-
Mix and bake brownies in a square pan according to the instructions on the back of the box. Allow them to completely cool about five minutes in the pan then lift out with foil handles. Allow to cool completely.
-
Remove brownies from the foil and cut into triangles. We cut out paper triangles measuring 2.5 inches wide at the base and 2.5 inches tall.
-
Snap the candy canes into 1.5″ long pieces, or you can use pretzel sticks. If you do use pretzels, use two side by side since they are small. Press the broken end of the candy cane into the bottom of the brownie triangles.
-
Separate the frosting into three separate bowls. Tint two of the bowls of frosting with food coloring (blue and green). Fill sandwich sized zipper bags with each color of frosting. Seal and snip off the corner of each bag to make a piping hole.
-
Decorate the brownies with the colored frostings and various sprinkles and stars.
Nutrition
Serving:
1
tree
|
Calories:
346
cal
|
Carbohydrates:
59
g
|
Protein:
2
g
|
Fat:
11
g
|
Saturated Fat:
2
g
|
Sodium:
194
mg
|
Potassium:
13
mg
|
Sugar:
45
g
|
Calcium:
1
mg
|
Iron:
1
mg
Tried this Recipe? Pin it for Later!
Follow on Pinterest @AmandasCookin or tag #AmandasCookin!
The recipes on this blog are tested with a conventional gas oven and gas stovetop. It’s important to note that some ovens, especially as they age, can cook and bake inconsistently. Using an inexpensive oven thermometer can assure you that your oven is truly heating to the proper temperature. If you use a toaster oven or countertop oven, please keep in mind that they may not distribute heat the same as a conventional full sized oven and you may need to adjust your cooking/baking times. In the case of recipes made with a pressure cooker, air fryer, slow cooker, or other appliance, a link to the appliances we use is listed within each respective recipe. For baking recipes where measurements are given by weight, please note that results may not be the same if cups are used instead, and we can’t guarantee success with that method.
