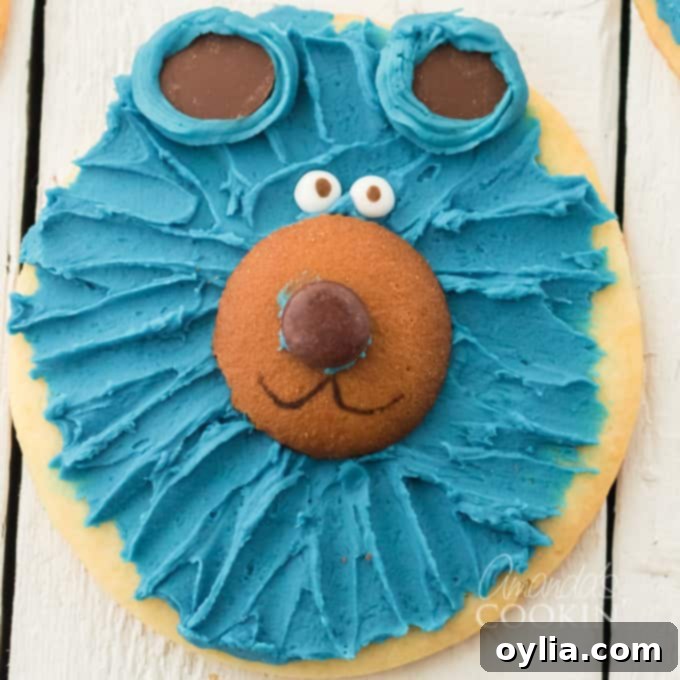
How to Make Adorable Bear Cookies: An Easy, Fun, and Family-Friendly Recipe
Whether you’re planning a woodland-themed birthday party, a cozy camping trip, or simply looking for a fun activity to do with the kids, these adorable bear cookies are an absolute hit. With their charming furry texture and sweet expressions, they are guaranteed to bring smiles to faces of all ages. The best part? You don’t need to be a professional cake decorator to create these delightful treats. This guide will walk you through how to easily make these lovable bear cookies, offering options for both from-scratch bakers and those looking for convenient shortcuts from the grocery store.
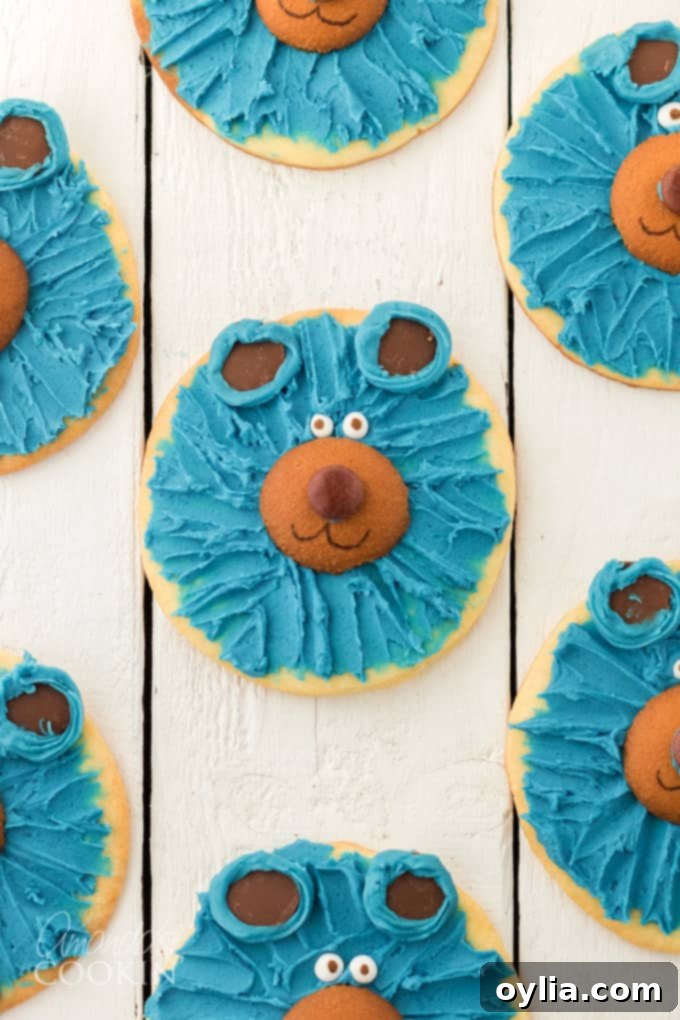
Why This Bear Cookie Recipe is a Must-Try
This bear cookie recipe stands out for its incredible flexibility and delightful simplicity. We understand that not everyone has hours to spend in the kitchen, nor does everyone enjoy baking from scratch. That’s precisely why this recipe is designed to cater to various skill levels and time constraints, making it accessible and enjoyable for everyone. Whether you’re a seasoned baker or a complete novice, you’ll find this process straightforward and rewarding.
Flexible Baking Options: Homemade or Shortcut
One of the biggest advantages of this recipe is the freedom to choose your starting point. If you’re short on time or prefer a less involved baking process, you can easily opt for a shortcut dough from your local grocery store. Refrigerated slice-and-bake sugar cookie dough works perfectly for these cookies, saving you precious minutes and effort. It’s a fantastic way to jump straight into the fun part: decorating!
However, if you cherish the aroma and taste of homemade goodness, we’ve got you covered. You can use your favorite homemade sugar cookie dough recipe. The flavor of freshly made cookies adds an extra layer of deliciousness to your bear treats, making them truly special.
Frosting Freedom: Canned or Crafted
Just like with the dough, you have options for the frosting. Canned vanilla frosting is a true lifesaver for busy bakers. It’s readily available, easy to spread, and tastes great. Simply open a can, add a touch of food coloring (if desired), and you’re ready to decorate!
For those who love the rich, creamy texture and customizable flavors of homemade frosting, feel free to use your own recipe. Our cream cheese frosting or a classic buttercream icing would be absolutely delicious and provide a wonderful base for your bear creations. Homemade frostings allow you to control the sweetness and consistency, offering a truly artisanal touch.
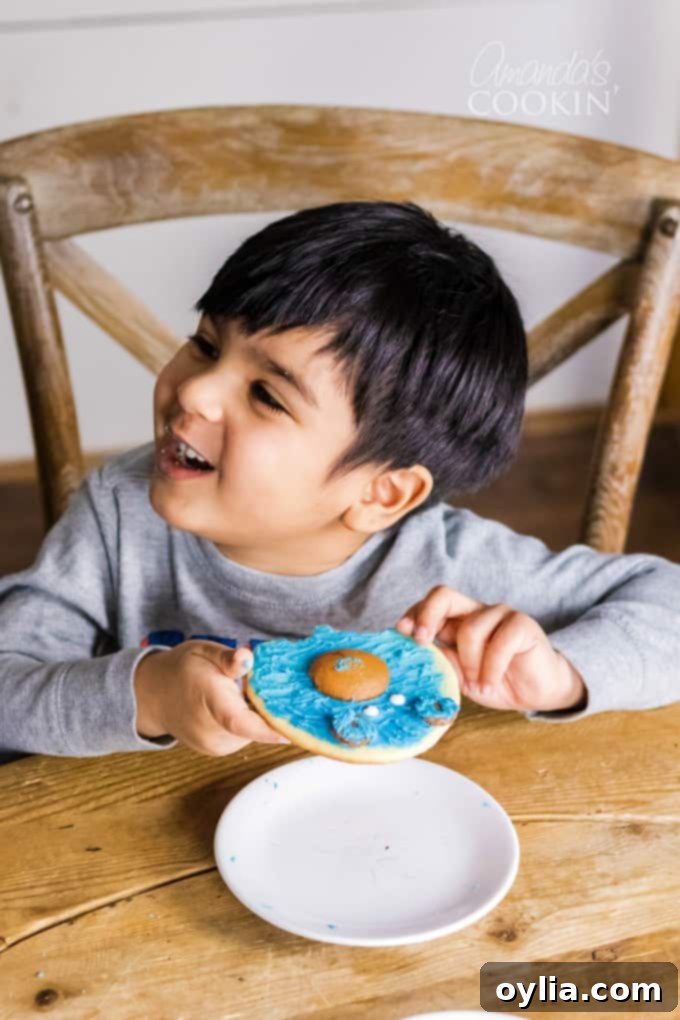
The Irresistible Charm of Bear Cookies for Every Occasion
Bear cookies are more than just a sweet treat; they’re a symbol of cuteness and joy, perfect for an array of celebrations and everyday delights. Their universal appeal makes them suitable for almost any gathering, adding a touch of whimsy and homemade charm.
Perfect for Themed Parties and Celebrations
- Birthday Parties: Imagine a child’s delight seeing these adorable bear faces at their birthday party! They fit perfectly into forest, woodland, camping, or even specific cartoon bear themes, like our original inspiration, Boomer from Wonder Park. You can customize the bear’s color to match any party palette.
- Baby Showers: Gentle and sweet, bear cookies are a heartwarming addition to baby showers, welcoming a new little “cub” into the world.
- Camping Trips & Outdoor Adventures: What’s better than a bear cookie around a campfire? They make excellent, themed snacks for nature lovers and adventurers, bringing a touch of the wild indoors (or outdoors!).
- Movie Nights & Character Fun: Inspired by beloved characters like Boomer, these cookies can be adapted to represent any favorite bear character, making movie nights extra special and interactive.
Beyond Celebrations: Everyday Joy
- School Events & Fundraisers: Stand out at bake sales or school events with these uniquely decorated cookies that are sure to be snapped up quickly.
- After-School Snack: A homemade bear cookie can turn an ordinary afternoon into a magical moment, especially when kids help in the creation process.
- Thoughtful Gifts: Packaged beautifully, these cookies make wonderful homemade gifts for friends, neighbors, or teachers, showing you care with a personal touch.
The simple design allows for endless creativity, ensuring your bear cookies are always a hit, no matter the reason for baking!
Gathering Your Ingredients for Delightful Bear Cookies
Making these charming bear cookies requires a straightforward list of ingredients. Many of these you might already have on hand, or they are easily found at any grocery store. The beauty of this recipe lies in its adaptability, allowing you to choose between convenience and homemade goodness for both your cookie dough and frosting.
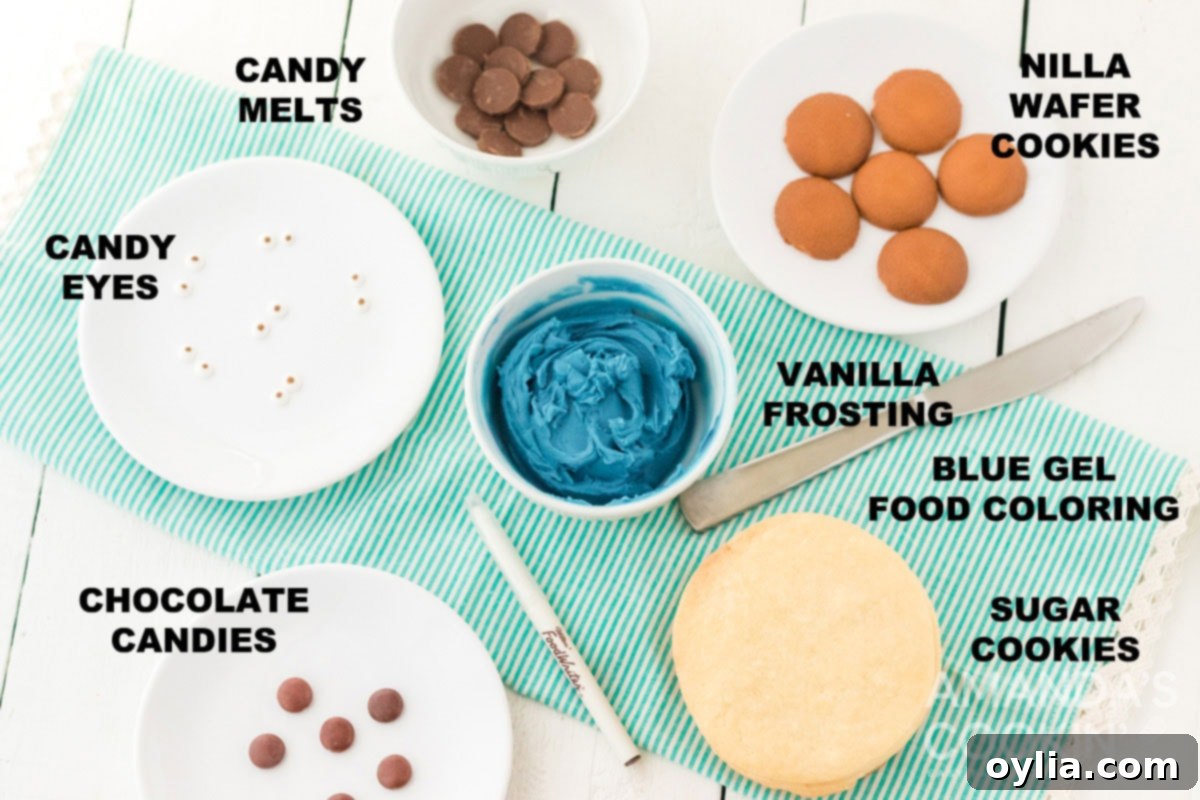
Get all measurements, ingredients, and instructions in the printable version at the end of this post.
What You’ll Need:
- Cookie Dough: A 16.5-ounce package of slice-and-bake refrigerator cookie dough (sugar cookie works best!) or your favorite homemade sugar cookie dough. This forms the base of your bear.
- Frosting/Icing: A 16-ounce can of vanilla frosting provides a quick and easy option. Alternatively, a batch of homemade vanilla buttercream or cream cheese frosting will elevate the flavor and texture.
- Gel Food Coloring: Blue gel food coloring was used for our Boomer-inspired bears, but you can choose any color to create different types of bears (brown for grizzly, white for polar, etc.). Gel colors give vibrant results without thinning the frosting.
- Small Candy Eyes: These edible decorations instantly bring your bear to life, giving them a whimsical and expressive look.
- Vanilla Wafer Cookies: About 14 regular-sized vanilla wafers are needed to create the perfect bear snout. Their round shape and light color make them ideal.
- Chocolate Candy for the Nose: Small round or oval chocolates work best. Think mini chocolate chips, M&Ms, or small chocolate-covered candies that can be firmly pressed onto the wafer.
- Candy Melts for the Ears: You’ll need about 28 candy melts (two per cookie) in a color that complements your bear’s frosting. These add a delightful structural element to the ears.
- Edible Food Marker: A black edible food marker is essential for drawing on the bear’s friendly mouth, adding that final touch of character.
Having these ingredients ready will make the baking and decorating process smooth and enjoyable. Remember, you can always refer to the detailed recipe card at the end of this post for precise measurements and instructions.
Step-by-Step Guide: Crafting Your Adorable Bear Cookies
These step-by-step photos and instructions are here to help you visualize how to make this recipe. For a concise, printable version of the full recipe, please scroll down to the end of this post!
Part 1: Preparing and Baking Your Cookies
- Roll Out the Dough: On a lightly floured surface, roll your cookie dough (whether store-bought or homemade) to an even thickness of approximately 1/4-inch. This ensures uniform baking and a good base for decorating.
- Cut Your Shapes: Use a 4-inch round cookie or biscuit cutter to cut out your cookies. This size provides a generous canvas for your bear faces. You should yield about 14 cookies from a standard 16.5-ounce package of dough. Gently transfer the cut-out cookies to your baking sheets.
- Bake to Perfection: Place your cookies on insulated baking sheets to prevent over-browning and ensure even baking. Bake according to the instructions on your dough package or your chosen homemade sugar cookie recipe.
- Cool Completely: Once baked, remove the cookies from the oven and let them cool on the baking sheets for a few minutes before transferring them to wire racks. It’s crucial that the cookies cool completely before you begin frosting, as warm cookies will cause the frosting to melt and slide off.
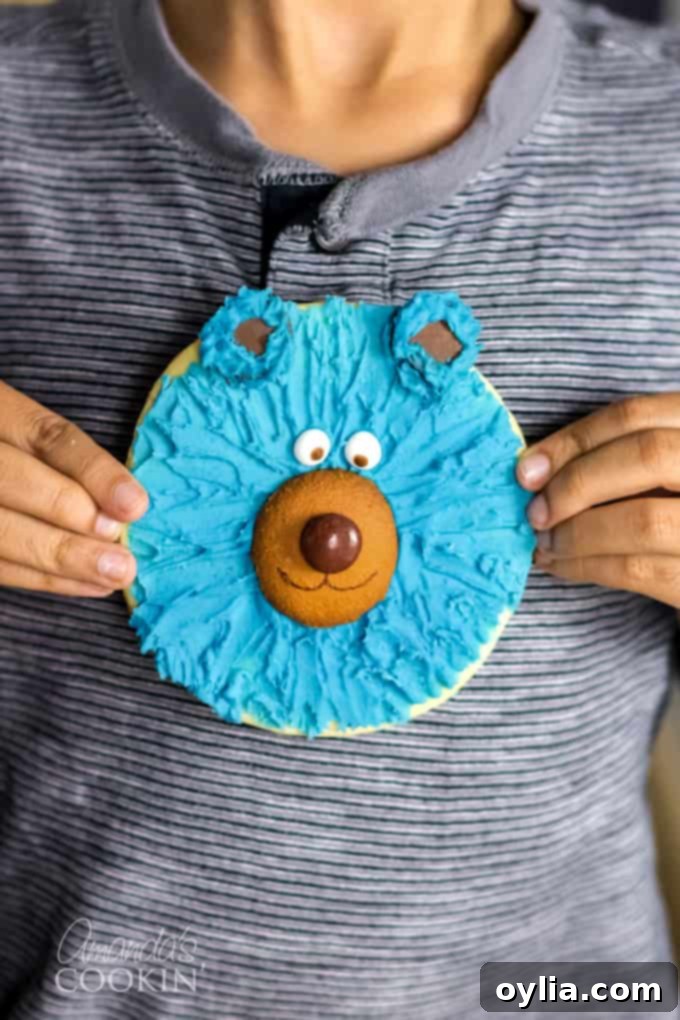
Part 2: Assembling Your Adorable Bear Faces
Now for the most exciting part: bringing your bear cookies to life with frosting and decorations! This is where the creativity truly shines, and it’s particularly fun for little hands to help with.
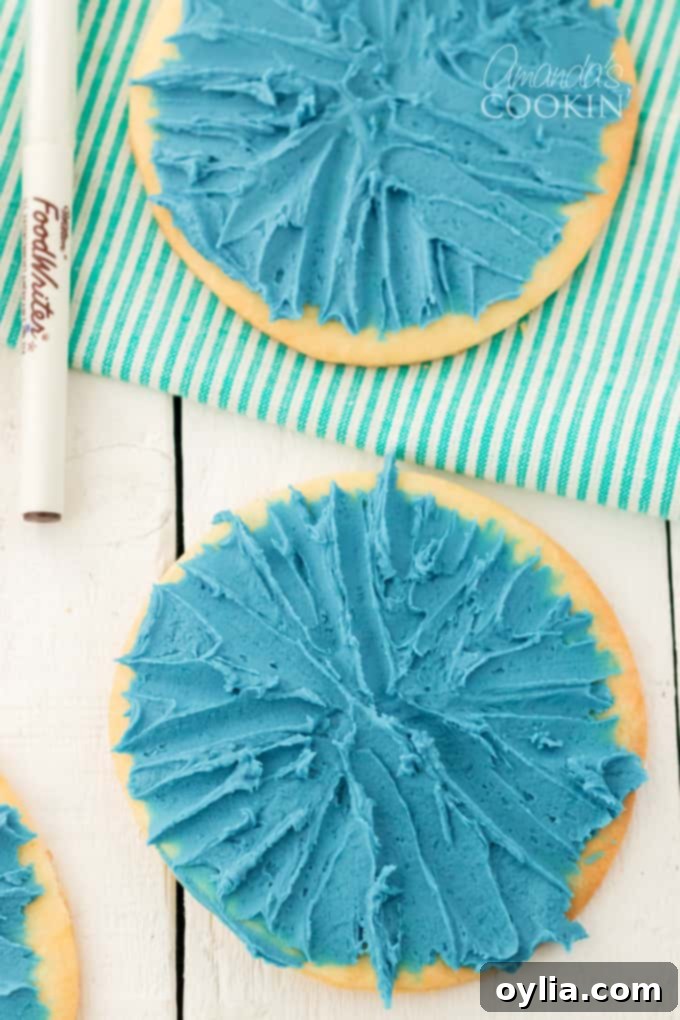
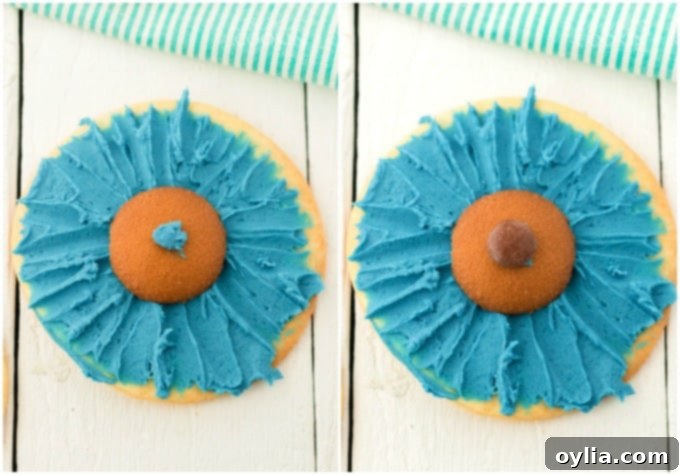
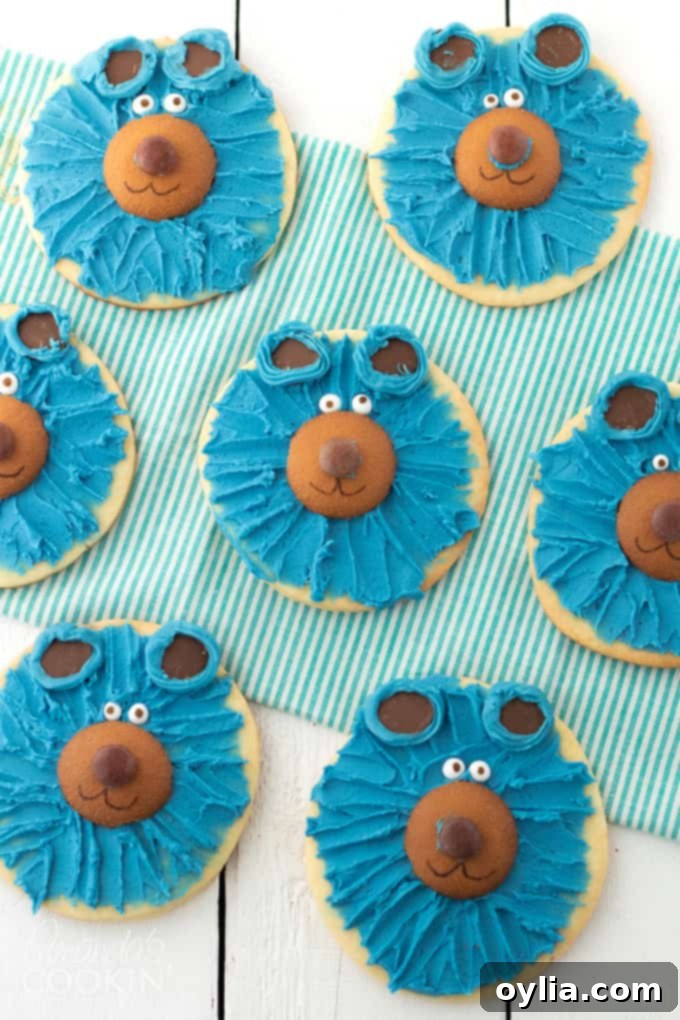
- Frost the Base: Begin by spreading a generous layer of your chosen frosting evenly over the entire surface of each cooled sugar cookie. Aim for a consistent, smooth base before adding texture.
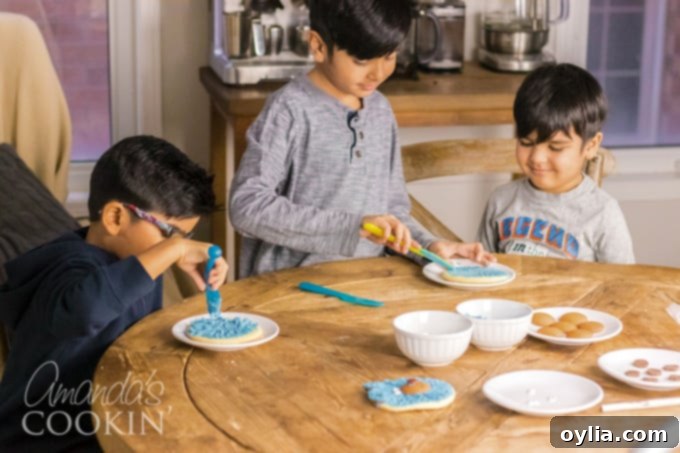
- Create the Fur Texture: This step adds so much character to your bears! Using the tip of a butter knife or a small offset spatula, gently drag the icing outwards from the center to create short, overlapping strokes that mimic the look of fur. This technique is wonderfully simple, making it achievable for even the youngest decorators, without the need for intricate piping skills. We were inspired by the technique used for our Cookie Monster Cookies to get this fun, furry look.
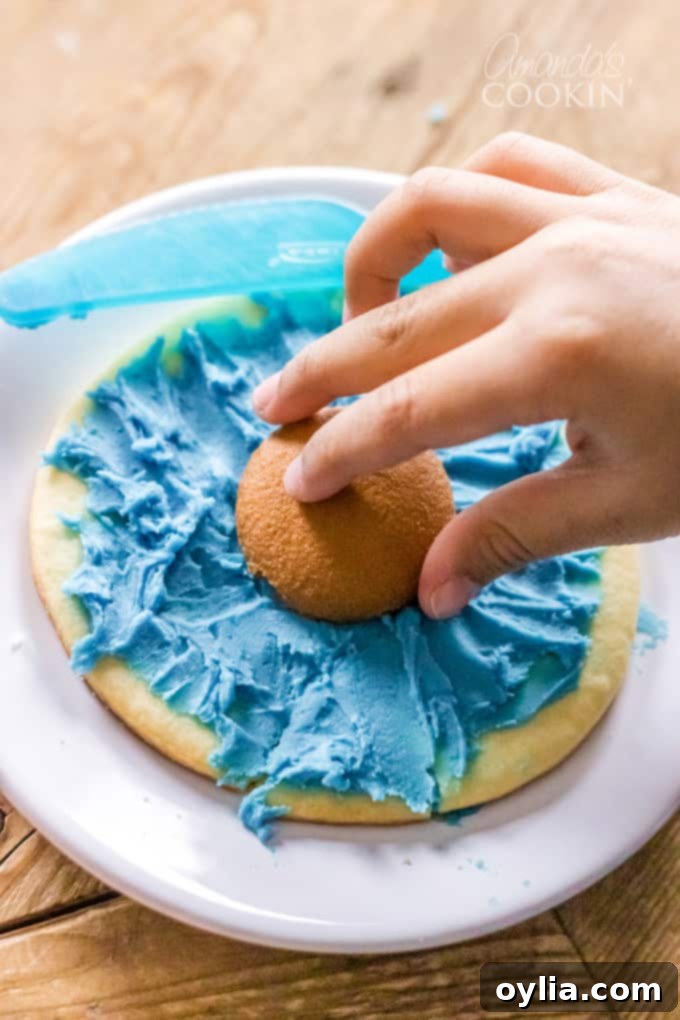
- Attach the Snout: Carefully press a vanilla wafer cookie into the frosting, slightly below the center of the cookie, to form the bear’s snout. Apply gentle pressure to ensure it adheres well without crushing the wafer.
- Add the Nose: Dab a small amount of buttercream or the base frosting onto the center of the vanilla wafer. Then, gently place your chosen chocolate candy onto this dab of frosting to create the bear’s nose.
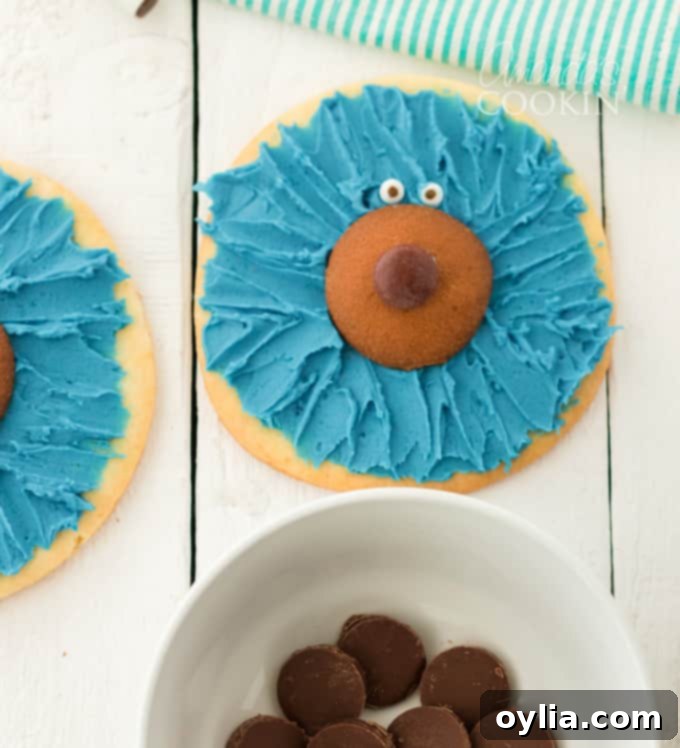
- Place the Eyes: Position the candy eyes above the snout, pressing them gently into the frosting. The frosting acts as a natural adhesive, holding them firmly in place to give your bear its expressive gaze.
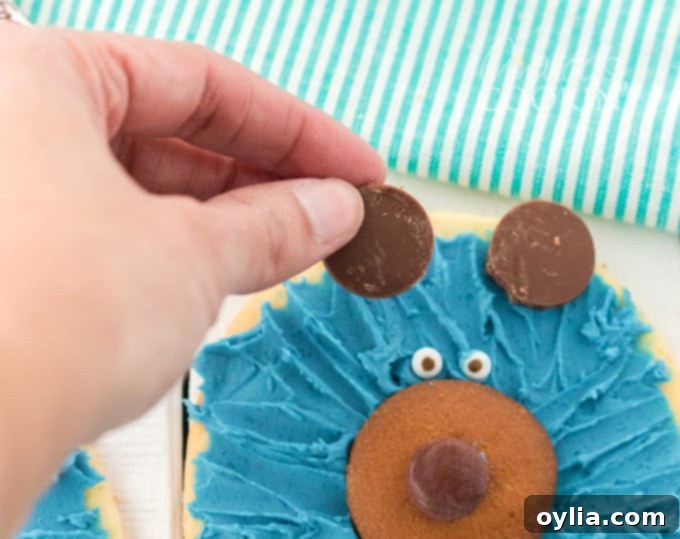
- Add the Ears: For the ears, place two candy melts on either side of the top edge of the cookie. These instantly create the iconic bear ear shape. If you like, spread or pipe a little extra buttercream around the edges of the candy melts to help them blend in and secure them further.
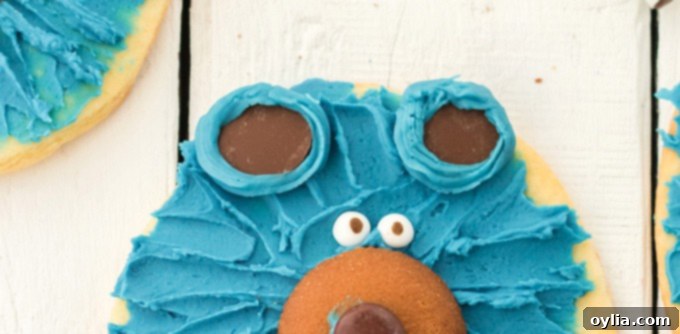
- Draw the Mouth: The final step is to add personality with a smile! Use an edible food marker to draw a simple curved line below the nose, completing your bear’s cheerful face.
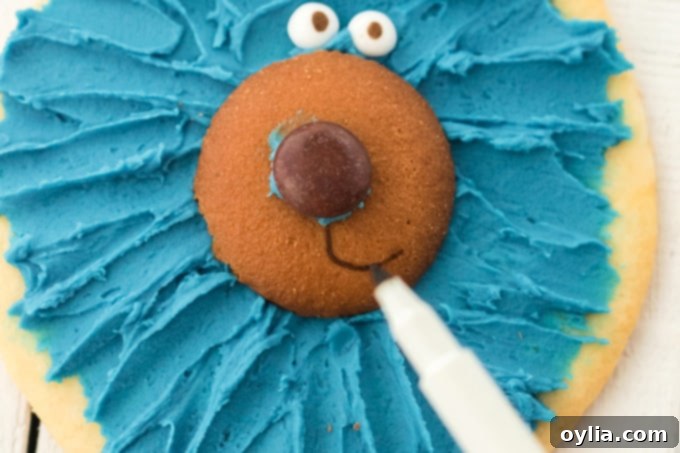
And just like that, you have a batch of adorable, custom-made bear cookies ready to delight! Allow the frosting to set slightly before serving or packaging.
Expert Tips & Frequently Asked Questions for Perfect Bear Cookies
Even though this recipe is designed to be simple, a few extra tips and tricks can help ensure your bear cookies turn out perfectly every time. Plus, we’ll answer some common questions you might have!
Decorating Tips:
- The “Furry” Effect is Optional: While dragging the butter knife through the frosting to create a “furry” texture adds a charming detail, it’s not a mandatory step. If you’re short on time or prefer a smoother look, feel free to just spread the frosting evenly over the cookies. They will still look adorable!
- DIY Candy Eyes: If you don’t have candy eyes on hand or prefer to make your own, it’s surprisingly easy. Melt a small amount of white chocolate, transfer it to a piping bag (or a ziploc bag with a tiny corner snipped off), and pipe small circles onto waxed paper. For the pupils, immediately place a miniature chocolate chip in the center of each white chocolate circle. Let them set in the refrigerator until firm, then gently peel them off. You can see a similar technique used on our bee cupcake toppers.
- Alternative Ears: Instead of candy melts, you can use mini chocolate cookies, thinly sliced almonds, or even pipe small semi-circles of frosting for the ears.
- Frosting Consistency: If your frosting is too stiff, add a tiny bit of milk or water (1/2 teaspoon at a time) until it’s spreadable. If it’s too thin, add a tablespoon of powdered sugar until it thickens.
- Let Frosting Set: For best results, allow the frosting to set for at least 30 minutes before handling or stacking the cookies. This prevents smudging and keeps your bears looking their best.
Preparation and Storage FAQs:
- Can I make the cookies ahead of time? Yes! You can bake the sugar cookies up to 3-4 days in advance. Store them in an airtight container at room temperature. Frosting can also be made a day or two ahead and stored in the fridge (bring to room temperature and re-whip if needed before decorating).
- How long do the decorated cookies last? Once decorated, these cookies will stay fresh in an airtight container at room temperature for up to 3 days, or in the refrigerator for up to a week.
- Can I freeze these cookies? You can freeze plain baked sugar cookies for up to 3 months. Thaw them completely before decorating. Freezing fully decorated cookies can be tricky as frosting may smudge or alter in texture, but it is possible in an airtight container if you need to.
Beyond Blue: Creative Variations for Your Bear Cookies
While our initial inspiration for these charming bear cookies came from Boomer the Bear from Wonder Park, leading to their delightful blue hue, the true magic of this recipe lies in its versatility. You are only limited by your imagination when it comes to customizing these treats! Here are some ideas to spark your creativity and make your bear cookies truly unique:
Color and Theme Customization:
- Classic Bear Hues: For a more traditional look, opt for brown frosting (achieved with a little cocoa powder or brown food coloring) to create grizzly bears or teddy bears. White frosting can transform them into adorable polar bears, while black frosting (using black gel food coloring) can give you playful panda bears.
- Seasonal Themes:
- Christmas Bears: Use red or green frosting and add a tiny Santa hat (made from a triangle of red candy melt and a white sprinkle dot) or a small piped scarf.
- Halloween Bears: Use orange or purple frosting, and draw on spooky stitches or a tiny witch hat for a fun twist.
- Valentine’s Day Bears: Pink or red frosting with a small candy heart for the nose makes for a sweet romantic treat.
- Rainbow Bears: Why stick to one color? Divide your frosting into several bowls and dye each a different vibrant color for a kaleidoscope of bear faces.
Flavor Enhancements:
- Cookie Dough Variety: While sugar cookies are a fantastic base, don’t hesitate to experiment with other plain cookie doughs. Peanut butter cookies can make delicious peanut butter bears, or even a simple chocolate cookie can create rich, dark bears.
- Flavored Frostings: Add extracts like almond, mint, or lemon to your vanilla frosting to introduce new flavor dimensions. A little orange zest can brighten up a citrusy bear!
Additional Decorations:
- Sprinkles and Glitter: Before the frosting sets, sprinkle edible glitter or themed sprinkles over your bears for extra sparkle and fun.
- Candy Accents: Use mini M&Ms or other small candies to create rosy cheeks, or use edible pearls for fancier details.
- Texture Variations: Besides the “fur” effect, you can experiment with different piping tips to create various textures – think rosettes for a fluffy bear or simple outlines for a cartoonish style.
Remember, the goal is to have fun and express your creativity. Don’t be afraid to experiment with different colors, flavors, and decorative elements to make your bear cookies truly your own!
Why Baking with Kids is a Wonderful Activity
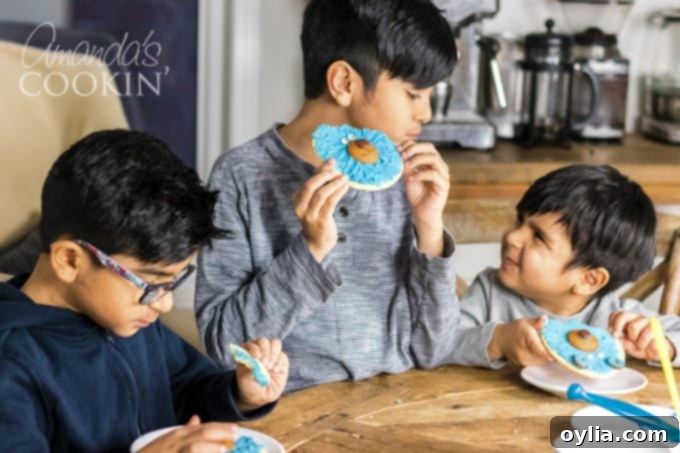
Baking these adorable bear cookies isn’t just about the delicious end product; it’s a fantastic opportunity for family bonding and a myriad of developmental benefits for children. Getting kids involved in the kitchen offers much more than just a sweet treat.
Educational Benefits:
- Math Skills: Measuring ingredients helps children understand fractions, quantities, and basic arithmetic in a practical, engaging way.
- Reading Comprehension: Following recipe instructions enhances their reading skills and ability to follow sequences.
- Science in Action: Observing how ingredients transform when mixed or heated teaches basic chemistry and physics concepts in a real-world setting.
- Fine Motor Skills: Rolling dough, cutting shapes, and carefully placing decorations improves dexterity and hand-eye coordination.
Creative and Emotional Development:
- Encourages Creativity: Decorating cookies allows kids to express themselves artistically, choosing colors, designs, and creating unique bear characters.
- Problem-Solving: If a decoration doesn’t go as planned, it’s a chance to think of alternative solutions, fostering adaptability.
- Sense of Accomplishment: Seeing the finished cookies, especially those they’ve helped create, gives children a wonderful sense of pride and boosts their self-esteem.
- Patience and Focus: Baking requires waiting for dough to chill or cookies to cool, teaching valuable lessons in patience and delayed gratification.
Family Bonding and Life Skills:
- Quality Time: Baking together creates lasting memories and strengthens family bonds through shared experiences.
- Teamwork: Assigning different tasks (measuring, stirring, decorating) promotes teamwork and cooperation.
- Responsibility: Learning to clean up after baking instills a sense of responsibility and tidiness.
- Healthy Eating Habits: Understanding how food is prepared can encourage a more mindful approach to eating and an appreciation for homemade meals.
So, next time you’re looking for a fun and productive activity, grab your aprons and invite your little ones into the kitchen. The joy on their faces as they decorate their own bear cookies, and the satisfaction of enjoying a homemade treat together, is truly priceless.
We hope you love making these fun bear cookies as much as we did! Ours were blue because we originally made them to look like Boomer the Bear from Wonder Park. But you could make them any color you want. Enjoy!
More Fun with Food
If you enjoyed making these whimsical bear cookies, you’ll love exploring more of our creative and delicious recipes, especially those perfect for themed parties or just for fun:
- Elmo Freakshakes: Dive into a vibrant, over-the-top dessert inspired by everyone’s favorite red monster.
- Cookie Monster and Elmo Cookies: Continue the character cookie fun with these adorable and easy-to-decorate treats.
- Cookie Monster Freakshake: Another epic shake, this time themed after the blue, cookie-loving character.
- Bear Toast: A super simple and cute breakfast idea that’s perfect for little ones and bear lovers.
- Unicorn Freakshakes: Embrace the magic with these colorful and fantastical shakes.
- Spiderman Cake: For superhero fans, this cake is an impressive centerpiece for any celebration.
These recipes are designed to bring joy and creativity to your kitchen, just like our bear cookies!
I love to bake and cook and share my recipes with you! I know it’s hard to remember to come back and search, so I’ve made it easy for you with my weekly newsletter! You can subscribe for free and I’ll send you delicious recipes every week right to your email.
Bear Cookies
IMPORTANT – There are often Frequently Asked Questions within the blog post that you may find helpful. Simply scroll back up to read them!
Print It
Pin It
Rate It
Save ItSaved!
Ingredients
- 16.5 ounce slice and bake refrigerator cookie dough or you can use homemade sugar cookie dough
- 16 oz canned vanilla frosting or homemade icing
- blue gel food coloring
- Small candy eyes
- 14 Vanilla wafer cookies for the snout
- Chocolate candy of your choice for the nose
- 28 Candy melts for the ears
- Edible food marker
Before You Begin
- Making the frosting “furry” is not a necessary step, it’s just for fun. Feel free to just spread it on!
- If you don’t have candy eyes and prefer not to buy any, you can make them by melting white chocolate and dropping small circles onto waxed paper with a piping bag. You can use a miniature chocolate chip for the pupil! You can see how this is done on my bee cupcake toppers.
Instructions
-
Roll cookie dough out to 1/4-inch thick. Use a 4-inch round cookie cutter to cut cookies, you should get 14 cookies.
-
Bake cookies according to the recipe or refrigerator dough package. Allow to cool completely on wire racks.
-
Spread the icing to cover your sugar cookie.
-
Drag your icing with the tip of a butter knife to create strokes of fur.
-
Next you attach the snout by gently pressing a vanilla wafer cookie into the frosting.
-
Add a touch of buttercream icing to the center of the wafer and attach the chocolate candy to create the nose.
-
Gently press the candy eyes into the frosting above the nose.
-
To create Boomer’s ears place candy melts on either side of the top of the cookie. Spread or pipe some buttercream around the edges.
-
Finally, use an edible food marker to add Boomer’s mouth.
Nutrition
The recipes on this blog are tested with a conventional gas oven and gas stovetop. It’s important to note that some ovens, especially as they age, can cook and bake inconsistently. Using an inexpensive oven thermometer can assure you that your oven is truly heating to the proper temperature. If you use a toaster oven or countertop oven, please keep in mind that they may not distribute heat the same as a conventional full sized oven and you may need to adjust your cooking/baking times. In the case of recipes made with a pressure cooker, air fryer, slow cooker, or other appliance, a link to the appliances we use is listed within each respective recipe. For baking recipes where measurements are given by weight, please note that results may not be the same if cups are used instead, and we can’t guarantee success with that method.
