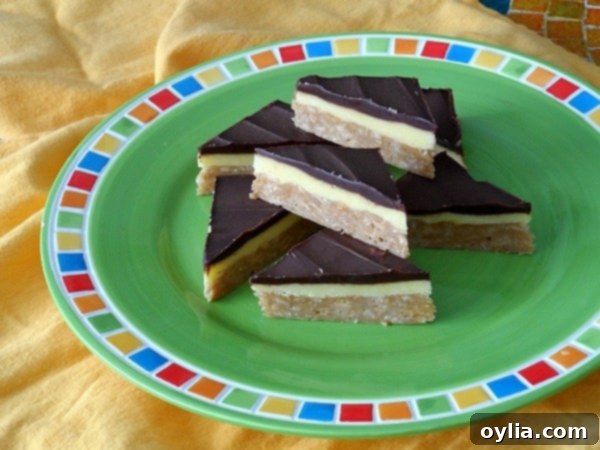
Irresistible No-Bake Peanut Butter Pudding Bars: Your New Go-To Dessert
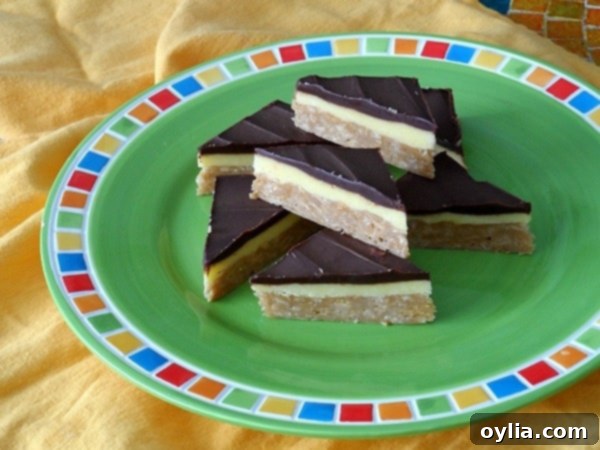
Prepare to be utterly charmed by these phenomenal No-Bake Peanut Butter Pudding Bars! This incredibly easy-to-make dessert seamlessly blends the nostalgic crunch of classic Rice Krispy treats with the rich, creamy goodness of peanut butter, smooth vanilla pudding, and a luscious chocolate topping. The result is a multi-layered masterpiece that delivers an explosion of flavor and texture with every bite. If you’re a fan of sweet, satisfying treats that require minimal effort but yield maximum deliciousness, these bars are about to become your new obsession.
These peanut butter pudding bars are more than just a dessert; they’re a celebration of simplicity and classic flavors. Their no-bake nature makes them ideal for any time of year, especially during warmer months when you want to avoid turning on the oven. They are fantastic for preparing ahead of time, allowing you to simply grab and go, making them the perfect candidate for parties, barbecues, potlucks, or any gathering where you need a reliable crowd-pleaser. Be warned, though: they are wonderfully sweet, so if you have an insatiable sweet tooth, you’re in for a real treat!
Why These No-Bake Peanut Butter Pudding Bars Disappear So Fast
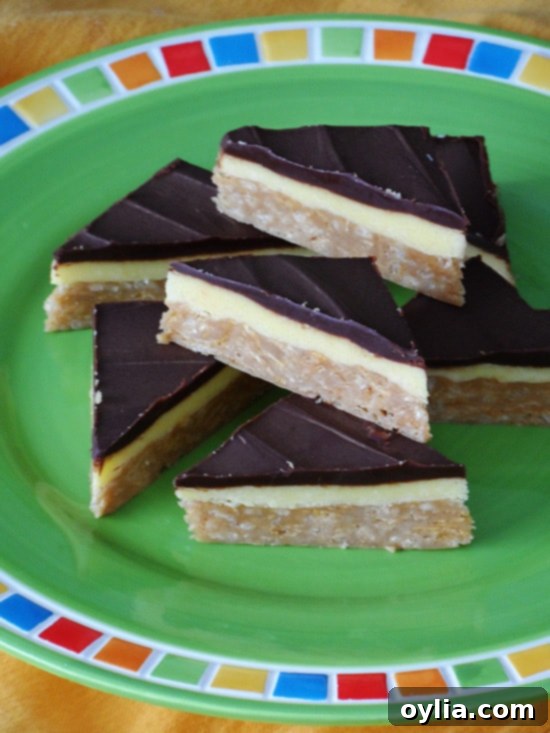
Speaking from experience, these bars have a magical way of vanishing almost as soon as they’re made. In a house with three growing boys, aged 14 to 21, I can confirm that these delectable treats don’t stand a chance. It didn’t take long for every single bar to disappear, leaving no trace behind! So, if you live with teenagers or have a hungry household, set your expectations accordingly – you might not have any leftovers, and that’s perfectly okay. Their irresistible combination of flavors and textures appeals to all ages, making them a universal hit.
The secret to their rapid disappearance lies in their balanced yet indulgent profile. The crispy cereal base provides a satisfying crunch that contrasts beautifully with the smooth, rich peanut butter and creamy vanilla pudding layers. Topped with a generous sheet of chocolate, it’s a symphony of textures and tastes that keeps everyone coming back for more. Plus, the ease of preparation means you can whip up a batch whenever a craving strikes, or a last-minute get-together calls for a fantastic dessert.
Crafting Your No-Bake Peanut Butter Pudding Bars: A Step-by-Step Guide
Making these no-bake bars is surprisingly simple, broken down into three distinct, delicious layers. Follow these instructions carefully to ensure perfect results every time.
Layer 1: The Crispy Peanut Butter Cereal Base
- **Prepare your pan:** Start by lining a standard rimmed cookie sheet (approximately 9×13 inches) with foil, extending the foil over the edges to create “handles.” This will make lifting the set bars out of the pan much easier for cutting. Set this aside.
- **Combine wet ingredients:** In a large saucepan, combine 1 cup of granulated sugar and 1 cup of light corn syrup. Place the saucepan over medium heat. Cook this mixture, stirring occasionally, until it begins to bubble gently around the edges of the pan. The goal here is to dissolve the sugar and create a syrup, not to caramelize it.
- **Continue cooking:** Once bubbling, continue to cook and stir the mixture for just one minute more. This helps ensure the sugar is fully dissolved and the syrup reaches the right consistency for binding.
- **Add peanut butter:** Remove the saucepan from the heat immediately. Stir in 2 cups of creamy peanut butter until it is completely melted and smoothly incorporated into the sugar-corn syrup mixture. The residual heat from the syrup will melt the peanut butter effortlessly.
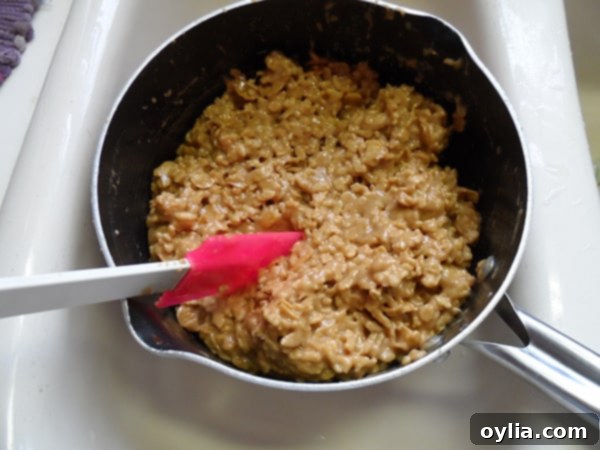
- **Add cereals:** Gently fold in 3 cups of Rice Krispies and 3 cups of Corn Flakes. Stir until both types of cereal are thoroughly and evenly coated with the peanut butter mixture. Ensure every flake and crisp is covered to create a cohesive base.

- **Press into pan:** Transfer the cereal mixture into your prepared foil-lined cookie sheet. Using the back of a spoon, a piece of waxed paper, or your clean (slightly moistened) hands, press the mixture down firmly and evenly across the bottom of the pan. This creates a solid, compact base for your bars. Set aside.
Layer 2: The Creamy Vanilla Pudding Layer

- **Melt butter for pudding:** In a separate clean saucepan, melt ¾ cup of unsalted butter over low heat. Be careful not to brown or burn the butter; you just want it to be fully liquid.
- **Mix pudding ingredients:** Remove the saucepan from the heat. Stir in 4 cups of powdered sugar, the contents of two 4-serving packages of vanilla instant pudding mix, and ¼ cup of milk. Whisk until the mixture is completely smooth and free of lumps. It should be thick and creamy.
- **Spread pudding layer:** Carefully and evenly spread this rich pudding mixture over the cereal layer in the pan. Use an offset spatula or the back of a spoon to ensure a smooth, consistent layer from edge to edge.
Layer 3: The Decadent Chocolate Topping
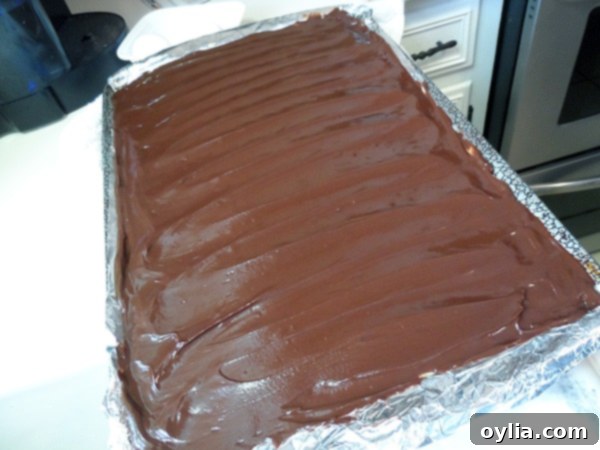
- **Melt chocolate topping:** In a microwave-safe bowl (heating in 30-second intervals, stirring in between) or in a clean saucepan over very low heat, melt one 12-oz package of semi-sweet chocolate chips with ½ cup of unsalted butter. Stir continuously until the chocolate and butter are fully melted and combined into a smooth, glossy, and creamy mixture.
- **Apply topping:** Pour the melted chocolate mixture over the pudding layer in the pan. Gently spread it out with an offset spatula to create an even, luscious chocolate topping.
Chilling and Serving Your Bars

- **Chill to set:** Transfer the pan to the refrigerator and chill for at least one hour, or until all layers are completely set and firm. This is crucial for easy cutting.
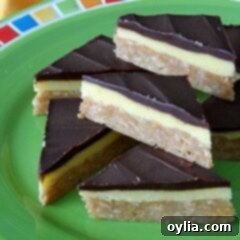
- **Cut and serve:** Once chilled, use the foil “handles” to lift the entire block of bars out of the pan. Place it on a cutting board. Use a sharp knife (running it under hot water and wiping dry between cuts can help achieve cleaner slices) to cut the bars into desired squares or triangles. Serve immediately and watch them disappear!
Tips for Perfect No-Bake Peanut Butter Pudding Bars
- **Accurate Measurements:** Baking (even no-bake) is a science. Ensure you measure all ingredients accurately for the best texture and consistency.
- **Don’t Overcook Syrup:** For the base layer, cooking the sugar and corn syrup just until bubbling at the edges and then for one more minute is key. Overcooking can make the base too hard; undercooking can make it too soft.
- **Quality Peanut Butter:** Use a creamy, shelf-stable peanut butter for the best results. Natural peanut butter (that separates) can alter the texture.
- **Even Spreading:** Take your time to spread each layer evenly. This ensures every bite has a perfect balance of all three delicious components.
- **Chill Time is Crucial:** Do not skip or rush the refrigeration step. An hour is the minimum, but two hours or even overnight will ensure the bars are perfectly set and easy to cut.
- **Clean Cuts:** For neat squares, use a long, sharp knife. Wiping the blade clean with a warm, damp cloth between each cut will prevent dragging chocolate and create cleaner edges.
Delicious Variations to Try
While the classic recipe is outstanding, these bars are also incredibly adaptable. Here are a few ideas to customize them:
- **Cereal Swap:** Experiment with other crispy cereals like Cheerios, Chex, or even crushed graham crackers for the base.
- **Nut Butter Alternatives:** Almond butter or cashew butter can be used for a different nutty flavor profile, though they may slightly alter the texture.
- **Pudding Flavor Fun:** Instead of vanilla, try chocolate, butterscotch, or banana instant pudding mix for a new twist.
- **Chocolate Choices:** Use milk chocolate, dark chocolate, or even white chocolate chips for the topping. A swirl of two different chocolates can also be visually appealing.
- **Add-ins:** Fold in mini marshmallows, chopped nuts (peanuts, pecans), or sprinkles into the cereal layer or sprinkle them on top of the chocolate before it sets.
- **Sea Salt Finish:** A sprinkle of flaky sea salt on top of the melted chocolate layer before chilling can enhance the flavors and add a gourmet touch.
Storage Instructions
These No-Bake Peanut Butter Pudding Bars are best stored in an airtight container in the refrigerator. They will stay fresh and delicious for up to 5-7 days. For longer storage, you can freeze individual bars (wrapped tightly in plastic wrap and then placed in an airtight container) for up to 1-2 months. Thaw in the refrigerator before serving.
Frequently Asked Questions (FAQs)
- Can I use natural peanut butter for these bars?
- It’s generally recommended to use creamy, processed peanut butter (like Jif or Skippy) for no-bake bars as it has a more consistent texture and less oil separation, which helps the bars set properly. Natural peanut butter can sometimes make the base too oily or crumbly.
- My cereal base is too hard/soft. What went wrong?
- If your base is too hard, you might have cooked the sugar and corn syrup mixture for too long. If it’s too soft or doesn’t bind well, it might not have been cooked long enough, or your peanut butter wasn’t fully incorporated.
- Can I use a different size pan?
- Yes, you can. A 9×13 inch pan is ideal for the thickness of layers. If you use a larger pan, the layers will be thinner, and if you use a smaller one, they will be thicker. Adjust chilling time accordingly.
- How important is the instant pudding mix?
- The instant pudding mix is crucial for the second layer’s texture and flavor. It helps create a thick, creamy layer that sets without baking. Do not substitute with cooked pudding or regular pudding mix.
- Can I make these bars ahead of time?
- Absolutely! These bars are perfect for making a day or two in advance. Store them in the refrigerator in an airtight container. The flavors actually meld and become even better over time.
- How do I get clean cuts?
- Ensure the bars are thoroughly chilled. For best results, use a sharp, thin knife. You can warm the knife blade under hot water and wipe it dry between each cut to get super clean slices, especially through the chocolate topping.
More No-Bake Desserts to Indulge In
If you’ve fallen in love with the ease and deliciousness of these No-Bake Peanut Butter Pudding Bars, you’ll want to explore more no-bake wonders. Here are some fantastic recipes from other talented bakers:
- No Bake Peanut Butter Bars – Amanda’s Cookin’
- Healthy Dark Chocolate No Bake Bars – Confessions of a Bright-Eyed Baker
- No Bake Crispy Chocolate Peanut Butter Bars – Parade Magazine
- Easy No-Bake Milk Chocolate S’Mores Bars – Very Best Baking
No-Bake Peanut Butter Pudding Bars Recipe
IMPORTANT – There are often Frequently Asked Questions within the blog post that you may find helpful. Simply scroll back up to read them!
Print It
Pin It
Rate It
Save ItSaved!
Ingredients
- 1 cup sugar
- 1 cup light corn syrup
- 2 cups creamy peanut butter
- 3 cups Rice Krispies
- 3 cups Corn Flakes
- ¾ cup unsalted butter
- 4 cups powdered sugar
- 2 4- serving packages vanilla instant pudding
- ¼ cup milk
- 1 12- oz package semi sweet chocolate chips
- ½ cup unsalted butter
Instructions
-
Line a rimmed cookie sheet (approx. 9×13 inches) with foil, extending the foil over the edges to create “handles.” Set aside.
-
Over medium heat, combine 1 cup sugar and 1 cup corn syrup in a large saucepan. Cook until the mixture is bubbling at the edges, stirring occasionally. Continue cooking and stirring for one minute more. Remove from heat and stir in 2 cups creamy peanut butter until melted and smooth. Add 3 cups Rice Krispies and 3 cups Corn Flakes, stirring until completely coated. Press this mixture firmly into the lined cookie sheet, forming the base layer.
-
In a separate saucepan over low heat, melt ¾ cup unsalted butter. Remove from heat and stir in 4 cups powdered sugar, two 4-serving packages of vanilla instant pudding mix, and ¼ cup milk. Whisk until smooth and creamy. Spread this pudding mixture evenly over the cereal layer in the pan.
-
In a microwave-safe bowl (heating in 30-second intervals) or in a saucepan over low heat, melt one 12-oz package semi-sweet chocolate chips and ½ cup unsalted butter. Stir until melted, smooth, and creamy. Spread this chocolate topping evenly over the pudding layer in the pan.
-
Refrigerate the bars for at least one hour (or until firm) to allow all layers to set completely. Once chilled, lift the entire block of bars out of the pan using the foil. Place on a cutting board and cut into squares or triangles using a sharp knife. Serve and enjoy!
The recipes on this blog are tested with a conventional gas oven and gas stovetop. It’s important to note that some ovens, especially as they age, can cook and bake inconsistently. Using an inexpensive oven thermometer can assure you that your oven is truly heating to the proper temperature. If you use a toaster oven or countertop oven, please keep in mind that they may not distribute heat the same as a conventional full sized oven and you may need to adjust your cooking/baking times. In the case of recipes made with a pressure cooker, air fryer, slow cooker, or other appliance, a link to the appliances we use is listed within each respective recipe. For baking recipes where measurements are given by weight, please note that results may not be the same if cups are used instead, and we can’t guarantee success with that method.
