Easy Cheesy Taco Empanadas: Your Ultimate Guide to Quick & Delicious Hand Pies
Get ready to revolutionize your weeknight dinners with these incredibly **easy cheesy taco empanadas**. This crowd-pleasing recipe comes together in a flash, using just four simple ingredients: convenient refrigerator biscuits, savory taco meat, creamy refried beans, and a generous amount of melty cheese. Perfect for a quick family meal, a fun appetizer, or using up those tasty taco night leftovers, these hand pies are guaranteed to become a new favorite in your kitchen.

Why These Taco Empanadas Will Be Your New Go-To Meal
Imagine tender biscuit dough, golden and flaky, encasing a savory blend of seasoned taco meat, creamy refried beans, and gooey melted cheese. These **taco empanadas** offer a delightful twist on classic taco night, transforming a beloved meal into a portable, mess-free hand pie. Here’s why this recipe stands out:
- Effortless Preparation: With just four core ingredients, these empanadas are incredibly simple to assemble. The use of refrigerator biscuits cuts down prep time significantly, making them perfect for busy weeknights.
- Kid-Friendly Favorite: The familiar flavors of tacos combined with the fun, hand-held format make these empanadas a huge hit with children. They’re easy for little hands to hold and eat, and kids often enjoy helping with the assembly process!
- Perfect for Leftovers: Have some leftover taco meat from your last taco Tuesday? This recipe is the ideal solution! It breathes new life into leftovers, preventing food waste and creating a completely new and exciting meal.
- Ultimate Comfort Food: Sometimes, the simplest combinations create the most satisfying dishes. These cheesy, savory pockets of goodness are pure comfort food that will warm you from the inside out.
- Versatile & Customizable: While the basic recipe is fantastic, it’s also a blank canvas for customization. Add your favorite taco toppings or mix-ins to truly make them your own.
Forget the fuss of traditional tacos; these **taco hand pies** are a game-changer. Serve them hot with a dollop of cool sour cream, a sprinkle of fresh chopped green onion, and a vibrant salsa fresca for an unforgettable meal that will have everyone asking for seconds.

Key Ingredients for Simple Taco Empanadas
Creating these delightful **cheesy taco empanadas** is all about simplicity and maximizing flavor with minimal effort. The core of this recipe relies on four readily available ingredients that come together to form a perfectly balanced, savory treat. You’ll find a detailed breakdown of all measurements and instructions in the printable recipe card at the very end of this post, but let’s take a closer look at what you’ll need.
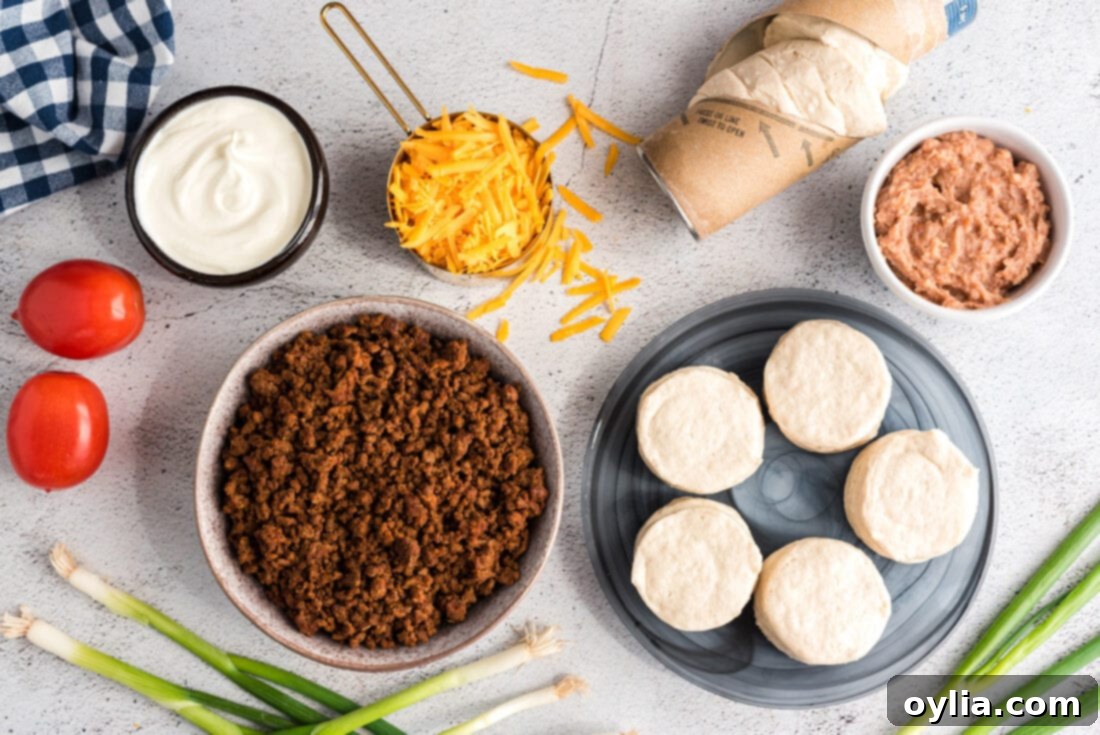
Ingredient Spotlight & Smart Substitutions
Let’s dive deeper into the ingredients that make these **quick taco empanadas** so special and discuss how you can adapt them to your pantry or dietary preferences.
Dough: The Secret to Speed and Simplicity
Forget the complexities of homemade pie crusts. The beauty of these **easy empanadas** lies in their simplicity, thanks to a clever shortcut: **refrigerator biscuits**. While refrigerated pie crusts can work, their round shape often leads to scraps that need to be re-rolled, adding an extra step. Using large refrigerator biscuits, such as Pillsbury Grands or a comparable generic brand, simplifies the process immensely. Each biscuit transforms into a perfect individual pocket with minimal effort. Just flatten, fill, and fold!
- Why Biscuits? They’re pre-portioned, bake up wonderfully flaky and golden, and provide a comforting, slightly sweet contrast to the savory filling.
- Alternative: Puff Pastry: For an even flakier, lighter crust, you could experiment with thawed puff pastry. Cut it into squares and follow the same filling and sealing steps. The baking time might need slight adjustment.
- Homemade Dough: If you’re feeling ambitious and prefer a more traditional empanada, a simple shortcrust pastry (like a pie crust) or even a savory scone dough could be used. However, this deviates from the “quick and easy” premise of this specific recipe.
Taco Meat: The Heart of Your Empanada
This recipe is a dream come true for using **leftover taco meat**. Whether it’s seasoned ground beef, turkey, or a plant-based alternative, ensure your taco meat is already cooked and seasoned to perfection. This is where a lot of the flavor comes from!
- Ground Beef: A classic choice. Cook it with your favorite taco seasoning (homemade or store-bought) until browned and drained of excess fat.
- Ground Turkey or Chicken: Lighter alternatives that still pack a punch with proper seasoning.
- Plant-Based Meat Crumbles: Excellent for vegetarian or vegan versions. Ensure they are fully cooked and seasoned.
- Seasoning: If you don’t have pre-seasoned taco meat, simply brown your ground meat and add a packet of taco seasoning mix according to package directions, or use a homemade blend of chili powder, cumin, paprika, garlic powder, onion powder, and oregano.
Refried Beans: Creamy Goodness
Refried beans add a layer of creaminess and depth that complements the taco meat beautifully. They also act as a binder, helping to hold the filling together within the empanada.
- Canned Refried Beans: The quickest option. Choose traditional, vegetarian, or even spicy varieties.
- Homemade Refried Beans: If you have time, homemade refried beans can elevate the flavor significantly.
- Alternatives: If you’re not a fan of refried beans, a thin layer of cream cheese (plain or jalapeño flavored) or even a spiced black bean dip could work as a base.
Cheese: The Melty, Cheesy Finish
What’s a cheesy taco empanada without, well, cheese? Shredded cheddar cheese is a fantastic choice for its meltability and familiar flavor, but feel free to experiment.
- Shredded Cheddar: Classic, reliable, and melts beautifully.
- Mexican Blend: A mix of Monterey Jack, cheddar, asadero, and queso quesadilla cheeses offers a great flavor profile for taco dishes.
- Pepper Jack: For a little kick of spice.
- Cotija Cheese: A sprinkle of cotija on top after baking can add a salty, crumbly texture.
Remember to divide your cheese; some goes inside for that gooey center, and a bit on top for a golden, irresistible crust.
Step-by-Step: Crafting Your Own Taco Empanadas
These step-by-step photos and instructions are here to help you visualize how to make this recipe. You can Jump to Recipe to get the printable version of this recipe, complete with measurements and instructions at the bottom.
Making these **easy taco empanadas** is a straightforward process that even novice cooks will find simple and enjoyable. The key is in the preparation and assembly, which we’ll walk through step by step. Gathering all your ingredients and tools before you start will make the process even smoother.
- Preheat & Prepare: Begin by preheating your oven to 375°F (190°C). This ensures your empanadas bake evenly and achieve that perfect golden-brown finish. Line a baking sheet with aluminum foil. The foil not only makes cleanup a breeze but also helps prevent sticking.
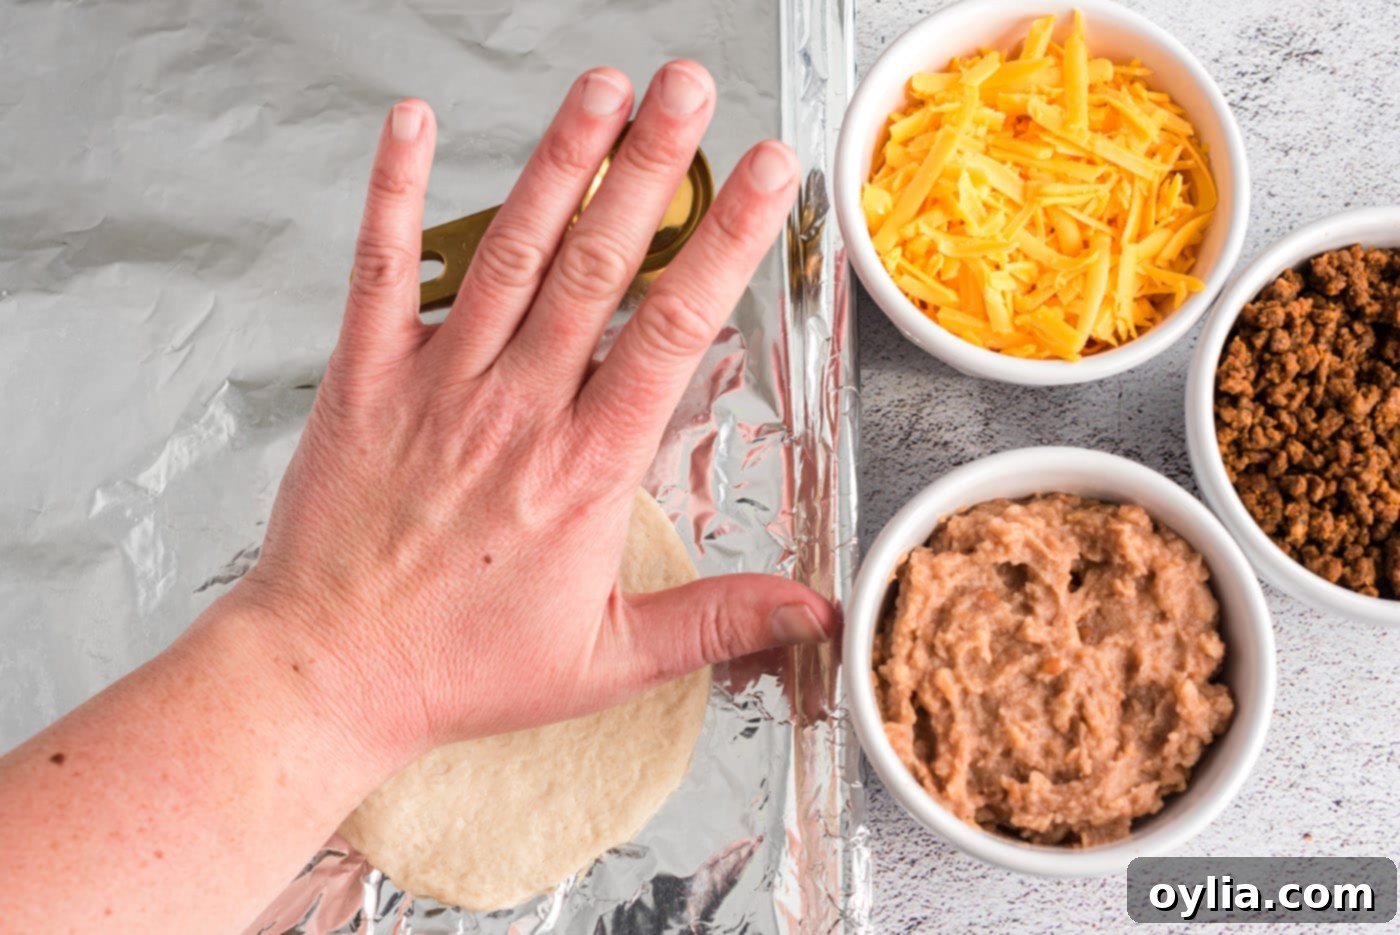
- Flatten the Dough: Take a single refrigerator biscuit and place it on the foil-lined baking sheet. Using the heel of your hand, gently but firmly flatten the biscuit, working from the center outwards, until it forms a roughly 4-5 inch circle. Aim for an even thickness to ensure even baking.

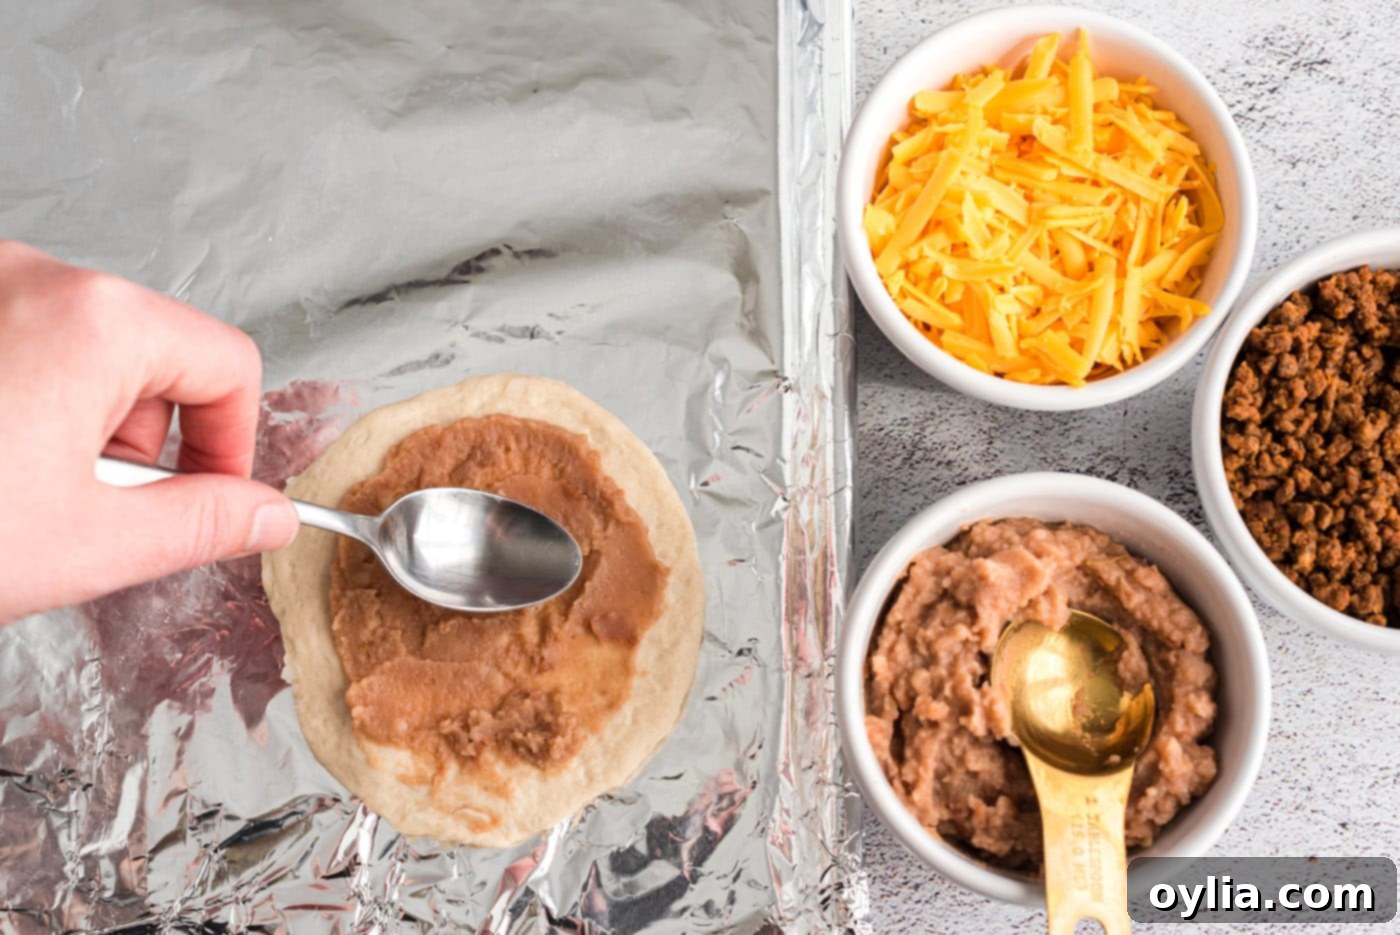
- Spread the Beans: Spoon about one tablespoon of refried beans onto the center of the flattened biscuit. Leave a small border around the edge for sealing.

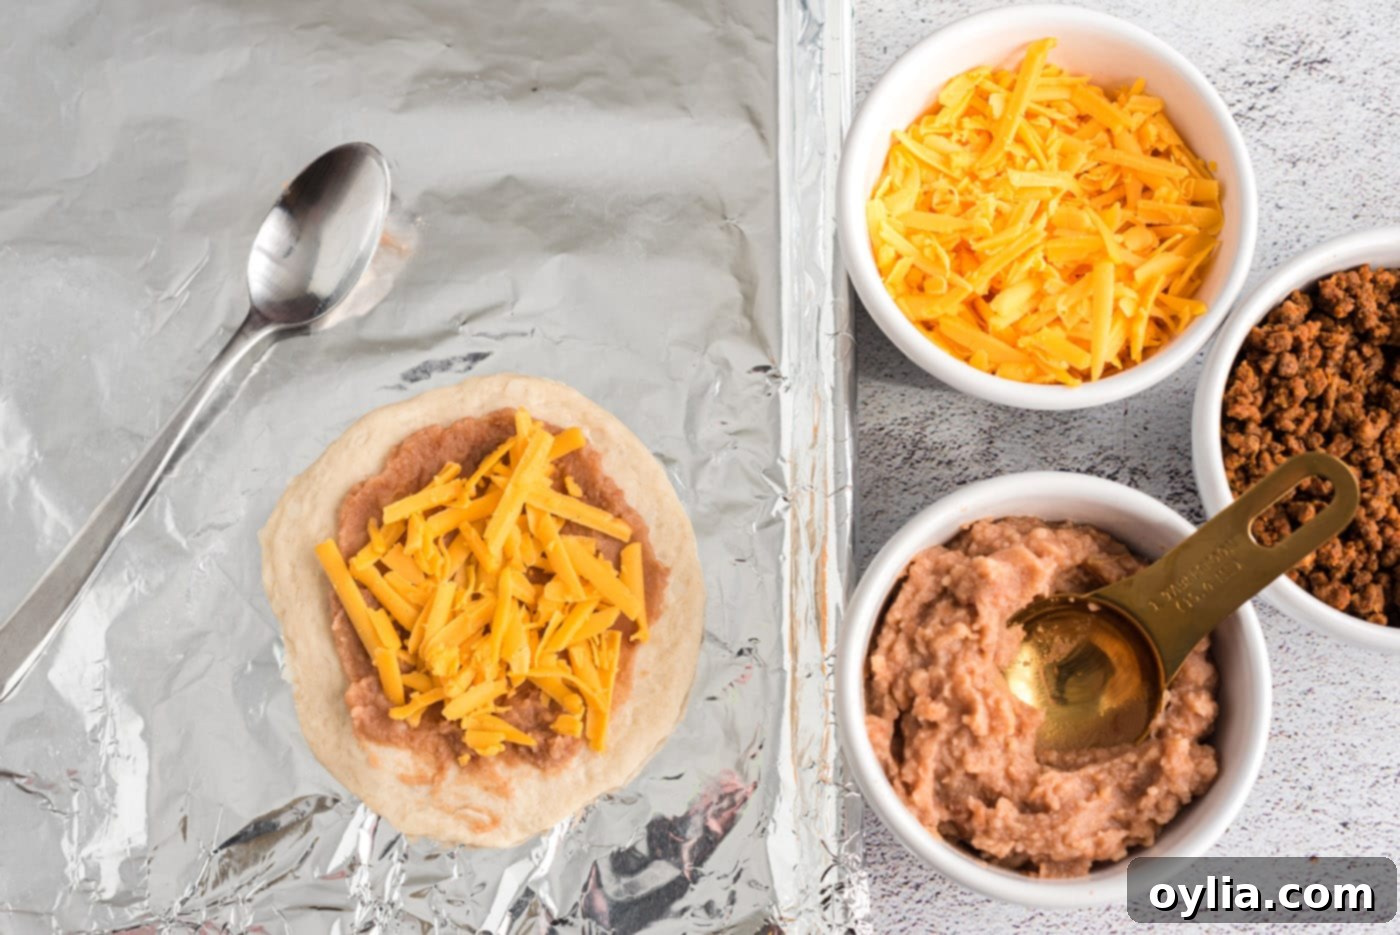
- Add the Cheese (First Layer): Sprinkle a tablespoon of shredded cheese over the refried beans. This layer of cheese will melt into the beans, creating a wonderfully creamy and flavorful base.

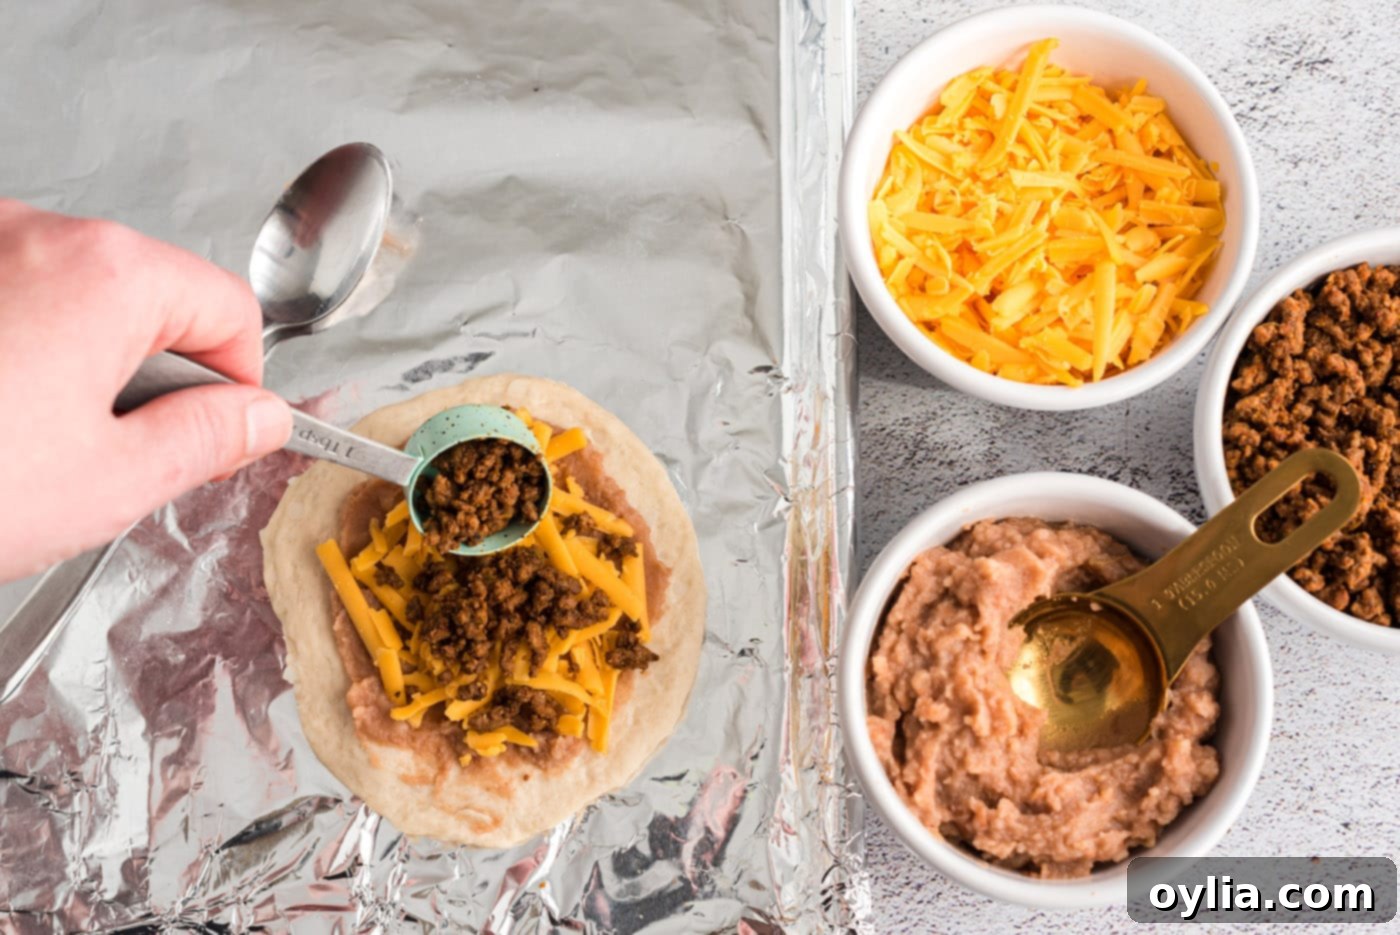
- Pile on the Taco Meat: Now, add a generous (heaping) tablespoon of your prepared taco meat onto the cheese. Don’t overfill, as you need to be able to seal the empanada.

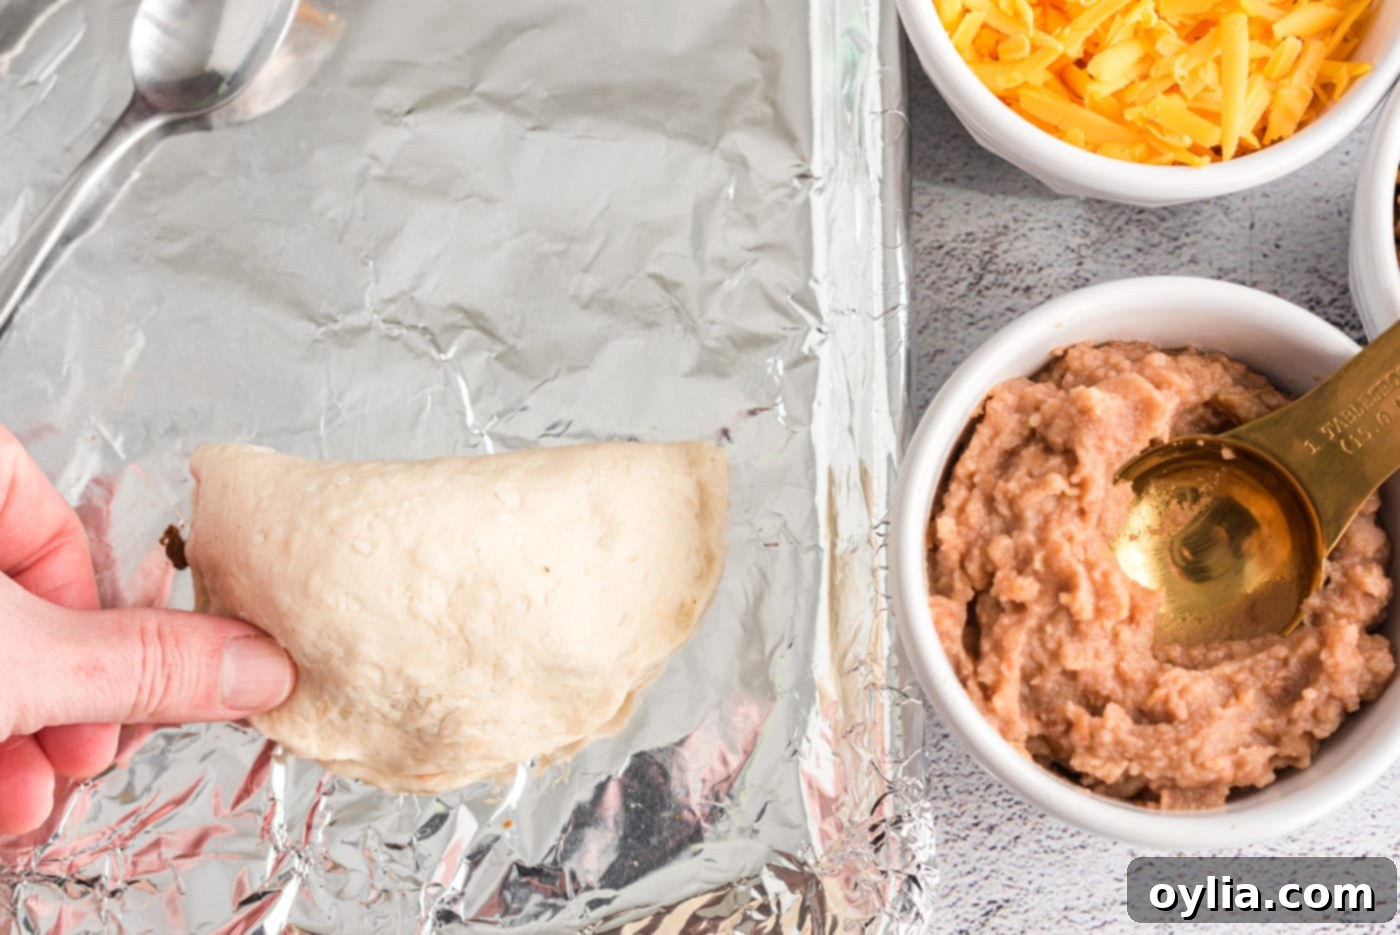
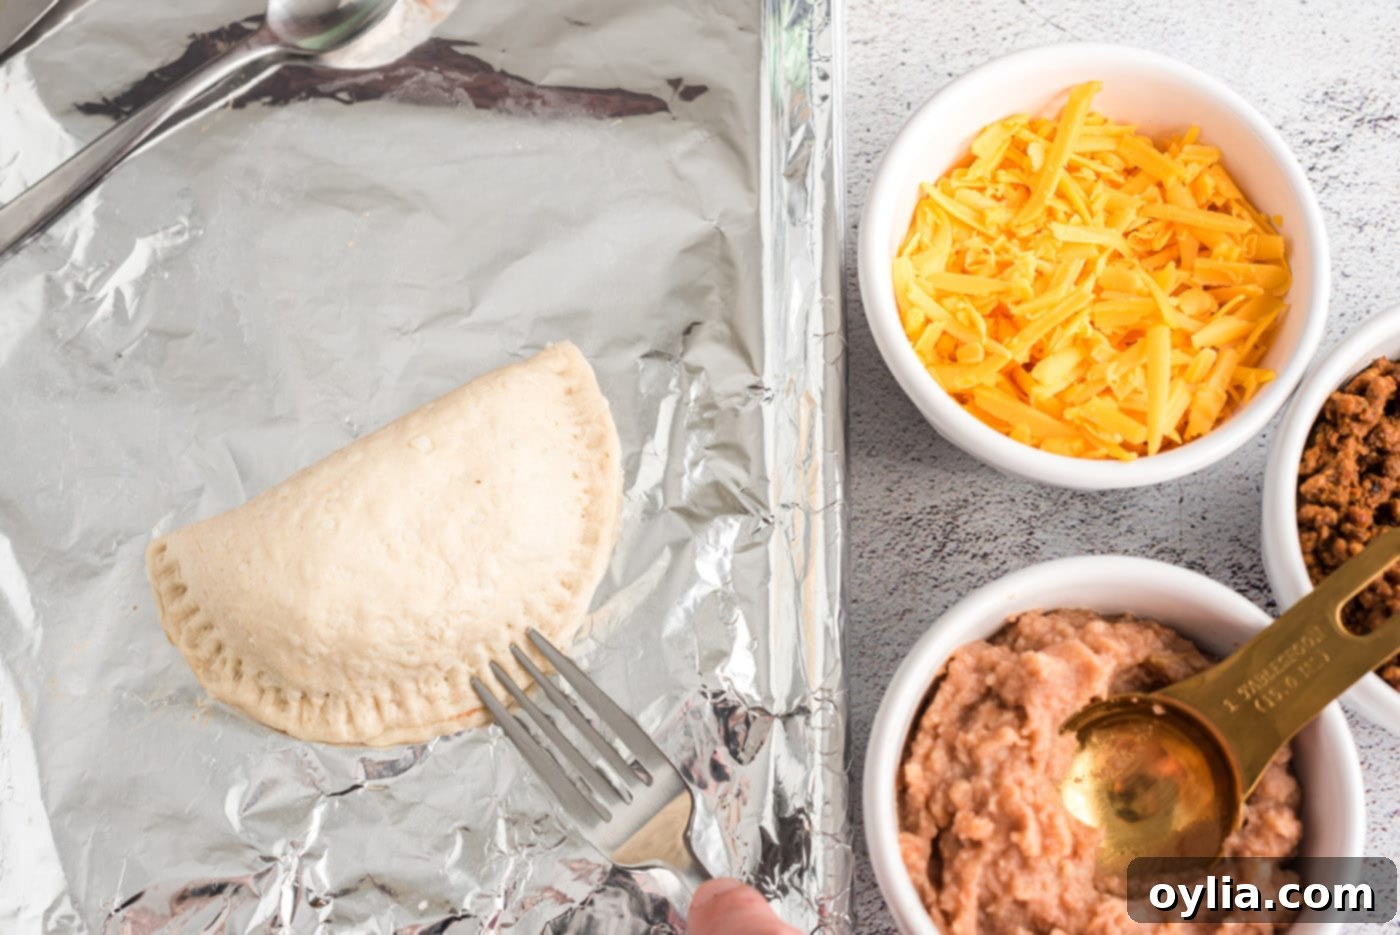
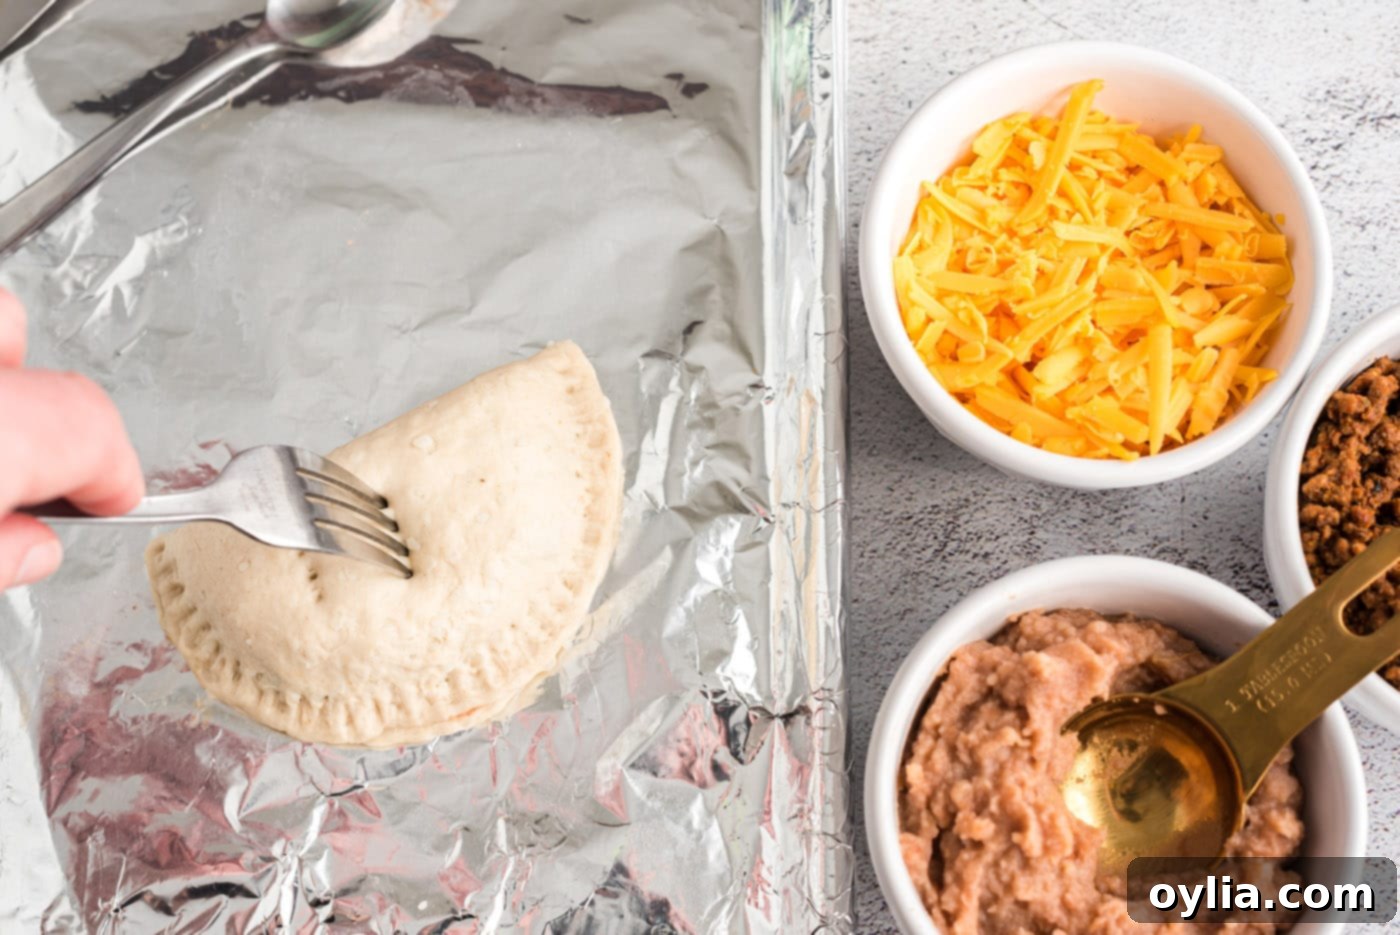
- Fold and Seal: Carefully fold one side of the biscuit dough over the filling to meet the other side, forming a half-moon shape. Press the edges firmly with your fingers to seal. Then, use the tines of a fork to crimp the edges all around – this not only creates a decorative border but also ensures a tight seal to prevent any filling from escaping. Finally, poke a few holes in the top of the empanada with the fork; this allows steam to escape during baking, preventing the dough from puffing up too much and ensuring a crispier crust.


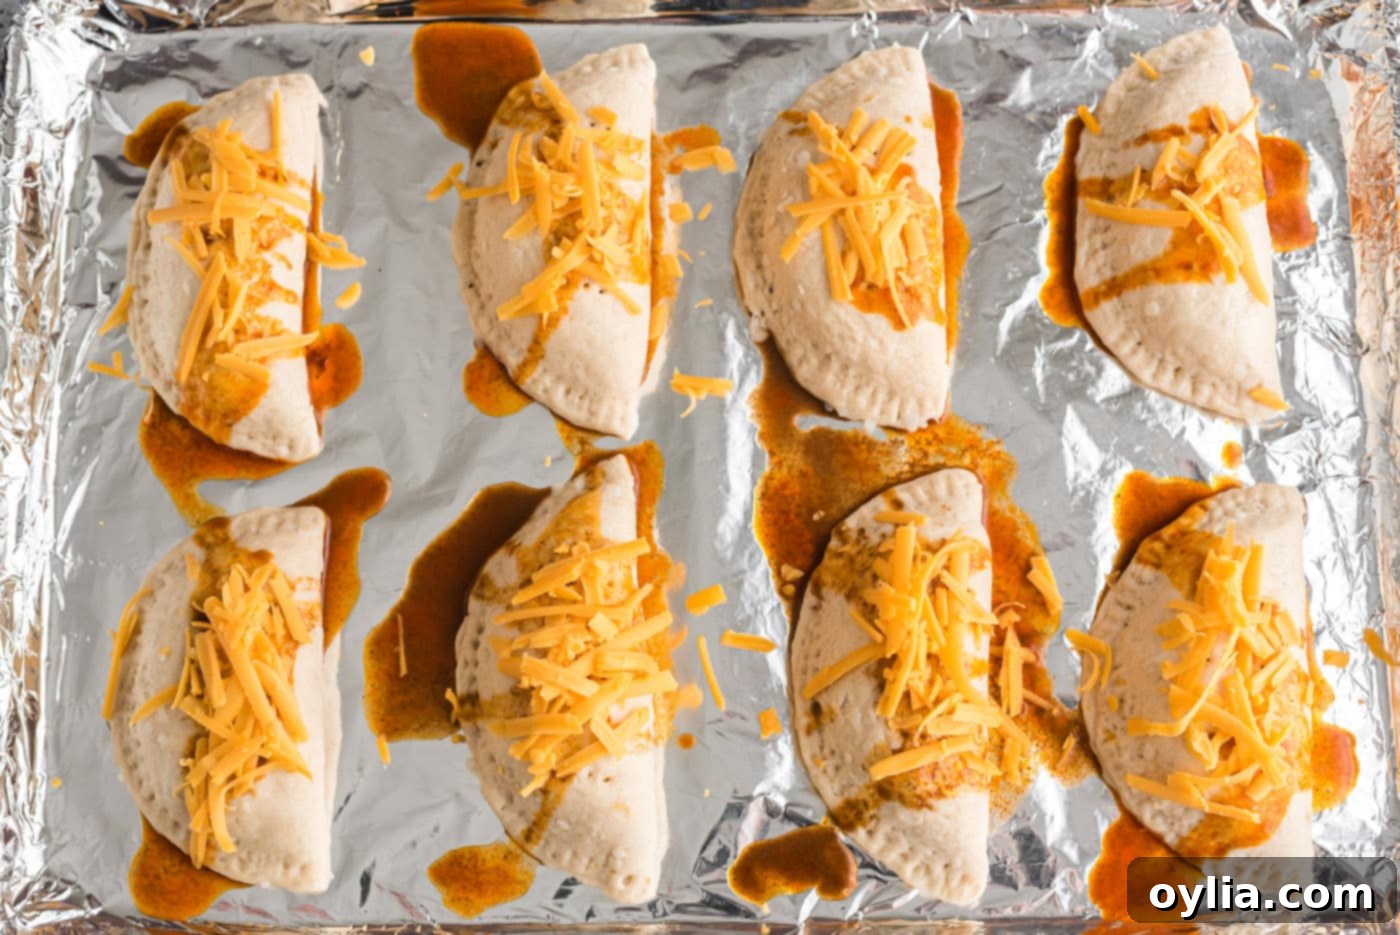
- Final Touches & Top with Cheese: Drizzle some of the flavorful juice from your prepared taco meat over the top of each empanada. This adds moisture and extra taco flavor. Then, crown each empanada with another tablespoon of shredded cheese. This top layer will get delightfully crispy and golden in the oven.

- Repeat for All: Continue these steps for all remaining biscuits and filling until you have a tray full of delicious unbaked **cheesy taco empanadas**.
- Bake to Golden Perfection: Place the baking sheet in your preheated oven and bake for 12-15 minutes. Keep an eye on them; they are ready when the biscuits are beautifully golden brown and the cheese is bubbly and melted.
Frequently Asked Questions & Expert Tips for Perfect Empanadas
We’ve gathered some common questions and essential tips to help you master these **easy taco empanadas** and make them even better!
Yes, absolutely! The beauty of these **taco hand pies** is their versatility. You can definitely enhance the flavor and texture of your filling. My go-to additions for extra zest and depth include a can of diced green chiles (drained well), finely chopped jalapeños (remove seeds for less heat), or finely diced onion. Sautéing the onion and jalapeños lightly before adding them to the meat ensures they cook through nicely. You could also mix in a small amount of corn or black beans for added bulk and nutrition. Just remember, avoid adding fresh ingredients like lettuce or diced tomatoes *before* baking, as they will release too much moisture and make your empanadas soggy. Save those for garnishing after baking!
Leftover **cheesy taco empanadas** are fantastic and store very well! Once they have cooled completely, place them in an airtight container. They can be kept in the refrigerator for 3-4 days. For reheating, the microwave is quick and convenient, but for best results (especially if you want that crispy biscuit crust back), I recommend reheating them in an air fryer at 350°F (175°C) for 5-7 minutes, or in a conventional oven at the same temperature until heated through and crisp again.
Absolutely! These **taco empanadas** make an excellent freezer meal for those nights you don’t feel like cooking from scratch. To freeze them, arrange the *unbaked* empanadas in a single layer on a parchment-lined baking sheet. Place the baking sheet in the freezer and “flash freeze” them until the dough has mostly hardened – typically about 1-2 hours. This quick freeze prevents them from sticking together. Once firm, transfer the frozen empanadas to a large freezer-safe ziptop bag or an airtight container. They can be frozen for up to 3 months.
When you’re ready to bake, you have a couple of options: you can allow them to thaw in the refrigerator overnight before baking as directed, or you can bake them straight from frozen. If baking from frozen, increase the oven temperature to 375°F (190°C) and add an additional 5-10 minutes to the baking time, or until they are golden brown and cooked through.
Don’t hesitate to play with the seasoning of your taco meat. A dash of smoked paprika or a pinch of cayenne pepper can add extra depth. For an even richer taste, mix a little cream cheese or sour cream into your refried beans before spreading. And don’t forget the power of a good egg wash (a beaten egg brushed over the dough before baking) for a super golden and shiny crust!
Serving Suggestions: What to Pair with Your Taco Empanadas
These **taco empanadas** are incredibly versatile and can be enjoyed in many ways. They are perfect for a quick lunch, a satisfying dinner, or even as a grab-and-go snack. Kids especially love their hand-held nature, making them ideal for school lunches or after-school treats. They can easily be reheated in the microwave or air fryer, and some even enjoy them cold the next day! They also make an excellent freezer meal, ready to be baked for those nights when cooking feels like too much effort.
Delicious Toppings & Dipping Sauces:
- Classic Toppings: A dollop of sour cream or Greek yogurt, fresh pico de gallo, a sprinkle of chopped green onions, shredded lettuce, and diced tomatoes are always winners.
- Spicy Kick: Drizzle with your favorite hot sauce or a creamy jalapeño ranch dressing.
- Creamy Options: Serve with guacamole, a generous scoop of avocado cream, or a drizzle of warm queso dip.
- Salsa Fresca (Pico de Gallo): The vibrant freshness of homemade salsa is an unbeatable accompaniment.
Perfect Side Dishes:
To make it a complete meal, consider pairing your **cheesy taco empanadas** with:
- Mexican Rice or Cilantro Lime Rice
- A simple green salad with a zesty vinaigrette
- Black bean and corn salad
- Elote (Mexican street corn) or a simple corn on the cob
- A side of extra refried beans or charro beans

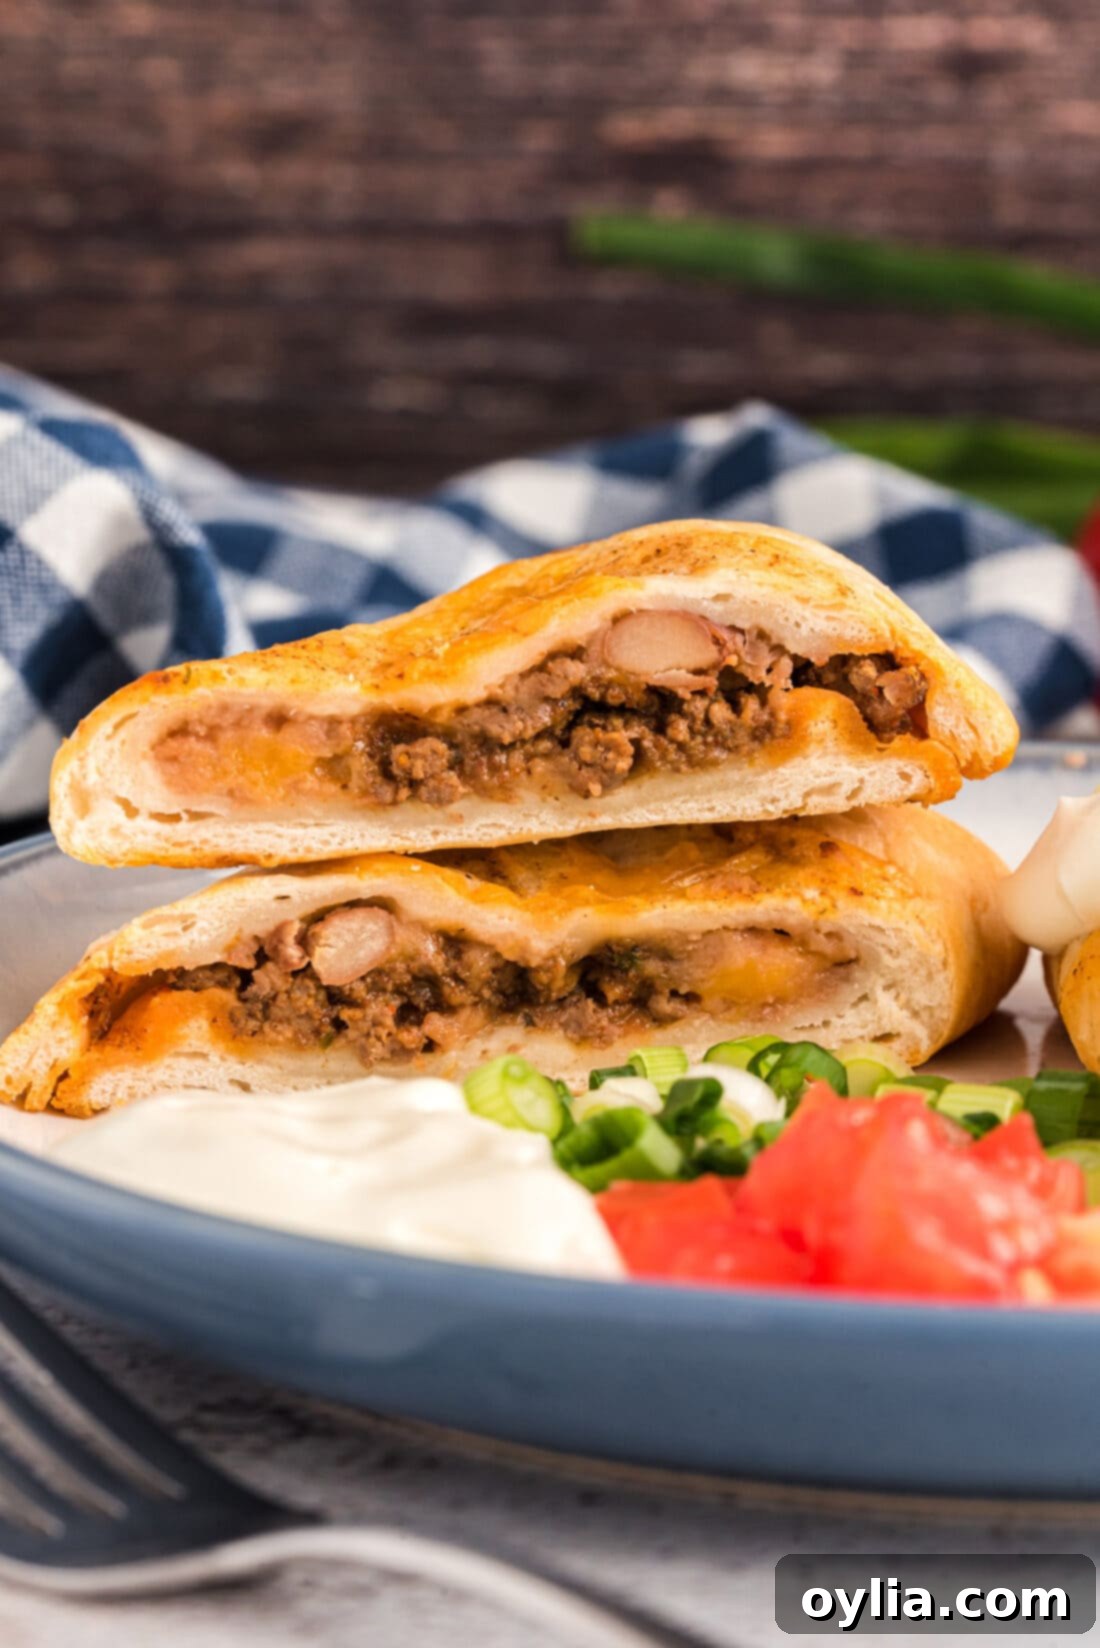
The image above showcases the original photo from this recipe, first shared back in October of 2014! It illustrates how simple yet satisfying these hand pies are. The beauty of these **quick empanadas** lies in their adaptability, making them suitable for casual family dinners or even a fun party appetizer.
Explore More Taco-Inspired Delights
If you love the flavors of tacos, you’re in luck! We have a collection of fantastic recipes that capture that delicious Tex-Mex essence. Once you’ve mastered these **easy cheesy taco empanadas**, why not try one of these other family favorites?
- Taco Pie: A hearty and satisfying casserole that brings all your favorite taco flavors into one dish.
- Taco Dip: The ultimate party appetizer, layered with creamy, cheesy, and fresh ingredients.
- Taco Soup: A comforting and flavorful soup packed with beans, corn, and seasoned ground meat.
- Walking Tacos: A fun, portable meal perfect for picnics, parties, or easy dinners.
- Taco Casserole: Another great option for feeding a crowd, combining rice, beans, meat, and cheese.
- Taco Pasta Salad: A refreshing and zesty salad, ideal for potlucks and summer gatherings.
- Homemade Taco Seasoning: Elevate any taco dish with your own blend of fresh spices.
I love to bake and cook and share my kitchen experience with all of you! Remembering to come back each day can be tough, that’s why I offer a convenient newsletter every time a new recipe posts. Simply subscribe and start receiving your free daily recipes!

Taco Empanadas
IMPORTANT – There are often Frequently Asked Questions within the blog post that you may find helpful. Simply scroll back up to read them!
Print It
Pin It
Rate It
Save ItSaved!
Ingredients
- 16 ounce large refrigerator biscuits like Pillsbury Grands
- ¾ cup refried beans divided
- 1 cup shredded cheddar cheese divided
- ¾ cup prepared taco meat divided
Optional garnishes:
- chopped tomato
- chopped green onion
- sour cream
- lettuce
Things You’ll Need
-
Baking sheets
-
Aluminum foil
-
Measuring cups and spoons
Before You Begin
- You can easily double this recipe for more or to freeze for later.
- To freeze, place the unbaked empanadas on a parchment lined baking sheet and flash freeze until the dough has mostly hardened. Flash freezing prevents the empanadas from sticking together. Remove from freezer and place the empanadas in a large ziptop bag or air-tight container and freeze for up to 3 months. You can allow them to thaw before baking, or bake straight from frozen, adding extra time in the oven as needed.
- Store leftovers in an air-tight container kept in the refrigerator for 3-4 days. Reheat in the microwave or air fryer.
- Feel free to add a can of diced green chiles, some chopped jalapenos, or diced onion to the meat mixture if desired.
- You don’t have to make homemade pie crust to make these taco empanadas. You can use refrigerated pie crusts, but because they are round, when you cut them into smaller circles you are forced to have scraps. You would have to meld those scraps back together with your existing pieces. Not a huge deal by any means, but an easier way is to use large refrigerator biscuits. I used Pillsbury Grands, but generic brands will work too.
Instructions
-
Preheat oven to 375 F and line a baking sheet with aluminum foil.
-
Flatten a biscuit on the foil using the heel of your hand, starting from the center and working your way outward.
-
Spread one tablespoon of refried beans onto the flattened biscuit.
-
Top refried beans with a tablespoon of shredded cheese.
-
Add a heaping tablespoon of prepared taco meat onto the cheese.
-
Fold the biscuit by pulling one side up over the other and sealing the edges with your finger. Crimp the edges and poke a few holes in top with a fork.
-
Drizzle some of the juice from the taco meat over the empanada. Top with another tablespoon of shredded cheese.
-
Repeat these steps for all empanadas.
-
Bake in preheated oven for 12-15 minutes or until biscuits are golden brown.
Nutrition
The recipes on this blog are tested with a conventional gas oven and gas stovetop. It’s important to note that some ovens, especially as they age, can cook and bake inconsistently. Using an inexpensive oven thermometer can assure you that your oven is truly heating to the proper temperature. If you use a toaster oven or countertop oven, please keep in mind that they may not distribute heat the same as a conventional full sized oven and you may need to adjust your cooking/baking times. In the case of recipes made with a pressure cooker, air fryer, slow cooker, or other appliance, a link to the appliances we use is listed within each respective recipe. For baking recipes where measurements are given by weight, please note that results may not be the same if cups are used instead, and we can’t guarantee success with that method.
This post originally appeared here on Oct 29, 2014, and has since been updated with new photos, expanded content, and expert tips to provide the most comprehensive guide to making these delightful taco empanadas.
