Delicious Frozen S’mores Bars: Your Ultimate No-Bake Summer Treat
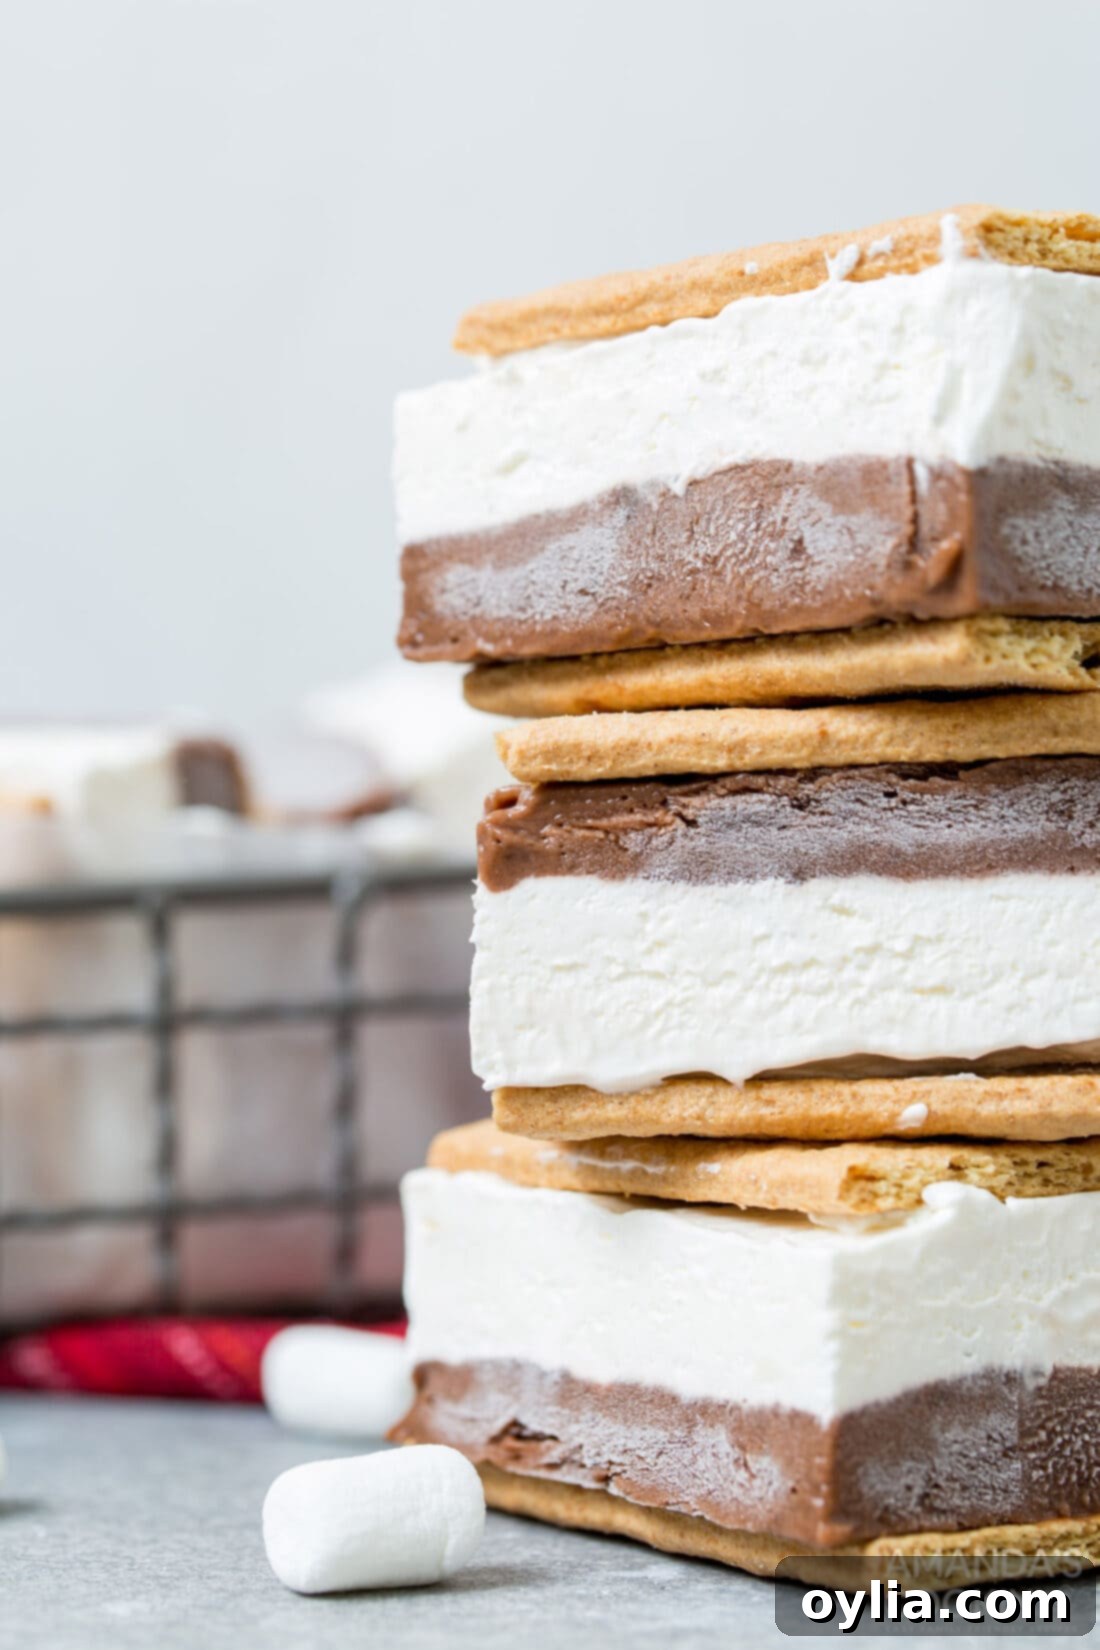
Embrace the nostalgic flavors of a classic s’more without the need for a campfire, and enjoy a refreshing twist with these incredible **Frozen S’mores Bars**! Imagine all the gooey, chocolatey, marshmallow goodness transformed into a delightful frozen dessert, perfect for beating the summer heat. These handheld treats feature decadent layers of rich chocolate pudding, creamy cream cheese, and light marshmallow fluff, all folded into a dreamy whipped topping, sandwiched between crisp graham crackers. They offer the perfect balance of sweet and cool, making them an irresistible addition to any warm-weather gathering or a simple afternoon indulgence.
Why This No-Bake Frozen S’mores Recipe is a Must-Try
Whether you call them frozen s’mores sandwiches, bars, or even a chilled s’mores delight, one thing is certain: they are the quintessential summer treat. This recipe takes everything you love about traditional s’mores – the crunchy graham crackers, the rich chocolate, and the sweet marshmallow – and transforms it into a cool, creamy, and wonderfully portable dessert. Unlike classic s’mores that require a roaring fire, these frozen delights are entirely no-bake, making them incredibly easy to prepare in your kitchen.
They offer a fantastic alternative to s’mores icebox cake, providing a convenient, individual serving size that’s perfect for casual backyard BBQs, refreshing pool days, or simply as a satisfying cool-down after a long day enjoying the summer sun. The combination of textures – the crispness of the graham crackers, the smooth fudgy pudding, and the airy marshmallow cream – creates a truly addictive experience that will have everyone reaching for more.
While s’mores are often associated with summer evenings and campfires, their delicious flavor profile is a year-round favorite. If you’re a devoted s’mores enthusiast, you’ll also adore other variations like s’mores bars, a decadent s’mores dip perfect for sharing, or delightful s’mores cookies. These frozen s’mores, however, bring a unique refreshing element that sets them apart, offering a cool and creamy escape from the heat while delivering all that beloved chocolatey marshmallow goodness.
Key Ingredients for Perfect Frozen S’mores Bars
Crafting these delectable frozen s’mores requires a few simple ingredients, easily found at any grocery store. The beauty of this recipe lies in its straightforward components that come together to create a surprisingly complex and satisfying dessert. For a complete list of measurements and step-by-step instructions, please refer to the printable recipe card at the end of this post.
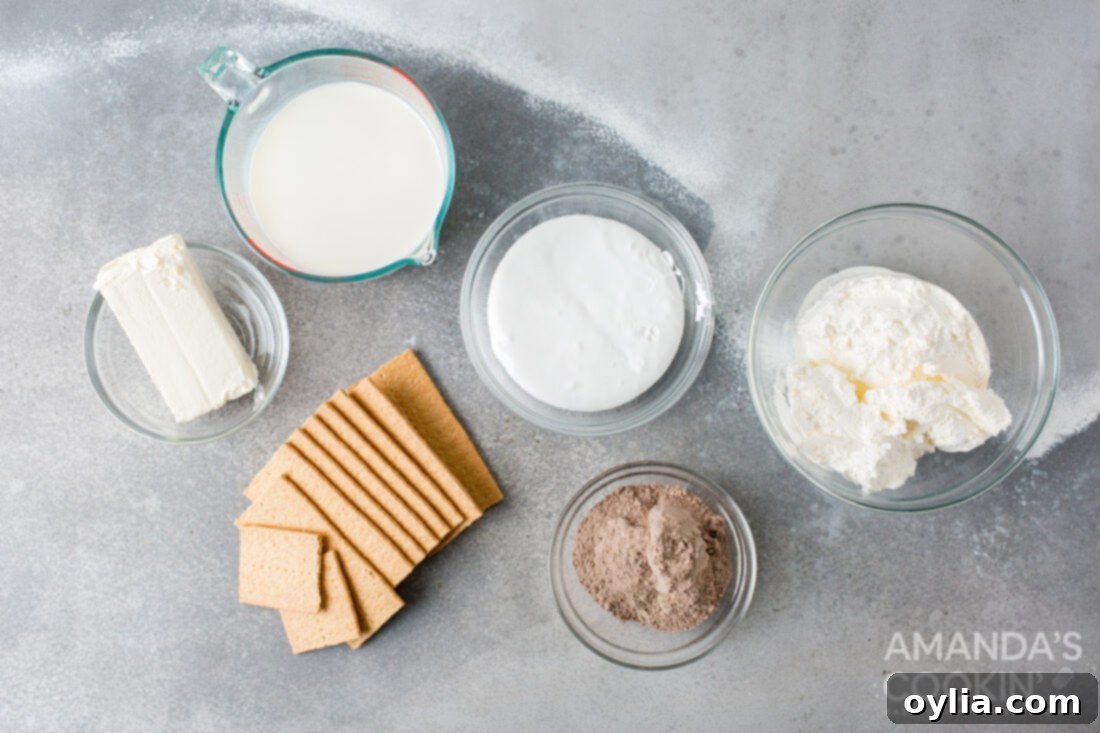
Graham Crackers: The Essential Foundation
Our frozen s’mores begin with classic **honey graham crackers**. These provide the iconic crunchy base and top, instantly recognizable as the signature component of any s’more. While honey is traditional, don’t hesitate to experiment! You could easily swap them for chocolate graham crackers to enhance the cocoa flavor, or cinnamon graham crackers for a spiced twist that adds another layer of warmth. The key is to choose a cracker that holds up well once softened slightly by the creamy filling.
The Rich and Creamy Layers
The magic of these bars lies in their multi-layered filling:
- Instant Chocolate Pudding: For the chocolate layer, we highly recommend using instant chocolate pudding. This choice is crucial because it sets quickly and achieves a consistency that beautifully mimics a fudgsicle – smooth, rich, and firm when frozen, but wonderfully creamy as it starts to thaw. This creates a delightful contrast with the other components.
- Marshmallow Fluff: The distinctive marshmallow layer is achieved with sweet, sticky marshmallow fluff. This ingredient ensures a smooth, airy, and stable marshmallow component that freezes perfectly. If marshmallow fluff isn’t readily available at your local grocery store, you can create a similar consistency by carefully melting regular marshmallows. Simply microwave them in short 5-second intervals, stirring in between, until smooth and pourable. Be very careful not to overheat them, as they can quickly become brittle. You’ll need approximately 2 cups of melted marshmallows to substitute for 8 ounces of marshmallow fluff.
- Cream Cheese: Softened cream cheese adds a delightful tang and richness to the marshmallow layer. It also contributes to the stability of the filling, ensuring it holds its shape when frozen and provides a pleasant creamy texture when enjoyed. Ensure your cream cheese is softened to room temperature for a lump-free, smooth mixture.
- Whipped Topping: To lighten and aerate the marshmallow and cream cheese mixture, we fold in whipped topping (like Cool Whip). This makes the filling incredibly light, fluffy, and reminiscent of a frozen mousse. Thaw your whipped topping in the refrigerator before using for the best results.
How to Craft Your Own Frozen S’mores Bars
These step-by-step photos and instructions are here to help you visualize how to make this recipe. You can Jump to Recipe to get the printable version of this recipe, complete with measurements and instructions at the bottom.
- Prepare Your Pan: First, line a 9×13 inch baking pan with parchment paper. It’s essential to leave enough parchment paper hanging over the sides to create “handles.” These handles will be invaluable for easily lifting the entire frozen dessert out of the pan once it’s set. This simple trick prevents any sticking and makes the cutting process much smoother.
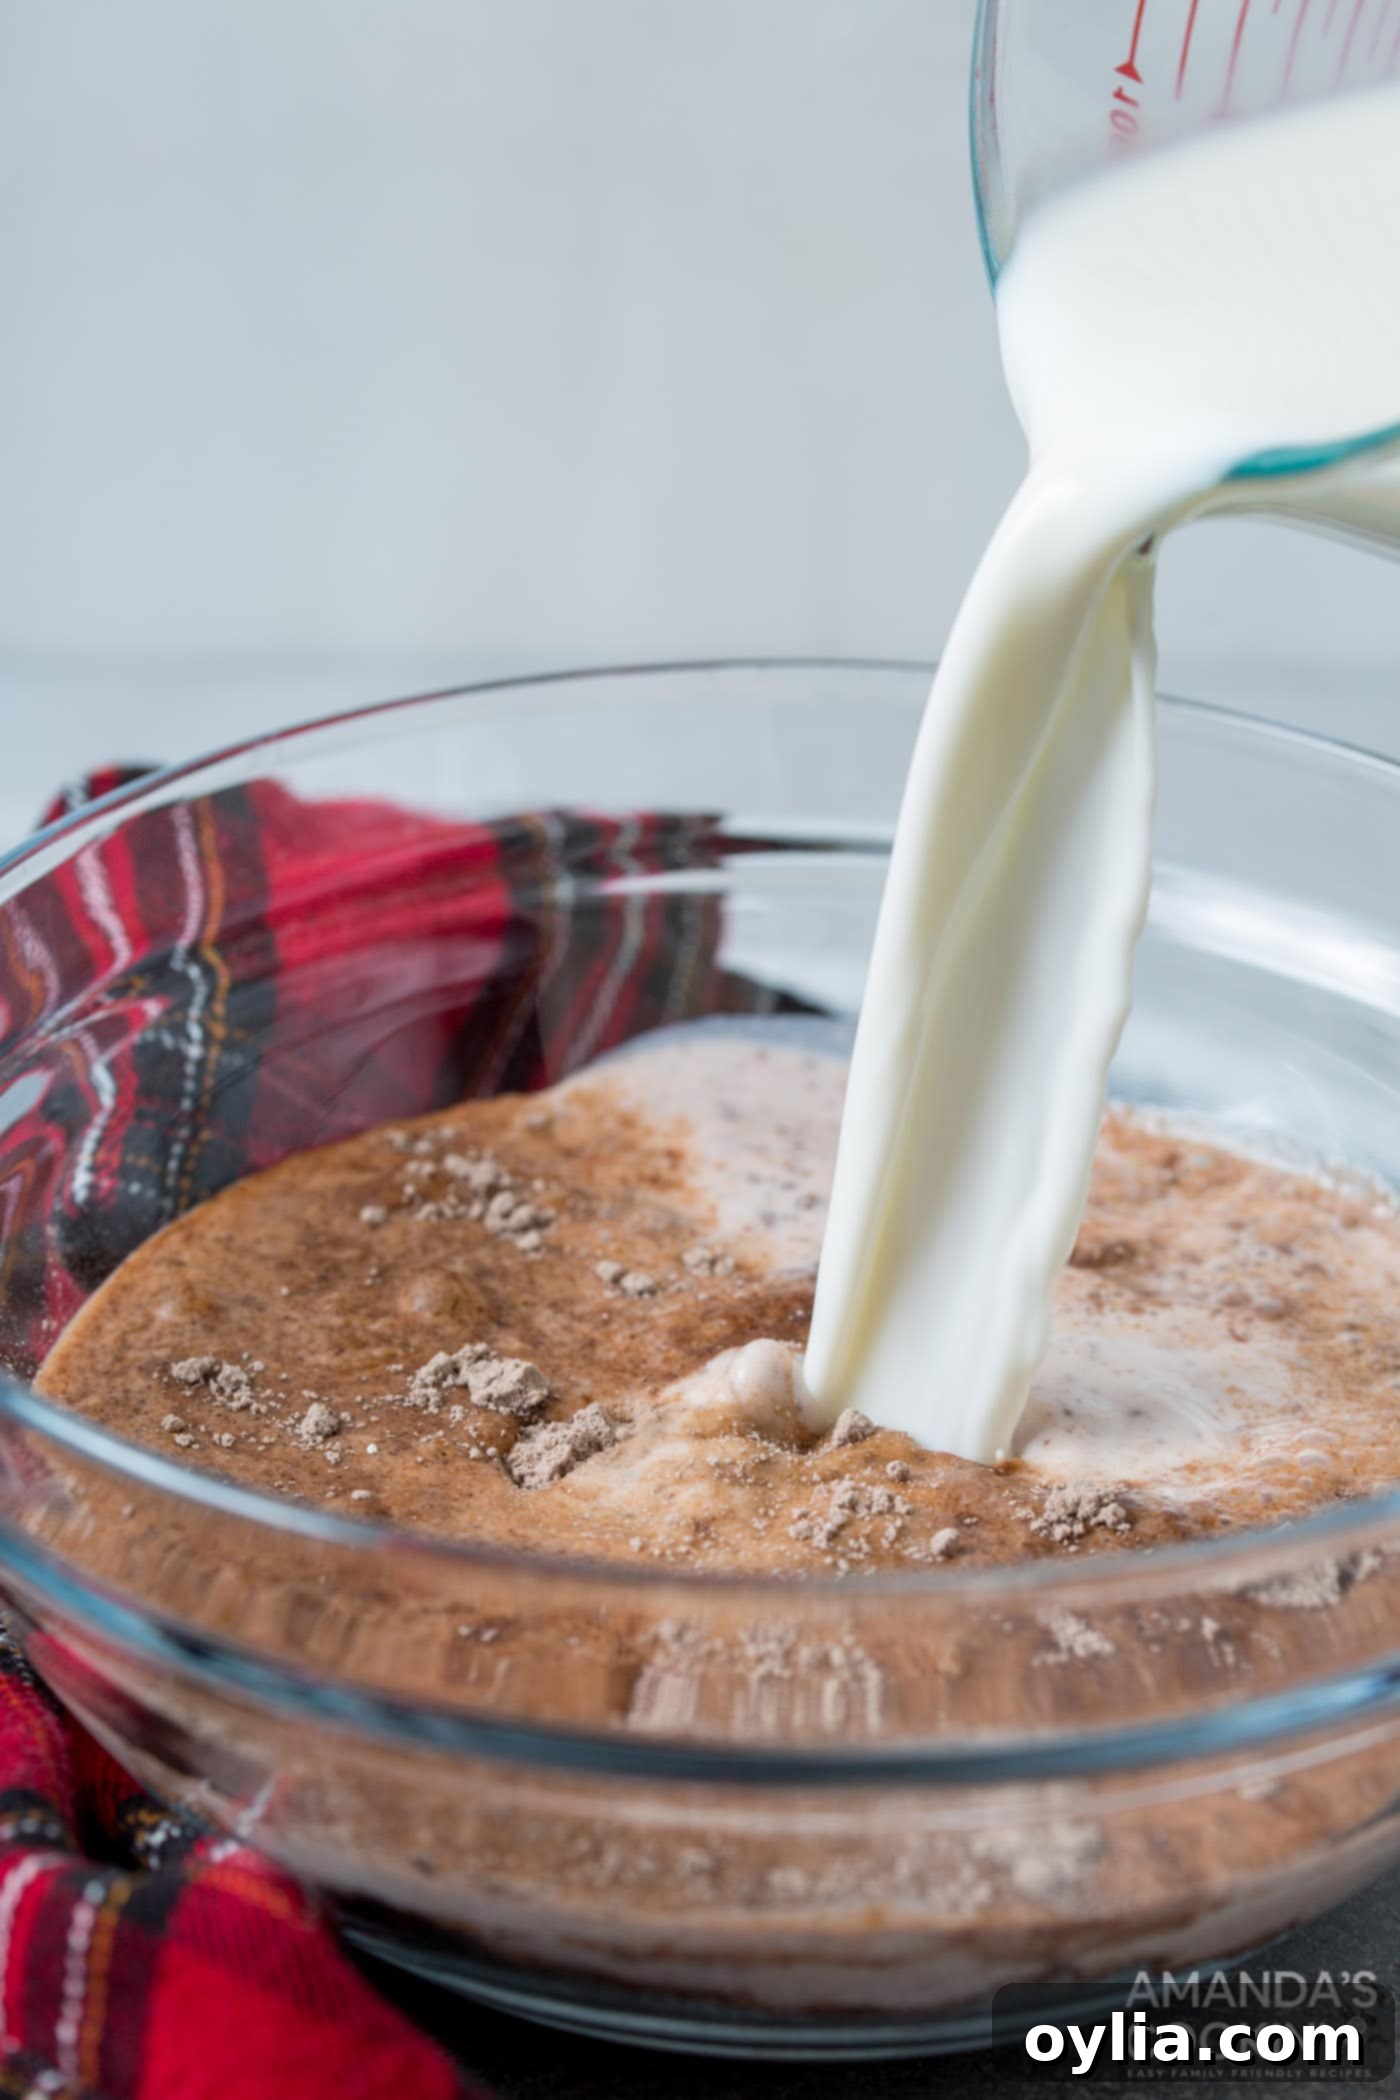
- Make the Chocolate Pudding Layer: In a large mixing bowl, prepare the instant chocolate pudding according to package directions, using cold milk. Whisk until it’s thick and smooth, ensuring no lumps remain.
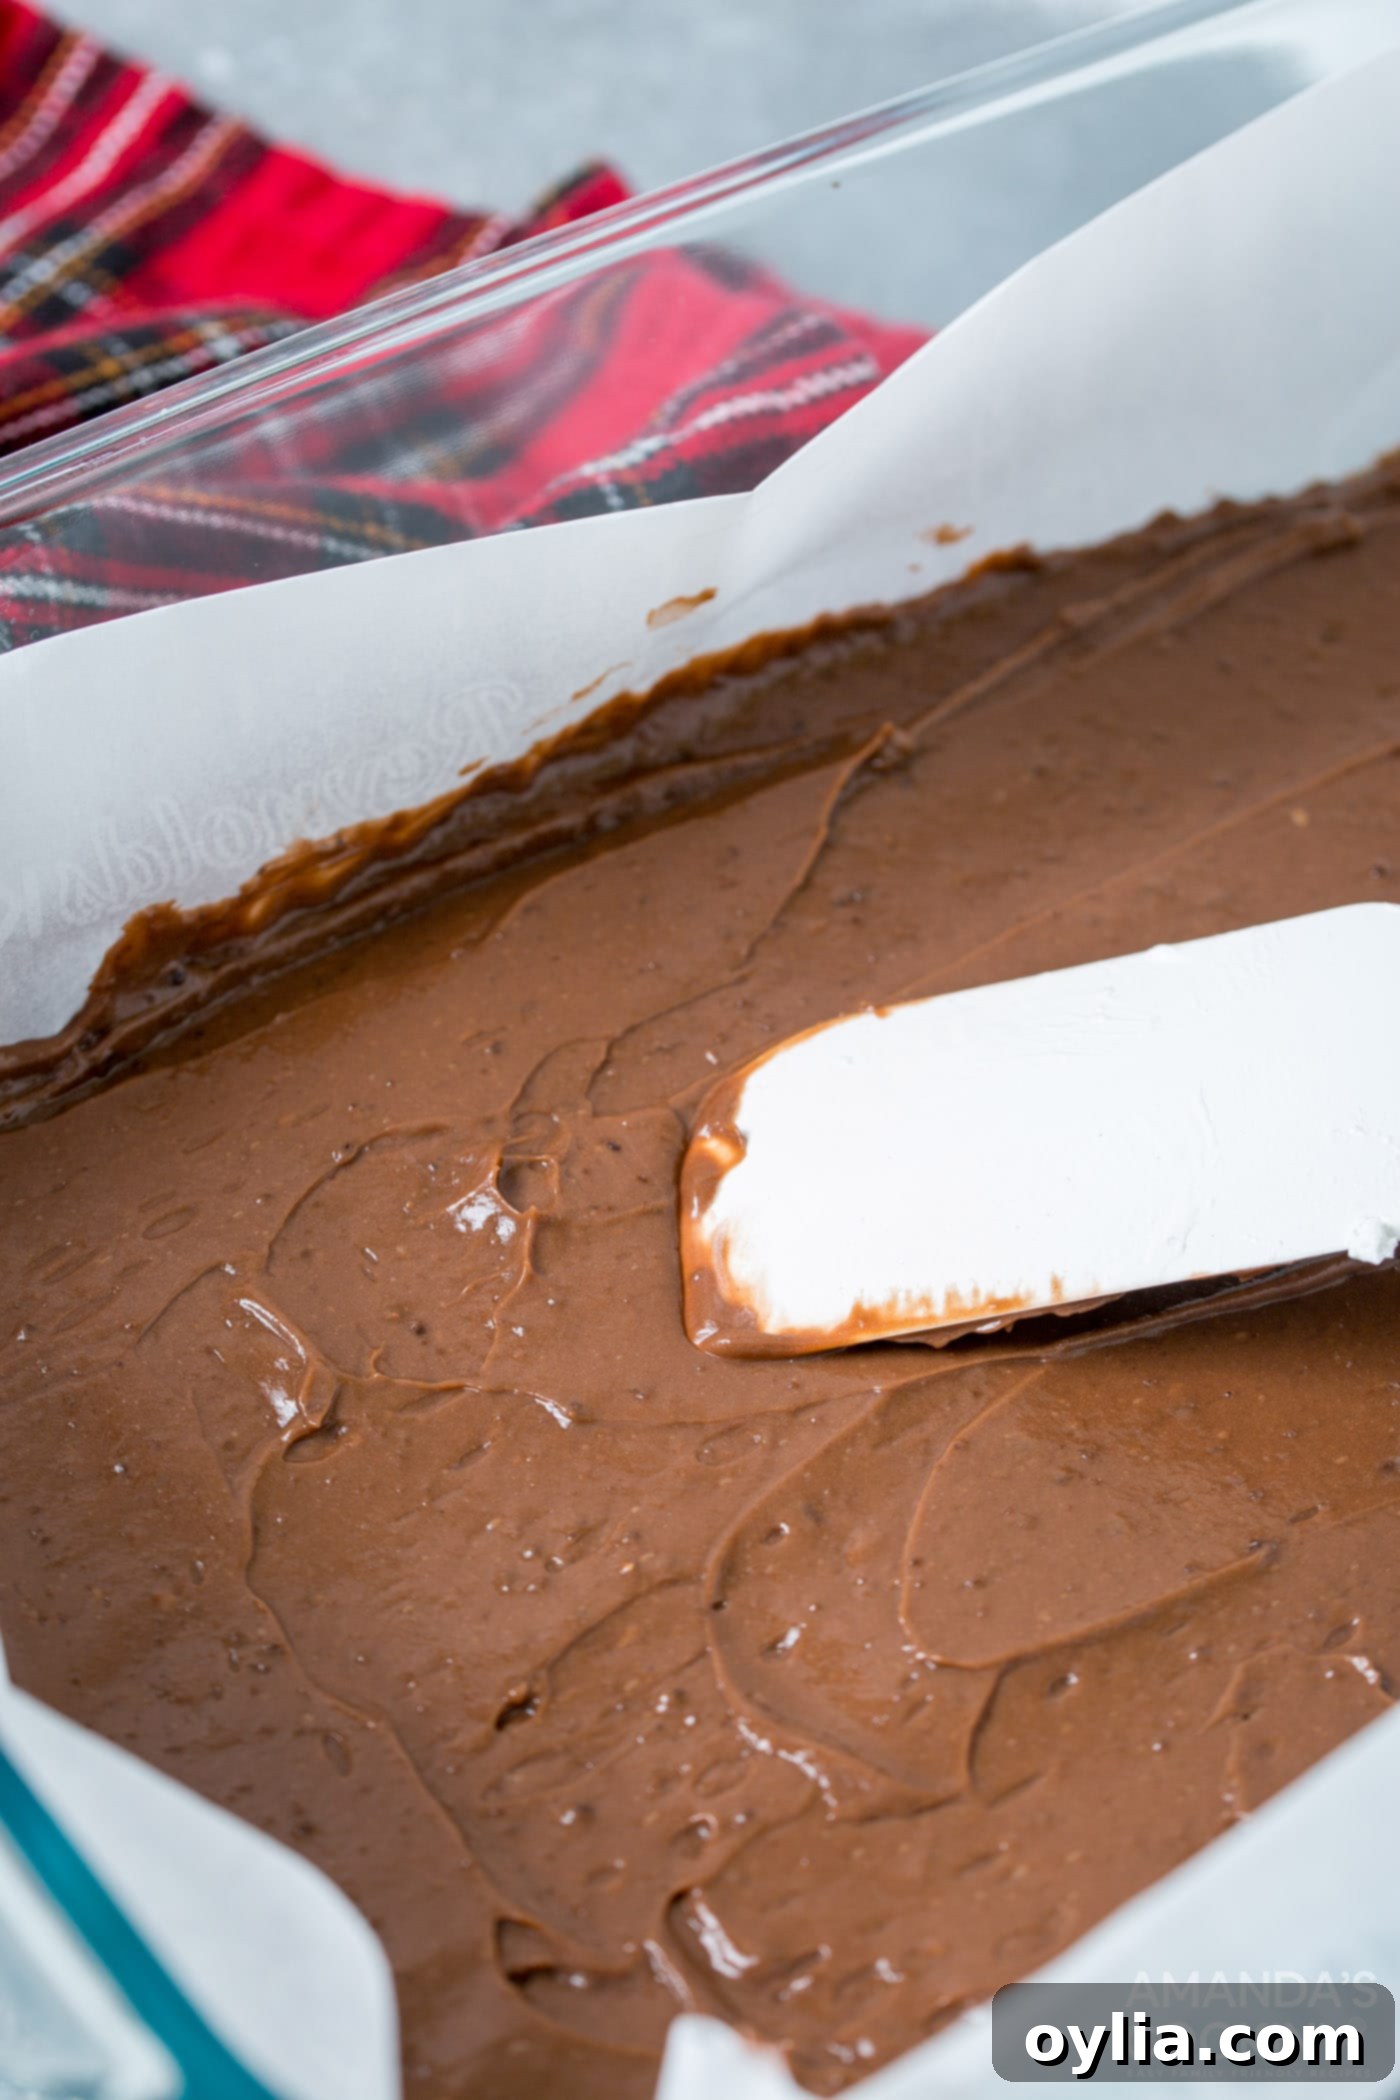
 Pour this pudding mixture into your prepared casserole dish, spreading it out evenly with a rubber spatula. Immediately transfer the dish to the freezer to chill and set while you prepare the marshmallow layer. This step helps create distinct, firm layers.
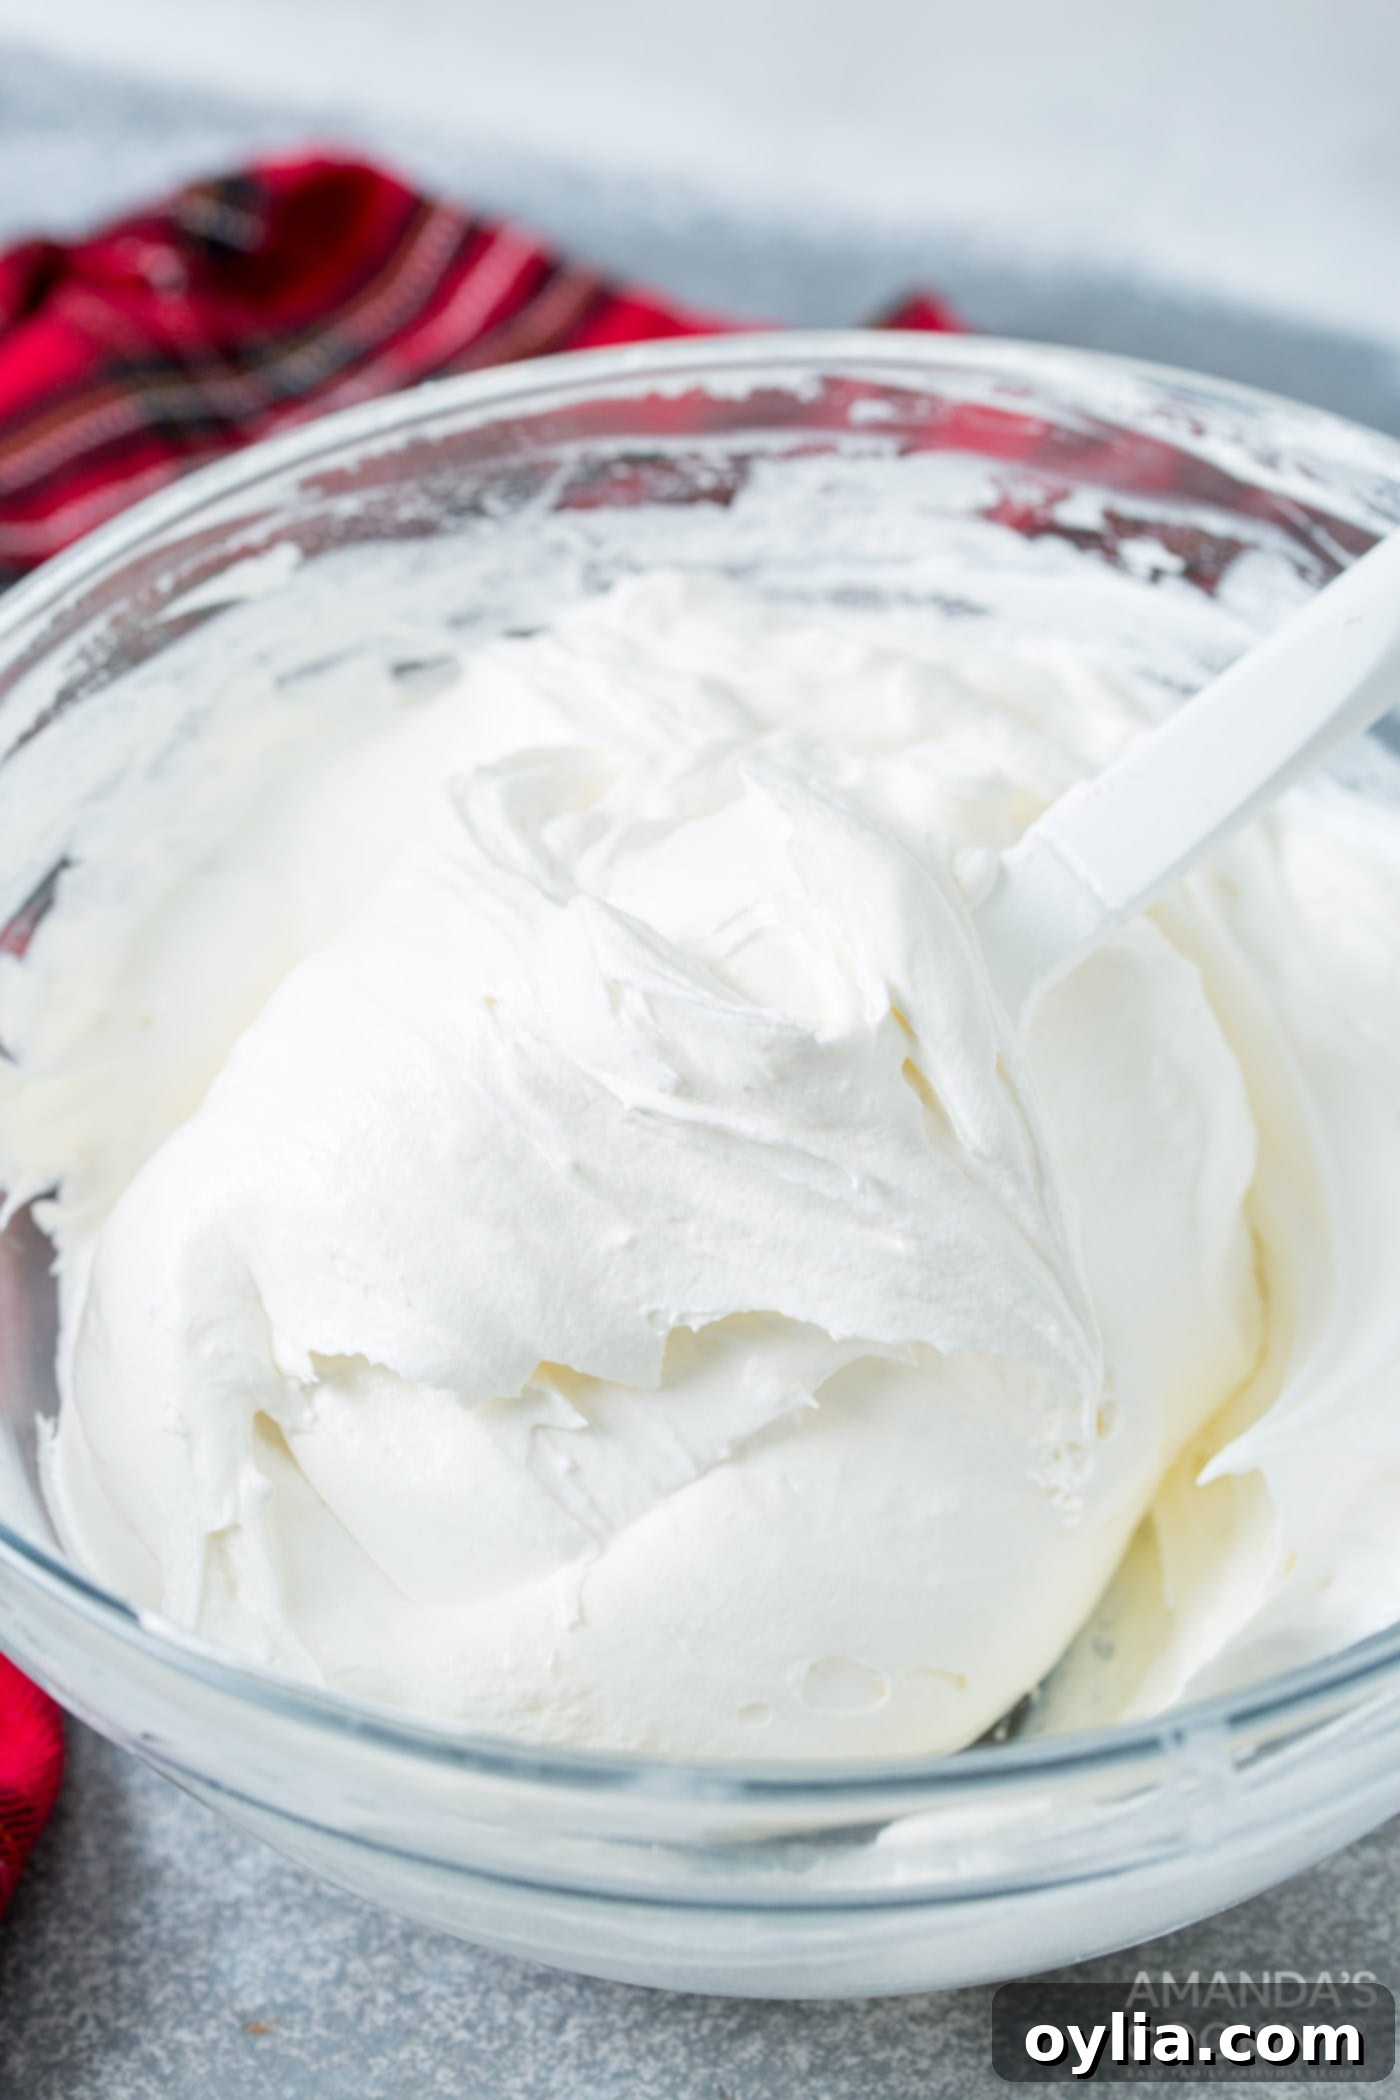
- Create the Marshmallow Layer: In a separate large bowl, beat the softened cream cheese with a hand mixer until it’s smooth and creamy, with no lumps. Add the marshmallow fluff and continue to beat until both ingredients are fully combined and fluffy. Finally, gently fold in the thawed whipped topping until just incorporated. Be careful not to overmix, as this can deflate the whipped topping.

- Assemble and Freeze: Retrieve the chilled pudding layer from the freezer. Using your rubber spatula, carefully spread the marshmallow mixture evenly over the chocolate pudding layer, creating a smooth and cohesive second layer. Return the dish to the freezer for a minimum of 4-6 hours, or ideally, for 24 hours to ensure it is completely firm and easy to cut. The longer freeze time allows the layers to fully set and marry their flavors.
- Prepare for Cutting: Once the layers are thoroughly frozen, use the parchment paper “handles” to lift the entire block out of the casserole dish and place it onto a sturdy cutting board. Allow it to sit at room temperature for about 10 minutes. This slight softening will make it easier to cut without cracking the layers.
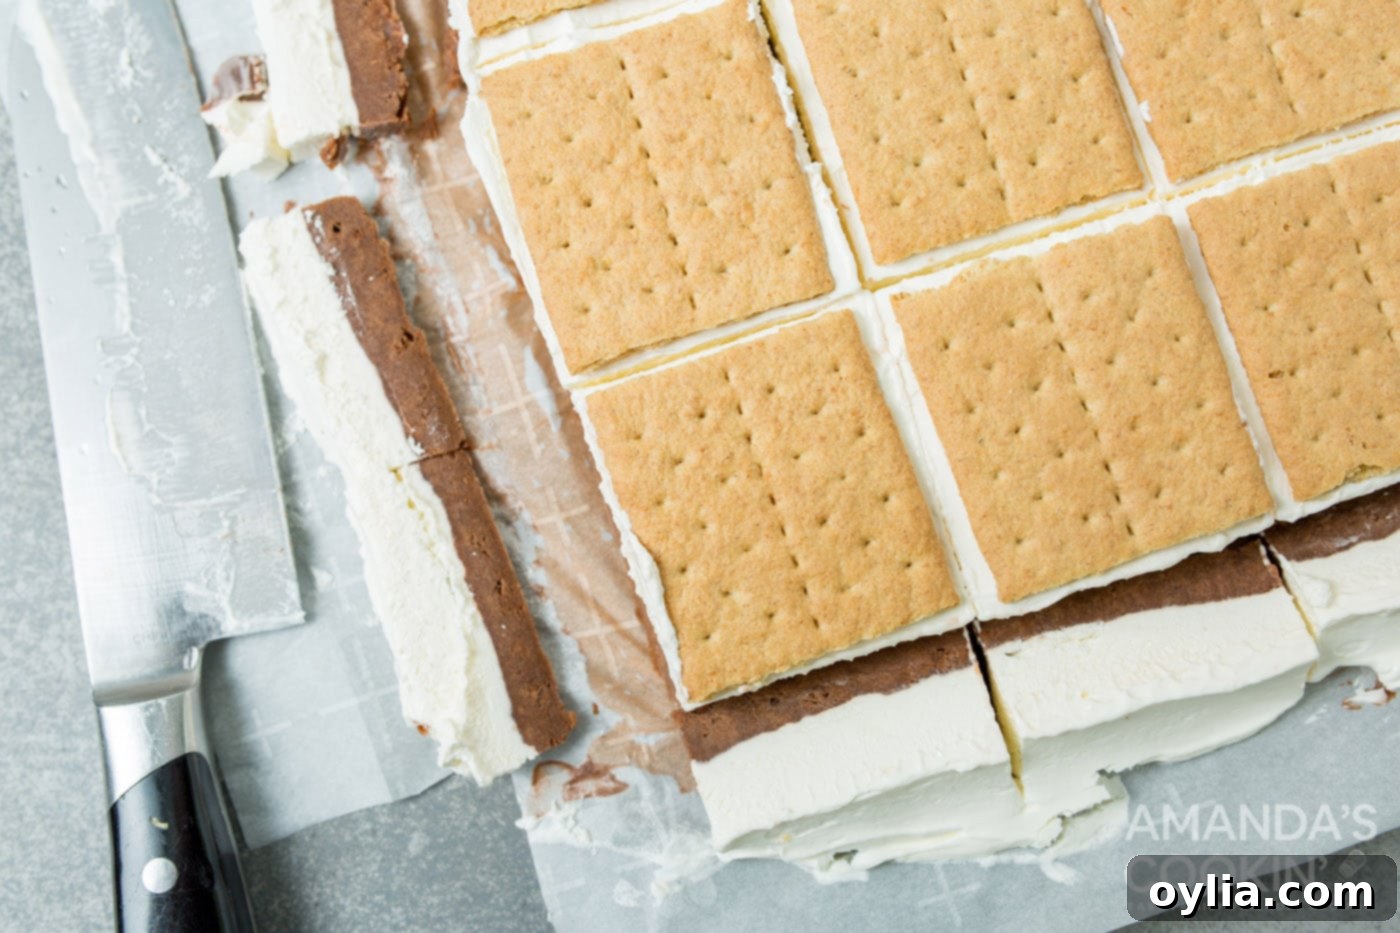
- Add Graham Crackers and Trim: Break your graham crackers in half. Carefully arrange these graham cracker halves over the top of the frozen layers, making sure they are spaced appropriately for your desired bar size.
 Using a hot, sharp knife (you can heat it by running it under hot water and wiping it dry), carefully cut around the graham crackers, trimming off any excess chocolate and marshmallow filling around the edges. This creates neat, clean bars.
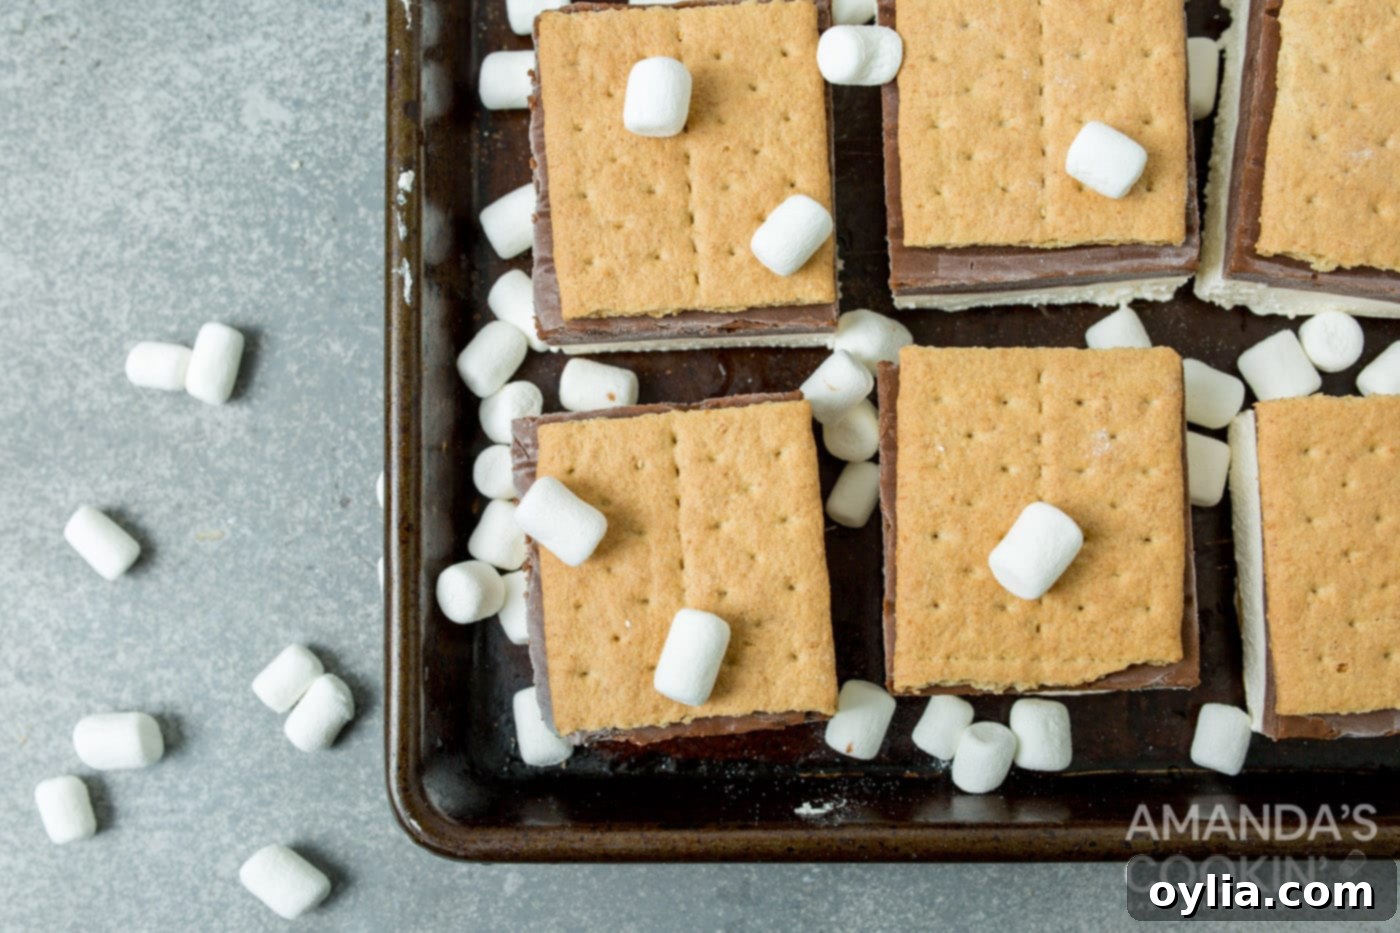
- Add the Second Graham Cracker Layer: Take another cutting board or a flat sheet pan. Carefully flip the frozen s’mores bars over onto the new surface, so the plain side is now facing up. Place the remaining graham cracker halves on this side, completing your s’mores “sandwiches.”
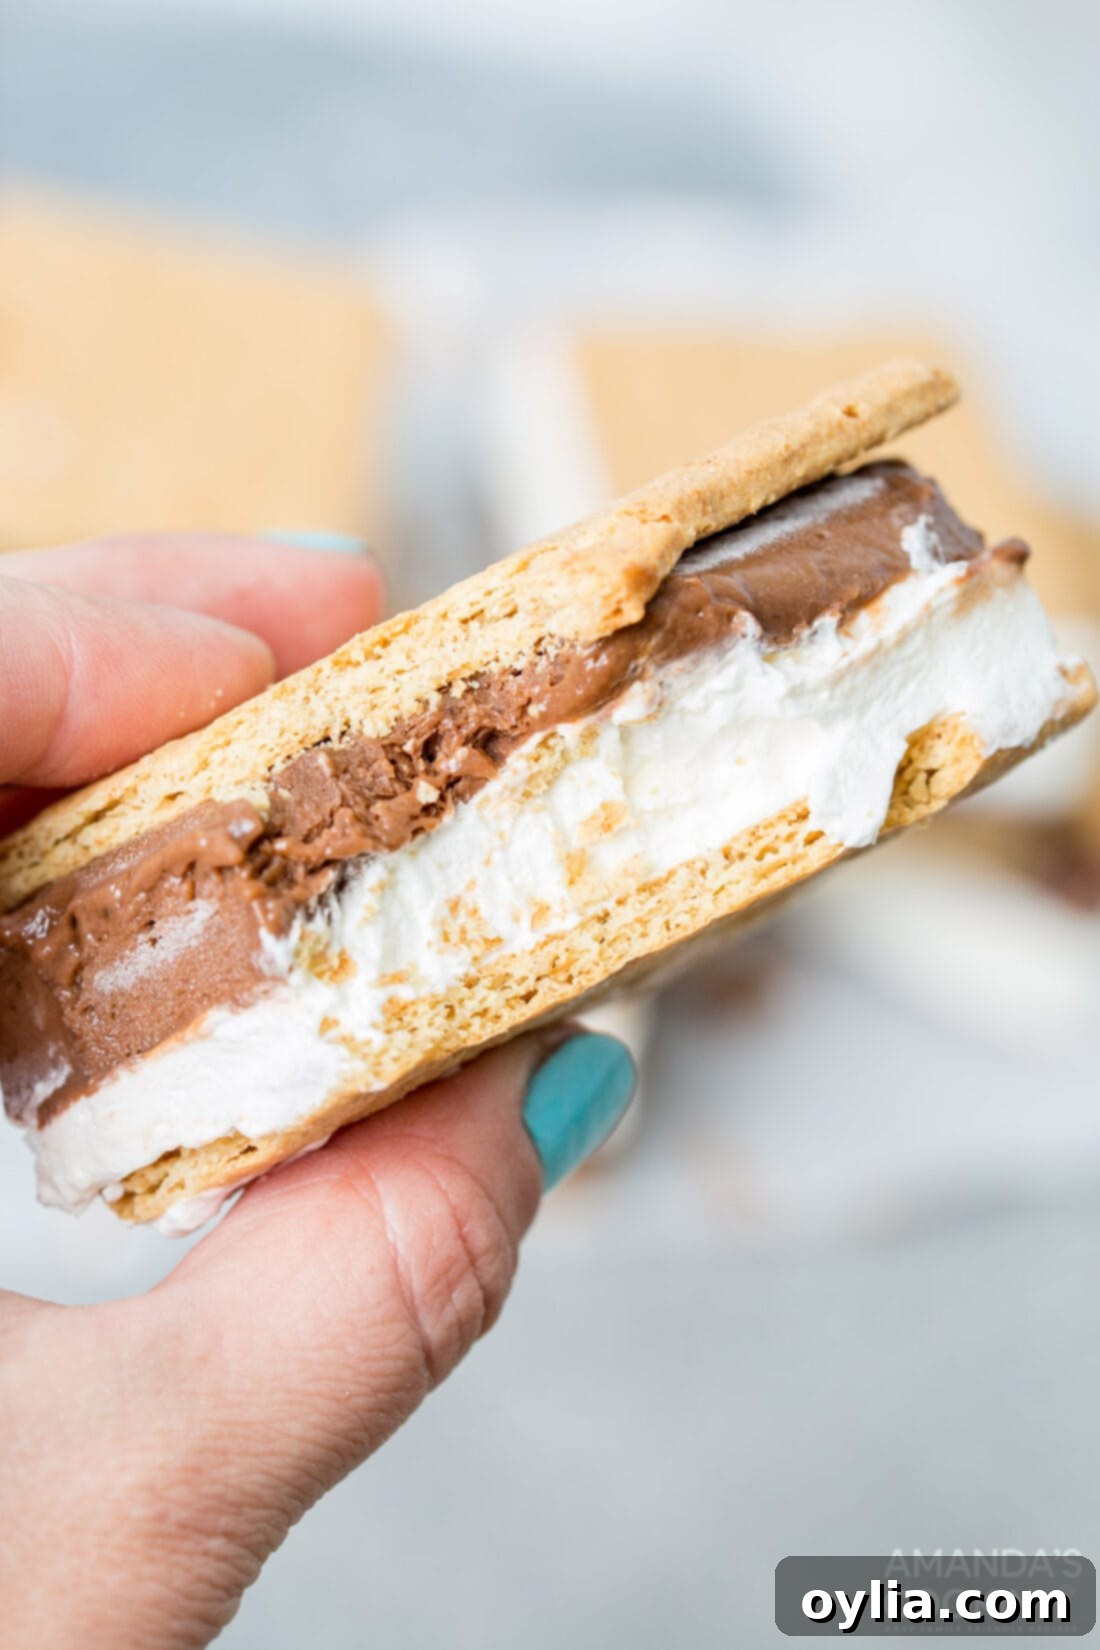
- Serve and Enjoy: You can enjoy these frozen s’mores immediately for a firm, ice-cream-like treat. However, we find them absolutely perfect if you allow the filling to melt slightly for about 15-20 minutes at room temperature before devouring. This allows the graham crackers to adhere beautifully to the creamy filling and creates a softer, more harmonious texture. Be prepared for delightful, messy fingers and happy faces!

Frequently Asked Questions & Expert Tips for Frozen S’mores
To keep your frozen s’mores bars fresh, store any leftovers in an airtight container in the freezer. For best results, individually wrap each s’mores bar tightly in waxed paper or plastic wrap before placing them in a freezer-safe bag or container. This helps prevent freezer burn and keeps them from sticking together. When stored with the graham crackers attached, they should last for about 3 days before the crackers may start to soften too much. For longer storage, refer to the “Can I make these ahead of time?” tip below.
Absolutely! These frozen s’mores are an excellent make-ahead dessert. You can prepare them up to 24 hours in advance, keeping them frozen until about 20 minutes before you plan to serve. This allows them to slightly thaw for optimal texture. If you wish to prepare them further in advance (e.g., several days to a week), here’s a pro tip to keep your graham crackers perfectly crisp: Follow all instructions for preparing and freezing the filling layers (chocolate pudding and marshmallow fluff). Once the filling is completely frozen, remove it from the pan and cut it into individual squares. Store these frozen filling squares tightly wrapped in the freezer. When you’re ready to serve, take the frozen filling squares out of the freezer and immediately place graham cracker halves on both sides. Let them sit at room temperature for about 20 minutes; this allows the filling to soften just enough for the graham crackers to adhere properly, ensuring a fresh, un-soggy crunch with every bite.
No problem! If you can’t find marshmallow fluff, you can easily substitute it with melted regular marshmallows. For this recipe, you’ll need approximately 2 cups worth of melted marshmallows to replace the 8 ounces of fluff. To melt marshmallows, place them in a microwave-safe bowl and microwave in 5-second intervals, stirring thoroughly after each interval, until smooth and gooey. Be very careful not to overheat them, as they can seize and become hard.
While the recipe calls for instant pudding and store-bought whipped topping for convenience and consistency, you could certainly experiment with homemade versions. If using homemade pudding, ensure it’s very thick and fully chilled before layering. For homemade whipped cream, ensure it’s stabilized (e.g., with a bit of cream cheese or gelatin) so it holds its structure well when frozen and thaws without weeping. Keep in mind that homemade ingredients might alter the texture and freezing time slightly.
Absolutely! These frozen s’mores are a fantastic canvas for creativity. Before the final freeze or just before serving, you could sprinkle mini chocolate chips, crushed toffee bits, a drizzle of chocolate syrup, or even a dusting of cocoa powder on top. For a different flavor profile, consider using white chocolate pudding, or adding a layer of peanut butter to the marshmallow mixture. The possibilities are endless for customizing your frozen s’mores!
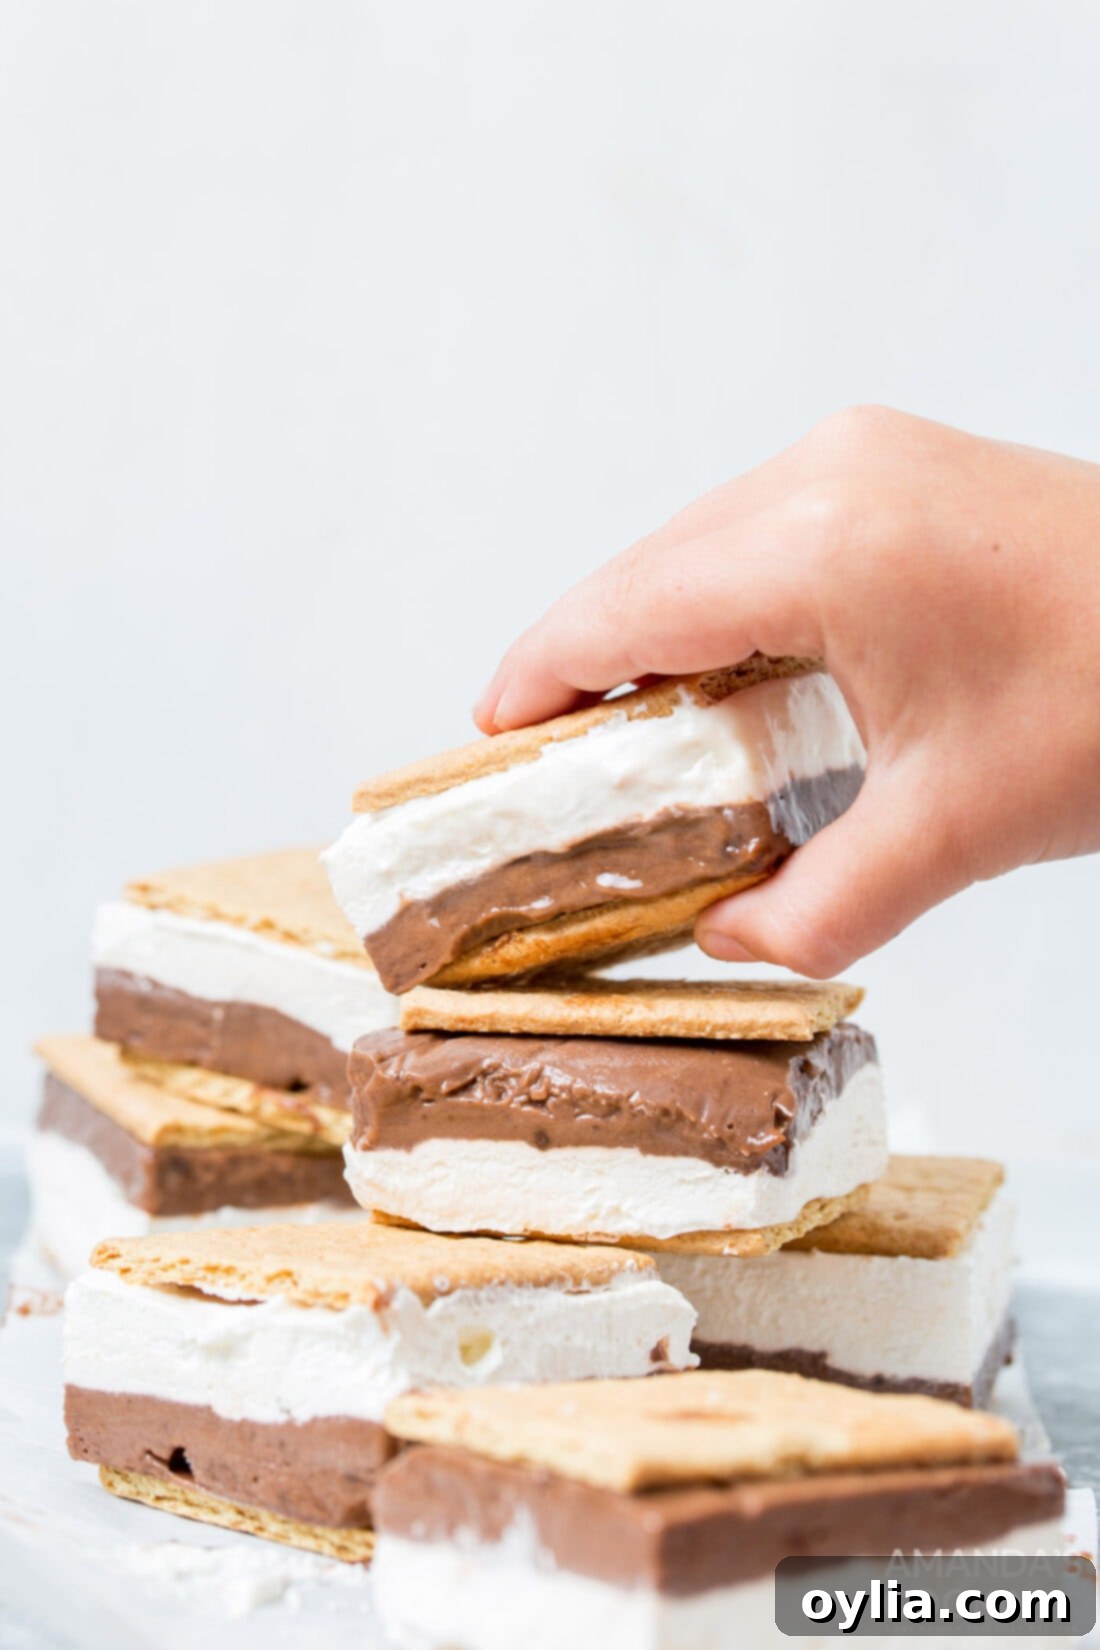
Serving Suggestions for Your Frozen S’mores Bars
These frozen s’mores bars are a versatile treat perfect for almost any occasion. For the best eating experience, allow them to sit at room temperature for about 15-20 minutes before devouring. This brief thaw period softens the filling just enough, making them wonderfully creamy and allowing the graham crackers to perfectly meld with the layers, creating that ideal s’mores texture.
If you’re planning to take these delightful bars to a picnic, a friend’s house, or a beach day, ensure they are kept in a well-insulated cooler with plenty of ice (or even dry ice for extended travel). Wrapping each bar individually in parchment paper or plastic wrap before placing them in a larger plastic bag will help them stay intact and prevent any condensation from making the graham crackers soggy. Remember, these are meant to be a fun, slightly messy treat, so have napkins handy! For an extra special touch, consider drizzling a little extra chocolate sauce or a sprinkle of mini marshmallows on top just before serving.
More Irresistible Frozen Treat Recipes
If you’re a fan of cool, refreshing desserts, you’re in for a treat! Explore some of our other favorite frozen delights perfect for any time of year:
- Raspberry Ice Cream Delight
- Homemade Dole Whip
- Creamy Strawberry Frozen Yogurt
- Easy Ice Cream Sandwich Cake
- Refreshing Strawberry Banana Popsicles
- Decadent Blueberry Cheesecake Popsicles
- No-Churn Butterfinger Ice Cream Sandwiches
I love to bake and cook and share my kitchen experience with all of you! Remembering to come back each day can be tough, that’s why I offer a convenient newsletter every time a new recipe posts. Simply subscribe and start receiving your free daily recipes!
Frozen S’mores Bars
IMPORTANT – There are often Frequently Asked Questions within the blog post that you may find helpful. Simply scroll back up to read them!
Print It
Pin It
Rate It
Save It
Saved!
Prevent your screen from going dark
Course:
Dessert
Cuisine:
American
12
bars
1 day
20 minutes
377
Amanda Davis
Ingredients
-
5.6
oz
instant chocolate pudding
1 box -
2.5
cups
milk
cold -
24
graham crackers -
8
oz
marshmallow fluff -
8
oz
cream cheese
softened -
10
oz
whipped topping
thawed
Things You’ll Need
-
13×9 baking dish -
Rubber spatula -
Hand mixer
Before You Begin
- The recipe card indicates you will need 24 hours of chill time in the freezer. This isn’t entirely necessary, however, you will need a minimum of 4-6 hours to freeze the pudding and marshmallow fluff layers to ensure they are firm enough to cut cleanly. This means you can easily make these the morning of your plans for an evening treat.
- For optimal texture and to prevent soggy graham crackers, you can also make these frozen s’mores 24 hours in advance. Keep them in the freezer and allow them to thaw for 20 minutes before enjoying. If you want to make them even further in advance (e.g., several days to a week), follow the instructions for preparing and freezing only the filling layers (pudding and fluff). Once completely frozen, cut the filling into individual squares. Store these frozen filling squares tightly wrapped in the freezer. When you’re ready to serve, remove the frozen filling squares from the freezer and immediately place graham cracker halves onto them. Let the graham cracker-topped filling rest for 20 minutes before enjoying, allowing the crackers to properly adhere to the creamy layers.
Instructions
-
Line a 9×13 inch pan with parchment paper, allowing the parchment paper to hang up the sides to create “handles” for easy removal.
-
In a large bowl, prepare the instant pudding with the cold milk until smooth and thickened. Pour the pudding into the prepared casserole dish and spread evenly. Place immediately into the freezer to chill and set while you make the marshmallow layer.
-
In another large bowl, beat the softened cream cheese with a hand mixer until smooth. Add the marshmallow fluff and beat again until fully combined and fluffy. Gently fold in the thawed whipped topping until just incorporated.
-
Use a rubber spatula to carefully top the chilled chocolate pudding layer with the marshmallow mixture, spreading it evenly. Return the dish to the freezer for 4-24 hours, or until completely firm.
-
Once fully frozen, use the parchment paper handles to remove the layered dessert from the casserole dish and place it onto a cutting board. Allow it to sit at room temperature for 10 minutes to soften slightly.
-
Break the graham crackers in half and arrange them on top of the frozen layers. Use a hot, sharp knife to cut around the graham crackers, trimming the edges of any excess chocolate and marshmallow filling to create clean, individual bars.
-
Using another cutting board or a flat sheet pan, carefully flip the s’mores sandwiches over and place the remaining graham cracker halves on the other side.
-
Enjoy your frozen s’mores immediately for a firm, ice cream-like texture, or allow them to thaw slightly for about 15-20 minutes at room temperature for a softer, creamier filling where the graham crackers adhere perfectly.
Nutrition
Serving:
1
frozen smores
|
Calories:
377
cal
|
Carbohydrates:
58
g
|
Protein:
6
g
|
Fat:
14
g
|
Saturated Fat:
8
g
|
Polyunsaturated Fat:
1
g
|
Monounsaturated Fat:
3
g
|
Cholesterol:
26
mg
|
Sodium:
469
mg
|
Potassium:
206
mg
|
Fiber:
1
g
|
Sugar:
36
g
|
Vitamin A:
354
IU
|
Calcium:
121
mg
|
Iron:
1
mg
Tried this Recipe? Pin it for Later!
Follow on Pinterest @AmandasCookin or tag #AmandasCookin!
The recipes on this blog are tested with a conventional gas oven and gas stovetop. It’s important to note that some ovens, especially as they age, can cook and bake inconsistently. Using an inexpensive oven thermometer can assure you that your oven is truly heating to the proper temperature. If you use a toaster oven or countertop oven, please keep in mind that they may not distribute heat the same as a conventional full sized oven and you may need to adjust your cooking/baking times. In the case of recipes made with a pressure cooker, air fryer, slow cooker, or other appliance, a link to the appliances we use is listed within each respective recipe. For baking recipes where measurements are given by weight, please note that results may not be the same if cups are used instead, and we can’t guarantee success with that method.
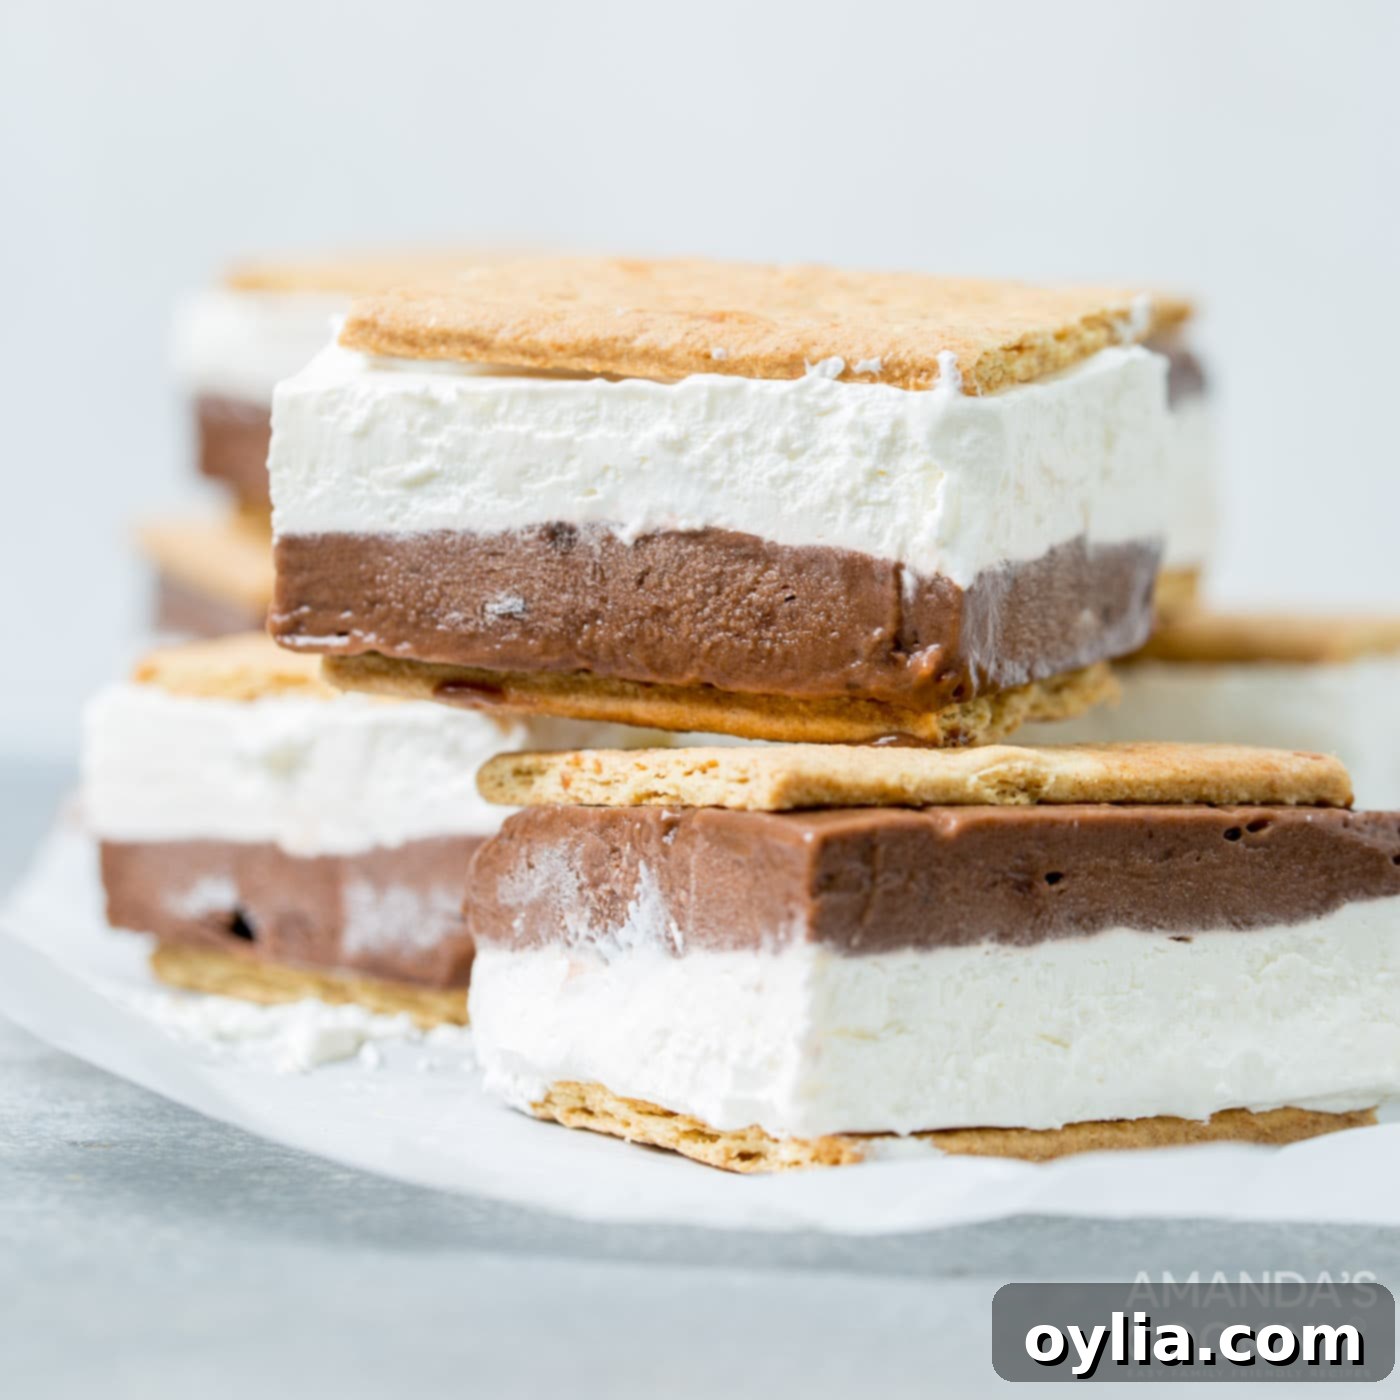
 Pour this pudding mixture into your prepared casserole dish, spreading it out evenly with a rubber spatula. Immediately transfer the dish to the freezer to chill and set while you prepare the marshmallow layer. This step helps create distinct, firm layers.
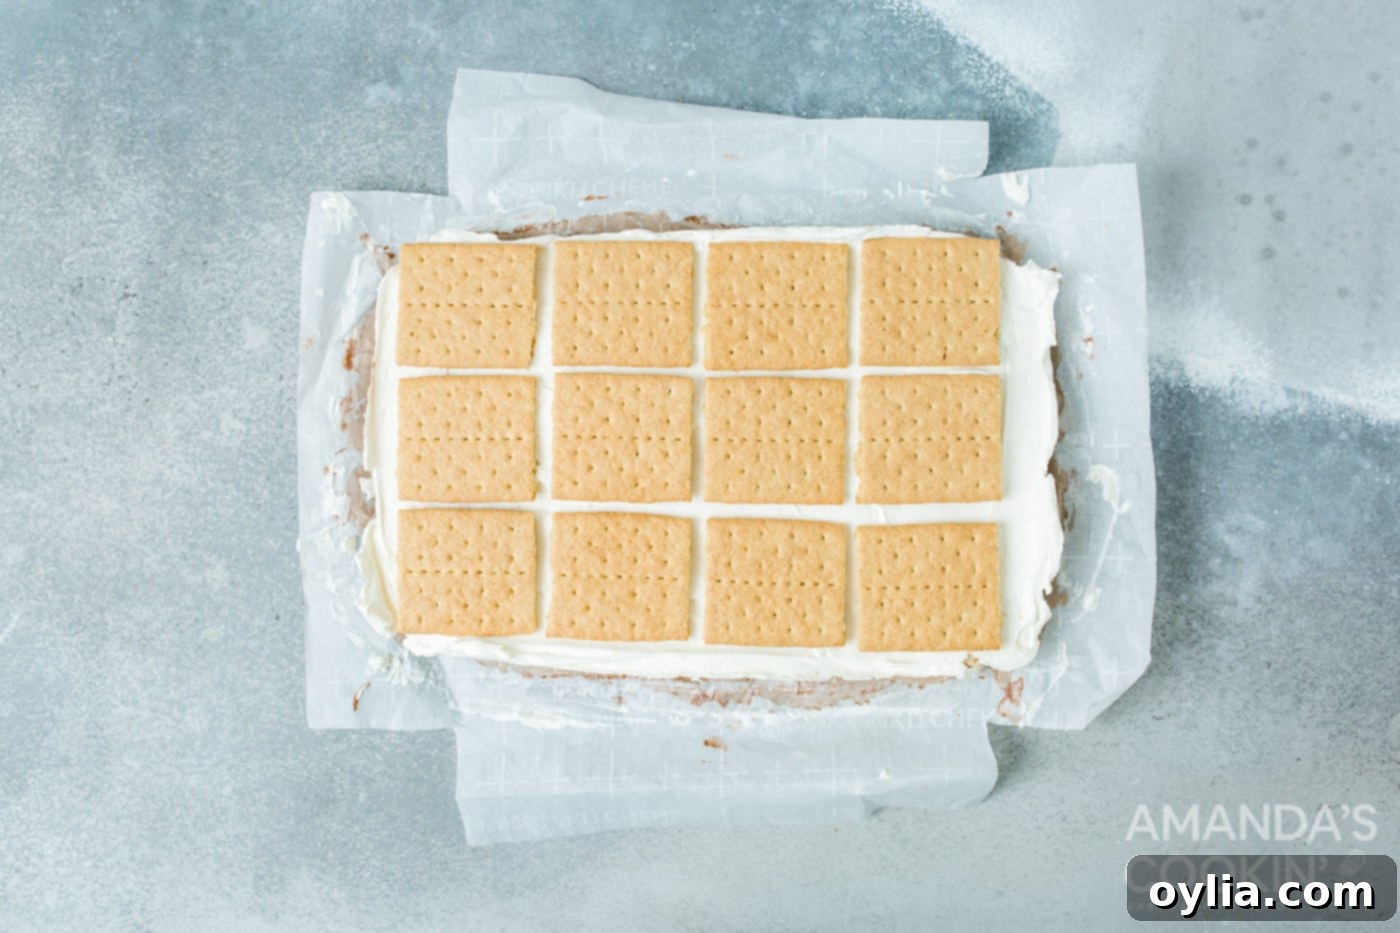 Using a hot, sharp knife (you can heat it by running it under hot water and wiping it dry), carefully cut around the graham crackers, trimming off any excess chocolate and marshmallow filling around the edges. This creates neat, clean bars.