Easy No-Bake Chocolate Chip Cookie Icebox Cake: Your New Favorite Dessert
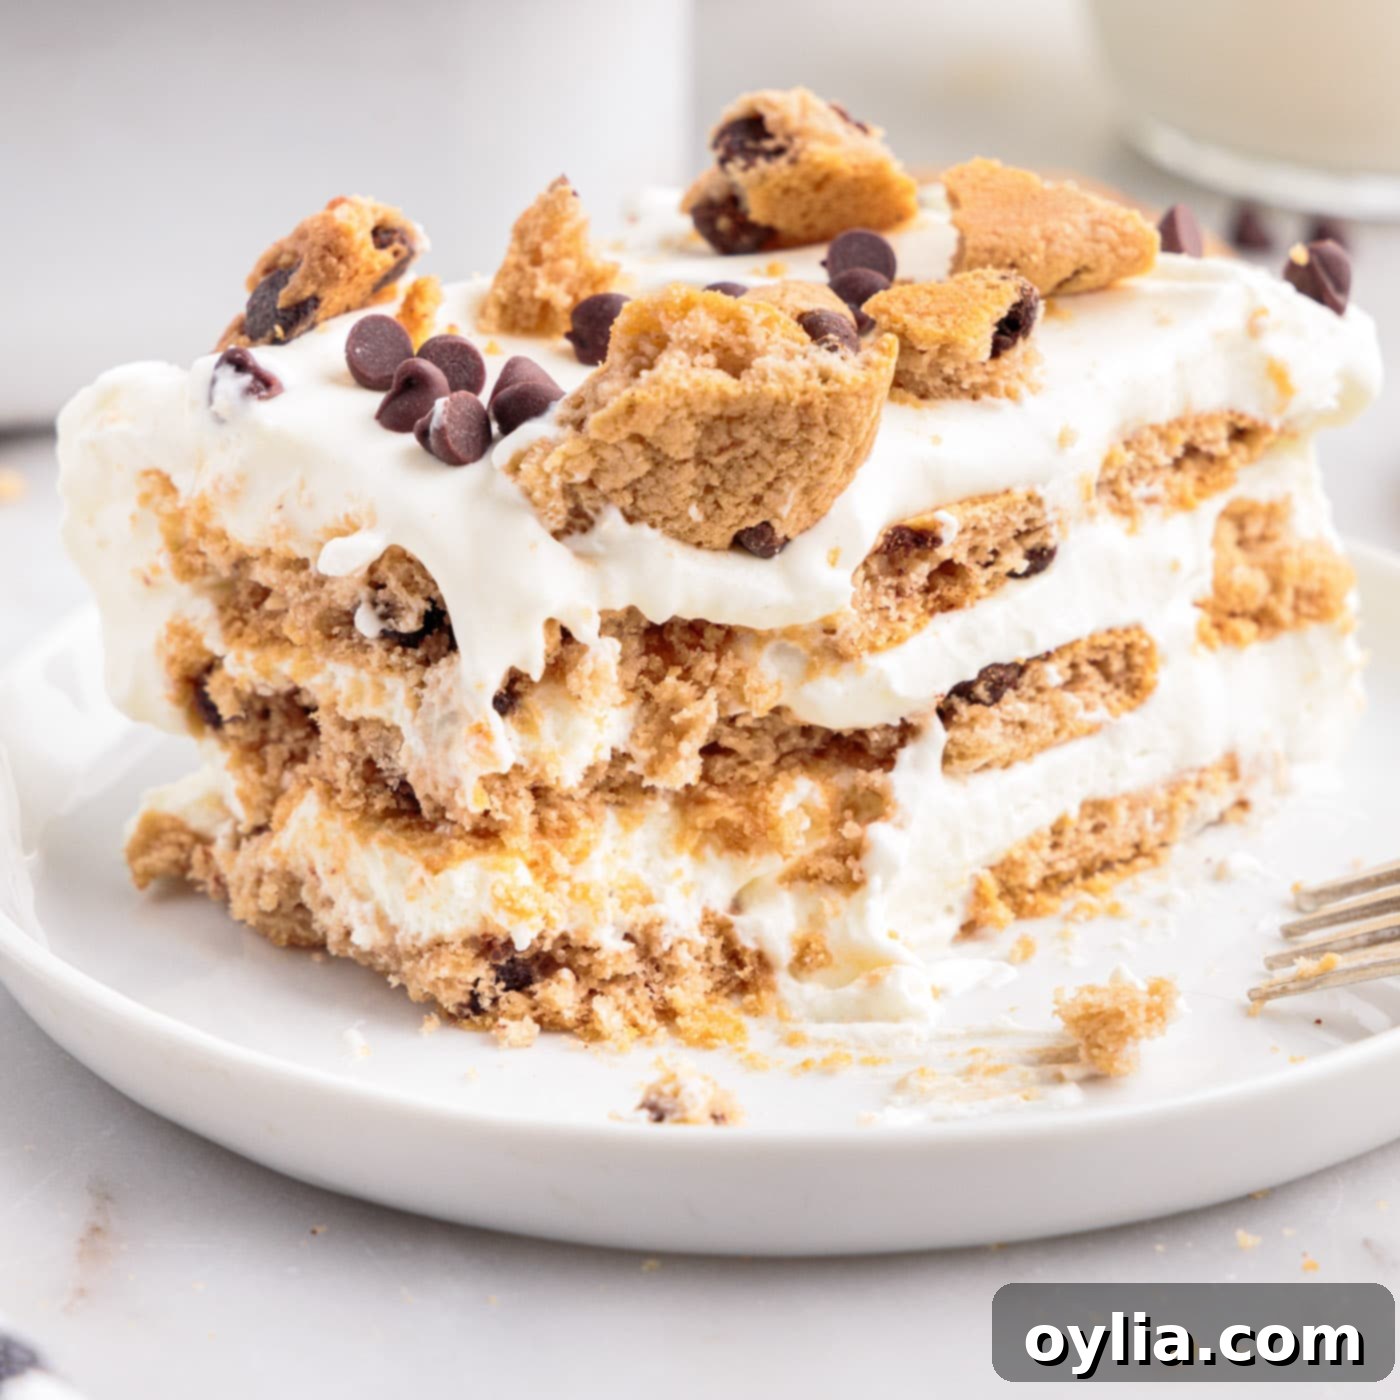
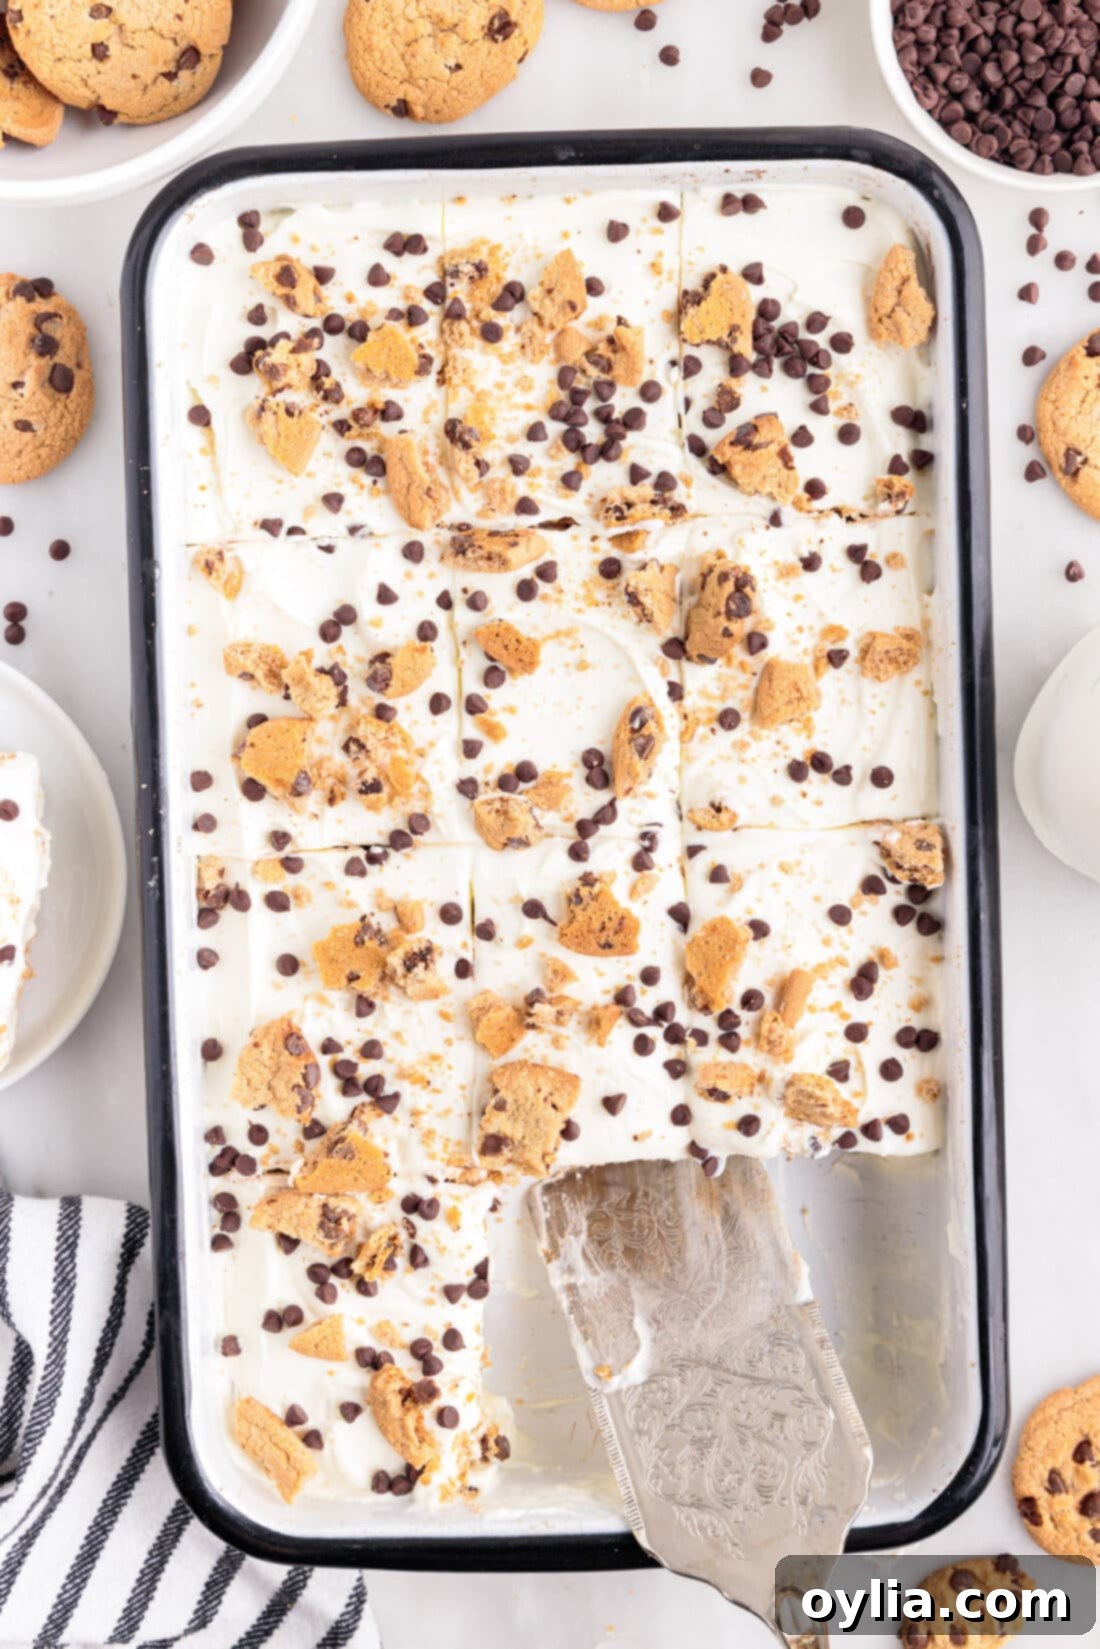
Prepare for a dessert experience that effortlessly combines two beloved classics: milk and cookies, in a format that’s utterly irresistible and incredibly simple to create. This no-bake chocolate chip cookie icebox cake is a true showstopper, boasting six luscious layers of dreamy, creamy goodness. It’s a testament to the fact that some of the most spectacular desserts don’t require an oven, making it the perfect treat for any occasion, especially when you’re looking for an easy yet impressive option. Imagine the nostalgic taste of your favorite chocolate chip cookies, magically softened to a cake-like consistency, all nestled within a rich, sweetened cream cheese filling. This recipe delivers all that and more, making dessert preparation a breeze!
Why This No-Bake Chocolate Chip Cookie Icebox Cake is a Must-Try
There’s an undeniable magic in the simple pairing of milk and cookies. It’s a nostalgic combination that evokes comfort, warmth, and a touch of childhood whimsy. In my opinion, it stands superior to almost all other snacks, offering a perfect balance of sweet, soft, and utterly satisfying. This chocolate chip cookie icebox cake captures that very essence, transforming classic crispy cookies into an extraordinary dessert without ever turning on your oven. The genius behind this easy recipe lies in how it perfectly mimics the delightful experience of dipping a crunchy chocolate chip cookie into cold milk, allowing it to soften into a tender, cake-like texture.
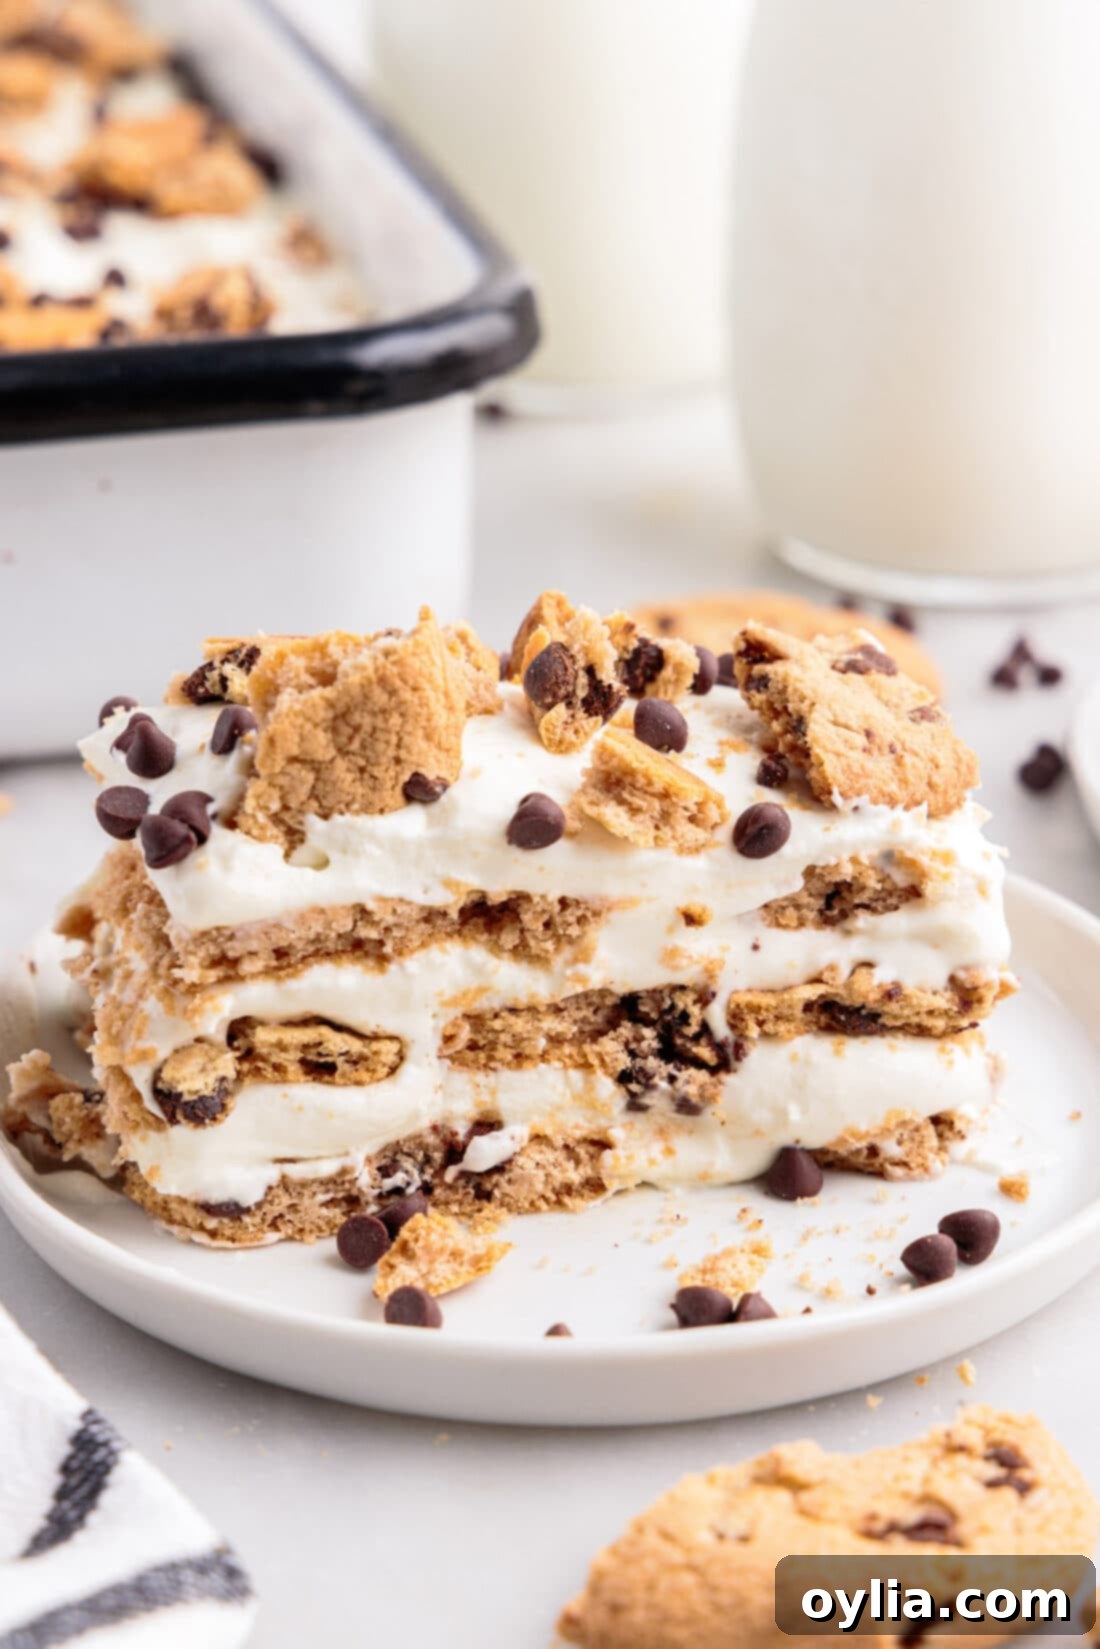
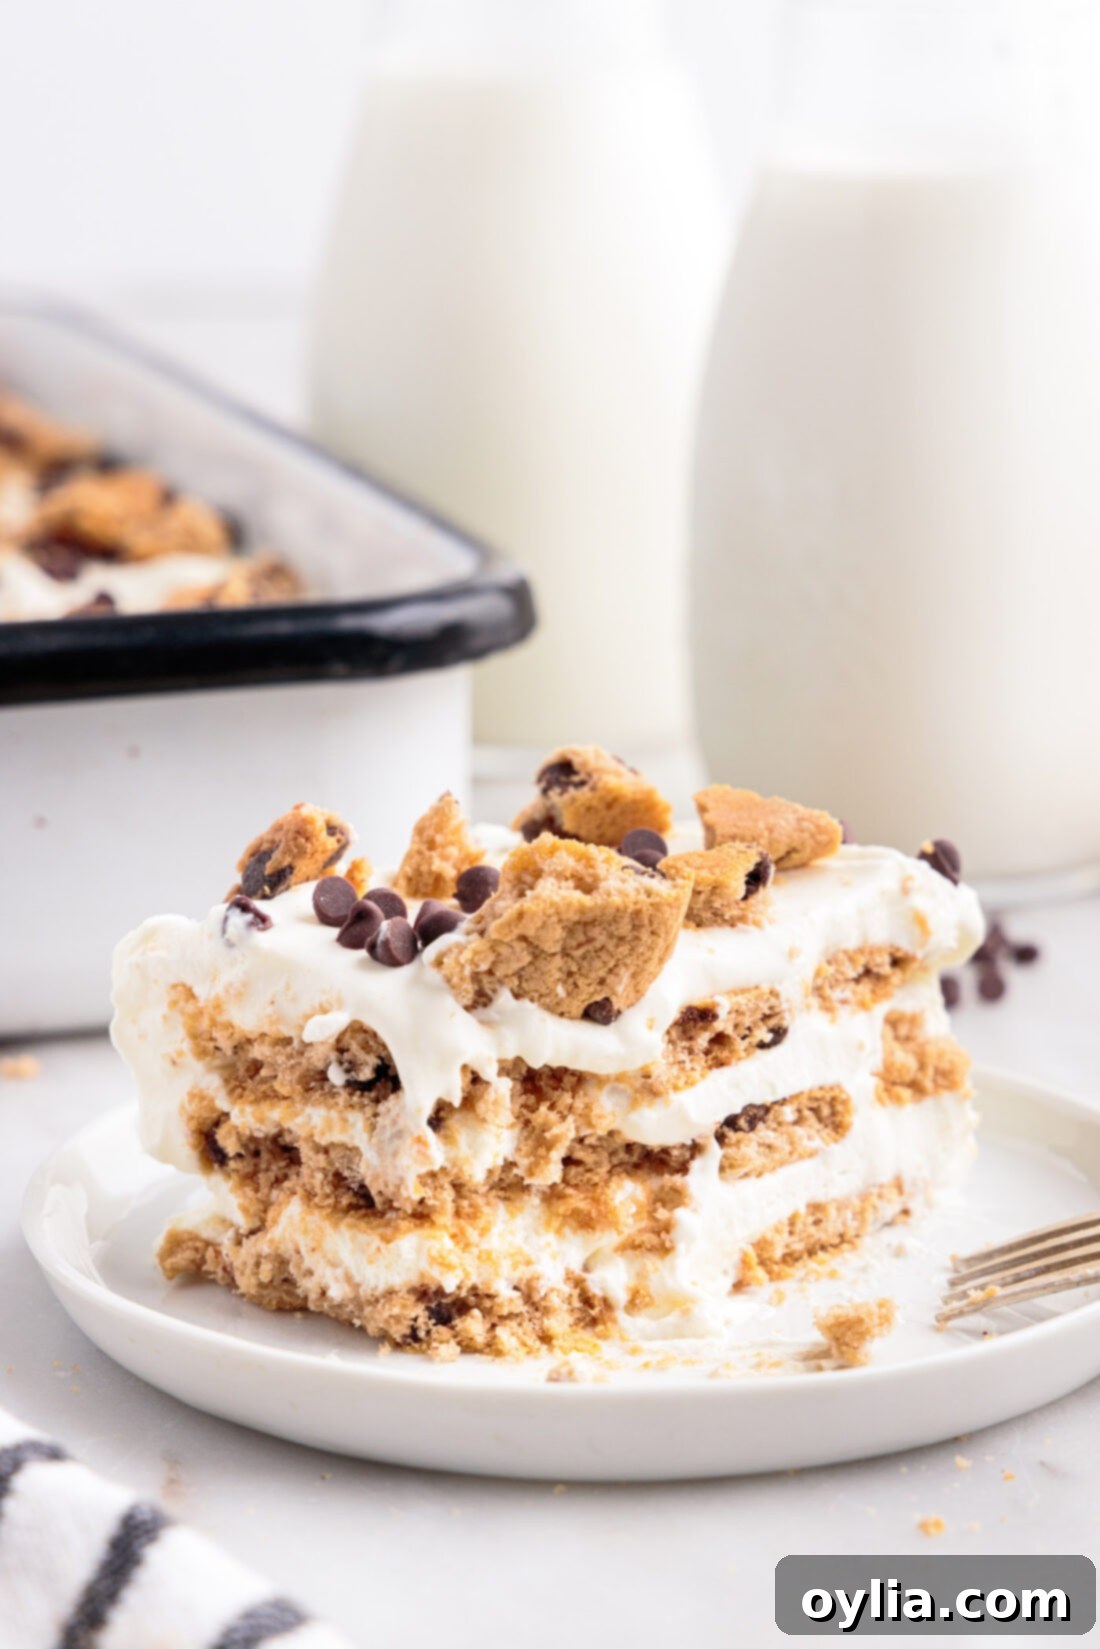
As layers of crisp chocolate chip cookies are nestled between generous dollops of a rich, sweetened whipped cream cheese mixture, a beautiful culinary alchemy occurs in the refrigerator. Over several hours, the moisture from the creamy filling gradually soaks into the cookies, transforming them from firm biscuits into remarkably soft, spongey layers that mimic traditional cake. This no-bake process not only creates an incredible, melt-in-your-mouth texture but also infuses every bite with that familiar, beloved “milk and cookies” flavor profile. It’s an ideal dessert for those seeking a delicious treat without the fuss of baking, perfect for hot summer days or any time you want a simple yet decadent sweet.
Having successfully created our popular Oreo icebox cake in the past, it was only a matter of time before we gave the iconic Chips Ahoy cookies the spotlight they so greatly deserve in the world of no-bake icebox desserts. This recipe takes that tried-and-true concept and applies it to another fan-favorite cookie, delivering a dessert that is not only incredibly easy to assemble but also immensely satisfying and a guaranteed crowd-pleaser for any gathering or a simple sweet craving. It’s a testament to how simple ingredients can come together to create something truly magical and memorable.
Essential Ingredients for Your Dreamy Chocolate Chip Cookie Icebox Cake
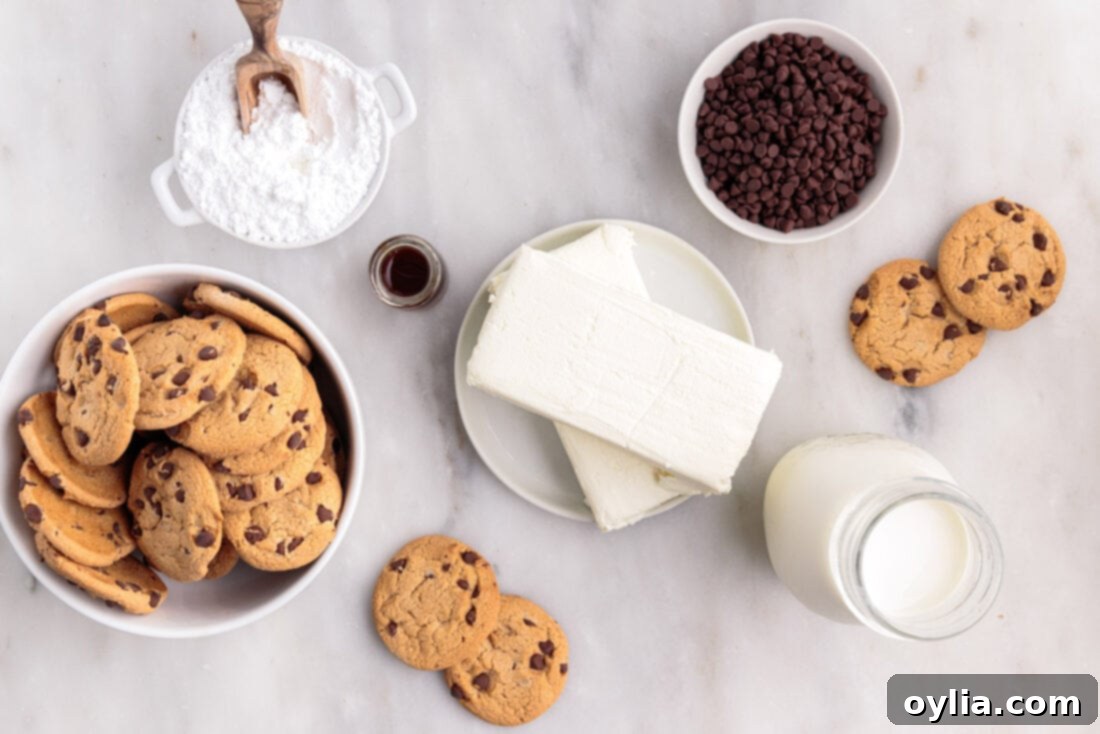
Crafting this delightful no-bake dessert requires just a handful of readily available and simple ingredients. The beauty of this chocolate chip cookie icebox cake is its reliance on classic flavors and textures to create something truly magical with minimal effort. Below is a concise list of what you’ll need to gather. For precise measurements and step-by-step instructions, make sure to refer to the printable recipe card located at the very end of this post.
Ingredient Insights and Smart Swaps for Your Icebox Cake
Understanding each ingredient’s role and knowing what substitutions work can significantly enhance your icebox cake experience. Here’s a closer look at the key components:
- COOKIE – The very foundation of our delightful icebox cake! For the best possible results, you’ll want to use thin, crisp chocolate chip cookies. Iconic brands like Chips Ahoy are absolutely ideal because their inherent crisp texture allows them to absorb the moisture from the whipped cream cheese mixture beautifully. This absorption is key to them transforming into those wonderfully soft, spongey, cake-like layers as the dessert chills. Other excellent store-bought options that work well include thin shortbread cookies, classic ginger snaps for a touch of spice, Nilla Wafers for a more vanilla-centric flavor, or even digestive biscuits. The crucial element here is to strictly avoid soft, chewy cookies, as they simply won’t undergo the desired texture change that makes icebox cakes so special. If you’re a fan of baking and prefer to make your own chocolate chip cookies from scratch, aim for a slightly crunchier batch. You can achieve this by baking them for a few extra minutes until they are golden brown and notably crisp, rather than soft and gooey. This extra crispness ensures they soften perfectly and contribute to the ideal texture of the finished icebox cake.
- CREAM CHEESE – Full-fat cream cheese is highly recommended for this recipe. Its rich flavor and creamy texture contribute significantly to the overall body, lusciousness, and stability of the whipped filling. It’s absolutely crucial that your cream cheese is fully softened to room temperature before you begin beating it. This step is non-negotiable for achieving a smooth, lump-free, and perfectly airy consistency in your cream mixture. While you can use reduced-fat cream cheese, be aware that the resulting filling might be slightly less firm and rich.
- VANILLA EXTRACT – A generous tablespoon of good quality pure vanilla extract is essential. It enhances all the sweet flavors in the cake, adding a layer of aromatic depth that imitation vanilla simply cannot replicate. Opt for pure vanilla for the best taste.
- POWDERED SUGAR – Also universally known as confectioners’ sugar or icing sugar, this finely milled sugar dissolves effortlessly into the cream cheese mixture. This results in a silky-smooth and perfectly sweet filling, free from any grainy texture that granulated sugar might impart. Granulated sugar will not work as effectively here, as it can make the filling gritty and compromise the delicate texture.
- HEAVY WHIPPING CREAM – This ingredient is what gives our filling its incredibly light, airy, and fluffy texture. It is imperative that your heavy whipping cream is very cold when you start to beat it. Cold cream whips up much faster, achieves significantly greater volume, and creates a more stable whipped topping. Do not use half-and-half or light cream, as they lack the necessary fat content to whip properly and achieve the desired consistency. For an extra boost, you can even chill your mixing bowl and whisk attachment in the freezer for 10-15 minutes before whipping.
- MINI CHOCOLATE CHIPS (for garnish) – While entirely optional, mini chocolate chips add a lovely visual appeal to the top of your icebox cake and provide an extra burst of chocolate flavor in every bite. You could also get creative and crush some additional chocolate chip cookies for a beautiful crumbly topping, or for a touch of elegance, drizzle the finished cake with a little chocolate syrup or caramel sauce.
Step-by-Step: Crafting Your Dreamy Chocolate Chip Cookie Icebox Cake
These step-by-step photos and detailed instructions are provided to help you visualize and successfully make this irresistible chocolate chip cookie icebox cake. For a convenient printable version of this recipe, complete with precise measurements and comprehensive instructions, simply Jump to Recipe at the bottom of this page.
- Prepare the Cream Cheese Base: Begin by placing your softened cream cheese in a large mixing bowl. Using a hand mixer, beat the cream cheese on medium speed until it’s wonderfully light, fluffy, and completely smooth. This usually takes a couple of minutes and ensures there are no lumps in your finished cream, providing a perfect base for your filling.
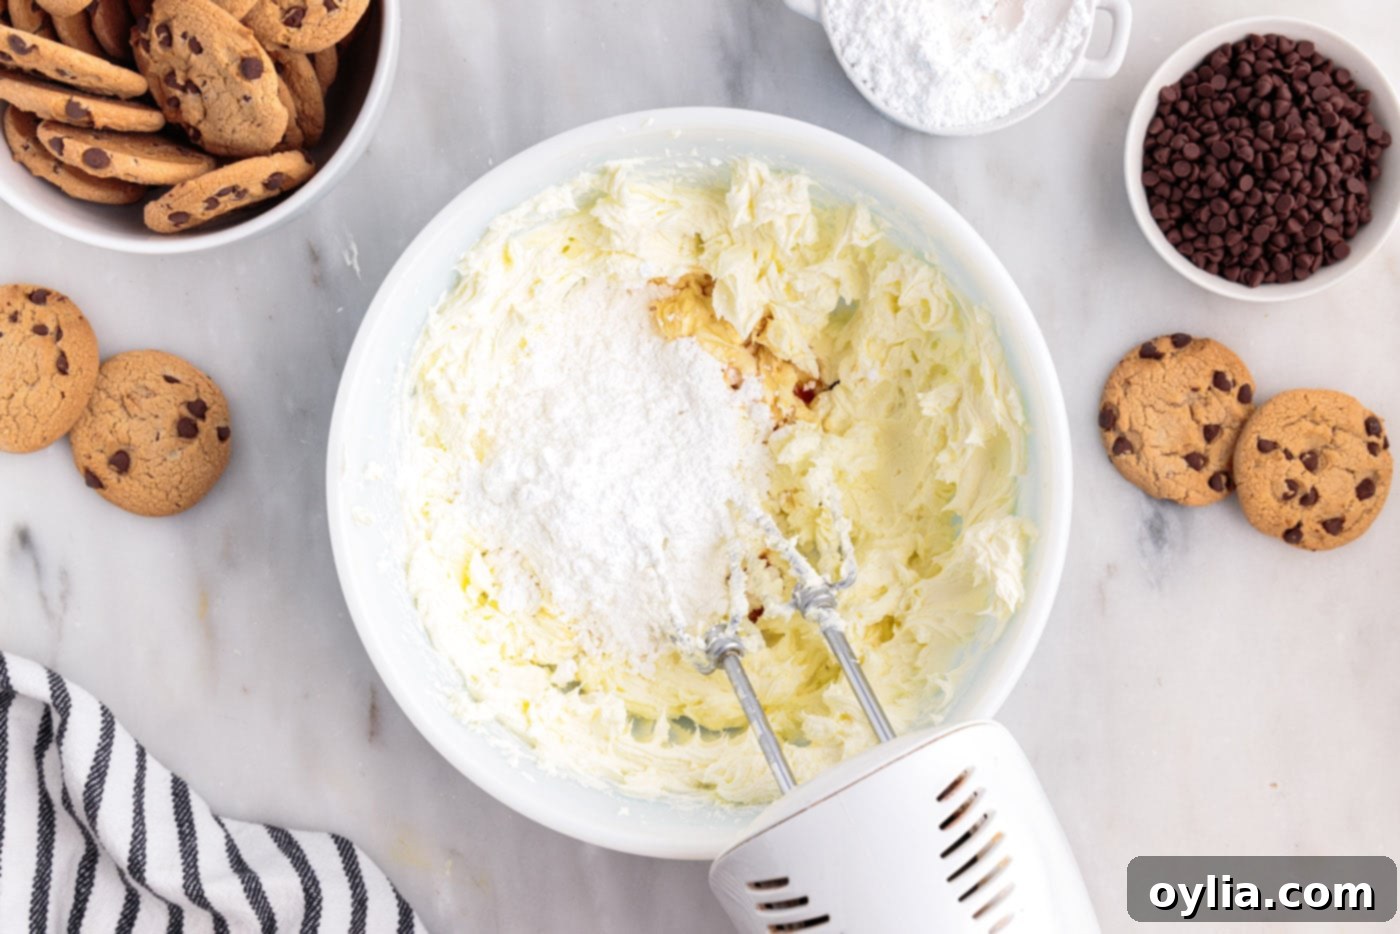
- Sweeten and Flavor the Cream: Once your cream cheese is fluffy, add the pure vanilla extract and powdered sugar to the bowl. Continue beating the mixture until all ingredients are thoroughly combined and the mixture is smooth and evenly sweetened. Make sure to scrape down the sides of the bowl with a spatula as needed to ensure every bit is incorporated and no pockets of unmixed ingredients remain.

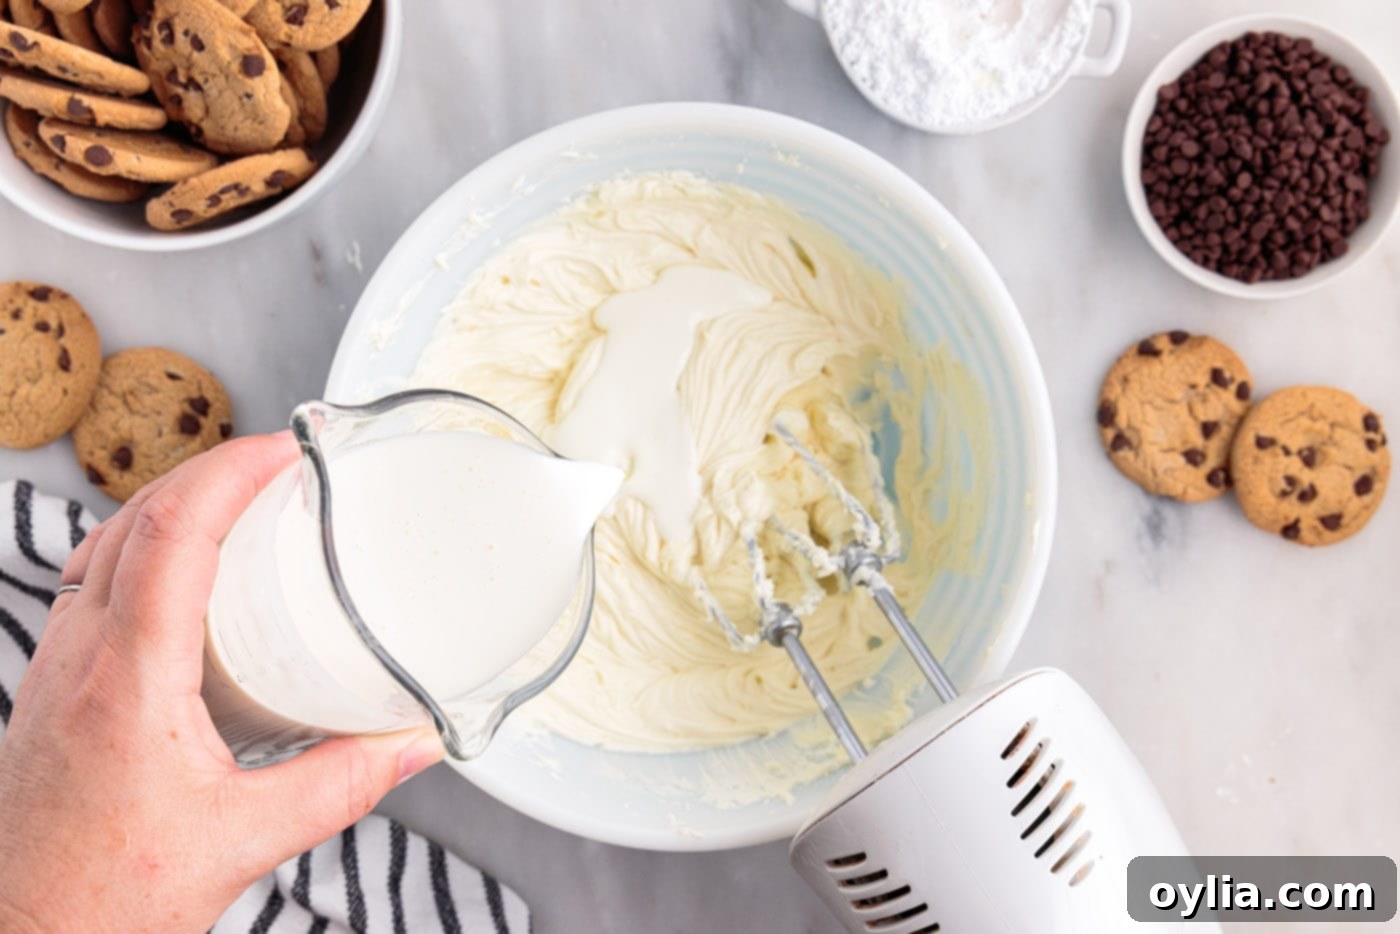
- Incorporate the Heavy Cream: This step is key to achieving a light and airy filling. With the hand mixer running on low speed, slowly and gradually pour in the very cold heavy whipping cream, adding just a little at a time. Continue beating constantly as you add the cream. Once all the cream has been incorporated, increase the speed to medium-high and beat until the mixture is beautifully fluffy and holds soft peaks, creating a voluminous cream filling. Be careful not to overbeat, as this can cause the mixture to become grainy and lose its smooth texture.

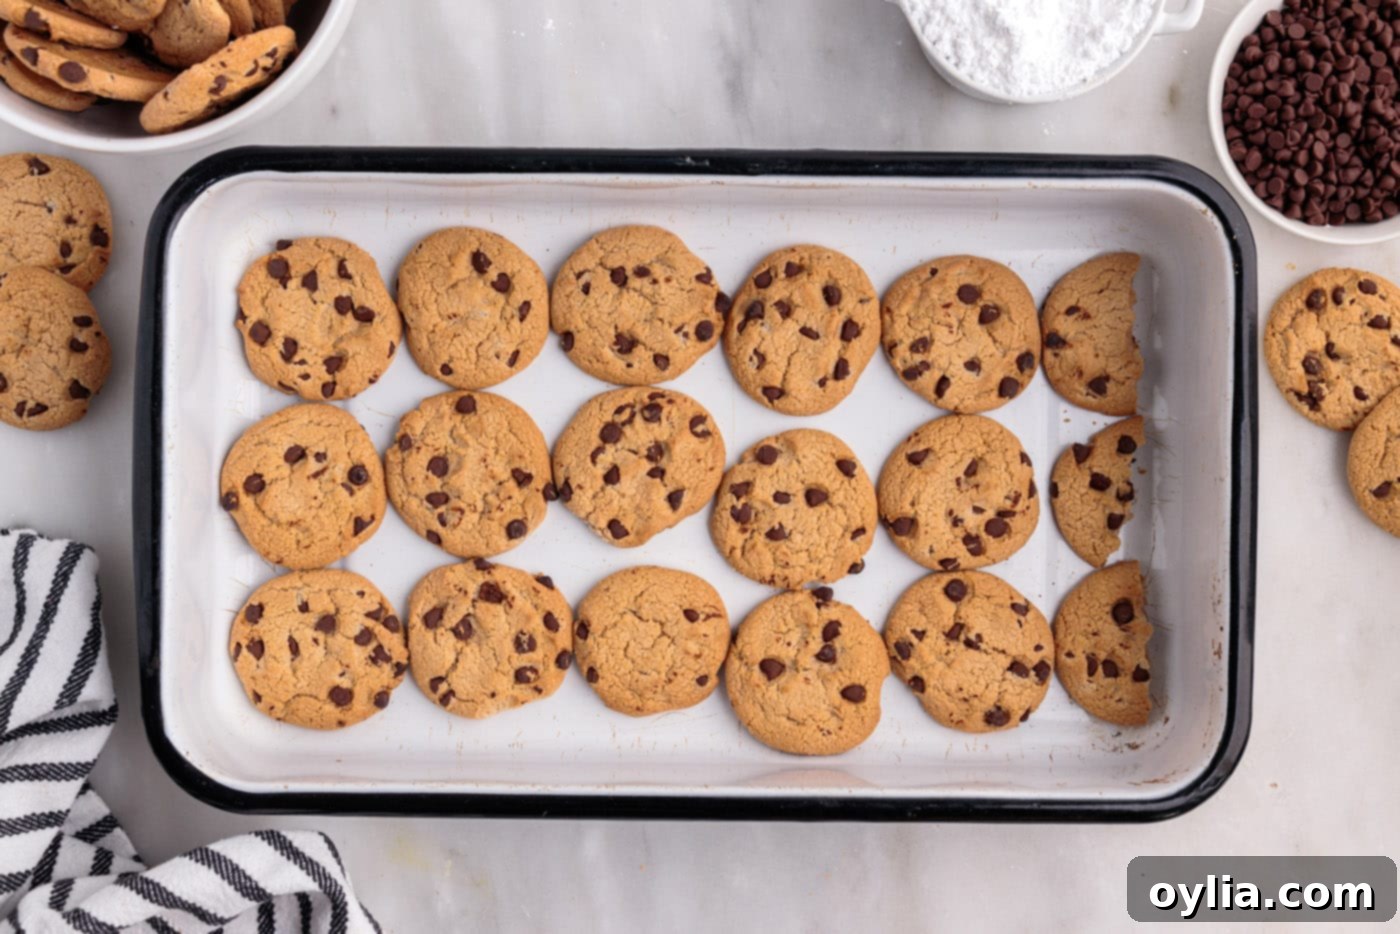
- Form the First Cookie Layer: Arrange a single, even layer of chocolate chip cookies to completely cover the bottom of a 9×13 glass casserole dish. Think of it like a puzzle! You will likely need to break some of the cookies in half or into smaller pieces to fill any gaps and ensure the bottom is completely covered. This creates a solid and delicious foundation for your no-bake icebox cake.

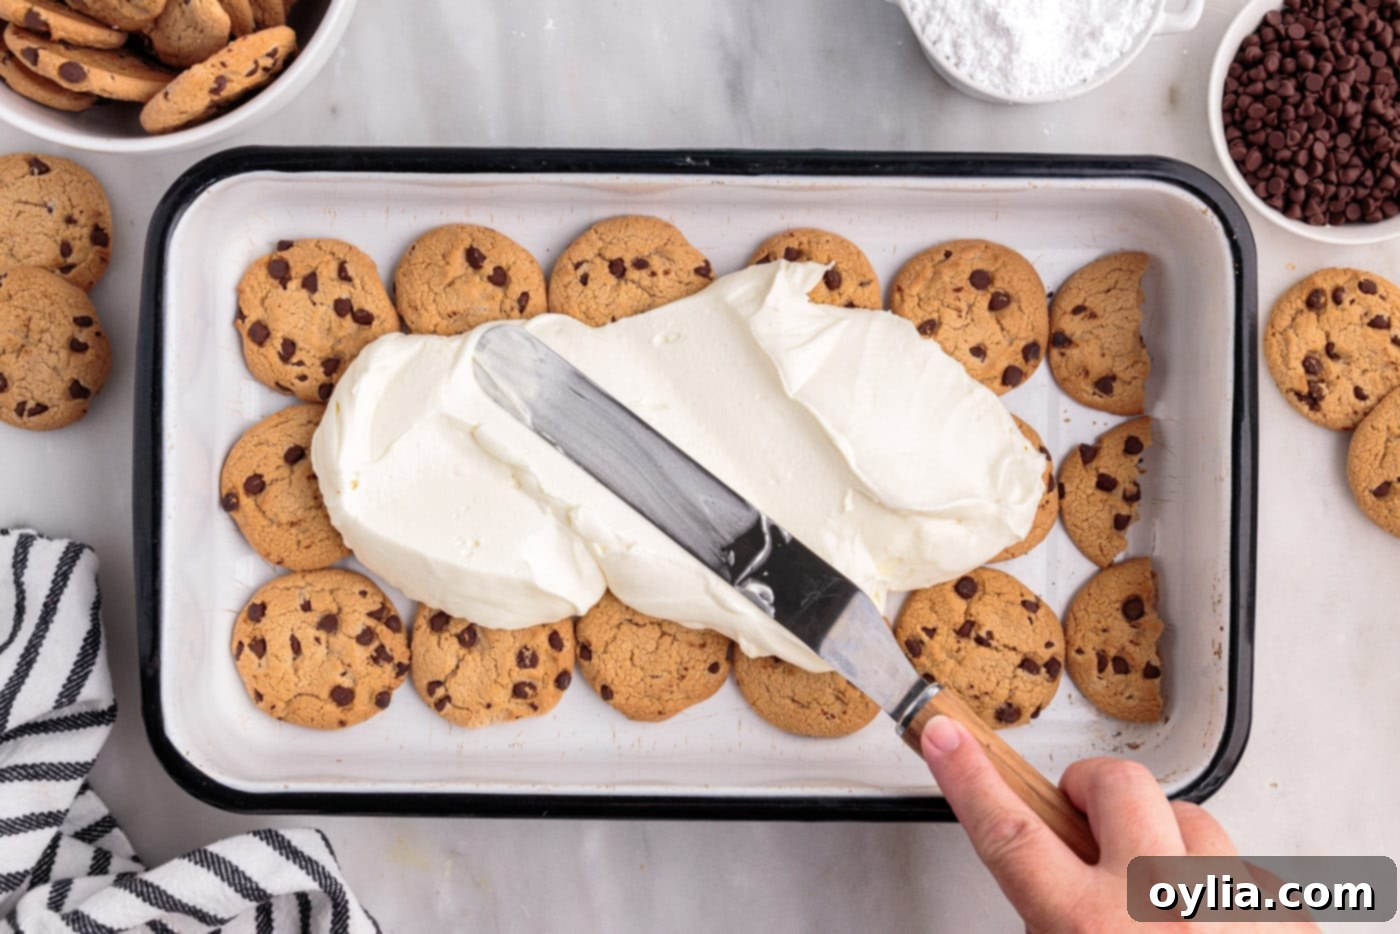
- Add the First Cream Layer: Carefully spread approximately one-third of your fluffy cream mixture evenly over the entire layer of cookies. Use an offset spatula or the back of a spoon to gently spread it from edge to edge, ensuring every cookie is well-covered. This layer is crucial for softening the cookies below.

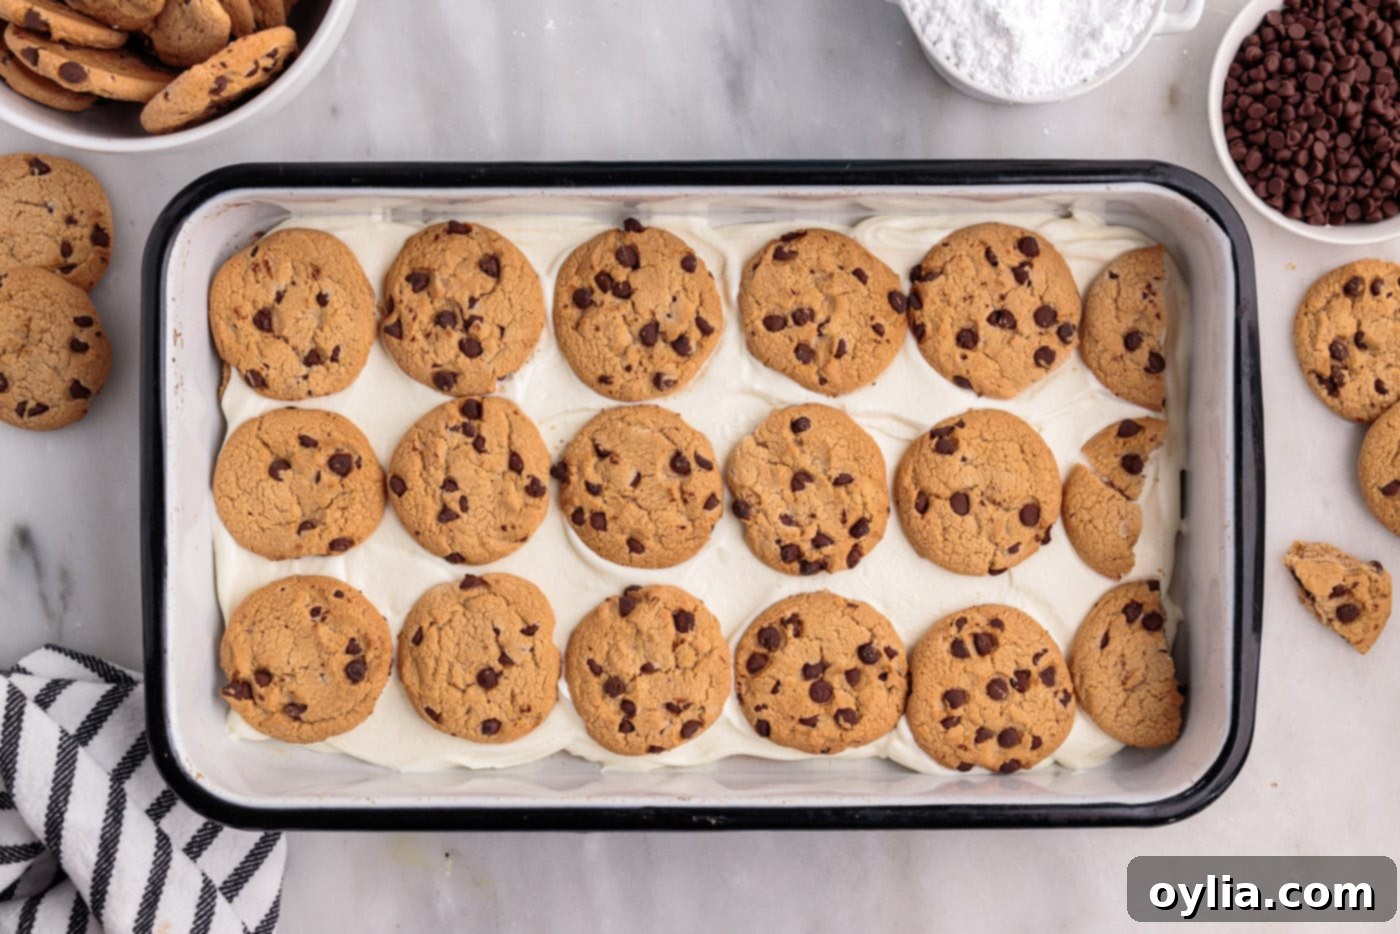
- Build the Layers: Repeat steps 4 and 5, continuing to layer cookies and cream mixture until you have three distinct layers of each. The final layer on top should always be the remaining whipped cream mixture, creating a smooth, inviting surface for your garnishes. Ensure each layer is as even as possible for a beautiful presentation when sliced.


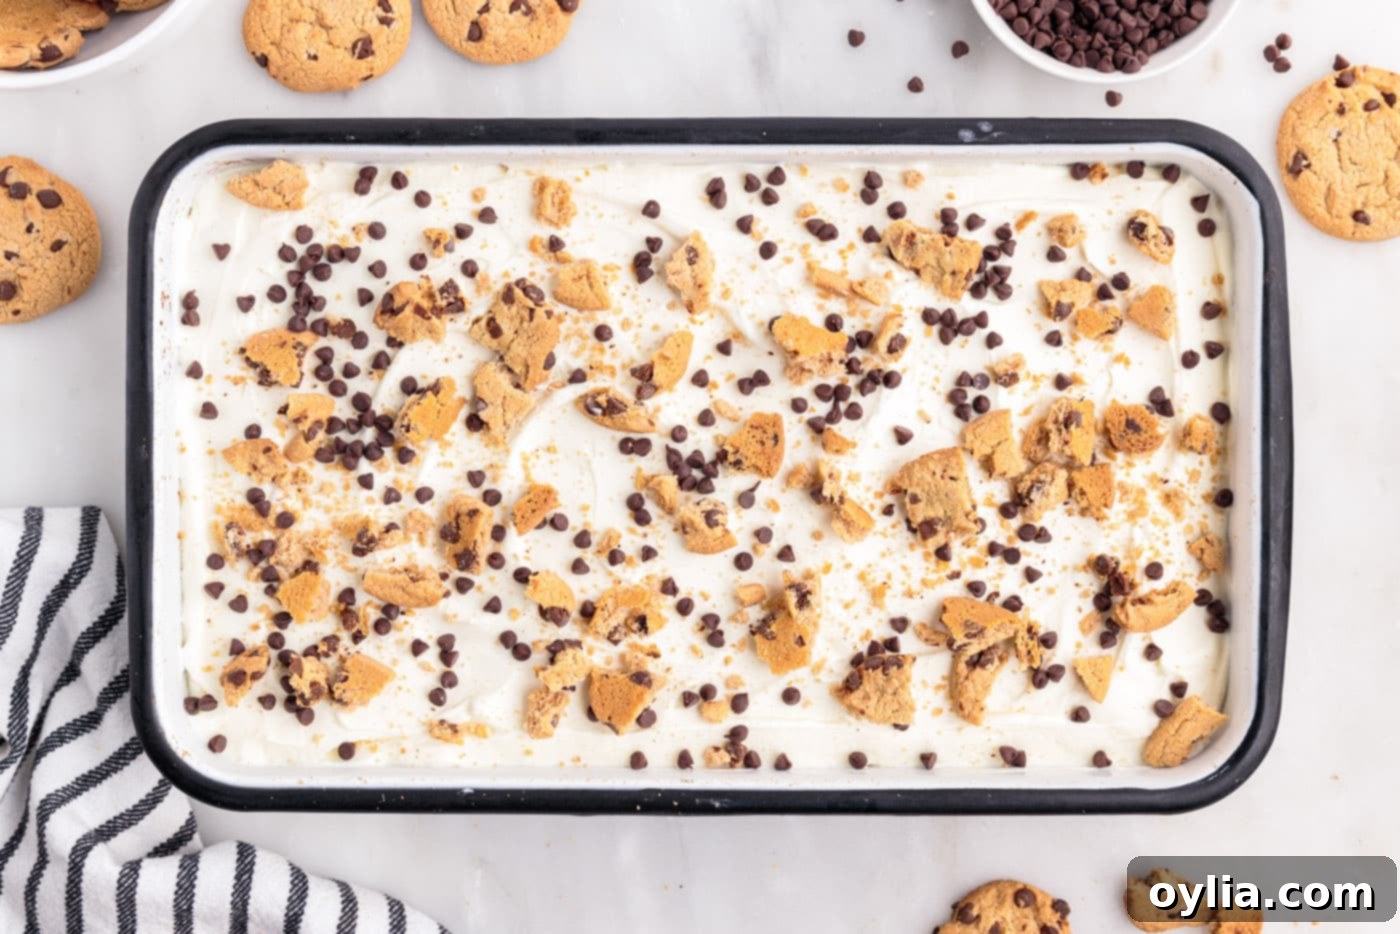
- Garnish and Decorate: For an extra touch of visual appeal and flavor, gently sprinkle the top whipped cream layer with additional cookie crumbs, a handful of mini chocolate chip cookies, or even a dusting of cocoa powder. You can get creative here with patterns or a simple, elegant scattering to make it truly your own.
- Chill to Perfection: This is a crucial step for any icebox cake and cannot be rushed! Cover the dish tightly with plastic wrap to prevent air exposure and place it in the refrigerator for a minimum of 4 hours. For an even firmer, more cohesive, and truly cake-like consistency, chilling it overnight (8-12 hours) is highly recommended. If you’re pressed for time, you can place it in the freezer for about 2-3 hours to help it set faster, but ensure it doesn’t freeze solid unless you intend to store it long-term.
- Prepare for Serving: If you chose to chill your cake in the freezer, remember to remove it and transfer it to the refrigerator for at least 15-20 minutes (or longer if it’s very firm) before you plan to serve. This allows the cake to soften slightly to the ideal texture, making it much easier to slice and ensuring a perfectly tender, melt-in-your-mouth experience for your guests.
Frequently Asked Questions & Expert Tips for No-Bake Icebox Cake Success
Yes, absolutely! This chocolate chip cookie icebox cake recipe is incredibly versatile and serves as a fantastic base for all sorts of cookie variations. The best choices are typically thinner, crisp cookies that can easily absorb moisture and soften. Excellent options include classic chocolate wafers, graham crackers (plain or cinnamon for a spicy kick), gingersnaps for a distinct flavor, shortbread cookies, biscotti, or vanilla wafers. For a different chocolate experience, consider turning it into an Oreo icebox cake using crushed or whole Oreo cookies. Experiment with your favorite crisp cookies to discover new and exciting flavor combinations!
To maintain its freshness, creamy texture, and prevent it from drying out or absorbing refrigerator odors, store your chocolate chip cookie icebox cake tightly covered with plastic wrap or in an airtight container. It will stay wonderfully delicious in the refrigerator for up to 3 days. Always ensure it’s well-sealed for optimal results.
Making this chocolate chip cookie icebox cake ahead of time is not only possible but actually highly recommended! The cake truly benefits from ample chilling time, which allows the cookies to fully absorb the sweetened cream cheese mixture and transform into that perfect cake-like consistency. It’s best to let it rest in the refrigerator for at least 4 hours, but making it a full day in advance (24 hours) will yield an even more flavorful and cohesive dessert. The longer it sits, the more the flavors meld and the cookies soften, making it taste even better upon serving. Store it with an airtight lid or tightly covered with plastic wrap in the refrigerator until you are ready to serve.
Yes, you can absolutely freeze this icebox cake for longer storage, typically up to 2-3 weeks. To do so effectively and prevent freezer burn, first ensure the cake is completely chilled and set. Then, cover it tightly with at least two layers of plastic wrap, making sure no air can get in. Follow this with an additional layer of heavy-duty aluminum foil. When you’re ready to enjoy it, transfer the frozen cake to the refrigerator for several hours to thaw and soften, or let it sit at room temperature for 15-20 minutes before slicing to allow it to reach the desired, tender consistency.
Achieving a light and fluffy cream mixture is crucial for the success of this icebox cake. The most common reasons for a less-than-fluffy result are cream cheese that isn’t fully softened or heavy cream that isn’t cold enough. Always ensure your cream cheese is at room temperature before beating it, making it easier to whip smooth and lump-free. For the heavy cream, it must be very cold; some even recommend chilling your mixing bowl and beaters in the freezer for 10-15 minutes beforehand to aid in whipping. Also, ensure you beat it long enough to incorporate sufficient air (until soft peaks form), but be careful not to overbeat, as this can cause the mixture to become grainy or separate.
The softening process for the cookies typically requires a minimum of 4 hours of chilling in the refrigerator. During this time, the cookies absorb moisture from the cream mixture and transform into a tender, cake-like consistency. However, for the best, most uniform, and fully cake-like texture, allowing the icebox cake to chill overnight (ideally 8-12 hours) is highly recommended. If you’re using thinner cookies (like Chips Ahoy Thins), they might soften slightly faster, while very thick or dense cookies could potentially require a bit more time to reach optimal tenderness.
Delightful Serving Suggestions for Your No-Bake Icebox Cake
Once your chocolate chip cookie icebox cake has had ample time to chill and set, it’s ready to be transformed into stunning individual servings. Serve it chilled, cut into generous slices. While this no-bake icebox cake won’t have the dense, firm texture of a traditional baked cake or a pudding-based icebox cake, its unique charm lies in its tender, soft, and slightly yielding texture. The cookies will be perfectly softened, creating a cohesive and satisfying structure, and each piece will hold its shape elegantly after several hours of chilling.
To truly elevate the presentation and enhance the flavor, consider these optional garnishes and serving ideas:
- Mini Chocolate Chips: A classic and always welcome choice that adds more chocolatey goodness and a pleasing texture contrast to the creamy layers.
- Crumbled Cookie Pieces: For a rustic and appealing finish, take a few extra cookies and roughly crush them. Sprinkle these crumbs generously over the top of the cake.
- Chocolate Sauce Drizzle: A luscious swirl of warm fudge sauce, chocolate syrup, or even a homemade ganache adds an extra layer of decadence and visual flair.
- Caramel Sauce: For a delightful twist, a drizzle of creamy caramel sauce perfectly complements the sweet and slightly salty notes of the chocolate chip cookies.
- Fresh Berries: A vibrant scattering of fresh raspberries, sliced strawberries, or plump blueberries can add a wonderful pop of color, a refreshing touch, and a hint of tartness to balance the sweetness of the cake.
- Whipped Cream Dollops: A final flourish of freshly whipped cream, perhaps lightly sweetened with a touch of vanilla, can make each slice feel extra special and luxurious.
- Espresso Powder: For a more sophisticated flavor profile, a very light dusting of finely ground espresso powder can subtly deepen the chocolate notes without adding a strong coffee taste.
Explore More Irresistible No-Bake Icebox Cake Recipes
If you’ve fallen in love with the simplicity, versatility, and undeniable deliciousness of this no-bake chocolate chip cookie icebox cake, you’ll be thrilled to discover our other easy-to-make icebox cake creations. They offer a fantastic way to enjoy delicious, layered desserts without ever having to turn on your oven. Perfect for hot summer days, holiday gatherings, or any time you need a quick and satisfying sweet treat with minimal fuss!
- Lemon Icebox Cake
- Orange Icebox Cake
- Strawberry Icebox Cake
- Mixed Berry Icebox Cake
- Banana Cream Pie Icebox Cake
- Lemon Blueberry Icebox Cake
- Nutter Butter Icebox Cake
I love to bake and cook and share my kitchen experience with all of you! Remembering to come back each day can be tough, that’s why I offer a convenient newsletter every time a new recipe posts. Simply subscribe and start receiving your free daily recipes!
Chocolate Chip Cookie Icebox Cake
IMPORTANT – There are often Frequently Asked Questions within the blog post that you may find helpful. Simply scroll back up to read them!
Print It
Pin It
Rate It
Save ItSaved!
Ingredients
- 16 ounces cream cheese two 8 ounce packages, softened to room temperature for best results
- 1 Tablespoon pure vanilla extract
- 1 cup powdered sugar
- 3 cups heavy whipping cream very cold, for optimal whipping
- 26 ounces crisp chocolate chip cookies approximately 2 – 13 oz packages of Chips Ahoy or similar thin, crisp cookies
- ½ cup mini chocolate chips for optional garnish or additional cookie crumbs
Things You’ll Need
-
13×9 baking dish (A glass casserole dish works best for even chilling and serving.)
-
Hand mixer (Essential for achieving a perfectly smooth and fluffy cream cheese mixture.)
-
Mixing bowls (At least one large bowl for mixing the cream filling.)
Chef’s Notes & Expert Tips
- Storage Best Practices: For optimal freshness and to prevent drying out, ensure your chocolate chip cookie icebox cake is tightly wrapped with plastic wrap or stored in an airtight container. It will remain delicious in the refrigerator for up to 3 days. For longer storage, you can freeze it for 2-3 weeks, wrapped first in plastic wrap and then a layer of aluminum foil to prevent freezer burn.
- Customizing Cream Layer Thickness: This recipe is designed to create layers of fairly even thickness between the cookies and the luscious cream mixture, providing a balanced bite. However, if you prefer thicker cream layers for a richer, more decadent feel, you can easily beat in an additional 1 cup of cold heavy cream into the mixture before layering. This will yield more cream while maintaining the delightful “milk and cookies” balance.
- Cookie Choices Matter: While classic Chips Ahoy cookies are fantastic, feel free to experiment with “thin” versions of chocolate chip cookies (like Chips Ahoy Thins). These will soften a bit quicker and result in slightly thinner, yet equally delicious, cookie layers within your icebox cake. Remember, the crispness of the cookie is key to its transformation!
- Understanding Icebox Cake Texture: It’s important to note that this chocolate chip cookie icebox cake will not develop the dense, rigid consistency of a traditional baked cake or some pudding-based icebox cakes. Instead, its charm lies in its tender, soft, and slightly yielding texture, where the cookies have transformed into spongey cake. After proper chilling for several hours, it will slice beautifully, with each piece holding its delightful layered shape.
- Room Temperature Cream Cheese: Always ensure your cream cheese is completely at room temperature before you start beating it. This step is non-negotiable for achieving a smooth, lump-free, and perfectly airy cream mixture.
- Cold Heavy Cream: Just as important as softened cream cheese, your heavy whipping cream must be very cold. This allows it to whip up properly and achieve maximum volume and fluffiness.
Instructions
-
In a large mixing bowl, beat the softened cream cheese with a hand mixer until it becomes light, smooth, and fluffy, typically for 1-2 minutes.
-
Add the vanilla extract and powdered sugar to the cream cheese. Continue beating on medium speed until the mixture is fully incorporated and wonderfully smooth, scraping down the sides of the bowl as needed.
-
With the mixer on low speed, slowly and gradually pour in the cold heavy whipping cream. Once all the cream is added, increase the speed to medium-high and beat continuously until the mixture is light, fluffy, and forms soft peaks. Be careful not to overbeat, as this can make the mixture grainy.
-
Arrange a single layer of chocolate chip cookies across the bottom of a 9×13 glass casserole dish. Break cookies as necessary to ensure a complete and even coverage of the bottom.
-
Evenly spread about one-third of the prepared fluffy cream mixture over the cookie layer. Use an offset spatula or the back of a spoon to create a smooth, consistent layer.
-
Repeat the layering process: add another layer of chocolate chip cookies, followed by another third of the cream mixture. Finish with a final layer of cookies and then the remaining cream mixture on top, making sure the top is smooth and even.
-
Optionally, sprinkle the top of the cake with additional cookie crumbs, mini chocolate chips, or other desired garnishes for decoration.
-
Cover the dish tightly with plastic wrap and refrigerate for a minimum of 4 hours, or ideally overnight, to allow the cookies to soften and the cake to set completely. For quicker setting, you may place it in the freezer for 2-3 hours.
-
If the cake was chilled in the freezer, remove it and let it sit in the refrigerator for at least 15-20 minutes before slicing and serving, ensuring a perfect, tender consistency.
Nutrition Information
The recipes on this blog are tested with a conventional gas oven and gas stovetop. It’s important to note that some ovens, especially as they age, can cook and bake inconsistently. Using an inexpensive oven thermometer can assure you that your oven is truly heating to the proper temperature. If you use a toaster oven or countertop oven, please keep in mind that they may not distribute heat the same as a conventional full sized oven and you may need to adjust your cooking/baking times. In the case of recipes made with a pressure cooker, air fryer, slow cooker, or other appliance, a link to the appliances we use is listed within each respective recipe. For baking recipes where measurements are given by weight, please note that results may not be the same if cups are used instead, and we can’t guarantee success with that method.
