Crispy & Easy Chicken Milanese Recipe: Your Guide to a Perfect Weeknight Meal
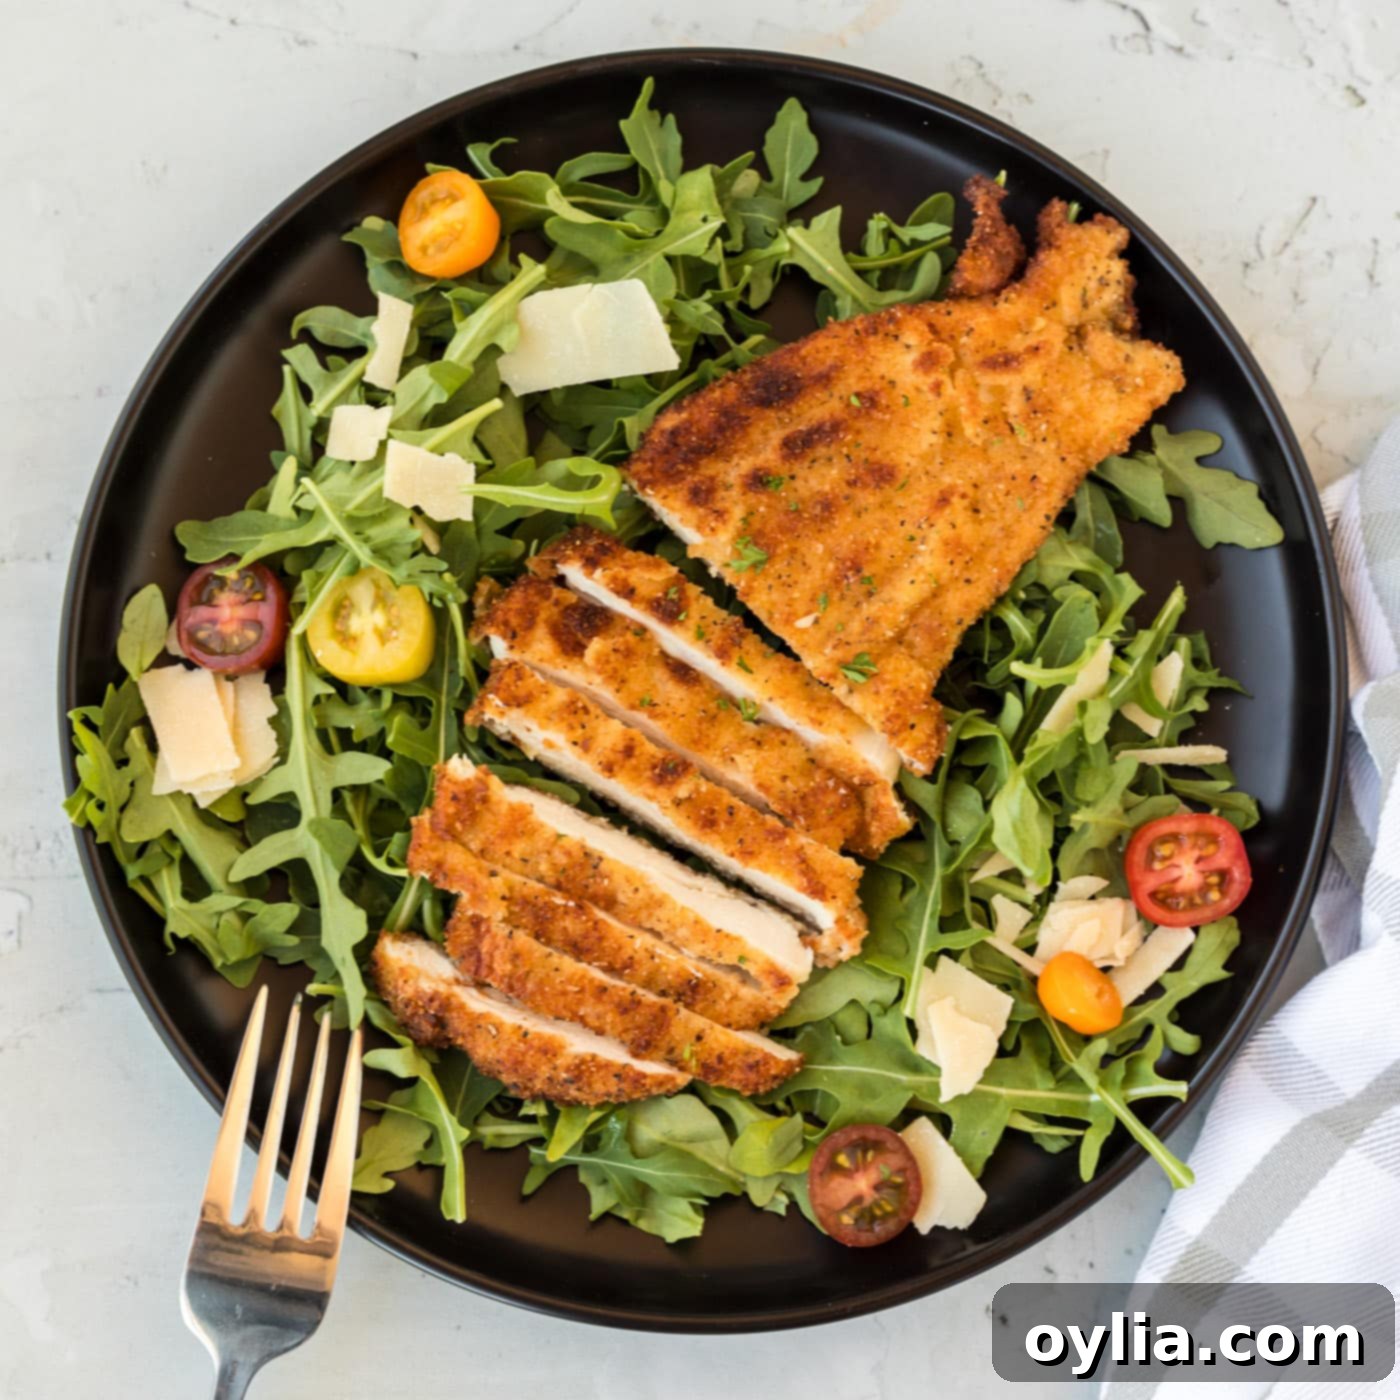
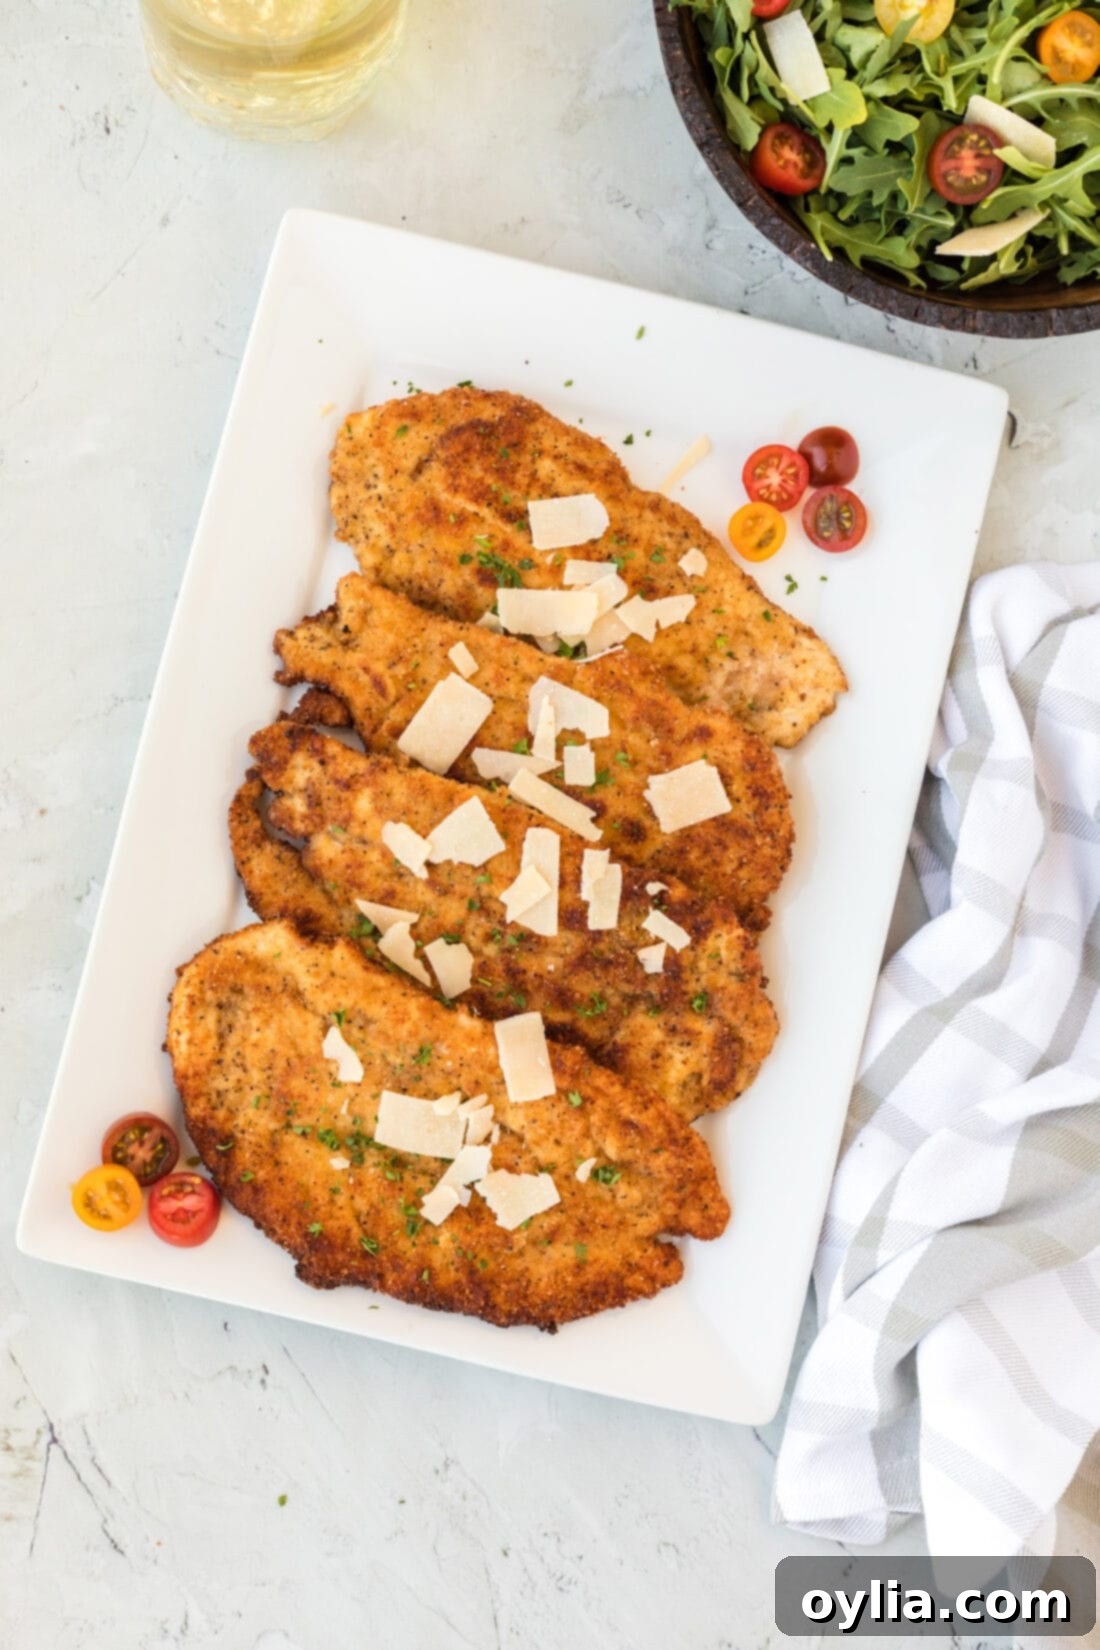
Chicken Milanese is a culinary delight that effortlessly combines simplicity with elegance, making it an ideal choice for both bustling weeknight dinners and special occasions. This classic Italian-inspired dish features thinly pounded chicken cutlets, coated in a seasoned breadcrumb mixture, and then pan-fried to a stunning golden crisp. The result is a wonderfully crunchy exterior that gives way to a tender, juicy interior, offering a truly satisfying meal that’s far easier to achieve at home than you might imagine. Forget complicated techniques; with this recipe, you’re just a few simple steps away from a restaurant-quality dish that will impress everyone at your table.
Why This Chicken Milanese Recipe is a Must-Try
Originating from Milan, Italy, the traditional “Cotoletta alla Milanese” was initially crafted with thinly sliced veal, often bone-in, and pan-fried to perfection. Over centuries, this culinary concept gracefully evolved, and chicken emerged as a popular, more accessible, and equally delicious alternative, giving rise to the beloved Chicken Milanese we savor today. This particular recipe meticulously captures the authentic essence of that classic dish, transforming humble chicken breasts into an extraordinary culinary experience.
The true magic of this recipe unfolds through its precise methodology. First, thinly pounding the chicken cutlets is paramount. This crucial step not only ensures rapid and uniform cooking but also guarantees that the meat remains incredibly tender and succulent, preventing any dryness. Next, the meticulous three-step breading process is key: a preliminary dredge in carefully seasoned flour, followed by a dip in a rich egg wash, and finally, a generous coating in perfectly seasoned breadcrumbs. This layering technique creates a robust, flavorful crust that fries up to an impeccable, shatteringly golden brown. This multi-layered coating isn’t just about an exceptional crunch; it also brilliantly seals in the chicken’s natural juices, guaranteeing a moist and flavorful interior.
While Chicken Milanese shares some stylistic similarities with other breaded chicken dishes, such as the ever-popular Chicken Parmesan, it distinguishes itself with its elegant simplicity. Unlike its saucier cousin, Milanese is often presented without heavy sauces, typically accompanied by just a bright squeeze of fresh lemon and a light, crisp salad. This minimalist approach allows the chicken’s perfectly crispy texture and delicate flavor to take center stage. It truly is an elegant yet unfussy dish that consistently delivers on both exquisite taste and satisfying texture, proving that a truly impressive and memorable meal doesn’t have to be complicated or time-consuming.
Essential Ingredients for Your Homemade Chicken Milanese
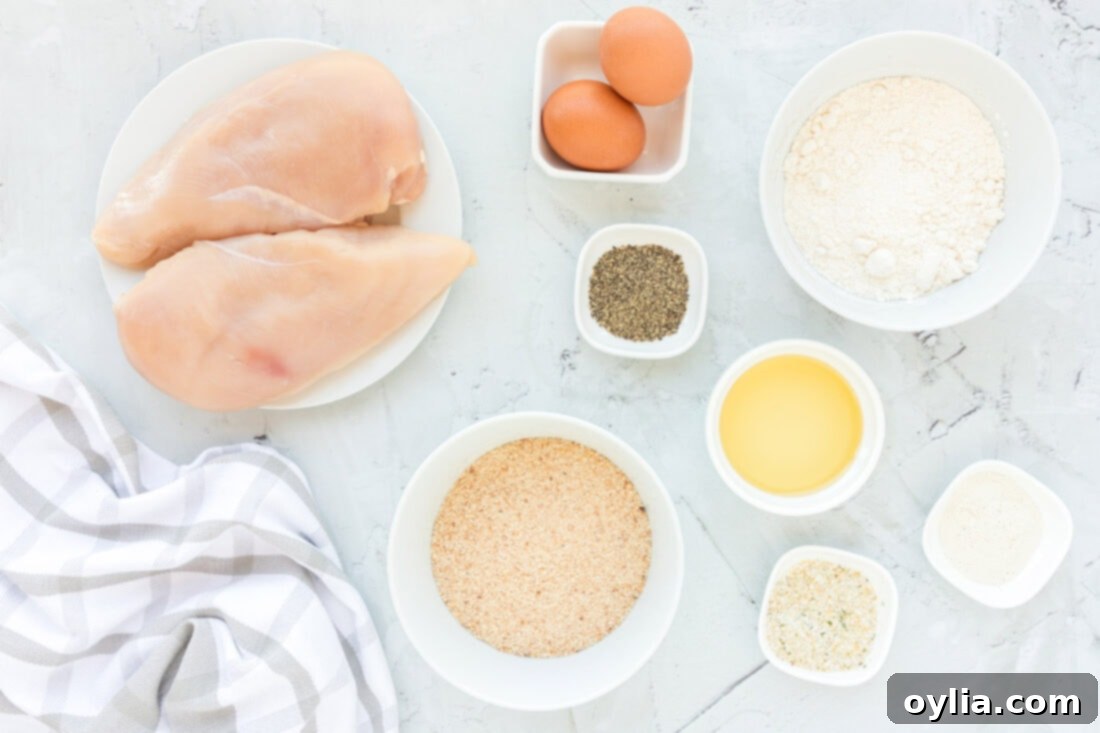
Crafting mouthwatering Chicken Milanese doesn’t demand exotic ingredients or an extensive shopping list. In fact, this delightful dish relies on a handful of straightforward, readily available pantry staples. The exquisite flavor and signature crispy texture are born from the simple yet harmonious combination of these everyday components. Below, you’ll find a visual representation of the ingredients, followed by an in-depth discussion and practical substitution suggestions for each key item, ensuring your homemade Milanese is a resounding success every time. For precise measurements and a full, printable guide, please refer to the complete recipe card located at the end of this post.
Ingredient Breakdown & Smart Substitutions
To truly master Chicken Milanese, it’s helpful to understand the role each ingredient plays and how you can adapt the recipe to suit your dietary needs or simply what you have on hand.
- CHICKEN – We recommend starting with two large chicken breasts, typically around 1 1/2 pounds. The cornerstone of Milanese is creating thin cutlets. This involves butterflying each breast and then meticulously pounding them to a uniform 1/4 inch thickness. This crucial step is not just for size; it significantly tenderizes the meat, allowing it to cook remarkably fast and evenly, thus preventing it from drying out. While pre-packaged chicken cutlets are available at most grocery stores, always verify their thickness and be prepared to pound them further if they aren’t quite 1/4 inch. This consistent thickness is key to the dish’s delicate texture.
- BREADCRUMBS – For an unparalleled, extra-crispy coating, Panko breadcrumbs are our top recommendation. Their distinctively large, flaky texture absorbs less oil during frying and yields a notably lighter, crunchier result compared to traditional fine breadcrumbs. Should Panko not be readily available, standard Italian seasoned breadcrumbs will certainly work; just be mindful that you might need to adjust the overall seasoning of your breading mixture. For those following a gluten-free diet, numerous brands now offer excellent gluten-free breadcrumbs that replicate the texture of traditional varieties very well.
- FLOUR – All-purpose flour serves as the vital initial dry layer in our breading process. It ensures the egg wash adheres uniformly and completely to the chicken, creating a perfect base for the breadcrumbs. If you require a gluten-free option, a high-quality gluten-free all-purpose flour blend can be used as a direct, seamless substitute. For an even crisper crust, consider incorporating a small amount of cornstarch into your flour mixture.
- EGGS & WATER – The egg wash functions as the indispensable binder, creating a sticky bridge between the dry flour and the breadcrumbs. Whisking in a couple of tablespoons of water (or milk, if preferred) subtly thins the eggs, facilitating a smoother, more even coating on the chicken without creating an overly thick or gummy layer.
- SEASONINGS (Garlic Salt, Black Pepper, Onion Powder) – These foundational seasonings are not merely sprinkled on the chicken but are thoughtfully incorporated into both the flour and breadcrumb mixtures. This strategic division ensures that every single bite of the crispy coating is infused with robust flavor. Feel empowered to customize these spices to your palate; additions like paprika can enhance color, a tiny pinch of cayenne pepper can introduce a subtle warmth, or dried Italian herbs such as oregano or basil can impart a wonderful aromatic depth. Always adjust quantities to achieve your desired taste profile.
- OLIVE OIL – Essential for pan-frying, olive oil not only aids in achieving that beautiful, deep golden-brown crust but also contributes a delightful, subtle flavor to the finished dish. It’s important to use enough oil to generously coat the bottom of your skillet, creating a shallow pool for frying, but not so much that the chicken is submerged in a deep-fry. If you prefer a more neutral-tasting oil or require one with a higher smoke point, vegetable oil, canola oil, or even grapeseed oil are all excellent and suitable alternatives.
Step-by-Step Guide to Crafting Perfect Chicken Milanese
These step-by-step photos and instructions are here to help you visualize how to make this recipe. For a convenient printable version with all measurements and detailed instructions, simply Jump to Recipe at the bottom of this post.
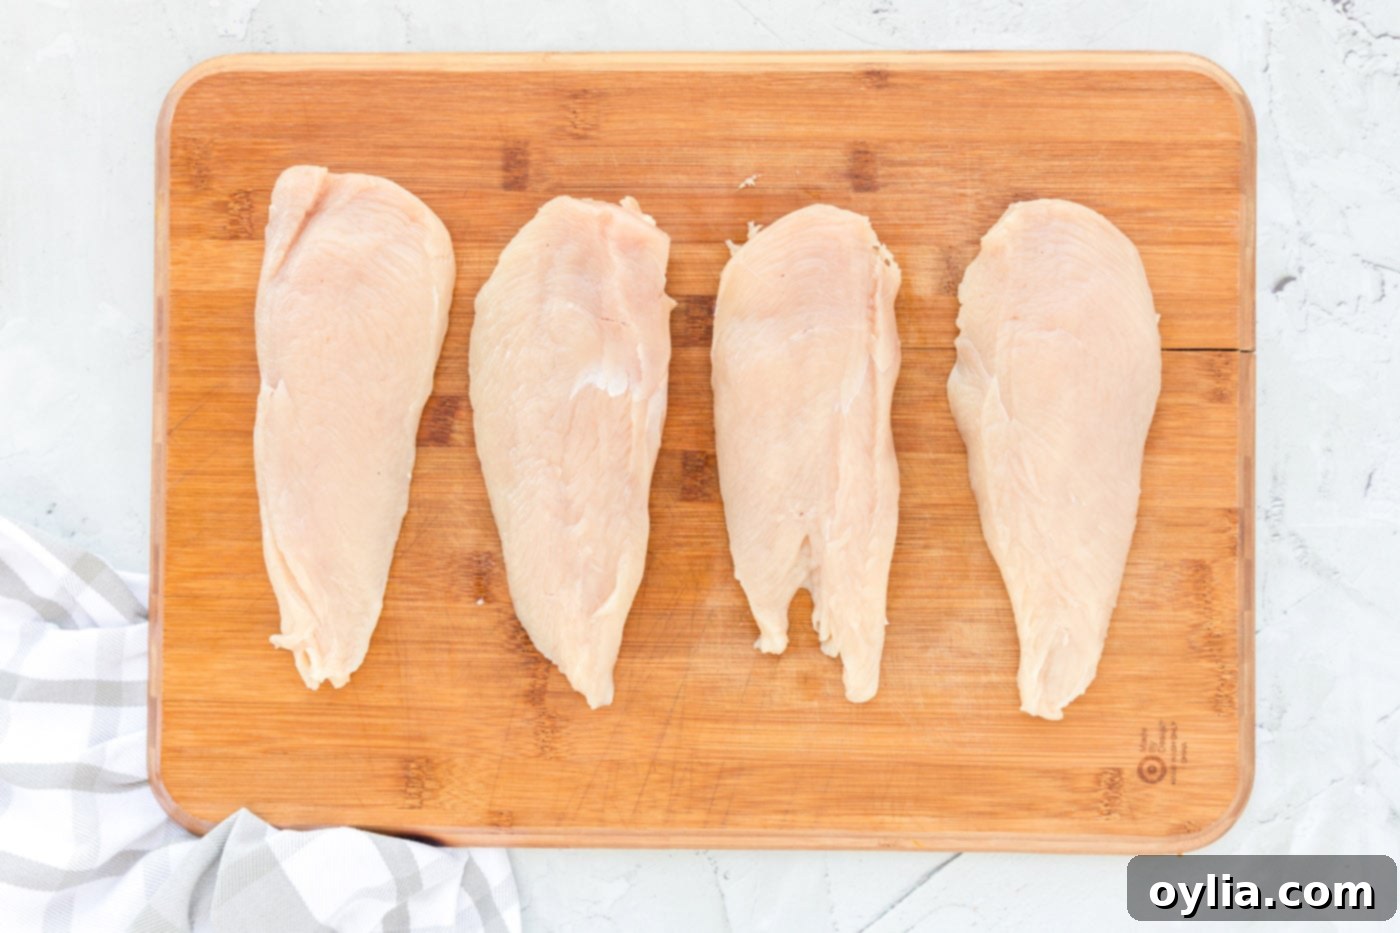
- Begin by thoroughly rinsing your chicken breasts under cold water and then patting them completely dry with paper towels. Eliminating excess moisture is a critical first step for achieving that coveted crispy coating, so don’t skip this!
- To prepare your chicken cutlets, lay each breast flat on a cutting board. Using a sharp chef’s knife, carefully slice horizontally through the center of each breast, starting from one side and stopping just before you cut all the way through. Then, open the breast like a book (this technique is called butterflying) and separate the two halves completely. You will now have four thinner, more manageable chicken pieces.

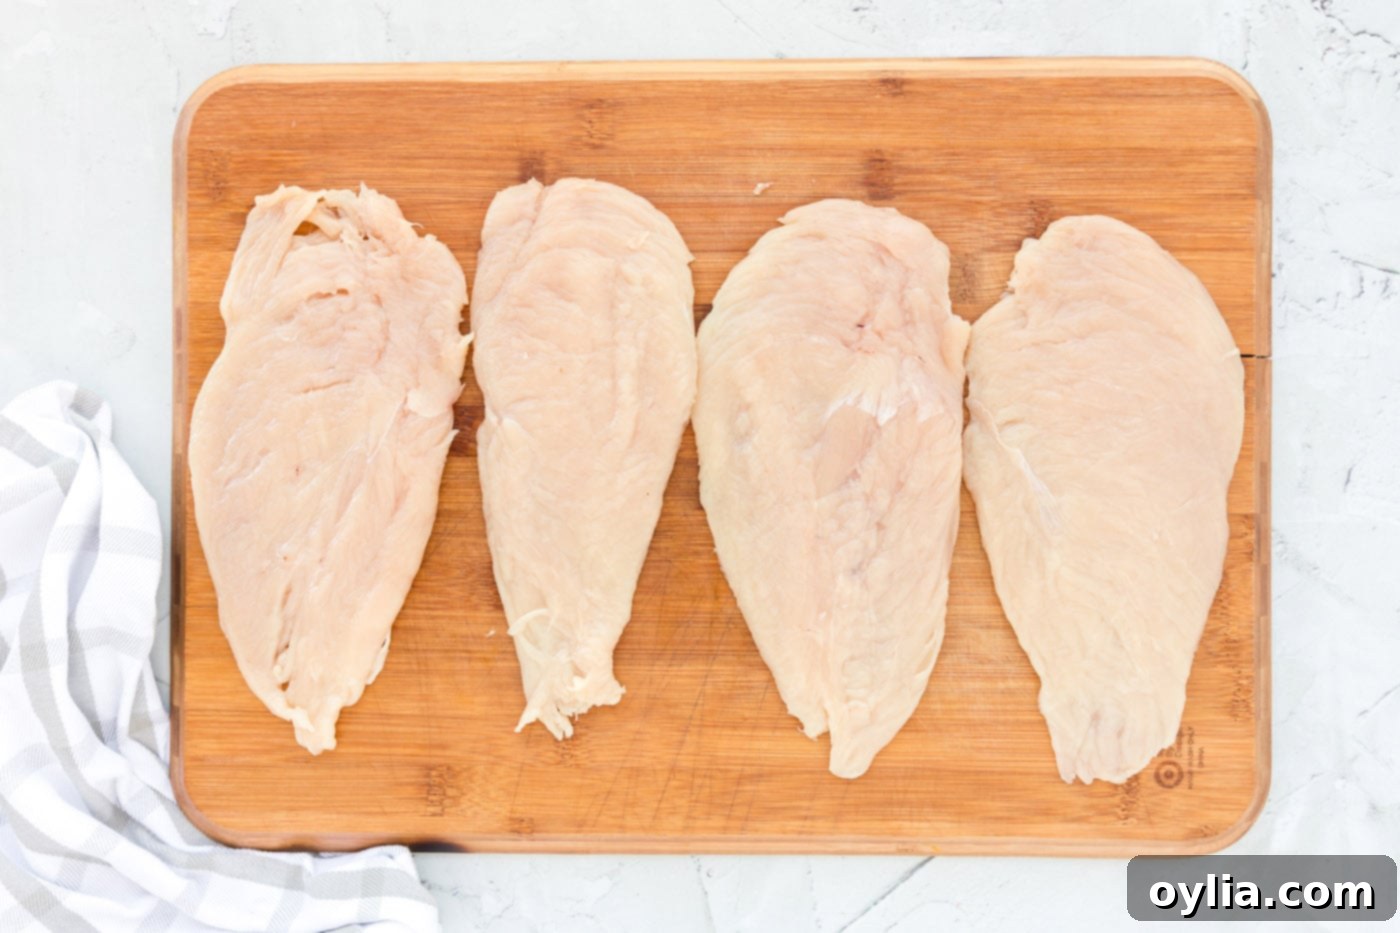
- Place each chicken piece individually between two sheets of plastic wrap or inside a large zip-top bag to prevent splattering and tearing. Using the flat side of a meat mallet or a heavy rolling pin, gently but firmly pound each breast until it reaches an even thickness of about 1/4 inch. The goal is consistency across the entire cutlet to ensure it cooks uniformly without any thin edges burning or thick parts remaining undercooked.

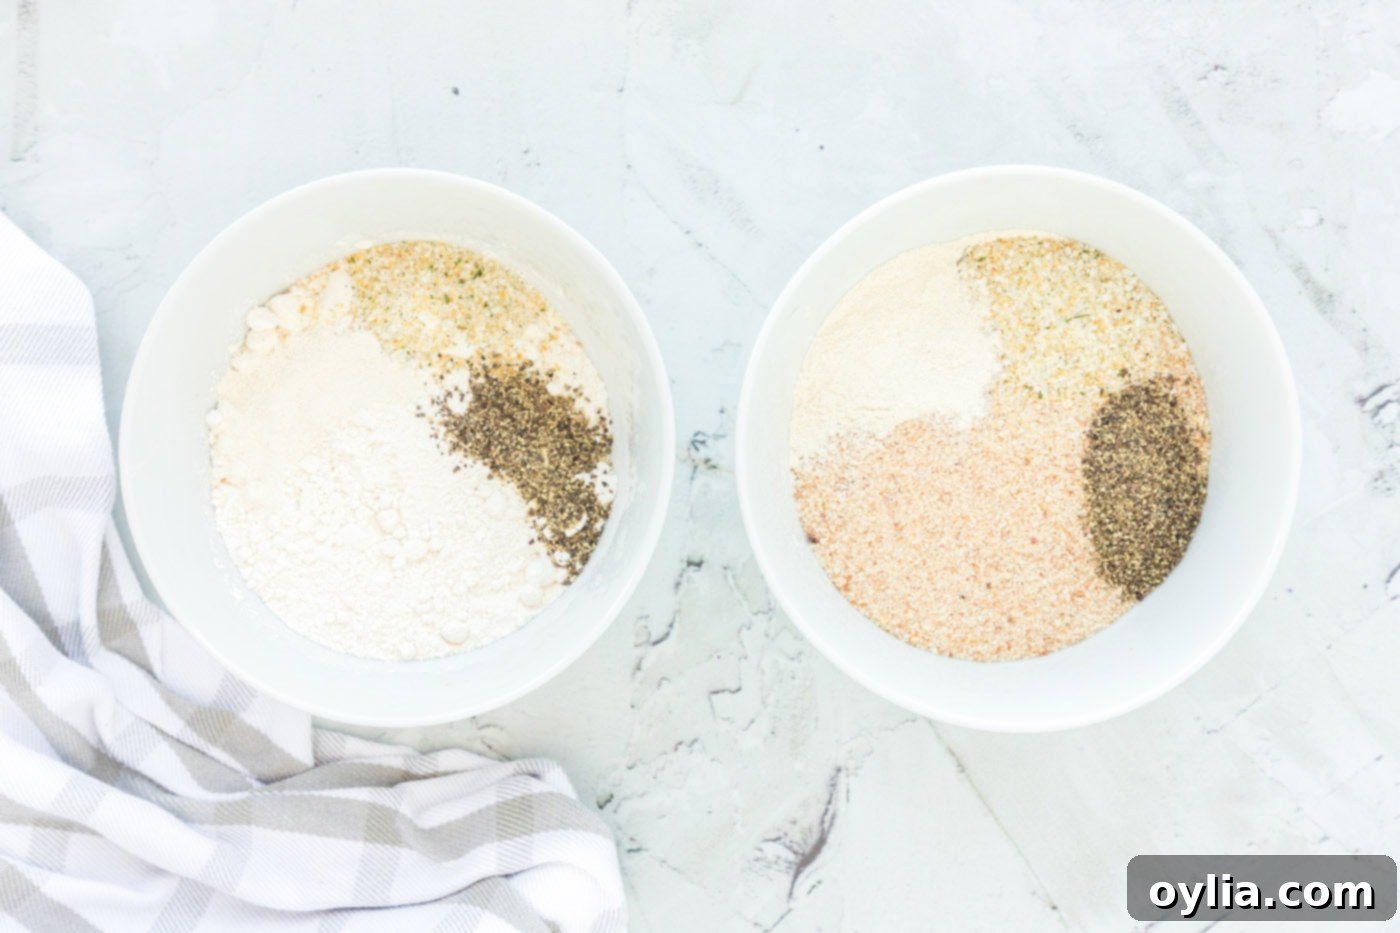
- Set up your dredging station: In a medium shallow bowl or a wide dinner plate, combine the all-purpose flour with 1 tablespoon of garlic salt, 1/2 tablespoon of black pepper, and 1/2 tablespoon of onion powder. Whisk these ingredients together thoroughly to ensure the seasonings are perfectly distributed throughout the flour.
- On a second shallow bowl or plate, combine the bread crumbs with the remaining garlic salt, pepper, and onion powder. Mix these ingredients diligently. By seasoning both the flour and breadcrumbs, you build multiple layers of flavor into your crispy coating, ensuring every bite is delicious.

- In a third shallow bowl or plate, whisk together the two large eggs and 2 tablespoons of water until the mixture is completely uniform and slightly frothy. This egg wash is the crucial adhesive that will bind the breadcrumbs to your floured chicken.
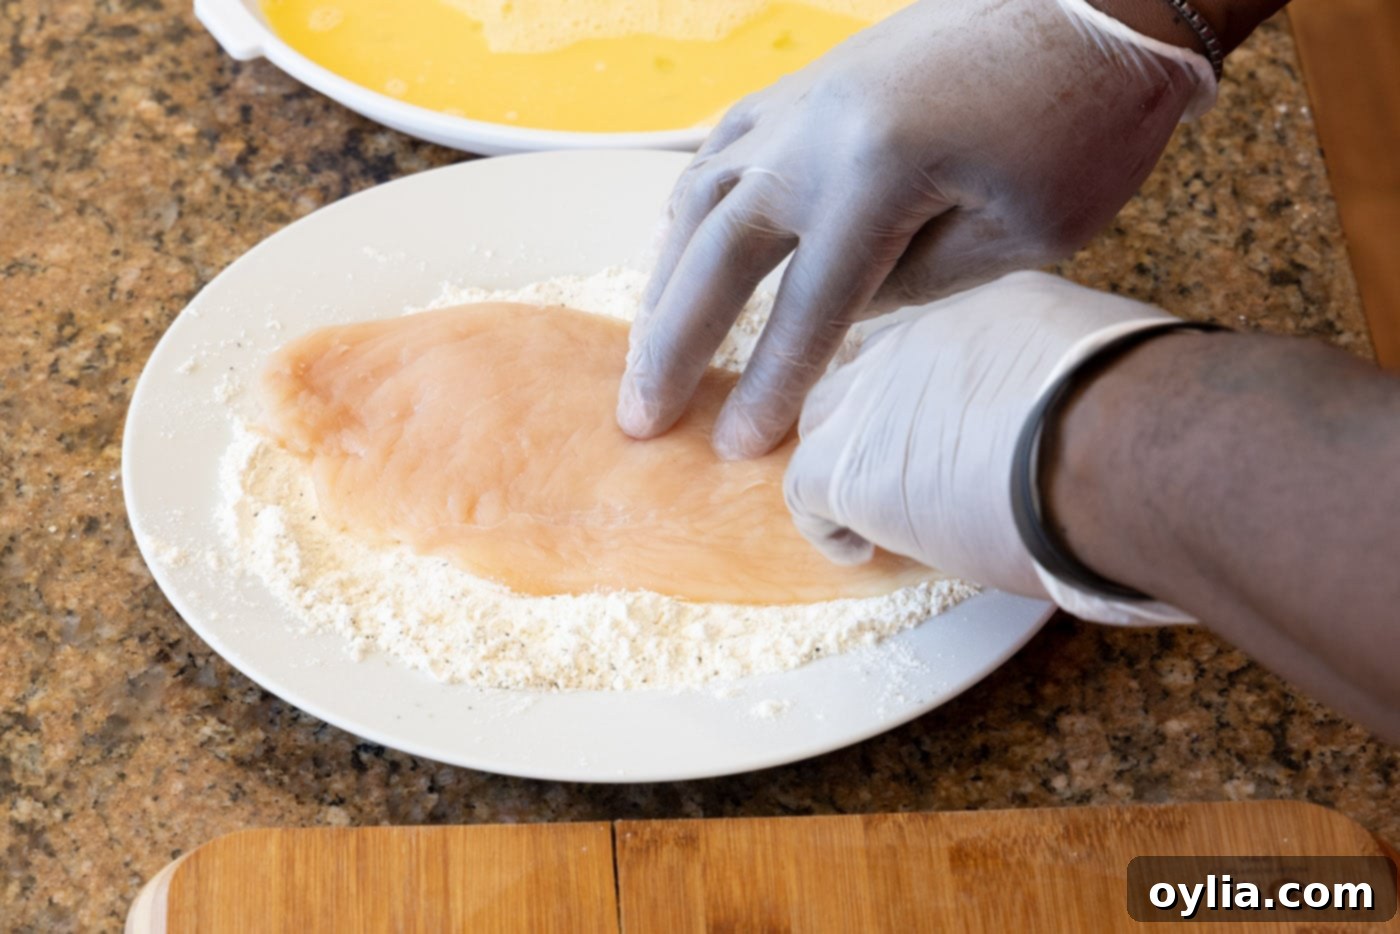
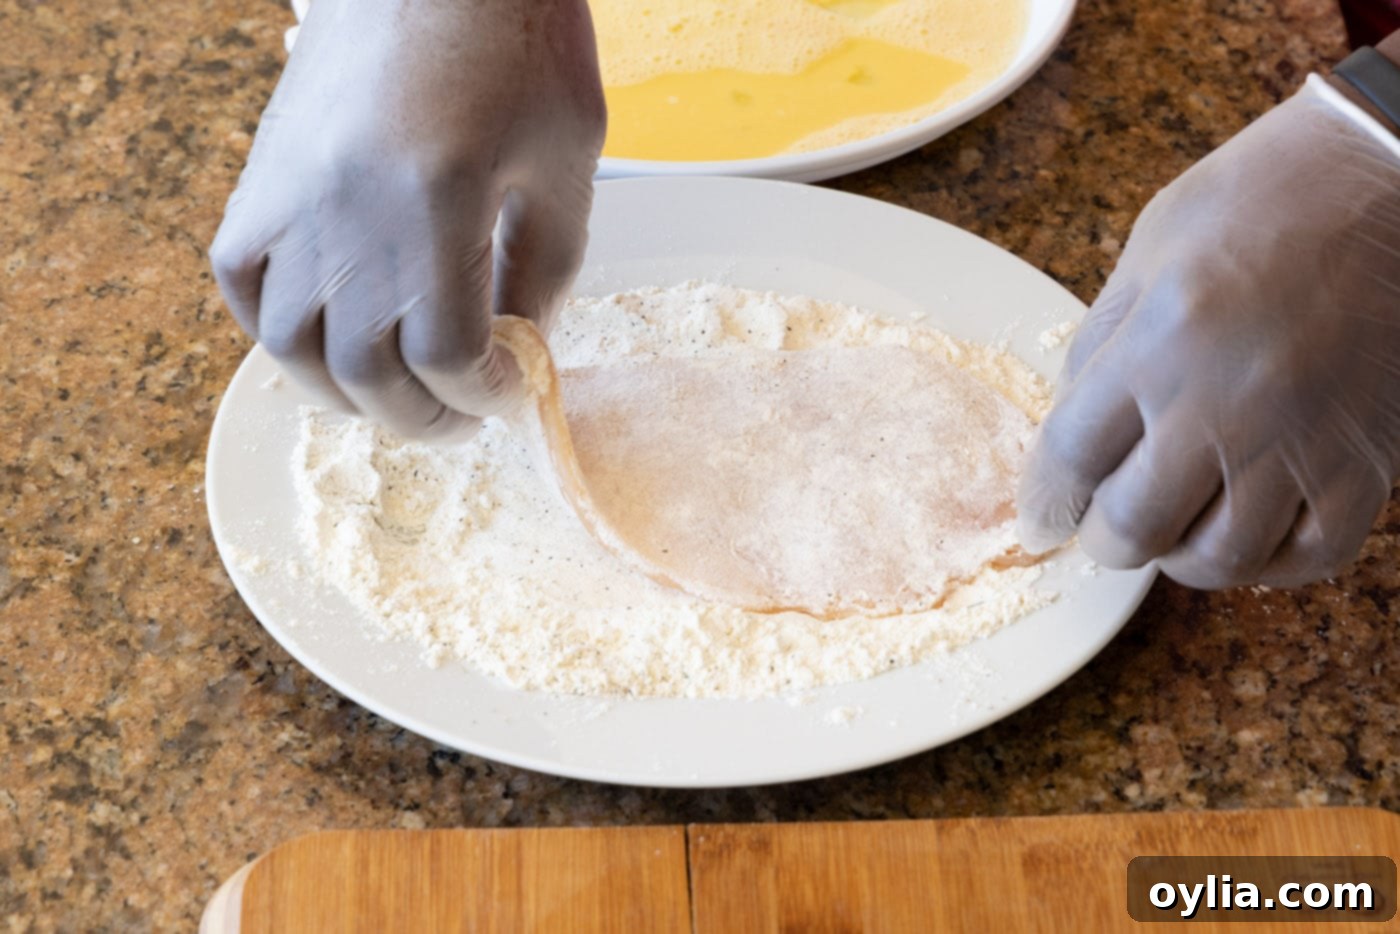
- Now, to coat the chicken: using one hand dedicated to dry ingredients and the other to wet (or wearing gloves for convenience), take a pounded chicken cutlet and press it firmly into the seasoned flour mixture. Ensure both sides are thoroughly coated, then gently shake off any excess flour. This initial dry layer is vital for the egg wash to adhere properly.


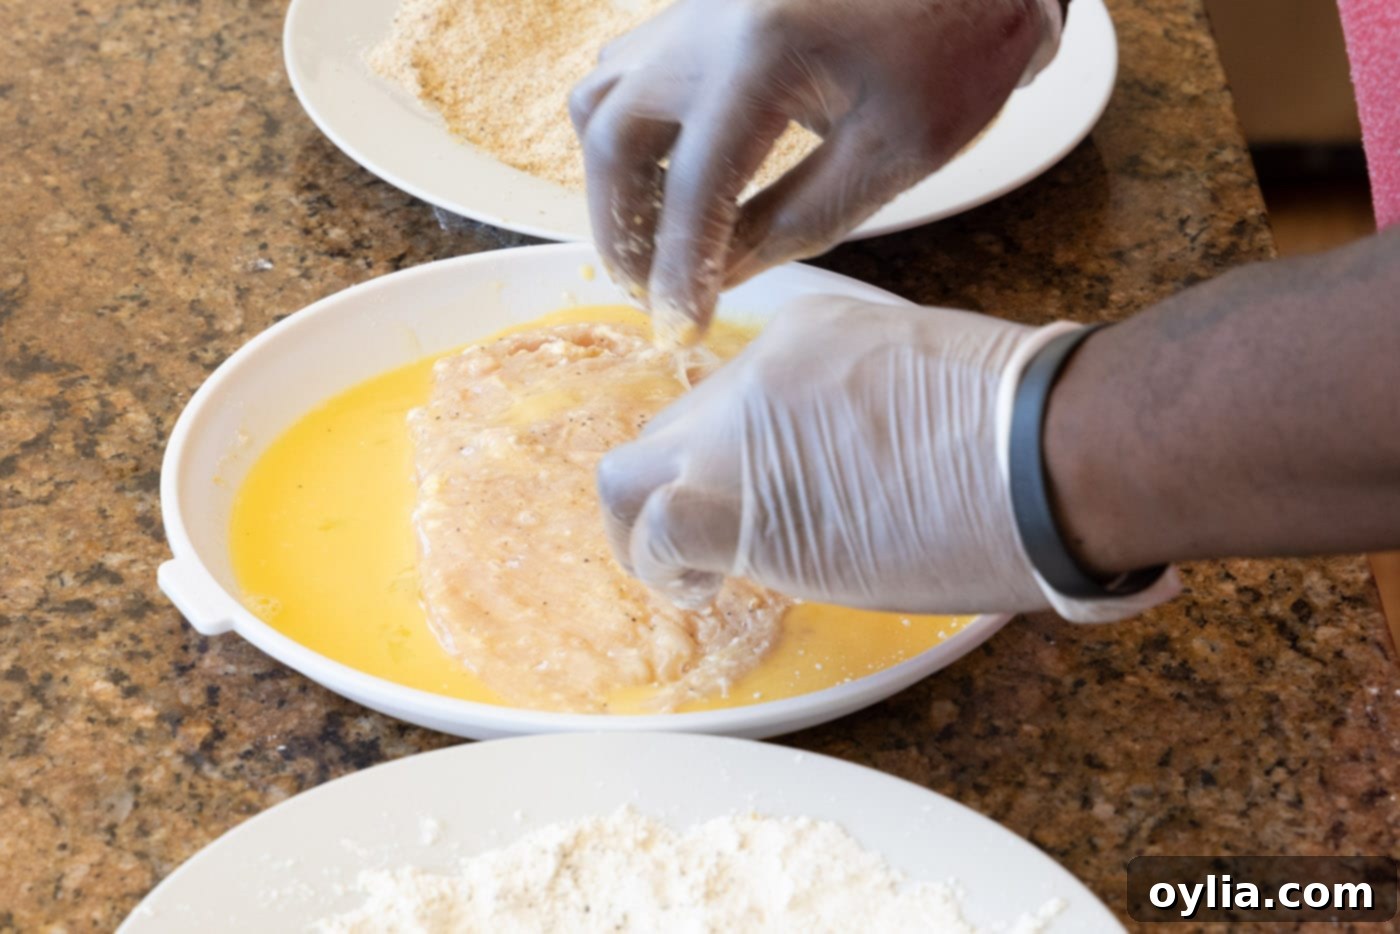
- Next, carefully dip the floured chicken cutlet into the whisked egg mixture. Ensure both sides are thoroughly coated, lifting the chicken and allowing any excess egg to drip back into the bowl before moving to the next step. This sticky layer is what will make the breadcrumbs adhere perfectly.

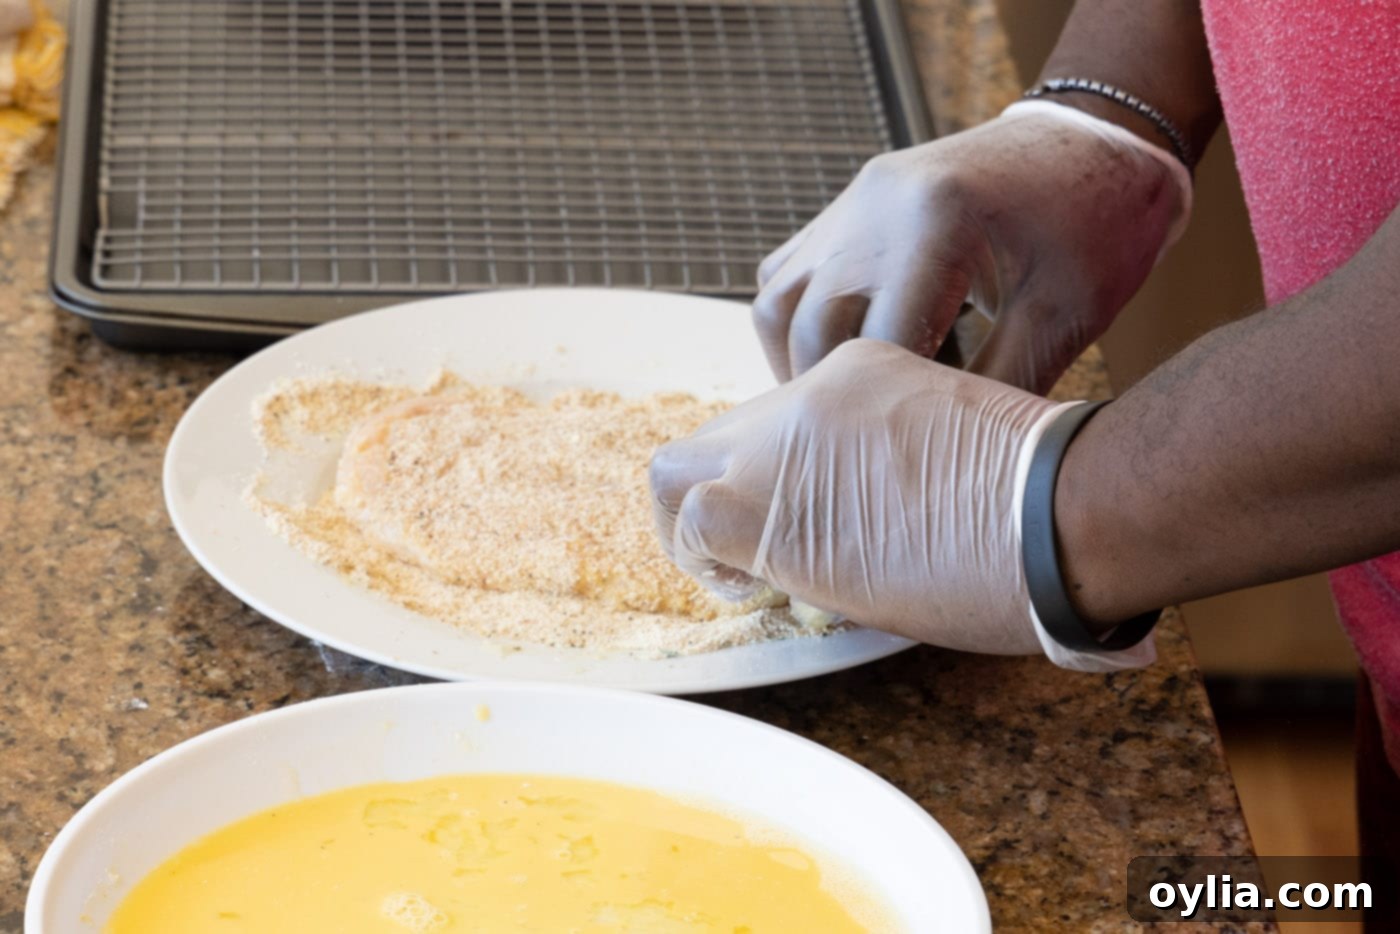
- Finally, transfer the egg-coated chicken to the seasoned bread crumb mixture. Gently press both sides of the chicken into the breadcrumbs, ensuring they are evenly and completely coated. Don’t be shy – the more breadcrumbs that adhere, the crispier and more flavorful your Chicken Milanese will be.

- Once fully coated, place the breaded chicken cutlet on a wire rack set over a baking sheet. This setup is crucial as it allows air to circulate around the cutlet, preventing the bottom from becoming soggy. Repeat this entire breading process for all remaining chicken filets. For an even firmer and potentially crisper coating, you can refrigerate the breaded cutlets for 15-30 minutes before frying.
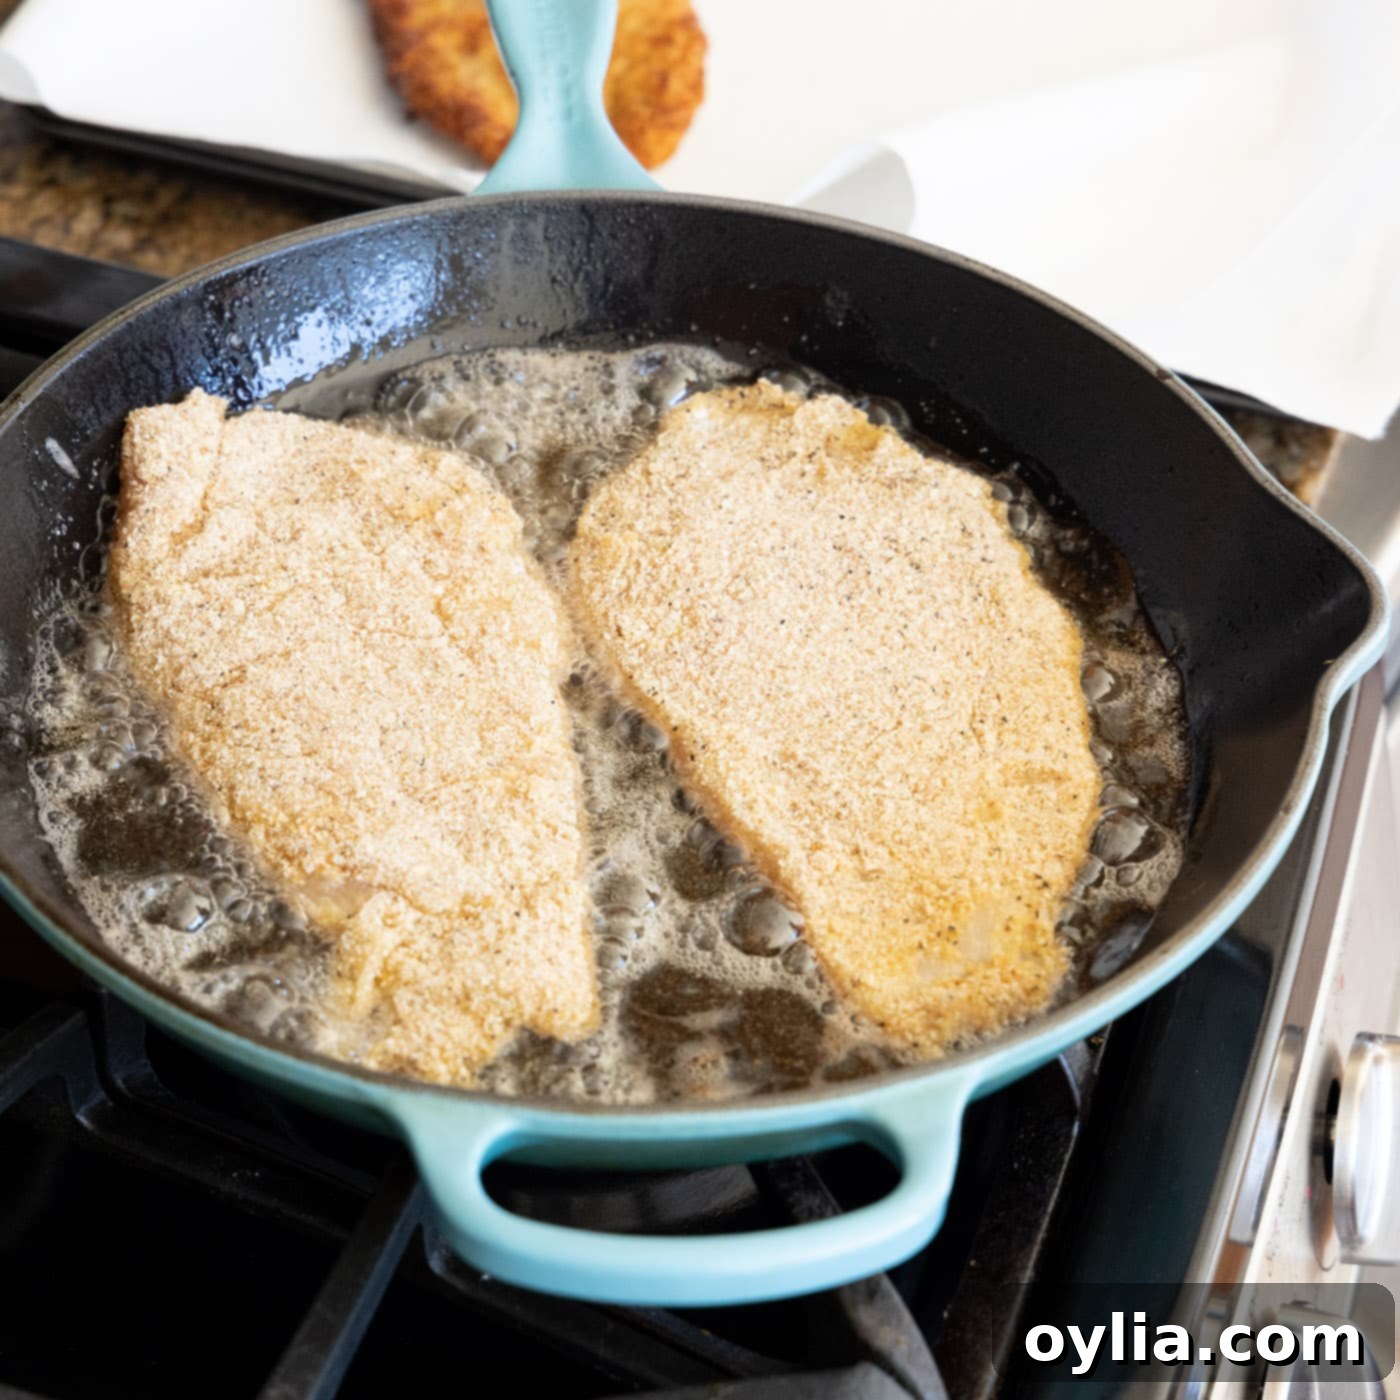
- Prepare for frying: Add about 3 tablespoons of olive oil to a large heavy-bottomed skillet. You need just enough oil to create a thin, even layer across the entire bottom of the pan, but not so much that the chicken is submerged. Heat the oil over medium heat until it is shimmering and hot enough to gently sizzle when a small test breadcrumb is dropped into it. Avoid letting the oil smoke, as this means it’s too hot.
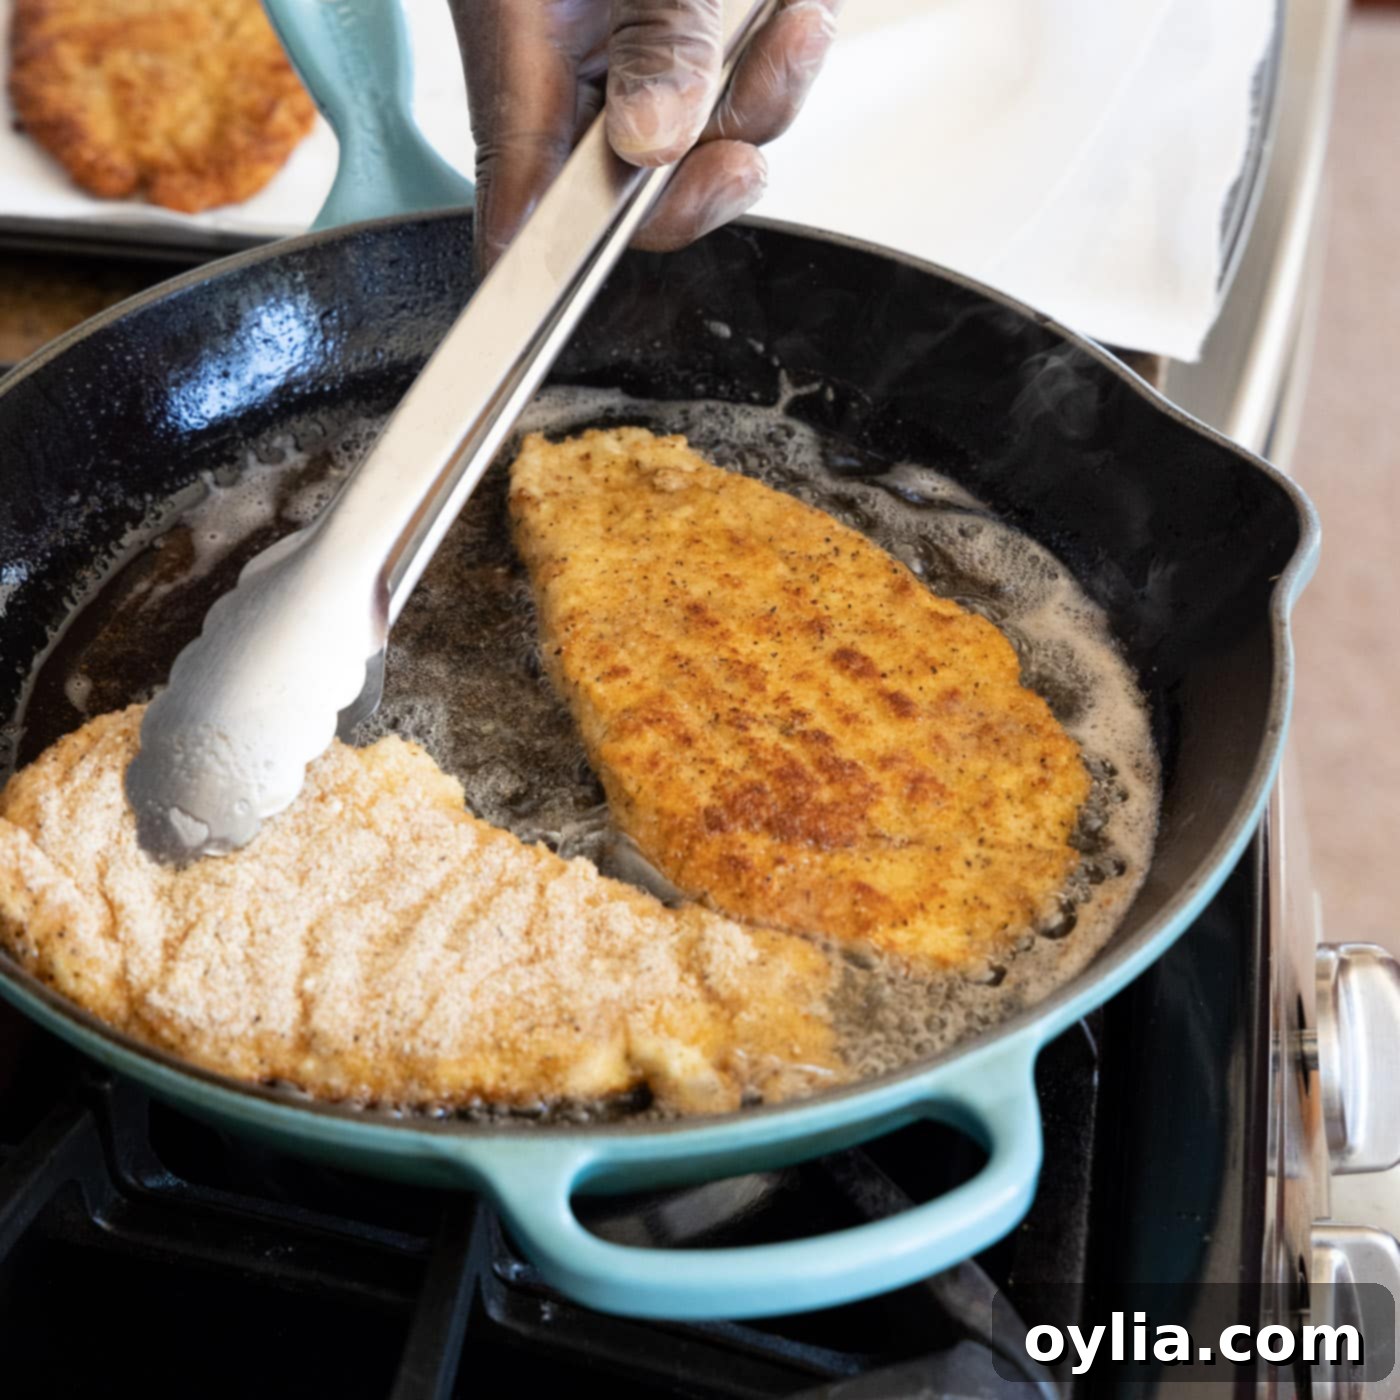
- Frying in batches is essential for perfectly crispy Chicken Milanese. Overcrowding the pan will significantly drop the oil temperature, leading to greasy, less crispy chicken. Place one or two chicken cutlets in the hot oil at a time, ensuring there’s ample space between them. Cook for 2-3 minutes per side, until the breading achieves a beautiful, deep golden-brown color and the chicken is cooked through. For safety and accuracy, use a meat thermometer to ensure the internal temperature of the chicken reaches 165°F (74°C).


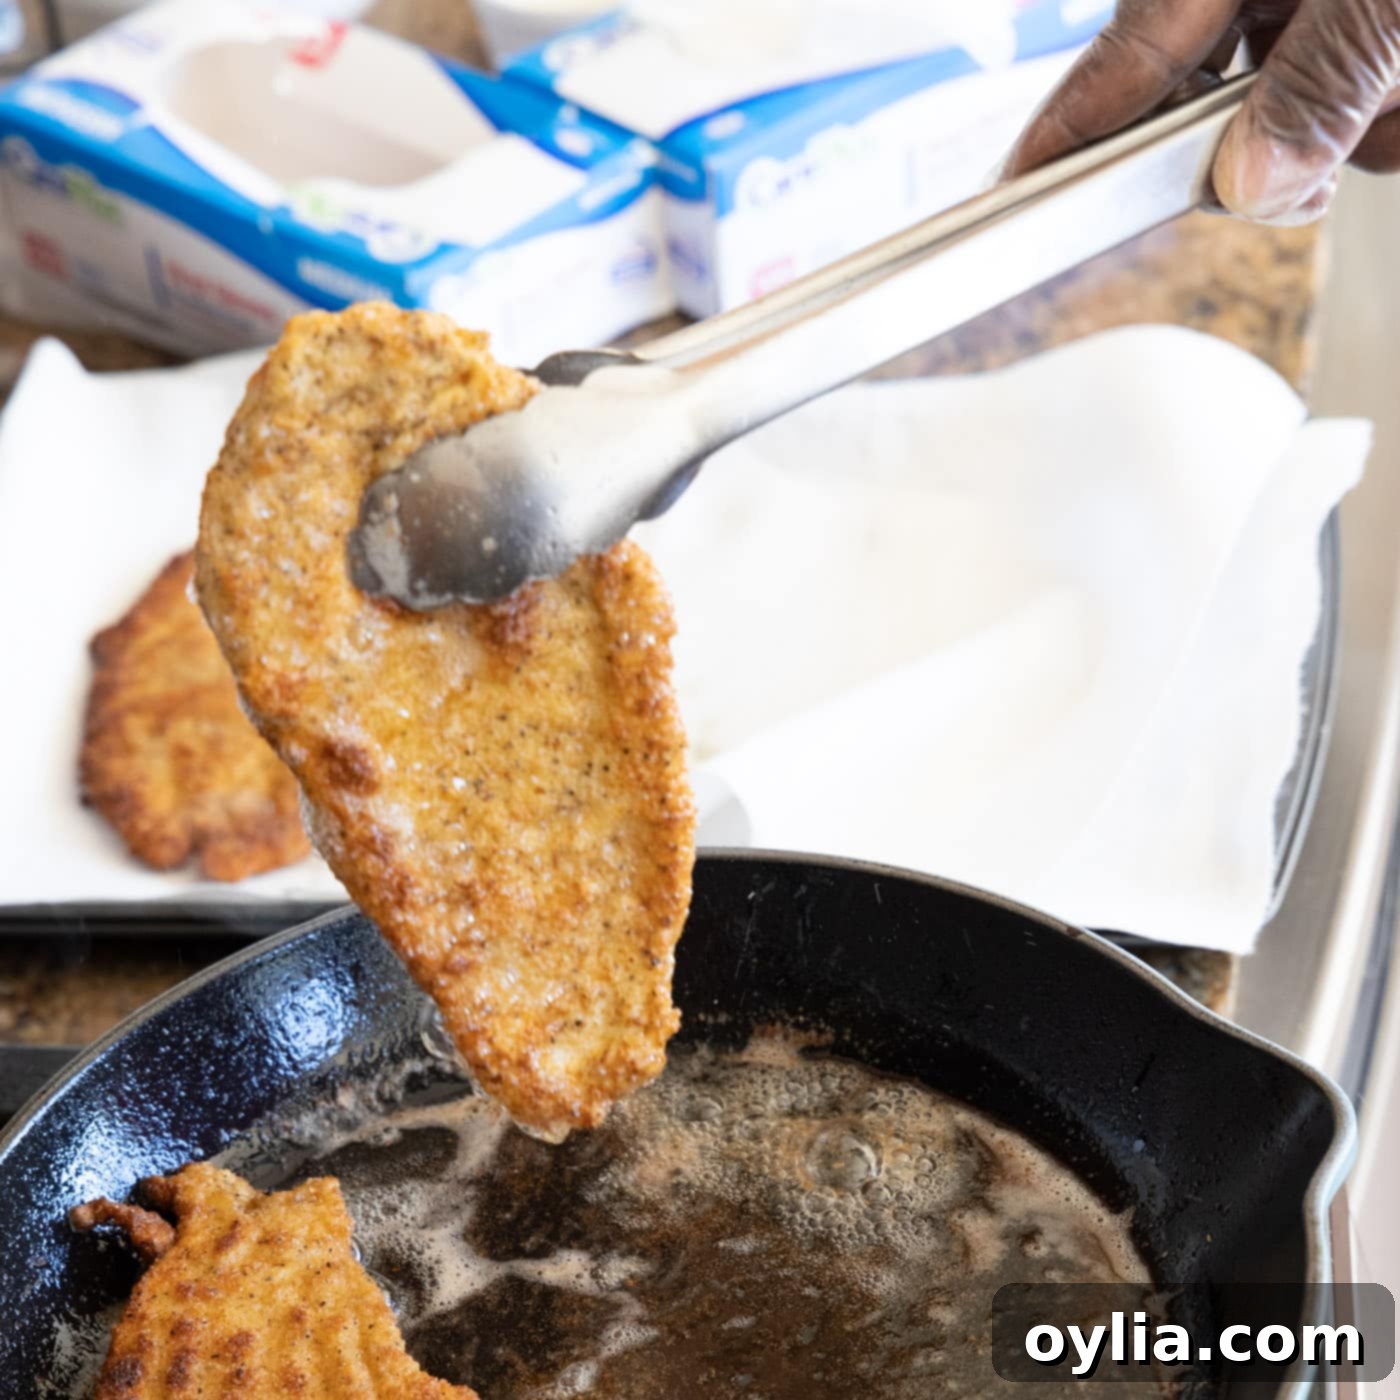
- Once each batch of chicken is cooked to golden perfection, remove the cutlets from the skillet and immediately place them on a clean wire rack lined with paper towels. This allows any excess oil to drain away, maintaining maximum crispiness. Keep the cooked chicken warm in a low oven (around 200°F/90°C) while you continue to cook the remaining batches, ensuring all your Milanese is perfectly crispy and hot for serving.

Frequently Asked Questions & Expert Tips for Success
To keep leftover Chicken Milanese at its best, place it in an air-tight container and store it in the refrigerator for 3-4 days. For optimal crispness upon reheating, try to arrange the cutlets in a single layer or separate them with a piece of paper towel to prevent moisture buildup.
Reheating in an oven or air fryer is paramount for reviving that delicious crispness. For oven reheating, preheat to 350°F (175°C) and bake the cutlets for 10-15 minutes, or until they are thoroughly heated and crispy. If using an air fryer, cook at 375°F (190°C) for 5-7 minutes, flipping them halfway through. We strongly advise against microwaving, as it will inevitably lead to a soggy breading.
Absolutely! The Milanese preparation technique originally features veal, known as Veal Milanese or Cotoletta alla Milanese, which is an exquisite choice. You can also successfully apply this method to create a delightful pork Milanese using thinly pounded pork loin or tenderloin cutlets. The cooking method remains essentially the same across these variations.
For achieving an undeniably superior crispiness, Panko breadcrumbs are highly recommended. Their unique, light, and flaky texture results in a significantly crunchier coating that absorbs less oil compared to denser, traditional fine breadcrumbs. While regular breadcrumbs will still yield a good result, Panko is the secret weapon for that extra crunch.
The ideal thickness for your chicken cutlets is approximately 1/4 inch (about 0.6 cm). Pounding the chicken to this uniform thinness is essential for several reasons: it ensures rapid and even cooking, preventing any part from becoming overcooked or undercooked, and it contributes to the signature tender texture that defines Chicken Milanese.
You can certainly get a head start! The chicken cutlets can be pounded a day in advance and stored covered in the refrigerator. For the breading, you can fully coat the cutlets and then refrigerate them on a wire rack for a few hours. This chilling period can actually help the breading adhere even better during frying. However, for the absolute pinnacle of crispness, we always recommend frying the Milanese just before you plan to serve it.
Expert Tips for Flawless Chicken Milanese:
- Pat Thoroughly Dry: This cannot be stressed enough. Ensure your chicken is impeccably dry before it touches the flour. Any residual moisture will create steam, which is the nemesis of a truly crispy crust.
- Season Every Layer Generously: Don’t just rely on seasoning the chicken itself. By generously seasoning both the flour and breadcrumb mixtures, you build robust layers of flavor throughout the entire coating, ensuring a delicious experience with every bite.
- Never Overcrowd the Pan: This is a golden rule for frying! Cook your cutlets in batches, giving each piece ample space in the skillet. Overcrowding will drastically lower the oil’s temperature, leading to steamed, greasy, and ultimately less crispy chicken.
- Maintain Optimal Oil Temperature: Medium heat is your sweet spot. The oil should be hot enough to elicit an immediate sizzle when a tiny piece of breadcrumb is dropped in, but it should never be smoking. Too low a temperature results in oil-soaked chicken, while too high will burn the breading before the chicken cooks through.
- Utilize a Wire Rack After Frying: Once fried, immediately transfer the cooked cutlets to a wire rack. This simple step allows air to circulate around all sides of the chicken, preventing condensation and ensuring the bottom remains just as crispy as the top.
- Fresh Lemon is Non-Negotiable: A generous squeeze of fresh lemon juice over the hot Chicken Milanese just before serving is not merely a garnish; it’s a traditional and essential element. The bright, zesty acidity of the lemon cuts beautifully through the richness of the fried chicken, elevating and balancing all the flavors.
Serving Suggestions: What to Serve with Chicken Milanese
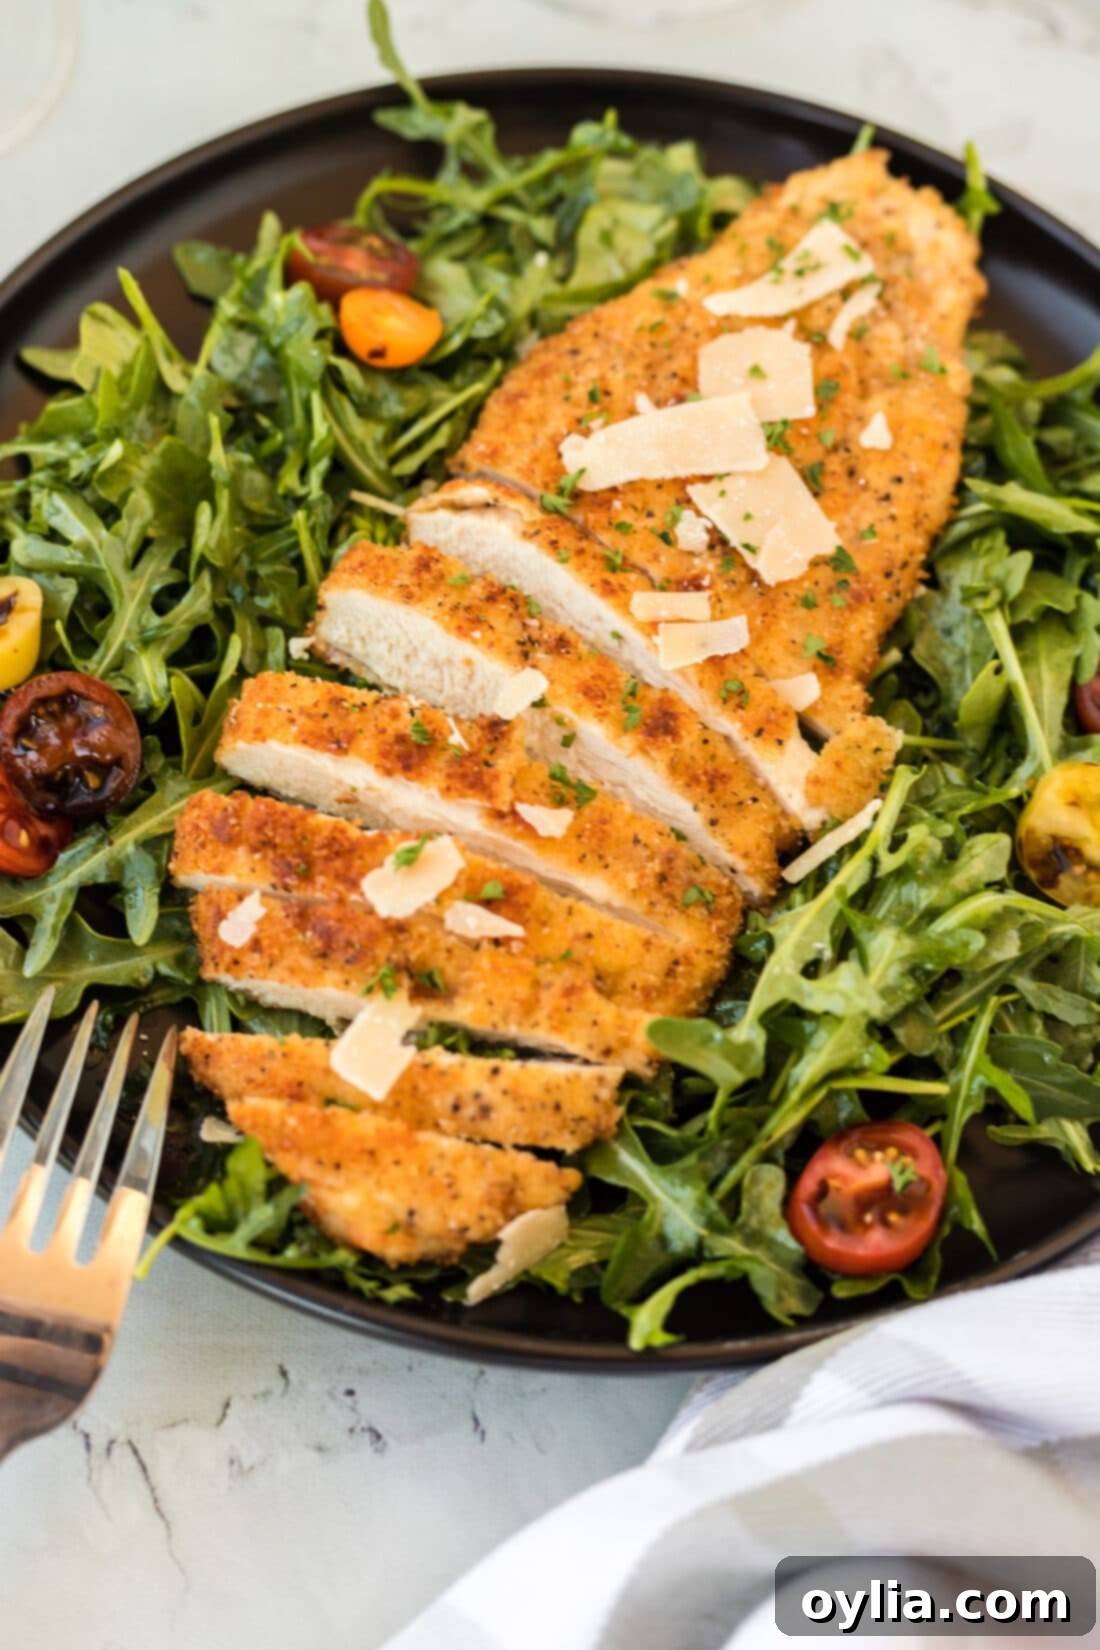
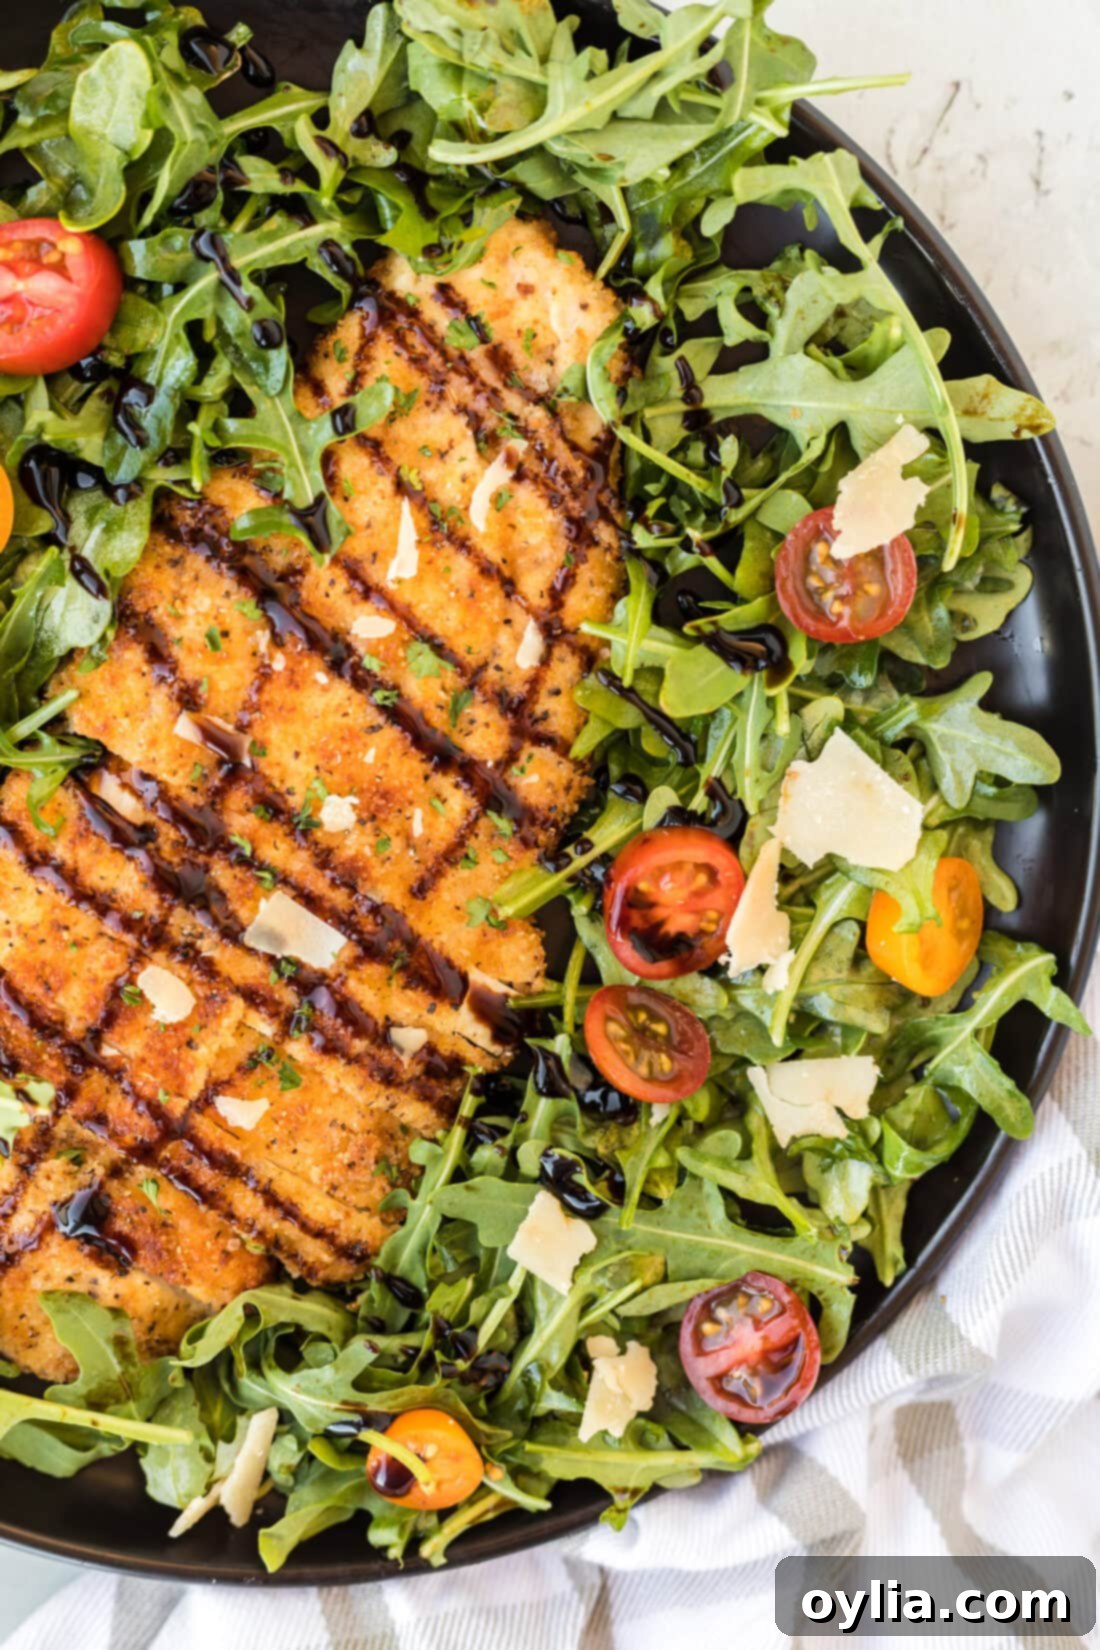
Chicken Milanese, with its delicate crispness and tender interior, is a remarkably versatile dish that pairs beautifully with a broad spectrum of side dishes. Traditionally, it is served with elegant simplicity: a generous wedge of fresh lemon, whose vibrant acidity brilliantly cuts through the richness of the fried chicken, and a light, peppery arugula salad tossed with a simple vinaigrette. This classic pairing is designed to highlight the chicken’s inherent crispness and succulent tenderness, allowing its natural flavors to shine.
However, the beauty of Chicken Milanese lies in its adaptability, allowing you to easily customize your meal with other delicious accompaniments to create a complete and satisfying spread. Consider these fantastic options:
- Fresh Salads: Beyond the traditional arugula, a fresh mixed green salad featuring crisp lettuce, juicy cherry tomatoes, cool cucumber slices, and a bright lemon vinaigrette is always a delightful choice. For a touch of Italian elegance, a simple Caprese salad, with slices of fresh mozzarella, ripe tomatoes, and fragrant basil, provides a wonderful contrast in textures and flavors.
- Roasted Vegetables: Roasting vegetables enhances their natural sweetness and introduces a delightful char that perfectly complements the Milanese. Excellent choices include tender roasted Brussels sprouts, slender asparagus spears, vibrant broccoli florets, crisp green beans, or sweet carrots. Simply drizzle them with a little olive oil, season with salt and pepper, and roast until tender-crisp.
- Creamy Sides: For those seeking a comforting and contrasting element, creamy mashed potatoes offer a smooth, rich texture that provides a delightful counterpoint to the crispy chicken. A delicate risotto, perhaps a classic Parmesan risotto, can also elevate the meal to a more refined level.
- Pasta: A light pasta dish can transform your Milanese into a more substantial and truly Italian feast. Consider serving it alongside spaghetti aglio e olio (garlic and oil) for a simple, flavorful option, or with a fresh, vibrant marinara sauce.
- Garnish: Always, always finish your Chicken Milanese with a final, generous squeeze of fresh lemon juice. This essential step brightens all the flavors. A sprinkle of freshly shaved or grated Parmesan cheese, or a scattering of finely chopped fresh parsley or basil, adds both appealing visual contrast and an additional burst of herbaceous freshness.
Explore More Delicious Chicken Recipes
If you’ve thoroughly enjoyed preparing and tasting this exquisite Chicken Milanese, then you’re in for a treat! Our collection of other incredible chicken recipes promises to bring even more comfort, flavor, and excitement to your kitchen. From rich and creamy preparations to hearty baked dishes and zesty pan-fried options, there’s always a fresh and exciting way to enjoy this versatile protein. Dive into more of our top-rated chicken recipes that are destined to become cherished family staples:
- Chicken Marsala
- Chicken Piccata
- Chicken Cacciatore
- Chicken Cordon Bleu
- Baked Chicken Thighs
- Marry Me Chicken
I love to bake and cook and share my kitchen experience with all of you! Remembering to come back each day can be tough, that’s why I offer a convenient newsletter every time a new recipe posts. Simply subscribe and start receiving your free daily recipes!

Chicken Milanese
IMPORTANT – There are often Frequently Asked Questions within the blog post that you may find helpful. Simply scroll back up to read them!
Print It
Pin It
Rate It
Save ItSaved!
Ingredients
- 2 large chicken breasts about 1 1/2 pounds
- 2 cups breadcrumbs
- 2 cups all-purpose flour
- 2 Tablespoons garlic salt divided
- 1 Tablespoon black pepper divided
- 1 Tablespoon onion powder divided
- 2 large eggs
- 2 Tablespoons water
- 3 Tablespoons olive oil
Things You’ll Need
-
Large heavy bottomed skillet
-
Vinyl gloves
-
Tongs
-
Meat mallet
Before You Begin
- The chicken does not take long to cook because it is pounded so thin. Essentially, you just want to cook it long enough to ensure both sides of the breading are beautifully golden and crispy, and the chicken reaches a safe internal temperature.
- For optimal crispiness, ensure the chicken is thoroughly patted dry before breading, and always avoid overcrowding the pan during frying.
- Store leftover Chicken Milanese in an air-tight container in the refrigerator for 3-4 days. For reheating, use the oven at 350°F (175°C) or an air fryer to best retain its crispy coating; microwaving will unfortunately make it soggy.
Instructions
-
Rinse chicken breasts and pat dry with paper towels.
-
Cut each breast in half by butterflying them, then separating with a knife. You will now have 4 breasts.
-
Pound each breast fairly thin, about 1/4 inch thick, but not so thin that it falls apart.
-
In a medium bowl, combine flour with 1 tablespoon garlic salt, 1/2 tablespoon black pepper, and 1/2 tablespoon onion powder. Pour contents onto a dinner plate.
-
In a second bowl, combine bread crumbs with remaining garlic salt, pepper, and onion powder. Pour contents onto a second dinner plate.
-
In a third bowl, whisk together eggs and water. Carefully pour contents onto a third dinner plate.
-
Using gloved hands, press the pounded chicken filet into the flour mixture, coating both sides and gently shaking off any excess.
-
Dip floured chicken into egg mixture, again coating both sides and allowing excess to drip off.
-
Finally, press the egg coated chicken into the bread crumb mixture. Gently press both sides of chicken to ensure they are evenly coated.
-
Place chicken on a wire rack and repeat this process for the remaining chicken filets.
-
Add olive oil to a large heavy-bottomed skillet. You want enough oil to coat the bottom of the pan, but not so much that the chicken will be submerged. Heat oil over medium heat until shimmering.
-
You will need to work in batches as the chicken filets are large and you don’t want to crowd them. Place chicken filet in hot oil and cook for 2-3 minutes per side. Turn chicken over with tongs and cook an additional 2-3 minutes. The breading should be nicely browned and the internal temperature of the chicken should reach 165°F (74°C).
-
Remove to paper towels and keep warm while you cook the remaining chicken.
Nutrition
The recipes on this blog are tested with a conventional gas oven and gas stovetop. It’s important to note that some ovens, especially as they age, can cook and bake inconsistently. Using an inexpensive oven thermometer can assure you that your oven is truly heating to the proper temperature. If you use a toaster oven or countertop oven, please keep in mind that they may not distribute heat the same as a conventional full sized oven and you may need to adjust your cooking/baking times. In the case of recipes made with a pressure cooker, air fryer, slow cooker, or other appliance, a link to the appliances we use is listed within each respective recipe. For baking recipes where measurements are given by weight, please note that results may not be the same if cups are used instead, and we can’t guarantee success with that method.
