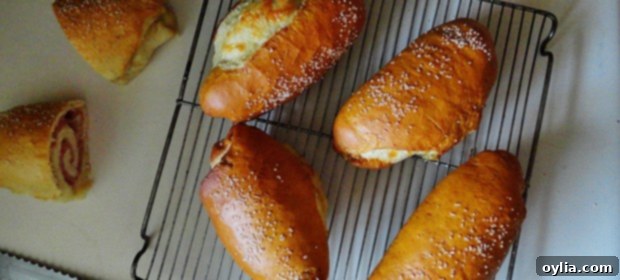
Irresistible Ham and Cheese Pretzel Rolls: Your Ultimate Guide to Stuffed Pretzel Perfection
There’s an undeniable magic to the humble soft pretzel. That warm, chewy interior, the satisfyingly dark golden crust, and the perfect kiss of coarse salt – it’s a culinary delight that few can resist. In our household, the love for these baked beauties runs deep. My husband and I are also staunch admirers of the classic ham and cheese combination. So, when the idea of merging a soft pretzel with a savory ham and cheese sandwich presented itself, it sounded almost too good to be true.
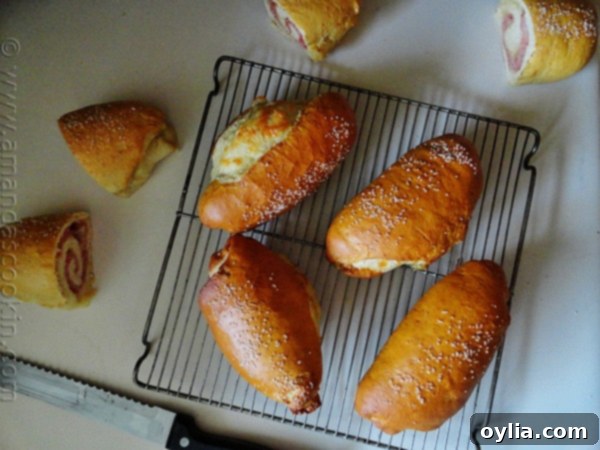
Imagine: a portable, perfectly packaged bite that delivers the best of both worlds. These Ham & Cheese Pretzel Rolls are not just a snack; they’re a revelation. They transform a simple sandwich into an exciting, hearty treat, ideal for any occasion. Picture them as the star of your next Super Bowl party, or as the ultimate crowd-pleaser when a hungry horde of teenagers descends upon your home. They’re convenient, incredibly flavorful, and guaranteed to disappear fast!
The Culinary Journey: From Inspiration to Creation
My quest for this delightful hybrid began when I stumbled upon this gem of a recipe on Peggy’s wonderful blog, My Fiance Likes It So It Must Be Good. It was truly a treasure trove of culinary inspiration. With so many fantastic-sounding recipes, the initial challenge wasn’t making them, but choosing which one to try first! After dedicating well over an hour to browsing (a common delightful dilemma for any food blogger), my shortlist somehow swelled to an astonishing sixteen recipes. Yes, sixteen! From a decadent Chocolate Hazelnut Cake to savory Korean Flank Steaks, and even a hearty Potato and Red Pepper Hash, the choices were overwhelming. Yet, one recipe shone brighter than the rest, capturing my imagination and my family’s collective cravings.
I’m no stranger to the art of pretzel making. A few years prior, my daughter and I embarked on a delicious project, creating Homemade German Pretzels for her German class assignment. Around the same time, I also perfected my Bretzel Rolls, officially known as Bavarian Pretzel Sandwich Rolls. These past experiences instilled in me a confidence to tackle pretzel dough, making Peggy’s Ham & Cheese Stuffed Pretzel Rolls an obvious and exciting next step. It was the perfect fusion of my love for pretzels and a savory filling.
Adapting the Recipe for Perfection
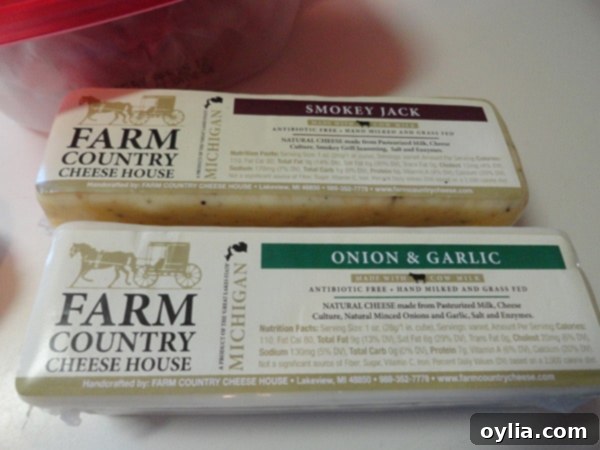
While Peggy’s original recipe was a fantastic starting point, I made a few adaptations to suit my preferences and past pretzel-making experiences. Most notably, I added a full cup more flour to the dough. This adjustment helped achieve a firmer, more manageable dough consistency, which I find crucial for shaping and handling stuffed pretzels. I also experimented with different types of cheese. During a visit to my favorite local market, I discovered an array of incredible specialty cheeses. I even shared my exciting find on Twitter via Instagram! While many flavors tempted me, I selected two distinct varieties to bring home, knowing they would elevate the flavor profile of these rolls. My method for handling the dough and the baking soda bath was also tweaked slightly to align with the techniques that have consistently yielded perfect pretzels in my kitchen.
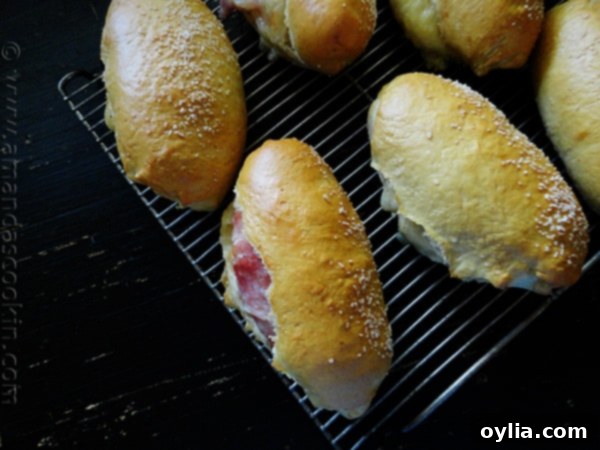
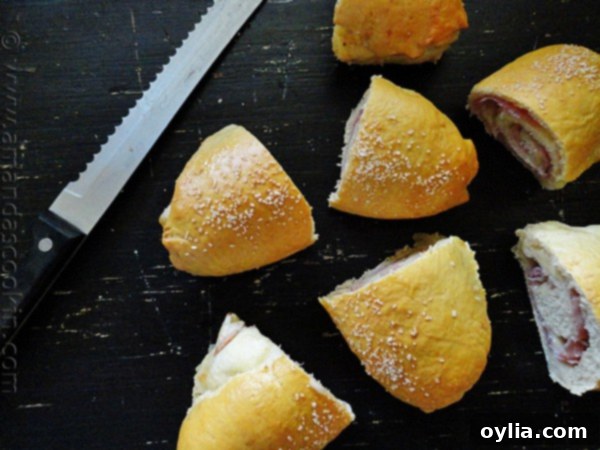
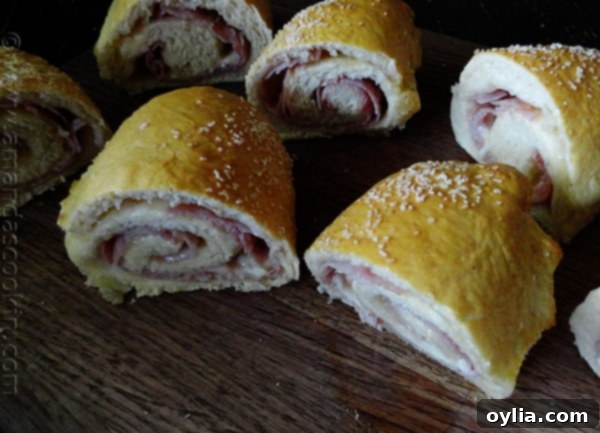
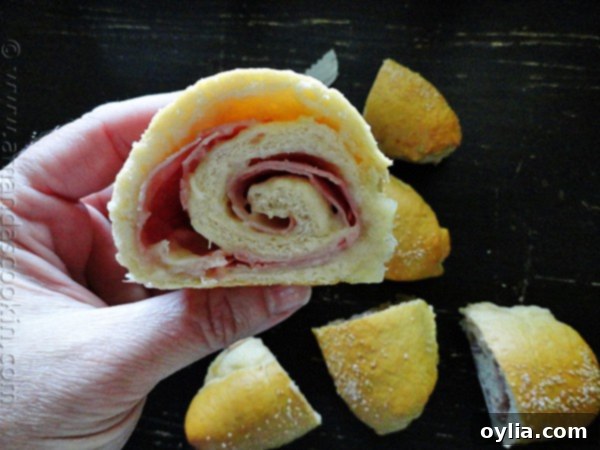
The moment of truth arrived after the rolls had cooled just enough to handle. I cut one in half, took a bite, then another, and another. Before I knew it, I had devoured two sandwiches right there on the spot! The combination of the warm, soft pretzel bread, the savory ham, and the perfectly melted cheese was simply heavenly. It was everything I had hoped for and more.
Serving Up Happiness: Family Favorites and Party Perfection
I prepared a batch with both ham and cheese, and another with just cheese to cater to different tastes. As expected, my children, not quite as enthusiastic about ham as my husband and I, preferred the cheese-only versions. My daughter even packed one for her school lunch the next day, a sure sign of success! These rolls are incredibly versatile and perfect for various occasions. I already know they’ll be a staple, especially during football season and any casual gathering where delicious, easy-to-eat food is a must. Pair them with a selection of mustards or a creamy cheese dip for an even more elevated experience.
Mastering the Pretzel Dough: Essential Tips for Success
Making pretzels might seem daunting, but with a few key tips, you’ll be baking like a pro in no time. The journey to a perfect pretzel starts with the dough, and here’s how to ensure yours is flawless:
1. The Importance of Proofing Your Yeast
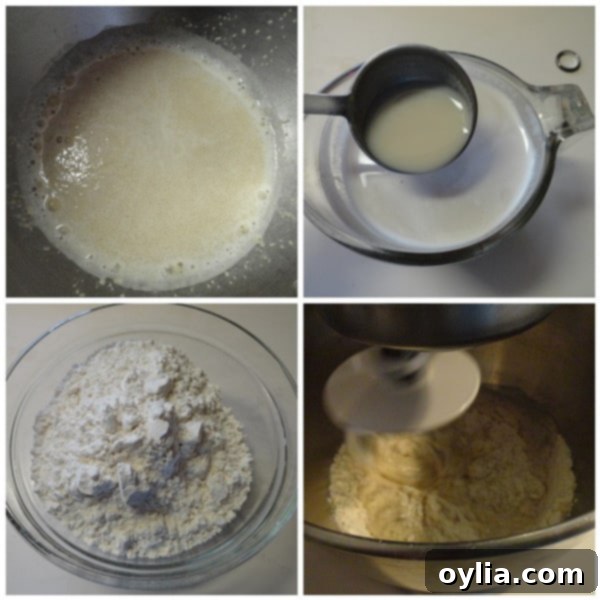
Whenever you’re working with yeast, the first crucial step is always to “proof” it. This process confirms that your yeast is active and alive, ready to make your dough rise beautifully. To proof yeast, simply mix it with a small amount of sugar (which acts as food for the yeast) and some warm liquid, typically water or milk, at a temperature between 105-115°F (40-46°C). After about 5 minutes, if the mixture begins to bubble and form a foamy layer on top, your yeast is active and good to go. If not, it’s best to discard it and start with a fresh batch of yeast.
2. Achieving the Perfect Dough Consistency
For these pretzel rolls, you’ll combine some brown sugar with warm milk before adding it, along with most of the flour, to your proofed yeast mixture. Kneading is vital for developing the gluten in the dough, which gives pretzels their characteristic chewiness. Start with the specified amount of flour, but be prepared to add a little more, spoonful by spoonful, until your dough is soft, pliable, and no longer excessively sticky. The goal is a smooth, elastic ball that’s a pleasure to work with. Allow it to rise in a warm place until it doubles in size, usually about two hours.
3. Filling and Shaping Your Rolls
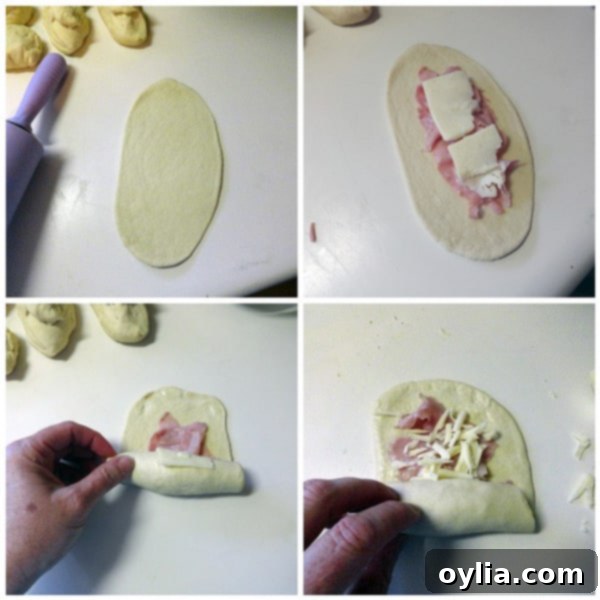
Once your dough has risen, gently punch it down and divide it into equal pieces. Roll each piece into an elongated shape, then flatten it slightly with a rolling pin. This is where the magic happens: layer 1-2 slices of your chosen ham and a generous amount of thin-sliced or shredded cheese onto the dough. Carefully roll up the dough, ensuring the filling is securely enclosed, and pinch the seams tightly to seal the edges. A little warm water can help create a stronger seal. Let these rolled-up beauties rest for about 30 minutes before their next critical step.
4. The Essential Baking Soda Bath
This step is what gives pretzels their signature dark, shiny crust and distinct flavor. You’ll bring a large pot of water to a rolling boil and then, standing back to avoid splashes, add baking soda. The baking soda will cause the water to vigorously bubble up momentarily as it reacts. This alkaline bath creates a unique environment on the surface of the dough, allowing it to brown rapidly and intensely during baking without overcooking the interior. Each roll should only spend about 30 seconds in this bath, turning once, before being carefully removed with a slotted spoon to drain. Place them on a parchment-lined baking sheet and sprinkle with coarse kosher salt for that authentic pretzel finish.
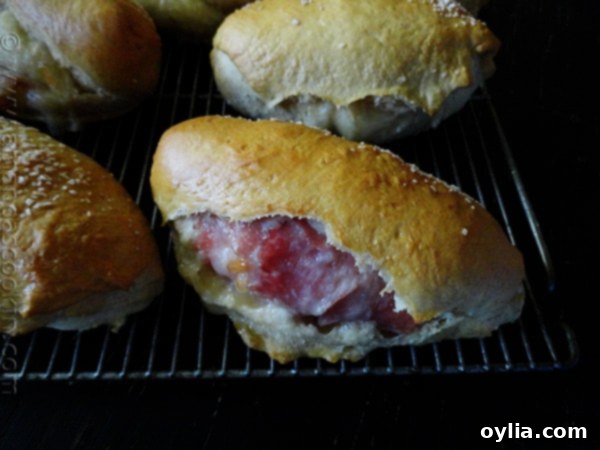
Note: Occasionally, a few of my rolls swelled a bit too much and burst during baking or the bath. Don’t worry, it’s nothing tragic and they’ll still be delicious! To minimize this, simply ensure your dough is rolled to a consistent, even thickness before adding the filling and sealing.
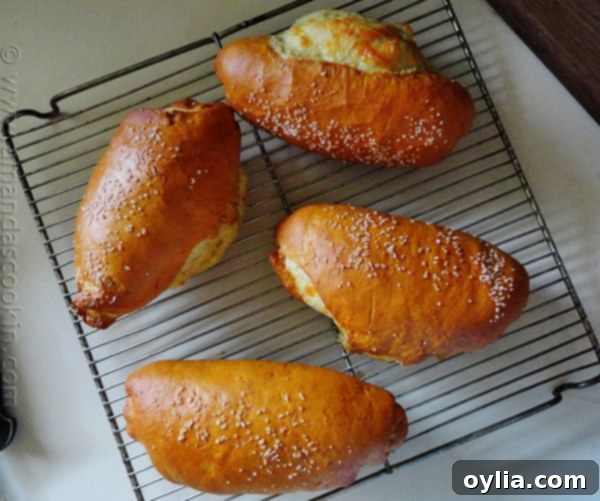
Why These Ham & Cheese Pretzel Rolls Are a Must-Try
- Perfect Party Food: Easy to eat, handheld, and universally loved. They’re a step up from typical finger foods.
- Kid-Friendly: A fantastic way to get kids excited about lunch or snacks, especially if you offer plain cheese versions.
- Satisfying & Hearty: More substantial than a regular pretzel, these rolls can serve as a light meal or a very satisfying snack.
- Unique Flavor Combination: The savory, slightly sweet pretzel dough perfectly complements the salty ham and creamy, melted cheese.
- Impressive Homemade Touch: Making pretzels from scratch is a rewarding experience, and these stuffed rolls will undoubtedly impress your guests.
A huge thank you to Peggy for sharing her wonderful recipe! These Ham & Cheese Pretzel Rolls were truly a fantastic discovery, and they’ve earned a permanent spot in my recipe rotation. I highly encourage you to give them a try – you won’t be disappointed. 🙂

Ham & Cheese Pretzel Roll Sandwiches
IMPORTANT – There are often Frequently Asked Questions within the blog post that you may find helpful. Simply scroll back up to read them!
Print It
Pin It
Rate It
Save ItSaved!
Ingredients
- 2 ¼ teaspoons SAF instant yeast
- 2 tablespoons plus 1 teaspoon dark brown sugar
- ½ cup warm water
- 1 cup warm 1% milk
- 3 ½ cups flour
- Deli or packaged ham thin sliced
- Shredded or thin sliced cheese
- 6 cups water
- 4 teaspoons baking soda
- kosher salt to top
Instructions
-
In large mixing bowl combine yeast, 1 teaspoon brown sugar, and warm water. Stir together and let sit until foamy, about 5 minutes.
-
In a small bowl, stir together remaining brown sugar and milk, mixing until sugar is dissolved.
-
Reserve one cup of the flour and set aside. Add remaining 2 1/2 cups flour and milk mixture to yeast mixture. Mix on low with dough hook (or by hand with wooden spoon). Add reserved flour as needed to make a soft dough.
-
Gently knead dough into a smooth ball on a floured surface, Then place in clean bowl, cover with plastic wrap, and let rise at room temperature for about 2 hours.
-
Preheat oven to 400 degrees and line a baking sheet with parchment paper.
-
Cut the dough into 4 separate pieces, then divide those pieces in half. Roll out each piece to desired length and flatten with rolling pin. Place 1-2 slices of ham and either thin sliced or shredded cheese on each rolled out piece of dough. Roll up the dough and seal the edges using warm water. Let the dough rest for 30 minutes.
-
Meanwhile, bring water to a rolling boil in a large pot. Standing back a little so as not to be splashed, add baking soda. Adding the baking soda will cause the water to react momentarily and bubble up.
-
Slide 1-2 rolls into the boiling water and boil for no more then 30 seconds, turning once. Carefully remove with slotted spoon and hold above pot and let drain. Place on parchment lined cookie sheet and sprinkle lightly with salt. Repeat with the remaining rolls. Bake the rolls until golden brown, about 20 minutes.
The recipes on this blog are tested with a conventional gas oven and gas stovetop. It’s important to note that some ovens, especially as they age, can cook and bake inconsistently. Using an inexpensive oven thermometer can assure you that your oven is truly heating to the proper temperature. If you use a toaster oven or countertop oven, please keep in mind that they may not distribute heat the same as a conventional full sized oven and you may need to adjust your cooking/baking times. In the case of recipes made with a pressure cooker, air fryer, slow cooker, or other appliance, a link to the appliances we use is listed within each respective recipe. For baking recipes where measurements are given by weight, please note that results may not be the same if cups are used instead, and we can’t guarantee success with that method.
‘);
