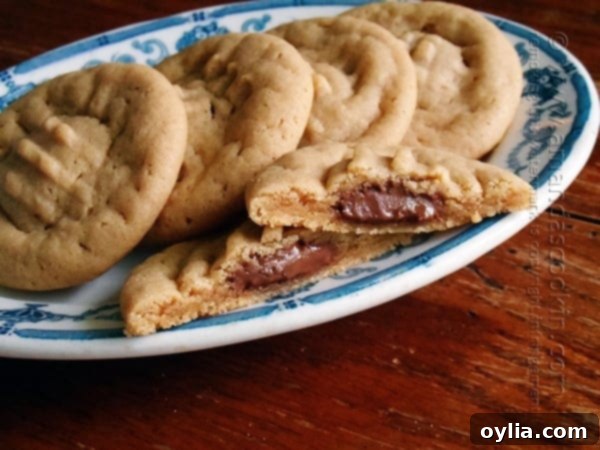
Irresistible Chocolate Stuffed Peanut Butter Cookies: The Ultimate Hershey Drop Treat
Few culinary pairings evoke as much universal delight as the classic combination of chocolate and peanut butter. It’s a match made in dessert heaven, a symphony of sweet, salty, and utterly comforting flavors. But what if you could take this beloved duo and elevate it to an extraordinary experience? Prepare yourself for just that with these incredible Chocolate Stuffed Peanut Butter Cookies with Hershey’s Drops. These aren’t just your average peanut butter cookies; they’re a delightful surprise package, each one hiding a gooey, melted chocolate center that will captivate your taste buds from the very first bite.
Why These Chocolate-Filled Peanut Butter Cookies Will Become Your New Favorite
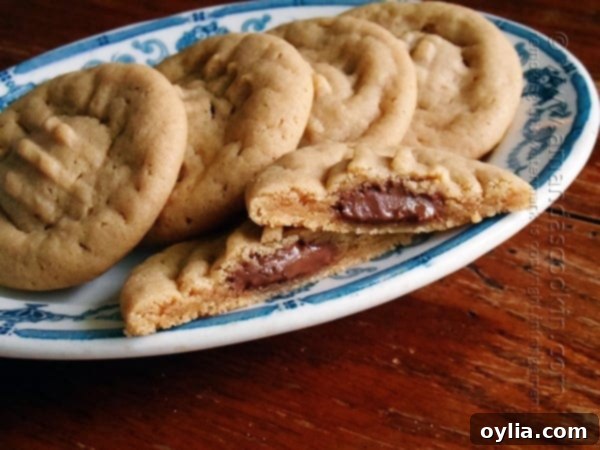
There’s something inherently exciting about a cookie that holds a hidden treasure. While traditional peanut butter cookies, with their signature fork marks, are always a hit, stuffing them with a rich chocolate candy like a Hershey’s Drop transforms them into an even more indulgent treat. The soft, chewy texture of the peanut butter dough perfectly complements the molten chocolate interior, creating a textural and flavor contrast that is simply unforgettable. These cookies are not only a feast for the eyes but also a delightful surprise for anyone who bites into them. They’re perfect for bringing to holiday gatherings, impressing guests, or simply enjoying as a well-deserved personal indulgence.
The Sweet Inspiration Behind Our Stuffed Cookie Recipe
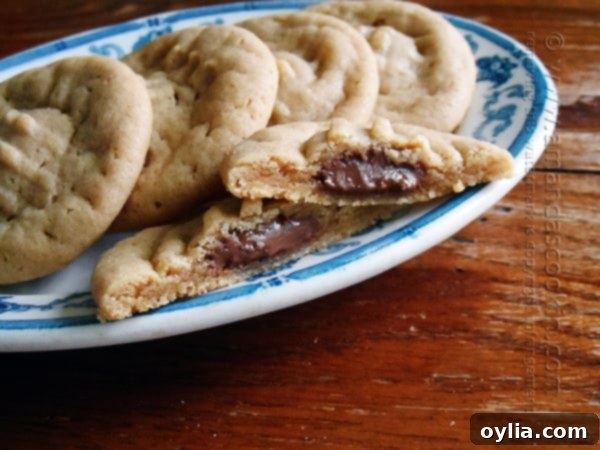
As the festive season approaches and the warmth of holiday preparations fills the air, thoughts naturally turn to baking. And what’s Christmas without an abundance of delicious, homemade cookies? This particular recipe has a charming origin story, stemming from a very relatable situation in my own home. My husband, much like many of us, tends to develop phases of obsession with certain candies. For a considerable period, those delightful little Hershey’s Drops were his absolute favorite snack. He’d stock up, and they’d quickly disappear.
However, as these phases often do, his Hershey’s Drop enthusiasm eventually waned, leaving a few unopened bags quietly residing in our cabinet. Instead of letting them languish, I saw an opportunity. Why not incorporate these sweet morsels into a new baking adventure? Combining the comforting goodness of our family’s favorite peanut butter cookie recipe with the unexpected delight of a melted chocolate center seemed like a stroke of genius. The result? Cookies that flew off the plate almost instantaneously! It was clear these chocolate-stuffed peanut butter criss-crosses were destined for greatness.
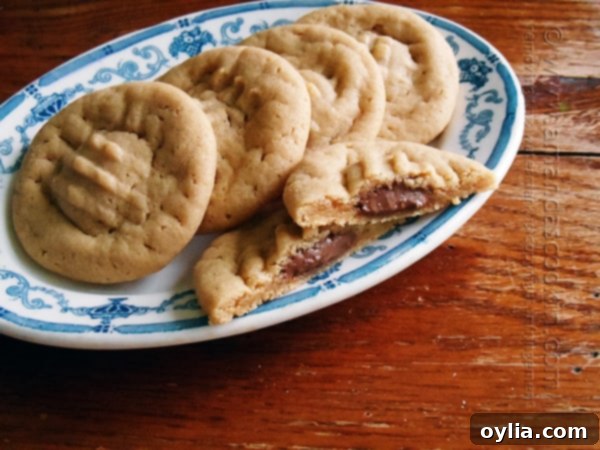
Our family already adores my soft and chewy peanut butter cookies, so I had a good feeling these stuffed variations would be an even bigger hit! If you’re a fan of the stuffed cookie concept and want to explore more delicious options, I highly recommend trying my Nutella Peanut Butter Cookies or these indulgent Snickers Peanut Butter Cookies. They’re all fantastic ways to add an extra layer of flavor and fun to your baking!
Step-by-Step Guide to Baking Perfect Chocolate Stuffed Peanut Butter Cookies
Creating these delightful chocolate-stuffed peanut butter cookies is a straightforward and enjoyable process. The key to success lies in properly encasing the chocolate center, ensuring it melts beautifully without escaping during baking. Follow these detailed steps, and you’ll be rewarded with a batch of warm, gooey cookies that are truly irresistible.
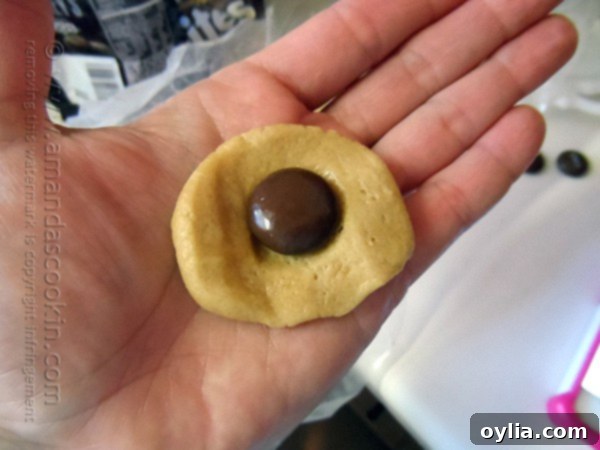
Step 1: Preparing the Dough and First Stuffing
Once your luscious peanut butter cookie dough is perfectly mixed, it’s time to add the secret ingredient. Take a portion of dough, roughly the size of a tablespoon. Gently roll it between your palms for a few seconds; the warmth from your hands will make the dough more pliable and easier to work with. Flatten this piece of dough into a small, uniform disc in your hand. Carefully place one Hershey’s Drop candy right in the center of the dough. The pliability of your dough is important here, ensuring it’s not too stiff or crumbly, which would make the stuffing process more challenging.

Step 2: Expertly Sealing the Chocolate Surprise
This step is critical for a perfect molten center. Carefully gather the edges of the cookie dough up and around the Hershey’s Drop, completely encasing it. Pinch the seams together firmly to ensure the chocolate is fully sealed inside. Gently roll the dough in your hands to form a smooth, perfect ball. There should be no visible cracks or openings where the chocolate could escape during baking. If the dough seems a little sticky, a tiny dusting of flour on your hands can help, or you might briefly chill the dough to make it more manageable. A well-sealed ball guarantees that wonderful chocolate explosion when you bite into the warm cookie.

Step 3: The Signature Criss-Cross and Baking Preparation
Once all your chocolate-stuffed dough balls are beautifully formed, place them evenly spaced on your prepared baking sheet (lined with parchment paper for easy removal). Now, for the quintessential peanut butter cookie touch: take a fork and gently press down on each cookie in a criss-cross pattern. This classic design is not merely decorative; it helps to slightly flatten the dough, promoting even baking and contributing to that desirable soft and chewy texture. Be mindful not to press too hard, as you want to avoid exposing the chocolate filling or making the cookies too thin.

Step 4: The Art of the Perfect Bake
Bake your cookies in a preheated oven for a short but crucial 7 to 9 minutes. The precise timing is key to achieving that perfect soft and chewy texture. You’re looking for the edges to be just set and very lightly browned. The centers may still appear slightly puffy and even a bit underbaked – this is exactly what you want! A crucial rule for these cookies is: DO NOT OVERBAKE. Overbaking will result in dry, crumbly cookies, losing that wonderful chewiness. They will continue to firm up and set beautifully as they cool on the baking sheet.
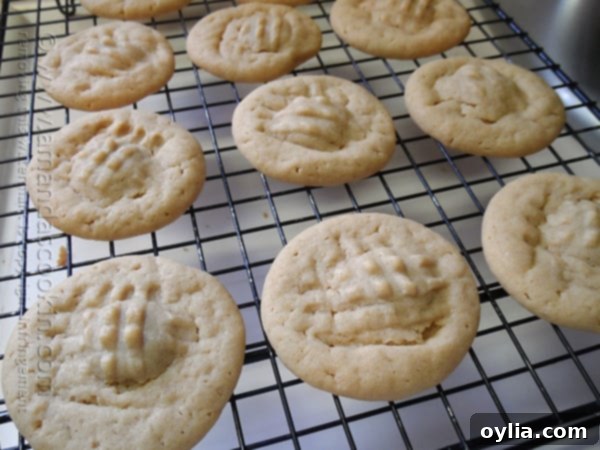
Step 5: Cooling for Optimal Texture and Flavor
Once your cookies emerge from the oven, resist the urge to move them immediately. Allow them to cool on the baking sheet for 3-4 minutes. This brief resting period is vital, as it allows the cookies to firm up enough to be transferred without breaking. After this initial cooling, carefully move the cookies to a wire cooling rack to cool completely. Cooling on a rack ensures proper air circulation, preventing soggy bottoms and allowing the chocolate inside to achieve a perfectly gooey consistency. While waiting for them to cool completely might test your willpower, it’s worth it for the ultimate enjoyment!
Expert Tips for Baking Your Best Chocolate Stuffed Peanut Butter Cookies
- Room Temperature Ingredients: Always use softened butter and a room-temperature egg. This ensures that your ingredients cream together smoothly, creating a uniform dough that bakes evenly.
- Proper Flour Measurement: For accurate results, spoon your flour into the measuring cup and level it off with a straight edge. Scooping directly from the bag can compact the flour, leading to too much flour and dry, dense cookies.
- Avoid Overmixing: Once you add the dry ingredients, mix just until no streaks of flour remain. Overmixing develops the gluten in the flour, which can result in tough, less tender cookies.
- Chill the Dough: If your dough feels too soft or sticky to handle easily, place it in the refrigerator for 15-30 minutes. Chilled dough is firmer, easier to stuff, and less prone to spreading excessively during baking.
- Uniform Cookie Size: Use a cookie scoop or a measuring spoon (like a tablespoon) to ensure all your dough balls are roughly the same size. This promotes even baking across the entire batch.
- Seal the Chocolate Properly: Take your time in Step 2 to completely encase the Hershey’s Drop. Any small opening can lead to the chocolate oozing out during baking, creating a messy (though still delicious) cookie.
- Parchment Paper is a Must: Always line your baking sheets with parchment paper or a silicone baking mat. This prevents sticking, promotes even browning, and makes cleanup a breeze.
Delicious Variations and Customization Ideas
While the classic Hershey’s Drop is undeniably fantastic in these peanut butter cookies, feel free to unleash your creativity and experiment with different fillings and additions:
- Alternate Chocolates: Instead of Hershey’s Drops, try stuffing with mini Reese’s Peanut Butter Cups, unwrapped ROLOS for a caramel surprise, or even a square of your favorite chocolate bar (milk, dark, or white). Chocolate truffles or chocolate kisses would also work wonderfully.
- Nut Butter Exploration: If you’re open to different flavors or have dietary restrictions, try using almond butter, cashew butter, or even sunflower seed butter (SunButter) in place of peanut butter. The texture might vary slightly, but the stuffed cookie concept remains delicious.
- Flavor Boosters: Mix in a handful of mini chocolate chips, chopped roasted peanuts, or even a sprinkle of cinnamon into the cookie dough itself for an extra layer of flavor and texture.
- A Touch of Salt: For a gourmet touch, sprinkle a tiny pinch of flaky sea salt on top of each cookie before baking. The salt enhances the richness of both the chocolate and peanut butter.
- Double the Chocolate: If you’re a true chocoholic, consider adding a few chocolate chips to the dough itself, in addition to the stuffed Hershey’s Drop.

Chocolate Stuffed Peanut Butter Cookies
IMPORTANT – There are often Frequently Asked Questions within the blog post that you may find helpful. Simply scroll back up to read them!
Print It
Pin It
Rate It
Save ItSaved!
Ingredients
- 1 ¾ cups unbleached all purpose flour
- ¾ teaspoon salt
- ¾ teaspoon baking soda
- ½ cup unsalted butter softened
- ¾ cup creamy peanut butter
- 1 ¼ cups firmly packed light brown sugar
- 3 tablespoons milk
- 1 tablespoon vanilla extract
- 1 large egg
- Hershey’s Drops candy (approx. 36 for 36 cookies)
Instructions
-
Preheat your oven to 375 degrees F (190 degrees C). Line two baking sheets with parchment paper or silicone baking mats. This will prevent sticking and ensure even baking.
-
In a medium-sized bowl, combine the dry ingredients: unbleached all-purpose flour, salt, and baking soda. Whisk them together thoroughly to ensure they are evenly distributed, then set this bowl aside.
-
In a large mixing bowl, using an electric mixer, beat together the softened unsalted butter, creamy peanut butter, and firmly packed light brown sugar on medium-high speed. Continue beating for about 4-5 minutes, or until the mixture appears light, fluffy, and well aerated. Reduce the mixer speed to low, and carefully add the milk, vanilla extract, and the large egg. Mix until all these wet ingredients are just combined. Stop the mixer, scrape down the sides of the bowl with a spatula, and then increase the mixer speed back to medium-high and beat for one more minute. Finally, reduce the mixer speed to low again.
-
Gradually add the whisked flour mixture into the wet ingredients, mixing on low speed. Mix only until the dry ingredients are just incorporated and no visible streaks of flour remain. Be careful not to overmix the dough, as this can lead to tougher cookies.
-
Take approximately one tablespoon of the cookie dough (a cookie scoop works wonderfully for consistent sizing). Roll it briefly in your hands to form a smooth ball, then gently flatten this ball in your palm to create a small disc. Place one Hershey’s Drop candy in the center of the flattened dough. Carefully gather the edges of the cookie dough around the chocolate candy, pinching the seams firmly to completely seal the chocolate inside. Roll the stuffed dough ball gently in your hands again to ensure it’s perfectly round and smooth. Place the prepared dough balls onto your lined baking sheets, leaving about 2 inches between each. To create the classic peanut butter cookie appearance, gently press a fork onto the top of each dough ball in a criss-cross pattern.
-
Bake the cookies for 7 to 9 minutes, or until the edges are set and just beginning to turn a very light golden brown. The centers of the cookies may still look slightly soft and puffy – this is absolutely normal and desired for a soft, chewy texture. It is crucial not to overbake these cookies, as they will continue to firm up as they cool on the hot baking sheet. Overbaking is the main cause of dry, crumbly cookies.
-
Once baked, allow the cookies to cool on the baking sheets for 3-4 minutes. This brief resting period is important as it allows them to set and become firm enough to handle without breaking. After this initial cooling, carefully transfer the cookies to a wire cooling rack to cool completely. These cookies are absolutely divine when enjoyed warm, right out of the oven, with the chocolate still wonderfully molten inside.
Nutrition
The recipes on this blog are tested with a conventional gas oven and gas stovetop. It’s important to note that some ovens, especially as they age, can cook and bake inconsistently. Using an inexpensive oven thermometer can assure you that your oven is truly heating to the proper temperature. If you use a toaster oven or countertop oven, please keep in mind that they may not distribute heat the same as a conventional full sized oven and you may need to adjust your cooking/baking times. In the case of recipes made with a pressure cooker, air fryer, slow cooker, or other appliance, a link to the appliances we use is listed within each respective recipe. For baking recipes where measurements are given by weight, please note that results may not be the same if cups are used instead, and we can’t guarantee success with that method.
Serving Suggestions and Storage Tips
These incredible chocolate-stuffed peanut butter cookies are truly at their best when served warm, straight from the oven. That’s when the Hershey’s Drop inside is perfectly melted, creating a luscious, gooey center that’s hard to beat. Pair them with a tall, cold glass of milk, a scoop of vanilla bean ice cream, or a steaming cup of coffee for the ultimate dessert experience. They also make fantastic edible gifts for friends, family, or neighbors during the holiday season or for any special occasion.
To store any leftover cookies (if there are any!), place them in an airtight container at room temperature. They will remain wonderfully fresh and chewy for up to 3-5 days. For longer storage, you can freeze the baked cookies for up to 2-3 months. Simply thaw them at room temperature when you’re ready to enjoy, or for that fresh-baked warmth, gently reheat them in the microwave for a few seconds. For an even more convenient option, you can prepare the dough balls (after stuffing and shaping, but before baking) and freeze them on a baking sheet until solid. Once frozen, transfer them to a freezer-safe bag. When a cookie craving strikes, bake them directly from frozen, adding an extra 1-3 minutes to the baking time.
Frequently Asked Questions (FAQs) About Chocolate Stuffed Peanut Butter Cookies
- Can I use other types of chocolate besides Hershey’s Drops?
- Absolutely! While Hershey’s Drops are excellent for their size and meltability, you can get creative. Small chocolate candies, a square from your favorite chocolate bar, or even mini chocolate truffles can be used. Just ensure they are small enough to be fully encased within the cookie dough to prevent them from oozing out excessively.
- My cookies spread too much while baking. What went wrong?
- Several factors can cause cookies to spread more than desired. Ensure your butter is softened but not melted or greasy. Chilling the dough for 15-30 minutes before stuffing and baking can also help firm it up, preventing excessive spreading. An inaccurate oven temperature (too low) can also contribute, so consider using an oven thermometer to ensure your oven is truly at 375°F (190°C). Lastly, precise flour measurement is crucial; too little flour can result in a wetter dough that spreads more.
- How do I prevent the chocolate filling from oozing out of the cookies?
- The most important step is to ensure the chocolate drop is completely enclosed within the cookie dough. Take your time when forming the ball, pinching all seams firmly closed. Gently rolling the ball between your palms after stuffing helps to create a smooth, sealed surface. If your dough is particularly warm or sticky, a quick chill in the fridge can make it easier to work with and improve the seal.
- Can I prepare these cookies in advance?
- Yes, you can! You can prepare the dough, stuff the chocolate, and form the balls. Then, place the raw dough balls on a baking sheet and freeze until solid. Once frozen, transfer them to an airtight freezer-safe bag or container and store for up to one month. When you’re ready to bake, place the frozen dough balls directly on your prepared baking sheet and bake, adding an extra 1-3 minutes to the suggested baking time.
- Why are my peanut butter cookies dry or crumbly?
- The most common reason for dry or crumbly cookies is overbaking. Peanut butter cookies should be removed from the oven when their edges are just set and lightly golden, but their centers still look soft. They will continue to cook and firm up as they cool on the baking sheet. Using room-temperature ingredients and being careful not to overmix the dough (which can develop gluten and make cookies tough) also contribute to a wonderfully moist and chewy cookie.
These Chocolate Stuffed Peanut Butter Cookies are more than just a simple dessert; they’re a delightful journey for your taste buds, combining the timeless appeal of peanut butter and chocolate with an exciting, melt-in-your-mouth surprise. Whether you’re baking for a special gathering, a holiday cookie exchange, or simply treating yourself and your loved ones, this recipe is guaranteed to bring smiles and satisfy even the most intense sweet cravings. So, gather your ingredients, follow these simple steps, and get ready to experience a truly irresistible homemade cookie. Happy baking!
