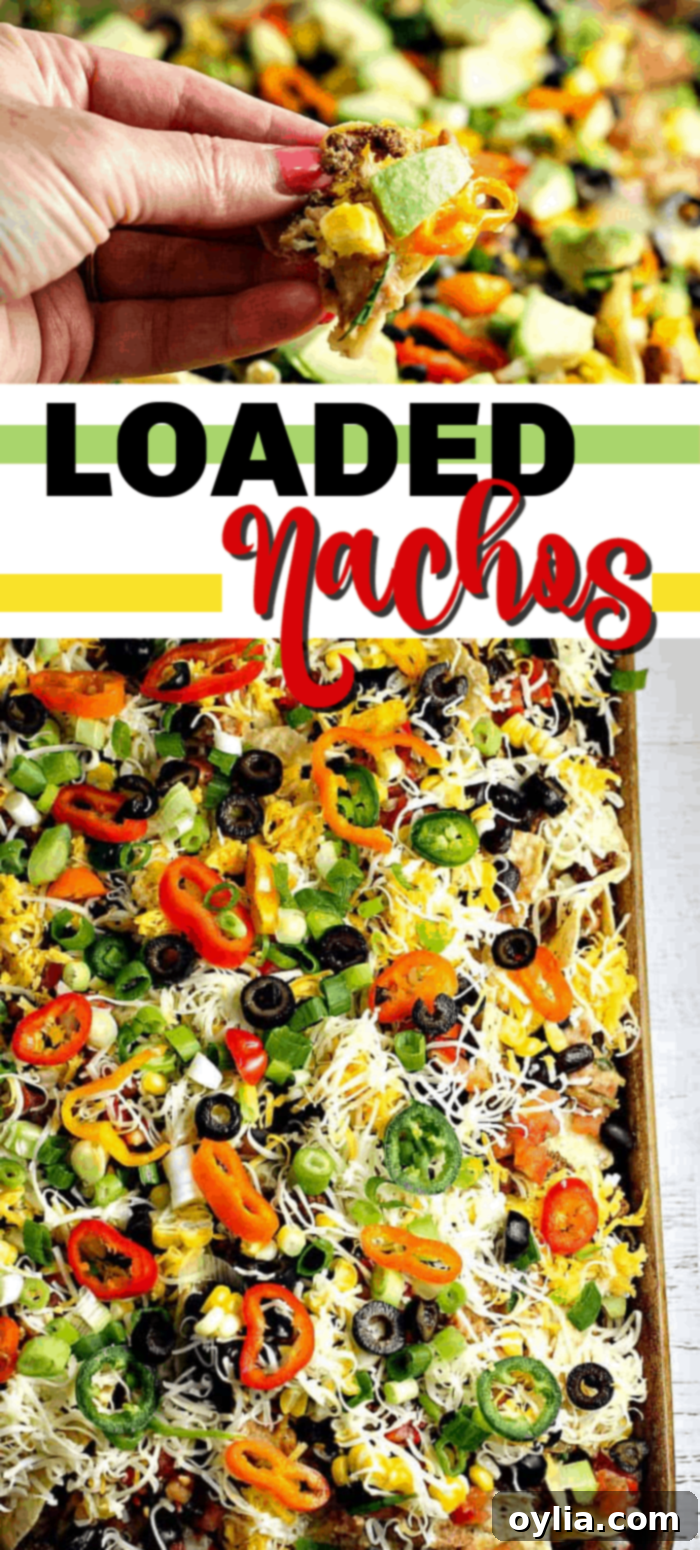
Ultimate Loaded Nachos Recipe: Your Go-To for Game Day & Beyond
Here on our blog, we have a deep appreciation for nachos, and not just any nachos – we’re talking about show-stopping, flavor-packed platters that make any gathering instantly better. From gourmet filet mignon steak nachos to our incredibly simple and satisfying rotisserie chicken nachos, we’ve explored the delicious versatility of this beloved dish. Today, we’re diving into a classic that never disappoints: a generous plate of Loaded Nachos. This isn’t just a snack; it’s a popular game day recipe, celebrated for being packed with delicious ingredients, hearty goodness, and an irresistible blanket of cheesy delight!
Get ready to transform your kitchen into a nacho assembly line and pile a platter high with your favorite fresh nacho ingredients using this incredibly easy-to-follow recipe. Whether you’re feeding a hungry crowd or simply indulging in a fantastic family meal, these loaded nachos are guaranteed to be a hit. We’ll guide you through creating layers of savory goodness, ensuring every single chip gets its fair share of flavor.

The Irresistible Allure of Loaded Nachos: Your Ultimate Game Day Essential
Football season is officially in full swing, and you know what that means for us food lovers? It’s prime time for fantastic game day appetizers! I don’t know about you, but this time of year brings out my ultimate craving for all sorts of party food munchies. Seriously, I just can’t get enough of them! There’s something undeniably special about gathering with friends and family, the excitement of the game building, and having a spread of comforting, shareable dishes.
Truth be told, I often find myself skipping a traditional dinner entirely and just feasting on appetizers instead. In this particular case, it was a mountain of these incredible Loaded Nachos that took center stage. This is exactly what my family and I did just the other night while we were engrossed in a thrilling college football game. The ease of preparation, combined with the sheer joy of digging into a plate piled high with cheesy, meaty, and vibrant toppings, makes nachos an absolute winner for any casual get-together.

These nachos were an enormous hit with my kids and husband! The best part? They are incredibly straightforward to make, coming together in under 30 minutes from start to finish. This makes them an ideal choice for last-minute entertaining or when you simply need a quick, delicious meal that everyone will love. Forget complicated recipes; these easy loaded nachos deliver maximum flavor with minimal effort, making them a true culinary MVP for any home cook.
There are affiliate links in this post. That means if you buy something from that link, I will earn a small commission, but it won’t cost you anything additional. We only recommend products we genuinely love and use in our own kitchen.
Crafting the Perfect Platter: Essential Ingredients for Delicious Loaded Nachos
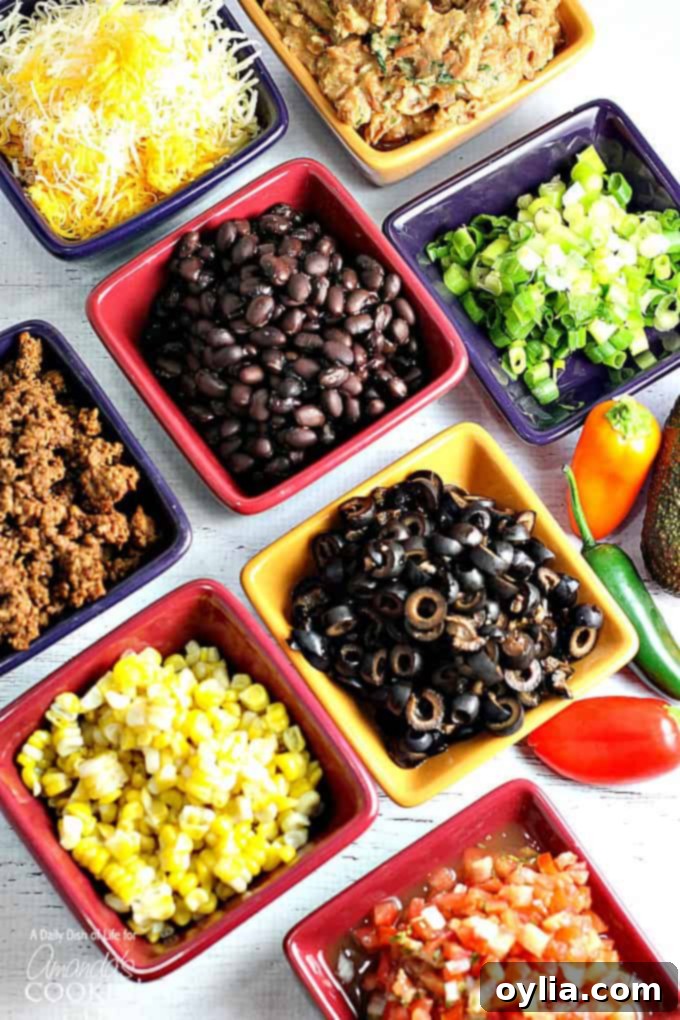
To create these show-stopping loaded nachos, you’ll need a selection of fresh, flavorful ingredients. The beauty of this recipe lies in its versatility, allowing you to tailor it to your family’s preferences. Here’s what we recommend for an explosion of taste and texture:
- 1 party size bag of sturdy tortilla chips (the foundation of your nacho masterpiece!)
- 1 lb lean ground beef (for that savory, meaty core)
- 2 tablespoons homemade taco seasoning (our secret to authentic flavor, though store-bought works too!)
- 1 cup refried beans, preferably homemade (for creamy texture and added depth)
- 1 15.5 oz can black beans, drained and rinsed (adds protein and earthy notes)
- 2 cups shredded cheese, a delightful mix of sharp cheddar and creamy Monterey Jack (the ultimate melting duo)
- 2 2.25 oz cans of sliced black olives, drained (for a briny burst)
- 1 cup corn, fresh cut from the cob, or frozen and thawed (for sweetness and crunch)
- 3 green onions, chopped, including the green parts (for a fresh, mild oniony bite and vibrant color)
- Sliced jalapeño peppers (adjust to your spice preference), and mini yellow, orange, and red peppers, sliced into rounds (for visual appeal and a gentle pepper flavor)
- 2 cups chunky salsa or pico de gallo, with any excess liquid drained (for fresh, zesty flavor)
- 1 avocado, perfectly ripe and chopped (for creamy richness and healthy fats)
These ingredients combine to create a symphony of flavors and textures, ensuring every bite of your homemade loaded nachos is a delightful experience. Don’t be afraid to adjust quantities or add your own favorite toppings!
Essential Kitchen Tools for Nacho Perfection
Having the right tools can make all the difference in preparing your loaded nachos efficiently and successfully. Here are a few items you’ll find particularly helpful in your kitchen:
- Cheese grater: For freshly shredded cheese that melts beautifully and evenly. Pre-shredded cheese often contains anti-caking agents that can hinder melting.
- Parchment paper: An absolute lifesaver for easy cleanup and preventing your precious nachos from sticking to the pan.
- Stoneware baking sheet: Provides even heat distribution, ensuring your chips get perfectly crispy without burning and your cheese melts consistently. A regular baking sheet works just fine too!
- Skillet: Essential for browning your ground beef and simmering it with the taco seasoning.
These tools, while simple, contribute significantly to the overall success and enjoyment of making your homemade loaded nachos. Gather them up, and let’s get cooking!
SCROLL DOWN FOR THE PRINTABLE VERSION OF THIS RECIPE
Building Your Masterpiece: A Step-by-Step Guide to Our Loaded Nachos
Our loaded nachos are designed to be an experience, covered with a delightful array of toppings – truly everything but the kitchen sink! The key to truly “loaded” nachos is thoughtful layering, ensuring every single chip receives a generous coating of deliciousness. I start by carefully spreading out the first layer of sturdy tortilla chips onto my prepared baking sheet. This forms the essential base for all the flavor to come.
Next, I layer each section of tortilla chips with the savory taco meat, followed by a dollop of creamy homemade refried beans, and a sprinkling of drained black beans. Then comes the star: a generous mix of shredded Cheddar and Monterey Jack cheeses, ensuring gooey, melty perfection. To add bursts of briny flavor, I scatter sliced black olives and sweet corn over the cheese. This first foundational layer is crucial for making sure the flavor is distributed throughout.
After the first layer is complete, I add another layer of tortilla chips and repeat the process with the remaining taco meat, beans, cheese, olives, and corn. This double-layering technique is what truly makes these nachos “loaded” and prevents any sad, plain chips at the bottom. Before placing it into the oven, I top everything with thinly sliced jalapeño peppers (for a gentle kick), colorful mini pepper rounds (for visual appeal and a mild sweetness), and freshly chopped green onions. The vibrant colors alone make them an appetizing sight!
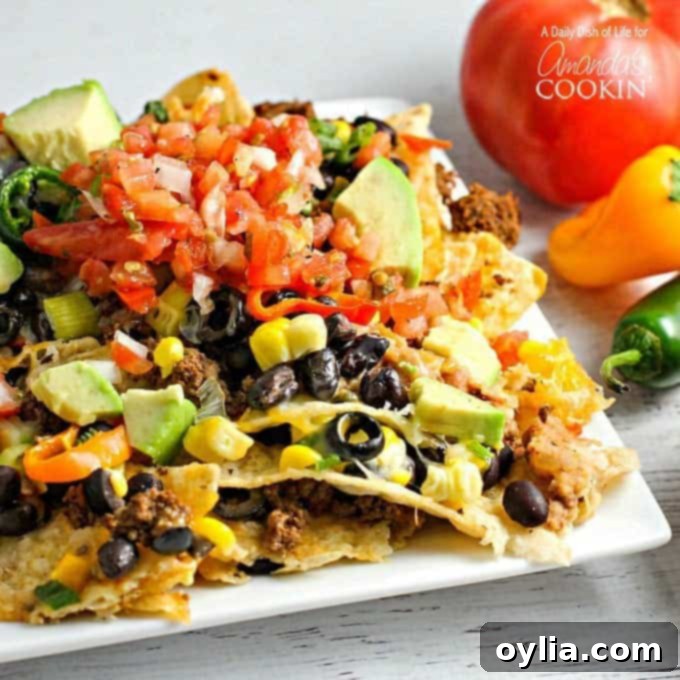
Once baked to golden, cheesy perfection, the nachos are pulled from the oven. The final touches are added immediately: generous scoops of well-drained chunky salsa or pico de gallo, and creamy avocado chunks. Adding these fresh, cold toppings after baking helps them retain their texture and vibrant flavor, providing a wonderful contrast to the warm, gooey base. This method guarantees a harmonious blend of hot and cold, savory and fresh, in every single bite.

While convenience certainly has its place, using homemade versions of components like taco spice seasoning and refried beans can truly elevate your nachos. Of course, you can absolutely opt for one of those pre-made taco seasoning packets or canned refried beans for a quicker preparation. However, in my opinion, making them from scratch yields a much healthier, fresher, and undeniably tastier result. Homemade seasoning allows you to control the salt and spice levels, and homemade refried beans have a creamier texture and richer flavor that really shines through in these loaded nachos.
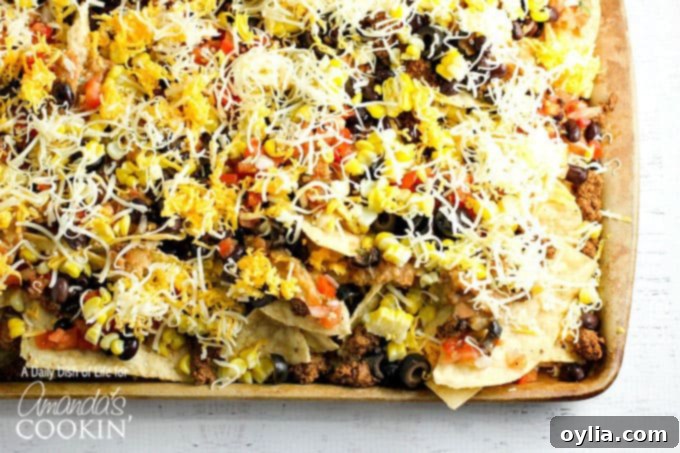
Here’s a sneak peek at what your baking sheet will look like after the first crucial layer of chips and toppings, ready for its second round of deliciousness.
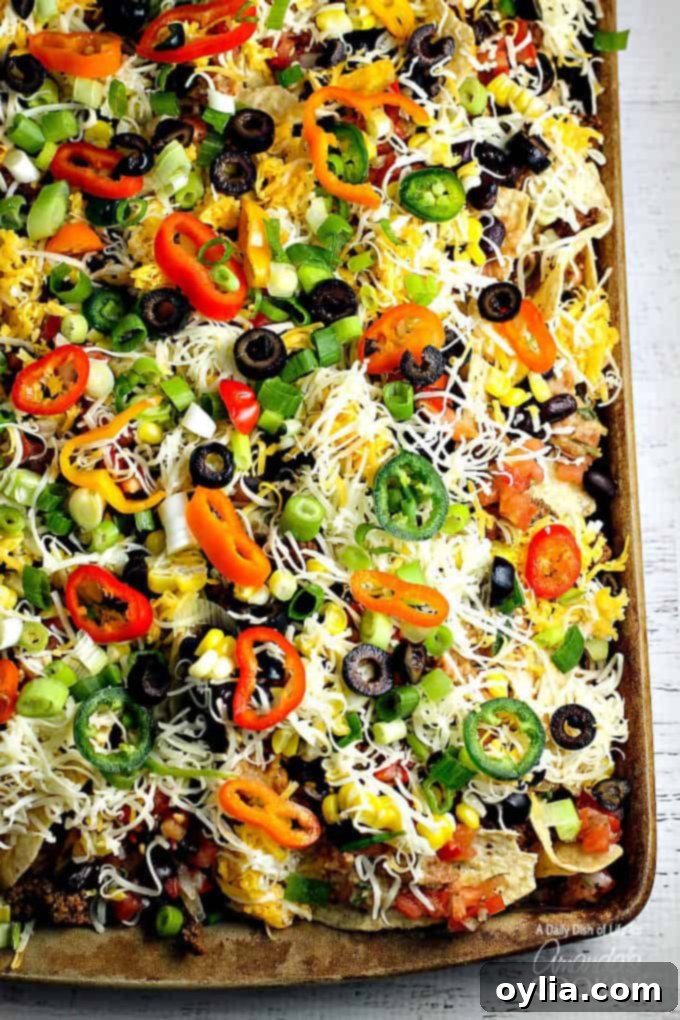
And here’s the tray, fully loaded and just about ready to go into the oven for that magical cheese-melting moment!
Don’t they look absolutely irresistible?! These Loaded Nachos are more than just a dish; they’re an experience, and they are sure to be a massive game day party favorite, disappearing almost as fast as you can make them!
Customizing Your Loaded Nachos: Endless Possibilities for Every Palate
One of the greatest joys of making nachos is how incredibly customizable they are. While our recipe for ground beef loaded nachos is a fan favorite, don’t hesitate to get creative and make them your own. Here are some ideas to inspire your next batch:
Protein Power-Ups:
- Rotisserie Chicken: For an even quicker option, shredded rotisserie chicken works wonderfully. We even have a dedicated recipe for rotisserie chicken nachos that you’ll love!
- Pulled Pork: Leftover pulled pork, especially with a smoky or slightly sweet BBQ sauce, makes for incredibly flavorful nachos.
- Steak: Thinly sliced, marinated steak (like our filet mignon version!) or even leftover grilled steak can take your nachos to a gourmet level.
- Vegetarian Options: For a meatless marvel, double up on the beans (black, pinto, or kidney), add sautéed mushrooms, or include a plant-based ground “meat” substitute.
Veggie Varieties:
Beyond the classic corn, olives, and peppers, consider adding:
- Diced tomatoes or fresh cherry tomatoes, halved.
- Sautéed bell peppers and onions for extra sweetness and depth.
- Pickled red onions for a tangy kick.
- Radishes, thinly sliced, for a peppery crunch.
Cheese Combinations:
While cheddar and Monterey Jack are a winning pair, explore other cheeses like pepper jack for a spicy kick, a blend of Mexican cheeses, or even a creamy queso fresco crumbled on top after baking.
Saucy Surprises:
Finish your nachos with a dollop of:
- Sour cream or Greek yogurt for a creamy, tangy contrast.
- Freshly made guacamole or a simple slice of avocado.
- A drizzle of hot sauce or a swirl of crema for an authentic touch.
- A sprinkle of fresh cilantro for herbaceous brightness.
The possibilities are truly endless, making loaded nachos a versatile dish that can cater to any craving or dietary preference.
Expert Tips for the Best Loaded Nachos Every Time
Achieving nacho perfection involves a few simple tricks that can elevate your dish from good to absolutely amazing. Keep these tips in mind for a consistently delicious outcome:
- Layering is Key: Don’t just dump all your toppings! Layering ensures that every chip has a chance to soak up flavor and cheese. Start with a thin layer of chips, then toppings, then more chips, and more toppings. This prevents the dreaded “bare chip” syndrome at the bottom of the pile.
- Preventing Soggy Chips: Use sturdy tortilla chips that can hold up to the weight of the toppings. Also, make sure your ground beef is well-drained, and any wet toppings like salsa or pico de gallo have excess liquid removed before adding them. Adding fresh, wet toppings *after* baking helps keep your chips crispy longer.
- Even Cheese Melt: Shred your own cheese if possible. Pre-shredded cheeses often contain anti-caking agents that can make them melt less smoothly. Distribute the cheese evenly over your layers to ensure maximum meltiness.
- Serve Immediately: Nachos are best enjoyed straight out of the oven when the cheese is perfectly gooey and the chips are warm and crisp.
- The Right Baking Sheet: A large baking sheet or sheet pan is ideal, allowing you to spread the chips in a single, or at most double, layer for even baking and melting. Using parchment paper, as mentioned, is a game-changer for cleanup.
- Balance Flavors and Textures: Aim for a variety of textures – crispy chips, creamy beans, tender meat, crunchy vegetables. And don’t forget the balance of flavors – savory, spicy, tangy, and fresh.
With these tips in your arsenal, you’ll be making the best loaded nachos that will impress everyone at your next get-together. So good!
More Great Game Day Recipes You’re Sure to Enjoy
Looking to complete your game day spread or just explore more delicious appetizers? These recipes pair perfectly with our Loaded Nachos and are guaranteed to be crowd-pleasers:
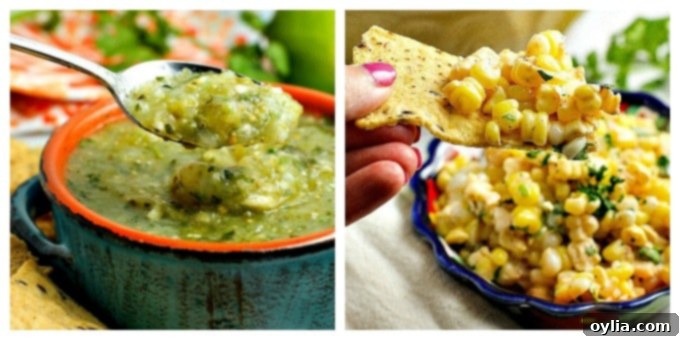
Salsa Verde: This tangy Salsa Verde is incredibly versatile. It’s fantastic with chips and nachos, but also adds a vibrant kick to burritos and enchiladas!
Mexican Corn Salad: An easy and delicious side dish or topping, this 15-minute corn salad can be enjoyed with chips or as a refreshing accompaniment to any meal.
Taco Pasta Salad: A truly easy crowd favorite! This vibrant and flavorful pasta salad is perfect for a potluck, BBQ, or any gathering where you need a dish that disappears fast.
Loaded Nachos
IMPORTANT – There are often Frequently Asked Questions within the blog post that you may find helpful. Simply scroll back up to read them!
Print It
Pin It
Rate It
Save ItSaved!
Ingredients
- 1 party size bag of tortilla chips
- 1 lb hamburger meat
- 2 tablespoons homemade taco seasoning
- ⅓ – ½ cup water
- 1 cup refried beans preferably homemade
- 1 15.5 oz can black beans drained and rinsed
- 2 cups shredded cheese a mix of Cheddar and Monterey Jack
- 2 2.25 cans of sliced black olives drained
- 1 cup corn cut straight from the cob, or frozen, thawed
- 3 green onions chopped, for garnish
- jalapeño mixed yellow, orange, red mini peppers, sliced in rounds for garnish
- 2 cups chunky salsa or pico de gallo drained of excess liquid
- 1 avocado cut into chunks
Instructions
-
Preheat oven to 400 degrees Fahrenheit (200°C). This ensures your chips get crispy and cheese melts quickly.
-
In a large skillet, brown the ground beef over medium-high heat. Break it up with a spoon as it cooks. Once fully cooked, drain any excess fat thoroughly. This prevents soggy nachos!
-
Return the drained ground beef to the skillet. Add your homemade taco seasoning and the specified amount of water. Bring the mixture to a gentle boil, then reduce heat and simmer for about two minutes, allowing the flavors to meld and the sauce to slightly thicken.
-
Line your stoneware baking sheet (or any large baking sheet) with parchment paper. This will make cleanup a breeze!
-
Spread out half of your party-size bag of tortilla chips onto the prepared baking sheet in a single layer. Try to ensure they slightly overlap to create a sturdy foundation.
-
Evenly distribute half of the taco meat, refried beans (dolloping small amounts over the chips), black beans, shredded cheese, sliced olives, and corn over this first layer of chips. This ensures every bite is flavorful.
-
Repeat the layering process with the remaining tortilla chips and all remaining toppings (taco meat, refried beans, black beans, cheese, olives, and corn). Make sure the final layer of cheese is on top for optimal melting.
-
Finally, top the entire platter with the chopped green onions, sliced jalapeño peppers, and colorful mixed mini pepper rounds. These will soften slightly in the oven and add a beautiful touch.
-
Place the baking sheet into your preheated oven and cook for about 10 minutes, or until the cheese is beautifully melted, bubbly, and slightly golden, and the chips are warmed through. Keep a close eye on them to prevent burning.
-
Once out of the oven, immediately top the hot nachos with the drained chunky salsa (or pico de gallo) and the freshly chopped avocado chunks. This adds a refreshing contrast to the warm, cheesy base.
-
Serve your magnificent loaded nachos warm, straight from the oven, and watch them disappear! Provide extra salsa, sour cream, or guacamole on the side for dipping if desired.
The recipes on this blog are tested with a conventional gas oven and gas stovetop. It’s important to note that some ovens, especially as they age, can cook and bake inconsistently. Using an inexpensive oven thermometer can assure you that your oven is truly heating to the proper temperature. If you use a toaster oven or countertop oven, please keep in mind that they may not distribute heat the same as a conventional full sized oven and you may need to adjust your cooking/baking times. In the case of recipes made with a pressure cooker, air fryer, slow cooker, or other appliance, a link to the appliances we use is listed within each respective recipe. For baking recipes where measurements are given by weight, please note that results may not be the same if cups are used instead, and we can’t guarantee success with that method.
