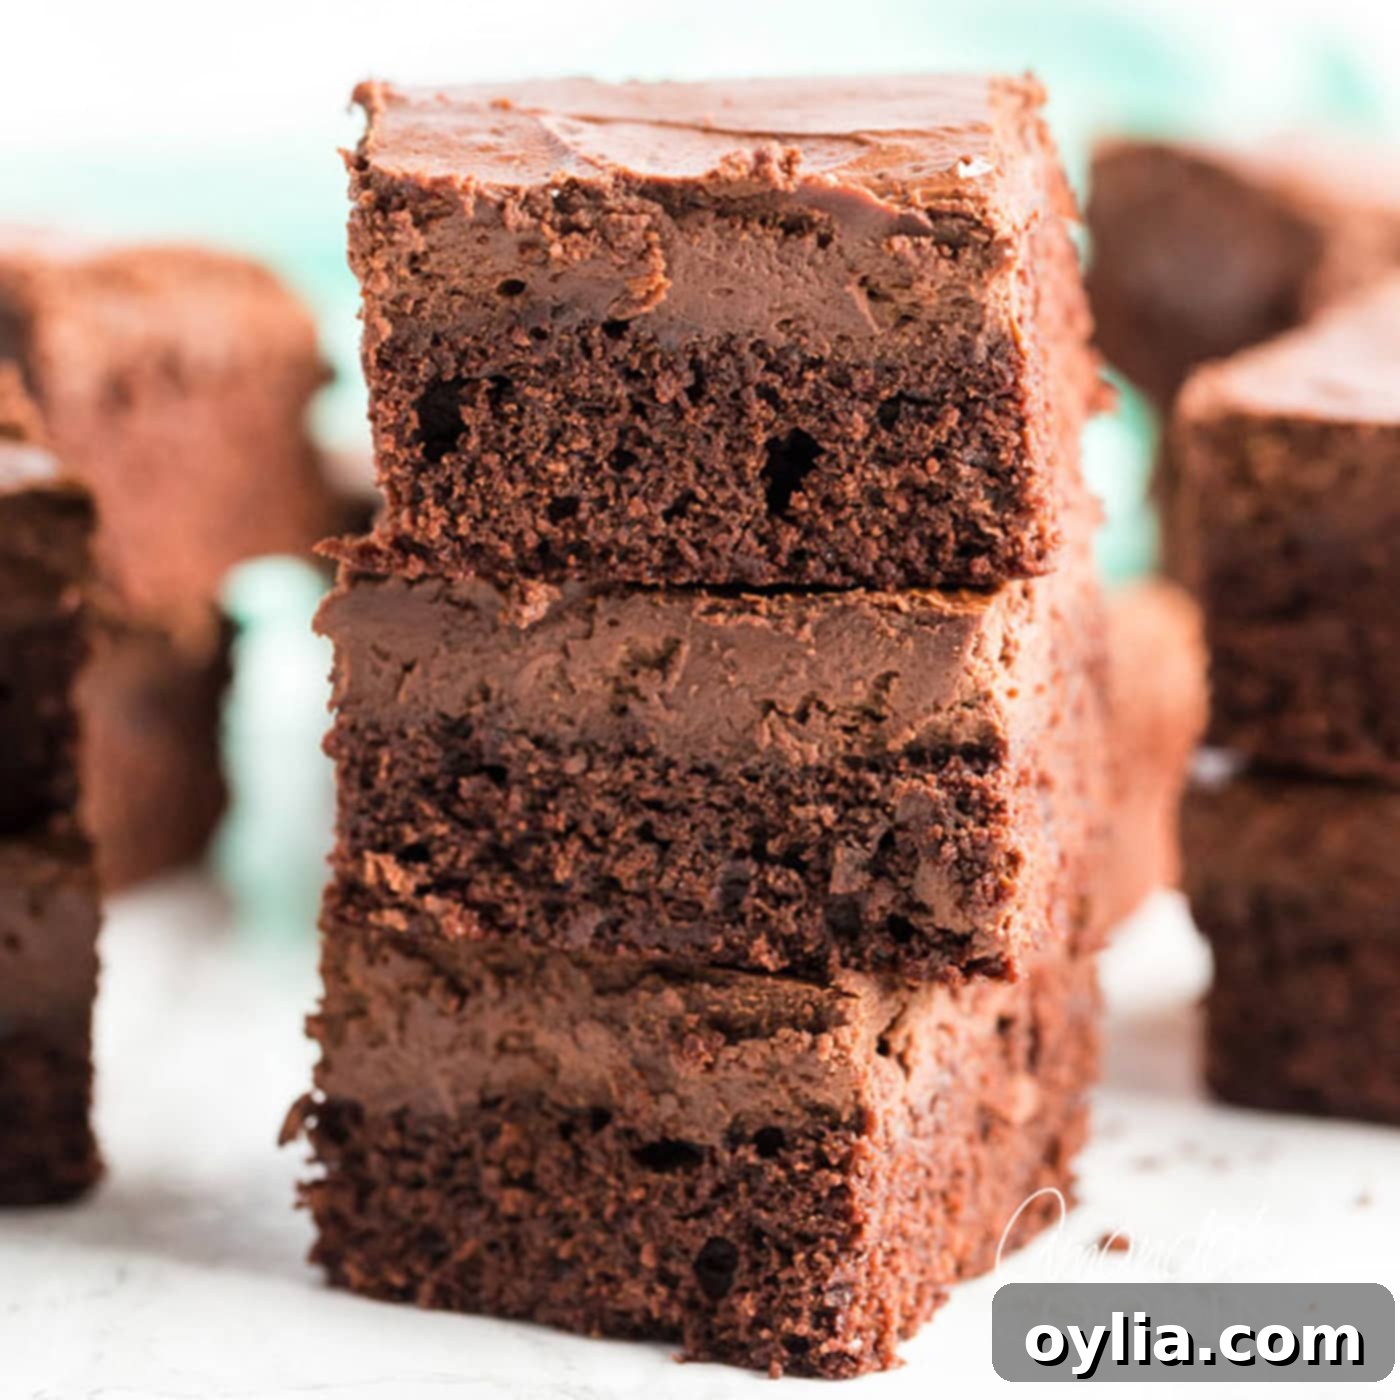
Irresistible Chocolate Cheesecake Brownies: The Ultimate Decadent Dessert Recipe
Prepare yourself for a culinary journey into pure indulgence with these truly irresistible Chocolate Cheesecake Brownies. Imagine the perfect harmony of a rich, fudgy brownie base crowned with a smooth, velvety chocolate-infused cheesecake layer. This isn’t just a dessert; it’s an experience. A match made in chocolate lover’s heaven, these brownies are so profoundly decadent, you’ll be eager to sink your teeth into them.
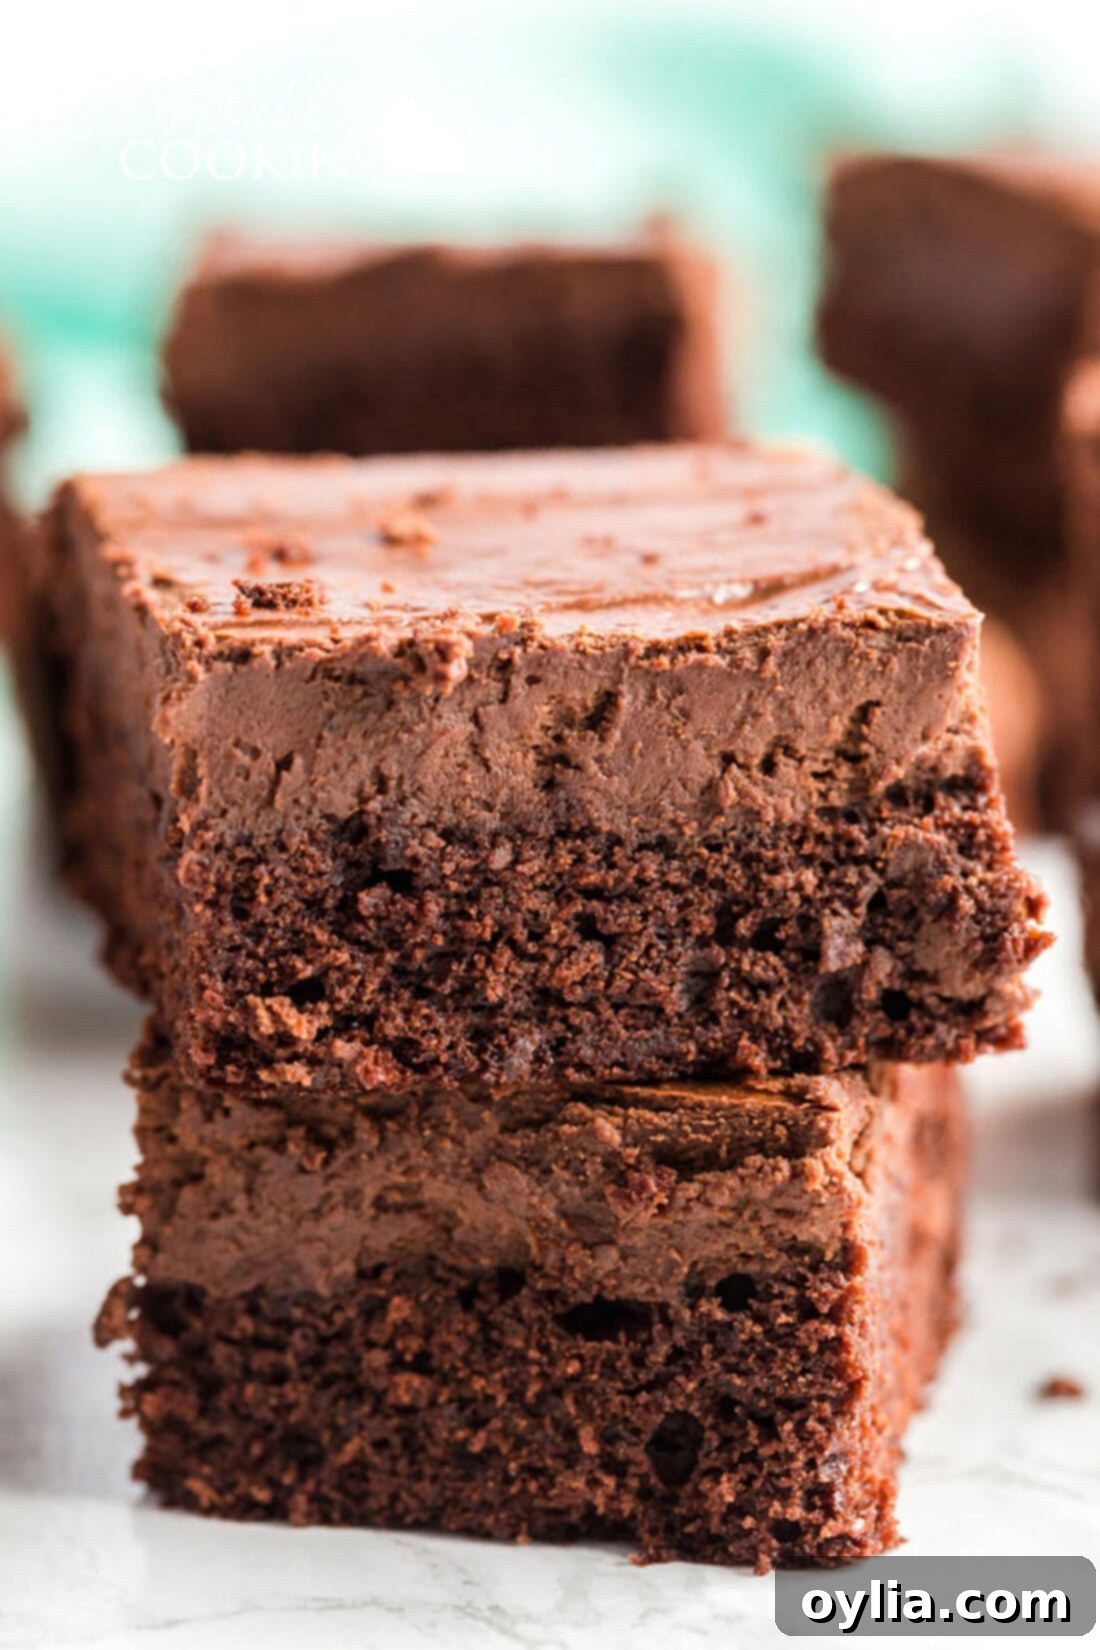
Whether you’re looking for an elegant grand finale to a dinner party or simply craving a marvelous sweet treat to share with your family, this recipe delivers on all fronts. The combination of intense chocolate and tangy cream cheese creates a dessert that’s both sophisticated and comforting. Once you try them, these Chocolate Cheesecake Brownies are sure to become a cherished addition to your baking repertoire.
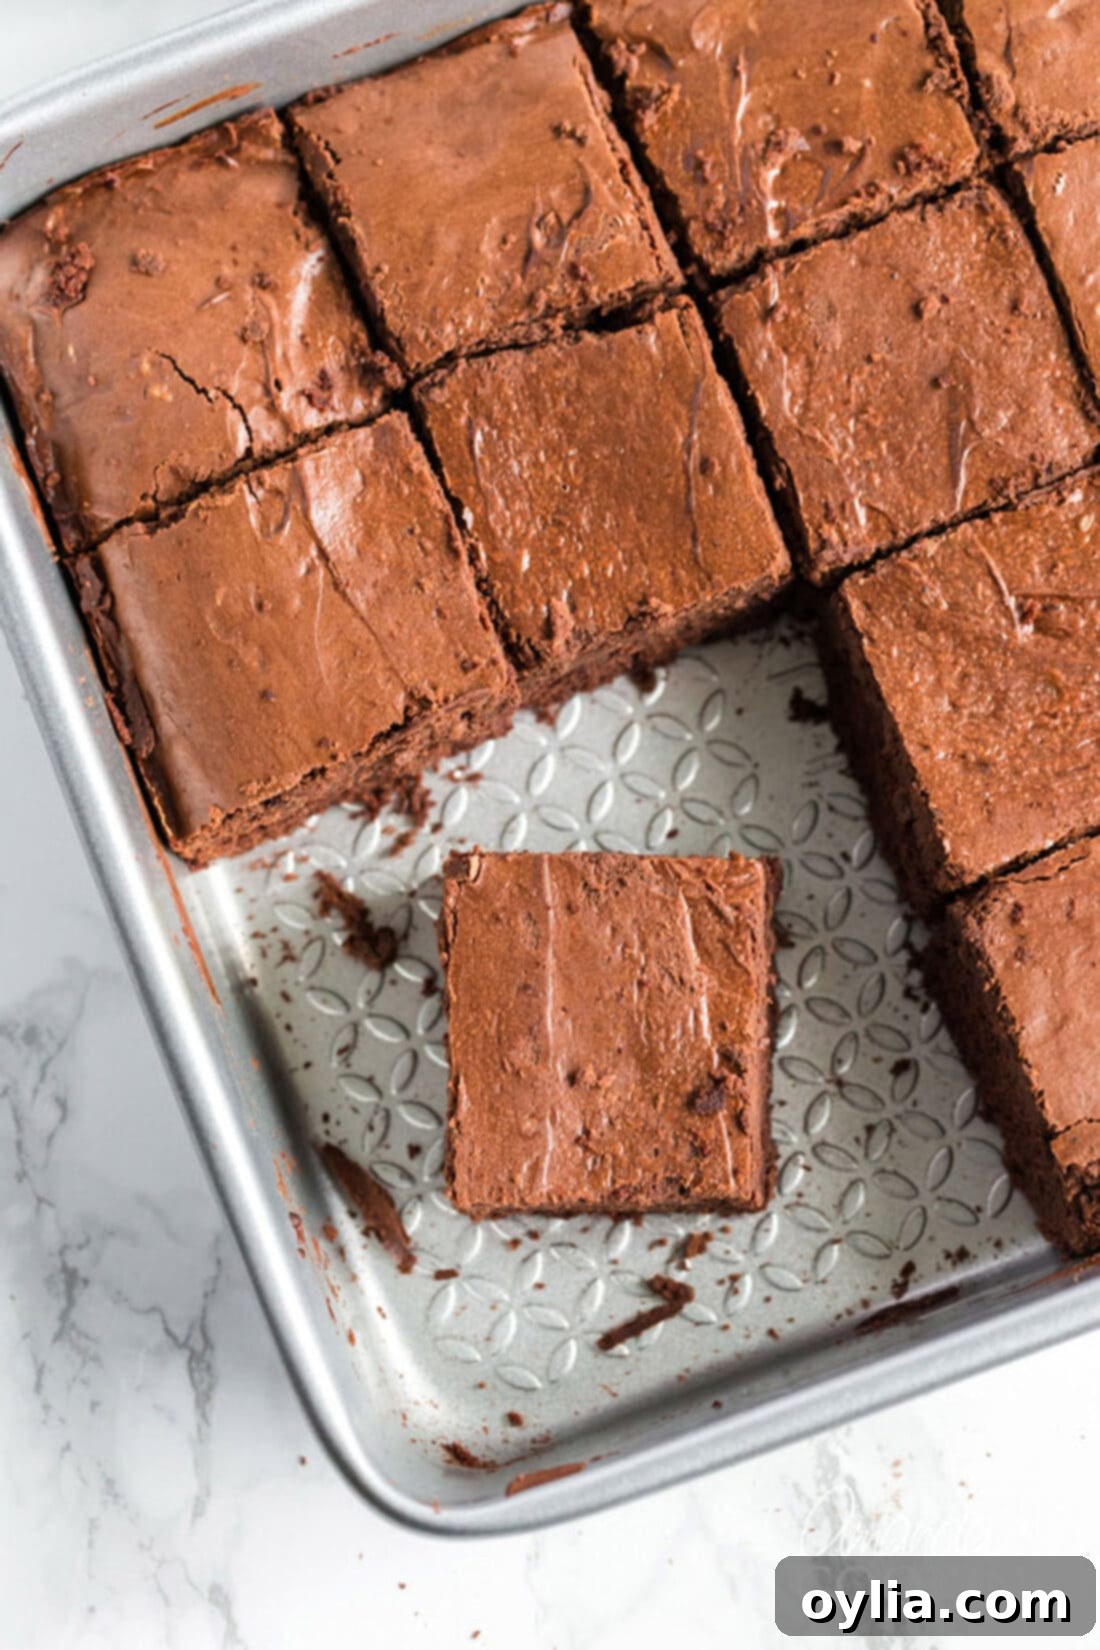
Mastering the Ingredients: Keys to Cheesecake Brownie Perfection
Achieving the perfect texture and flavor for these Chocolate Cheesecake Brownies hinges on paying close attention to your ingredients and how you handle them. I’ve meticulously tested this recipe multiple times to guarantee an amazing outcome every time. Please read through these important notes, and for the most precise measurements and detailed instructions, refer to the recipe card below. Following these tips will ensure your baking success and result in brownies that are truly outstanding.
For the Fudgy Brownie Layer:
- Unsalted Butter: Opt for unsalted butter to have full control over the salt content in your recipe. Margarine is not recommended as it has a different fat content and water composition, which will negatively impact the texture and flavor of your brownies. Butter provides that rich, classic fudgy quality.
- Packed Brown Sugar: When measuring brown sugar, it is crucial to pack it firmly into your measuring cup. This ensures you get the correct amount, contributing to the brownies’ signature moistness and dense texture. Unpacked brown sugar will lead to a dry brownie.
- Baking Cocoa: Precision is key here. Use the “scoop and sweep” method – scoop the cocoa into your measuring cup and then level it off with a straight edge. Over-measuring cocoa can lead to dry, crumbly brownies. For the best and most consistent results, I highly recommend weighing your ingredients using a kitchen scale, especially the cocoa. Exact weights are provided in the printable recipe card.
- Large Eggs: The size of your eggs matters. This recipe is specifically formulated for large eggs. Using extra-large or medium eggs will throw off the delicate balance of moisture and binders, potentially affecting the final consistency of your brownies.
- Pure Vanilla Extract: While imitation vanilla extract works, pure vanilla extract offers a much richer, more authentic flavor profile that elevates the overall taste of your brownies. If you prefer the distinct flavor of imitation vanilla, feel free to use it, but understand it will impart a different nuance to the dessert.
- All-Purpose Flour: Similar to cocoa, measure your flour using the “scoop and sweep” method. Even better, weigh your flour as specified in the printable recipe for maximum accuracy. Too much flour will result in a cakey, rather than fudgy, brownie.
- Regular Table Salt & Double-Acting Baking Powder: These leavening and seasoning agents are essential. Salt balances the sweetness and enhances the chocolate flavor, while baking powder provides just enough lift without making the brownies overly cakey.
For the Creamy Cheesecake Layer:
- Two Types of Chocolate: This recipe utilizes both unsweetened chocolate and semisweet chocolate. The unsweetened chocolate provides a deep, intense chocolate flavor, while the semisweet chocolate adds a touch of sweetness and rounds out the chocolate profile. I find brands like Ghirardelli or Baker’s chocolate deliver excellent results due to their quality and consistent melting properties.
- Very Soft Cream Cheese: This is a non-negotiable step for a perfectly smooth cheesecake layer. Your cream cheese must be very soft, but never try to soften it in the microwave, as this can alter its texture and make it lumpy. For optimal results, remove the cream cheese from the refrigerator approximately 40 minutes before you plan to bake. Unwrap it and cut it into about 8 smaller pieces, spreading them out on a plate so they come to room temperature evenly and quickly.
- Large Egg, Granulated Sugar, Pure Vanilla Extract & Salt: These standard cheesecake ingredients contribute to the creamy texture, balanced sweetness, and enhanced flavor of the cheesecake layer. Ensure your egg is large for consistent results.
Essential Tools for Baking Success
Having the right kitchen tools can make the baking process smoother and more enjoyable. Here are a few indispensable items that will assist you in creating these incredible Chocolate Cheesecake Brownies:
- 9×9 baking dish: The perfect size for these layered brownies, ensuring even baking.
- Food processor: Essential for achieving that silky-smooth cream cheese mixture without any lumps.
- Wooden spoon: Ideal for mixing the brownie batter by hand, preventing overmixing.
- Cooling rack: Crucial for allowing the brownies to cool evenly and completely, preventing a soggy bottom.
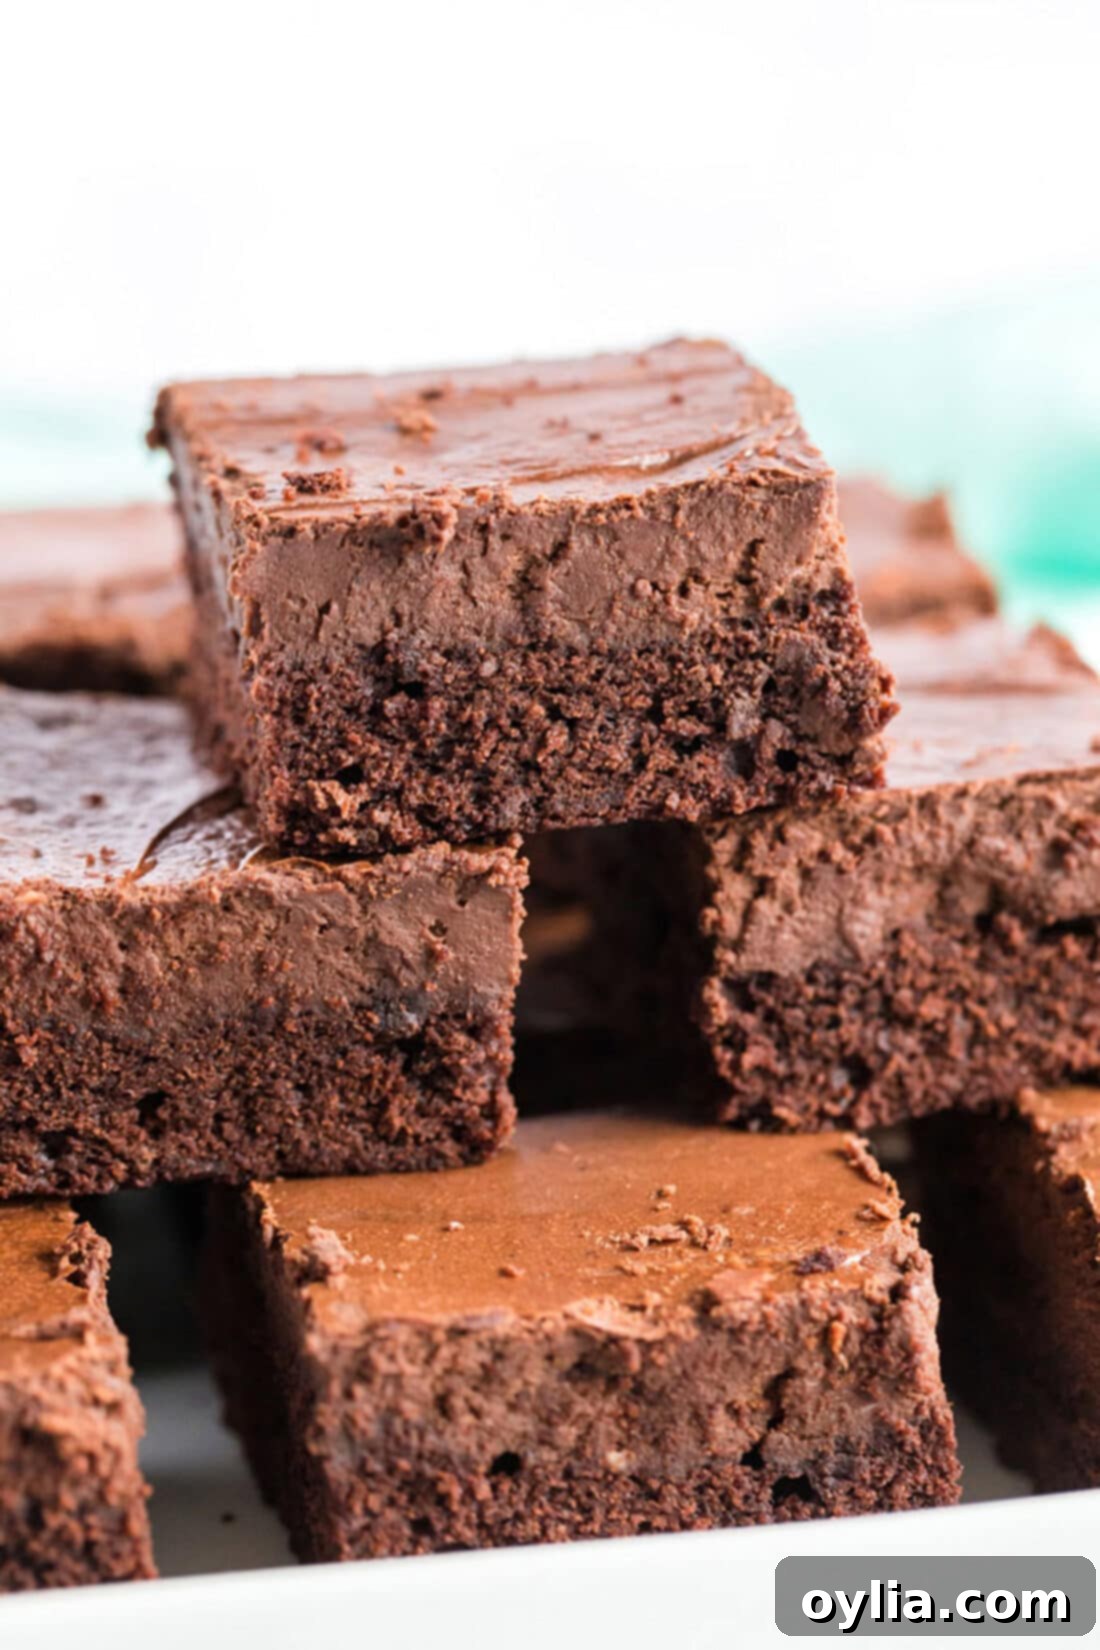
How to Make the Perfect Chocolate Cheesecake Brownies
Crafting these delectable brownies is simpler than you might think! Just follow these step-by-step instructions carefully, and you’ll be rewarded with a dessert that looks as impressive as it tastes.
- Begin by preheating your oven to 350°F (175°C). This ensures the oven is at the correct temperature for even baking from the moment your pan goes in. Thoroughly grease a 9×9 inch baking pan to prevent sticking. You can use butter or a non-stick cooking spray.
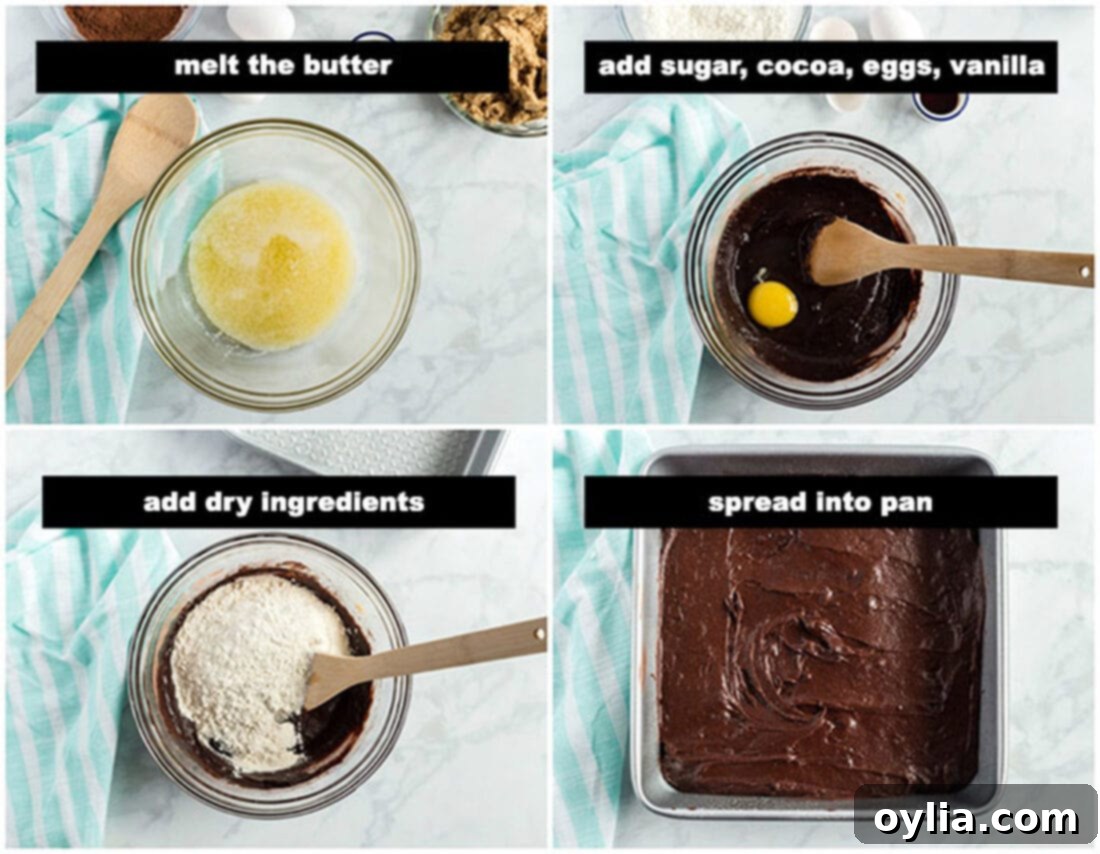
- Prepare the Brownie Layer: In a medium saucepan or microwave-safe bowl, melt the butter. Once melted, remove from heat and, using a sturdy wooden spoon, stir in the packed brown sugar and baking cocoa until well combined. The mixture will be thick and glossy. Add the eggs, one at a time, mixing thoroughly after each addition until fully incorporated. This ensures a smooth, emulsified batter. Stir in the pure vanilla extract.
- In a separate, smaller bowl, whisk together the all-purpose flour, salt, and baking powder. Gradually add these dry ingredients to the butter mixture, mixing just until combined. Be careful not to overmix, as this can develop the gluten in the flour and lead to tough brownies. Spread this brownie batter evenly into your prepared 9×9 baking dish. Set this aside while you prepare the cheesecake layer.
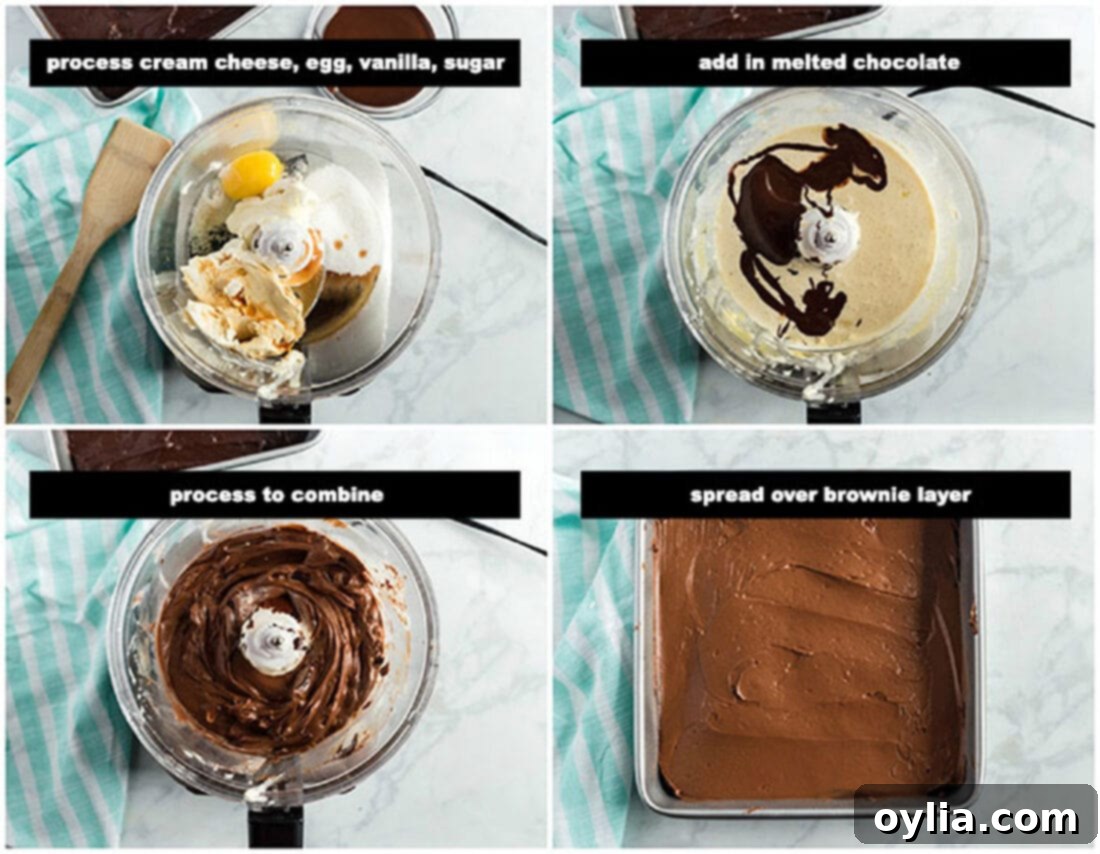
- Prepare the Cheesecake Layer: In a microwave-safe bowl, melt the unsweetened and semisweet chocolate in 30-second intervals, stirring in between, until smooth. Be careful not to scorch the chocolate. In a food processor, combine the very soft cream cheese (remember, no microwave!), the large egg, granulated sugar, pure vanilla extract, and salt. Process until the mixture is completely smooth and creamy, scraping down the sides as needed. Pour the slightly cooled melted chocolate into the food processor and process again until everything is just combined and the mixture is uniform in color.
- Carefully spread the chocolate cheesecake mixture evenly over the brownie layer in the baking dish. Gently swirl it if you desire a marble effect, but a simple, even layer is perfectly fine.
- Bake to Perfection: Place the baking dish in your preheated oven and bake for approximately 40-45 minutes. Baking times can vary, so keep an eye on them. To test for doneness, insert a toothpick into the center; it should come out with only a few moist crumbs attached, but not wet batter. Avoid overbaking, as this can dry out both layers.
- Cooling and Storing: Once baked, remove the brownies from the oven and let them cool completely on a wire rack. This is a crucial step; cutting warm brownies will result in a messy, crumbly outcome. Cooling allows the layers to set properly. Store the cooled brownies in a sealed, airtight container. For optimal freshness and texture, refrigeration is preferred. These brownies are delightful whether enjoyed chilled from the fridge or at room temperature!
The Art of Flavor Blending: Chocolate and Cheesecake
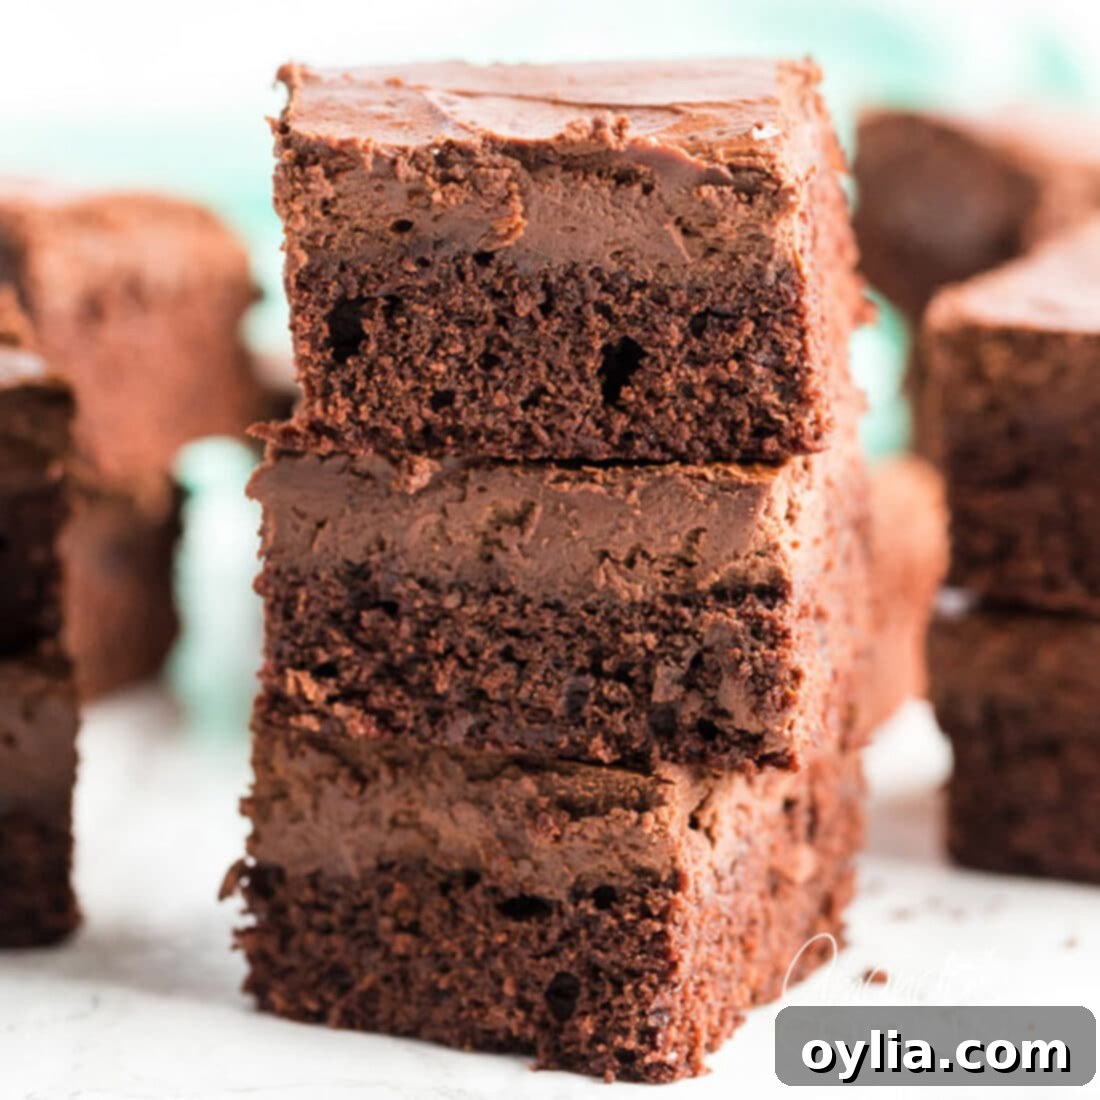
The magic of these brownies lies in the exquisite marriage of two beloved desserts. The deep, intense bitterness of quality cocoa and unsweetened chocolate in the brownie layer is perfectly balanced by the sweet, tangy, and creamy notes of the chocolate cheesecake. This creates a symphony of textures and flavors that dance on your palate – the satisfying chewiness of the brownie giving way to the smooth, melt-in-your-mouth cheesecake. It’s a combination that truly elevates the simple brownie into something extraordinary, making it a showstopper for any occasion.
Creative Variations and Serving Suggestions
While these Chocolate Cheesecake Brownies are spectacular on their own, feel free to get creative with variations and serving ideas to suit your taste or occasion:
- Nutty Crunch: Fold in a handful of chopped walnuts or pecans into the brownie batter for an added textural contrast.
- Coffee Kick: Enhance the chocolate flavor by adding 1 teaspoon of espresso powder to the brownie batter. Coffee amplifies chocolate without making it taste like coffee.
- Raspberry Swirl: After spreading the cheesecake layer, dollop small amounts of raspberry jam on top and gently swirl it in with a knife for a fruity twist.
- Minty Fresh: Add 1/2 teaspoon of peppermint extract to the cheesecake layer for a refreshing chocolate mint combination.
- Toppings Galore: Before serving, dust with a light coating of cocoa powder, drizzle with chocolate ganache, or add a dollop of whipped cream and fresh berries.
Serve these brownies slightly warm with a scoop of vanilla bean ice cream for an ultimate dessert experience, or pair them with a hot cup of coffee or a cold glass of milk for a comforting treat.
Storage and Freezing Tips
Proper storage is key to keeping your Chocolate Cheesecake Brownies fresh and delicious for as long as possible:
- Refrigeration: Because of the cream cheese layer, these brownies should be stored in an airtight container in the refrigerator. They will stay fresh for up to 5-7 days.
- Freezing: These brownies freeze beautifully! Once completely cooled, cut them into individual squares. Wrap each square tightly in plastic wrap, then place them in a freezer-safe bag or container. They can be frozen for up to 2-3 months.
- Thawing: To enjoy from frozen, simply transfer the desired number of brownies to the refrigerator overnight, or let them come to room temperature on the counter for about an hour.
Frequently Asked Questions (FAQ)
- Can I use a different size baking pan? Using a different size pan will alter the thickness of your layers and baking time. A larger pan will result in thinner brownies that bake faster; a smaller pan will yield thicker brownies requiring more baking time. It’s best to stick to a 9×9 inch pan for the results intended by this recipe.
- My cheesecake layer cracked. What happened? Cracking in cheesecake layers often occurs from overbaking or rapid temperature changes. Ensure you don’t overbake, and let the brownies cool slowly on a wire rack to room temperature before refrigerating.
- Can I make these gluten-free? While this specific recipe isn’t designed for gluten-free flour, you might be able to substitute with a 1:1 gluten-free baking flour blend. However, results can vary greatly with gluten-free alternatives, and the texture may not be identical.
- Why is it important for cream cheese to be soft? Soft cream cheese blends smoothly and evenly with other ingredients, creating a creamy, lump-free cheesecake layer. Cold cream cheese will result in a lumpy mixture and an inconsistent texture.
- Can I omit one type of chocolate? It’s not recommended. The combination of unsweetened and semisweet chocolate is carefully chosen to achieve a balanced, deep chocolate flavor in the cheesecake layer. Altering this will change the overall taste profile significantly.
These chocolate cheesecake brownies are truly one of my all-time favorite recipes, a consistent crowd-pleaser that I enjoy making again and again. I sincerely hope you find as much joy in baking and savoring them as I do!
More Decadent Dessert Recipes You Might Like:
If you’ve fallen in love with these brownies, here are a few more delightful dessert recipes from my blog that you might enjoy:
- Fudge Brownies with Peanut Butter Frosting
- Classic Fudgy Brownies
- Fudge Frosted Espresso Brownies
- Brownies in a Cast Iron Skillet
- Oreo Cheesecake Brownies
- Refreshing Chocolate Mint Brownies
- Brookies (Brownie Cookies)
Chocolate Cheesecake Brownies
IMPORTANT – There are often Frequently Asked Questions within the blog post that you may find helpful. Simply scroll back up to read them!
Print It
Rate It
Save ItSaved!
Ingredients
Brownie layer:
- ½ cup butter
- 1 cup PACKED brown sugar
- 1.5 ounces baking cocoa 1/2 cup NOT PACKED, scoop and sweep like flour
- 2 large eggs
- 1 teaspoon vanilla
- 3.67 ounces all purpose flour 3/4 cup measured with scoop and sweep method
- ½ teaspoon salt
- ½ teaspoon baking powder
Cheesecake layer:
- 2 oz unsweetened chocolate
- 2.5 oz semisweet chocolate
- 8 ounces very soft cream cheese
- 1 large egg
- ¼ cup granulated sugar
- 1 teaspoon vanilla
- ¼ teaspoon salt
Things You’ll Need
-
9×9 baking pan
-
Food processor
-
Wooden spoon
-
Wire cooling racks
Before You Begin
- IMPORTANT – weigh dry ingredients according to the recipe. Use a kitchen scale to get the most accurate measurement and ensure recipe success!
- ALSO don’t change the chocolate types, this will change the flavor. These bars have a dark chocolate flavor. They are not sweet like chocolate cake or chocolate chip cookies.
- When you measure your brown sugar, it needs to be packed into the measuring cup. Dip your measuring cup into the sugar, fill it as much as you can, and smash it down into the cup tight. Then level off the top.
- When measuring baking cocoa it needs to be done with the scoop and sweep method, otherwise you will get too much and dry out your brownies. I have weighed the ingredients and included those weights in the printable version. Please weigh your ingredients for best results.
- Measure your flour using the scoop and sweep method, or for BEST results weigh it according to the printable version below.
- Your cream cheese needs to be very soft, but please don’t use the microwave. For best results, take the cream cheese out of the fridge 40 minutes before you decide to bake. Unwrap it and cut it into about 8 pieces and don’t let them touch each other. This will let them come to room temperature move evenly.
Instructions
-
Preheat oven to 350 F. Butter or spray a 9×9 baking pan.
-
Melt the butter and using a wooden spoon, mix in the brown sugar and cocoa. Add eggs, one at a time, mixing well. Add vanilla and mix to combine.
-
In another bowl, whisk together flour, salt and baking powder. Combine with butter mixture, and spread evenly in the baking dish. Set aside.
-
Melt the chocolate in the microwave. Place cream cheese, egg, sugar, vanilla and salt in a food processor and process until smooth. Add melted chocolate and process to combine.
-
Spread cheesecake mixture evenly over the brownie layer. Bake in preheated oven for about 40-45 minutes. Test with a toothpick – at most you should only get a few moist crumbs. Cool completely before cutting.
-
Store in a sealed container, preferably in the refrigerator. Excellent cold or at room temperature!
Nutrition
The recipes on this blog are tested with a conventional gas oven and gas stovetop. It’s important to note that some ovens, especially as they age, can cook and bake inconsistently. Using an inexpensive oven thermometer can assure you that your oven is truly heating to the proper temperature. If you use a toaster oven or countertop oven, please keep in mind that they may not distribute heat the same as a conventional full sized oven and you may need to adjust your cooking/baking times. In the case of recipes made with a pressure cooker, air fryer, slow cooker, or other appliance, a link to the appliances we use is listed within each respective recipe. For baking recipes where measurements are given by weight, please note that results may not be the same if cups are used instead, and we can’t guarantee success with that method.
This post originally appeared on this blog on Feb 26, 2011.
