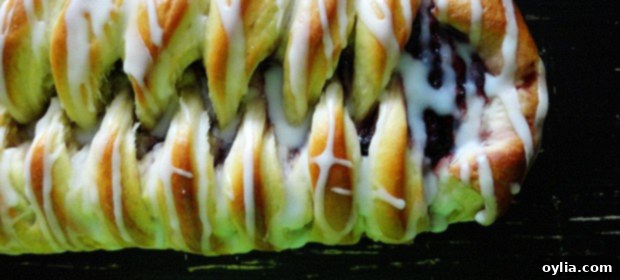
Master the Art of Homemade Braided Blackberry Danish: An Easy & Impressive Breakfast Pastry Recipe

There’s something uniquely satisfying about baking a breakfast pastry that looks as incredible as it tastes. This homemade braided danish with a rich cream cheese and vibrant blackberry filling is precisely that kind of masterpiece. It’s a showstopper, a conversation starter, and an absolute delight for your taste buds. While its intricate braided appearance might suggest a complex baking challenge, I’m here to assure you that creating this beautiful sweet pastry is much simpler and far more enjoyable than it seems. The process itself becomes quite therapeutic once you get into the rhythm!
This recipe yields two generous danishes, perfect for feeding a crowd at brunch, enjoying over a couple of mornings, or gifting one to a very lucky friend. Imagine the joy of presenting this freshly baked, golden-brown creation, adorned with a delicate powdered sugar drizzle. It truly has a serious “wow factor.” I still remember the first time I pulled these from the oven; their beauty was so captivating, I literally called everyone in to witness their glory! The collective “oooo’s and ahhhh’s” were all the validation I needed. This isn’t just baking; it’s creating an experience.
My Baking Journey: From Yeast Mishaps to Danish Mastery
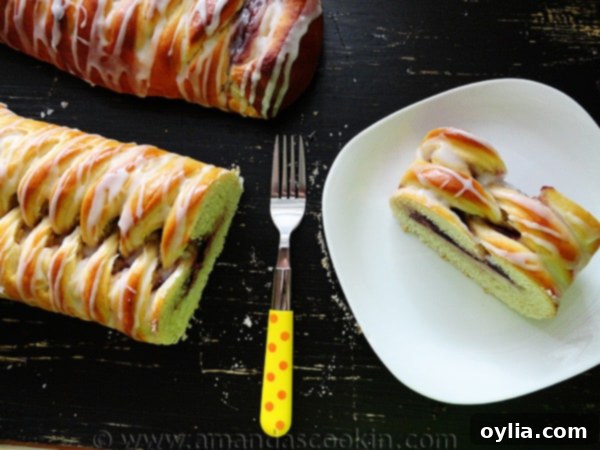
My inspiration for this delightful braided breakfast pastry came from an unexpected place: a King Arthur Baking Company catalog. I was initially drawn to their Braided Lemon Bread recipe, and while I’ve adapted it with my own delicious twists—most notably swapping lemon for luscious blackberry preserves and cream cheese—the core method remains a testament to their excellent baking resources. Their online version is highly rated, which gave me the confidence to try again after my initial attempt went awry. It’s a fantastic foundation for anyone looking to make an impressive yet manageable yeast dough pastry.
Learning from My First Attempt: Essential Yeast Dough Tips

Let’s be honest, baking can sometimes be a journey of trial and error. My first attempt at this braided danish was definitely a learning experience, primarily because I rushed things and inadvertently “killed” my yeast. This is a common pitfall for many home bakers, but it’s easily avoidable with a few key practices:
- Room Temperature Ingredients: I skipped bringing my eggs and butter to room temperature. Cold ingredients can shock and slow down yeast activity, preventing the dough from rising properly. Always ensure your dairy and eggs are at room temperature for optimal dough development.
- Water Temperature is Key: I heated my water too much for the yeast, essentially cooking it before it had a chance to activate. Yeast thrives in warm, not hot, environments. Aim for water between 105-115°F (40-46°C). If it’s too hot, it kills the yeast; too cold, it won’t activate.
- Proof Your Yeast: This is non-negotiable, especially if you’re unsure about your yeast’s freshness. I noticed my yeast wasn’t really proofing (getting frothy and bubbly) at the beginning, but I pressed on anyway, hoping for the best. Don’t make my mistake! If your yeast doesn’t show signs of life after 5-10 minutes in warm water with a pinch of sugar, it’s likely dead, and you’ll need to start with fresh yeast. This simple step can save you a lot of wasted ingredients and baking frustration.
These lessons were crucial for my success. So, heed my warning: don’t be like me on that particular baking day! Patience and attention to detail are your best friends when working with yeast.
My Second Attempt: A Triumph of Patience and Technique
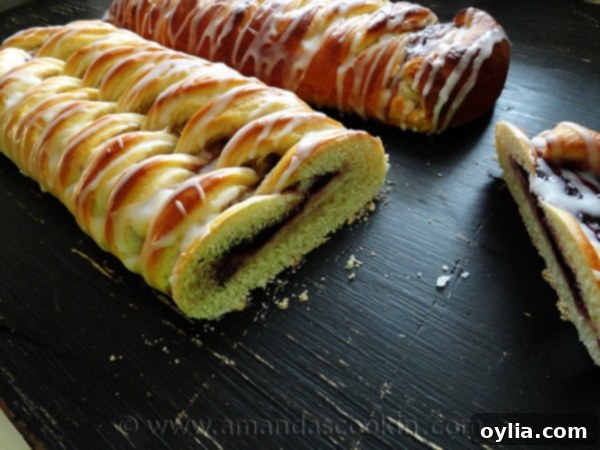
Armed with the wisdom gained from my initial mishap, my second attempt was a resounding success. I made sure all my ingredients were at room temperature, checked my water temperature diligently, and, most importantly, I carefully observed the sponge to ensure the yeast was active and happy before proceeding. This small but significant shift in approach made all the difference, leading to the beautiful, airy, and delicious danishes you see pictured here.
Understanding the “Sponge” for a Richer Danish Dough
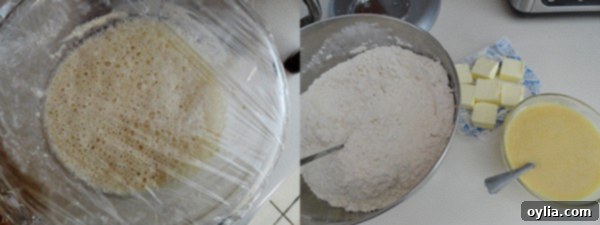
One of the secrets to this danish’s tender texture and impressive rise lies in the use of a “sponge.” If you’re new to yeast baking, a sponge is essentially a pre-ferment: a simple mixture of yeast, warm water, a bit of flour, and sugar. It acts as a starter, giving the yeast a head start before it’s incorporated into the main dough. This technique is particularly beneficial for enriched doughs, like this danish, which contain a higher amount of fat (butter) and sugar (from the yogurt and added sugar) and eggs. These ingredients, while contributing to a richer flavor and softer crumb, can sometimes make it harder for the yeast to work effectively.
By allowing the yeast to activate and multiply in the simpler, less inhibited environment of the sponge, you’re building up a strong, active culture. After mixing the sponge ingredients, simply cover it loosely with plastic wrap and let it sit for about 15-20 minutes. You’ll know it’s ready when it becomes visibly frothy and bubbly, indicating a healthy and active yeast. While the sponge is working its magic, I usually take that time to measure and combine the rest of my wet ingredients (yogurt, eggs, vanilla) and whisk together the dry ingredients, streamlining the process.
Crafting the Perfect Danish Dough and Irresistible Filling
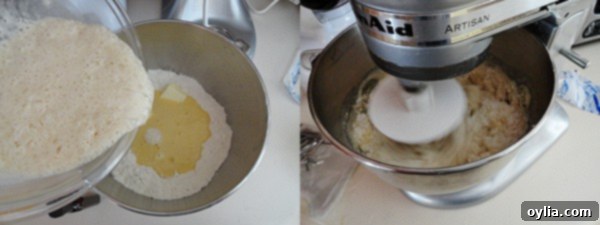
Once your sponge is active, it’s time to bring everything together. In the bowl of your stand mixer, combine the frothy sponge with all the prepared wet and dry dough ingredients. Using a dough hook, mix and knead the dough on medium-low speed for about 5-6 minutes. You’re looking for a soft, smooth, and elastic dough that pulls away from the sides of the bowl. This kneading process is vital for developing gluten, which gives the danish its structure and chew. After kneading, transfer the dough to a lightly greased bowl, cover it tightly with plastic wrap, and allow it to rise in a warm place for 60-90 minutes, or until it has become quite puffy and nearly doubled in size. This first rise, known as bulk fermentation, is crucial for flavor development.
While your beautiful danish dough is undergoing its first transformation, you can prepare the delicious filling. The cream cheese mixture is simple yet incredibly flavorful, combining softened cream cheese, sugar, sour cream, and a touch of flour to help it set. Ensure your cream cheese is well softened to avoid lumps and achieve a silky-smooth consistency. This creamy base pairs perfectly with your choice of fruit preserves. I’ve found blackberry and black raspberry to be phenomenal, but the beauty of this recipe lies in its versatility—feel free to explore your favorite fruit flavors!
The Art of Shaping and Braiding Your Danish

Once your dough has risen, gently deflate it and divide it in half. For ease of handling and transfer, I highly recommend rolling out each half onto a piece of parchment paper cut to your desired dimensions (approximately 10″x15″ rectangles). This ingenious trick makes moving the filled and braided danish to the baking sheet incredibly simple. Lightly mark your dough lengthwise to divide it into three equal sections. Then, generously spread half of your prepared cream cheese filling down the middle section, followed by half of your fruit preserves. A critical tip here, learned from experience: leave about an inch of dough clear on all sides of the filling, especially at the ends. This prevents the filling from oozing out during baking, ensuring a neat and beautiful danish.

Now for the fun part: braiding! This technique looks impressive but is surprisingly straightforward. Using a sharp knife or pizza cutter, make 1-inch crosswise strips down the length of the two outer sections of the dough, ensuring you have an equal number of strips on each side. To begin the braid, take one end of the center section of dough and fold it neatly over the filling to seal the top. Then, starting from one side (say, the left), lift the top dough strip and gently bring it across the filling diagonally, pressing the end of the strip into the dough on the opposite side where it rests. Repeat this action with the top strip from the other side, crisscrossing them. Continue this alternating pattern all the way down the loaf. I also highly recommend gently pressing the end of each strip into the dough it touches to help secure them, preventing them from popping open during baking – a common issue I’ve heard others mention.
Endless Flavor Possibilities and The Perfect Finish

The beauty of this braided danish recipe is its incredible adaptability. While I personally love the vibrant sweetness of blackberry preserves, and black raspberry was another fantastic choice in my successful batch, don’t feel limited! Imagine the possibilities:
- Fruit Preserves: Apricot, cherry, strawberry, raspberry, orange marmalade – any fruit preserve will create a delightful flavor profile.
- Curds: Lemon curd or lime curd would offer a bright, tangy contrast to the sweet dough and cream cheese.
- Pie Fillings: Apple pie filling, cherry pie filling, or even peach filling can transform this into a seasonal treat.
- Savory Options: For a less sweet version, consider a savory cream cheese blend with herbs, sun-dried tomatoes, or roasted garlic.
- Chocolate & Nut: Nutella, chocolate chips, or a pecan filling would be decadent and delicious.
After braiding, slide your loaves on the parchment onto an insulated baking sheet, cover them with a soft cloth, and let them rise for another 45-50 minutes until visibly puffy. Preheat your oven to 375°F (190°C). Before baking, brush the loaves with an egg wash (a lightly beaten egg mixed with a bit of water and a pinch of salt). This helps achieve that beautiful golden-brown crust. Bake for 25-30 minutes, or until perfectly golden. The aroma filling your kitchen will be pure bliss!

Once out of the oven, let them cool for 15-20 minutes. For the finishing touch, I opted for a simple yet elegant powdered sugar drizzle. While some recipes call for pearl sugar, I find a drizzle to be much prettier and adds a delicate sweetness. To make it, gradually add small amounts of milk to sifted powdered sugar until you reach a thick but pourable consistency. Place waxed paper under your cooling rack to catch any drips, then artfully drizzle the glaze back and forth across the warm danishes. Allow the glaze to set for a few minutes before slicing and serving. This braided danish is truly a recipe I’ll be making again and again, and I encourage you to try it too!
Frequently Asked Questions About Braided Danish
- Can I prepare the danish dough ahead of time? Yes! After the first rise, you can punch down the dough, wrap it tightly in plastic wrap, and refrigerate it for up to 24 hours. Let it come to room temperature for about 30-60 minutes before rolling and shaping.
- What if my yeast doesn’t proof? If your sponge doesn’t become frothy and bubbly, your yeast is likely inactive. Discard the sponge and start again with fresh yeast and properly tempered water.
- Can I use frozen fruit? Fresh fruit can be used, but it might release more moisture during baking. If using frozen fruit, thaw it and drain any excess liquid thoroughly, or consider cooking it down into a thicker preserve first.
- How do I store leftover danish? Store leftover danish at room temperature in an airtight container for 1-2 days, or in the refrigerator for up to 4 days. You can gently warm slices in the microwave or oven for a fresh-baked taste.
- Can I freeze the danish? Yes, you can freeze the baked danishes (before drizzling the glaze) wrapped tightly in plastic wrap and then foil for up to 2-3 months. Thaw at room temperature and warm gently before glazing and serving.
Braided Breakfast Danish
IMPORTANT – There are often Frequently Asked Questions within the blog post that you may find helpful. Simply scroll back up to read them!
Print It
Pin It
Rate It
Save ItSaved!
Ingredients
Sponge
- ¾ cup warm water
- 2 teaspoons sugar
- 1 tablespoon SAF instant yeast
- ½ cup unbleached all purpose flour
Dough
- All of the sponge
- ¾ cup vanilla yogurt
- ½ cup 1 stick unsalted butter, softened
- 2 large eggs beaten and brought to room temperature
- ½ cup sugar
- 2 teaspoons salt
- 2 teaspoons vanilla extract
- 5 cups unbleached all purpose flour
Filling
- ⅔ cup cream cheese softened
- ¼ cup sugar
- ¼ cup sour cream
- ¼ cup unbleached all purpose flour
- ½ cup fruit preserves
Finishing
- egg wash for brushing braid
- ½ cup sifted powdered sugar
- 1-2 tablespoons milk
Instructions
-
In a small bowl, combine the sponge ingredients. Stir well to combine, loosely cover with plastic wrap, and set aside to proof for 10 to 15 minutes.
-
In the bowl of your stand mixer whisk together the combine the sponge with all of the dough ingredients. Mix with the dough hook and knead on speed 2 until a soft, smooth dough forms, about 5 to 6 minutes.
-
Place the kneaded dough in a lightly greased bowl, cover with plastic wrap, and allow to rise for 60 to 90 minutes, until quite puffy and nearly doubled.
-
While the dough is rising, prepare the filling. Combine all the filling ingredients (except the preserves) in a small bowl, mixing until smooth and lump-free. Reserve the filling and preserves until ready to fill the braids.
-
Cut two pieces of parchment into 10″x15″ rectangles. Gently deflate the dough and divide it in half. Cover half with plastic wrap and set it aside as you roll out the first piece into a 10″ x 15″ rectangle onto one of the parchments. Rolling on parchment paper makes moving the bread to the baking sheet much, much easier. Lightly press two lines down the dough lengthwise, to divide it into 3 equal sections. Spread half the cream cheese filling down the center section, and top with half the preserves, leaving 1″ free on all sides of the filling.
-
To form the braid, cut 1″ crosswise strips down the length of the outside sections, making sure you have the same number of strips down each side. Begin by taking one end of the center section of dough and folding it over the filling. Beginning on the left, lift the top dough strip and gently bring it across the filling diagonally and gently press the end of the strip into the dough where it rests. Repeat on the other side with the top dough strip, so that the two strips crisscross each other. Continue down the entire braid, alternating strips to form the loaf.
-
Repeat the rolling, filling, and braiding steps for the second piece of dough, using the remaining cream cheese filling and preserves. Gently slide the loaves on the parchment onto an insulated baking sheet. You should be able to fit both loaves on one sheet, but may need trim the parchment. Cover the loaves with a soft cloth and let them rise for 45 to 50 minutes, or until quite puffy.
-
Preheat the oven to 375°F. Brush the loaves with egg wash (one lightly beaten egg, 2 teaspoons water and a pinch of salt) and bake for 25 to 30 minutes, or until the loaves are golden brown. Remove from the oven and cool for 15 to 20 minutes.
-
To make the drizzle, slowly add small amounts of milk to the powdered sugar until you have a thick but drizzling consistency. With loaves on a cooling rack, place waxed paper underneath to catch drips, then drizzles powdered sugar glaze back and forth across the loaves. Allow to set before serving.
The recipes on this blog are tested with a conventional gas oven and gas stovetop. It’s important to note that some ovens, especially as they age, can cook and bake inconsistently. Using an inexpensive oven thermometer can assure you that your oven is truly heating to the proper temperature. If you use a toaster oven or countertop oven, please keep in mind that they may not distribute heat the same as a conventional full sized oven and you may need to adjust your cooking/baking times. In the case of recipes made with a pressure cooker, air fryer, slow cooker, or other appliance, a link to the appliances we use is listed within each respective recipe. For baking recipes where measurements are given by weight, please note that results may not be the same if cups are used instead, and we can’t guarantee success with that method.
