How to Make Creamy Homemade Hummus in 5 Minutes (4 Flavorful Recipes!)
Hummus is a truly versatile and delicious spread that has graced plates and tantalized taste buds for centuries. This creamy, protein-packed treat is perfect for dipping your favorite veggies, spreading onto sandwiches and wraps, or simply enjoying by the spoonful! While store-bought options are plentiful, did you know that making your own hummus at home is incredibly simple and takes just about 5 minutes? Forget the bland, mass-produced versions – today, we’re diving into the art of crafting your own homemade hummus, exploring not one, but four delightful flavors that will elevate your snacking game. Get ready to transform humble chickpeas into a culinary masterpiece, just like this Mediterranean Veggie Wrap deserves.
Homemade Hummus: A College Staple & Beyond
I think many of us have that one food phase during our formative years – a culinary obsession that takes over our entire diet for a spell. For me, that food was hummus, and that transformative time was college. It became my go-to for breakfast, lunch, and dinner, often paired with pita bread or fresh vegetables. Looking back, I realize how much money I spent on pre-made tubs of hummus when I could have been whipping up batches right in my dorm kitchen. If only I had known then just how incredibly easy and economical it is to make hummus from scratch, and the endless flavor possibilities that await with ingredients readily available in any fridge, I might have subsisted on homemade hummus for all four years!
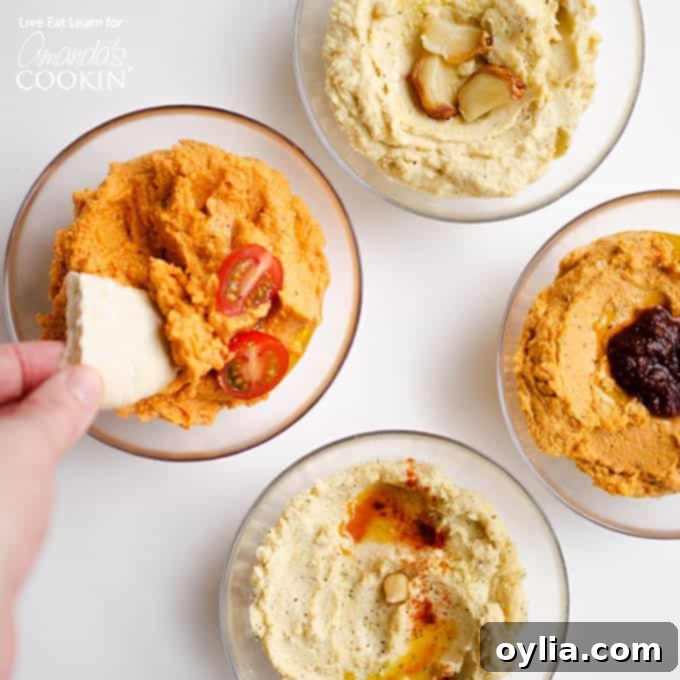
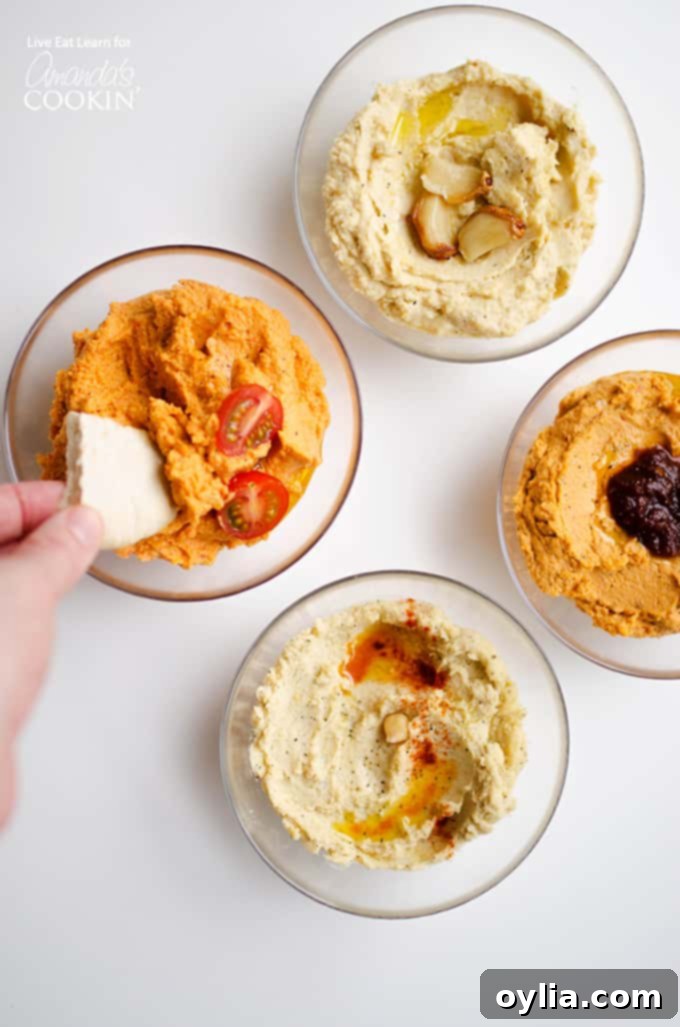
Today, we’re not just making plain hummus; we’re exploring four of many exciting flavors: Traditional (the classic everyone loves), Romesco (inspired by this awesome sauce, with a rich, smoky twist), Roasted Garlic (mellow and deeply aromatic), and Chipotle (for those who crave a little kick). And if you’re truly feeling adventurous and want to break the mold, you must check out my dessert hummus recipe: Cookie Dough Hummus! One of my absolute favorite ways to enjoy savory hummus is generously spread on this Roasted Butternut Chickpea Hummus Wrap.
Why Make Hummus at Home?
Beyond the simple satisfaction of creating something delicious with your own hands, there are numerous compelling reasons to ditch the store-bought tubs and embrace homemade hummus.
Unbeatable Freshness and Flavor
There’s simply no comparison to the taste of freshly made hummus. The vibrant flavors of lemon, garlic, and tahini are much more pronounced, and the texture is inherently smoother and creamier. You control the quality of every ingredient, ensuring a superior end product that’s free from preservatives and artificial additives often found in commercial varieties.
Cost-Effective and Convenient
Chickpeas and other basic hummus ingredients are incredibly inexpensive, making homemade hummus a budget-friendly option. A single can of chickpeas, combined with a few pantry staples, yields a generous batch that would cost significantly more if purchased pre-made. Plus, it’s surprisingly quick to prepare – often faster than a trip to the grocery store!
Tailor-Made for Your Taste Buds
One of the biggest advantages of making hummus at home is the ability to customize it exactly to your liking. Love more garlic? Add an extra clove! Prefer it tangier? Squeeze in more lemon juice. Want a specific texture? Adjust the amount of liquid. And, of course, the flavor variations are endless, allowing you to experiment and discover new favorites beyond the standard.
Nutritional Powerhouse
Hummus is not only delicious but also incredibly healthy. It’s naturally vegan and vegetarian, packed with essential nutrients:
- Chickpeas (Garbanzo Beans): These legumes are a fantastic source of plant-based protein and dietary fiber, which helps with satiety and digestive health. They also provide complex carbohydrates for sustained energy.
- Tahini: Made from ground sesame seeds, tahini adds healthy monounsaturated and polyunsaturated fats, along with calcium, iron, and other minerals. It’s crucial for achieving that authentic hummus flavor and creaminess.
- Extra Virgin Olive Oil: A drizzle of high-quality EVOO not only enhances the flavor but also provides heart-healthy monounsaturated fats and antioxidants.
- Lemon Juice: Beyond its bright, fresh taste, lemon juice adds vitamin C and helps to balance the flavors, making the hummus more vibrant.
- Garlic: Known for its potent flavor and numerous health benefits, garlic adds an indispensable aromatic depth to hummus.
To make hummus, you’ll need these essential ingredients:
- 1 can chickpeas (15 ounces), drained and rinsed
- 3 Tbsp extra virgin olive oil (plus more for drizzling)
- 3 Tbsp tahini
- 2 Tbsp fresh lemon juice
- 1 clove garlic (omit for roasted garlic flavor, or add more to taste)
- ½ tsp salt (adjust to taste)
- ¼ tsp pepper (adjust to taste)
For our delightful flavor variations, you’ll also need:
- Romesco: 1 or 2 roasted red peppers (jarred or fresh roasted), ½ cup chopped Roma tomatoes, ½ tsp smoked paprika
- Roasted Garlic: ½ head roasted garlic (for that sweet, mellow garlic flavor)
- Chipotle: 1 or 2 chipotle peppers in adobo sauce (adjust for desired heat)
Kitchen tools you may find useful:
- Food processor (essential for creamy hummus!)
- Rubber spatula (for scraping down the sides)
- Measuring cups and spoons
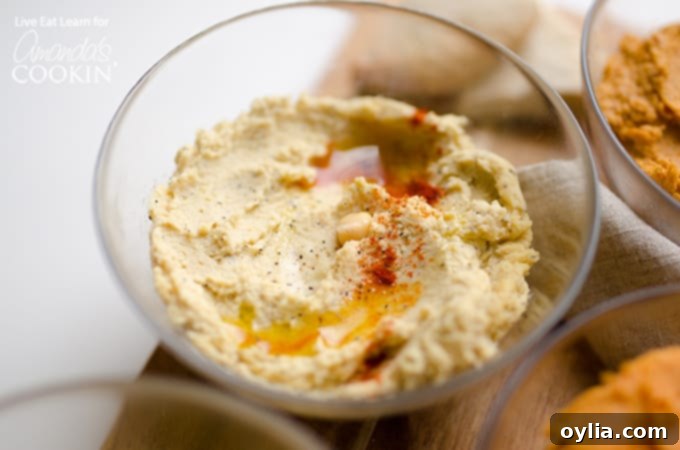
Mastering the Art of Homemade Hummus: Step-by-Step
Making hummus is surprisingly straightforward. With a good food processor and a few simple ingredients, you’ll have a batch of fresh, flavorful hummus ready in no time. Follow these easy steps to create your perfect dip:
- Choose Your Desired Flavor. Before you begin, decide which delightful flavor you’d like to create! We’ve provided the classic base recipe, along with three incredible additions to tantalize your taste buds.
- For the vibrant Romesco Hummus, you’ll incorporate sweet roasted red peppers, fresh Roma tomatoes, and a touch of smoky paprika. This combination adds a beautiful color and complex, savory depth.
- If you’re a fan of rich, mellow garlic, our Roasted Garlic Hummus is for you. Simply add half a head of roasted garlic to the base mixture. Roasting the garlic transforms its pungent bite into a sweet, earthy, and incredibly fragrant addition.
- For those who crave a smoky, spicy kick, the Chipotle Hummus is a must-try. Just blend in 1 or 2 chipotle peppers in adobo sauce – adjust the quantity to control the heat level.
- Feeling adventurous? Don’t stop there! Consider adding sun-dried tomatoes for an Italian twist, fresh basil pesto for an herbaceous note, or even roasted beets for a stunning pink hue and earthy sweetness.
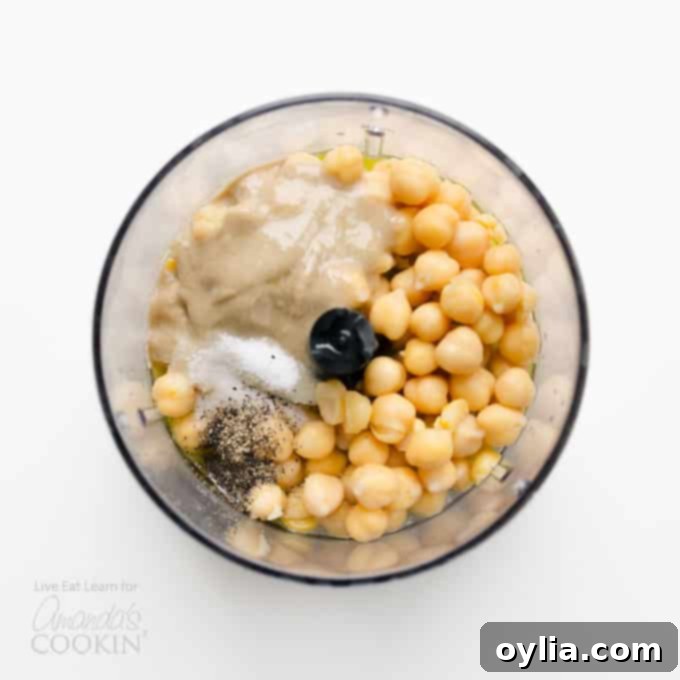
- Combine All Ingredients in the Food Processor. Once you’ve selected your flavor, gather all of your base ingredients (chickpeas, olive oil, tahini, lemon juice, garlic – unless making roasted garlic, salt, and pepper) and place them into the bowl of your food processor. If you’re making one of the flavored variations, add your “flavor makers” at this stage as well. Ensure everything is in the bowl before you start blending.
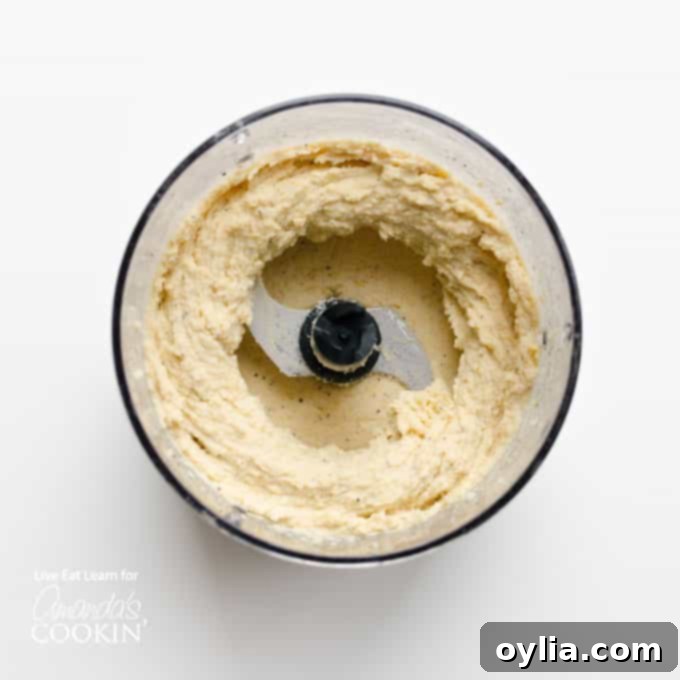
- Blitz Until Smooth and Creamy. Secure the lid on your food processor and process the ingredients. Start with short pulses, then blend continuously until the mixture becomes wonderfully smooth and creamy. You may need to stop the food processor occasionally to scrape down the sides of the bowl with a rubber spatula, ensuring all ingredients are incorporated evenly. If the hummus appears too thick or isn’t blending smoothly, you can add a tablespoon or two of cold water or chickpea liquid (aquafaba) until you reach your desired consistency.
Pro Tip for Ultra-Smooth Hummus: For an exceptionally silky texture, you can take an extra step and remove the skins from each chickpea before adding them to the food processor. This process can be a bit tedious, but it yields a noticeably smoother result, often preferred by hummus connoisseurs. Alternatively, some people boil canned chickpeas with a pinch of baking soda for a few minutes, which helps loosen the skins.
- Let It Rest for Optimal Flavor and Texture. While it’s tempting to dive right in, allowing your freshly made hummus to rest is crucial for the best results. Transfer the hummus to an airtight container and let it cool in the refrigerator for at least an hour before serving. This resting period allows the flavors to meld and deepen, and the hummus to firm up slightly, achieving that perfect, luxurious texture.
It’s truly so easy, I can tell you how to make hummus in one single sentence. Are you ready? Simply throw all your chosen ingredients into a food processor and blitz until it’s smooth and creamy! It’s that effortlessly delicious, y’all!
Serving Suggestions and Storage Tips
Creative Ways to Enjoy Your Hummus
Hummus is incredibly versatile and can be enjoyed in countless ways. Of course, it’s a classic dip for warm pita bread, pita chips, or a vibrant assortment of fresh vegetables like carrots, cucumber slices, bell pepper strips, and celery sticks. But don’t limit yourself! Spread it generously on sandwiches and wraps for a healthy and flavorful alternative to mayonnaise. Use it as a base for flatbread pizzas, a dollop alongside grilled meats or falafel, or even thin it out slightly with a little water or lemon juice to create a creamy salad dressing. Garnish your hummus with a drizzle of extra virgin olive oil, a sprinkle of paprika or sumac, fresh parsley, toasted pine nuts, or a few red pepper flakes for an extra touch.
Storing Homemade Hummus
Proper storage is key to keeping your homemade hummus fresh and delicious. Once prepared, transfer your hummus to an airtight container and store it in the refrigerator. It typically lasts for 4-5 days. To help prevent it from drying out and to maintain its vibrant flavor, you can pour a thin layer of olive oil over the top of the hummus before sealing the container. Stir well before serving.
Frequently Asked Questions About Homemade Hummus
Can I use dried chickpeas instead of canned?
Absolutely! Using dried chickpeas can yield an even more flavorful and creamier hummus. You’ll need to soak them overnight and then boil them until very tender, usually for 1-2 hours, before proceeding with the recipe. Make sure they are cooked until soft enough to crush between your fingers easily for the smoothest results.
How do I make my hummus extra smooth?
Beyond peeling the chickpeas (as mentioned in step 3), a few tricks can help: ensure your tahini is smooth and well-stirred, use a high-powered food processor, and blend for longer than you think necessary. Adding a tablespoon or two of ice-cold water during blending can also help emulsify the mixture and achieve a lighter, fluffier texture.
How long does homemade hummus last?
When stored in an airtight container in the refrigerator, homemade hummus typically stays fresh for 4 to 5 days. Always rely on your senses – if it smells off or develops mold, it’s time to discard it.
Can I make hummus without tahini?
While tahini is a key ingredient for authentic hummus flavor and texture, you can certainly make a tahini-free version if you have an allergy or simply prefer not to use it. You can substitute tahini with a tablespoon or two of nut butter (like cashew butter for a mild flavor) or simply omit it and add an extra tablespoon of olive oil for creaminess. Keep in mind the flavor profile will be different.
We have lots of dips and spread recipes here on Amanda’s Cookin’ be sure to check out some of our favorites below!
- Another favorite dip for veggies is this Buttermilk Ranch Dressing, that you can also make from scratch!
- OR for a sweeter taste, you’ll love our Cream Cheese Fruit Dip. Perfect to bring along to a summer-time party!
- This Skinny French Onion Dip is another favorite veggie platter staple!
- For a fall or winter party, this Cranberry Salsa is your best bet! Pair it with some crackers and enjoy.
- And you can’t forget a good ole Healthy Guacamole recipe. Find out its secret ingredient!

How to Make Hummus
IMPORTANT – There are often Frequently Asked Questions within the blog post that you may find helpful. Simply scroll back up to read them!
Print It
Rate It
Save ItSaved!
Ingredients
Base
- 15 ounce can chickpeas drained and rinsed
- 3 Tbsp extra virgin olive oil
- 3 Tbsp tahini
- 2 Tbsp lemon juice
- 1 clove garlic except for roasted garlic flavor
- ½ tsp salt
- ¼ tsp pepper
Flavor Makers
- Romesco: 1 or 2 roasted red peppers ½ cup chopped roma tomatoes, ½ tsp smoked paprika
- Roasted Garlic: ½ head roasted garlic
- Chipotle: 1 or 2 chipotle peppers in adobo sauce
Before You Begin
Instructions
-
Choose a flavor you would like to make. Add the base ingredients plus the flavor makers to a food processor. Blitz until smooth and creamy. For best texture, let cool in the fridge for an hour before eating.
Nutrition
The recipes on this blog are tested with a conventional gas oven and gas stovetop. It’s important to note that some ovens, especially as they age, can cook and bake inconsistently. Using an inexpensive oven thermometer can assure you that your oven is truly heating to the proper temperature. If you use a toaster oven or countertop oven, please keep in mind that they may not distribute heat the same as a conventional full sized oven and you may need to adjust your cooking/baking times. In the case of recipes made with a pressure cooker, air fryer, slow cooker, or other appliance, a link to the appliances we use is listed within each respective recipe. For baking recipes where measurements are given by weight, please note that results may not be the same if cups are used instead, and we can’t guarantee success with that method.
This post was originally published on this blog on Feb 2, 2018.
