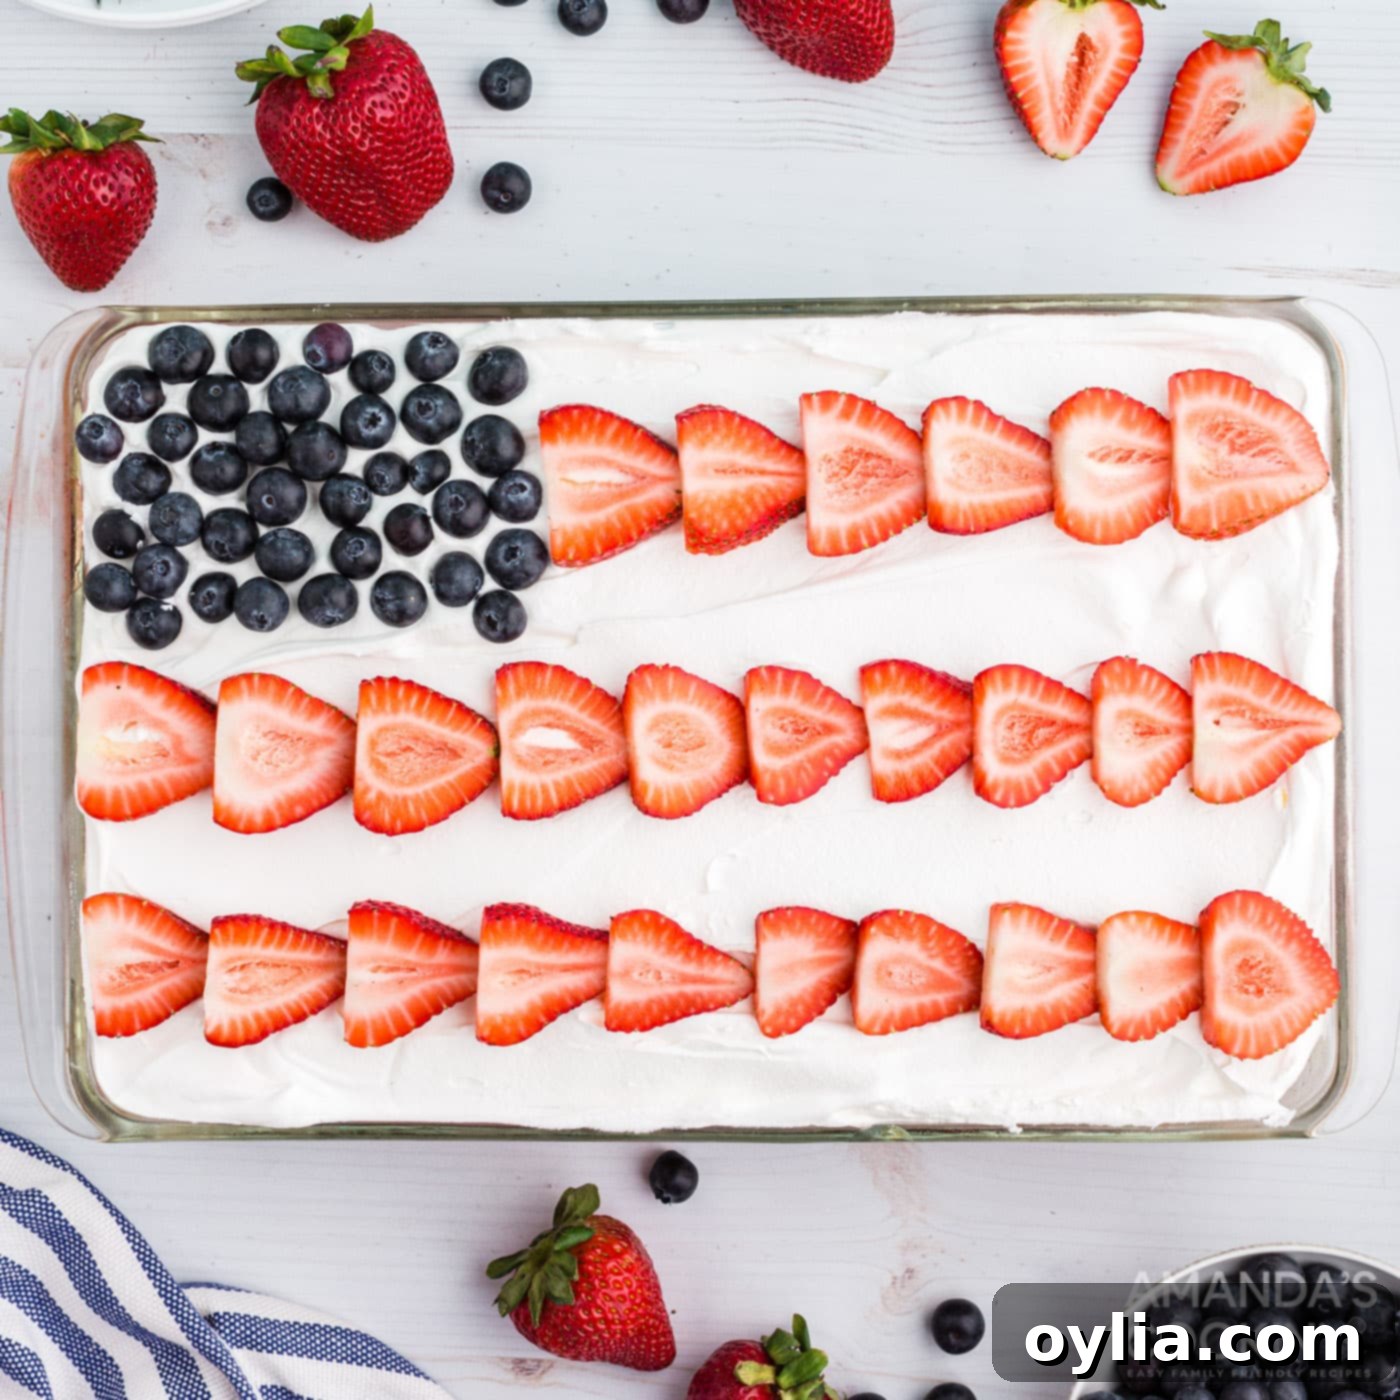
Easy Red, White & Blue Poke Cake: Your Ultimate Patriotic Dessert Recipe
Get ready to impress with this incredibly simple yet visually stunning Red, White & Blue Poke Cake! Perfect for any patriotic celebration, this dessert combines a moist white cake base with vibrant red and blue Jell-O, a creamy Cool Whip topping, and a beautiful arrangement of fresh summer berries. It’s not just a cake; it’s a celebration on a plate, designed to bring joy and a festive spirit to your holiday table. Whether you’re gathering for Memorial Day, the Fourth of July, or Veterans Day, this poke cake is sure to be the star of the show.
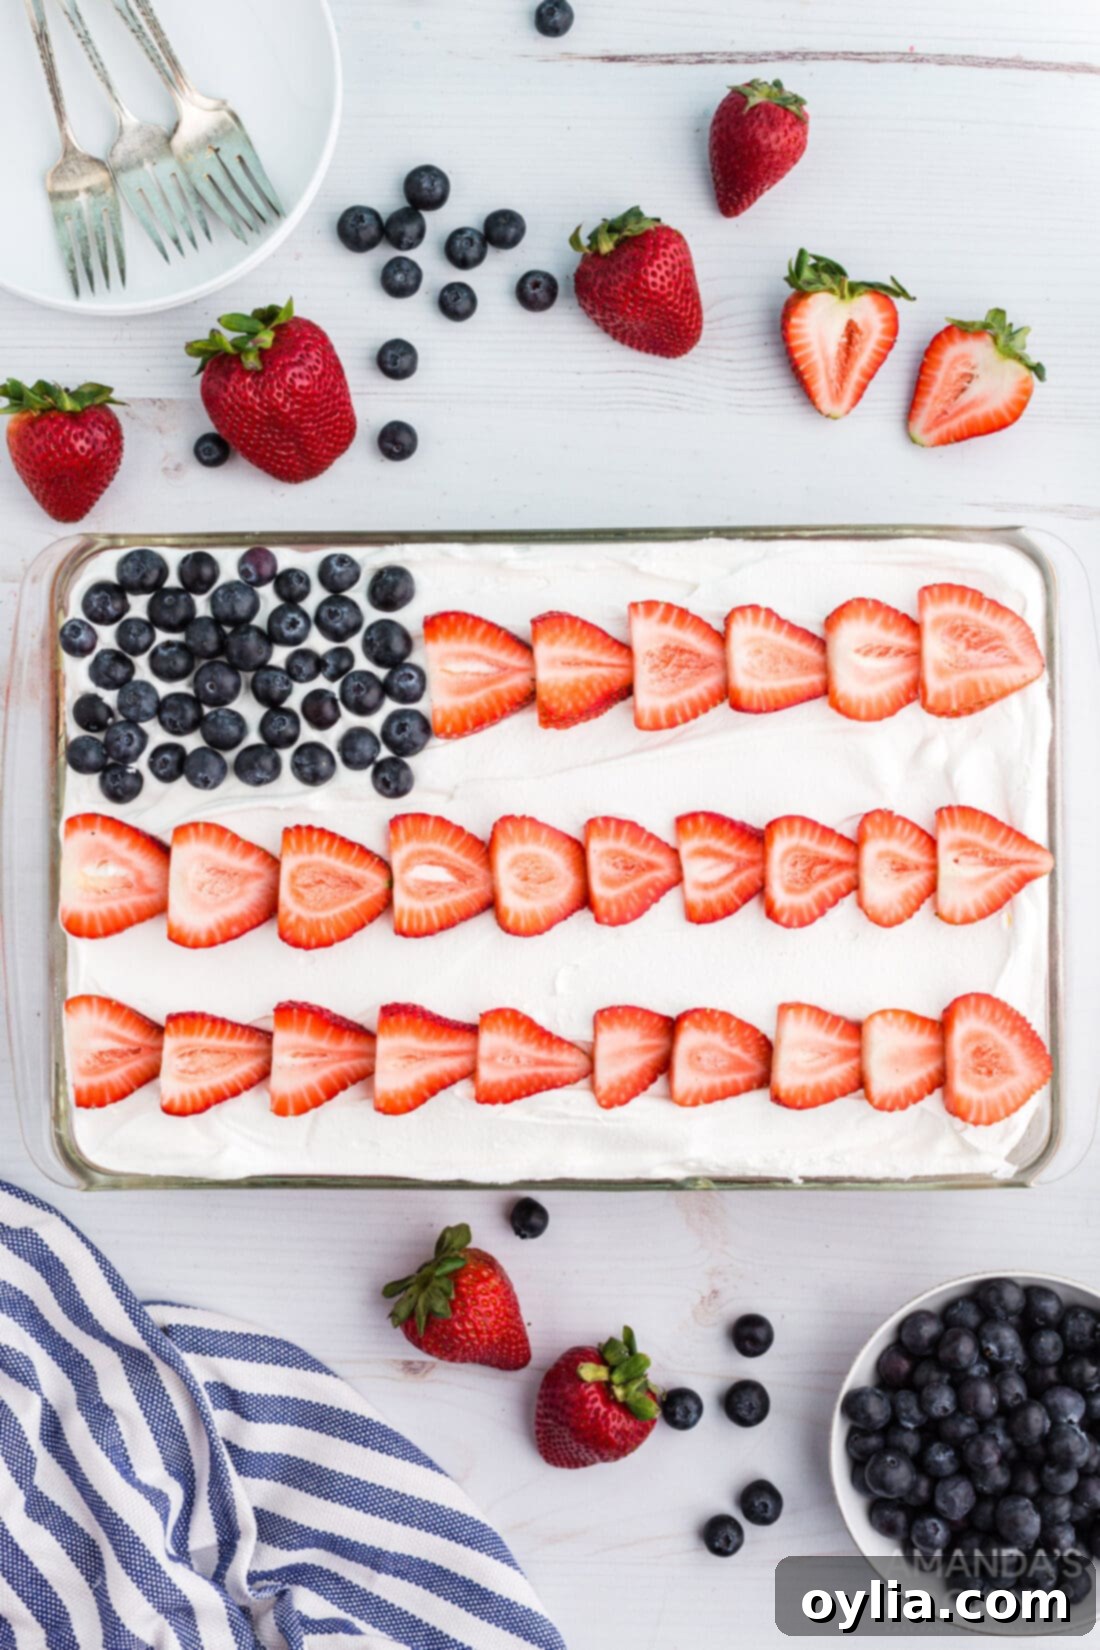
Why This Easy Patriotic Poke Cake Recipe is a Must-Try
This Red, White & Blue Poke Cake recipe isn’t just delicious; it’s a brilliant choice for numerous reasons, making it a favorite for holiday potlucks and family get-togethers. Its simplicity and impressive presentation make it a go-to dessert for occasions like Memorial Day, Fourth of July, or Veterans Day.
- Effortlessly Impressive: You don’t need to be a seasoned baker to create a dessert that looks like it came from a professional bakery. This recipe utilizes a boxed cake mix, Jell-O, and whipped topping, simplifying the process without compromising on visual appeal or taste.
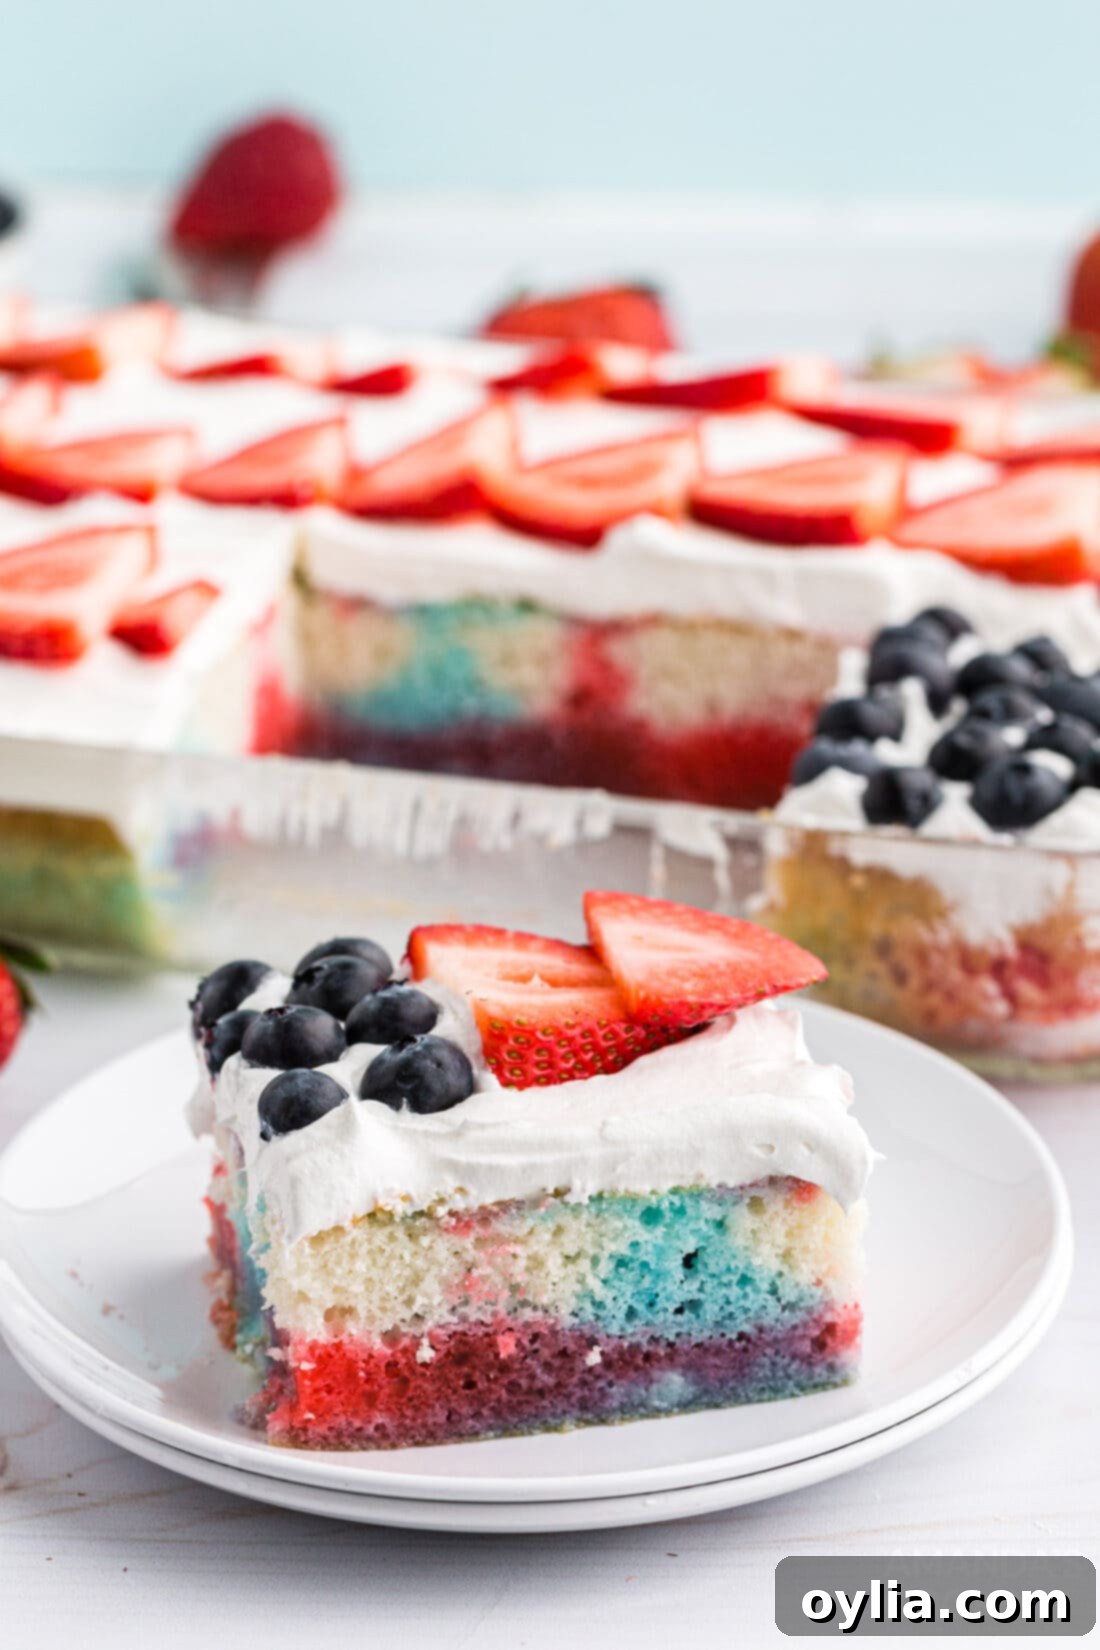
- Moist and Flavorful: The “poke” method involves pouring liquid Jell-O into holes poked in the baked cake. This technique infuses the cake with extra moisture and a burst of fruity flavor, resulting in a delightfully moist texture that’s far from dry or bland.
- Perfectly Patriotic: The vibrant red and blue Jell-O seeping into the white cake, topped with a canvas of white whipped cream and fresh red and blue berries, creates an iconic American flag design. It’s a truly festive treat that celebrates national holidays in the most delicious way.
- Crowd-Pleaser: Everyone loves a colorful, fruity, and moist cake, especially one that evokes such a cheerful holiday spirit. This cake is guaranteed to be a hit with both kids and adults, making it ideal for large gatherings.
- Highly Customizable: While we stick to classic flavors for this patriotic version, poke cakes are incredibly versatile. This isn’t our first venture into the world of poke cakes; we’ve explored delightful variations like our Watermelon Poke Cupcakes, a creamy Banana Pudding Poke Cake, and a decadent Boston Cream Poke Cake. These show just how adaptable the poke cake concept is, allowing you to tailor flavors to any occasion or preference.
Key Ingredients for Your Patriotic Masterpiece
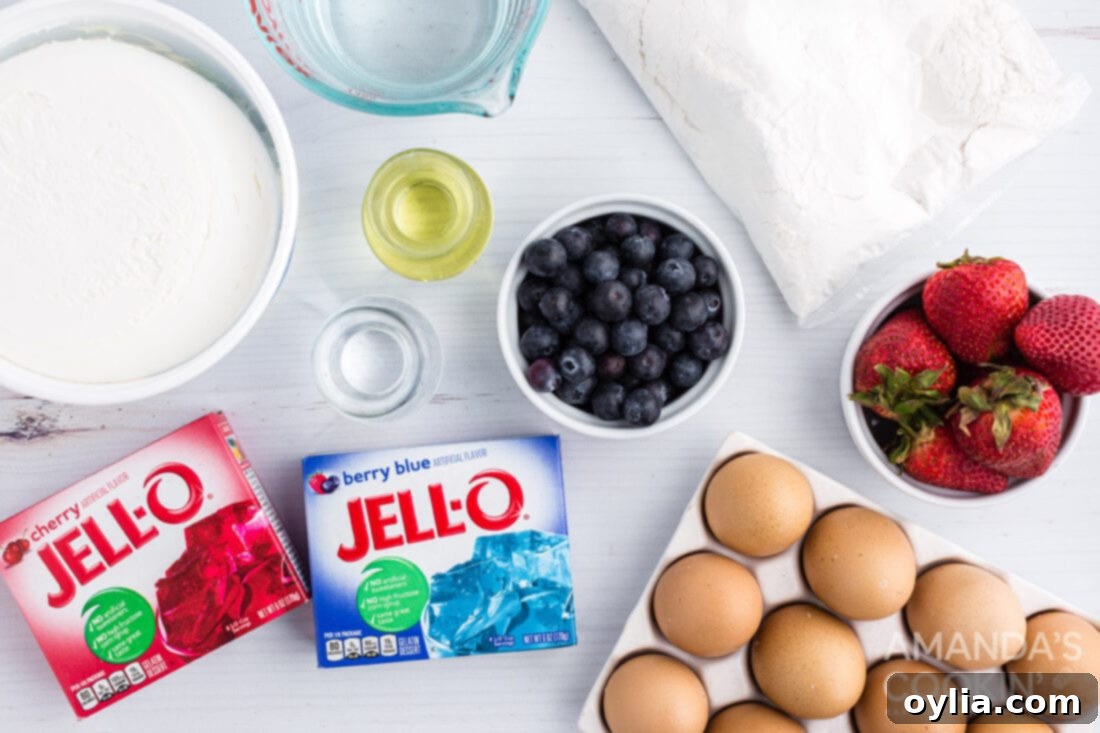
One of the beauties of this Red, White & Blue Poke Cake is its reliance on readily available, simple ingredients. You’ll find all specific measurements, quantities, and detailed instructions in the printable recipe card at the very end of this post. For now, let’s dive into what makes each component essential.
The Jell-O: Infusion of Color and Flavor
For our patriotic theme, we opted for Berry Blue and Cherry Jell-O to achieve those classic red and blue hues. However, feel free to get creative with other red or blue flavors! Strawberry or raspberry (much like our popular raspberry poke cake) would work wonderfully for the red, and any blue gelatin would be suitable. The key here is to use UNPREPARED Jell-O. You’ll be preparing it fresh according to our recipe card, which includes the precise amount of boiling and ice water needed, so you won’t need to strictly follow the box instructions for preparation. We recommend using approximately 1.5 oz of each Jell-O flavor. Using too much liquid Jell-O can lead to pooling at the bottom of the cake, which, while still tasty, can make for a slightly less ideal texture. Don’t waste any leftover Jell-O mixture; it’s perfect for making individual Jell-O cups or other fun, festive treats!
The Cake Base: A Canvas of White
A white cake mix is our foundation for this recipe, and it’s a deliberate choice. The pale color of the white cake allows the vibrant red and blue Jell-O to truly “pop” and shine through, creating that beautiful contrast essential for the flag design. For an authentic “red, WHITE, and blue” cake, a crucial tip is to use egg whites only when preparing your cake mix. Many white cake mixes call for whole eggs, which contain yolks that can impart a yellowish tint to the cake. By using only the whites, you ensure a brilliantly white cake that perfectly highlights the red and blue Jell-O, making your patriotic dessert even more striking.
The Topping: Creamy Cloud and Fresh Berries
Our choice for the topping is Cool Whip, primarily for its convenience and excellent ability to hold its shape, making for a beautifully stable whipped layer. It’s ready to use straight from the tub after thawing, saving you precious time. However, if you prefer a richer flavor or want to go completely homemade, a homemade whipped topping is absolutely welcome! Simply whip heavy cream with a touch of sugar and vanilla until stiff peaks form. To create the iconic flag design, we turn to fresh strawberries and blueberries. These berries not only add natural sweetness and a refreshing tang but also provide the perfect colors for the American flag motif. While strawberries and blueberries are traditional, you could also incorporate blackberries for additional blue or raspberries for a different red hue, though this might slightly alter the classic flag appearance. Choose firm, ripe berries for the best flavor and presentation.
Step-by-Step Guide: Crafting Your Red, White and Blue Poke Cake
These step-by-step photos and detailed instructions are here to guide you visually through the entire process of making this delightful cake. For a printable version of this recipe, complete with precise measurements and comprehensive instructions, simply jump to the recipe card at the bottom of this page.
- Prepare Your Cake: Preheat your oven to 350°F (175°C), or follow the specific temperature instructions on your cake mix package. In a large bowl, beat together the white cake mix, eggs (remember to use egg whites only for a truly white cake), vegetable oil, and water according to the quantities and directions provided on your cake mix packaging. This ensures your cake batter is perfectly consistent.
- Bake the Cake: Pour the prepared cake batter evenly into a greased 9×13 inch glass baking dish. Bake for approximately 30 minutes, or until a toothpick inserted into the center comes out clean. Baking times can vary, so keep an eye on it.
- Initial Cooling: Once baked, remove the cake from the oven and allow it to cool in the baking dish for 5-10 minutes. This brief cooling period helps the cake set before you start poking holes, preventing it from crumbling. While the cake cools, this is the perfect time to prepare your Jell-O mixtures.
- Prepare the Jell-O Mixtures: For each individual color of Jell-O (red and blue), carefully measure out 3 oz of the unprepared Jell-O powder into separate bowls. To each bowl, add 1 cup of boiling water and stir thoroughly until the Jell-O crystals are completely dissolved. This should only take a couple of minutes. Once dissolved, stir in 1 cup of ice water into each mixture. The ice water helps to cool the mixture down quickly, preventing it from cooking the cake too much when poured, and speeds up the setting process.
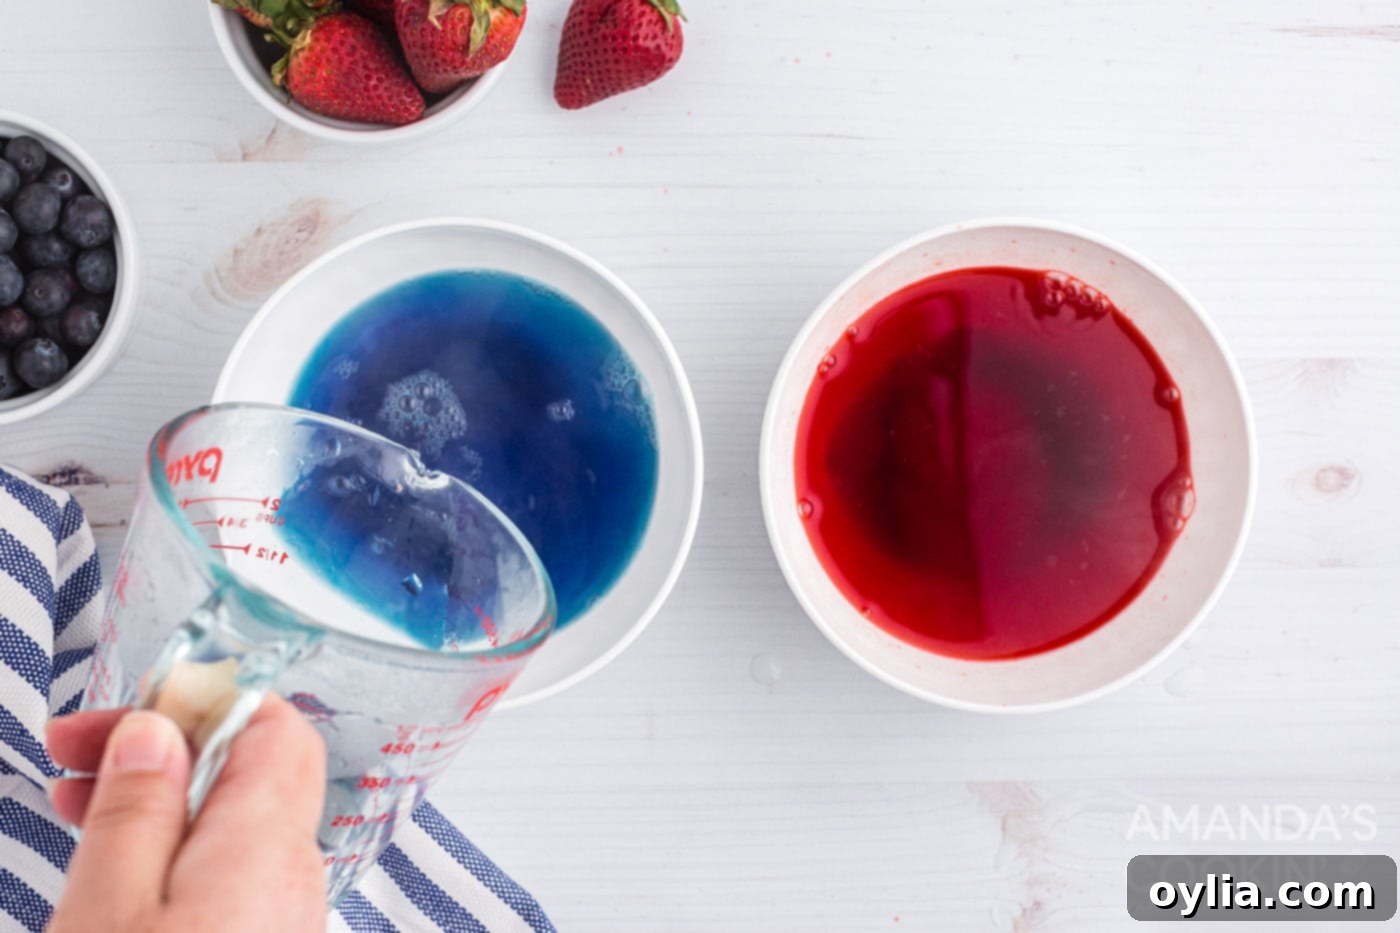
Preparing the vibrant red and blue Jell-O mixtures. - Poke the Holes: Once the cake has cooled slightly (but is still warm), it’s time for the “poke” action! Use the handle of a wooden spoon, a chopstick, or even the blunt end of a skewer to poke holes all over the surface of the cake. Aim for holes that are about ½ to ¾ inch deep and spaced approximately 1 inch apart. Don’t be shy, but avoid poking all the way through to the bottom of the dish, as this could cause the Jell-O to leak.
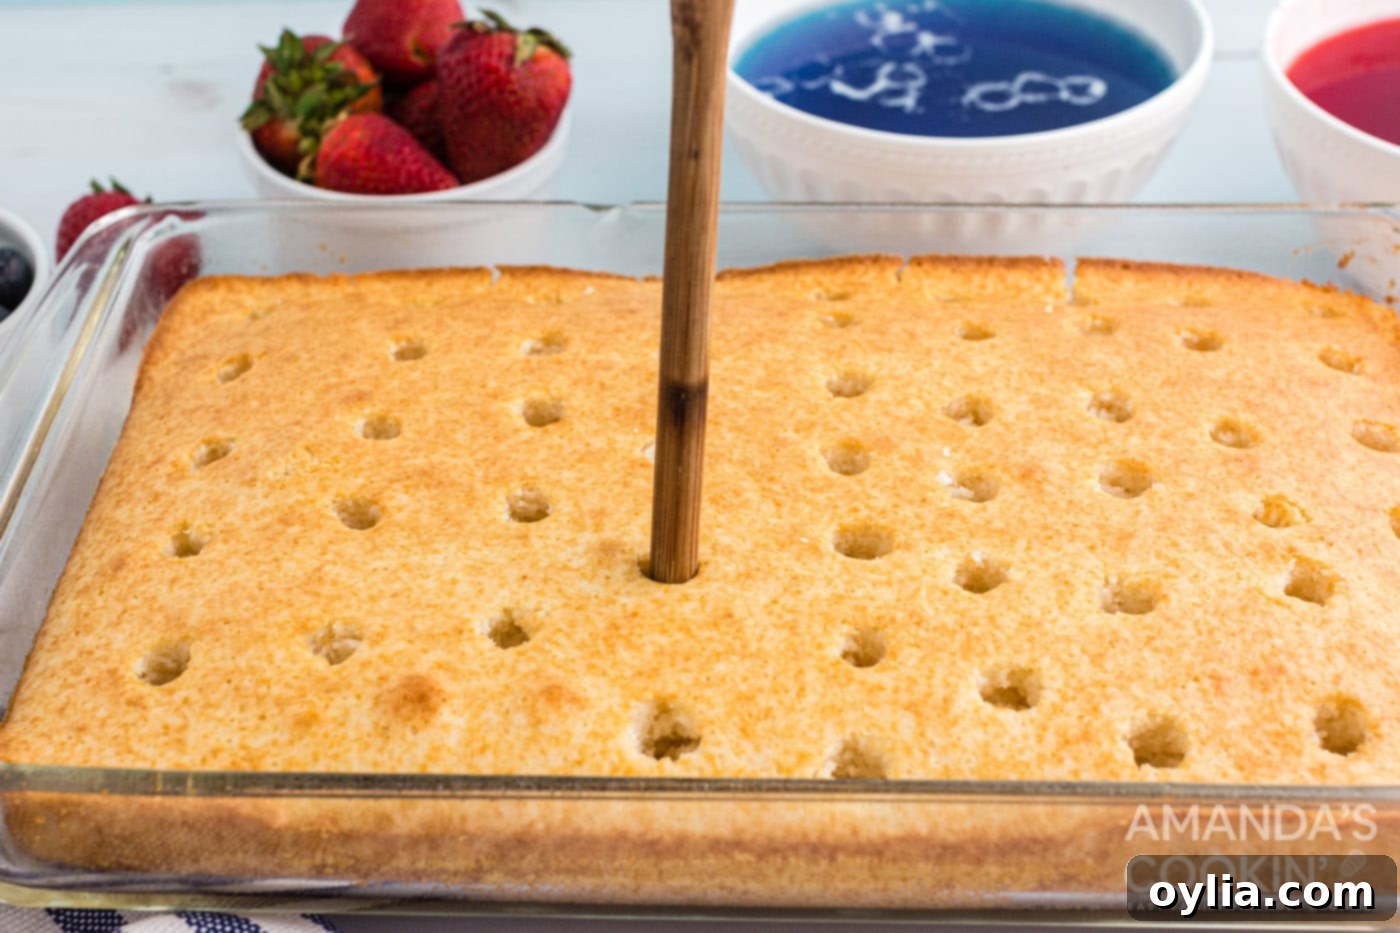
Creating the signature “poke” pattern for Jell-O infusion. - Infuse with Jell-O: Now for the fun part – drizzling the colorful Jell-O! Carefully alternate rows of the blue and red Jell-O liquid over the poked holes in the cake. You’ll want to drizzle it generously, ensuring the liquid seeps into each hole. You likely won’t need to use all of the prepared Jell-O liquid, so be mindful not to over-saturate the cake, which could lead to a soggy bottom. The goal is even distribution for a beautiful marbled effect when sliced.
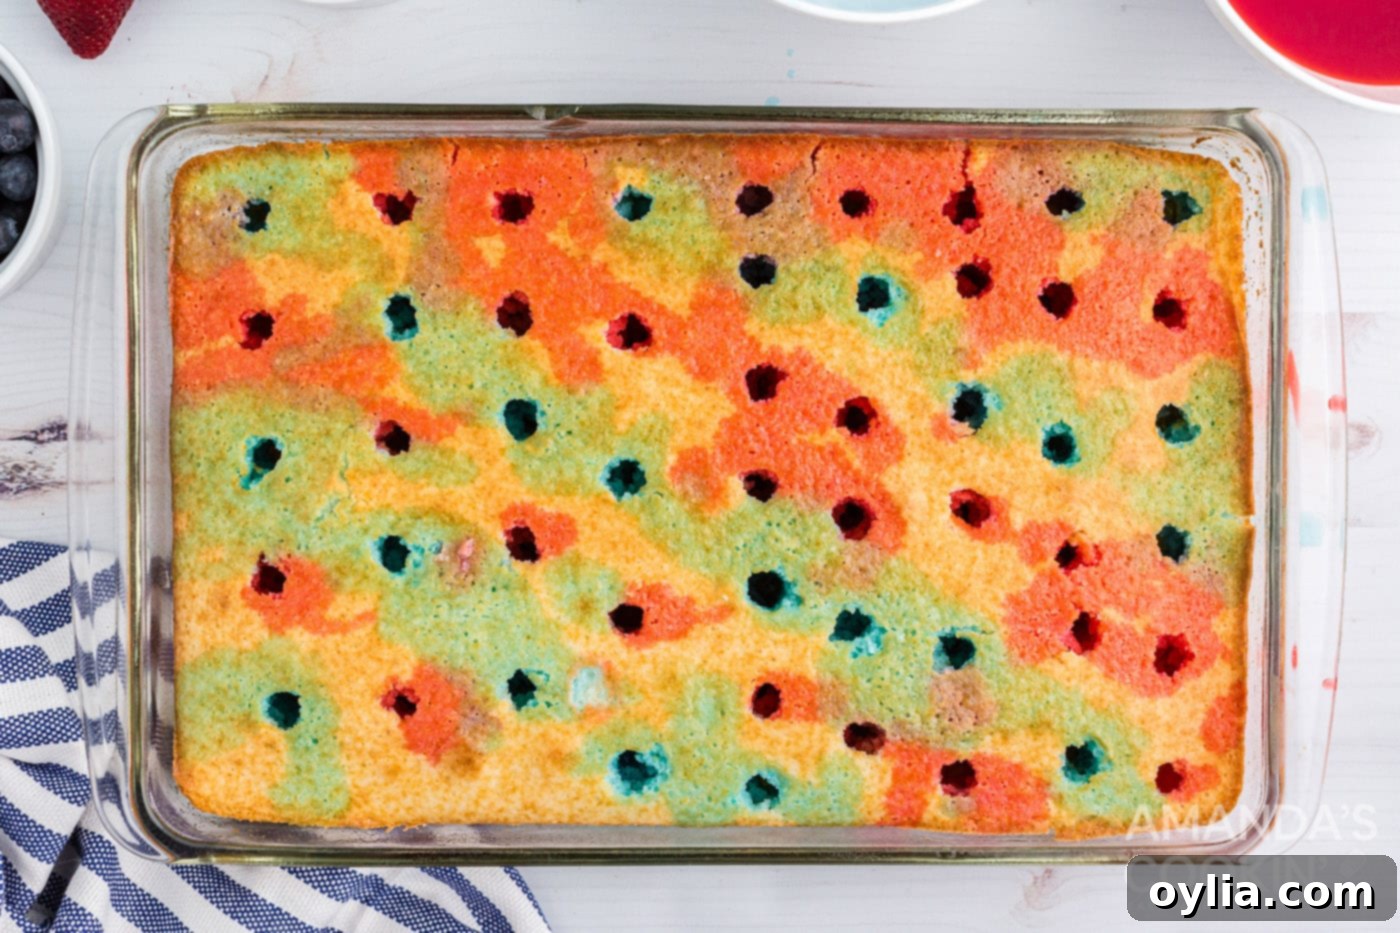
Alternating rows of red and blue Jell-O create a vibrant internal pattern. - Final Cooling: Allow the cake to cool completely at room temperature, then transfer it to the refrigerator for at least 30-60 minutes. This crucial step allows the Jell-O to fully set within the cake, creating that distinct, moist texture.
- Top with Cool Whip: Once the cake is thoroughly cooled and the Jell-O is set, gently spread the thawed Cool Whip (or your homemade whipped topping) evenly over the entire surface of the cake. A rubber spatula or offset knife works best for creating a smooth, inviting white canvas.
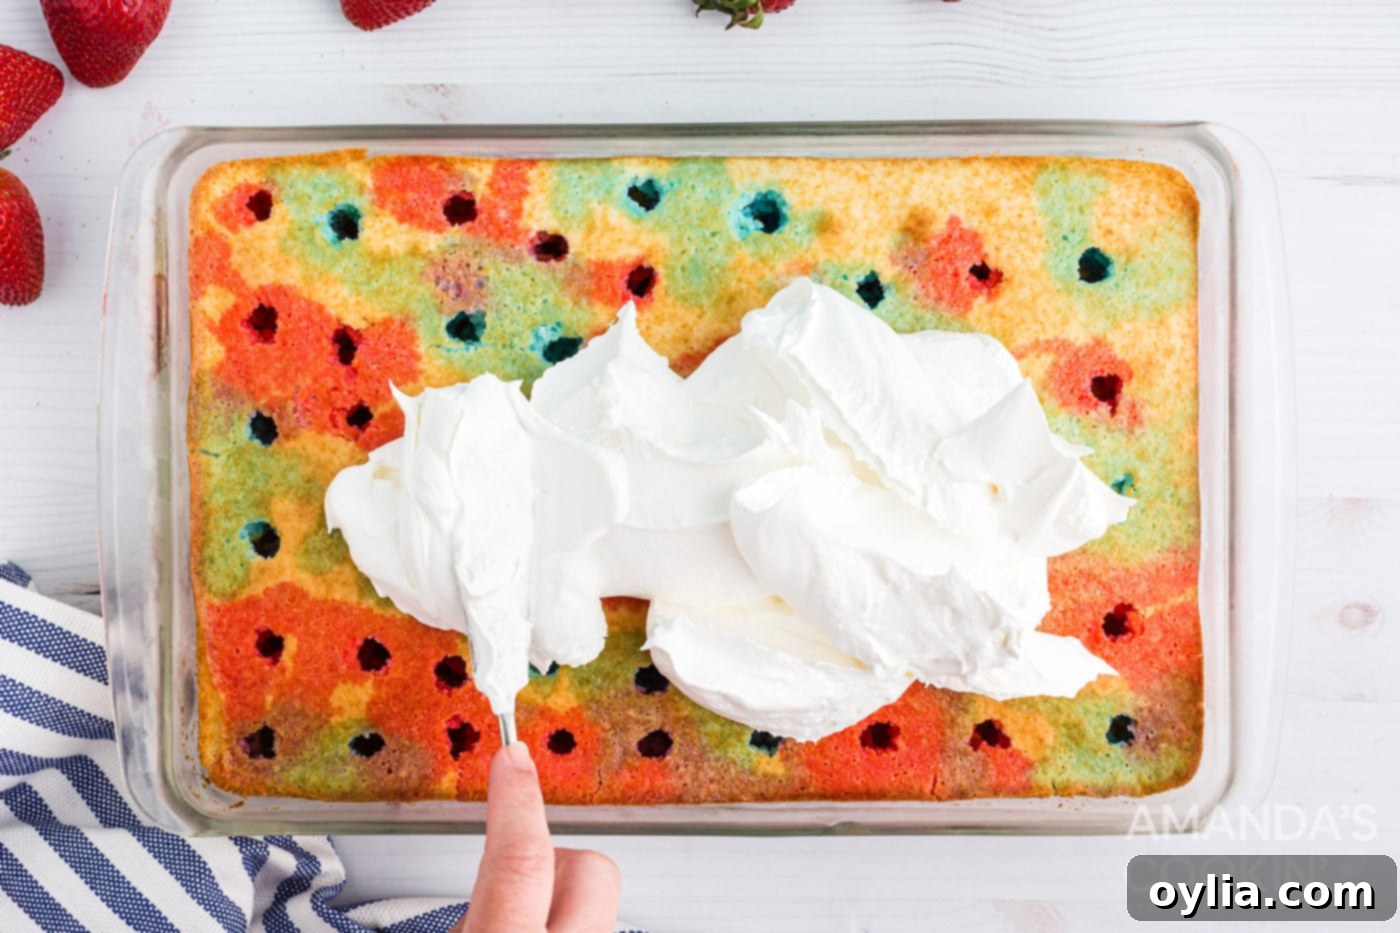
A smooth layer of Cool Whip sets the stage for the flag design. - Create the Flag Design: This is where your cake transforms into a beautiful American flag! Neatly place your blueberries into one top-left corner of the cake, forming the “stars” field. Then, arrange the sliced strawberries in horizontal rows across the remainder of the cake (excluding the blueberry corner), slightly overlapping each slice to create neat, defined “stripes.”
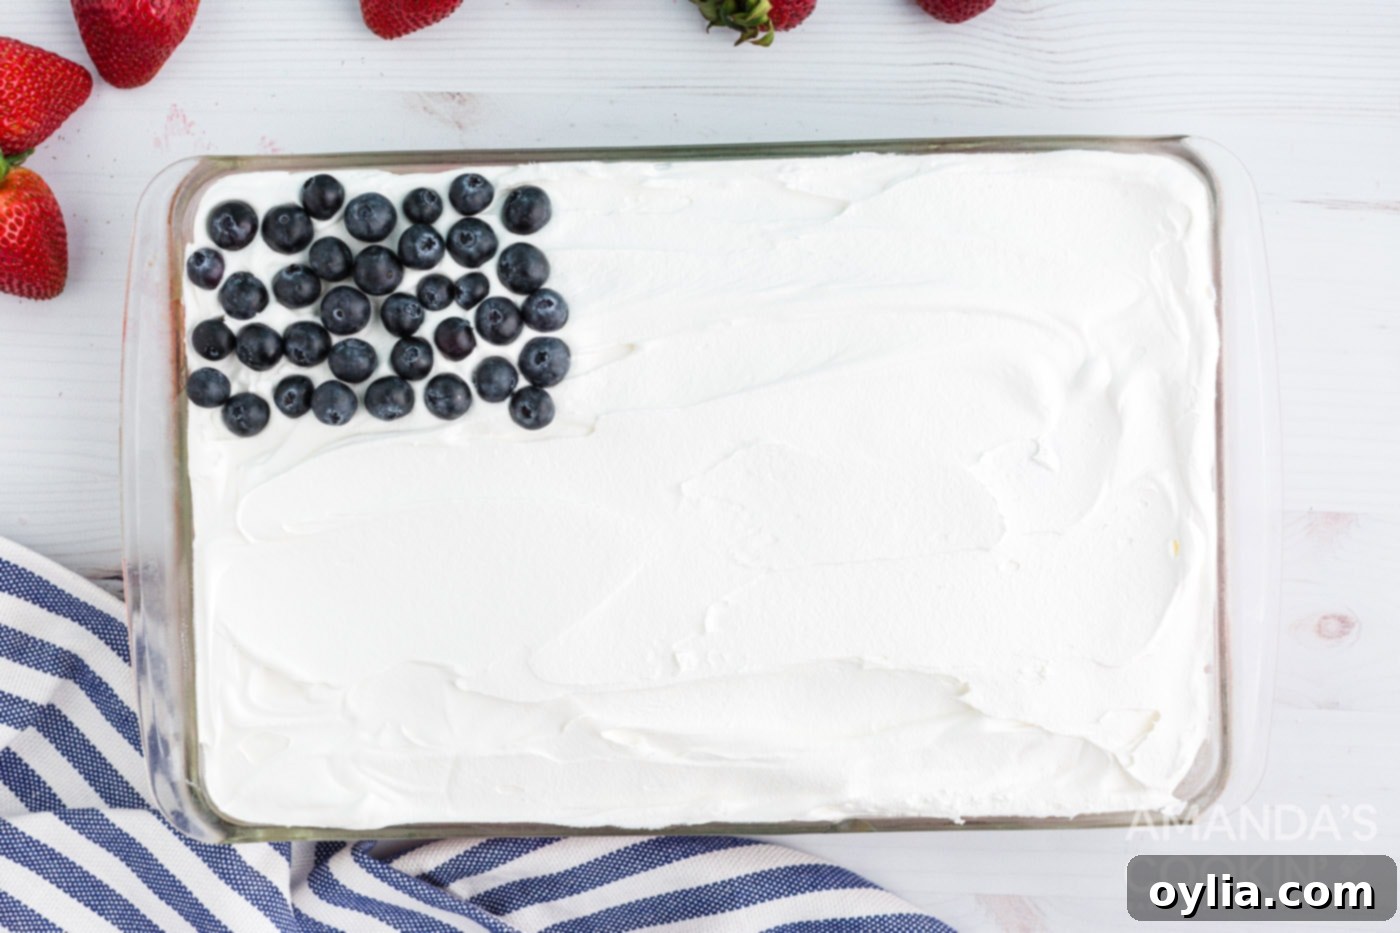
Arranging the blueberries to form the “stars” portion of the flag. 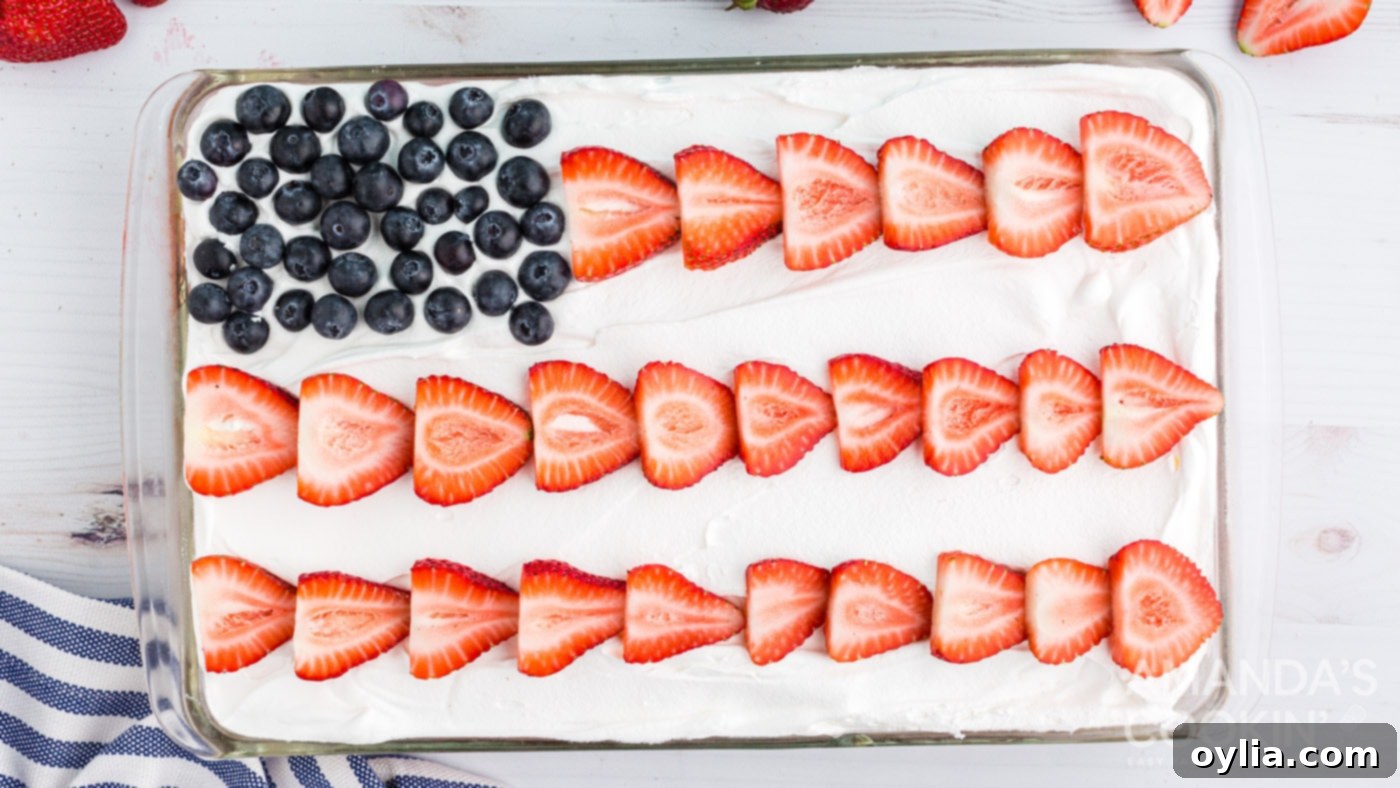
The completed patriotic flag design using fresh strawberries and blueberries. - Chill and Serve: For the best texture and to ensure the Jell-O and topping are perfectly set, refrigerate the finished cake for at least 2 hours before serving. When ready to enjoy, slice into 20-24 festive pieces and serve chilled.
Frequently Asked Questions & Expert Tips for Perfect Poke Cake
Absolutely! This patriotic poke cake is an excellent make-ahead dessert. You can prepare it up to 1 day in advance of your event. In fact, making it a day ahead often allows the Jell-O to fully penetrate and moisten the cake, resulting in an even more flavorful and satisfying dessert. Just ensure it’s tightly covered in the refrigerator to keep it fresh.
To maintain its freshness and deliciousness, store this poke cake tightly covered with plastic wrap or in an airtight container in the refrigerator for up to 3 days. Be aware that after a couple of days, the fresh strawberries on top might start to release some liquid, slightly affecting their appearance, but the cake will still be tasty.
Yes, absolutely! While we love the convenience of boxed cake mix and Cool Whip, you are more than welcome to elevate this recipe with homemade components. We even have a classic white cake recipe that would be a fantastic substitute for the cake mix if you prefer to bake from scratch. Similarly, you can whip your own heavy whipping cream with sugar and vanilla to create a fresh, homemade whipped topping to spread on the cake instead of using frozen whipped topping or Cool Whip. Both options yield delicious results!
Pooling usually happens if too much liquid Jell-O is used, or if the holes aren’t deep enough/too close together, preventing absorption. To avoid this, ensure your holes are a consistent depth (about 1/2 to 3/4 inch) and spaced about 1 inch apart. Drizzle the Jell-O slowly and watch as it absorbs. You won’t necessarily use all the liquid Jell-O prepared. If pooling does occur, it’s still safe to eat, but the texture might be slightly different at the bottom. You can gently blot any excess if it’s significant before chilling.
Yes, you can absolutely use sugar-free Jell-O for this recipe if you’re looking to reduce sugar content. The preparation steps remain exactly the same. The texture and color will still be vibrant and the cake will be just as moist and delicious.
For a professional-looking flag, ensure your strawberries are sliced into even 1/8 to 1/4 inch pieces. Use the center slices for the most uniform “stripes.” Choose strawberries that are similar in size for a consistent look. When placing them, slightly overlap each slice to create a continuous stripe effect. For the blueberry section, aim for an even layer of berries in the top-left corner, covering the whipped topping completely in that area.
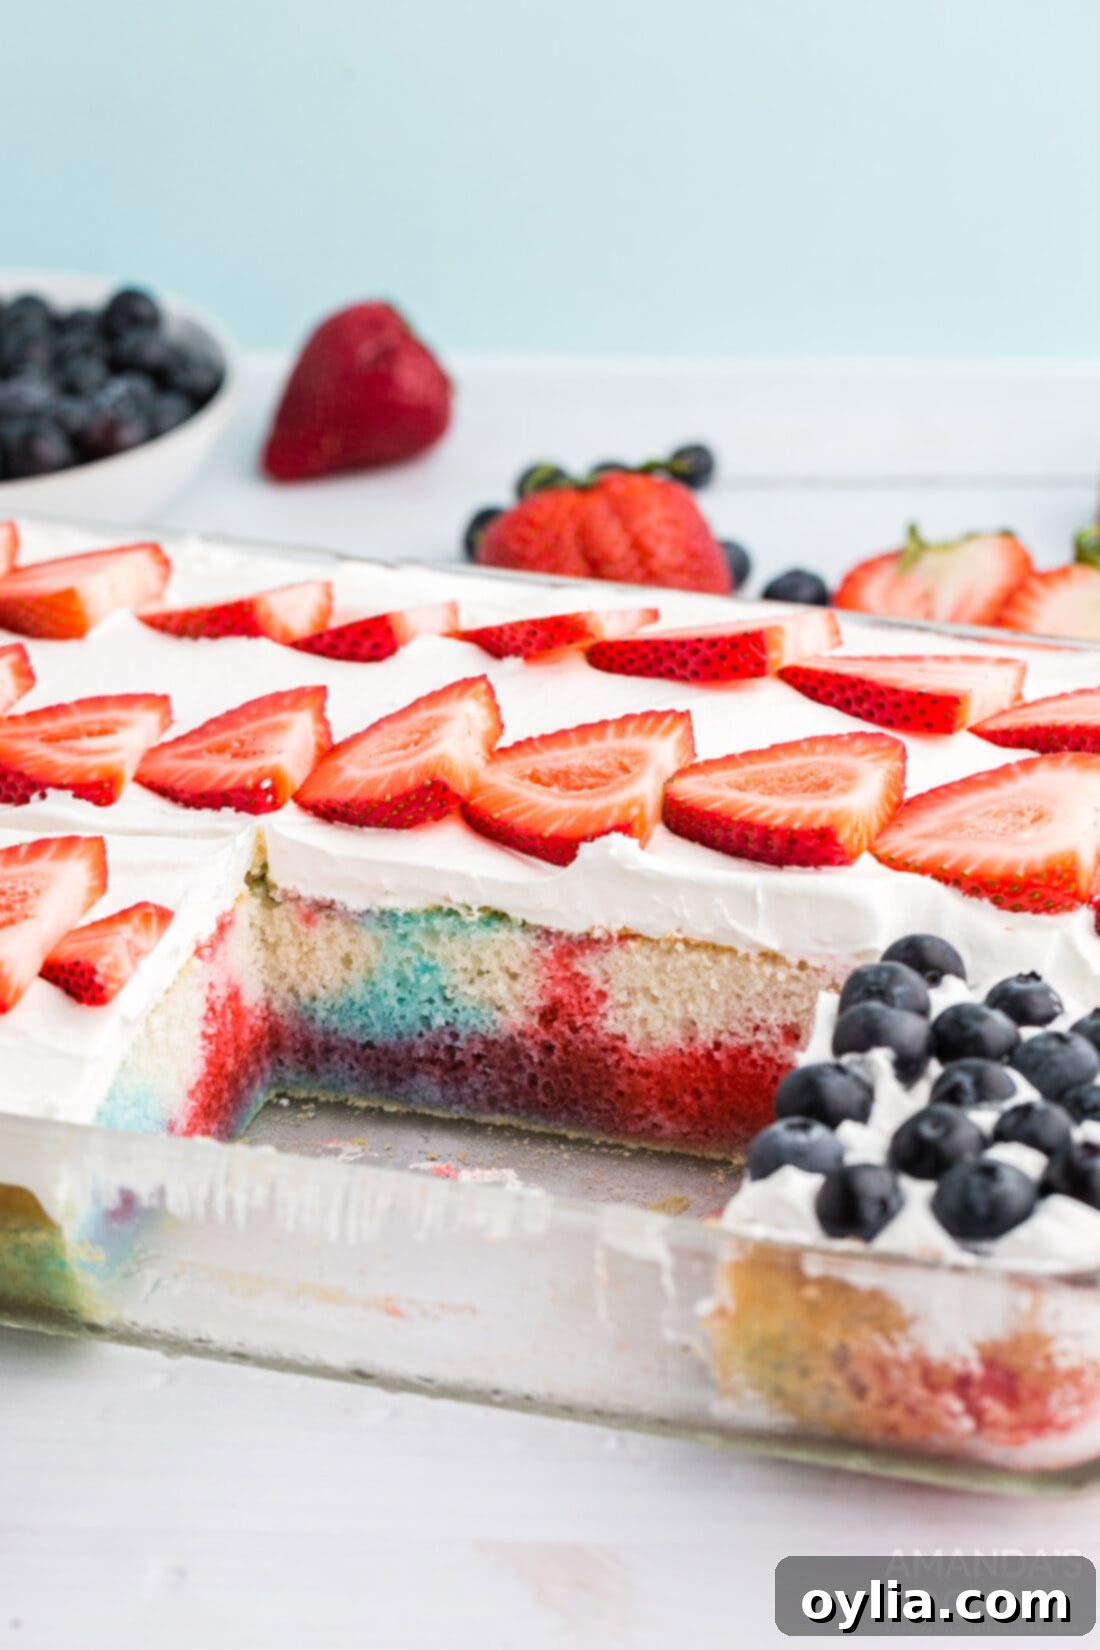
Elevate Your Holiday Spread: Serving Suggestions
This Red, White & Blue Poke Cake is not just a dessert; it’s a statement piece, perfect for rounding off any festive meal. It’s an ideal addition to potlucks, casual backyard BBQs, or more formal holiday parties. Its vibrant colors and refreshing flavors make it particularly well-suited for warm weather celebrations.
Consider pairing this delightful dessert with easy-to-prepare main courses and side dishes that complement its light, fruity profile without being too heavy. Here are some fantastic ideas:
- Grilled Favorites: The fresh taste of this poke cake pairs wonderfully with smoky, savory grilled dishes. Think about serving it alongside succulent grilled shrimp, juicy marinated grilled chicken skewers, or classic grilled burgers and hot dogs.
- Summer Sides: For sides, keep it light and fresh. A vibrant grilled corn on the cob, a crisp green salad, or a refreshing pasta salad would be excellent choices.
- Beverage Pairings: Complement the cake with other patriotic-themed drinks like a Patriotic Punch or a cool Patriotic Vodka Lemonade Slushie for adults.
- Dessert Bar Extravaganza: If you’re hosting a grand celebration, feature this poke cake as the centerpiece of a patriotic dessert bar. Surround it with other themed treats for an unforgettable display.
More Festive Patriotic Recipes to Explore
If you love celebrating with themed food, then you’re in the right place! We have a treasure trove of other patriotic recipes that are perfect for your next American holiday gathering. From refreshing drinks to charming desserts and savory snacks, you’ll find plenty of inspiration to create a truly memorable spread.
- Patriotic Punch: A colorful, family-friendly drink perfect for any celebration.
- Patriotic Mini Cheesecakes: Bite-sized delights with red, white, and blue toppings.
- American Flag Kabobs: Healthy and fun fruit skewers arranged like a flag.
- Taco Salad Flag: A savory flag creation that doubles as a delicious meal.
- Mini Shortcake Cups: Individual desserts bursting with berries and cream.
- American Flag Brownies: Fudgy brownies decorated for the occasion.
- Patriotic Charcuterie Board: An impressive spread of themed snacks and treats.
- American Flag Cupcakes: Easy-to-decorate cupcakes that kids will love.
- 4th of July Jello Shots: A fun adult treat for your holiday party.
- Patriotic Ice Cream Cone Cupcake: A playful twist on cupcakes, served in cones.
- Mixed Berry Icebox Cake: A no-bake, refreshing layered dessert.
- Patriotic Vodka Lemonade Slushie: Another refreshing adult beverage to keep cool.
I love to bake and cook and share my kitchen experience with all of you! Remembering to come back each day can be tough, that’s why I offer a convenient newsletter every time a new recipe posts. Simply subscribe and start receiving your free daily recipes!
Red White and Blue Poke Cake
IMPORTANT – There are often Frequently Asked Questions within the blog post that you may find helpful. Simply scroll back up to read them!
Print It
Pin It
Rate It
Save ItSaved!
Ingredients
- 16.25 oz white cake mix along with the ingredients called for on the back of the box, normally vegetable oil, 2-3 eggs, and water
- 3 oz cherry jello unprepared
- 3 oz berry blue jello unprepared
- 2 cups boiling water divided
- 2 cups ice water divided
- 8 oz Cool Whip or whipped topping
- 10 strawberries sliced
- 1 cup blueberries
Things You’ll Need
-
13×9 baking dish
Before You Begin
- For a truly red, WHITE, and blue cake, be sure to use egg whites only when mixing up the cake mix. Egg yolks will make the cake mix more yellow.
- You really only need 1.5 oz. of each flavor of Jell-o. If you add too much of the liquid jello, it starts to puddle on the bottom of the cake. Use the leftover jello to make jello cups or other festive jello treats.
- When slicing the strawberries, first cut off the stem and then slice into even slices, about 1⁄8”-1⁄4” thick. Use the center slices only for the most similar size and shape pieces when overlapping. Choose strawberries that are all similar in size so that the slices placed as stripes are uniform.
Instructions
-
Preheat oven to 350°F or as directed on cake mix package instructions.
-
Beat together cake mix, eggs, oil, and water following the instructions and quantities indicated on cake mix package.
-
Pour cake batter into a greased 9×13 glass baking dish and bake according to instructions (approximately 30 minutes).
-
Allow the cake to cool for 5-10 minutes while you prepare the jello.
-
For each of the colors of jello – mix 3 oz. with 1 cup of boiling water and stir until dissolved. Then add 1 cup ice water and stir until combined.
-
Use the handle of a wooden spoon or a chopstick to poke holes all over the cake.
-
Alternate rows of blue and red jello liquid, drizzling it heavily over the holes in the cake; you will not need to use all of the jello.
-
Once the cake has cooled completely, gently top with the thawed Cool Whip.
-
Place blueberries neatly into one top left corner of the cake. Slice strawberries into 1⁄8” slices and place them in rows across the whole cake (except for the blueberry corner), overlapping each slice slightly.
-
Refrigerate for 2 hours before serving. Slice into 20-24 pieces and serve.
Nutrition
The recipes on this blog are tested with a conventional gas oven and gas stovetop. It’s important to note that some ovens, especially as they age, can cook and bake inconsistently. Using an inexpensive oven thermometer can assure you that your oven is truly heating to the proper temperature. If you use a toaster oven or countertop oven, please keep in mind that they may not distribute heat the same as a conventional full sized oven and you may need to adjust your cooking/baking times. In the case of recipes made with a pressure cooker, air fryer, slow cooker, or other appliance, a link to the appliances we use is listed within each respective recipe. For baking recipes where measurements are given by weight, please note that results may not be the same if cups are used instead, and we can’t guarantee success with that method.
