Irresistible Tropical Dream Dessert Bars: Your Ultimate Guide to a Fruity Summer Treat

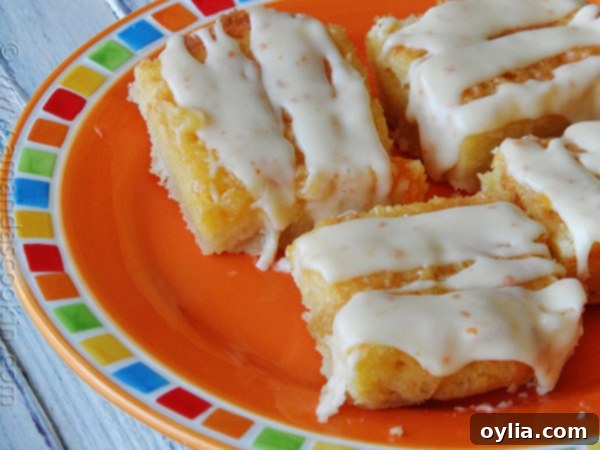
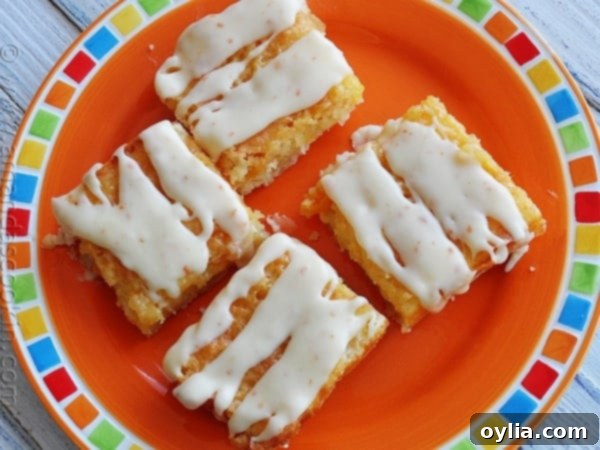
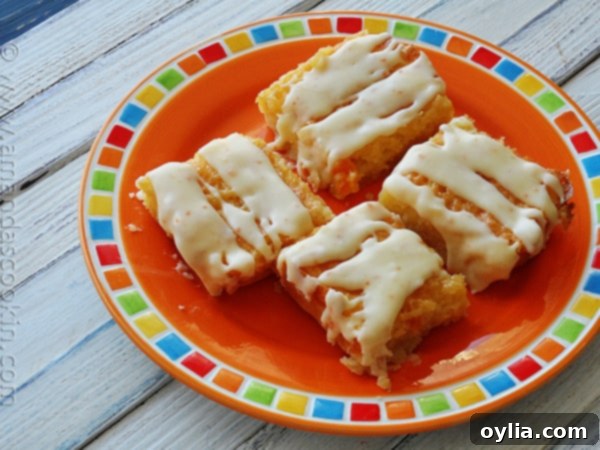
If you’re a lover of sweet, vibrant, and utterly delicious fruity desserts, then you’ve just stumbled upon your next obsession: Tropical Dream Dessert Bars! These delightful bars are an absolute dream come true, packed with the luscious flavors of tropical fruits and crowned with a bright, zesty confectioners’ glaze infused with fresh orange. They are more than just a dessert; they are a mini-vacation for your taste buds, transporting you to a sunny paradise with every bite.
Imagine the perfect treat for a lively luau party, a casual summer barbecue, or even a cozy family gathering. These bars fit every occasion, bringing a burst of sunshine and sweetness. While one bar might be enough to perfectly satisfy your sweet tooth, we totally understand if you can’t resist reaching for a second (or third!). Your secret’s safe with us!

The Secret to Their Irresistible Tropical Flavor
What makes these Tropical Dream Dessert Bars so incredibly flavorful? The magic lies in a harmonious blend of dried apricots, crushed pineapple, and fresh orange juice. Each ingredient plays a crucial role in creating a dessert that’s both sweet and wonderfully tangy, with a delightful chewiness from the apricots and a juicy burst from the pineapple. The orange juice ties all these elements together, providing a bright, citrusy counterpoint that truly elevates the overall experience.
Why These Ingredients Work So Well
- Dried Apricots: These provide a concentrated sweetness and a lovely chewy texture, adding depth to the filling. Their natural tartness also balances the sugar beautifully.
- Crushed Pineapple: A quintessential tropical fruit, pineapple brings a juicy tang and a tender consistency. Remember to drain it well to prevent a soggy filling!
- Orange Juice & Zest: Fresh orange juice brightens the fruit flavors in the filling, while the zest in the glaze adds an aromatic, intense citrus kick that makes the topping truly pop.
Of course, the beauty of homemade desserts is the freedom to personalize them. While this recipe is fantastic as written, don’t hesitate to experiment with other dried or tropical fruits. Think dried mango, shredded coconut, or even a hint of lime zest for a unique twist. These bars are incredibly versatile, allowing you to truly make them your own!

Essential Tips for Baking Perfect Dessert Bars
Achieving perfectly set and sliceable dessert bars requires a little patience, but the results are absolutely worth it. Here’s a crucial tip: **Make sure these bars are allowed to sit and cool completely before you attempt to cut or pick them up.** This is paramount to prevent crumbling and ensure neat, beautiful squares.
- Cooling is Key: After baking, let the bars cool completely at room temperature. This allows the filling to firm up and the crust to stabilize. Rushing this step often leads to messy, crumbly bars.
- Refrigeration for Speed: If you’re in a bit of a hurry, once they’ve cooled sufficiently at room temperature, you can transfer them to the refrigerator for an hour or two to firm them up even faster. Just ensure they are fully cooled before chilling.
- Prepare Your Pan Properly: Lining your baking pan with foil, allowing it to overhang the edges, is a game-changer. This creates “handles” that let you easily lift the entire slab of cooled bars out of the pan, making cutting a breeze. Don’t forget to spray the foil with cooking spray to prevent sticking!
- Don’t Over-Process the Crust: When making the shortbread crust, pulse the ingredients in the food processor just until coarse crumbs form and it barely starts to come together. Over-processing can lead to a tough crust.
- Drain Pineapple Thoroughly: Excess moisture from the crushed pineapple can make your filling watery. Use a fine-mesh sieve to press out as much liquid as possible before adding it to the mixture.
- Achieving the Perfect Glaze Consistency: When making the orange glaze, start with the smaller amount of orange juice and gradually add more until you reach a thick, drizzling consistency. You want it thick enough to coat, but thin enough to drizzle smoothly over the bars.
Follow these simple guidelines, and you’ll be enjoying perfectly structured, delicious Tropical Dream Dessert Bars in no time!
Enjoy every delightful bite!
Explore More Tropical Dessert Delights
If these Tropical Dream Dessert Bars have awakened your craving for more exotic flavors, here are some other fantastic recipes to try:
- Tropical Chiffon Pie – A light and airy delight from Woman’s Day.
- Tropical Layered Dessert – A refreshing, multi-layered treat from Kraft.
- Tropical Sunshine Cake – Bring sunshine to your table with this cake from Very Best Baking.

Tropical Dream Dessert Bars
IMPORTANT – There are often Frequently Asked Questions within the blog post that you may find helpful. Simply scroll back up to read them!
Print It
Pin It
Rate It
Save ItSaved!
Ingredients
Crust
- 2 cups unbleached all purpose flour
- ¼ cup plus 2 tablespoons powdered sugar
- ⅛ teaspoon baking powder
- 2 sticks 1 cup cold unsalted butter, cubed
Tropical filling
- 1 cup chopped dried apricots
- ⅓ cup orange juice
- 4 eggs
- 1 ½ cups sugar
- ½ teaspoon vanilla extract
- ¼ cup plus 2 tablespoons all purpose flour
- 1 teaspoon baking powder
- ¼ teaspoon salt
- ¾ cup drained crushed pineapple
Glaze
- 2 cups powdered sugar
- 2 tablespoons unsalted butter melted
- 2 teaspoons orange zest
- 2-3 tablespoons orange juice
Instructions
-
Preheat your oven to 350°F (175°C). Line a 13×9 inch baking pan with aluminum foil, ensuring the foil extends over the edges to create “handles.” Lightly spray the foil with cooking spray to prevent sticking.
For the Crust
-
In the bowl of a food processor, combine the unbleached all-purpose flour, powdered sugar, and baking powder. Pulse a few times to thoroughly combine these dry ingredients. Add the cold unsalted butter (cubed) all at once. Process until coarse crumbs are formed and the mixture just begins to come together into a dough. Avoid over-processing. Transfer the crumb mixture into the prepared baking pan and press it evenly into the bottom. Bake in the preheated oven for 15 minutes, or until the crust is a light golden brown. Once baked, remove the pan from the oven and place it on a wire rack to cool completely.
For the Filling
-
In a small bowl, combine the chopped dried apricots and orange juice. Stir gently and set aside to allow the apricots to plump slightly while you prepare the rest of the filling.
-
Wipe out the food processor bowl (no need to wash it completely). Add all four eggs to the cleaned bowl. Pulse lightly to beat the eggs. Next, add the granulated sugar and process for one minute until well combined and slightly lightened. Incorporate the vanilla extract with a quick pulse. Add the remaining dry ingredients for the filling: flour, baking powder, and salt. Pulse a few times, just until the dry ingredients are combined with the wet mixture. Finally, add the apricot mixture (with any remaining juice) and the thoroughly drained crushed pineapple. Pulse quickly a few times, just enough to combine everything without overmixing. Pour this vibrant filling mixture evenly over the completely cooled crust in the baking pan. Spread it gently with a spatula to ensure an even layer. Bake for 25-30 minutes, or until the filling is set (it should not jiggle significantly when gently shaken) and the edges are lightly browned.
-
Remove the pan from the oven and place it back on the cooling rack. Allow the bars to cool completely in the pan. Once fully cooled, use the foil overhangs to lift the entire slab of bars out of the pan. Place on a cutting board and cut into individual squares.
For the Glaze
-
In a small bowl, add the powdered sugar. To this, add the melted unsalted butter, orange zest, and an initial tablespoon of orange juice. Stir vigorously with a whisk or spoon until smooth. Gradually add small amounts of the remaining orange juice, a teaspoon at a time, until you achieve a thick, smooth, and drizzling consistency. The glaze should be thick enough to hold its shape slightly but still pourable. Drizzle the finished glaze generously over each individual dessert bar. Allow the glaze to set for at least 30 minutes at room temperature, or in the refrigerator, before serving. This will prevent the glaze from being sticky when handled.
The recipes on this blog are tested with a conventional gas oven and gas stovetop. It’s important to note that some ovens, especially as they age, can cook and bake inconsistently. Using an inexpensive oven thermometer can assure you that your oven is truly heating to the proper temperature. If you use a toaster oven or countertop oven, please keep in mind that they may not distribute heat the same as a conventional full sized oven and you may need to adjust your cooking/baking times. In the case of recipes made with a pressure cooker, air fryer, slow cooker, or other appliance, a link to the appliances we use is listed within each respective recipe. For baking recipes where measurements are given by weight, please note that results may not be the same if cups are used instead, and we can’t guarantee success with that method.
Storing Your Tropical Dream Dessert Bars
These delightful bars keep wonderfully, so you can enjoy them for days after baking. Store the cooled and glazed bars in an airtight container at room temperature for up to 3 days. For longer freshness, you can refrigerate them for up to a week. If stacking, it’s a good idea to place a piece of parchment paper between layers to prevent the glaze from sticking. For an even more indulgent experience, some people prefer them slightly chilled, as it enhances their refreshing quality, especially on a hot day.
Why You’ll Love Making These Bars
Beyond their incredible taste, these Tropical Dream Dessert Bars are relatively simple to make, making them an excellent choice for bakers of all skill levels. The use of a food processor for both the crust and the filling streamlines the process, cutting down on prep time and making cleanup easier. They are also highly customizable; feel free to add shredded coconut to the crust for an extra tropical crunch, or mix in some chopped nuts for added texture. The bright colors and appealing aroma of these bars make them a showstopper at any gathering, always drawing compliments and requests for the recipe. Share a taste of paradise with your loved ones, or keep them all to yourself – we won’t judge!
So, gather your ingredients, follow our detailed steps, and get ready to create a truly memorable dessert. These Tropical Dream Dessert Bars are guaranteed to bring a slice of sunshine to your kitchen and joy to everyone who tastes them. Happy baking!
