The Ultimate Pineapple Dream Dessert: A Crowd-Pleasing No-Bake Treat
Every family cherishes those special recipes that reliably appear at every gathering – the ones passed down through generations, evoking sweet memories with every delightful bite. Much like a classic Pineapple Upside Down Cake, a refreshing Ambrosia Salad, or a nostalgic Watergate Salad, our Pineapple Dream Dessert holds a special place in our hearts. This light, fluffy, and incredibly easy layered dessert consistently steals the show and disappears faster than you can say “another slice, please!”
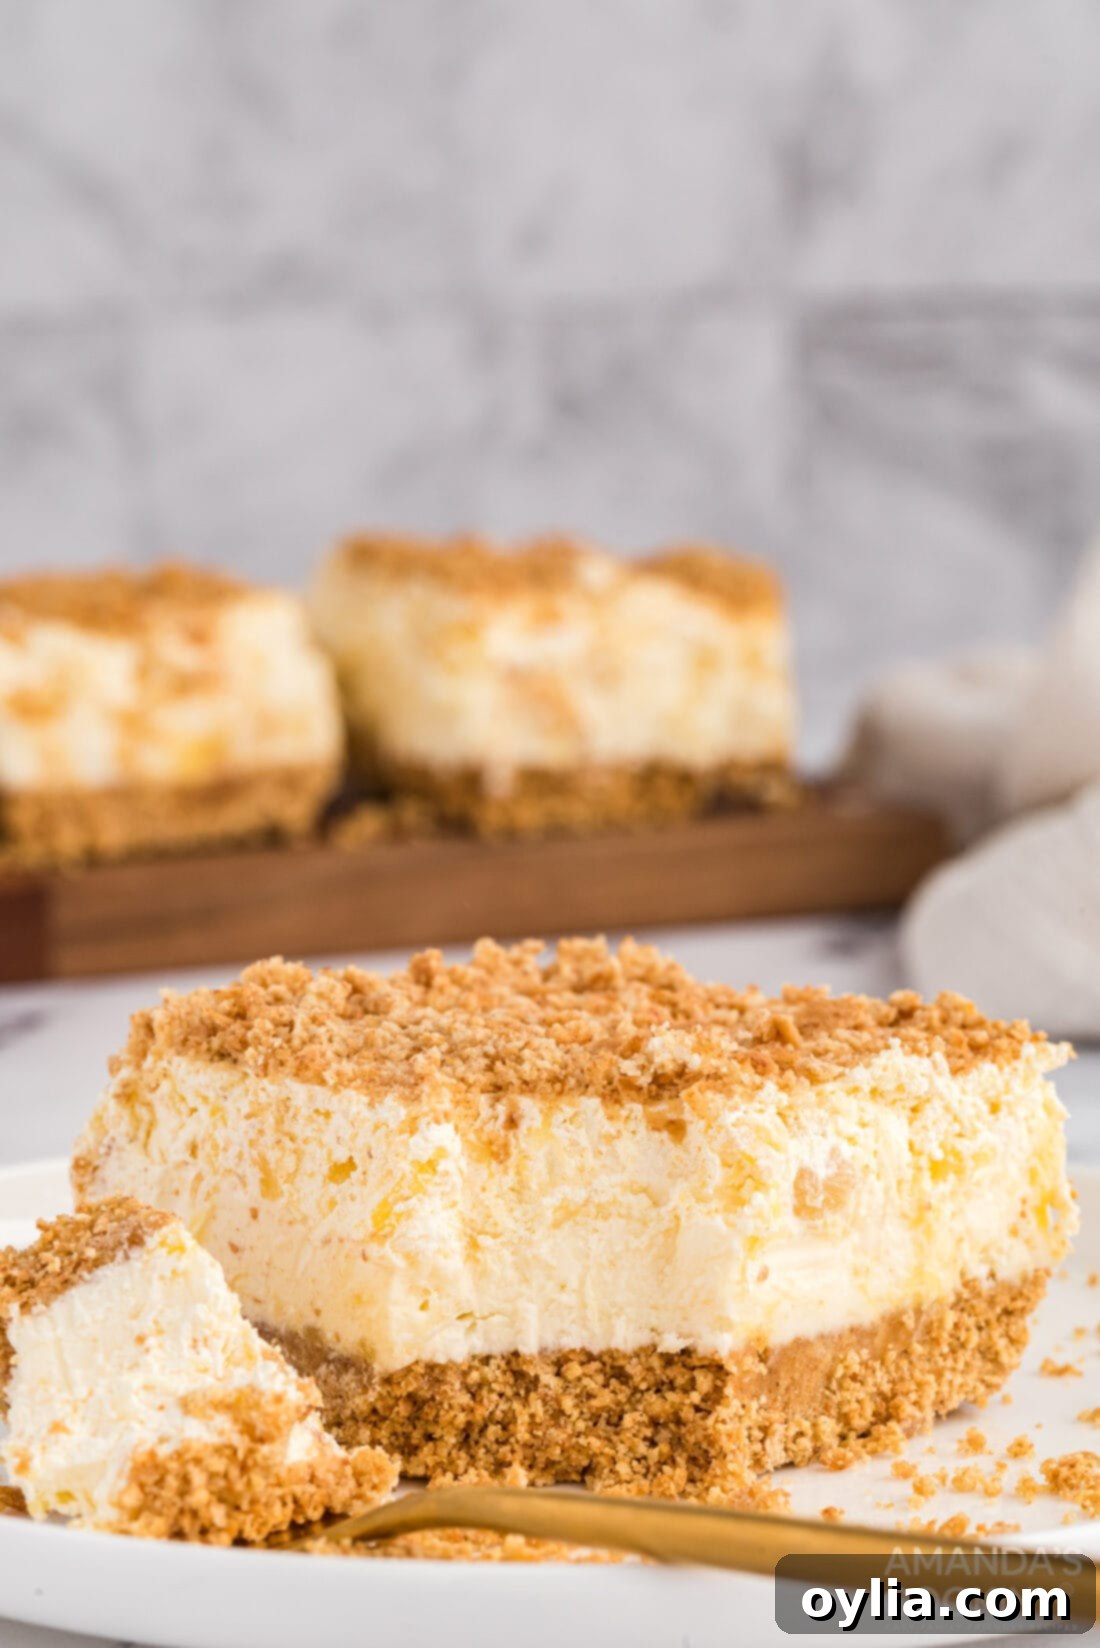
What makes this particular pineapple cream cheese dessert an undeniable family favorite? Its effortless charm and universally loved flavor profile. This delightful treat is not only incredibly simple to prepare, requiring minimal baking (or a complete no-bake option!), but also surprisingly easy to transport. This makes it an ideal choice for potlucks, holiday celebrations, summer barbecues, or any casual family function where you want to impress without the stress. You can confidently count on this dessert to be a highlight, ensuring you’ll rarely, if ever, take home leftovers – just an empty dish and a trail of compliments!
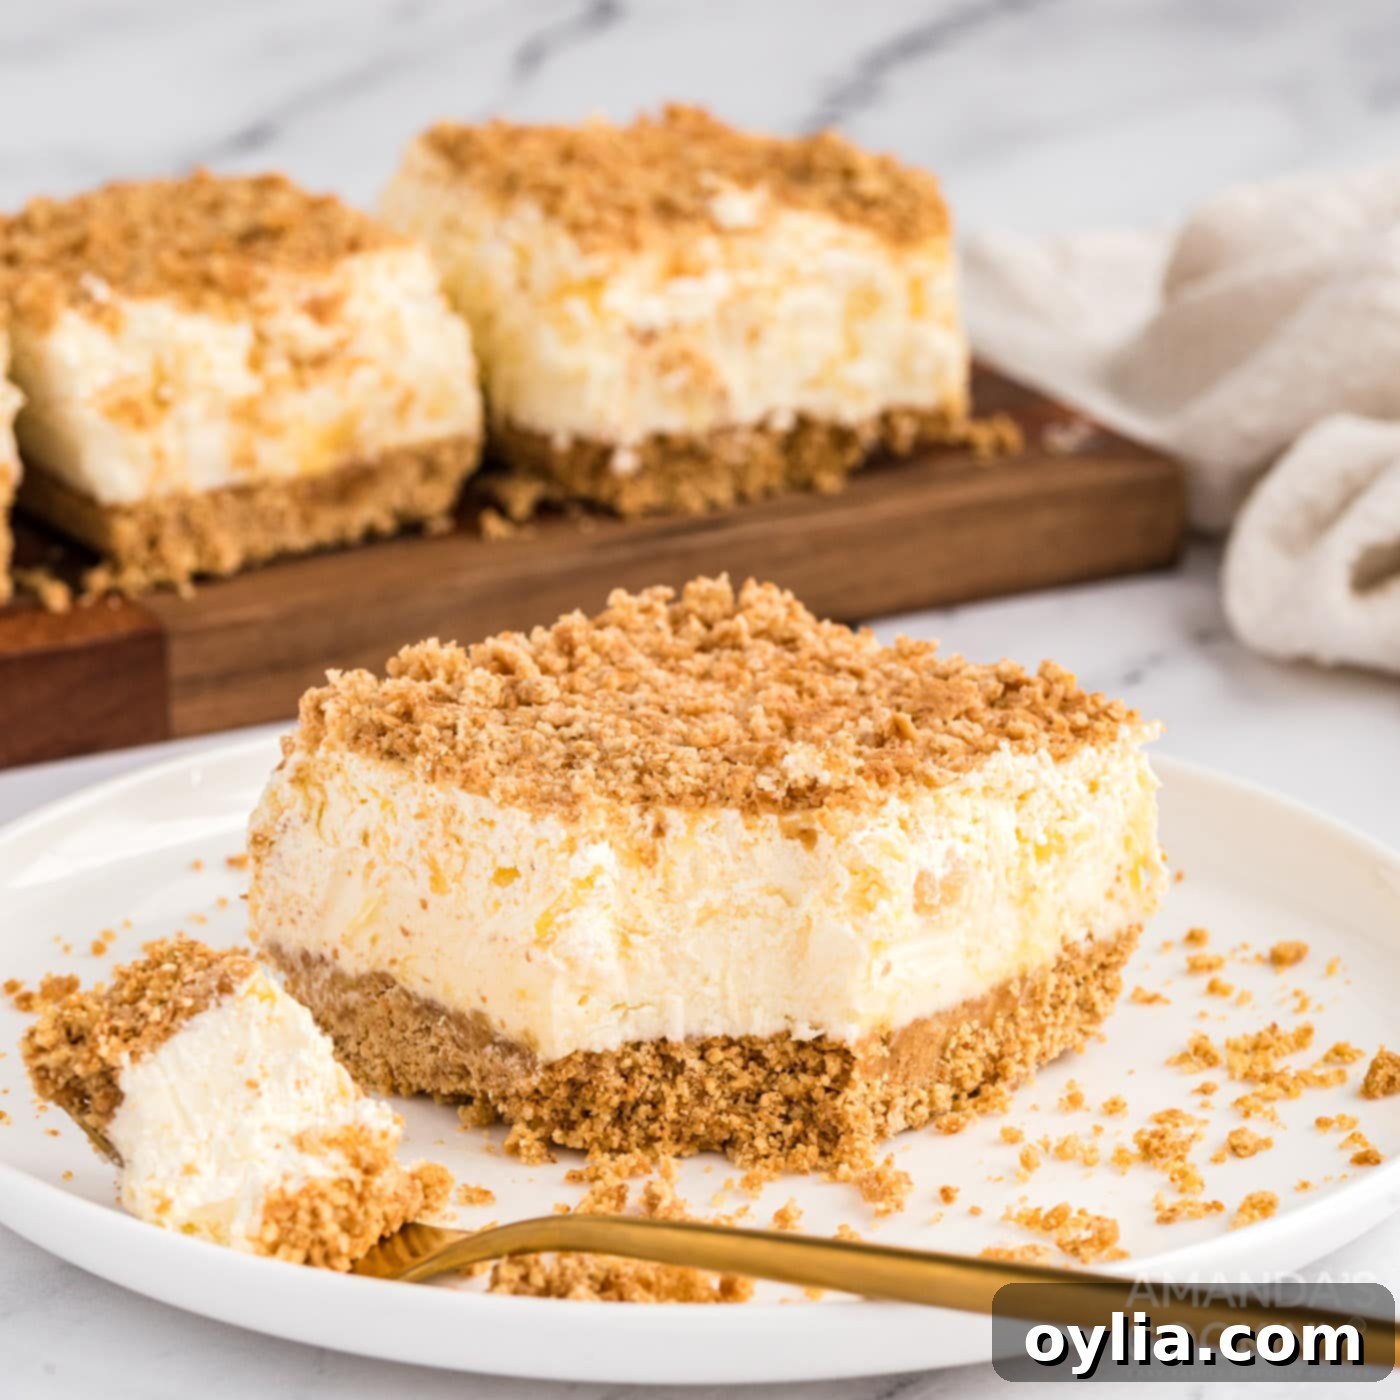
Heads Up! Yes, you’re in the right place! We’ve given our photos a fresh new look, but rest assured, the beloved recipe for this Pineapple Dream Dessert remains exactly the same. Recognize this photo?
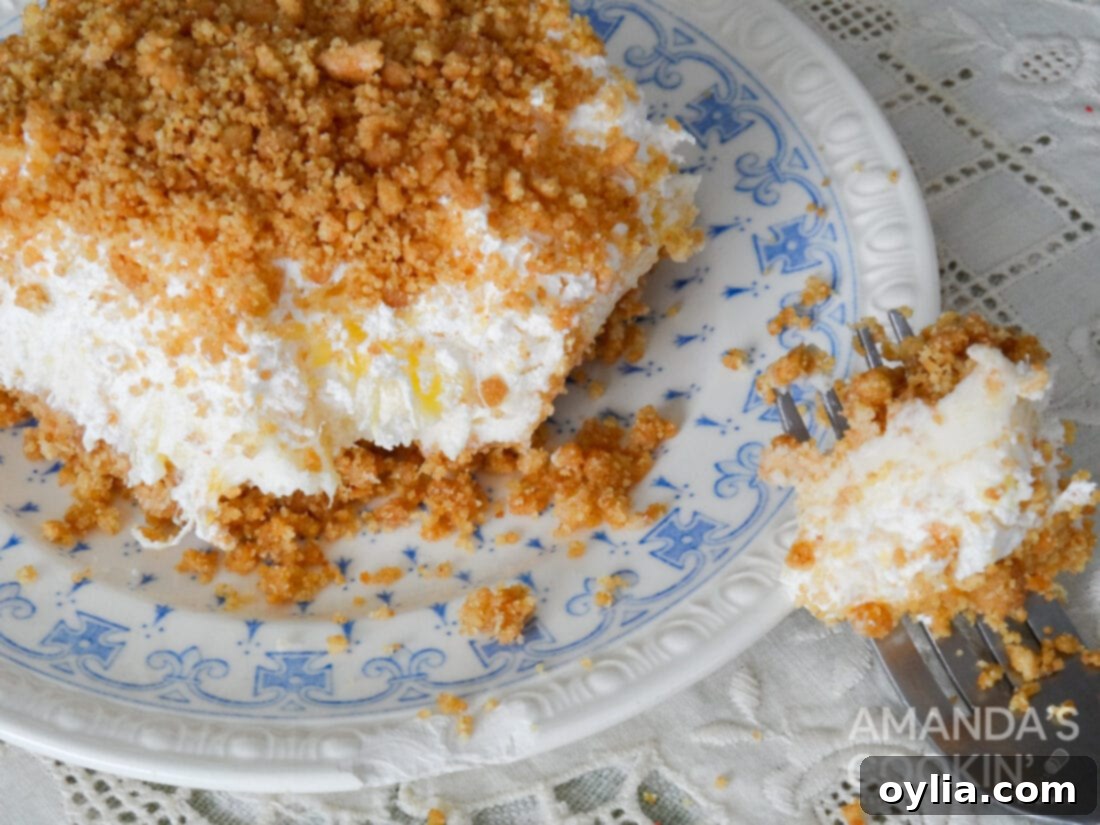
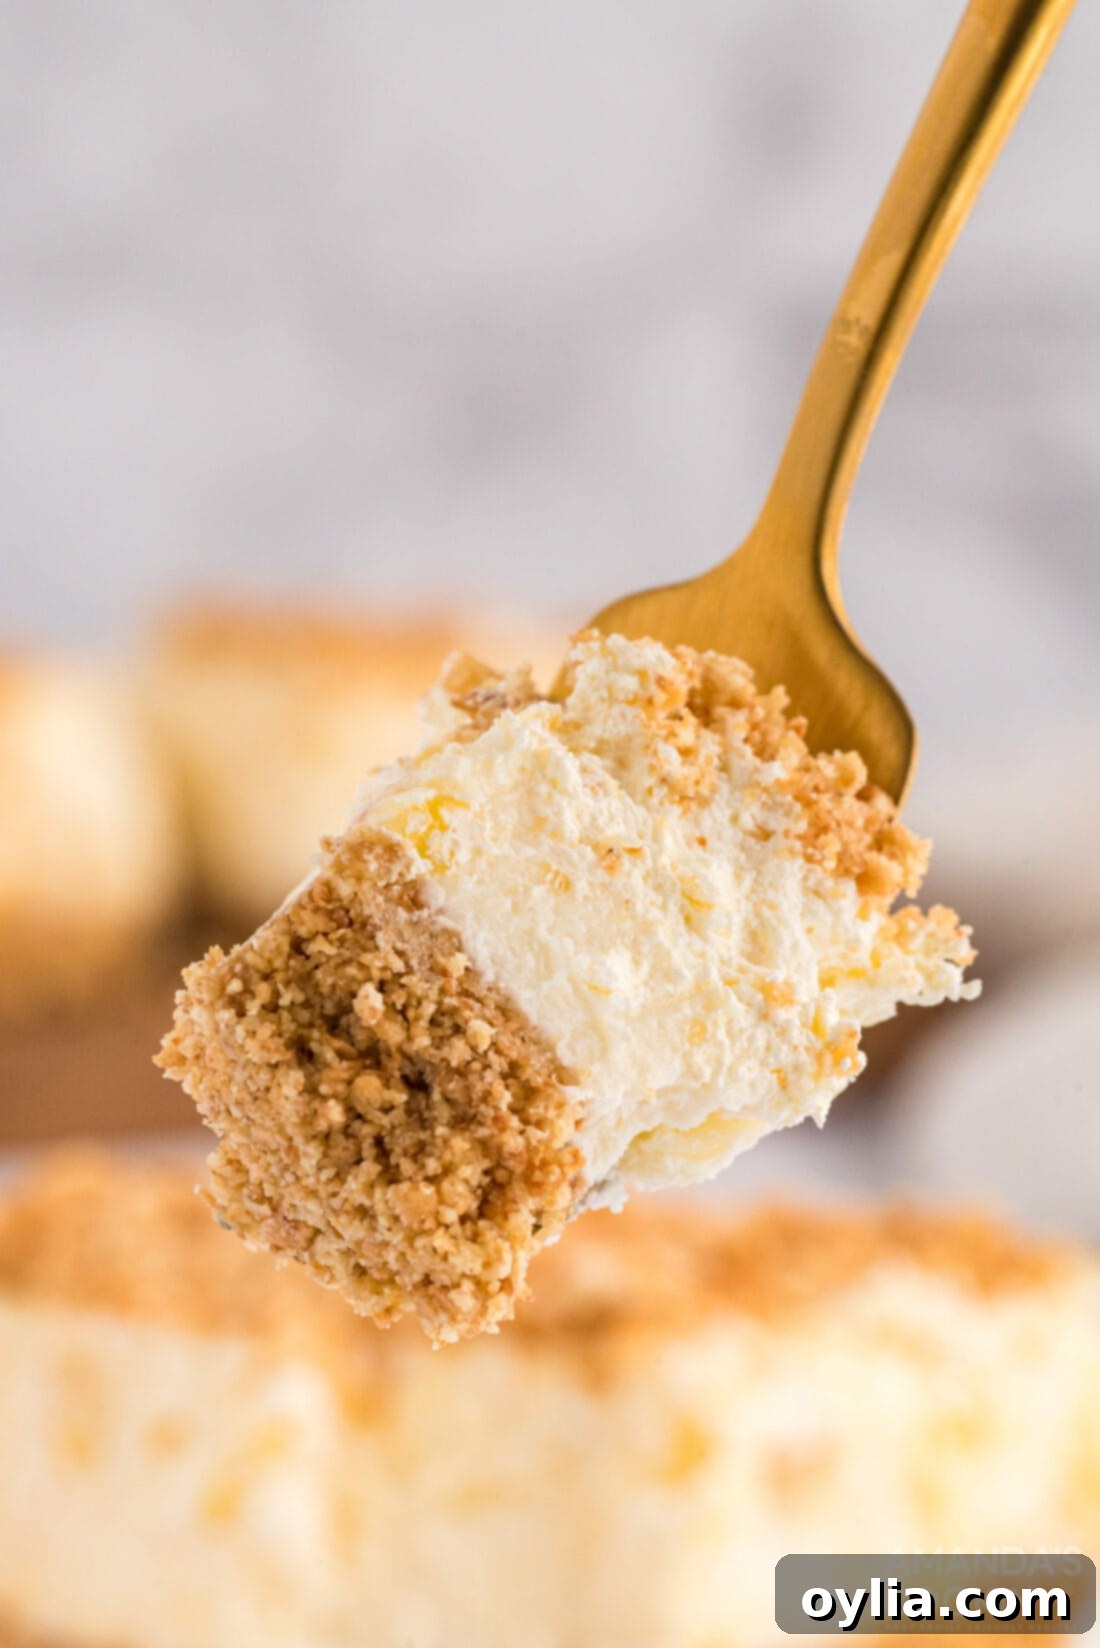
This dessert shares the same magical, crowd-pleasing quality as our famous Chocolate Lasagna recipe; everyone who tries it seems to fall instantly in love. Its harmonious combination of a buttery graham cracker crust, a rich and tangy cream cheese layer generously studded with crushed pineapple, and a light, airy whipped topping is simply divine. It’s the kind of dessert that leaves every guest completely satisfied and eager to ask for the recipe!
Why This Pineapple Dream Dessert is a Must-Make for Any Occasion
If you’re searching for a dessert that effortlessly checks all the boxes – easy to make, incredibly delicious, and always a guaranteed hit – then this Pineapple Dream Dessert is your answer. Here’s a deeper look at why it deserves a prominent spot in your recipe collection:
- Effortlessly Delicious: This recipe is a testament to simplicity and taste. With minimal baking (or a convenient no-bake alternative for the crust), you can create a dessert that tastes like it took hours of intricate work, but only requires straightforward steps. It’s perfect for both novice and experienced bakers.
- Perfect for Any Gathering: Its light, refreshing nature and easy portability make it the ideal companion for a wide range of social events. From casual summer barbecues and holiday feasts to office potlucks and intimate family dinners, this dessert travels well and always receives rave reviews.
- Refreshing & Light Flavor Profile: The natural tartness and sweetness of the pineapple create a beautiful balance with the rich cream cheese and the airy whipped topping. This combination results in a dessert that feels light on the palate, making it a wonderful conclusion to any meal, especially on warmer days.
- Delightful Layered Perfection: Each spoonful offers a harmonious blend of textures. You get the satisfying crunch of the graham cracker crust, the smooth and creamy richness of the pineapple-infused cream cheese filling, and the fluffy, melt-in-your-mouth goodness of the whipped topping. This textural variety keeps every bite interesting.
- A Taste of Sweet Nostalgia: For many, desserts like this Pineapple Dream evoke cherished childhood memories and images of joyful family gatherings. It’s more than just a dessert; it’s a connection to tradition and a reminder of simpler, sweeter times, making it a beloved classic that continues to be passed down through generations.
Frequently Asked Questions About Pineapple Dream Dessert
This timeless dessert has delighted taste buds for decades, and naturally, home cooks often have questions about how to best prepare it or customize it. Here, we address some of the most common inquiries to help you achieve Pineapple Dream perfection:
Absolutely! While Cool Whip, which revolutionized convenience desserts upon its market introduction in the late 1960s (and in its current form, now includes milk and cream), is prized for its stability due to added stabilizers, using freshly made whipped cream is a wonderful, natural alternative. To substitute, you’ll need approximately 1 cup of heavy whipping cream, whipped to soft peaks, for every 8-ounce tub of Cool Whip specified in the recipe. However, it’s worth noting that fresh whipped cream, without stabilizers, may not hold its shape as long, especially in warmer environments. If you desire a more resilient homemade option, consider a recipe for homemade stabilized whipped cream, which often incorporates ingredients like unflavored gelatin or a touch of cornstarch to enhance its structure and longevity.
Yes, the “Dream” dessert concept is incredibly adaptable and encourages creativity! If you adore the tropical flavor of this pineapple version, you will undoubtedly be enchanted by a strawberry variation. Simply replace the crushed pineapple with an equal amount of well-drained crushed strawberries to create a truly delicious Strawberry Dream Dessert. You could also experiment with other soft, thoroughly drained fruits like crushed peaches or mixed berries. The most crucial step when substituting fruit is to ensure it is meticulously drained of any excess liquid to prevent your beautiful dessert from becoming watery and losing its desired texture.
While it is possible to use fresh pineapple, canned crushed pineapple is generally the preferred choice for this recipe due to several advantages. The juices that canned pineapple comes in help to pre-soften the fruit, making it blend seamlessly into the creamy layers and contributing to the desired smooth texture of this dessert. Fresh pineapple, on the other hand, can be a bit firmer and may not integrate as well unless it is very finely diced or crushed. If you do opt for fresh, ensure it’s minced into very small pieces. Pre-cut fresh pineapple found in stores, often stored in plastic containers, can be a good compromise as it typically contains some accumulated juices at the bottom. Regardless of whether you use fresh or canned, remember to drain it as thoroughly as possible to avoid introducing too much moisture to your dessert.
Absolutely, making this dessert in advance is not only possible but highly recommended! This Pineapple Dream Dessert benefits immensely from a good chill. The refrigeration period allows all the layers to firm up beautifully and, crucially, gives the flavors ample time to meld and deepen, resulting in an even more delicious and harmonious taste. You can easily prepare it a day in advance, making it a perfect, stress-free make-ahead option for parties, holiday meals, or any special gathering. Just ensure it is covered tightly with plastic wrap and kept in the refrigerator until you are ready to serve.
Should you be so fortunate as to have any leftovers of this delectable dessert (a rare occurrence!), simply cover the baking pan tightly with plastic wrap or transfer individual slices to an airtight container. Store the covered dessert in the refrigerator, where it will remain fresh and delicious for up to 3-4 days. While it will still taste wonderful, please note that the graham cracker crust might gradually soften slightly over time.
Freezing this dessert is generally not advised. The delicate textures of the cream cheese and whipped topping layers can undergo undesirable changes when frozen and then thawed. They might become watery, grainy, or separate, compromising the smooth, light consistency that makes this dessert so appealing. Additionally, a frozen and thawed graham cracker crust often becomes soggy. For the best experience, this dessert is truly best enjoyed fresh after its recommended chilling period.
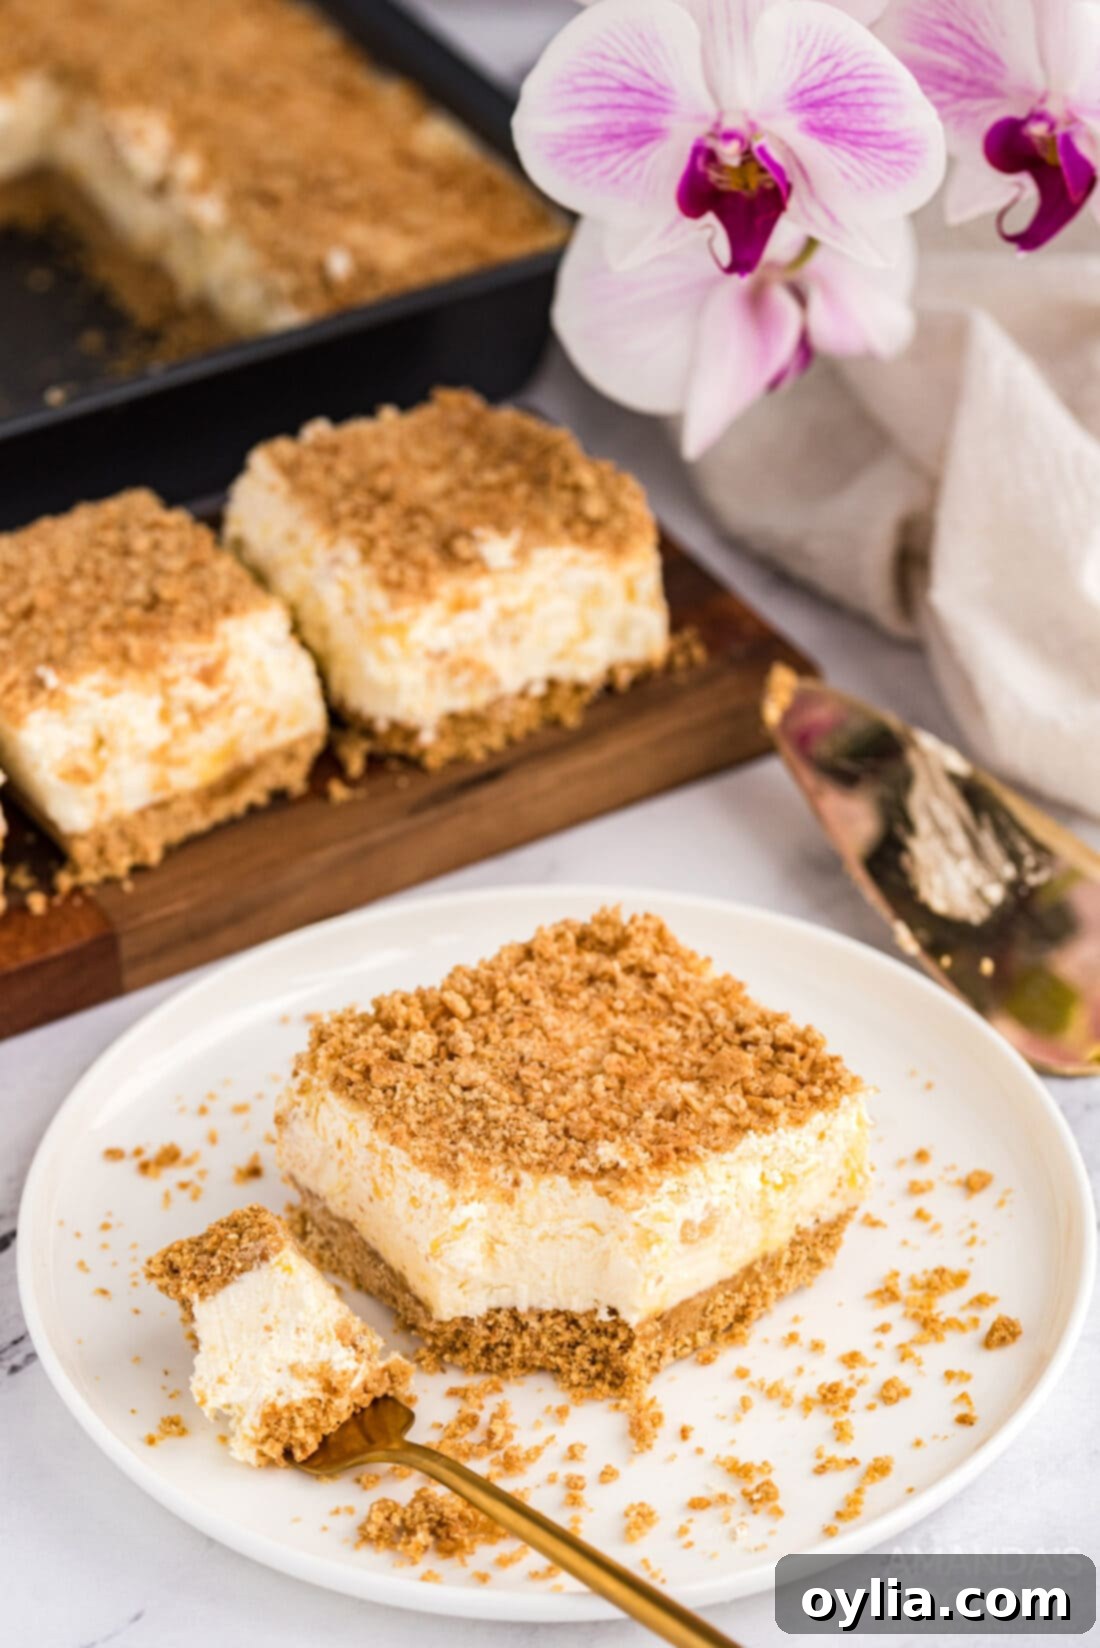
Just like our vibrant and flavorful Strawberry Jello Pretzel Salad, this Pineapple Dream Dessert is an outstanding choice for any social gathering. Its beautiful layered appearance and refreshing, sweet-tart taste make it a guaranteed hit whether you’re bringing it to a festive holiday dinner, a casual potluck with friends, or a lively summer picnic. Remember, the secret to serving this chilled delight at its absolute best is to keep it thoroughly refrigerated until the very last moment, ensuring its light, airy, and creamy texture remains perfectly intact.
Expert Tips for a Flawless Pineapple Dream Dessert
Achieving the perfect Pineapple Dream Dessert is incredibly simple, especially when you keep these expert tips in mind. They’ll help ensure your dessert is a triumph every single time:
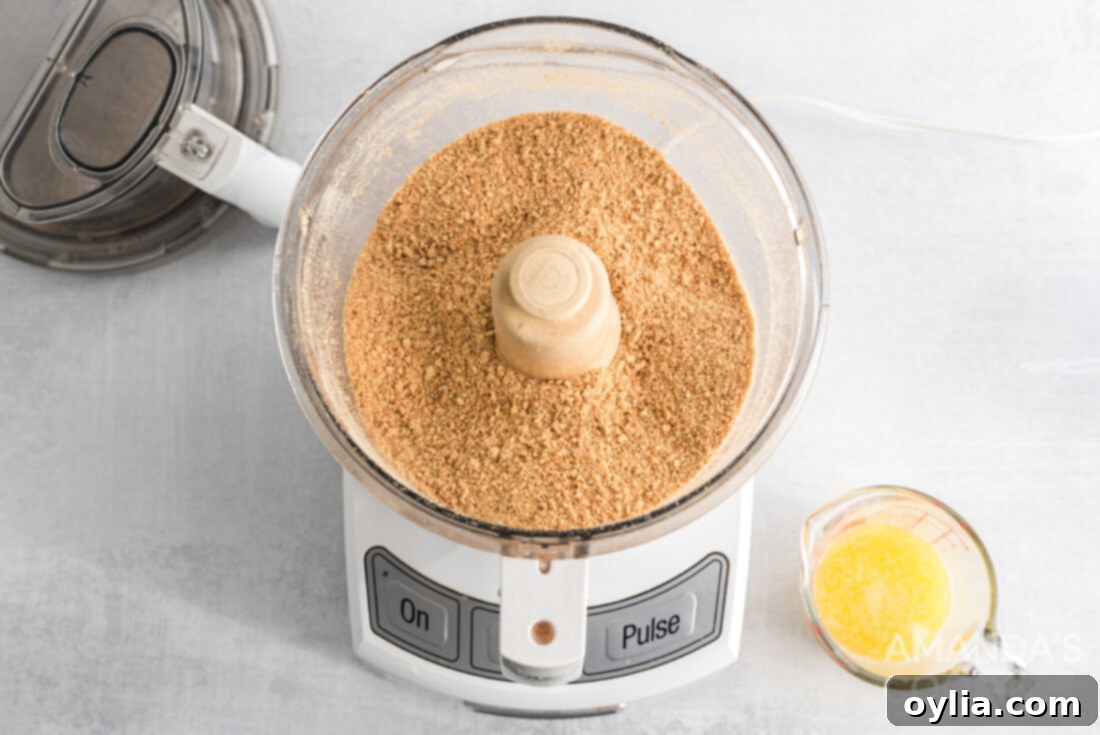
- Achieve Crust Perfection: You have options for your graham cracker crust! While pre-made graham cracker crumbs offer a convenient shortcut, crushing whole graham crackers yourself can sometimes yield a fresher flavor. For a quick and consistent result, a sealed bag and a rolling pin work wonderfully. However, for ultimate ease and fine, uniform crumbs, we highly recommend running them through our food processor! The key is to ensure the crumbs are fine and thoroughly coated with melted butter for a sturdy, flavorful base that won’t crumble apart.
- Drain the Pineapple Meticulously: This is arguably the most crucial step in preventing a soggy dessert! Excess pineapple juice can dilute your creamy filling, compromise its texture, and prevent it from setting properly. Use a fine-mesh sieve and press down on the crushed pineapple with the back of a spoon to extract as much liquid as possible before incorporating it into any of the layers.
- Room Temperature Ingredients for Creaminess: For the smoothest, most lump-free cream cheese filling, ensure both your cream cheese and unsalted butter are at true room temperature. This makes them much easier to beat together into a light, airy, and uniform consistency, which is essential for that dreamy texture in your pineapple cream cheese layer.
- Embrace the Chill Time: Do not rush the refrigeration process! A minimum chilling time of 4 hours is necessary for the dessert to properly set, allowing all the layers to firm up. For the absolute best possible set, optimal flavor development, and the cleanest slices, chilling your Pineapple Dream Dessert overnight is highly recommended. Patience here truly pays off!
- Garnish for Visual Appeal: A simple garnish can elevate your dessert from delicious to dazzling. A final sprinkle of the remaining graham cracker crumbs on top just before serving adds a lovely textural contrast and visual interest. For an extra touch of tropical flair, you could even add a few small pineapple tidbits or a maraschino cherry.
Essential Ingredients You’ll Need for This Delightful Dessert
Gathering your ingredients is the exciting first step towards creating this incredibly satisfying and easy-to-make Pineapple Dream Dessert. Below, you’ll find a concise list of all the components you’ll need. For precise measurements and a complete set of detailed instructions, please refer to the convenient printable recipe card located at the very end of this post.
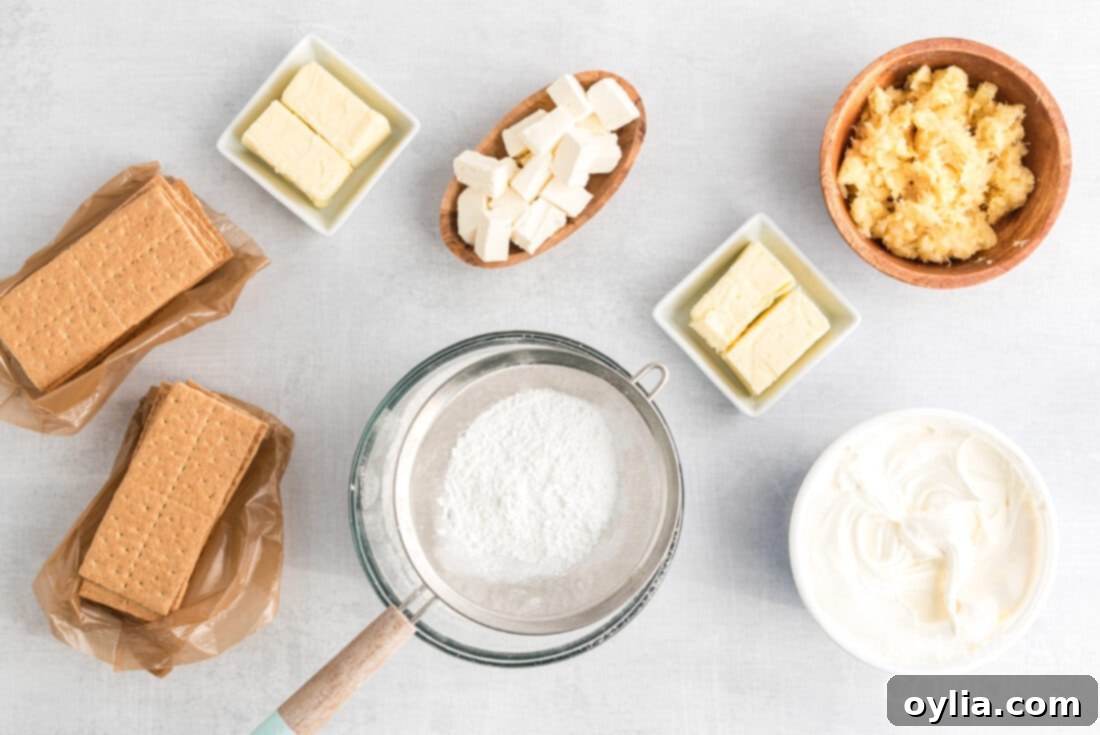
- 2 ½ cups graham crumbs (this typically equates to crumbs from approximately 2 sleeves of graham crackers)
- ½ cup unsalted butter, melted (this butter is specifically for creating the delicious crust)
- 2 cups powdered sugar, sifted (sifting ensures a smooth, lump-free filling)
- ½ cup unsalted butter, softened (this butter is for the creamy filling layer)
- 4 oz cream cheese, softened (ensure it’s at room temperature for easy blending)
- 8 oz container Cool Whip (thawed, or you can use homemade stabilized whipped cream for a similar effect)
- 20 oz can crushed pineapple, thoroughly drained (draining well is key to prevent a watery dessert)
NO-BAKE CRUST VERSION: Beat the Heat!
If the weather outside is too hot to even contemplate turning on your oven, you are absolutely in luck! This Pineapple Dream Dessert can be effortlessly made with a delicious no-bake crust. Simply prepare the graham cracker crust mixture exactly as instructed in the recipe. However, instead of baking it, firmly press the mixture into your chosen pan and place it directly into the refrigerator. Allow it to chill for at least 20-30 minutes, or until the butter has solidified sufficiently to bind the crumbs together. While a baked crust offers a slightly crispier, more defined texture, the no-bake version is equally delightful and provides a wonderful, softer textural contrast. Just be aware that a no-bake crust might not hold together quite as firmly as its baked counterpart, especially after sitting out for an extended period, but rest assured, the taste remains outstanding!
How to Make Pineapple Dream Dessert: Your Step-by-Step Guide
These step-by-step photos and detailed instructions are thoughtfully provided to help you visualize and easily navigate each stage of making this delightful recipe. For a convenient printable version, which includes all precise measurements and a condensed set of instructions, you can jump directly to the complete recipe card at the bottom of this post.
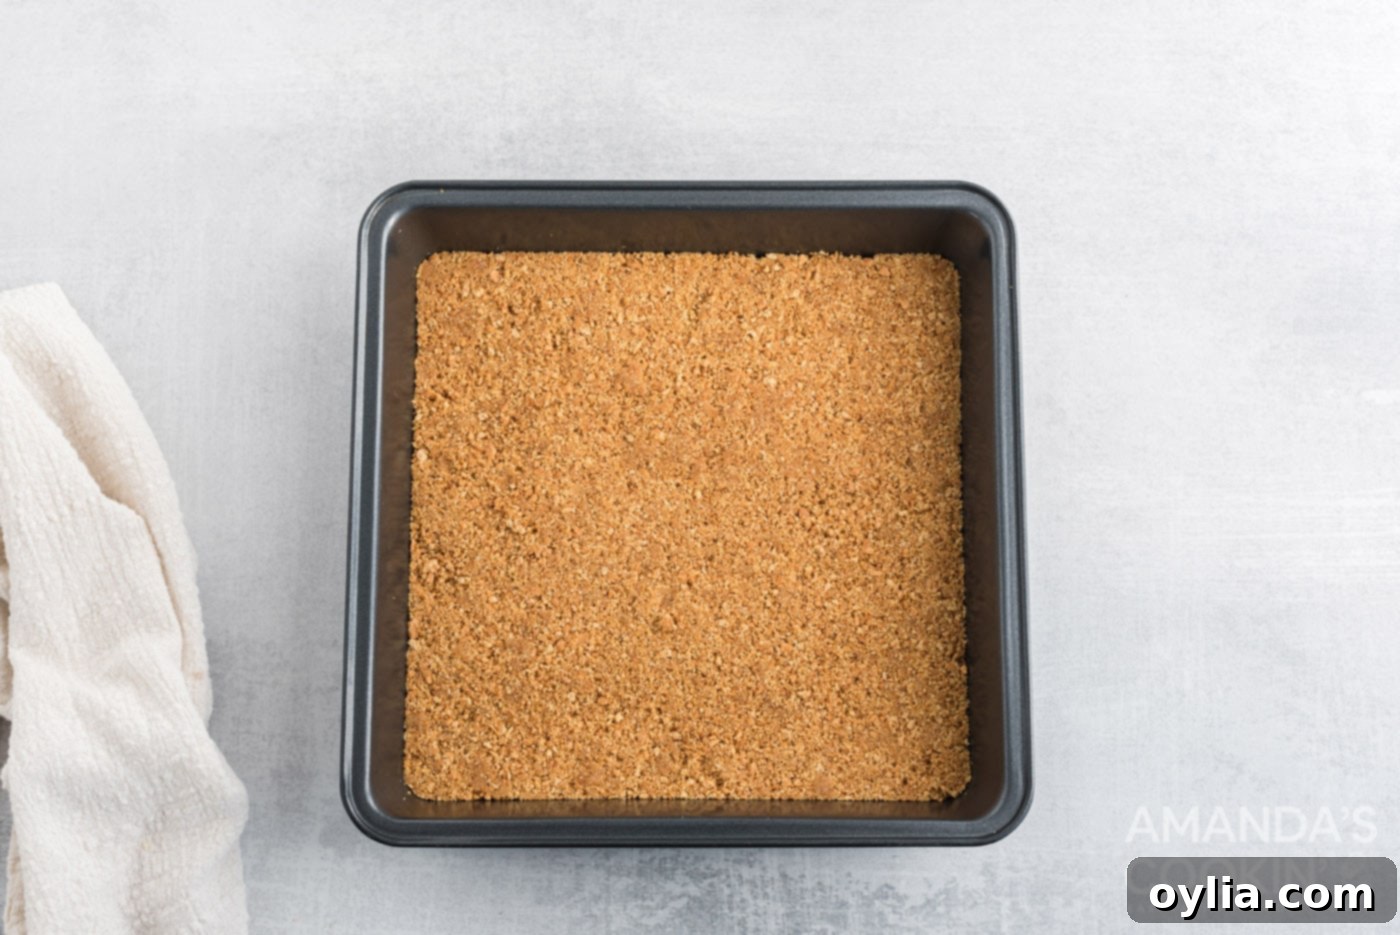
- Prepare the Crust: Begin by preheating your oven to 300°F. (If you prefer the no-bake crust, please refer to the “No-Bake Version” note in the “Before You Begin” section above). Melt ½ cup of unsalted butter in the microwave and set it aside to cool slightly. In a medium bowl, combine the graham cracker crumbs with the melted butter, tossing them together until the crumbs are evenly moistened. Firmly press precisely 2 cups of this crumb mixture into the bottom of a 9×9 inch square baking pan. Bake for 8-10 minutes, or until the crust is lightly golden. Once baked, remove the pan from the oven and place it on a wire rack to cool completely.

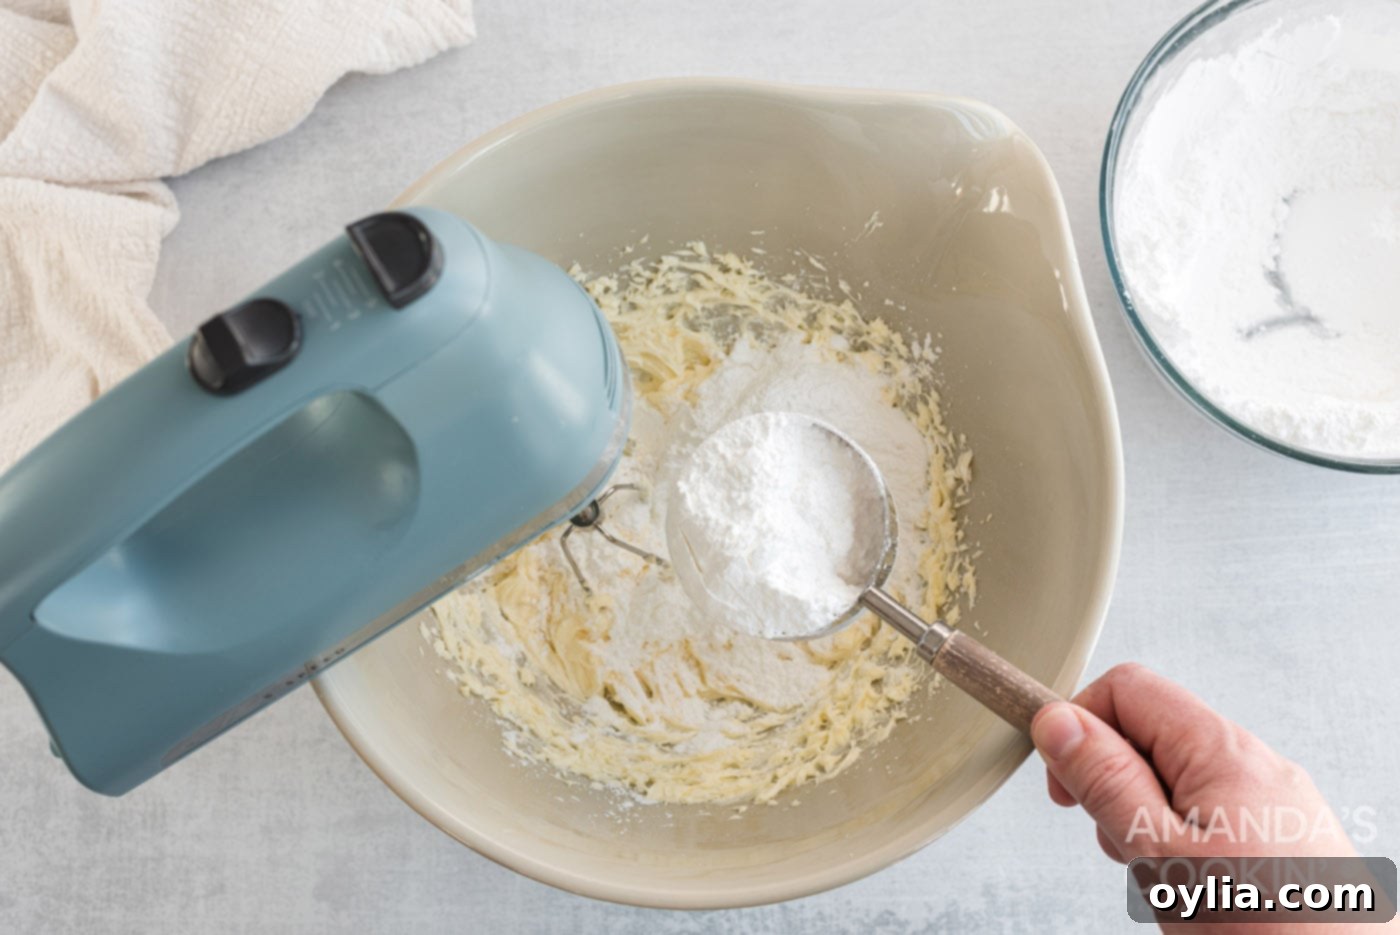
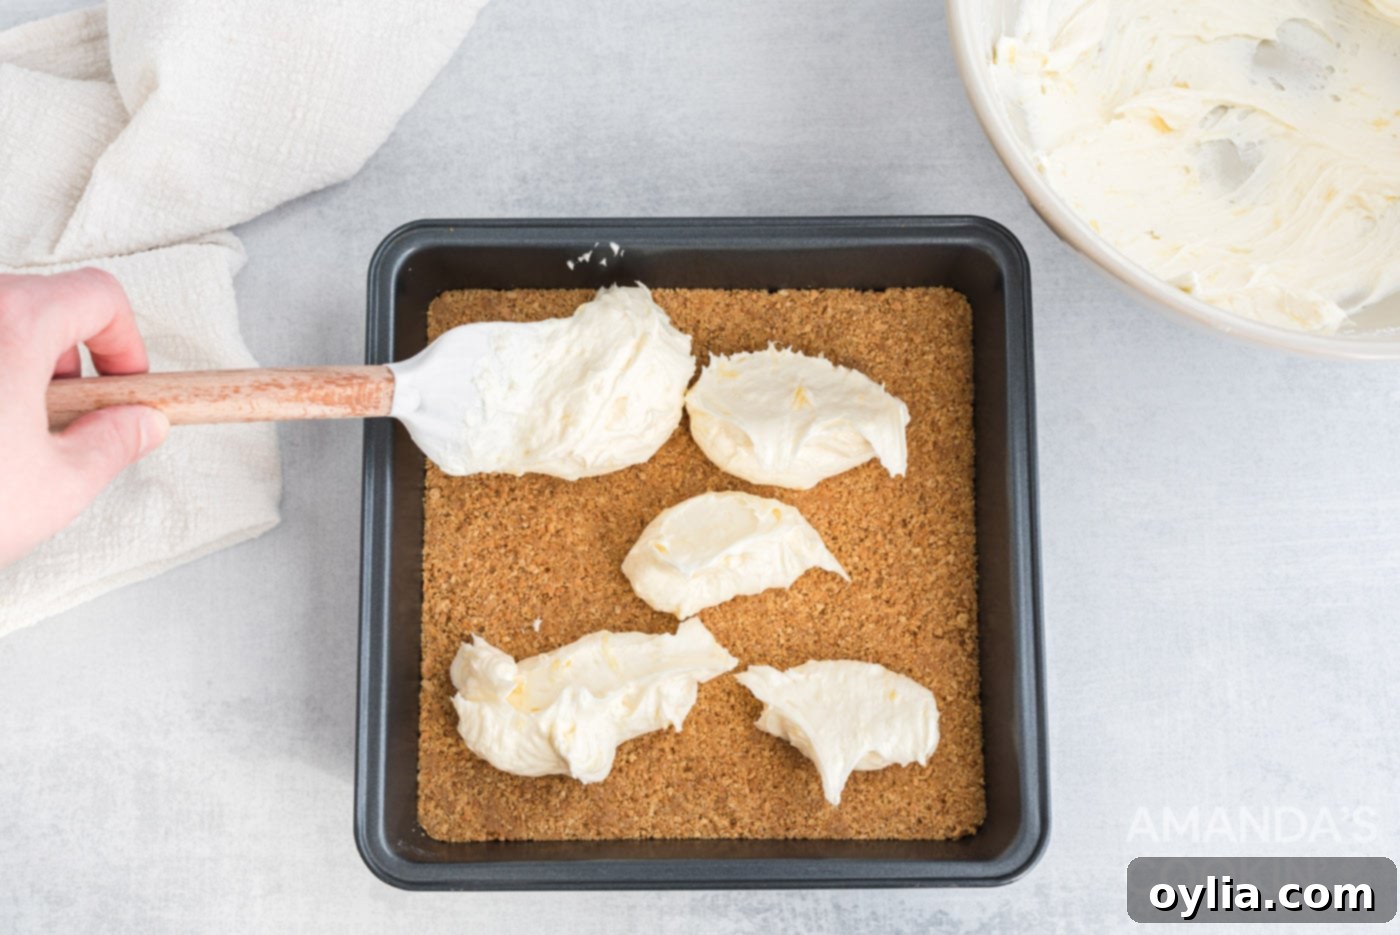
- Create the Cream Cheese Filling: In a large mixing bowl, using an electric mixer, beat the softened cream cheese and the remaining ½ cup softened unsalted butter together until the mixture is beautifully light, smooth, and creamy. Reduce the mixer speed to low and gradually add the 2 cups of sifted powdered sugar, one cup at a time, mixing until it is fully incorporated and no lumps remain. Increase the mixer speed to medium-high and continue to beat for about one minute until the filling becomes wonderfully smooth and fluffy.

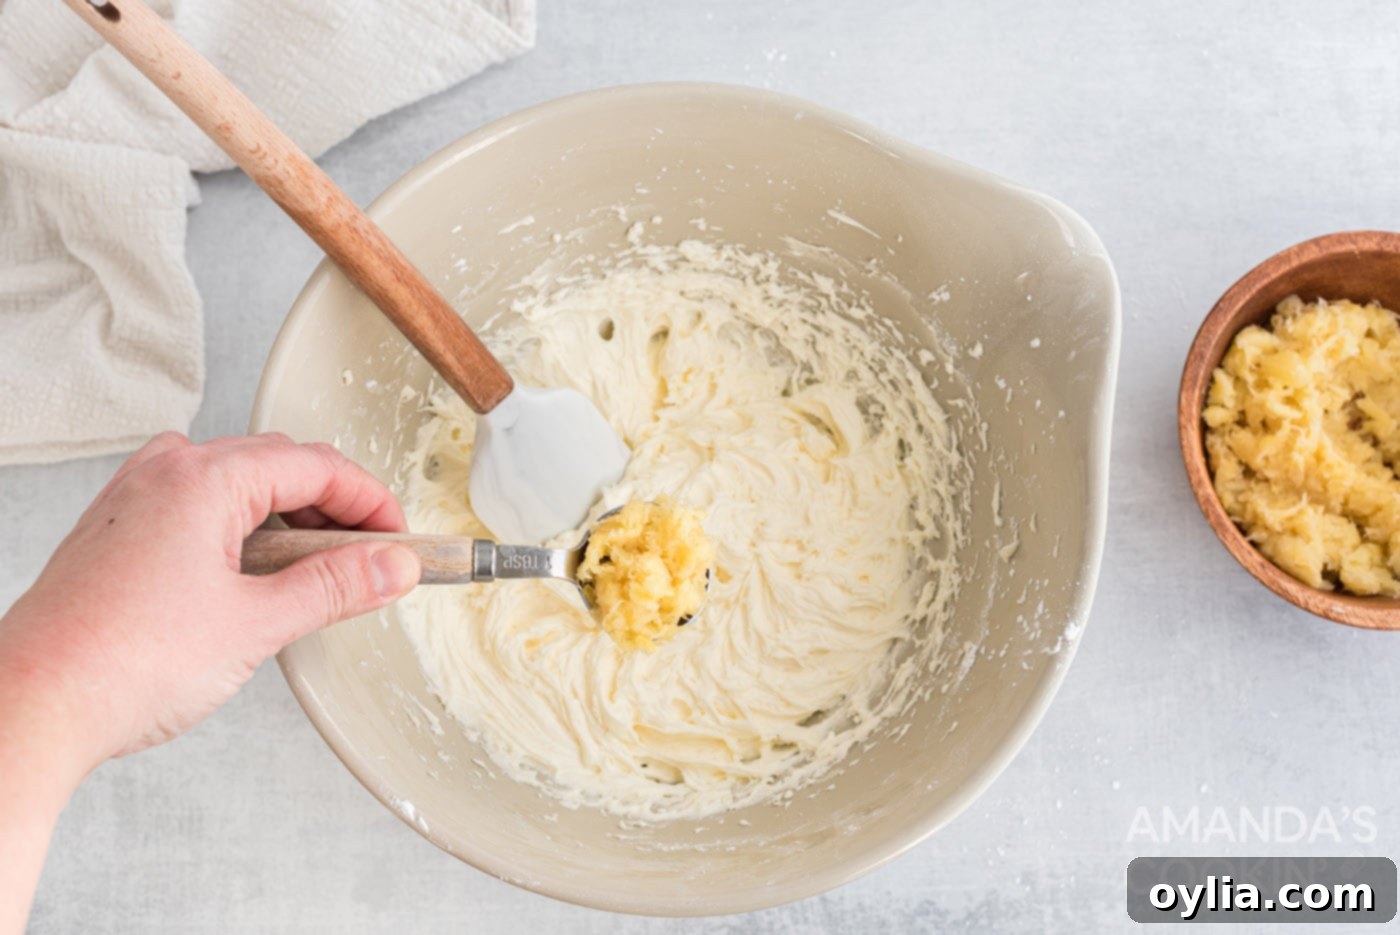
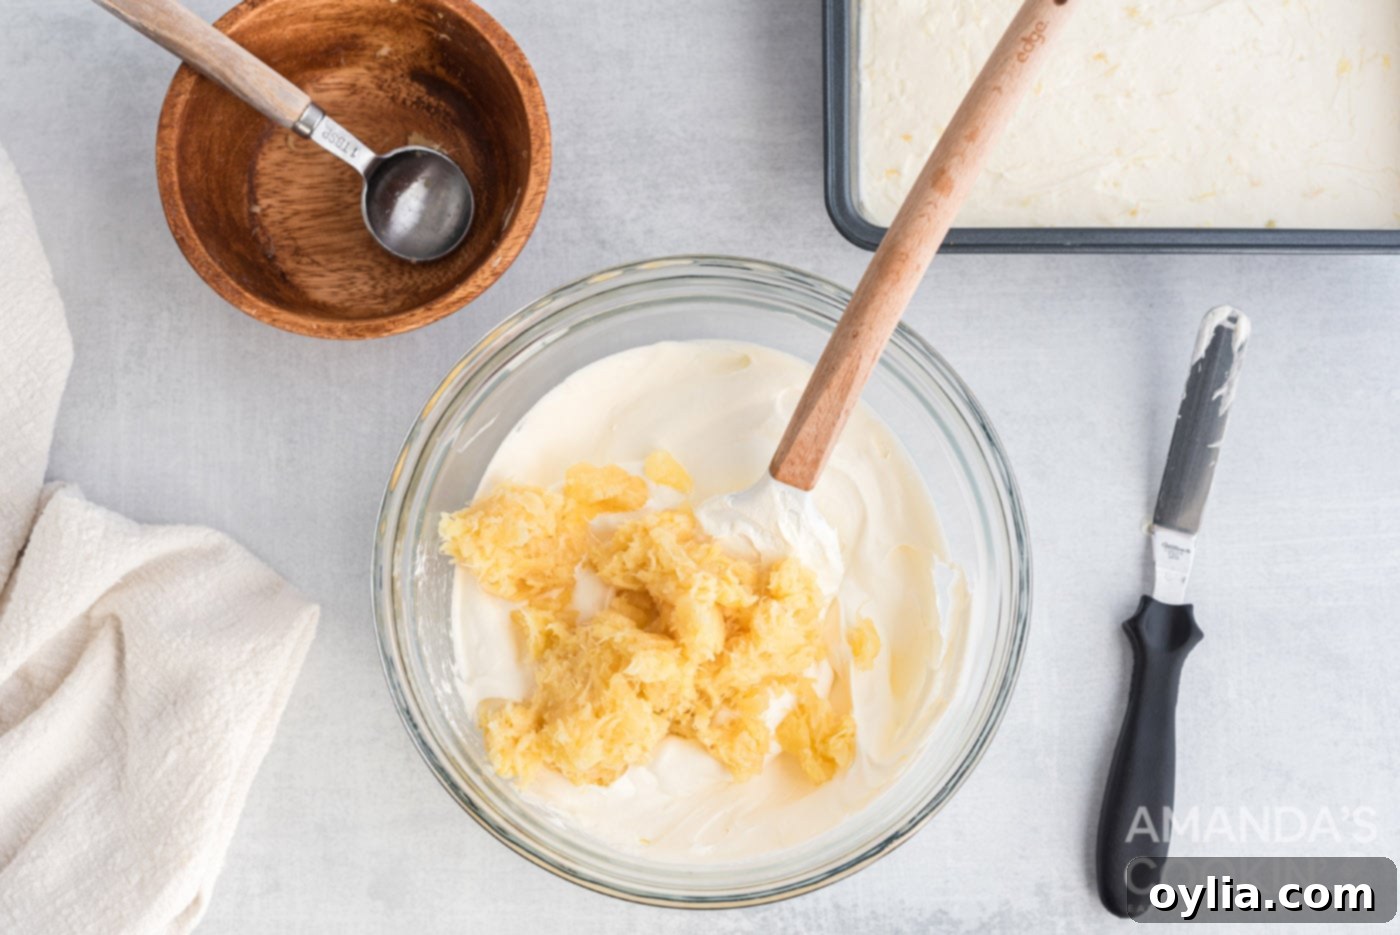
- Incorporate Pineapple into Filling: Add a generous, heaping tablespoon of the very well-drained crushed pineapple to the prepared cream cheese mixture. Using a rubber spatula, gently fold the pineapple into the cream cheese mixture. This small amount of pineapple adds a lovely subtle burst of fruity flavor directly into the creamy layer.

- Spread the Cream Cheese Layer: Carefully and evenly spread the pineapple-infused cream cheese mixture over the cooled graham cracker crust. Ensure the layer is smooth and reaches all edges of the pan.

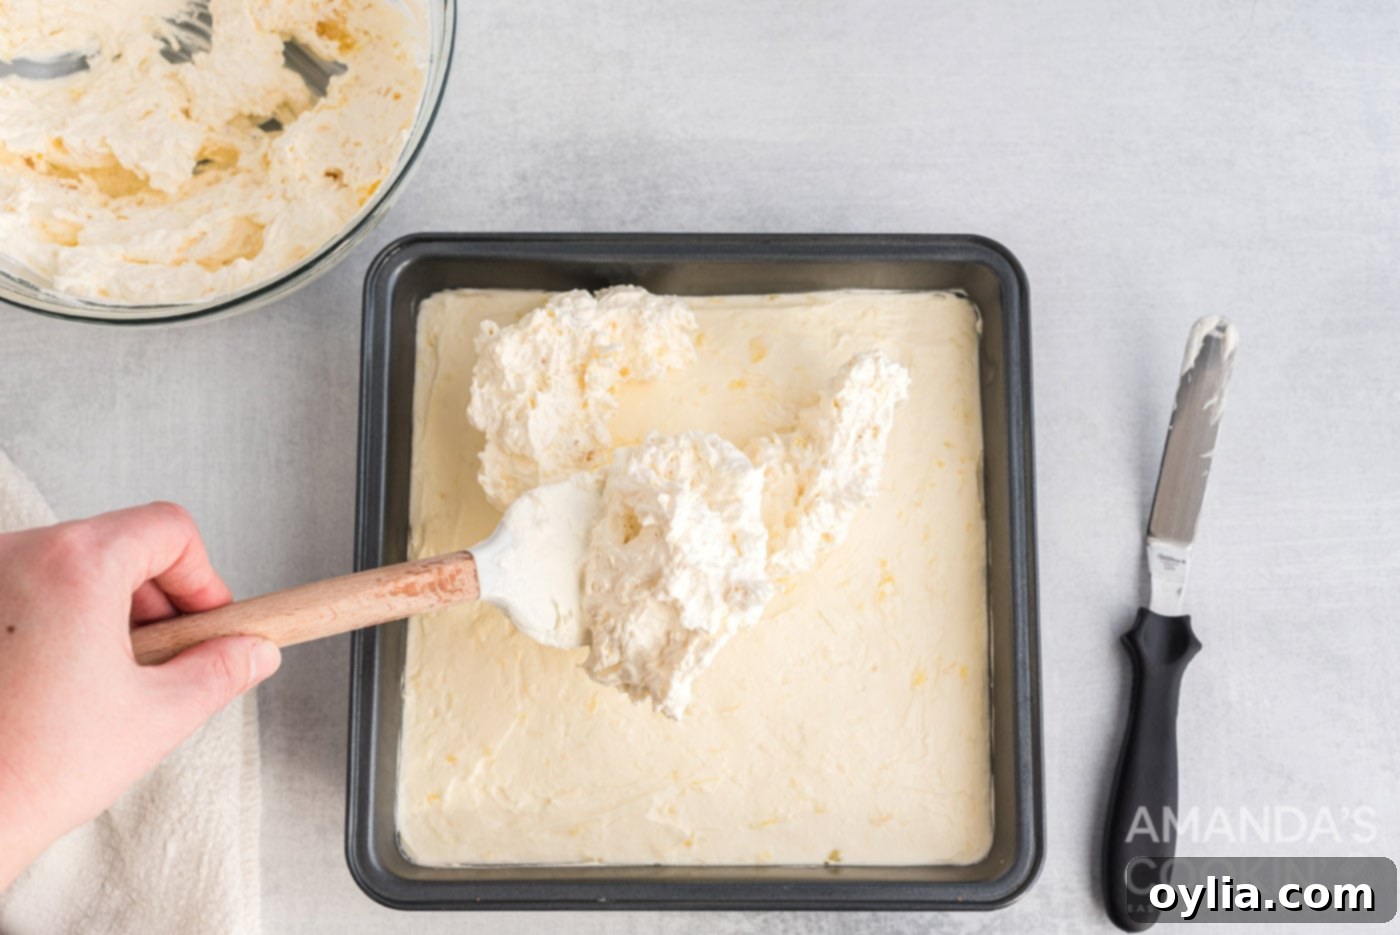
- Add the Whipped Topping Layer: In a separate, clean bowl, gently fold the remaining well-drained crushed pineapple into the thawed 8 oz container of Cool Whip. Mix until just combined. Then, spread this fluffy pineapple-whipped cream mixture evenly over the cream cheese layer, creating the top layer of your dessert.


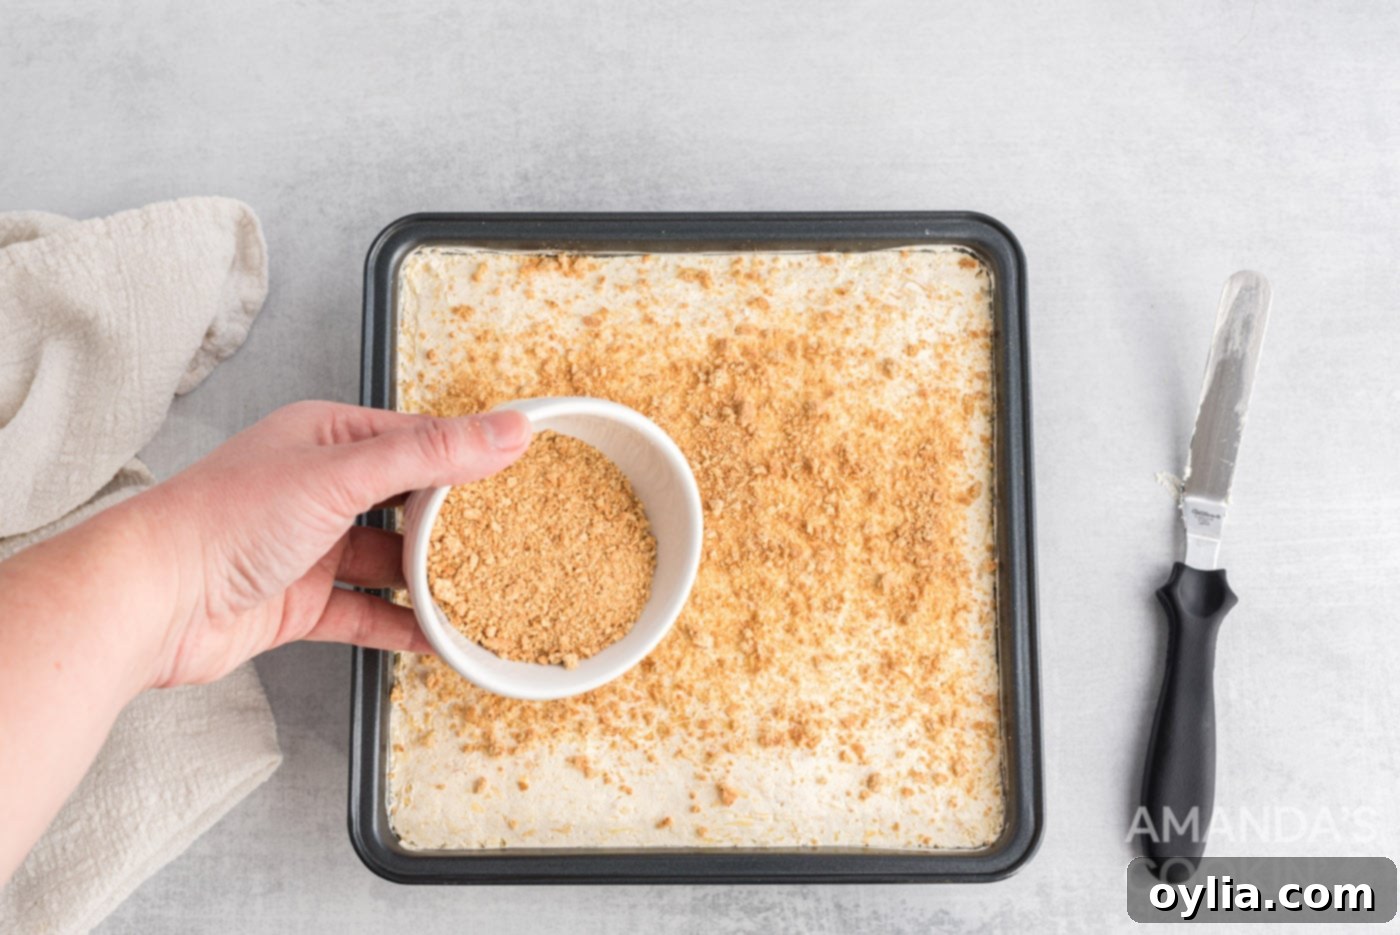
- Finishing Touch: Evenly sprinkle the remaining ½ cup of the graham cracker crumb mixture over the very top layer of the dessert. This final touch adds a lovely complementary texture and enhances the visual appeal.

- Chill to Perfection: Cover the entire pan tightly with plastic wrap and transfer it to the refrigerator. Allow the dessert to chill for a minimum of 4 hours. For the absolute best possible set, optimal flavor development, and for slices that hold their shape beautifully, chilling your Pineapple Dream Dessert overnight is highly recommended.
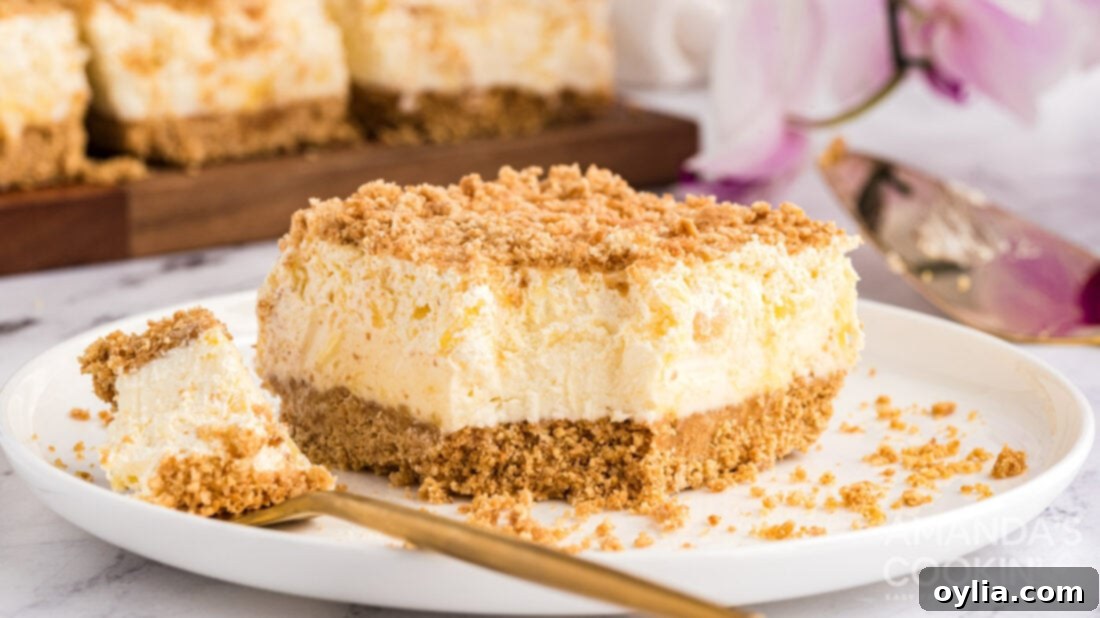
What Do You Call This Heavenly Dessert? Many Names, One Delicious Taste!
It’s always fascinating how many different affectionate names a truly classic and beloved recipe can accumulate over time and across various regions! Does your family have a special, unique name for this incredible layered pineapple dessert? While we lovingly refer to it as Pineapple Dream Dessert, here are some other common (and equally delicious-sounding) names we’ve heard it called:
- Pineapple Cool Whip Dessert
- Pineapple Delight
- Pineapple Dream Squares
- Pineapple Surprise Dessert
- Pineapple Graham Cracker Dessert
- Pineapple Cream Dessert
- Heavenly Pineapple Dessert
- No-Bake Pineapple Layer Dessert
- The Good Pineapple Stuff
No matter what name it goes by in your home, one thing remains absolutely consistent: this dessert is universally amazing, and there are almost never any leftovers to speak of. It’s always a surefire favorite, sparking joy and conversations, and someone will inevitably ask you for the recipe. So, it’s always a good idea to print a couple of extra copies to graciously share with eager friends and family members!
More Irresistible Potluck & Easy Dessert Ideas You’ll Love
If you’re anything like us, you believe you can never have too many easy, crowd-pleasing dessert recipes tucked away in your culinary arsenal. If you’ve fallen in love with the simplicity and deliciousness of this Pineapple Dream Dessert, then you’re truly in for a treat with these other fantastic options, all perfect for any gathering or simply to satisfy a sweet craving:
- Cream Puff Chocolate Eclair Cake: This is another potluck superstar that everyone eagerly anticipates! This creamy, decadent, and visually appealing dessert is a definite must-try for your next event. It’s surprisingly simple to assemble and always looks incredibly impressive on any dessert table.
- Sex in a Pan (also known as Chocolate Dream): This captivating dessert goes by many playful names – Chocolate Dream, Robert Redford Dessert, or Better Than Anything Dessert – but everyone universally agrees on its sheer deliciousness. With its luxurious layers of cream cheese, rich chocolate pudding, and airy whipped cream, it’s a guaranteed party for your taste buds!
- Strawberry Jello Pretzel Salad: A unique and incredibly addictive sweet and salty combination that’s always a massive hit! This delightful “salad” (which is truly a dessert) is so immensely popular that some families consider it an absolute requirement for every single holiday gathering.
- Banana Pudding Poke Cake: For all the devoted banana lovers out there, this dessert is an absolute dream come true! A moist and tender cake generously infused with creamy banana pudding, it’s an irresistible treat that promises not to disappoint and will surely earn you rave reviews.
- Ambrosia Salad: While not a “one-pan” dessert in the strictly traditional sense, this vintage classic remains a potluck favorite for very good reason. A delightful and vibrant mix of maraschino cherries, sweet mandarin oranges, tender pineapple tidbits, colorful fruit cocktail, and fluffy marshmallows, this Ambrosia Salad recipe is a nostalgic taste of yesteryear that’s still deeply cherished today.
- Luscious Lemon Delight: From our wonderful friends at Happy Hooligans, this bright, zesty, and easy-to-make layered dessert is a refreshingly tart option, and it’s so simple that even younger kids can joyfully help with its preparation.
- Chessmen Banana Pudding: The Kids Activities Blog shares this fun and delightful twist on a classic banana pudding, made extra special with those charming Chessmen cookies. It’s a playful treat that appeals to all ages.
- Chocolate Banana Twinkie Cake: Today’s Creative Life brings us an indulgent and playfully retro dessert that is truly hard to resist, especially for fans of classic American treats and unique flavor combinations.
- Pineapple Yogurt Dessert: A special thank you goes out to Cathy for generously sharing this lighter, yet equally delicious and satisfying, pineapple dessert option with our community! It’s a guilt-free pleasure.
- No-Bake Chocolate Eclair Cake: This utterly irresistible no-bake eclair cake is truly the dessert of your dreams. It’s so incredibly good and easy that your guests will definitely be asking for both second and third servings!
- Orange Pineapple Cake: Bursting with the vibrant, sweet flavors of mandarin oranges and generously topped with a luscious, fruity pineapple frosting, this cake is an absolute delight and simply irresistible.
Curious to see just how easy it is to whip up this amazing and crowd-pleasing dessert? Watch our quick video below, which beautifully demonstrates the simple step-by-step process of creating this delightful treat!

Pineapple Dream Dessert
IMPORTANT – Don’t miss our Frequently Asked Questions and Expert Tips sections above in the blog post for helpful insights and troubleshooting to make your Pineapple Dream Dessert perfect!
Print It
Pin It
Rate It
Save ItSaved!
Ingredients
Crust:
- 2 ½ cups graham crumbs (approximately 2 sleeves of graham crackers)
- ½ cup unsalted butter (melted, for crust)
Layers:
- 2 cups powdered sugar (sifted)
- ½ cup unsalted butter (softened, for filling)
- 4 oz cream cheese (softened)
- 8 oz Cool Whip (thawed, or homemade stabilized whipped cream)
- 20 oz crushed pineapple (drained very well)
Before You Begin
Instructions
-
Preheat oven to 300°F. (Refer to the “No-Bake Version” note in the “Before You Begin” section if you prefer to skip baking the crust).
-
Melt ½ cup of unsalted butter in the microwave and let it cool slightly. In a bowl, combine the graham crumbs and melted butter, tossing until well incorporated. Firmly press 2 cups of this graham cracker crumb mixture into a 9×9 inch square baking pan. Bake for 8-10 minutes, then remove and place on a wire rack to cool completely.½ cup unsalted butter
-
In a large bowl, beat the softened cream cheese and the other ½ cup softened butter together until the mixture is smooth and creamy. With the mixer on low speed, gradually add the 2 cups of sifted powdered sugar, one cup at a time, until fully combined. Increase speed to medium-high and beat for about one minute until fluffy. Add 1 heaping tablespoon of the well-drained crushed pineapple and gently stir it in with a rubber spatula. Evenly spread this cream cheese and pineapple mixture over the cooled crust.½ cup unsalted butter, 4 oz cream cheese, 2 cups powdered sugar
-
In another bowl, gently fold the remaining well-drained crushed pineapple into the 8 oz container of Cool Whip. Spread this pineapple-whipped topping mixture evenly over the cream cheese layer. Sprinkle the remaining ½ cup of the graham cracker crumb mixture on top. Cover the pan with plastic wrap and refrigerate for at least 4 hours, or preferably overnight, to allow the dessert to set completely and for the flavors to fully meld.8 oz Cool Whip
Nutrition
The recipes on this blog are tested with a conventional gas oven and gas stovetop. It’s important to note that some ovens, especially as they age, can cook and bake inconsistently. Using an inexpensive oven thermometer can assure you that your oven is truly heating to the proper temperature. If you use a toaster oven or countertop oven, please keep in mind that they may not distribute heat the same as a conventional full sized oven and you may need to adjust your cooking/baking times. In the case of recipes made with a pressure cooker, air fryer, slow cooker, or other appliance, a link to the appliances we use is listed within each respective recipe. For baking recipes where measurements are given by weight, please note that results may not be the same if cups are used instead, and we can’t guarantee success with that method.
This recipe for Pineapple Dream Dessert was originally published here on July 9, 2013, and has since been updated with fresh, expanded content and new photos to enhance your cooking experience!
